Resubscribe in HighLevel
A one-click path for contacts to opt back into your marketing emails — how it works, how DND and reporting are affected, and how to verify the change in the contact record.
Resubscribe gives contacts a simple way to opt back into your marketing emails after they've unsubscribed. This article explains how the resubscribe link on the unsubscribe success page works, how it affects DND and reporting, and how to verify everything in the contact record. You'll also find workflow ideas and FAQs to help you manage consent and deliverability with confidence.
Table of Contents
What is Resubscribe in HighLevel?
Resubscribe is a built-in option shown on the unsubscribe success page that lets a contact immediately opt back into email. When clicked, HighLevel updates the contact so they're eligible to receive marketing emails again.
This supports compliant, contact-initiated consent recovery — without manual edits to the contact record.
Key Benefits of Resubscribe
Understanding the value of resubscribe helps teams balance compliance with growth. The benefits below focus on faster recovery of consent, clearer CRM status, and smoother downstream reporting and automation.
- Frictionless consent recovery: Contacts can opt back in with one click from the unsubscribe success page.
- Cleaner CRM status: Updates the contact's email eligibility so you don't need manual DND toggles.
- Better campaign continuity: Enables clean re-engagement sequences once a contact opts back in.
- Compliance-friendly workflow: Captures a positive, contact-initiated action to help support consent records.
- Operational efficiency: Reduces support tickets asking, "Please add me back."
Where the Resubscribe Link Appears
Knowing where the link displays helps you test end-to-end and set expectations for your team. The link appears on the unsubscribe success page after a contact completes an unsubscribe action.
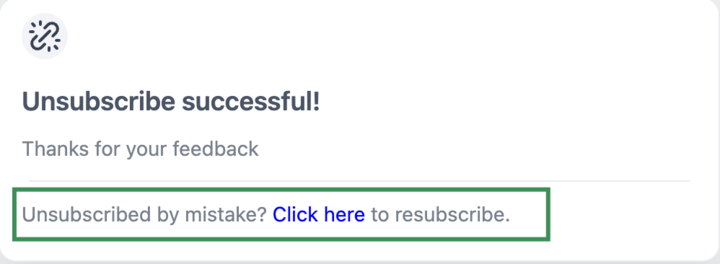
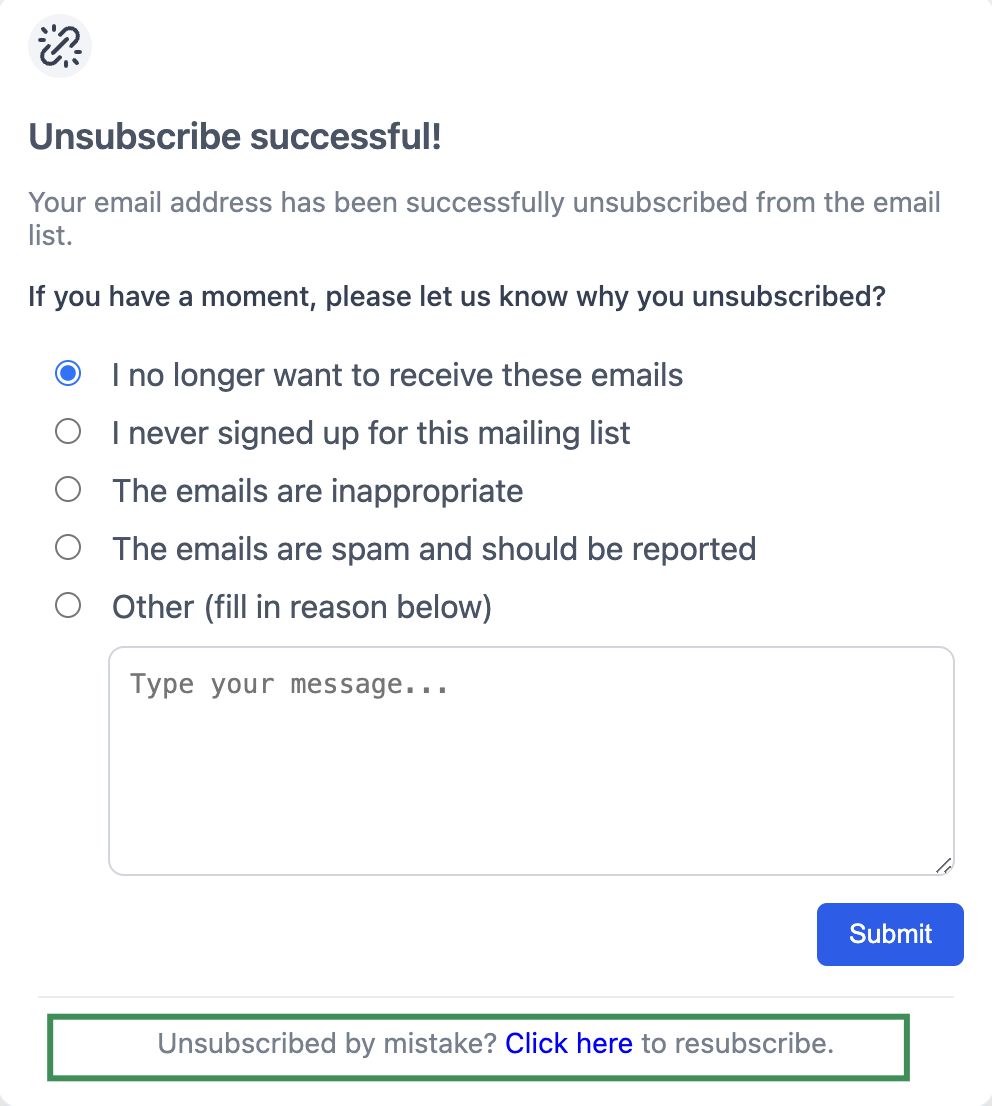
- The resubscribe option shows on the unsubscribe success page after a contact opts out from an email.
- Availability may depend on the unsubscribe flow type configured in your account (One-Step, Two-Step, or Dynamic). Review your flow configuration to understand the exact experience (see Configuring Unsubscribe Flows in Related Articles).
- If you use default LC Email unsubscribe links or custom unsubscribe implementations, confirm the success-page behavior in a quick test (steps below).
- The link is intended for the same contact who unsubscribed — forwarded or altered links may not behave as expected.
Screenshot: Unsubscribe success page with the Resubscribe link highlighted near the confirmation message.
DND & Consent Updates
Resubscribe changes a contact's eligibility to receive email. Here's what to look for so you can verify the change and keep consent records clear.
- Clicking Resubscribe updates the contact so they can receive marketing emails again (email eligibility).
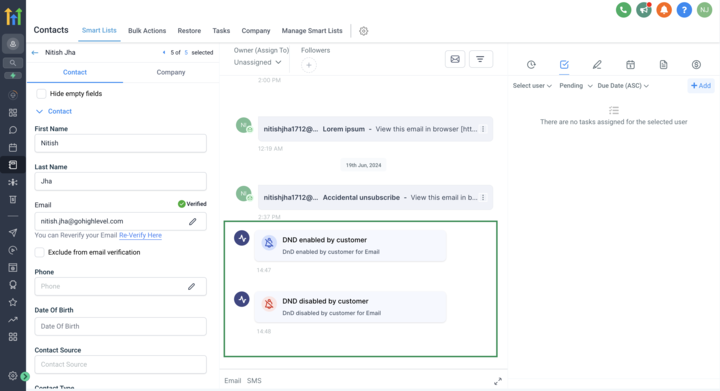
- Verify the change in the contact record by reviewing DND status and Activity/Consent history.
- Use notes or tags (e.g.,
Resubscribed - {date}) to preserve auditability for your team.
Tip
Compare the contact record before (Email = Unsubscribed / Blocked) and after (Email = Eligible / Not in DND) to confirm the update applied cleanly.
Reporting Notes
Campaign analytics may not immediately reconcile unsubscribe and resubscribe events. Set expectations with your team and choose the right reports when validating metrics.
- Some campaign statistics may still show the contact under unsubscribed for a period of time, even after they resubscribe.
- When validating performance, compare message-level and contact-level data, and check known timing/aggregation behavior in your email reporting documentation.
- Consider segmenting reports by current eligibility to get an accurate audience snapshot for future sends.
Automation Ideas (Optional)
Optional workflows you can layer on top of the core resubscribe flow to make the experience even smoother.
- Resubscribe confirmation email: Trigger a short "welcome back" email that acknowledges the choice and links to preference settings.
- Auto-tag for audit trail: Add a tag like
Resubscribedwith the date to simplify consent audits. - Gentle re-engagement sequence: Drip a low-volume series instead of adding contacts to large broadcasts immediately — respect the fresh consent.
- Internal team notification: Notify the assigned rep in Slack or an internal email when a lapsed lead resubscribes.
How To Set Up & Test Resubscribe
A quick test validates your unsubscribe flow, confirms the resubscribe link appears, and verifies the change in the contact record before you rely on it in production.
Step 1: Prepare a test contact
- Create or identify a contact you can email.
- Confirm they can receive emails (not currently suppressed).
Step 2: Send a simple test email
- Include the default unsubscribe link in the footer (or your configured unsubscribe method).
- Send the email to your test contact.
Step 3: Unsubscribe using the email
- Open the email and click Unsubscribe.
- Complete the unsubscribe flow and reach the success page.
Step 4: Click "Resubscribe" on the success page
- On the success page, click the Resubscribe link to opt back in.
Step 5: Verify the contact record
- Open the test contact and confirm email eligibility is restored (review DND and recent Activity entries).
- Add a tag or note such as
Resubscribed - {date}for internal tracking.
You're All Set
Resubscribe gives your audience a respectful way back in — without manual work for your team and with a clean audit trail. Test once, layer on a confirmation workflow, and trust the flow to handle the rest.
Frequently Asked Questions
Was this article helpful?
That’s Great!
Thank you for your feedback
Sorry! We couldn't be helpful
Thank you for your feedback
Feedback sent
We appreciate your effort and will try to fix the article