Every web app gets its own permanent app address when you publish. You can change that address and connect up to 10 custom domains so your clients reach the app on your own website address.
Set Your App Address
Open your web app and click Publish at the top right.
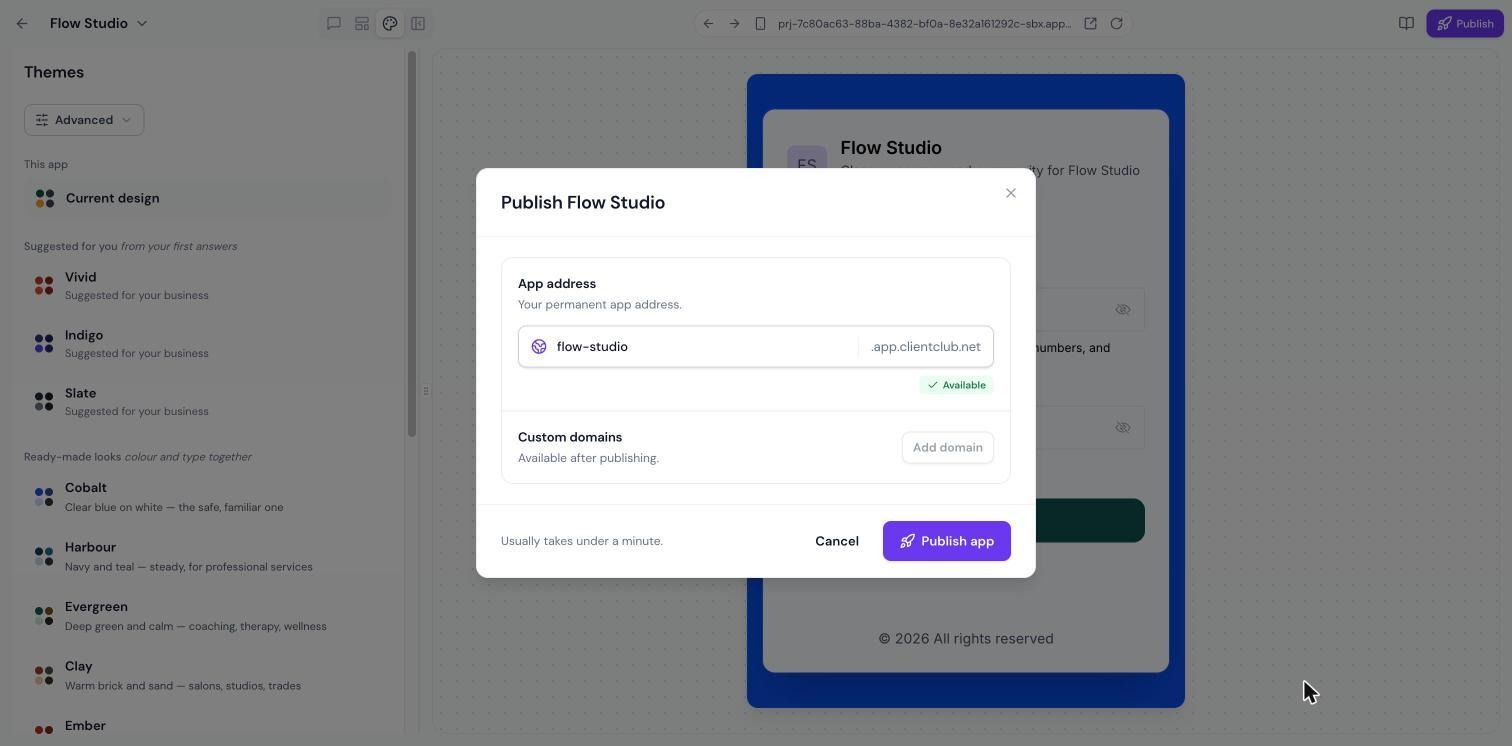
Under App address, enter the name you want. You'll see Available when the name is free.
Click Publish app. Publishing usually takes under a minute.
Connect a Custom Domain
Custom domains become available after your app is published.
Click Publish again to open the Publish window.
Under Custom domains, click Add domain.
Enter your domain or subdomain, and choose the connection type: Subdomain (CNAME), the default, for an address like app.yourbusiness.com, or Root domain (A record) for an address like yourbusiness.com.
Follow the on-screen instructions to add the DNS records at your domain provider.
Wait for the domain to verify, then open it to check your app.
Tip: DNS changes can take a little while to take effect. If the domain doesn't verify straight away, check the records and try again later.
Limits
Up to 10 custom domains per app.
Custom domains are for web apps. Mobile apps are published as an Android APK.
Frequently Asked Questions
Can I change my app address later?
Yes. Open the Publish window to update it. When you rename it, the old address stops working and links you've already shared break. Custom domains keep working.
Does my app still work on its original address?
Yes. The app address keeps working alongside your custom domains, as long as you don't rename it.
Was this article helpful?
That’s Great!
Thank you for your feedback
Sorry! We couldn't be helpful
Thank you for your feedback
Feedback sent
We appreciate your effort and will try to fix the article