Before you create tasks, it helps to decide how your work will be organized. Project Management uses three containers - Spaces, Folders, and Lists - and getting this structure right early saves a great deal of rearranging later. This article explains what each container does, how to create them, and how to decide which to use.
Note: Project Management is currently in Private Beta and may not be visible to all customers. Access is being rolled out gradually to selected customers.
It will soon be available through Labs, allowing all customers to enable it and explore the new and enhanced experience
TABLE OF CONTENTS
- The structure at a glance
- What a Space does
- What a Folder does
- What a List does
- Choosing your structure
- Steps for creating a Space
- Steps for creating a folder
- Steps for creating a list
- Renaming and deleting
- Frequently Asked Questions
The structure at a glance
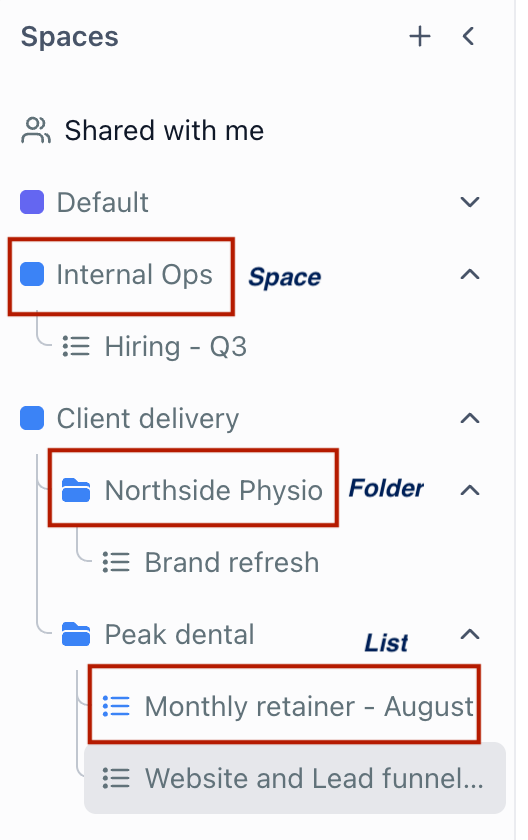
Work is nested in the following order: Space, then optionally a Folder, then a List, then tasks, then subtasks.
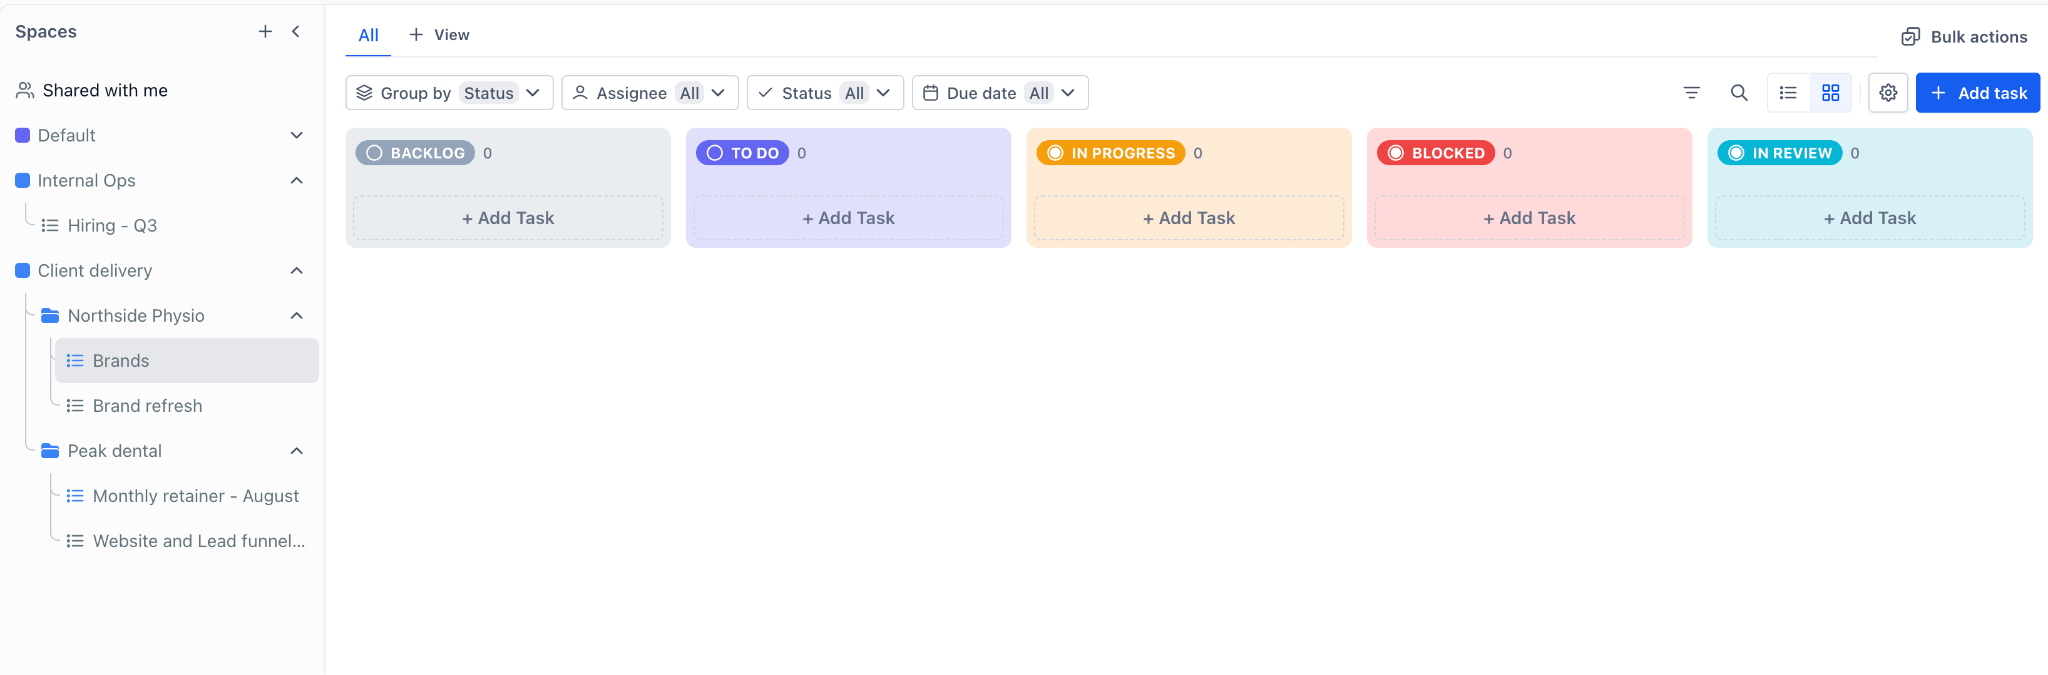
All of this appears as an expandable tree in the panel on the left of the Tasks page, under the heading Spaces. Click the arrow beside a Space or Folder to expand it. Lists have no arrow, because their contents are tasks and those are shown in the main area of the page.
What a Space does
A Space is the outermost container and the most important one to plan, because several settings belong to the Space rather than to individual Lists:
- Task statuses: The statuses available to tasks are configured per Space, so every List inside a Space shares the same set of statuses.
- Custom fields: Custom fields are also configured per Space and apply to the tasks within it.
- Members and privacy: A Space can be made private and shared with named people.
- Color: Each Space carries a color, shown as a dot in the tree, which makes large trees easier to scan.
What a Folder does
A Folder is an optional grouping layer that sits inside a Space and holds Lists. It exists purely to keep a long list of Lists tidy. A Folder does not carry its own statuses, and it does not hold tasks directly.
Use a Folder when a single Space accumulates enough Lists that scanning the tree becomes slow - for example a Delivery Space with a Folder per client, and a List inside each Folder per engagement.
What a List does
A List is where tasks live. It usually represents one project, one client, or one ongoing workstream. A List can sit directly inside a Space, or inside a Folder within that Space, and you can mix both arrangements in the same Space.
When you open a task, the breadcrumb at the top of the panel shows the Space and List it belongs to, so you can always tell where a task sits.
Choosing your structure
Two examples of the same idea at different scales:
- A small team - one Space called Operations, with Lists directly inside it such as Onboarding, Support Escalations, and Internal Admin. No Folders needed.
- A larger agency - a Space per department, and inside Delivery a Folder per client, with a List inside each Folder per engagement.
One practical point worth deciding up front. Statuses are per Space, so if one team works in three stages and another in seven, they should be separate Spaces.
Steps for creating a space
Open the Tasks page
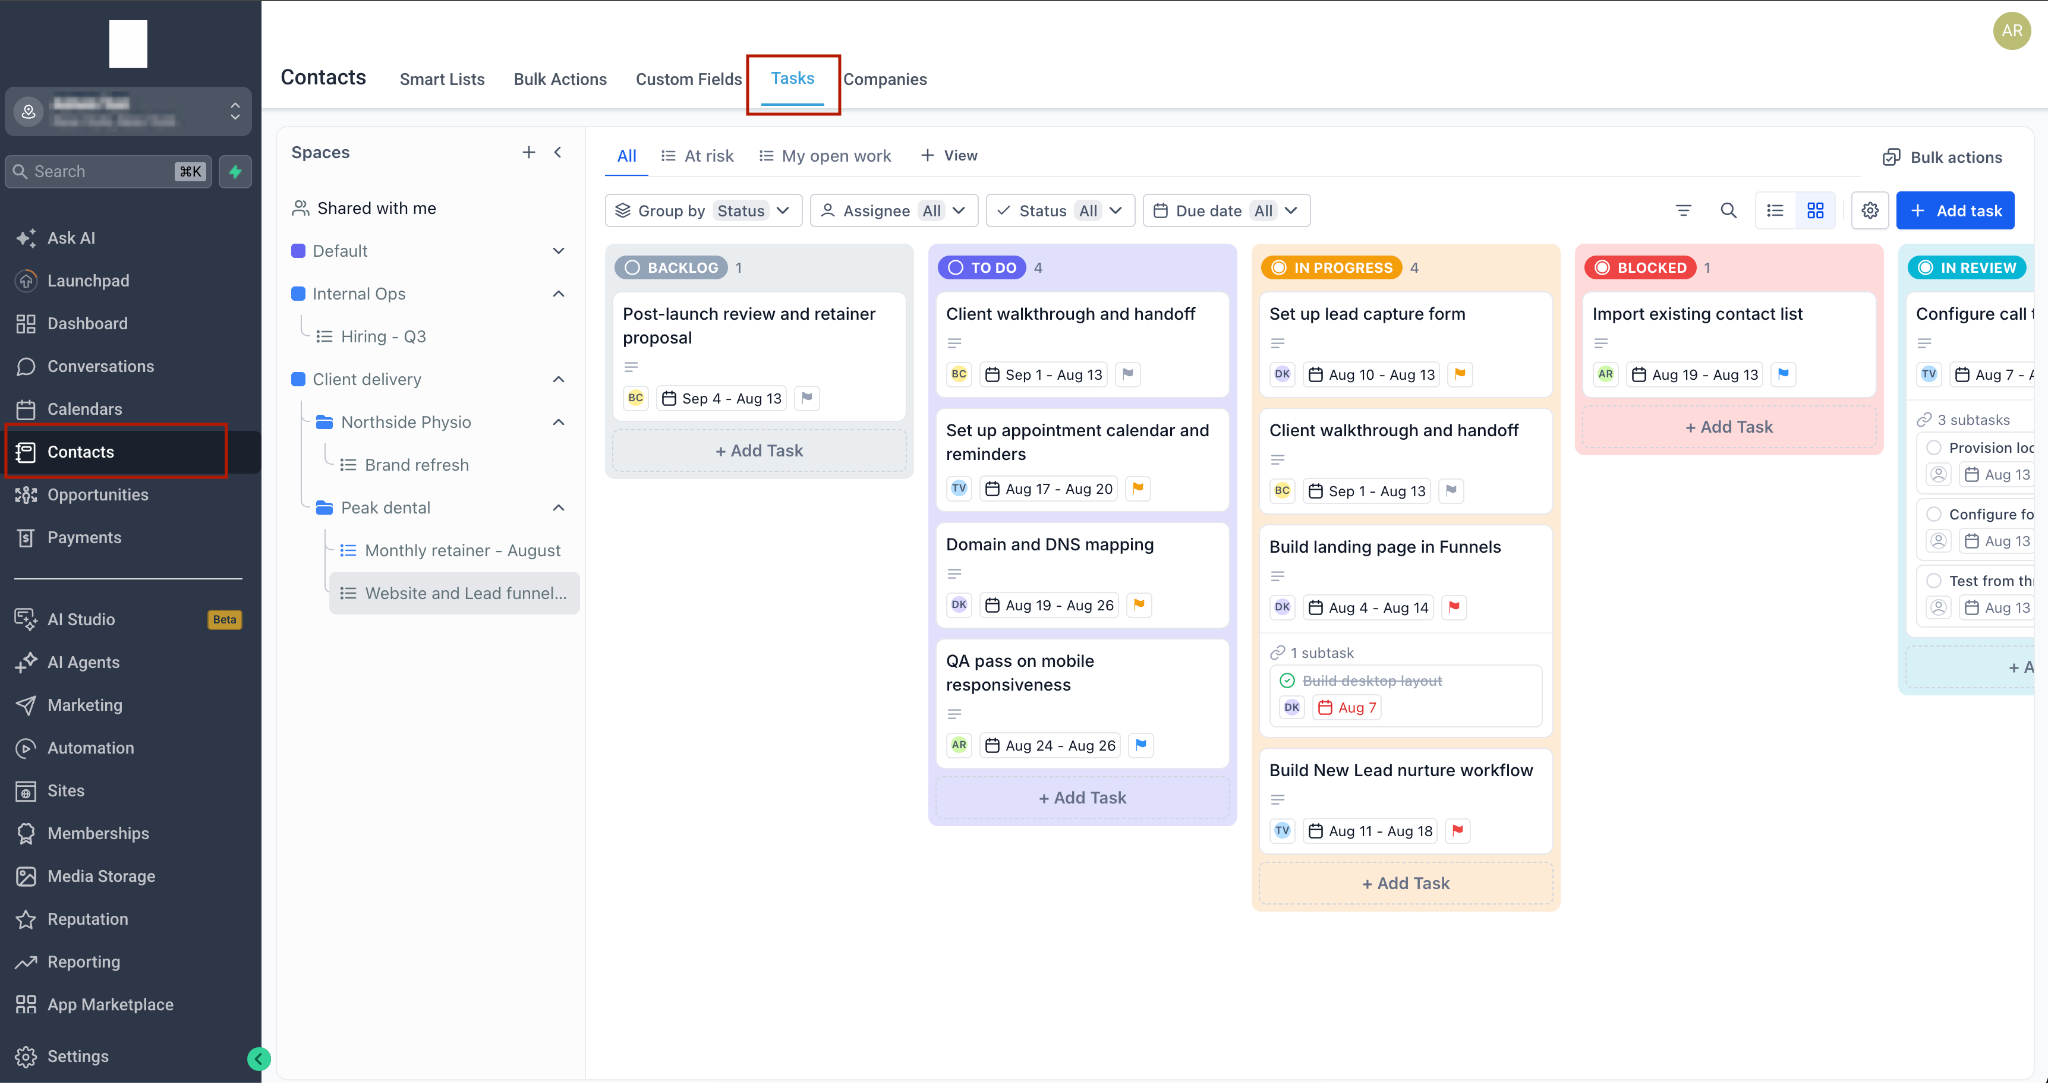
Go to "Contacts" in the left navigation menu, then select the "Tasks" tab.
Add a new Space
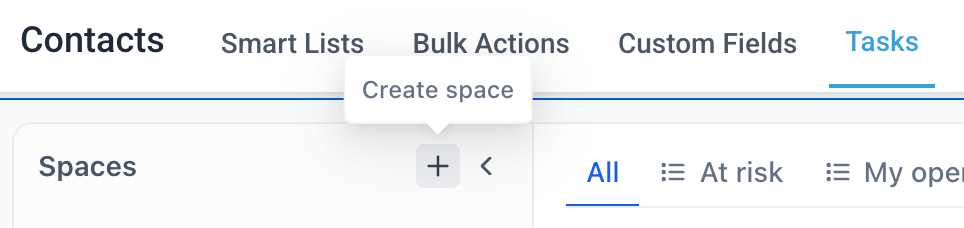
Use the add '+' control beside the "Spaces" heading in the left panel.
Name the Space and pick a color
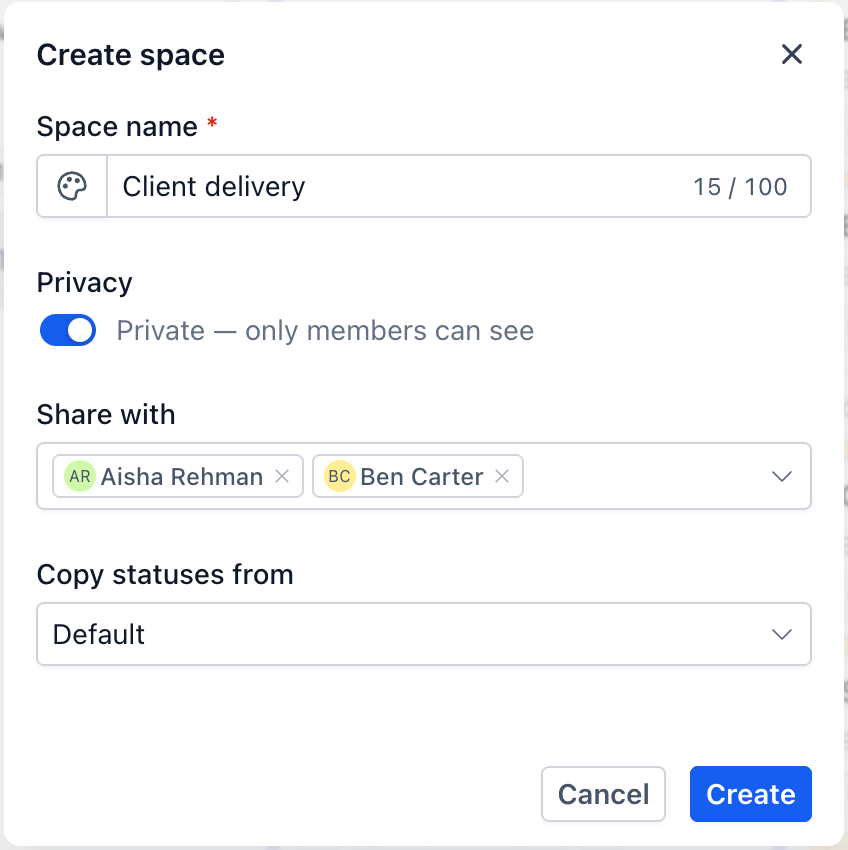
Enter a Space name. The name field allows up to 100 characters and shows a live character count as you type. Choose a color so the Space is easy to identify in the tree.
Create
Click "Create". The space appears in the tree in the left panel.
Steps for creating a folder
Open the Space options menu or click on '+' add control beside Space name
Hover over the Space in the left panel and click its options control. The menu contains Rename, Settings, Create list, Create folder, Custom fields, Status options, and Delete.
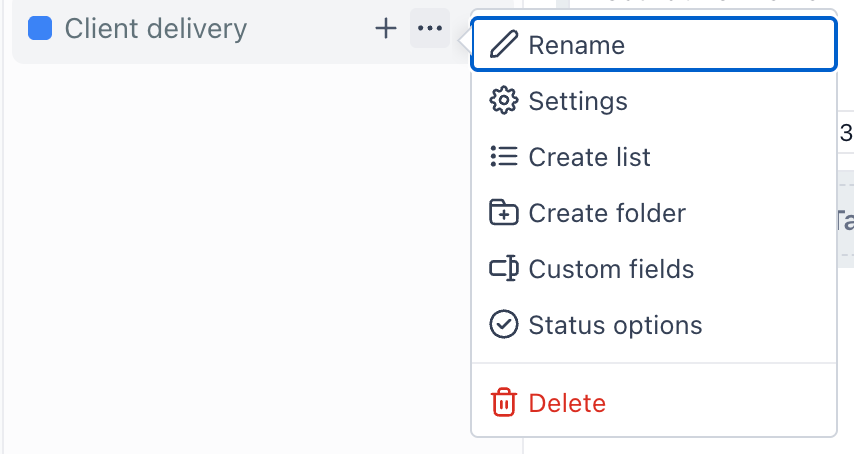
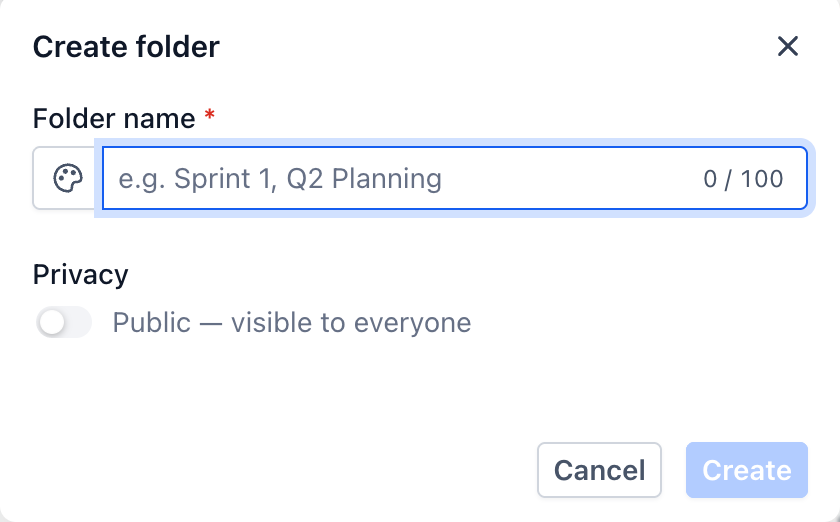
Choose "Create folder"
Give the Folder a name and save it. It appears inside the Space, with an arrow so you can expand it.
Steps for creating a list
Decide where the List should sit
To put the List directly in a Space, open the Space options menu. To put it inside a Folder, open that Folder's options menu instead.
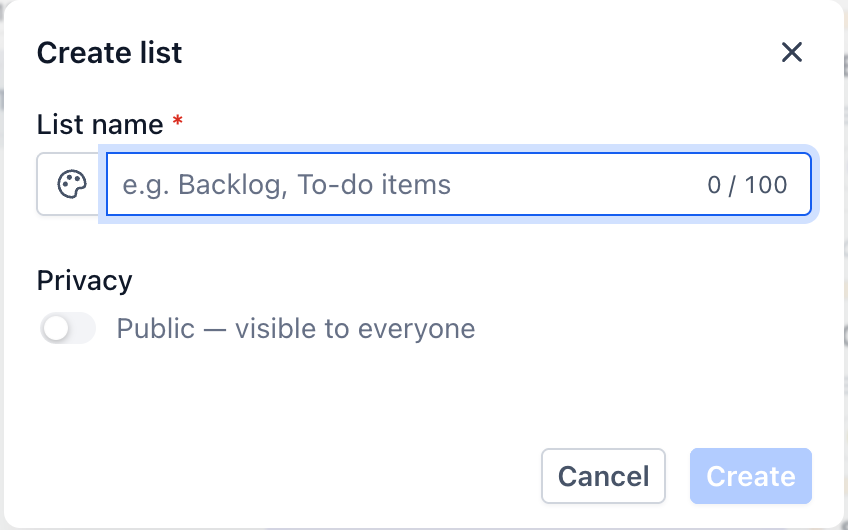
Choose "Create list"
Give the List a name that identifies the project, client, or work stream it represents.
Open the List and start adding tasks
Click the List in the left panel. Its tasks appear in the main area of the page, ready for you to add to.
Renaming and deleting
Both actions are in the options menu of the item you want to change. "Rename" changes the name in place. "Delete" removes the item.
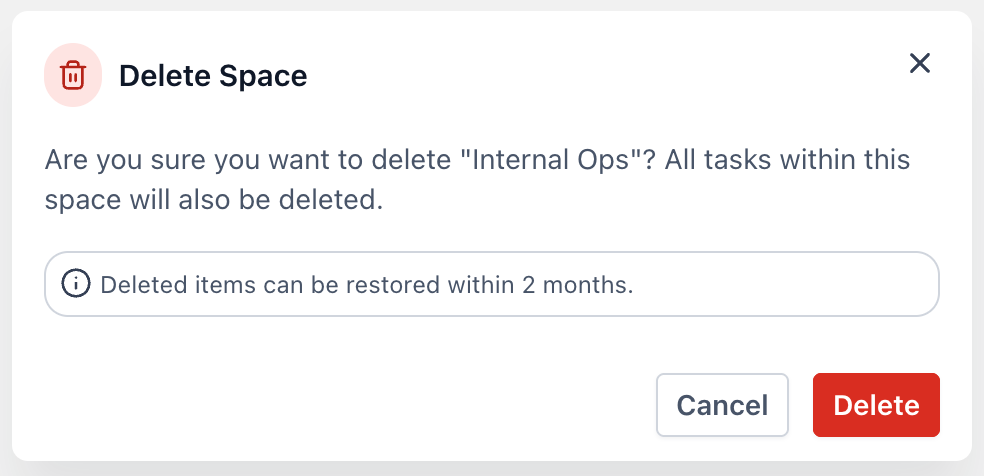
Take care with delete on a space. A space contains its folders, lists, and all the tasks inside them, along with its status configuration and custom fields.
Frequently Asked Questions
Q: Do I have to use folders?
No. folders are optional. A list can sit directly inside a space, and many teams never need a folder.
Q: Can a folder contain another folder?
No, another folder cannot be added within a folder. Only lists can be added within a folder.
Q: Can a folder hold tasks directly?
No. Tasks live in Lists. A Folder holds Lists.
Q: Can two lists in the same space user different statuses?
No. Statuses are configured on the Space, so every List inside a Space shares the same statuses. If two workstreams need different stages, put them in separate Spaces.
Q: How long can a Space name be?
Up to 100 characters. The name field shows a running count as you type.
Next: Create a task or sub-task
Was this article helpful?
That’s Great!
Thank you for your feedback
Sorry! We couldn't be helpful
Thank you for your feedback
Feedback sent
We appreciate your effort and will try to fix the article