Monday.com Actions (Available Now)
Actions enable Workflows to create, modify, or locate Monday data. Use Test Action to validate your connection, preview live schema, and capture returned fields (like Item ID) for downstream steps.
| Action | Purpose |
|---|---|
| Create New Board | Create a new board and return its Board ID for later steps. |
| Create New Group | Create a group within a board and return the Group ID. |
| Create New Column | Add a column (Status, Date, People, etc.) to a board. |
| Create New Item | Create an item in a group and return the Item ID for reuse. |
| Create New Subitem | Create a subitem under an item and return the Subitem ID. |
| Update Item | Update an item’s mapped columns (Status, People, Date, Text, etc.). |
| Update Subitem | Update a subitem’s mapped columns. |
| Archive Board | Archive a completed board to keep workspaces tidy. |
| Archive Group | Archive a completed group on a board. |
| Delete Item | Permanently delete an item (irreversible). |
| Delete Group | Permanently delete a group (irreversible). |
| Get Board Items | Retrieve items from a board (may paginate on large boards). |
| Find Items by Column Value | Locate items using specific column values (Status, People, custom). |
| Find Items by ID | Fetch a specific item when you already have its Item ID. |
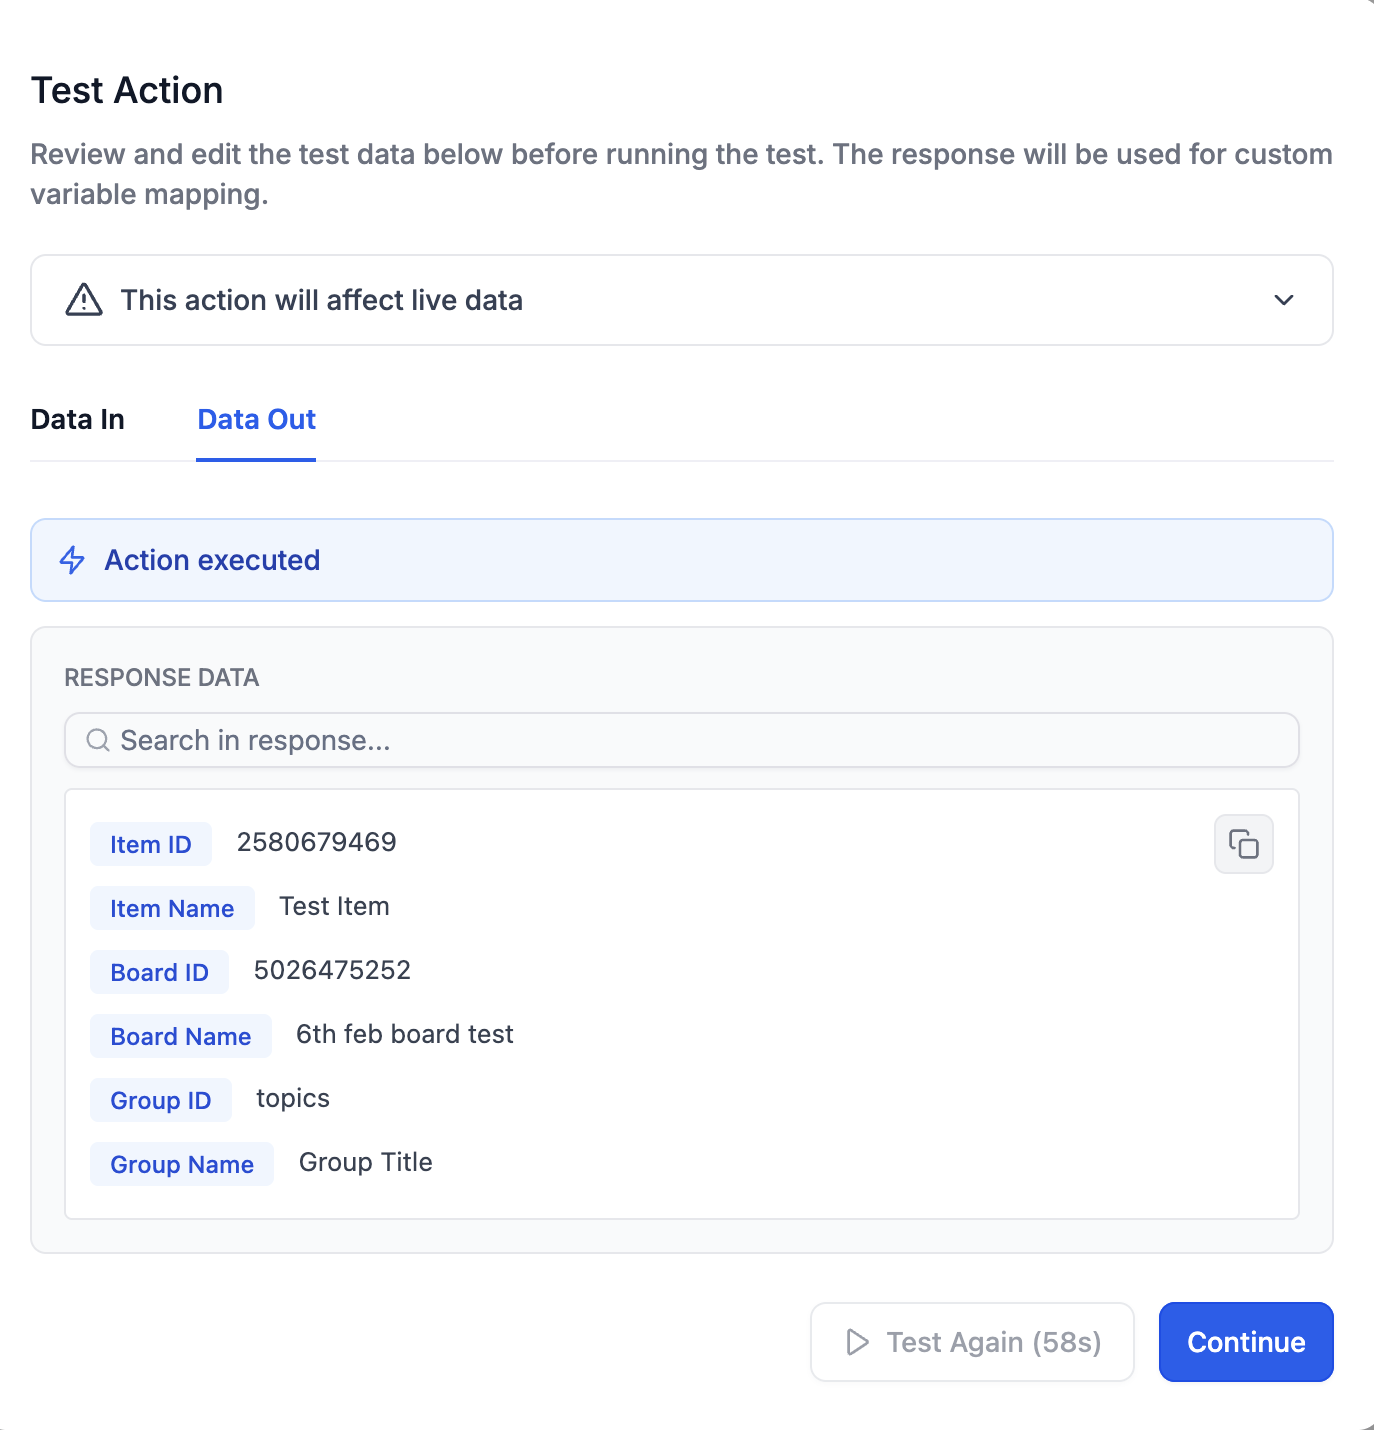
Test Action
Use Test Action in any Monday.com step to validate your connection, preview live schema, and capture returned fields (like Item ID) for downstream steps—reducing mapping errors.
Validates your Monday authentication and selected Board/Group/Item.
Pulls a live response and auto-saves the schema (e.g.,
item.id,column_values.status.label).Reuse returned fields as custom values in later steps (no re-mapping needed).
Surfaces common errors early (invalid key, permission denied, column mismatch).
How to Set Up a Workflow with Monday.com
Follow these streamlined steps to connect Monday.com, add it to your workflow, and map fields so your boards, groups, and items update reliably—mirroring the ClickUp article’s setup pattern while keeping the flow concise.
Step 1: Create or open a workflow
Go to Automation → Workflows, create a new workflow or open an existing one, then name it and select a folder if needed.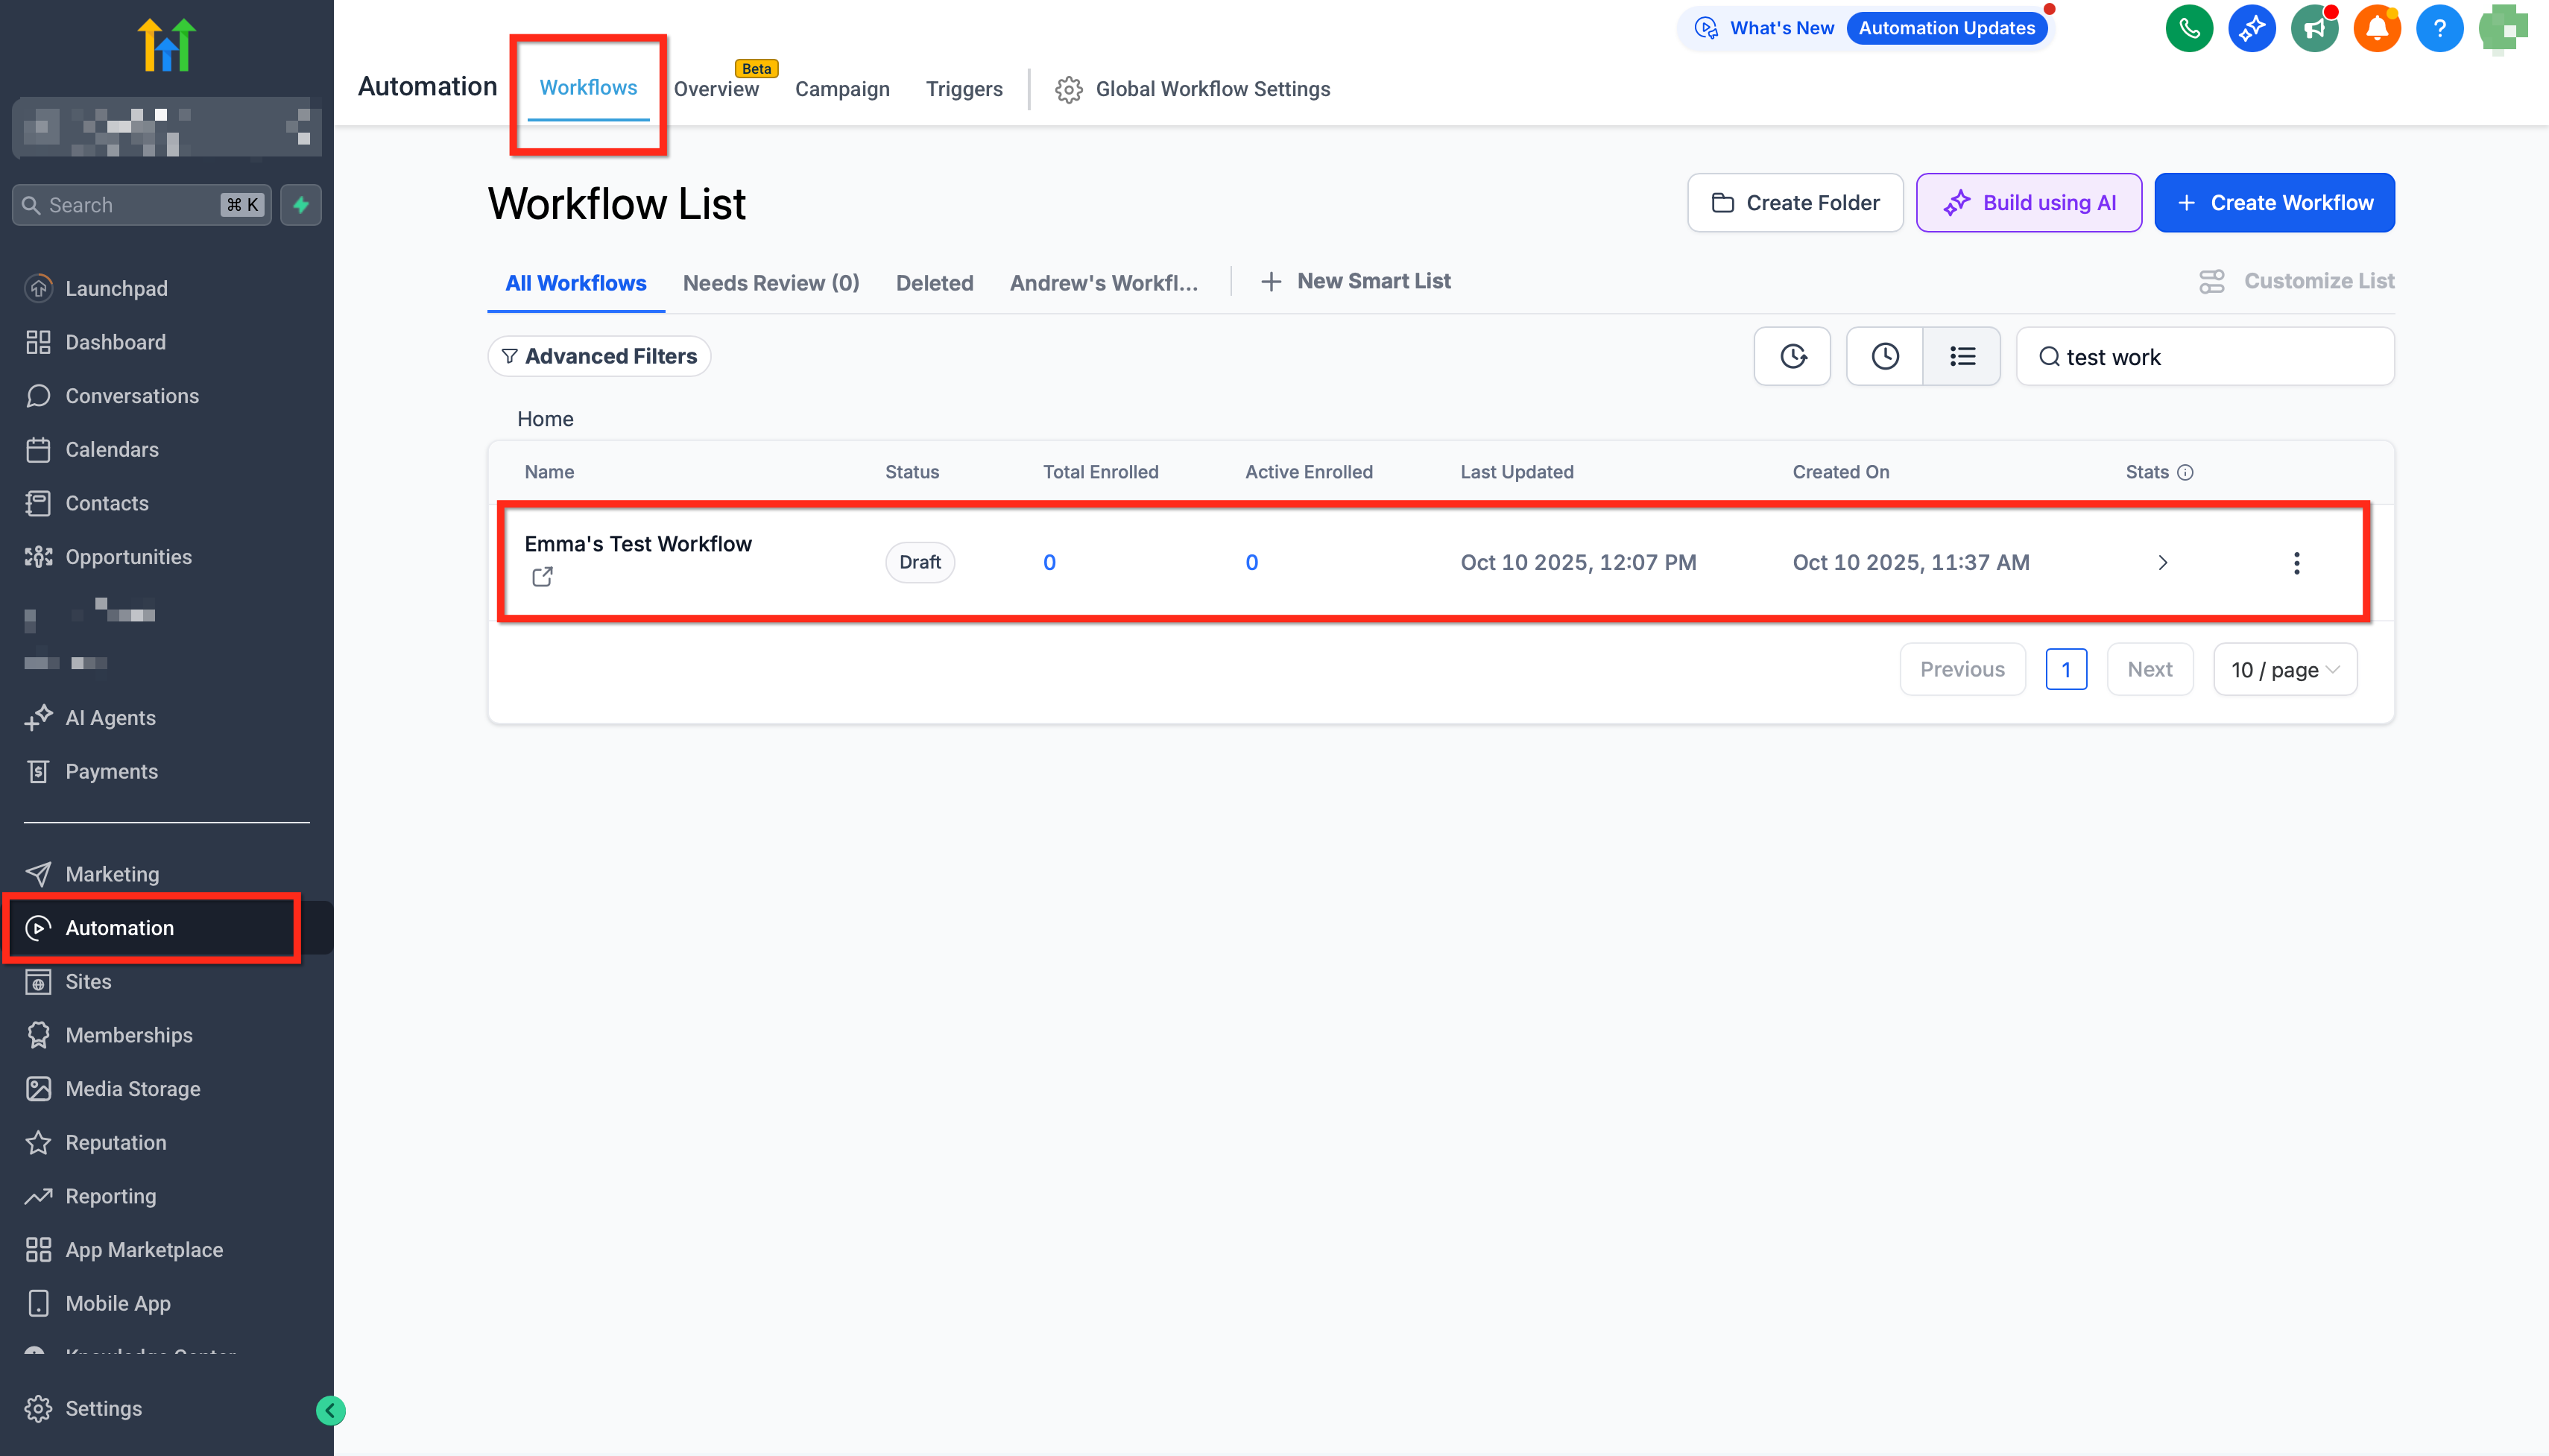
Step 2: Choose a trigger
Monday.com triggers are Coming Soon. Start with another trigger (e.g., Opportunity Status Changed, Form Submitted, or Schedule) and configure any filters you require; you can switch to a Monday.com trigger later without rebuilding downstream steps.
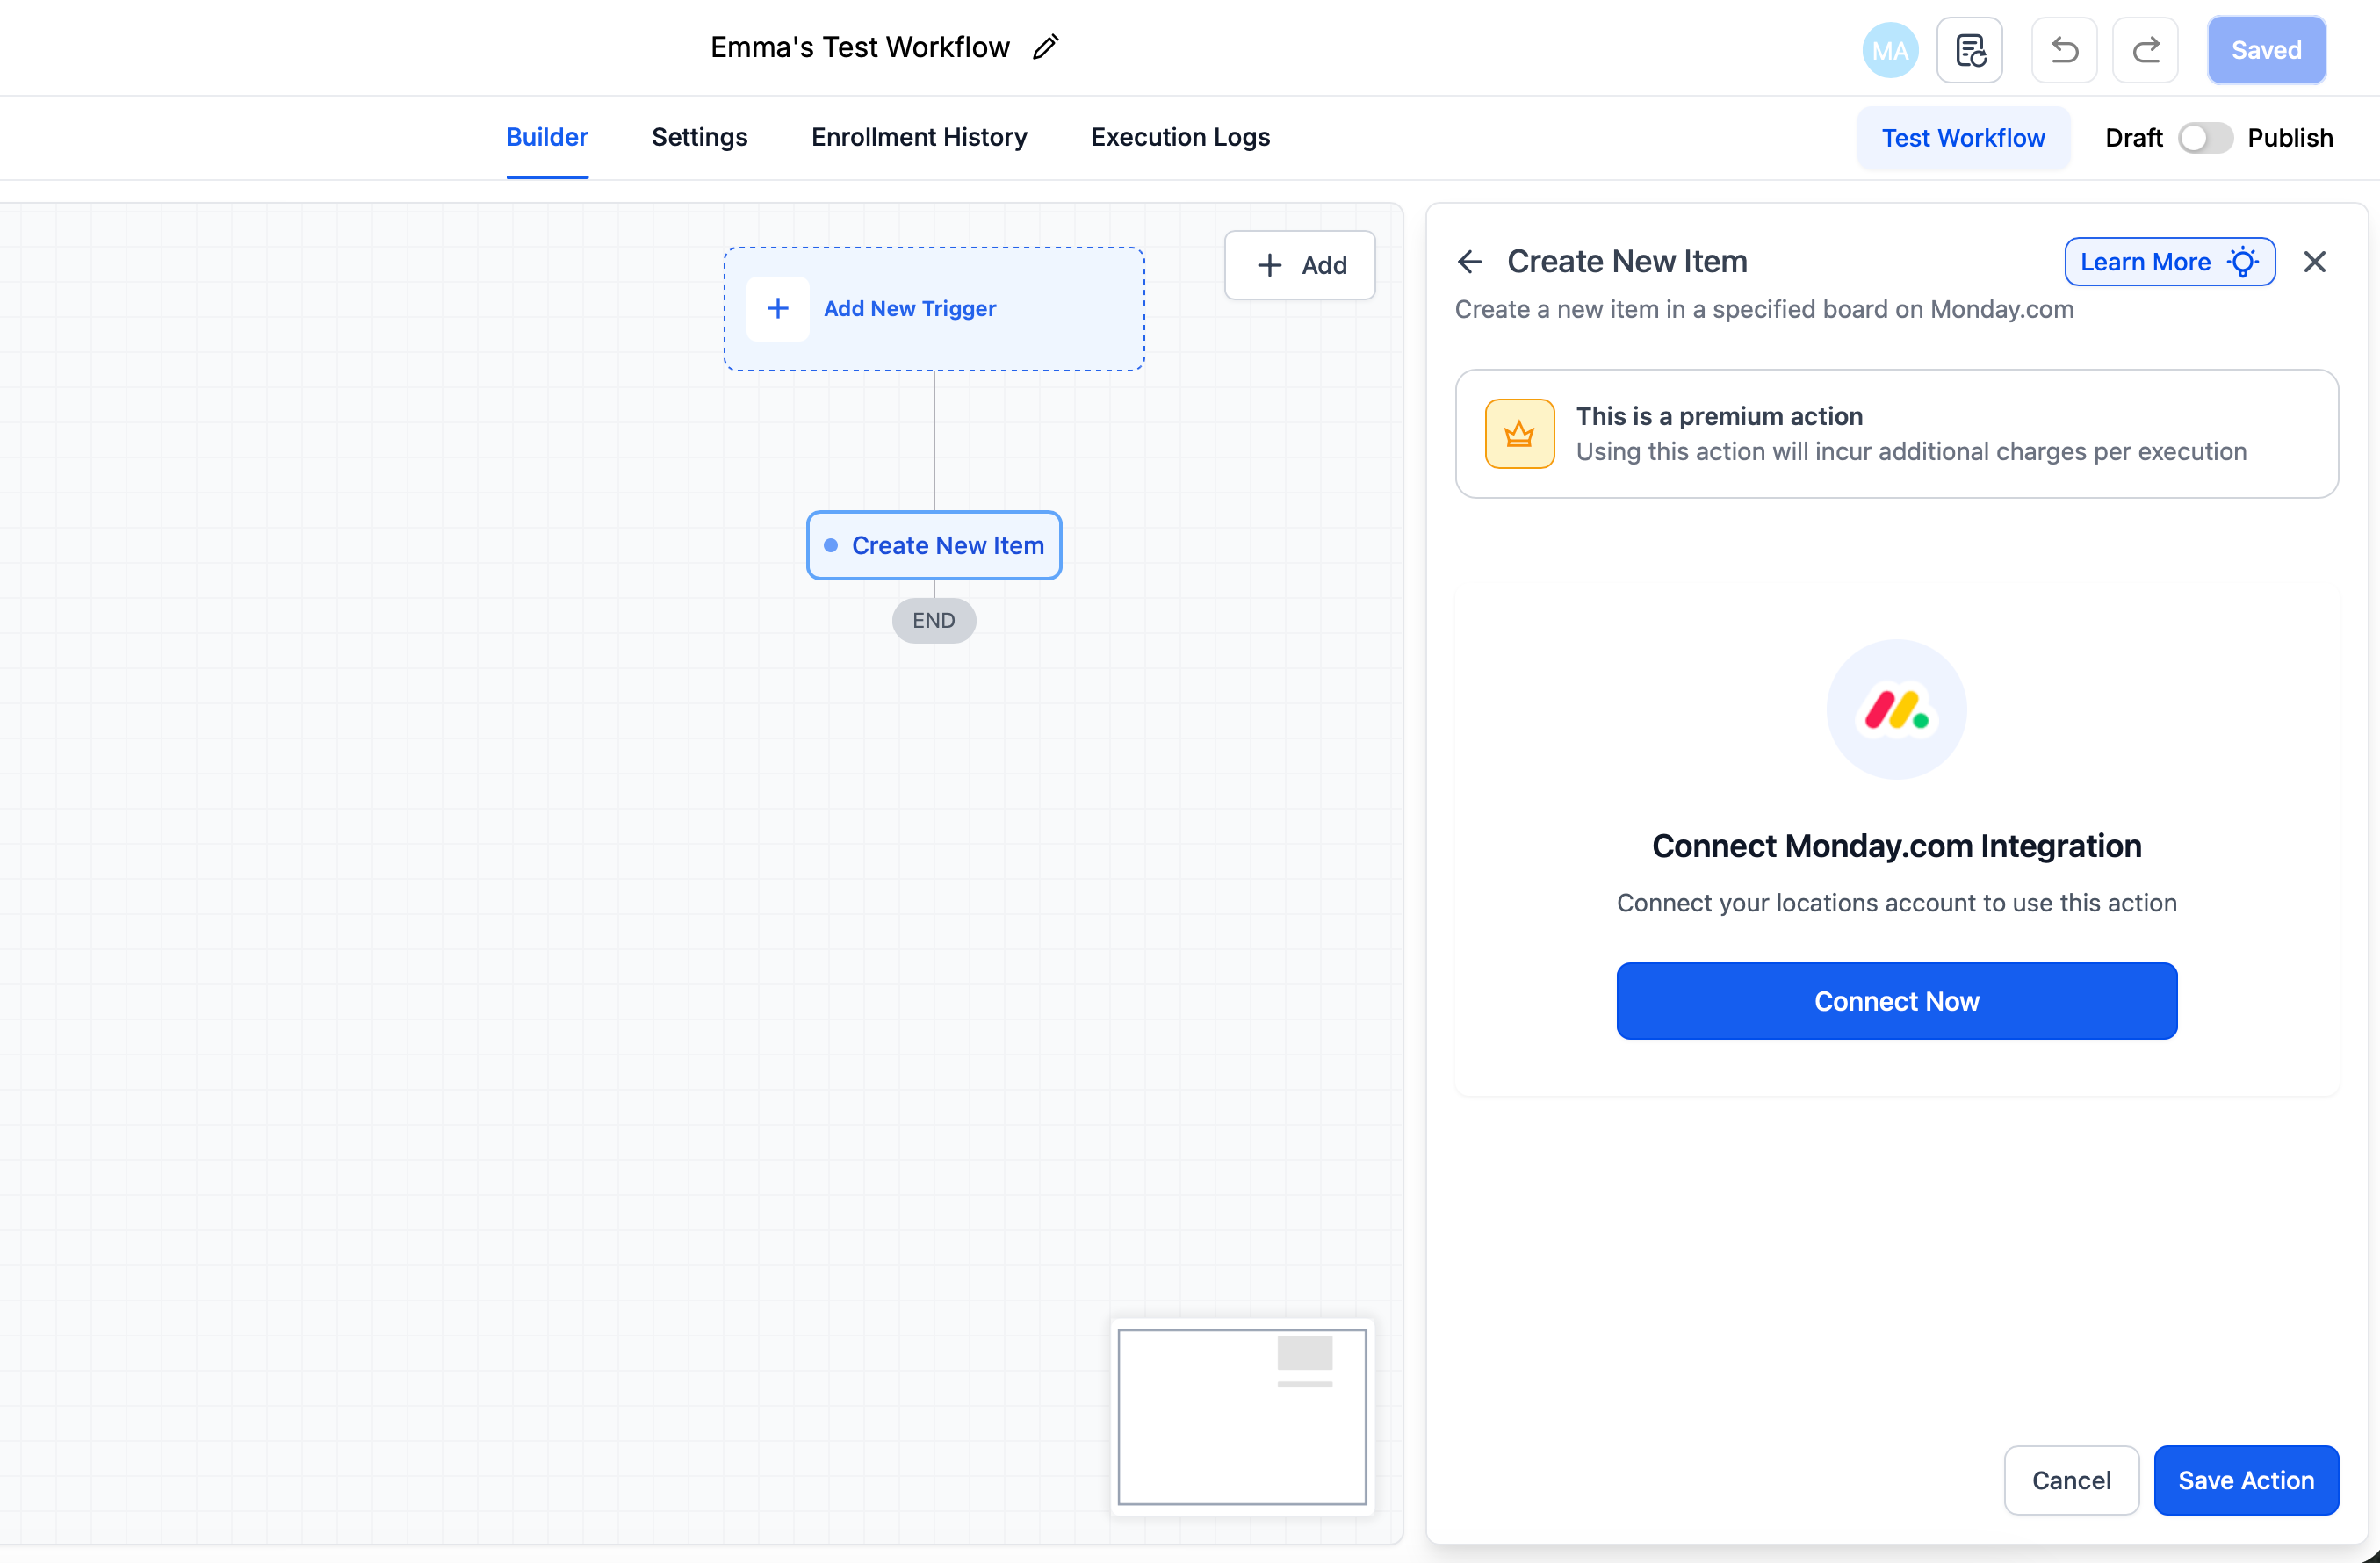
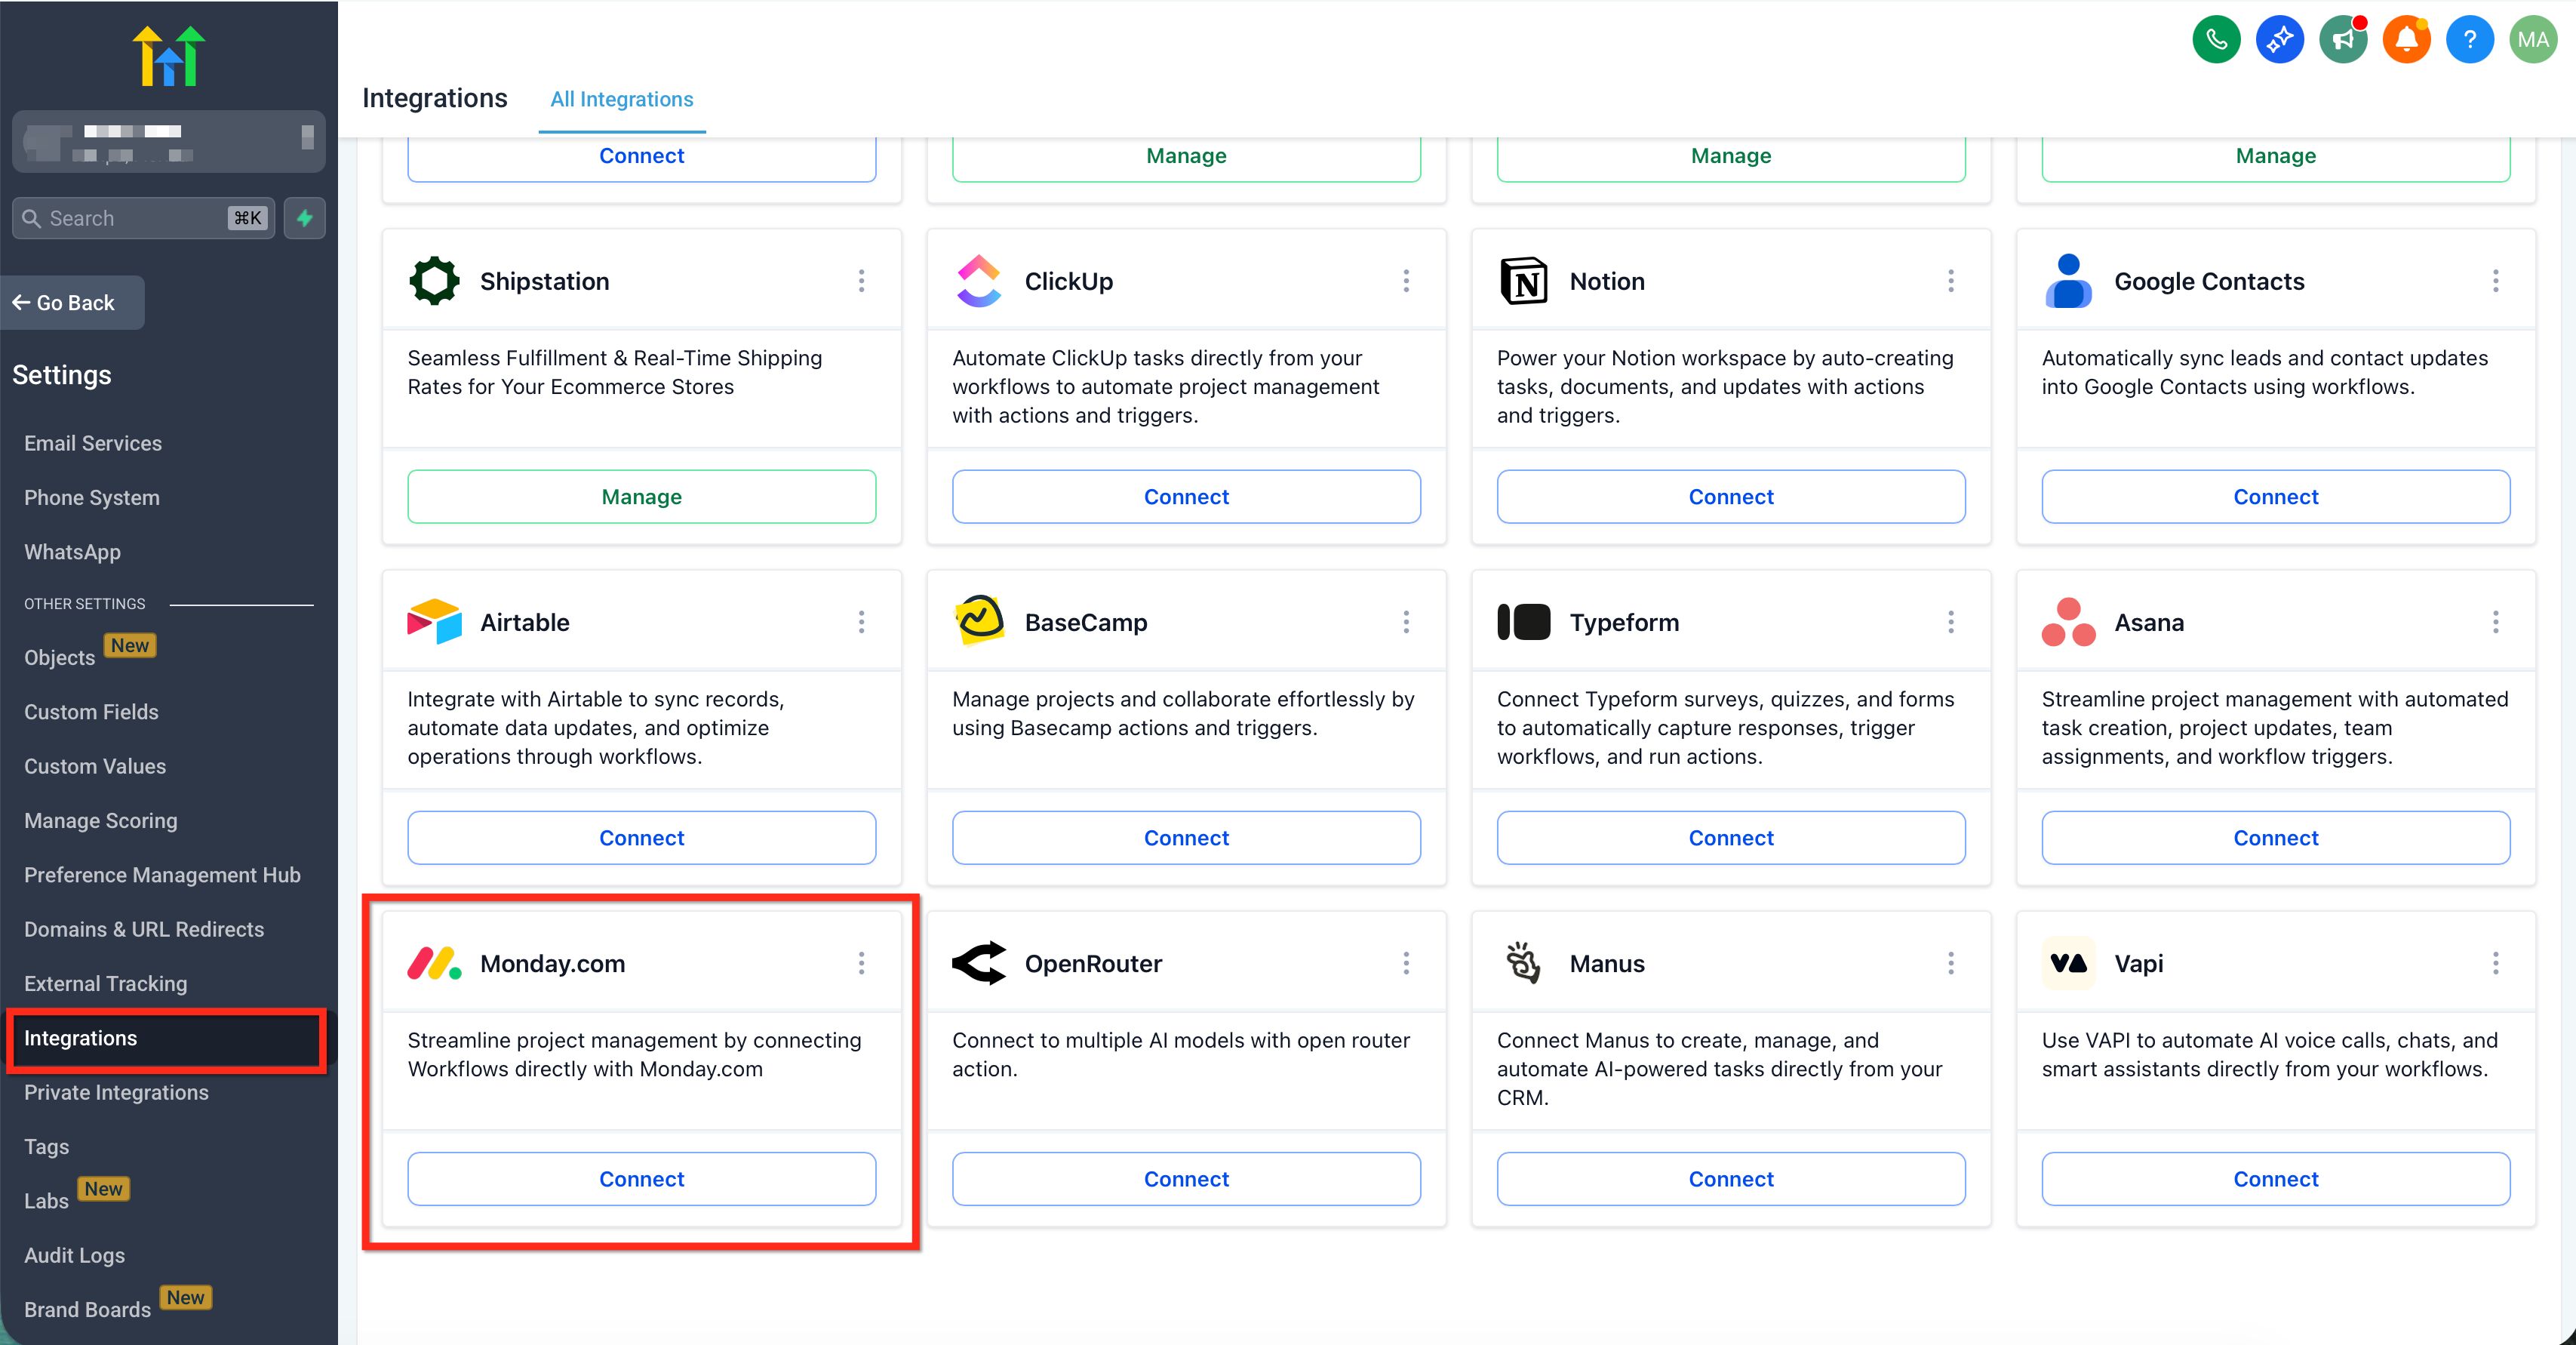
Step 3: Add a Monday.com action step
Click the + icon to add a step, search for Monday.com, and select the needed action such as Create New Item, Update Item, or Find Items by Column Value. If prompted, click Connect Now and authenticate your Monday.com account.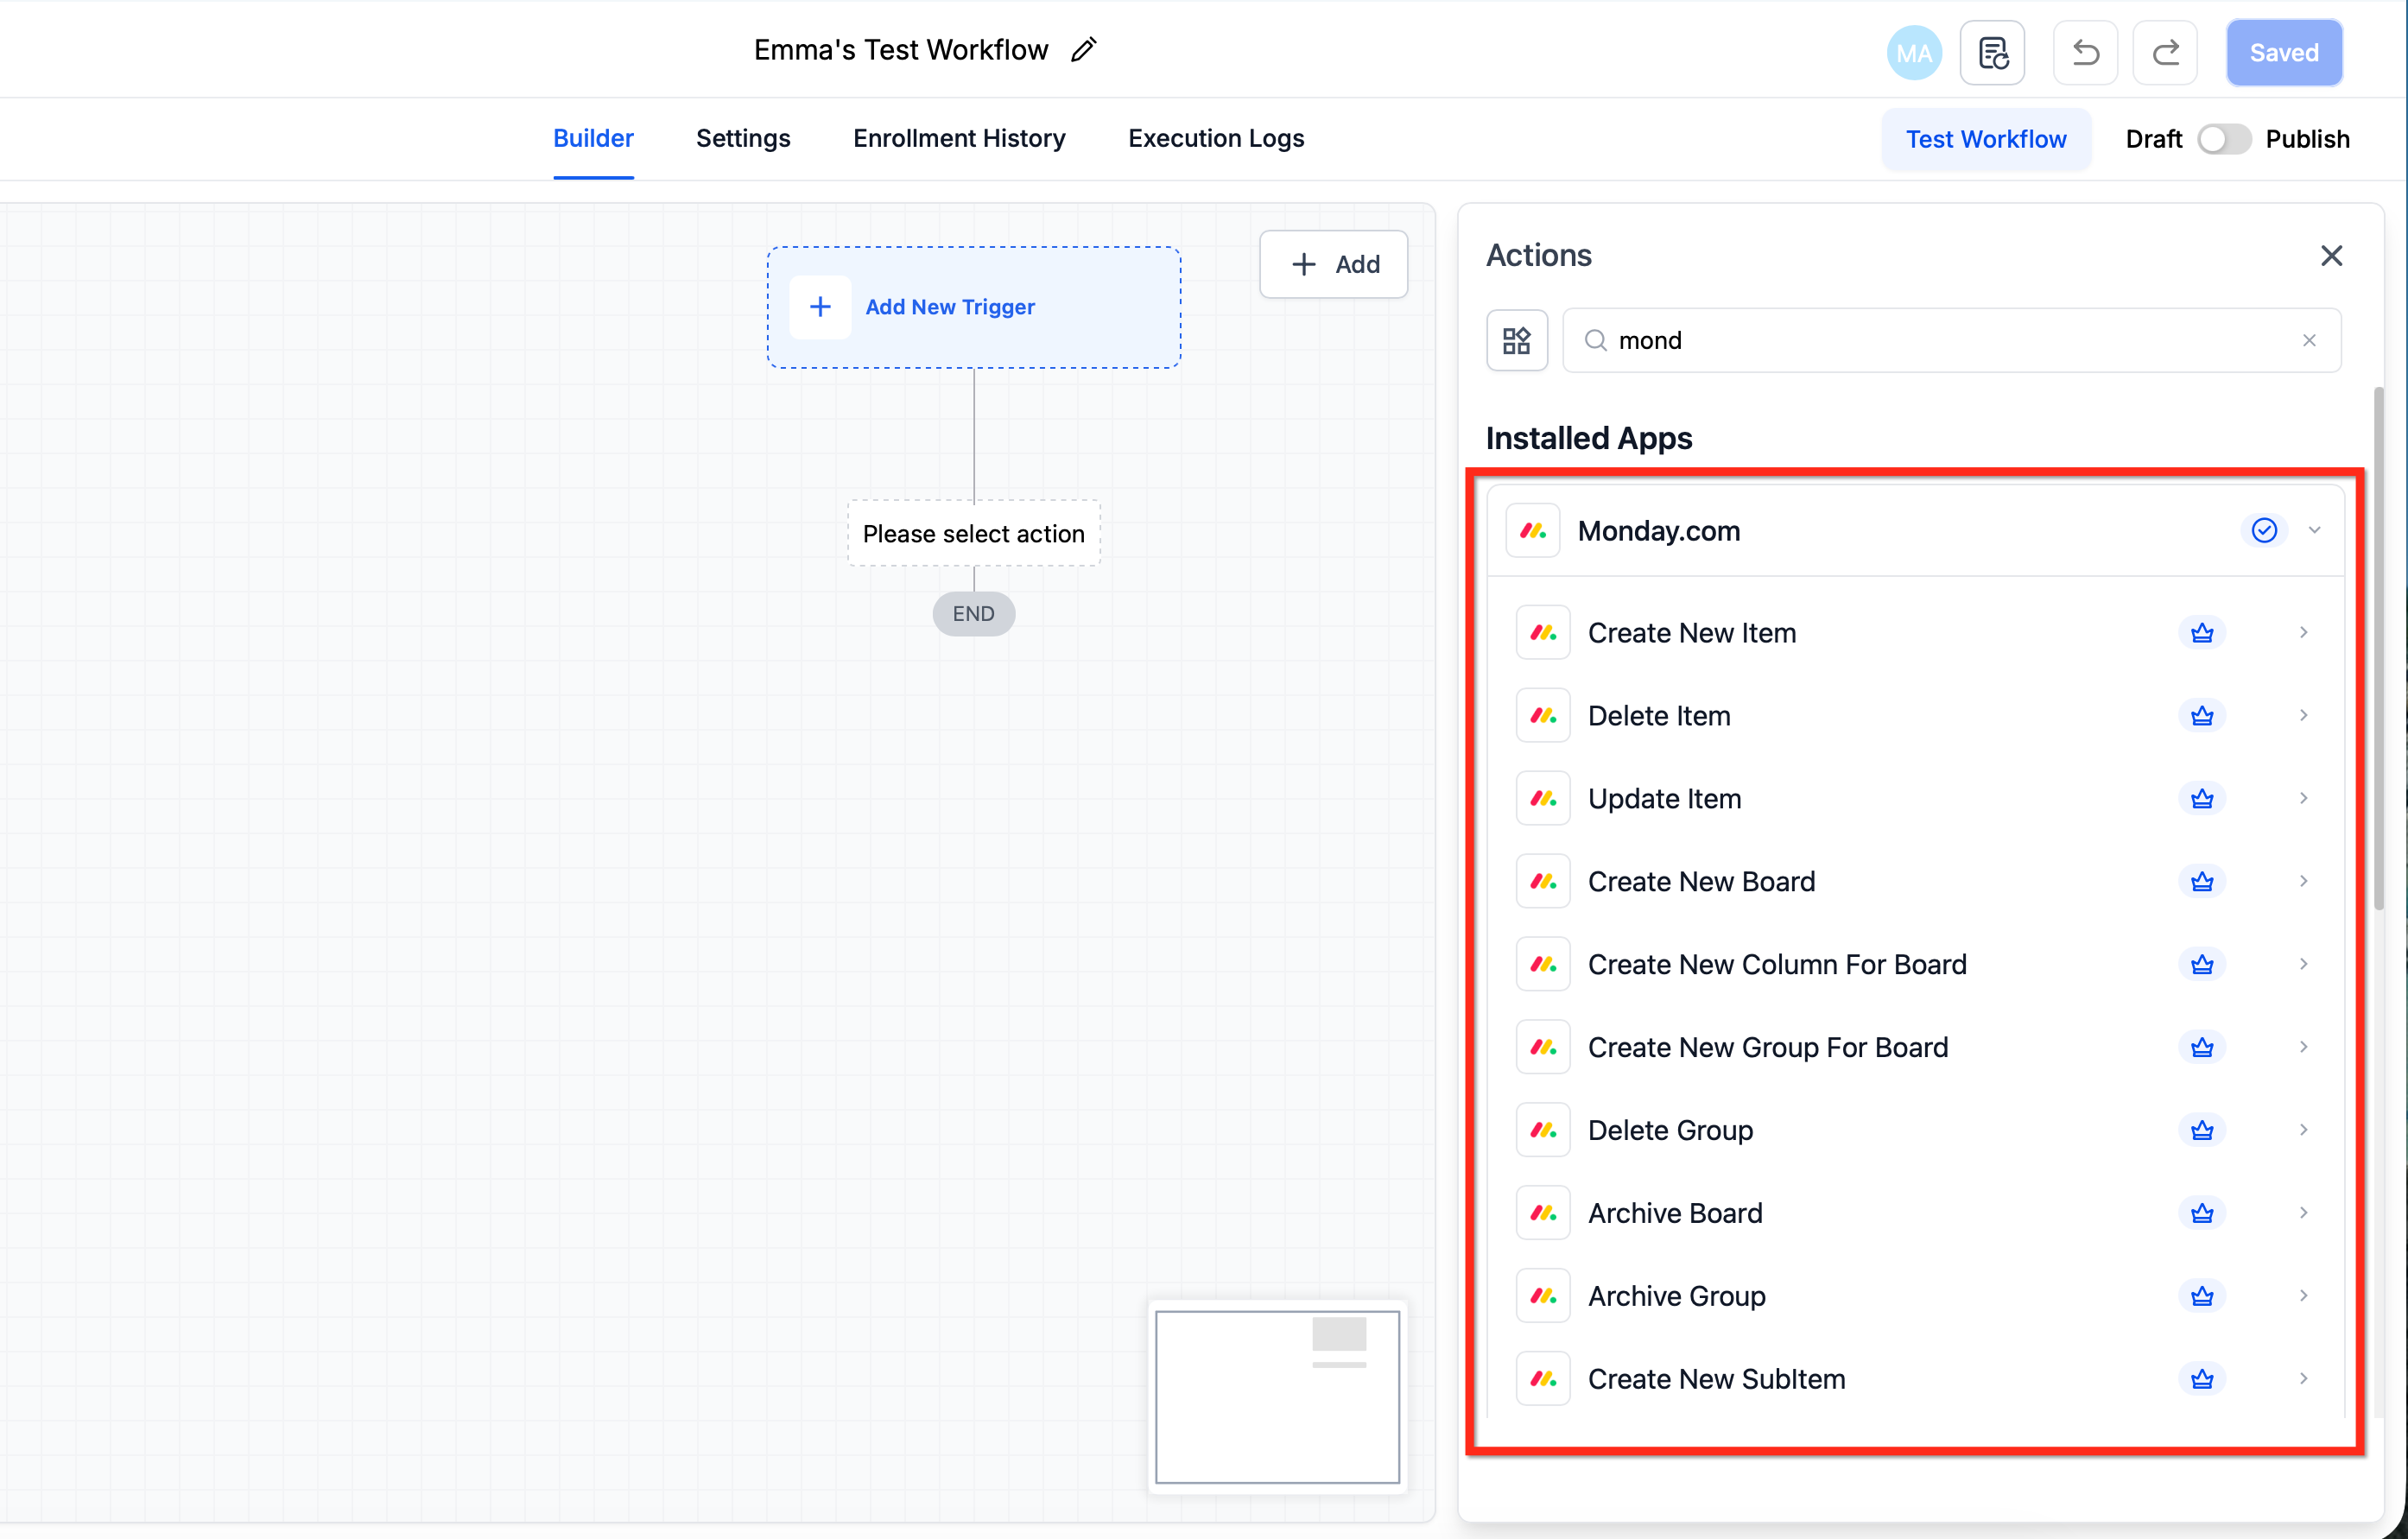
Step 4: Select your Workspace, Board, and Group
In the action configuration, choose the Workspace, select the target Board, and, if applicable, pick the Group where the action should apply.
Step 5: Map fields to Monday columns
Provide the required values such as Item name, then map any additional columns you want to write—like Status, People/Owner, Date, or Text—ensuring each value matches the corresponding Monday column type. For update or delete actions, include the relevant Item ID, Subitem ID, Group ID, or Board ID.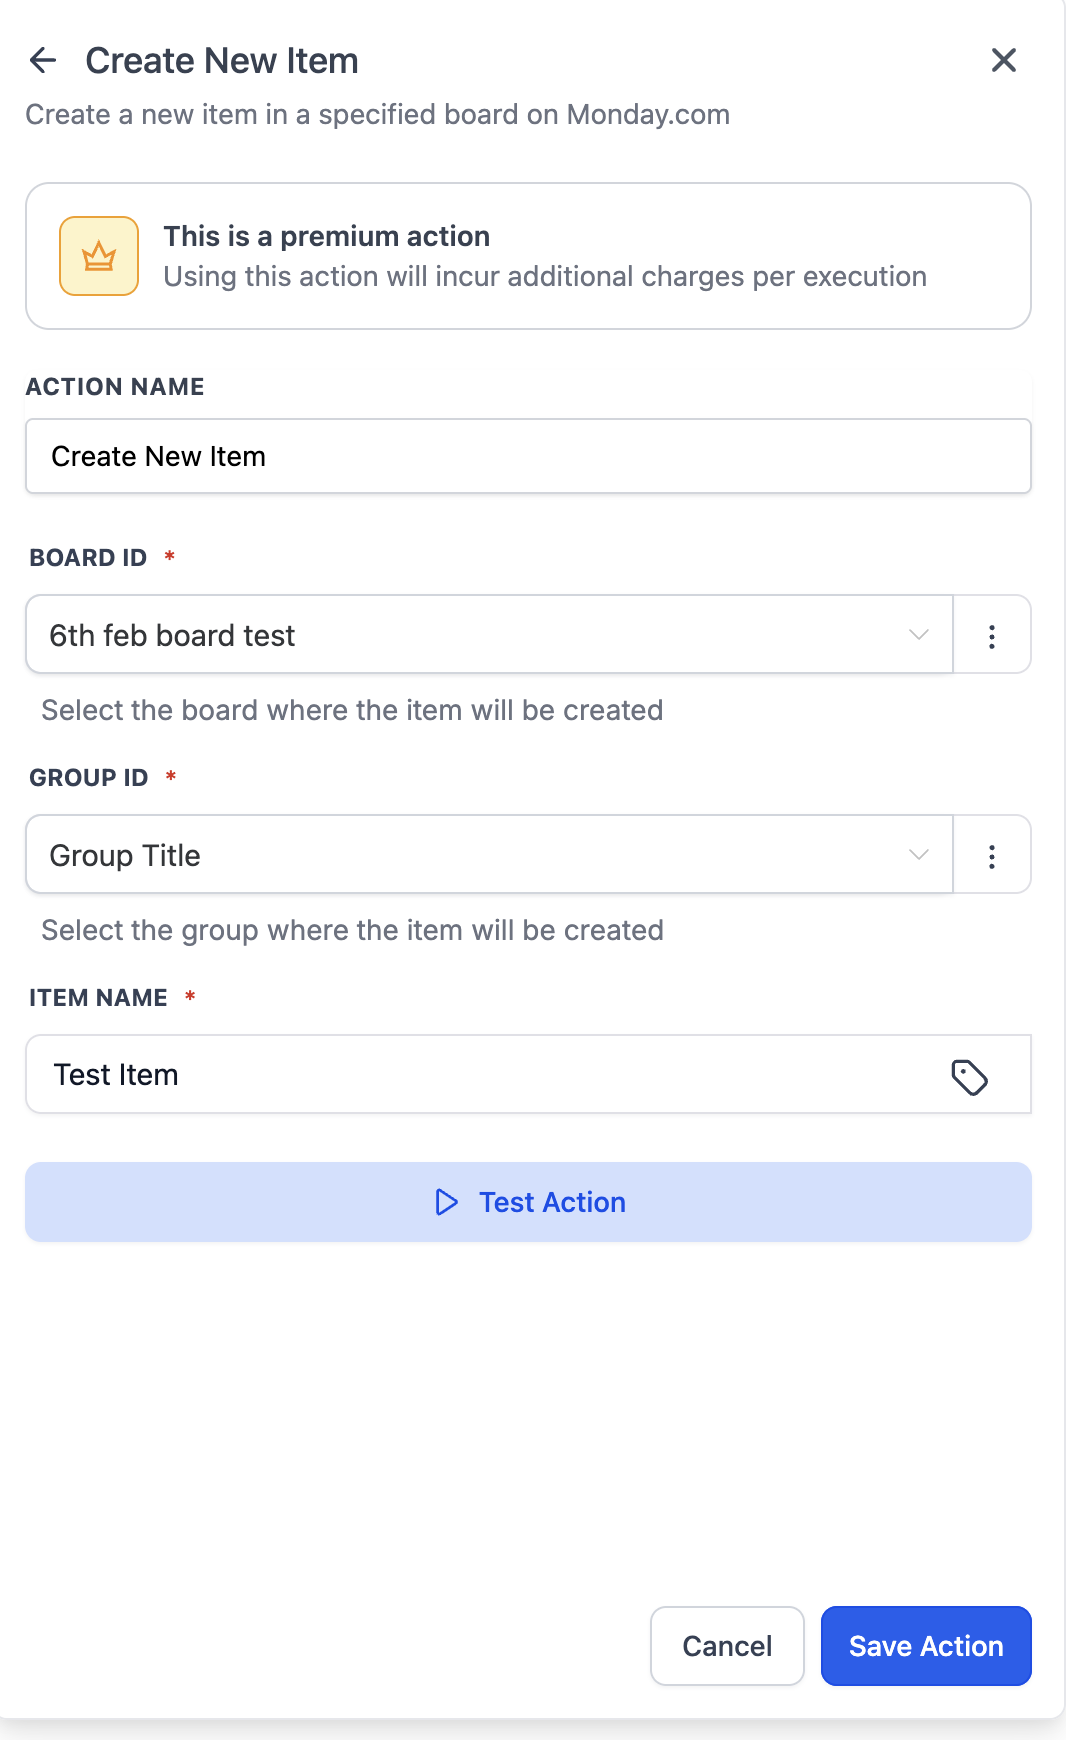
Step 6: Add follow-up steps (optional)
Build conditions or branches to handle different outcomes, chain additional Monday.com actions when necessary, and include internal tasks or CRM updates to keep stakeholders informed.
Step 7: Save and publish
Click Save, then Publish to activate the workflow, run a controlled live test such as moving a deal to the target stage, and verify the expected updates appear on the correct Monday board and group.
Use Cases & Patterns
These patterns mirror common agency processes. Start with the core flow, then add branches, filters, or schedules as your needs grow.
Use Case 1: Client Onboarding Automation
Goal: Automatically sync new onboarding items with CRM and team notifications.
Workflow Setup
Trigger: New Item in Board (“Client Onboarding”)
Actions:
Create or update contact in HighLevel CRM
Send Slack message to account manager
Add row to Google Sheets for tracking
Update Monday item status to “CRM Synced”
Result: Every new onboarding item instantly updates CRM and notifies the team.
Use Case 2: Project Status → Client Communication
Goal: Notify clients when a project is completed.
Workflow Setup
Trigger: Column Value Changed (Status → Completed)
Actions:
Send Gmail message to client
Create CRM note
Archive item in Monday.com
Send Slack update to #client-updates
Result: Clients and teams are informed automatically—no manual follow-ups.
Use Case 3: Internal Task Sync (Monday → ClickUp)
Goal: Keep Monday and ClickUp tasks aligned across teams.
Workflow Setup
Trigger: New Item in Board (“Design Tasks”)
Actions:
Create task in ClickUp
Store Monday item ID in ClickUp custom field
Send Slack notification
Update Monday item with ClickUp task link
Result: Teams work in their preferred tools without losing visibility.
Frequently Asked Questions
Q: Can I build a bi-directional sync?
Yes, use two workflows (one Monday→HighLevel and one HighLevel→Monday) and pass IDs to avoid conflicts.
Q: Do I need a specific Monday plan?
Most actions work with standard access. Advanced board features may require Monday plan tiers configured for your workspace.
Q: How does billing work?
Monday.com steps count toward premium workflow features. Agencies can enable and re-bill premium features to sub-accounts.
Q: Can I update multiple columns at once?
Yes. Update Item and Update Subitem support mapping multiple compatible columns in a single step.
Related Articles
Was this article helpful?
That’s Great!
Thank you for your feedback
Sorry! We couldn't be helpful
Thank you for your feedback
Feedback sent
We appreciate your effort and will try to fix the article