This guide explains the core Media Storage workflows in HighLevel, including how to access, upload, organize, search, preview, manage, and recover media files.
TABLE OF CONTENTS
- Access Media Storage
- Upload Files
- Organize and Find Media
- Preview and Insert Media
- Manage Files and Folders
- Trash and File Recovery
- Frequently Asked Questions
Access Media Storage
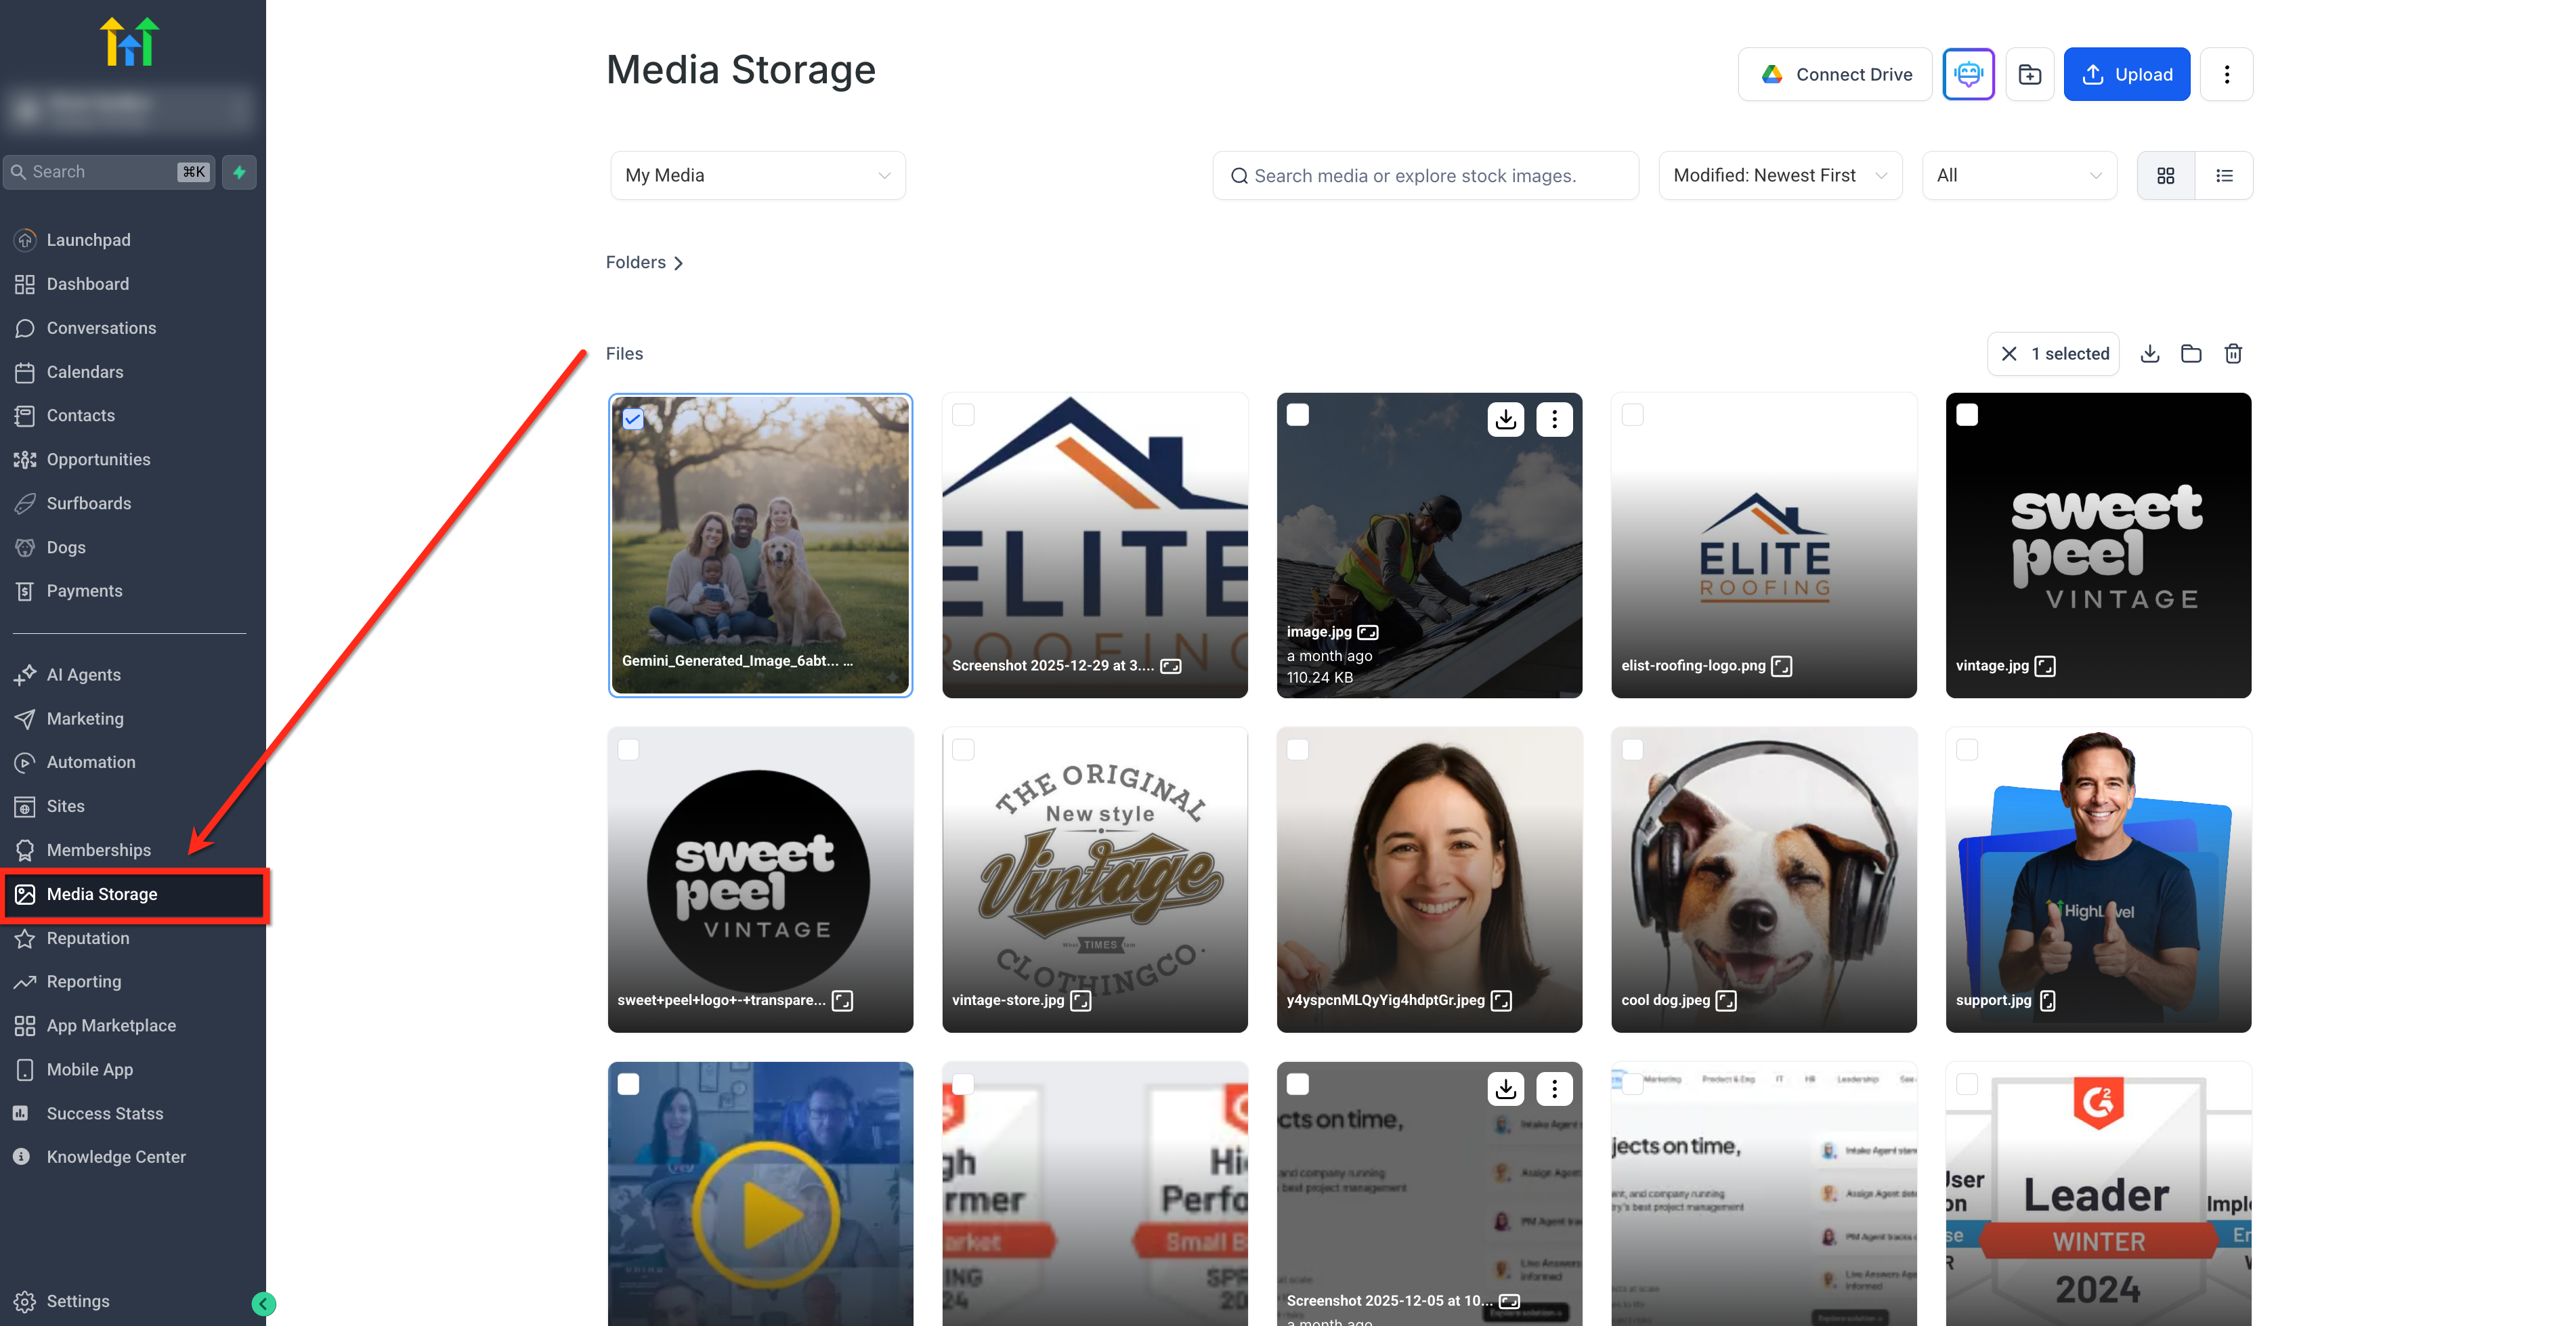
To access Media Storage, go to the left sidebar of your dashboard and click Media Storage.
Upload Files
Upload Individual Files
Drag files from your computer directly into the Media Storage interface to upload them.
For supported file types, upload limits, browser compatibility, and advanced Media Storage behavior, see Media Storage File Types, Limits & Advanced Features.
Track Upload Progress
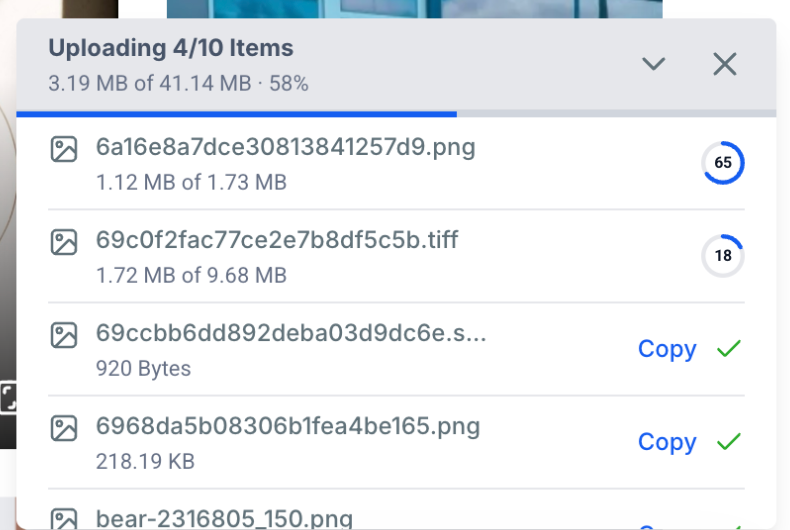
When you upload files to Media Storage, the upload panel shows progress in real time. The header shows the number of items uploading, the transferred size, and the overall upload percentage.
Each file shows its upload percentage and transferred size compared with its total file size. When a file finishes uploading, a green checkmark marks it as complete.

Upload a Folder
You can upload an entire folder to Media Storage while keeping its folder structure.
During the upload, progress appears in a folder-based view so you can track nested folders and files. A toast notification also shows how many items were skipped.
Folder uploads support up to 3 levels of nested folders and up to 1,000 files per upload.
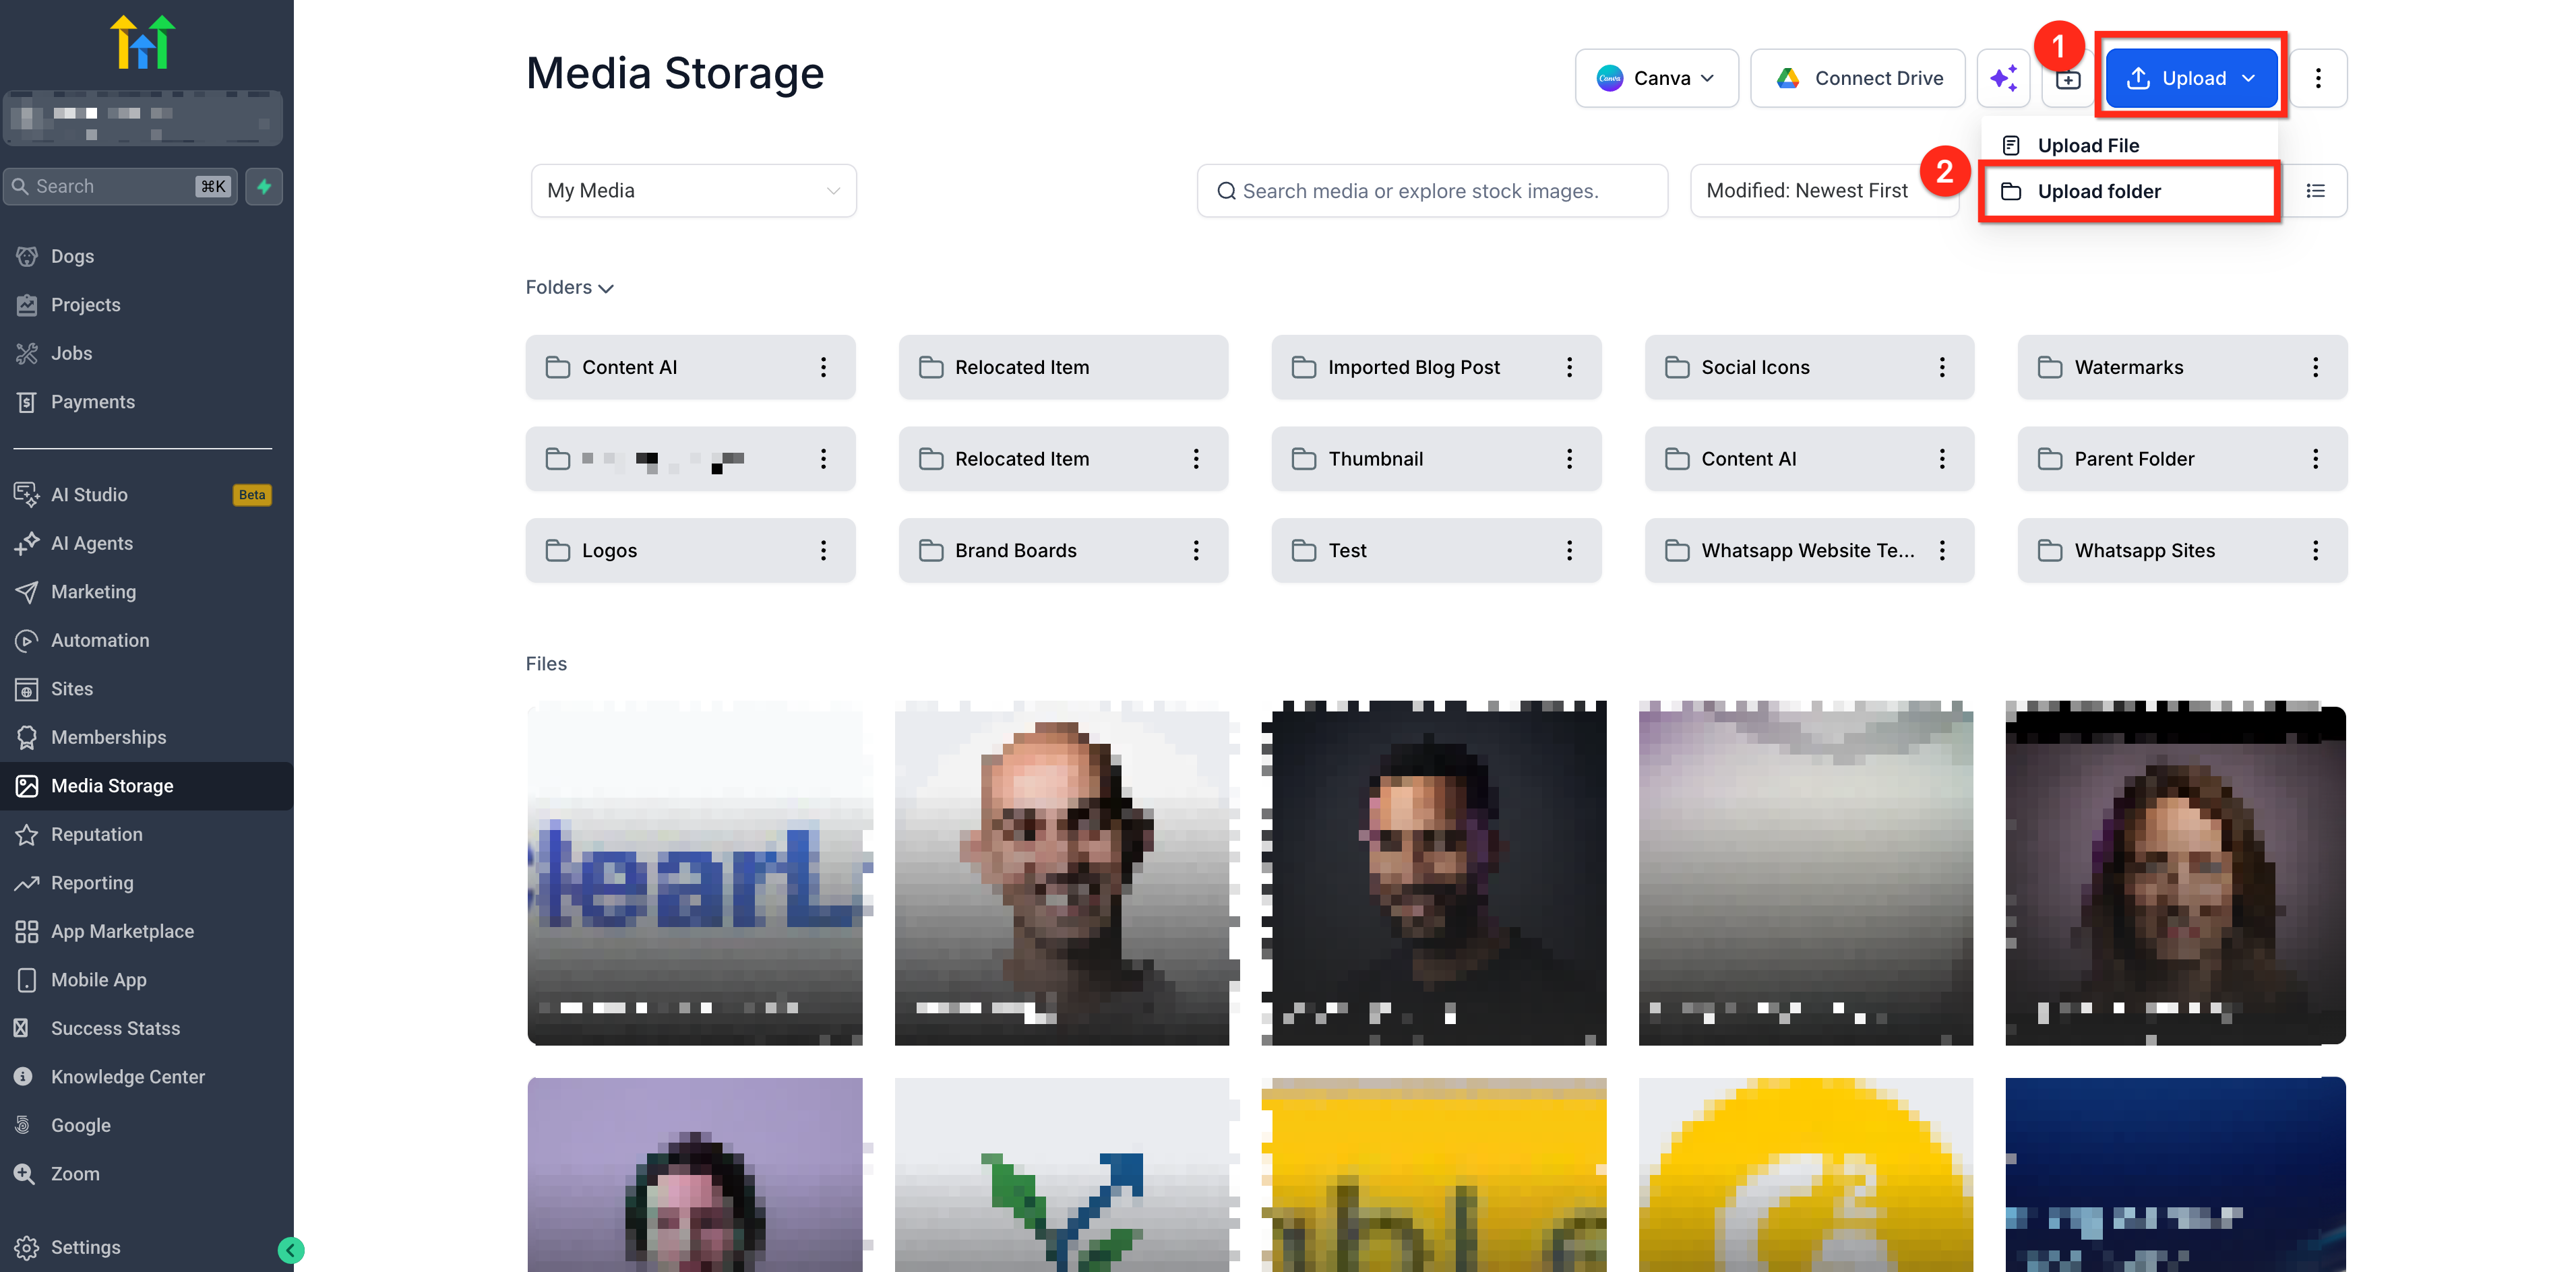
To upload a folder:
- Click Upload.
- Select Upload Folder.
Organize and Find Media
Search Media Storage
Use the Media Storage search bar to find files and folders across your entire media library.
Search results include matching items from the main Media Storage level and from folders and subfolders at any depth.
Search remains global even when you start searching from inside a folder. The same search behavior is available in List View.
Find a File's Location
Hover over a file in the search results to view its folder path. The folder path shows where the file is stored in Media Storage.
Open the Containing Folder
To go directly to a file's location:
- Find the file using the Media Storage search bar.
- Click the three-dot menu for the file.
- Select Open containing folder.
Media Storage opens the folder containing the file and clears the search field.
Sort Media
Sort your media using the following options:
- Sort by Name: A to Z or Z to A
- Sort by Size: Smallest First or Largest First
- Sort by Modified Date: Newest First or Oldest First
Grid and List View
Toggle between Grid View and List View based on how you want to browse your files.
- Orientation Badge in Grid View: Images display a badge showing Landscape, Portrait, or Square.
- Pixel Dimensions in List View: Width × Height values appear next to image names so you can review image dimensions before using a file.
Note: Older uploaded images may not immediately display dimensions due to background processing delays.Preview and Insert Media
When Media Storage is used within supported HighLevel products, such as the website or funnel builder, you can preview and insert files without leaving your workflow.
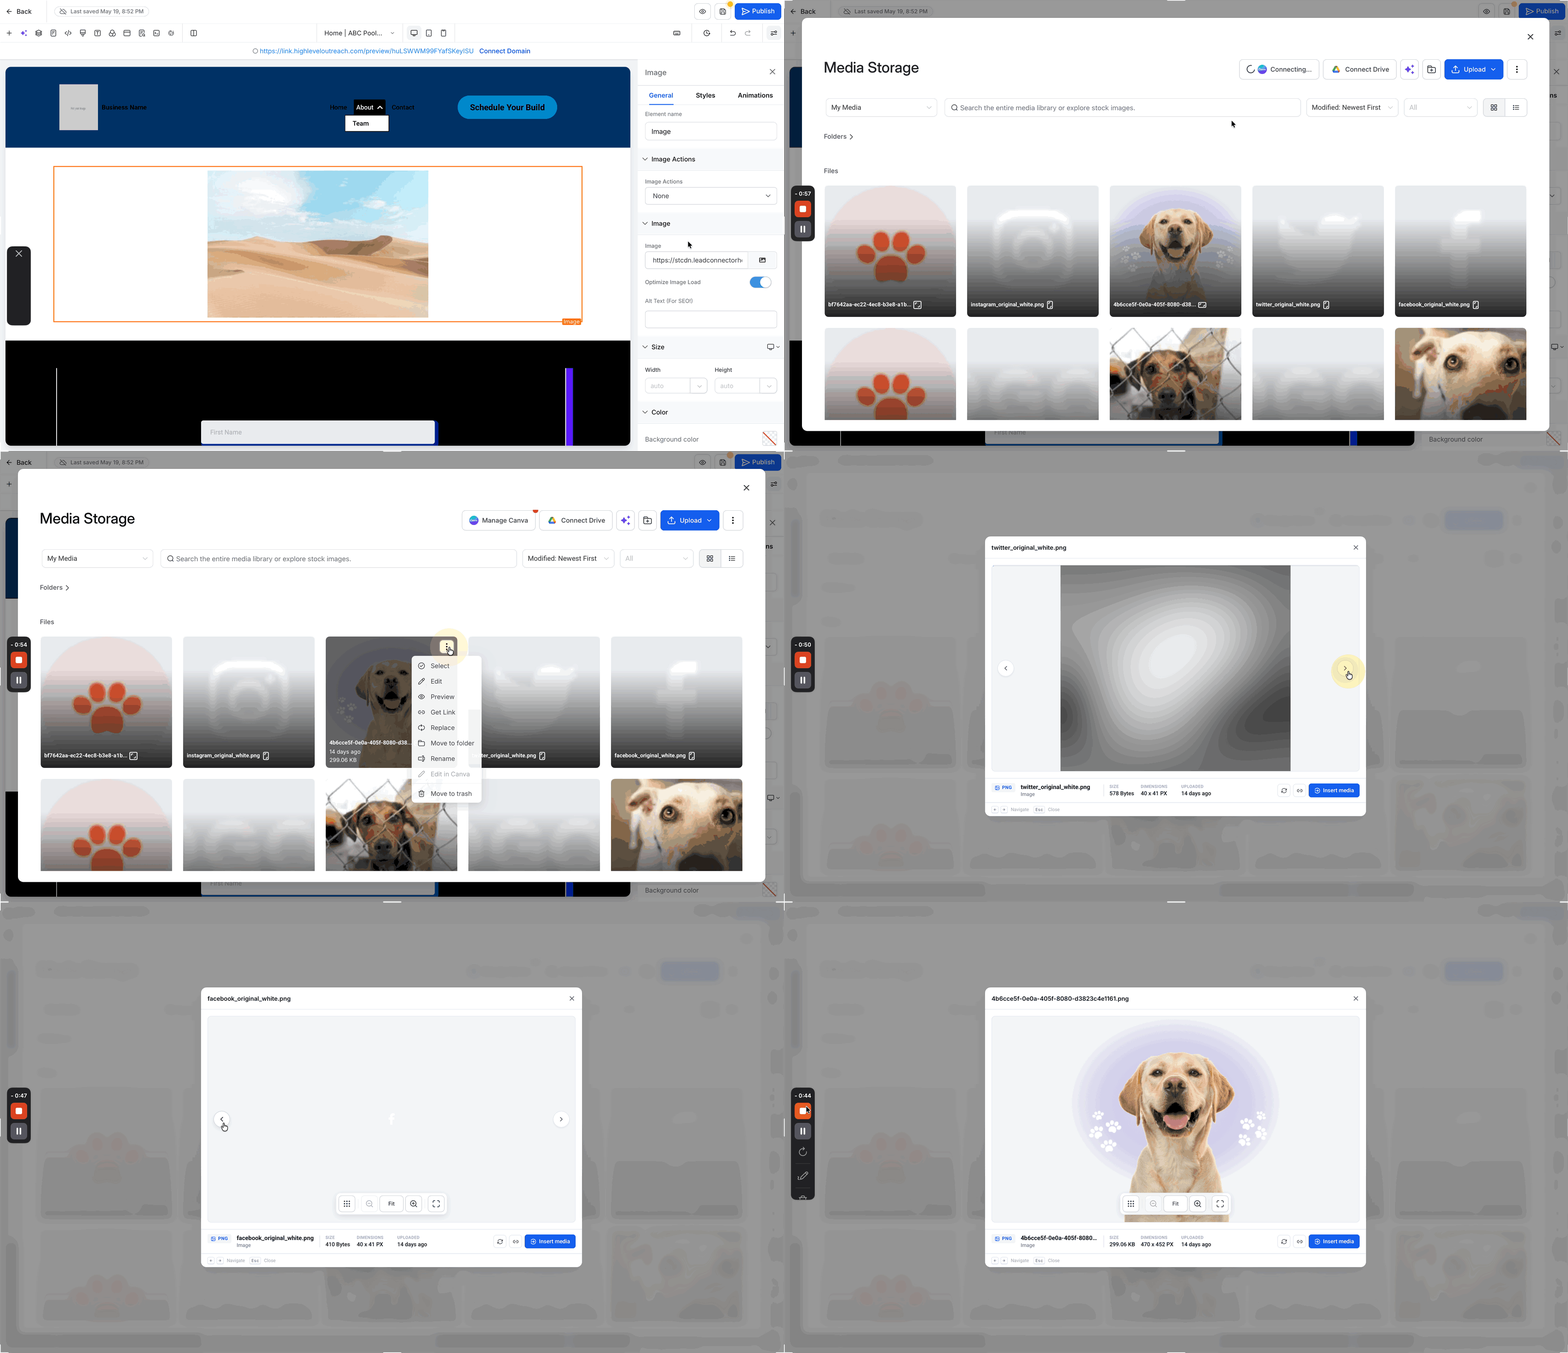
Open a File Preview
Open the three-dot menu for a file and select Preview to review the file before using it.
Navigate Between Files
Use the arrow buttons in Preview, or press the left and right arrow keys on your keyboard, to move between images and videos without closing each file.
Interactive Image Preview Controls
When you preview an image in Media Storage, you can inspect image details without downloading the file or leaving Media Storage.
- Zoom an image: Zoom from 100% to 400% using the toolbar, mouse wheel or trackpad, pinch gestures, or keyboard controls. Zoom follows your cursor so you can focus on a specific part of the image.
- Pan while zoomed: Click and drag the image to inspect different areas while zoomed. The image remains within the Preview area.
- View an image in fullscreen: Expand the image to fullscreen for a larger view. While fullscreen is active, press
Escto exit fullscreen and return to Preview. - Move the control bar: Drag the floating control bar to reposition it. You can also use the arrow keys to move it.
- Start each Preview with a clean state: Zoom level, pan position, control-bar placement, and fullscreen state reset when you switch files or close Preview.
These interactive controls apply to image previews. Other file types continue to use their existing Preview behavior.
Image Preview supports keyboard navigation and screen readers and respects the user's Reduce Motion preference.

Insert Media
- Use the Insert Media button to select and insert a single file.
- Insert files directly from the Preview screen.
Edit Text Files in Preview
You can edit supported text files directly from Media Storage without downloading and re-uploading the file.
Supported editable file types include:
- `.txt`
- `.css`
- `.json`
- `.sql`
- `.rtf`
To edit a supported text file:
1. Open the file in Preview.
2. Click Edit in the Preview toolbar.
3. Make your changes.
4. Click Save.
The Save button remains disabled until you make a change.
Saving updates the existing file instead of creating a new copy. The file keeps the same name and public URL, so existing links to the file continue to use the same URL.
If you close Preview, navigate away, or cancel while you have unsaved changes, Media Storage asks you to confirm before discarding them.
Unsupported file types do not display the Edit button.
Note: If an edited file is larger than 5 MB, you can still save it, but the file will no longer be available for Preview after saving. Media Storage displays a warning before you save.
Manage Files and Folders
Quick Actions
Access file options using the right-click menu or hover-over quick action buttons.
Available actions include:
- Rename
- Delete
- Move to Folder
- Preview
- Insert
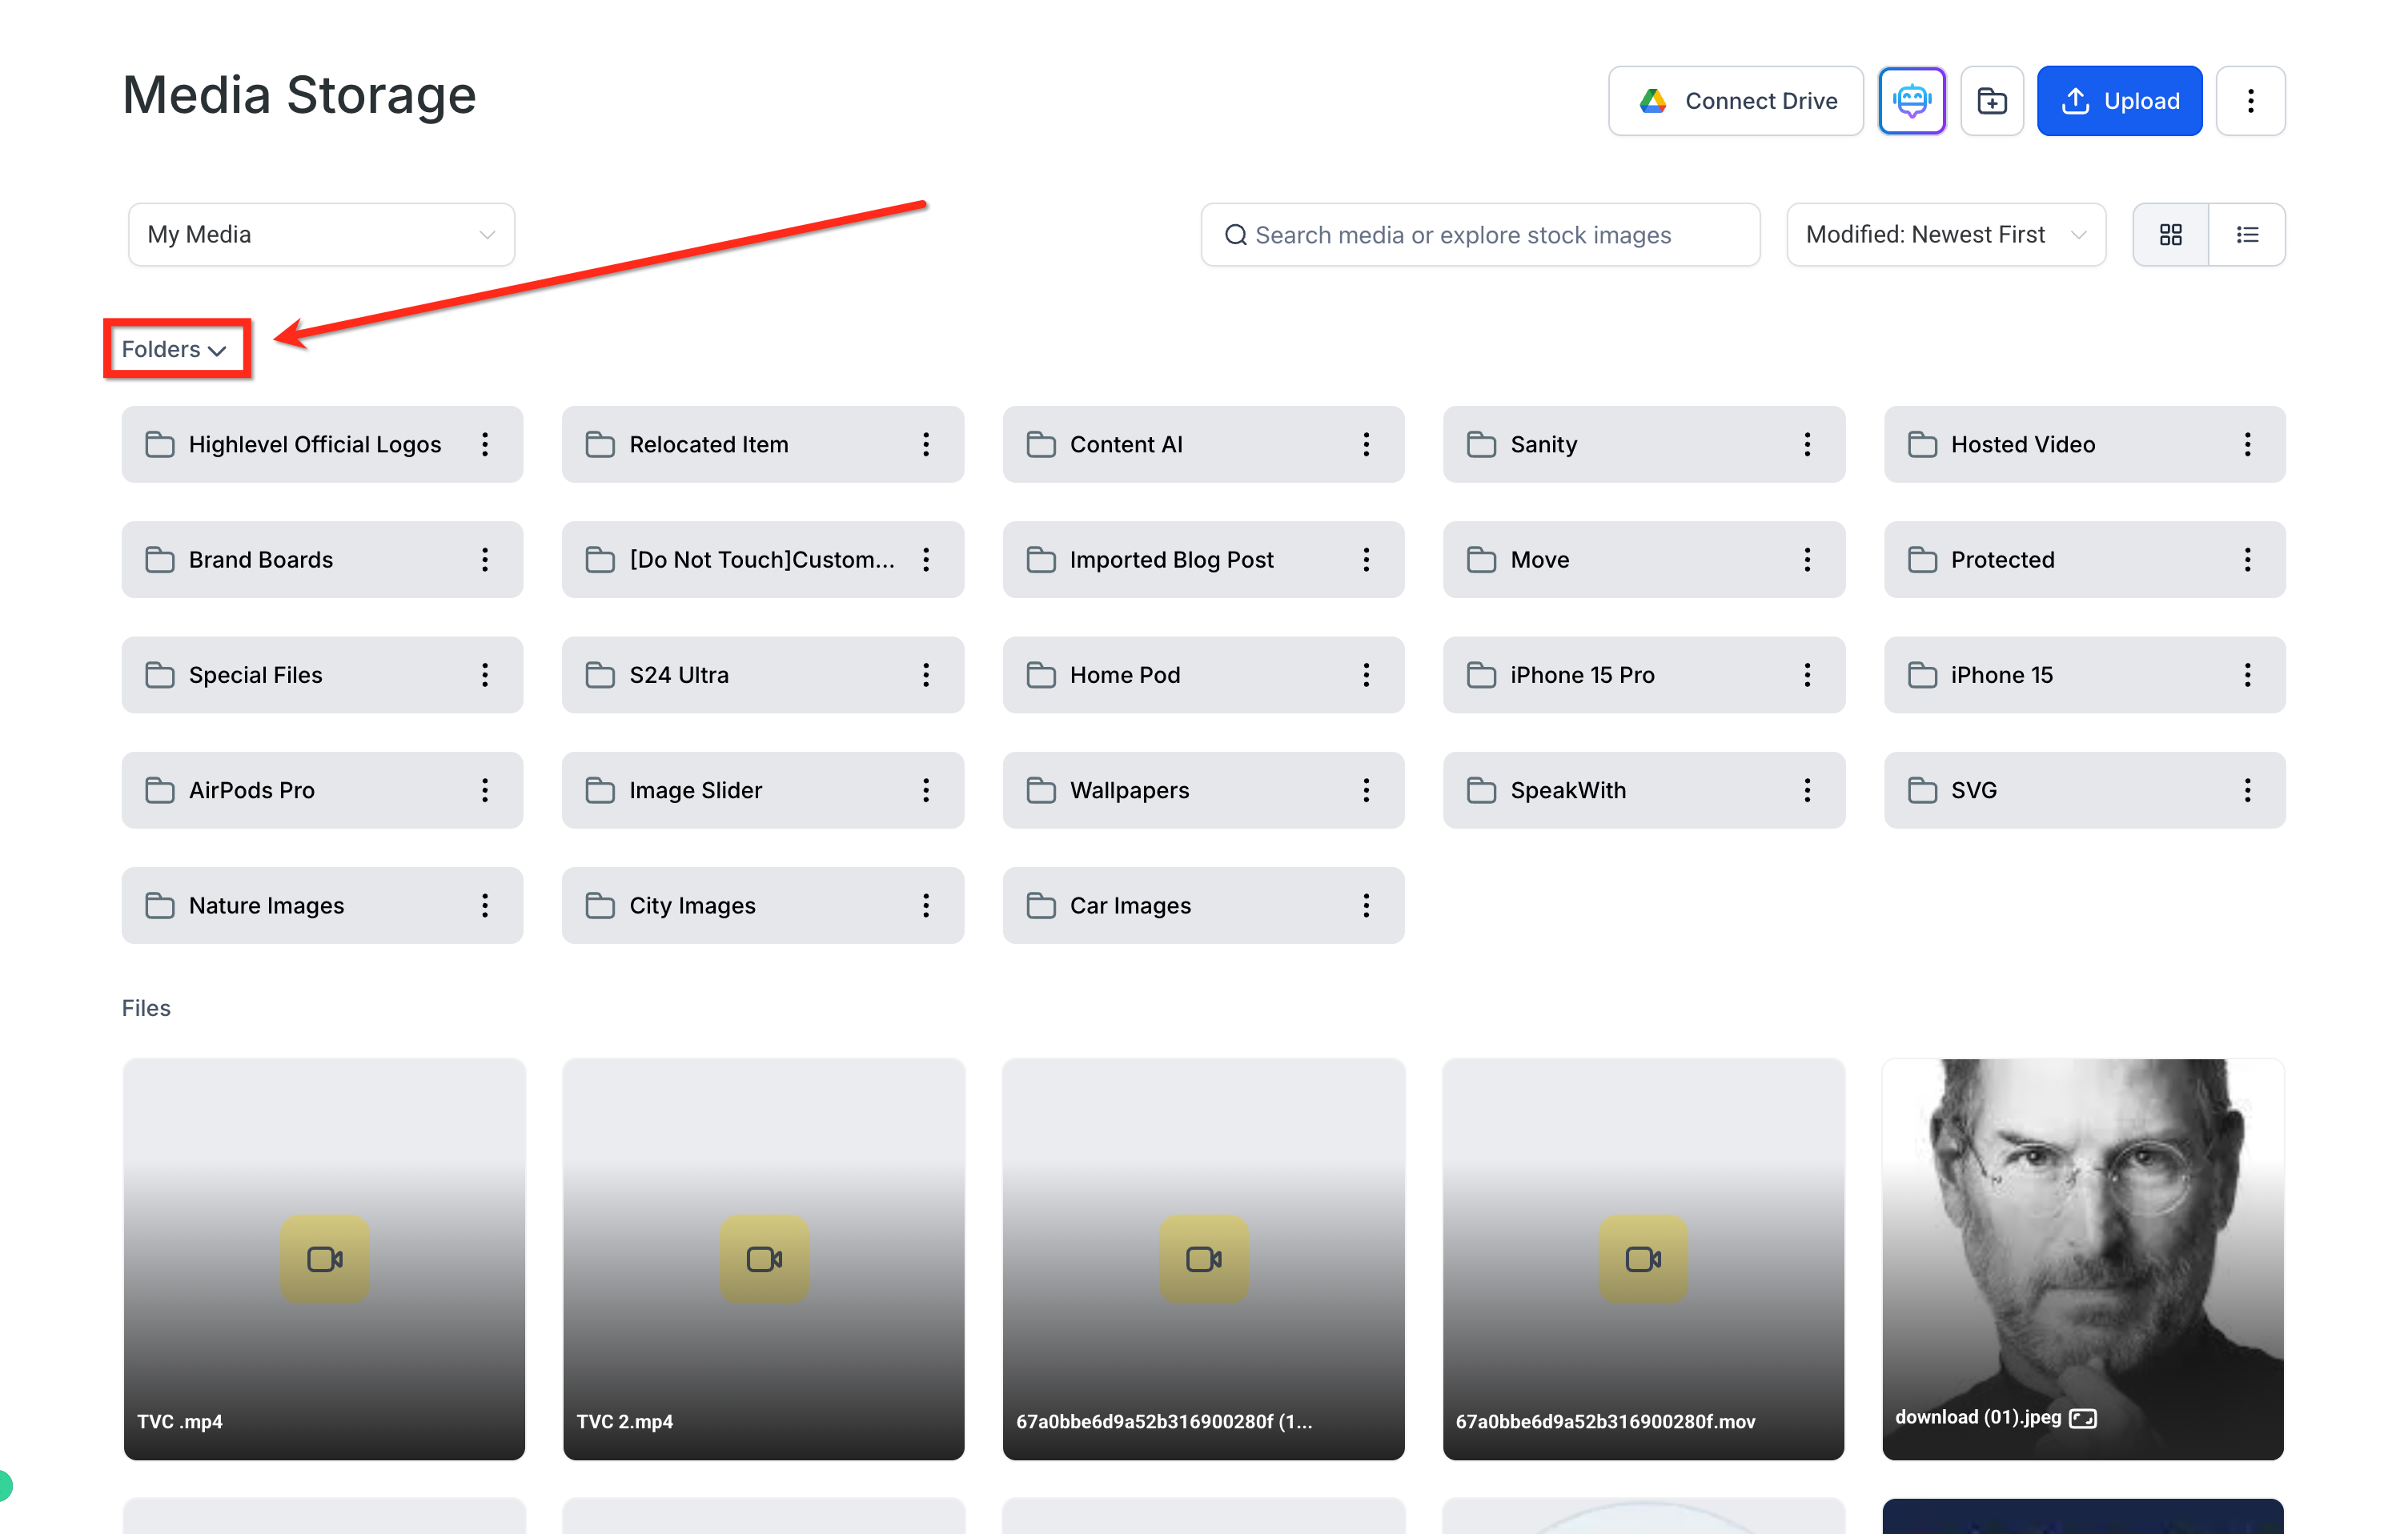
Collapse or Expand the Folders Section
If you have a large folder structure, collapse the Folders section to reduce clutter and focus on your files.
Click the arrow next to Folders to collapse the folder list. Click it again to expand the list.
Move Entire Folders
You can move entire folders with their contents, including nested files and subfolders.
To move a folder:
- Click the three-dot (⋮) menu next to the folder and select Move to Folder.
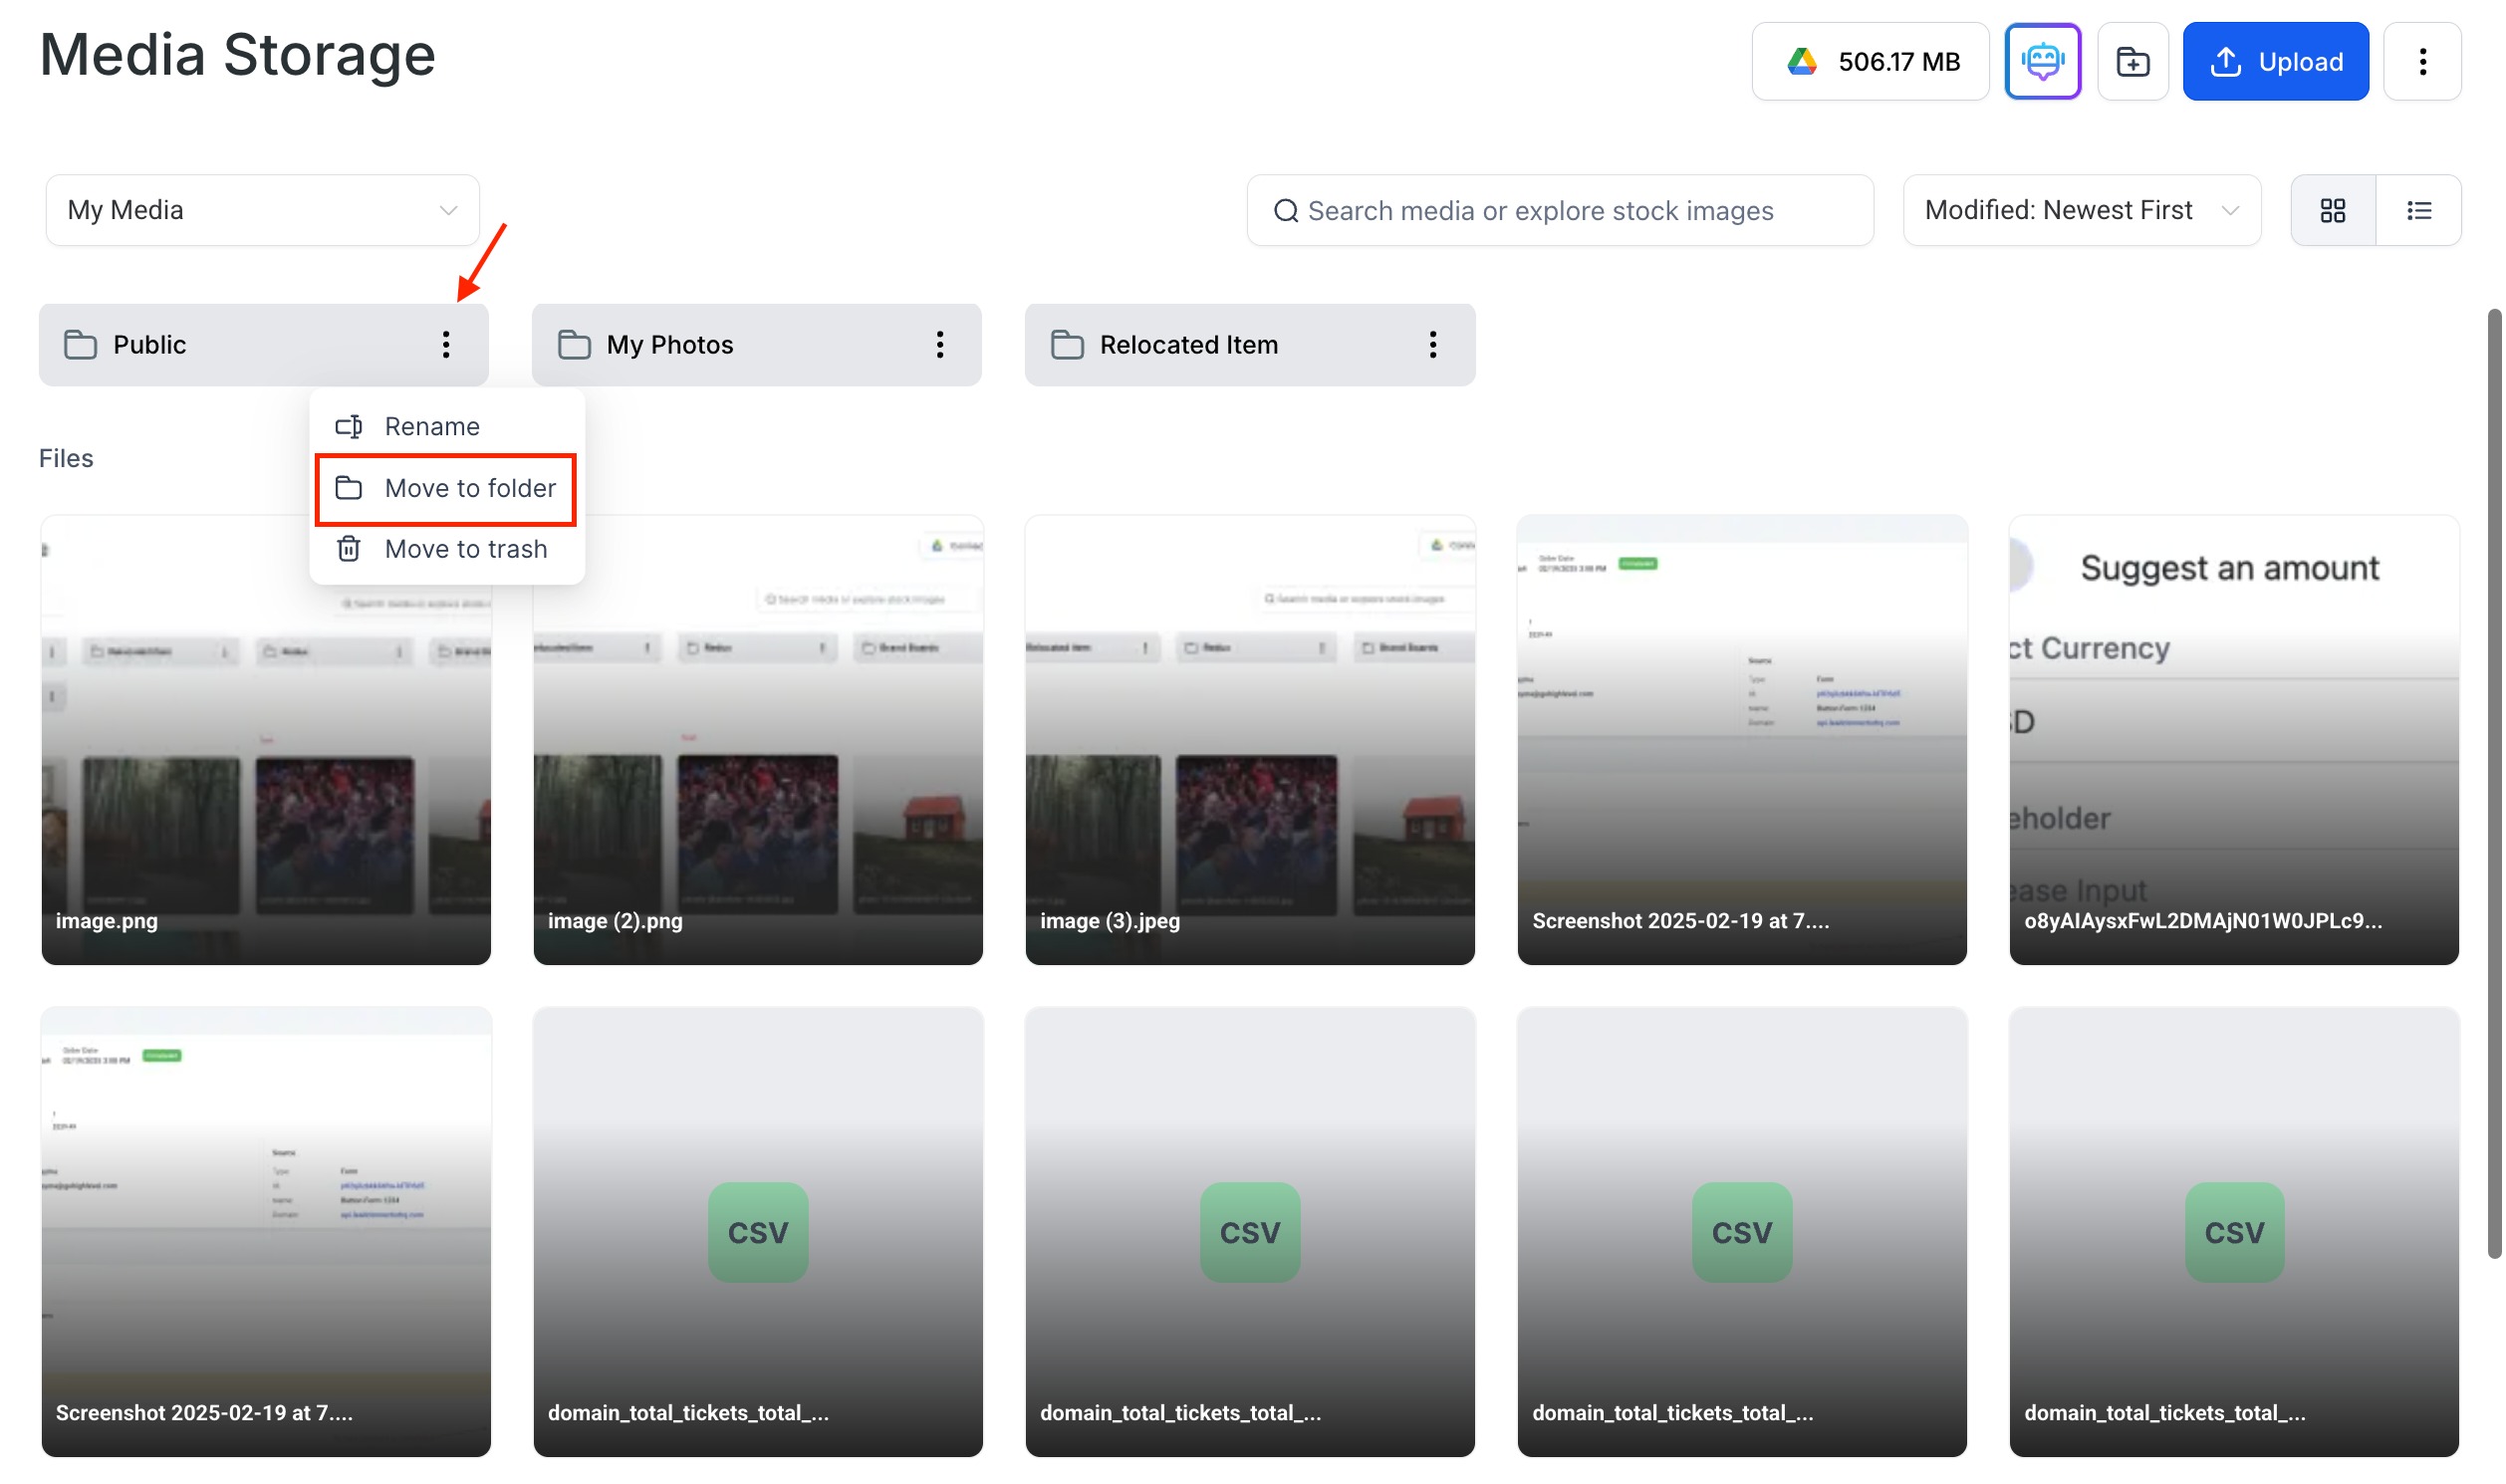
- Choose an existing folder or create a new one.
- Confirm the move.
Note: Moving a folder keeps its nested subfolders intact.Download a Folder as a ZIP
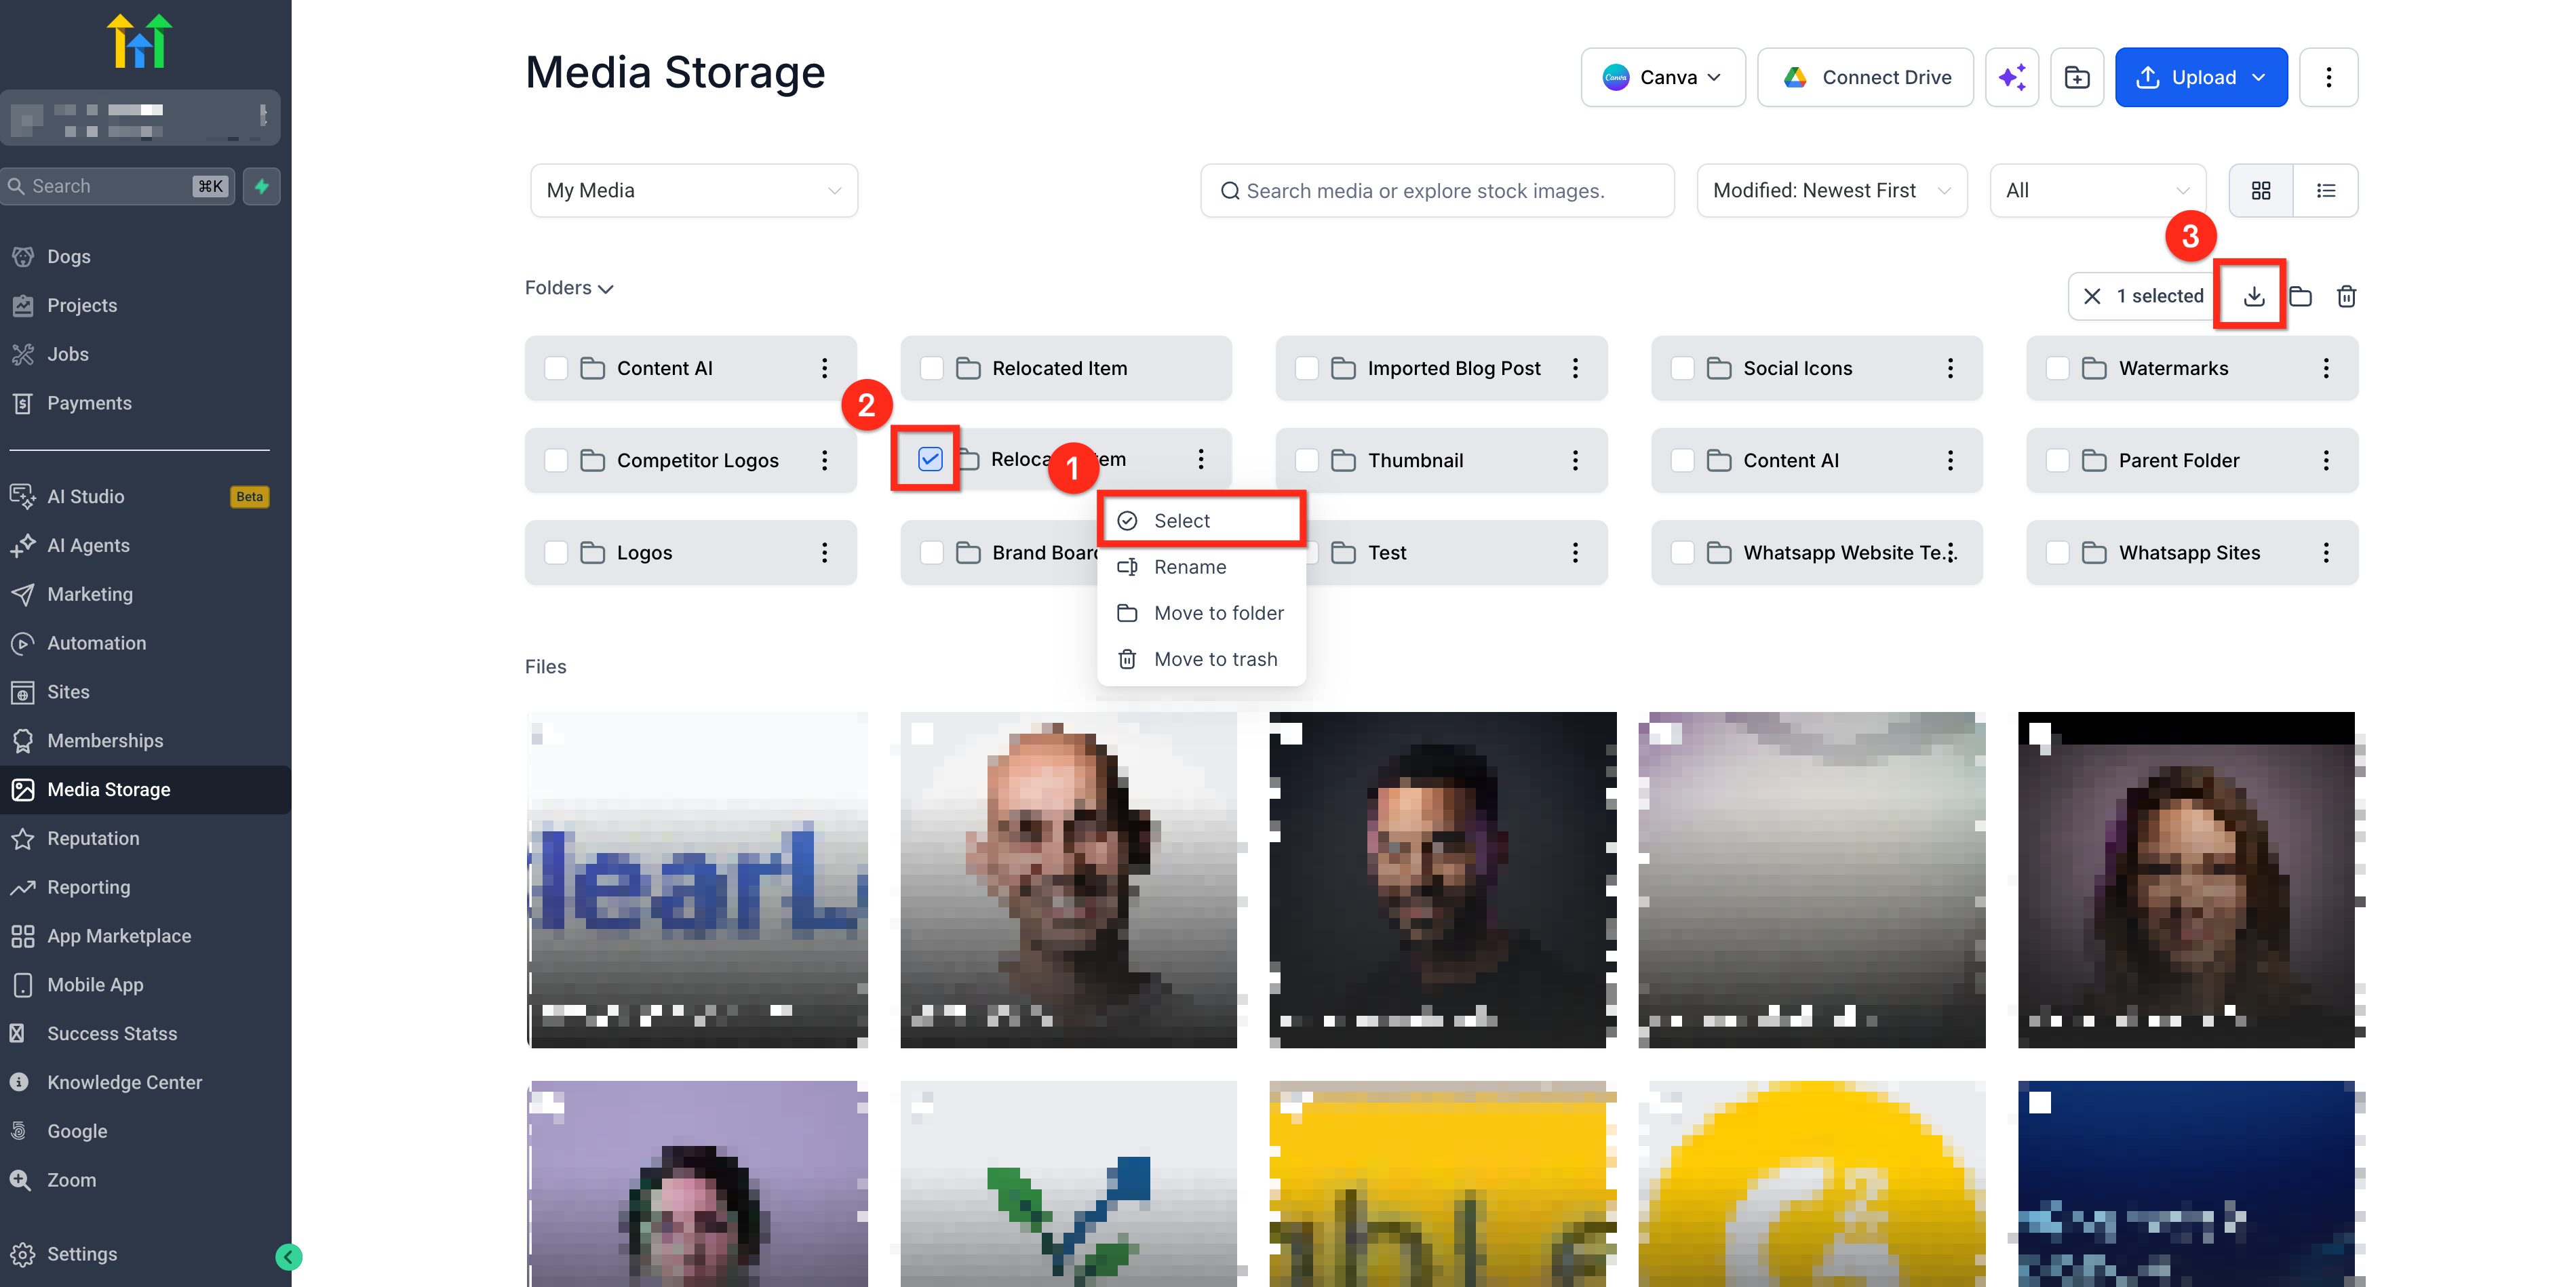
You can download an entire folder as a single ZIP file. Folder downloads preserve the original folder structure, including nested subfolders.
Folder downloads require sufficient local disk space in the browser environment.
To download a folder:
- Click the three-dot icon next to the folder and click Select.
- Ensure the folder is selected and select any additional folders you want to download.
- Click Download to save the selection as a ZIP file.
Trash and File Recovery
Deleted media files move to Trash, where they remain for 30 days before permanent removal.
- Click the three-dot menu at the top right and select Trash.
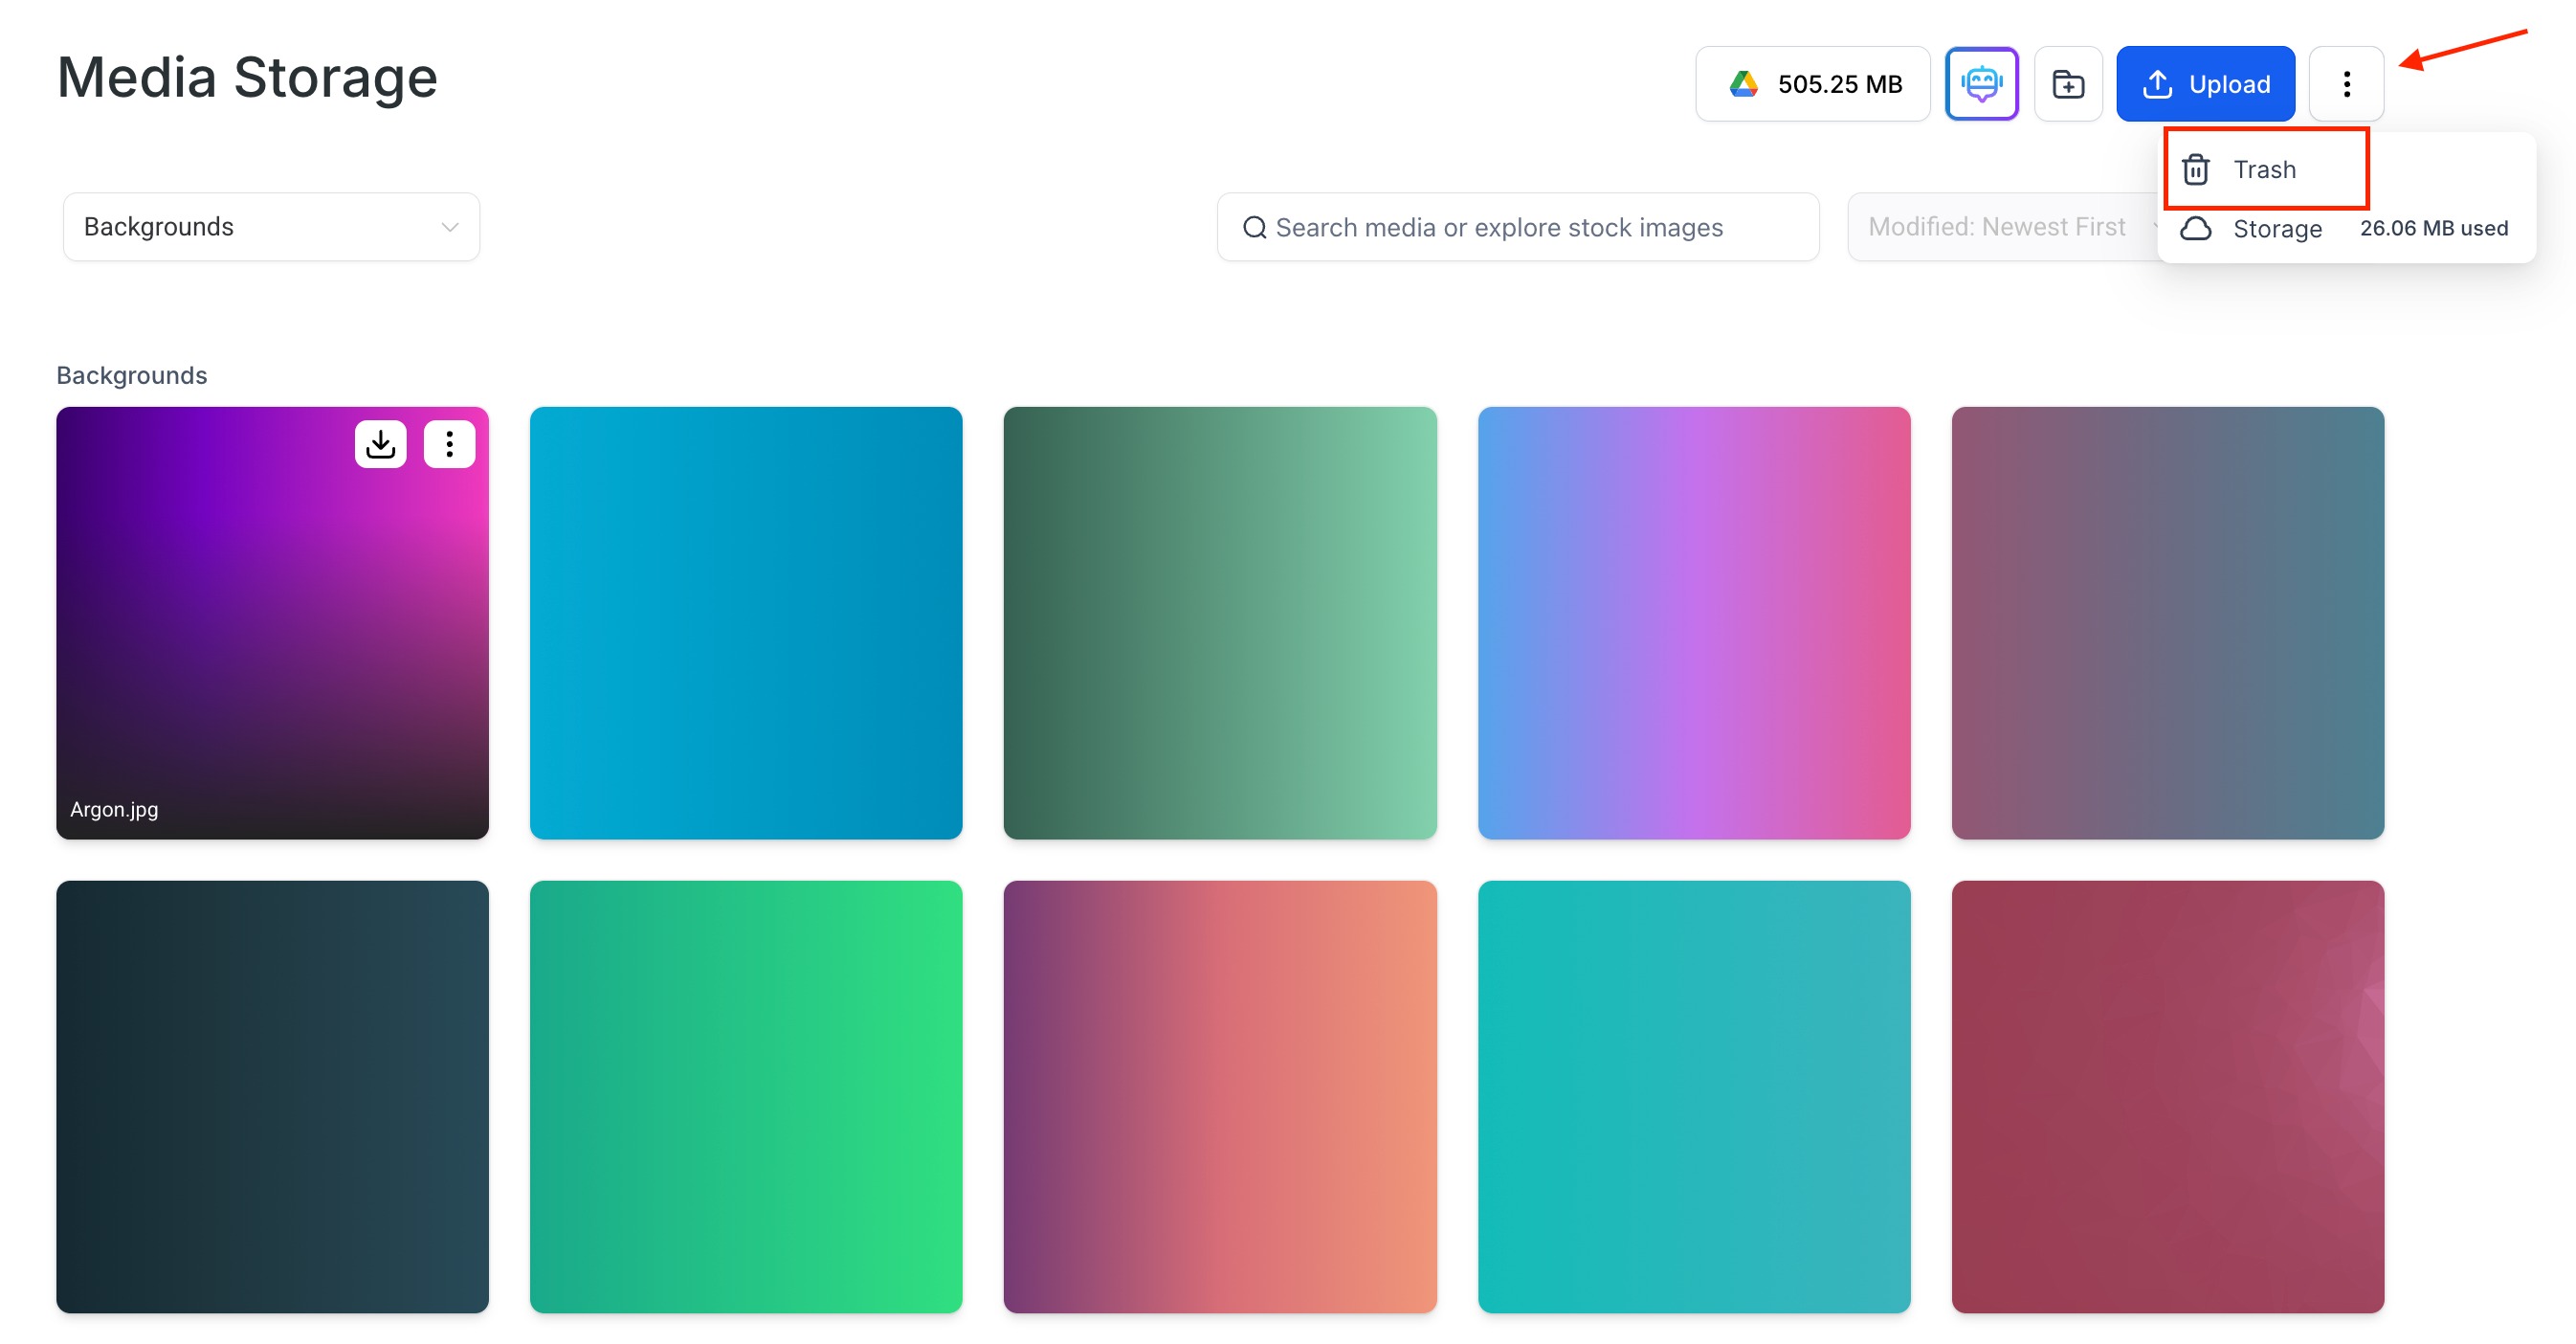
- Choose a file to Restore or Delete Permanently.
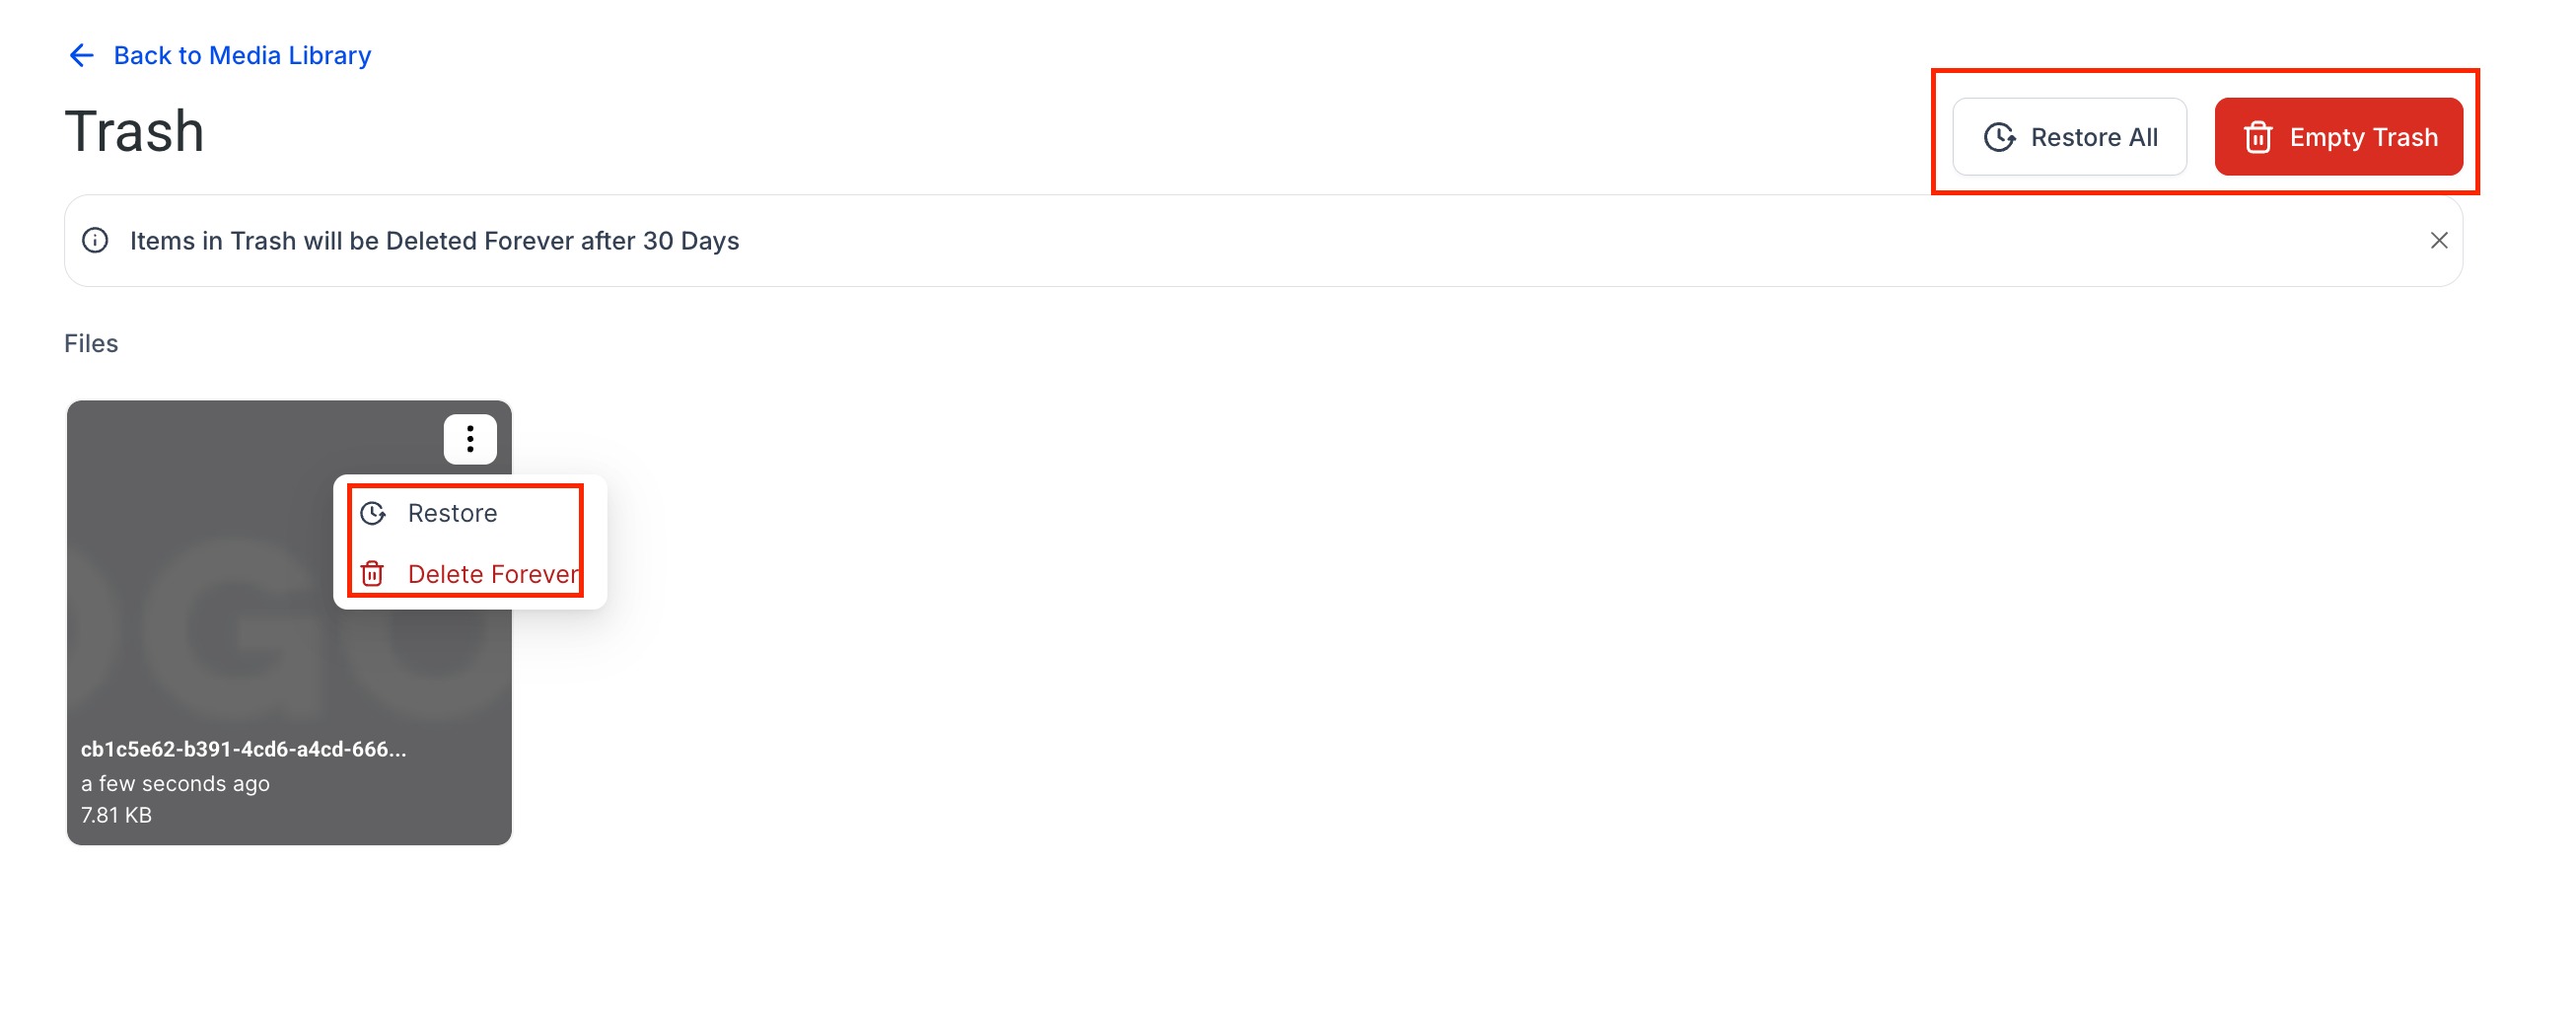
Important: Files are non-recoverable after 30 days.

Trash access is location-wide. Any user logged into the same location can view and restore items in Trash, regardless of who moved them there.
Frequently Asked Questions
Q: Can I use both Grid View and List View?
Yes. Grid View displays image orientation badges, while List View displays image pixel dimensions.
Q: What sorting options are available?
You can sort by name, size, and modified date using ascending or descending order.
Q: What happens to deleted files?
Deleted files move to Trash for 30 days. Users in the same location can view and restore trashed items or permanently delete them. After 30 days, files are removed and cannot be recovered.
Was this article helpful?
That’s Great!
Thank you for your feedback
Sorry! We couldn't be helpful
Thank you for your feedback
Feedback sent
We appreciate your effort and will try to fix the article