Create, Edit, and Clone WhatsApp Templates
WhatsApp templates are required to send outbound WhatsApp messages. This guide shows how to create a template, track approval status, edit an existing template, and clone a template to save time.
Table of Contents
Template Category Validation in WhatsApp Manager
When you create a new template in WhatsApp Manager, you must select a category (for example, Marketing, Utility, or Authentication).
Meta validates the selected category against its template category rules. The system assigns a status such as Approved, Pending, or Rejected.
To avoid rejections, make sure the template content matches the category intent.
Pre-Requisites
Before you create templates in a sub-account (location), confirm:
Create a WhatsApp Template
Open WhatsApp Templates
In your sub-account, go to Settings → WhatsApp → Templates. Then click Create Template.
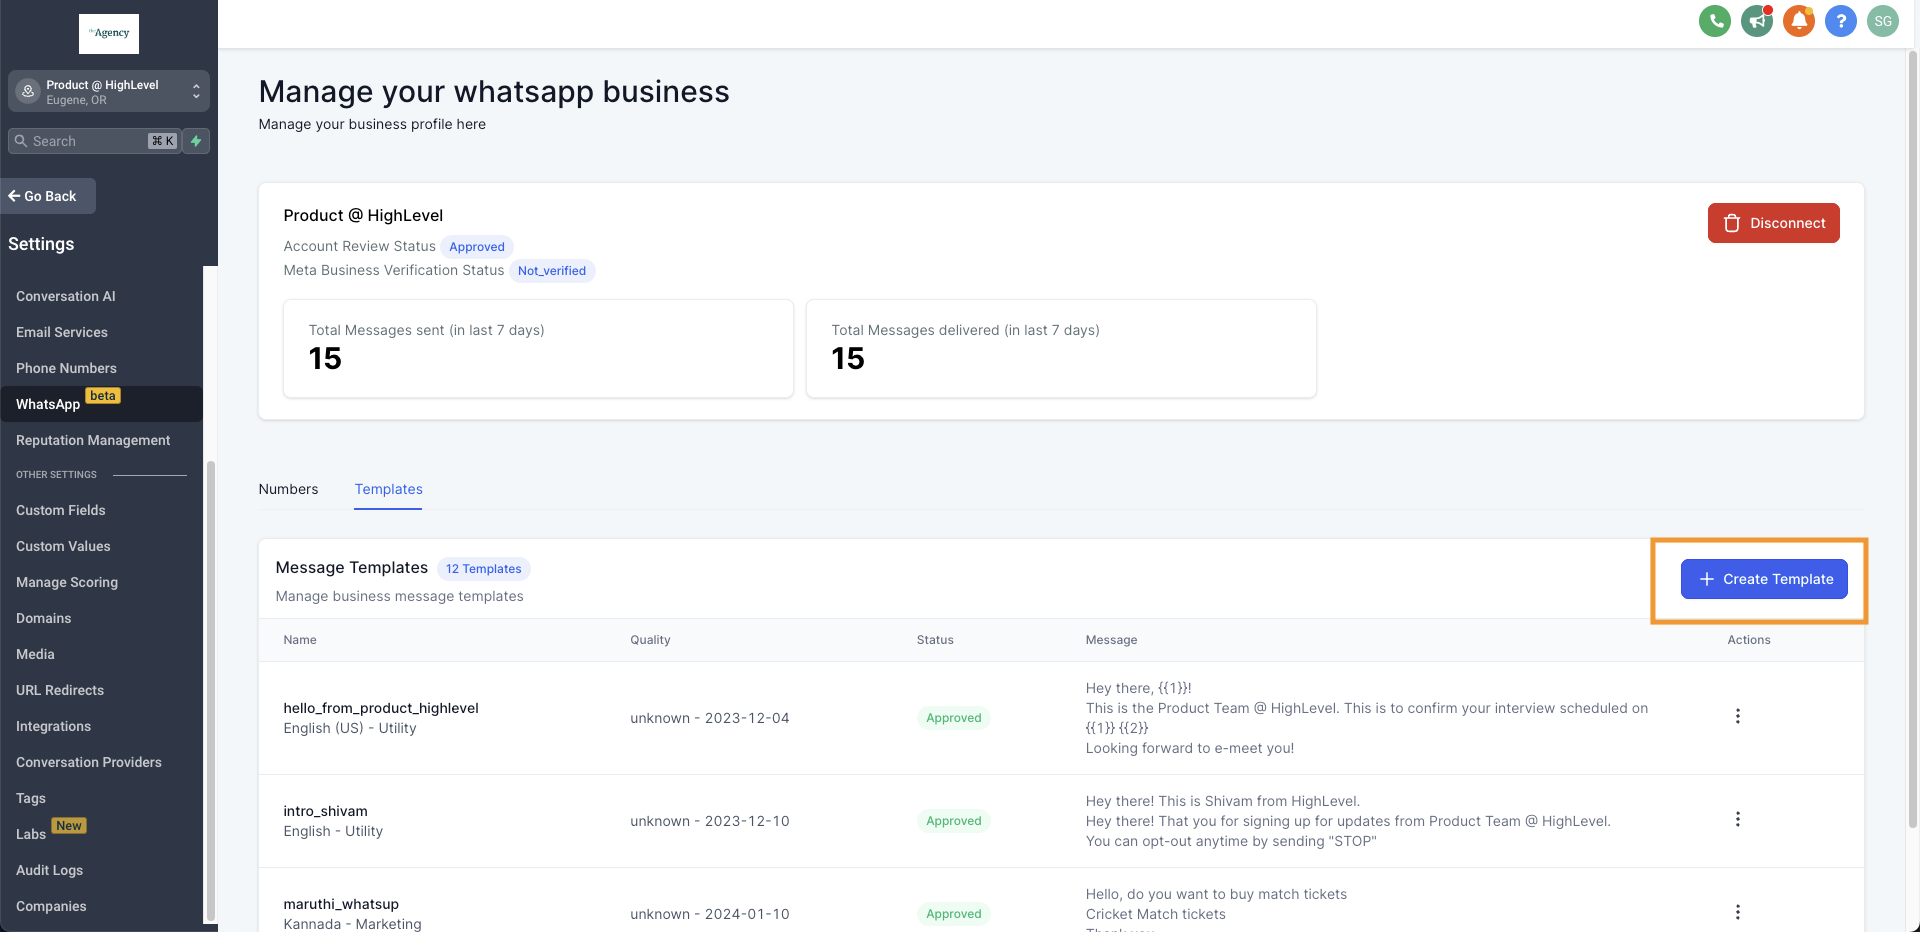
[ Screenshot placeholder — Templates list view showing existing template names and statuses ]
Fill In Template Details
Complete the template details:
- Template Name — Use lowercase letters and underscores.
- Category — Select the category for your use case.
- Language — Select the template language.
- Header (Optional) — Add header text (static or with one custom variable, such as
{{1}}).
Add Header Media (Image, Video, or Document)
If you set the header type to Image, Video, or Document, you now have two ways to add header media:
- Upload from Computer — Upload a new file from your device.
- Choose from Media Library — Reuse an existing asset stored in your location's Media Library.
When you open Choose from Media Library, the picker filters assets automatically based on your selected header type (image, video, or document). This helps prevent attaching unsupported file types.
Supported file types: png, jpg, mp4, pdf
Add Body and Footer
Add your message content:
- Body — The main content of your message. Use Add Variable for placeholders such as
{{1}},{{2}}. - Footer (Optional) — A short line at the bottom of the template.
Meta requires sample values for every variable you include.
Add Variables (Header and Body)
To add variables:
- Click Add Variable under Header or Body.
- Choose a field (example: contact name).
- Enter a sample value for Meta review.
Submit and Track Approval Status
Review and Submit
When your template is complete, click Create. The system submits the template to Meta for approval.
Track Status
You can track approval status under Settings → WhatsApp → Templates.
Common statuses:
Edit or Resubmit a Template
To edit or resubmit a template:
- Go to Settings → WhatsApp → Templates.
- Find your template and click the three-dot menu.
- Select Edit template (then update and submit again).
Clone a WhatsApp Template
Cloning lets you duplicate an existing template without rebuilding it from scratch.
Important: Cloning retains variables, buttons, and formatting.
Open the Templates List
Go to Settings → WhatsApp → Templates.
Select Clone Template
- Find the template you want to duplicate.
- Click the three-dot menu.
- Select Clone template.
Rename and Save
In the Create Template screen, rename the template and update any content as needed. Then click Save/Create.
Frequently Asked Questions
How do I add custom variables in the Header and Body?
Click Add Variable under Header or Body, select the field, and enter a sample value for Meta review.
What WhatsApp Template categories can I use?
Common categories are Marketing, Utility, and Authentication. Choose the category that matches your message intent to reduce rejections.
How do I edit or resubmit a rejected template?
Go to Settings → WhatsApp → Templates, open the template actions, choose Edit template, make updates, and submit again.
What do WhatsApp Template statuses mean?
- Pending: Awaiting Meta approval
- Approved: Ready to use
- Rejected: Needs changes and resubmission
Can I use media like images or videos in templates?
Yes. Media templates support:
- Images
- Videos
- Documents (some accounts may also support additional media types depending on Meta and product availability)
Why is the Create button inactive?
Common causes:
- The template is not approved yet.
- No valid WhatsApp number is connected.
- Required variable sample values are missing.
- Unsupported template content or button types were used.
You're all set!
Your WhatsApp templates are now ready to create, submit, edit, and clone with confidence. If you run into approval issues or have questions, contact our support team.
Was this article helpful?
That’s Great!
Thank you for your feedback
Sorry! We couldn't be helpful
Thank you for your feedback
Feedback sent
We appreciate your effort and will try to fix the article