Creating a whitelabel membership Progressive Web App (PWA) allows businesses to offer a seamless, branded experience without the need for a traditional mobile app. This guide walks you through setting up, customizing, and deploying your PWA using HighLevel. You'll also find installation instructions, and comparisons with native mobile apps.
Important: The Membership PWA is available only in the Legacy Memberships experience. It is not supported in the Client Portal experience. If your location is using Client Portal, switch to Legacy Memberships before configuring the PWA.
TABLE OF CONTENTS
- What is a Whitelabel Membership PWA?
- Key Benefits of Using a Whitelabel Membership PWA
- Why You Should Consider Creating a PWA : Key Differences
- Prerequisites: Prepare Your Membership and Branding
- How to Set Up Your Whitelabel Membership PWA
- How to Install the PWA
- Troubleshooting the Membership PWA
- Frequently Asked Questions
- Related Articles
What is a Whitelabel Membership PWA?
A Progressive Web App (PWA) is a web-based application that provides a mobile app-like experience without requiring users to download it from an app store. HighLevel's Whitelabel Membership PWA allows businesses to customize the look, branding, and functionality of their membership site while maintaining full control over content and user experience.
Unlike native mobile apps, PWAs are accessed through a web browser and can be installed directly onto a user's device without going through Apple’s App Store or Google Play. This makes them a flexible and cost-effective alternative for businesses wanting to offer an app-like experience without the complexity of native app development.
In HighLevel, the Membership PWA is part of the Legacy Memberships experience. It is separate from the Client Portal and Client Portal mobile app.
Key Benefits of Using a Whitelabel Membership PWA
- Works Across All Devices: Accessible on mobile, tablet, and desktop without separate development.
- App-Like Experience: Learners can open the membership portal from their Home Screen, desktop, or application launcher.
Why You Should Consider Creating a PWA : Key Differences
| Feature | PWA | Native Mobile App |
|---|---|---|
| Installation | Installed via browser, no app store required | Downloaded from App Store/Google Play |
| Updates | Automatically updated when refreshed | Requires manual updates via app stores |
| Offline Capability | Internet access is generally required; availability of previously loaded content may vary. | Full offline functionality |
| Push Notifications | Availability depends on the device, browser, operating system, and HighLevel feature support. | Fully supported |
| Performance | Fast and lightweight | Generally faster for complex apps |
| Approval Process | No app store approval required | Subject to App Store/Google Play guidelines |
Prerequisites: Prepare Your Membership and Branding
Before configuring your Membership PWA, it’s important to ensure your branding and membership structure are set up correctly. This foundation improves your user’s experience and makes your PWA feel polished and professional.
- Customize Your Branding: Switch to Legacy Memberships, then navigate to Memberships > Courses > Settings > Branding and configure the available branding and app settings. Upload your business logo and add a favicon for browser tab branding. These visual elements appear throughout the app and reinforce your brand identity.
- Set Up Your Membership Structure: In Legacy Memberships, navigate to Memberships > Courses > Products to create or review your courses, offers, access levels, and related content. Create product tiers, add courses, and configure pricing and access levels. Organizing your content now ensures a smooth learning journey inside the PWA.
- Link a Custom Domain (Optional): Connect a custom domain (e.g., app.yourbrand.com) via Settings > Domains. Adding a branded domain enhances trust and gives your PWA a more polished, app-like experience.
Once these steps are complete, you’re ready to begin configuring your Membership PWA.
How to Set Up Your Whitelabel Membership PWA
Step 1: Access Memberships
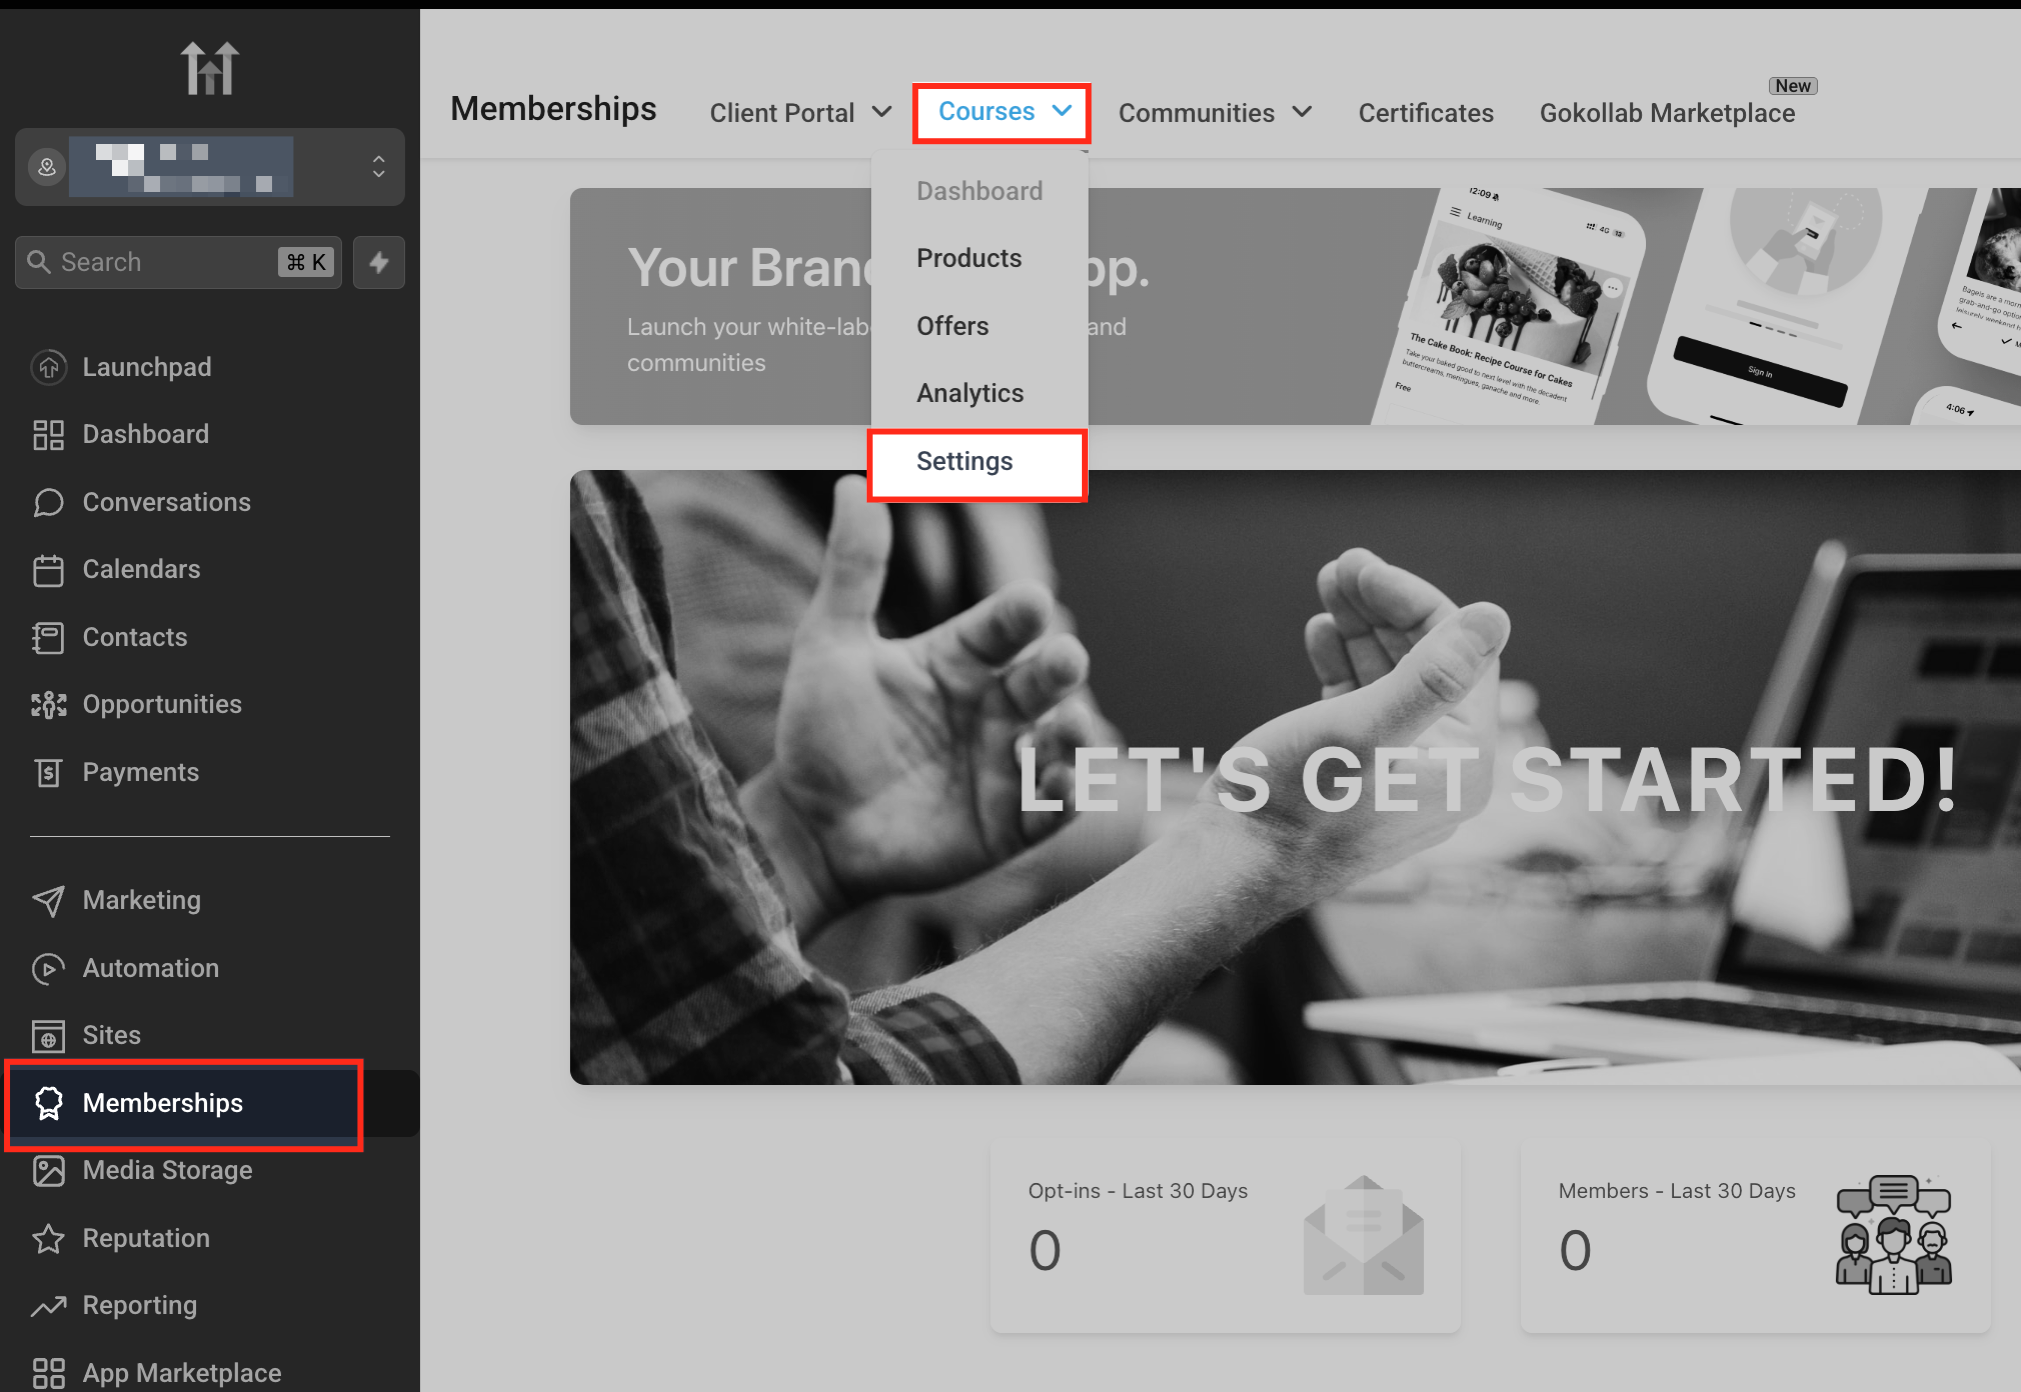
To begin setting up your Membership PWA, In the sub-account, navigate to Memberships. If Client Portal opens, use the Memberships switcher to move to Legacy Memberships. Then select Courses > Settings from the top navigation menu. This will open the Membership Settings area, where you’ll find key configuration options.
Important: The Membership PWA is available only in the Legacy Memberships experience. It is not supported in the Client Portal experience.
Step 2: Select App Settings
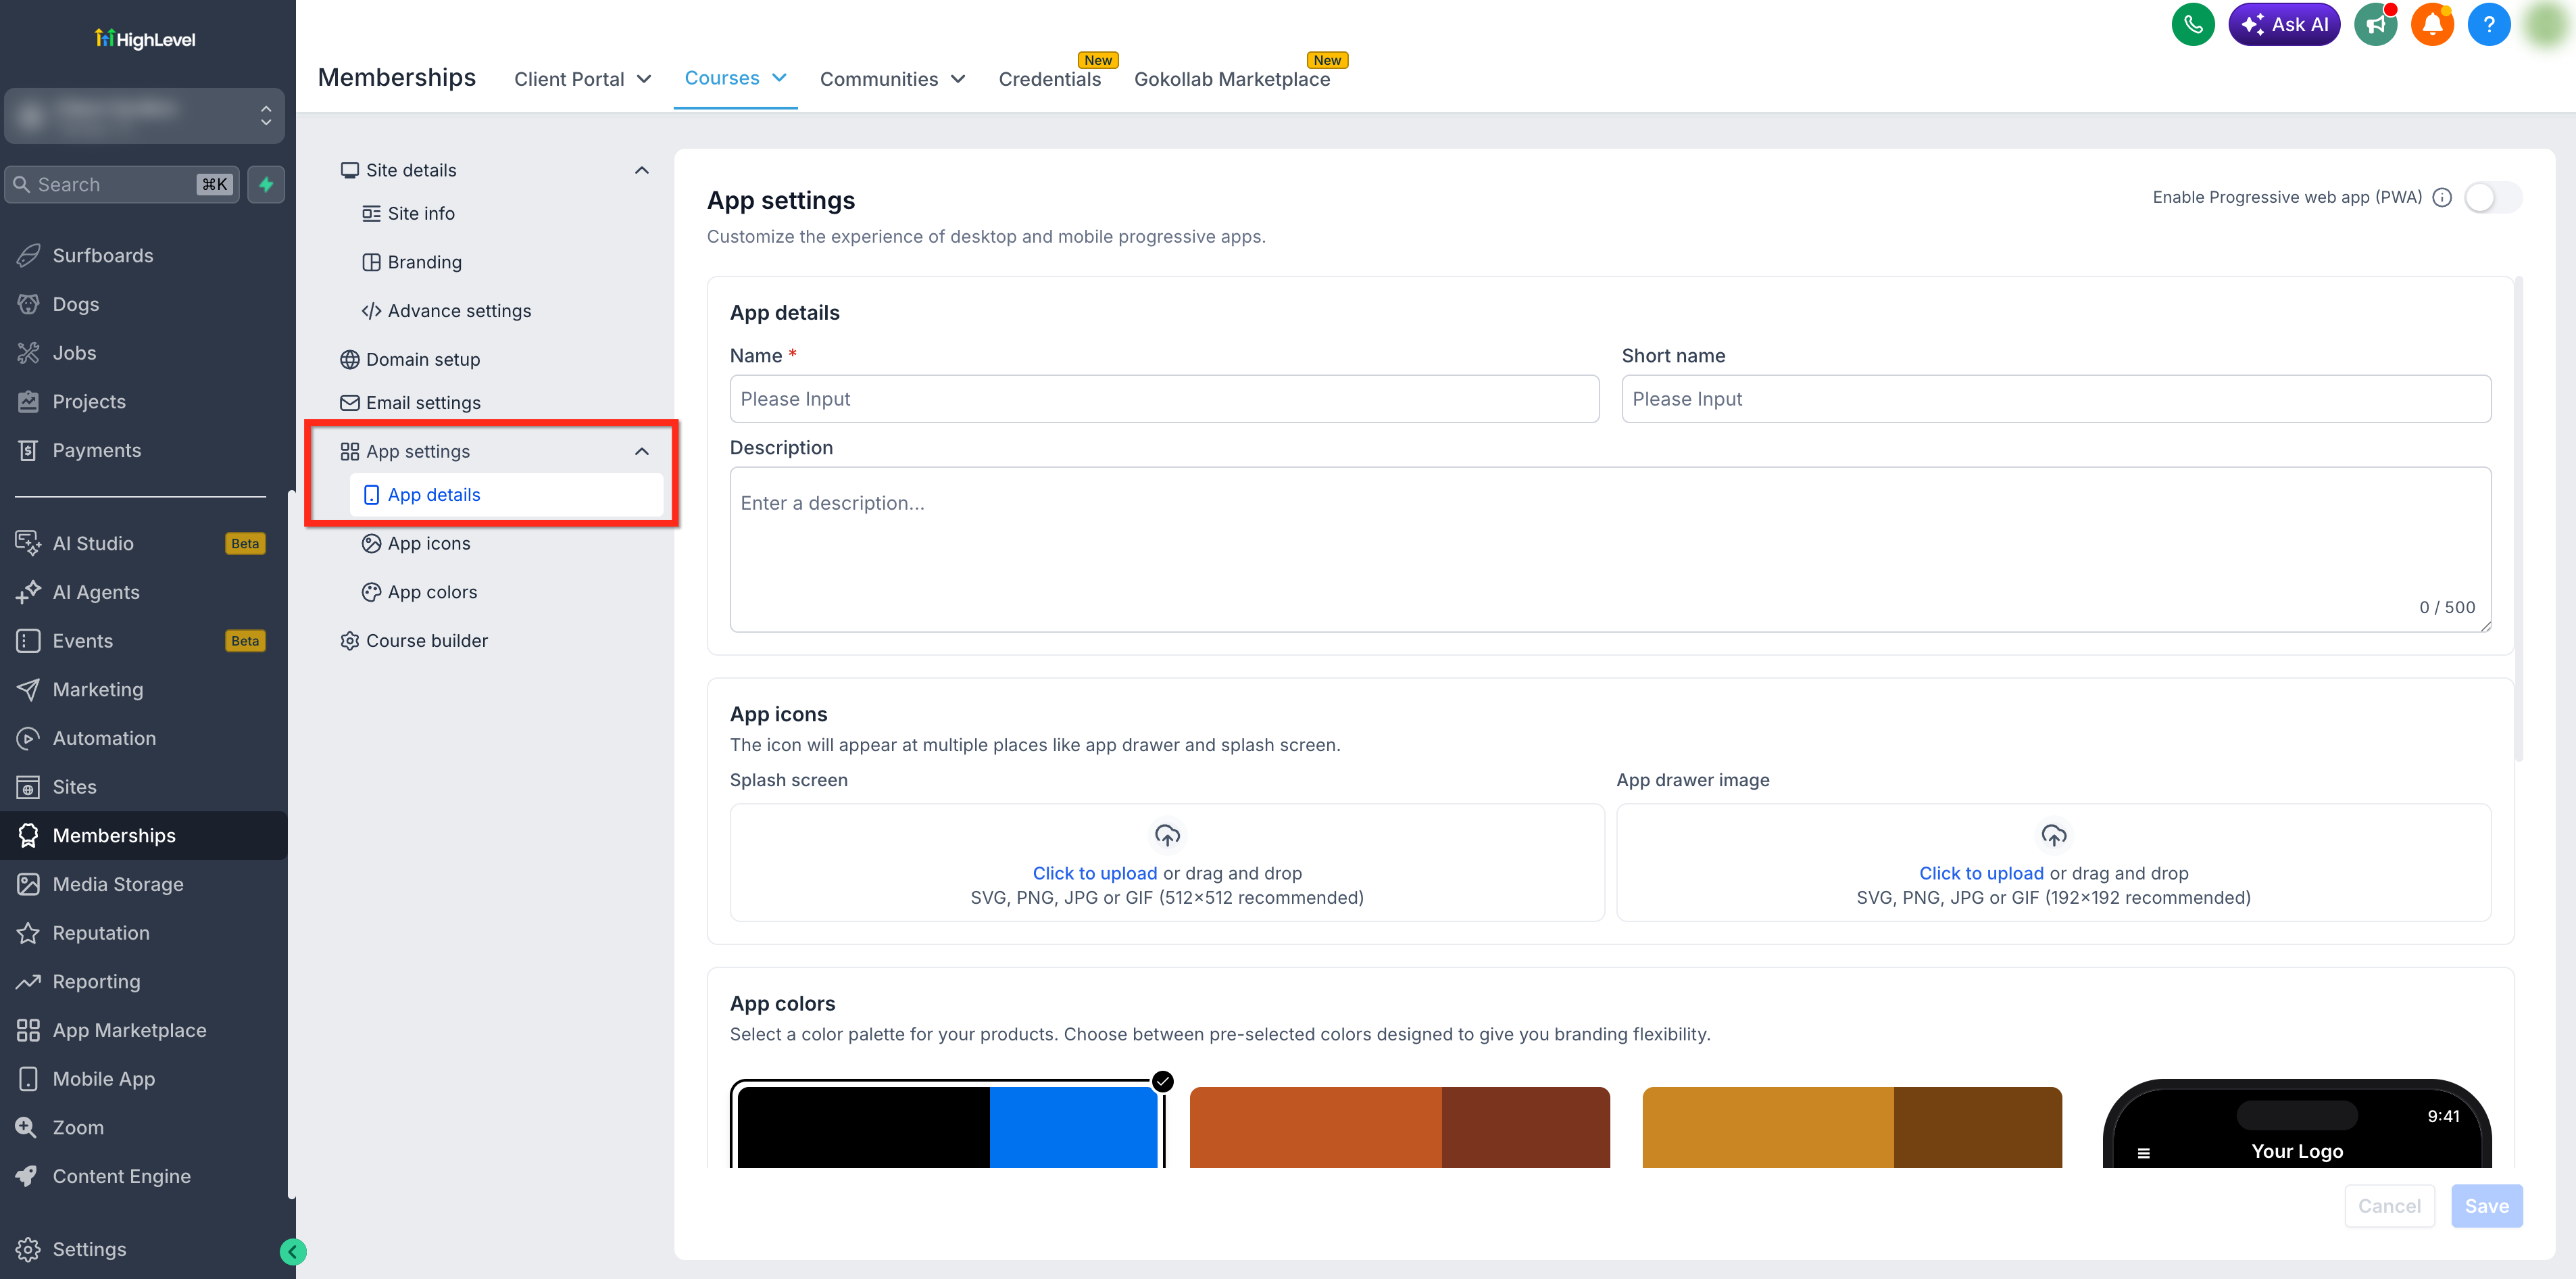
Once you’ve navigated to Courses > Settings, look for the App Settings (App Details) tile. This is where you’ll customize how your Progressive Web App (PWA) appears and behaves on both desktop and mobile devices.
If the App Settings tile is not visible, confirm that the location is using Legacy Memberships rather than Client Portal.
Step 3: Enable PWA Installation
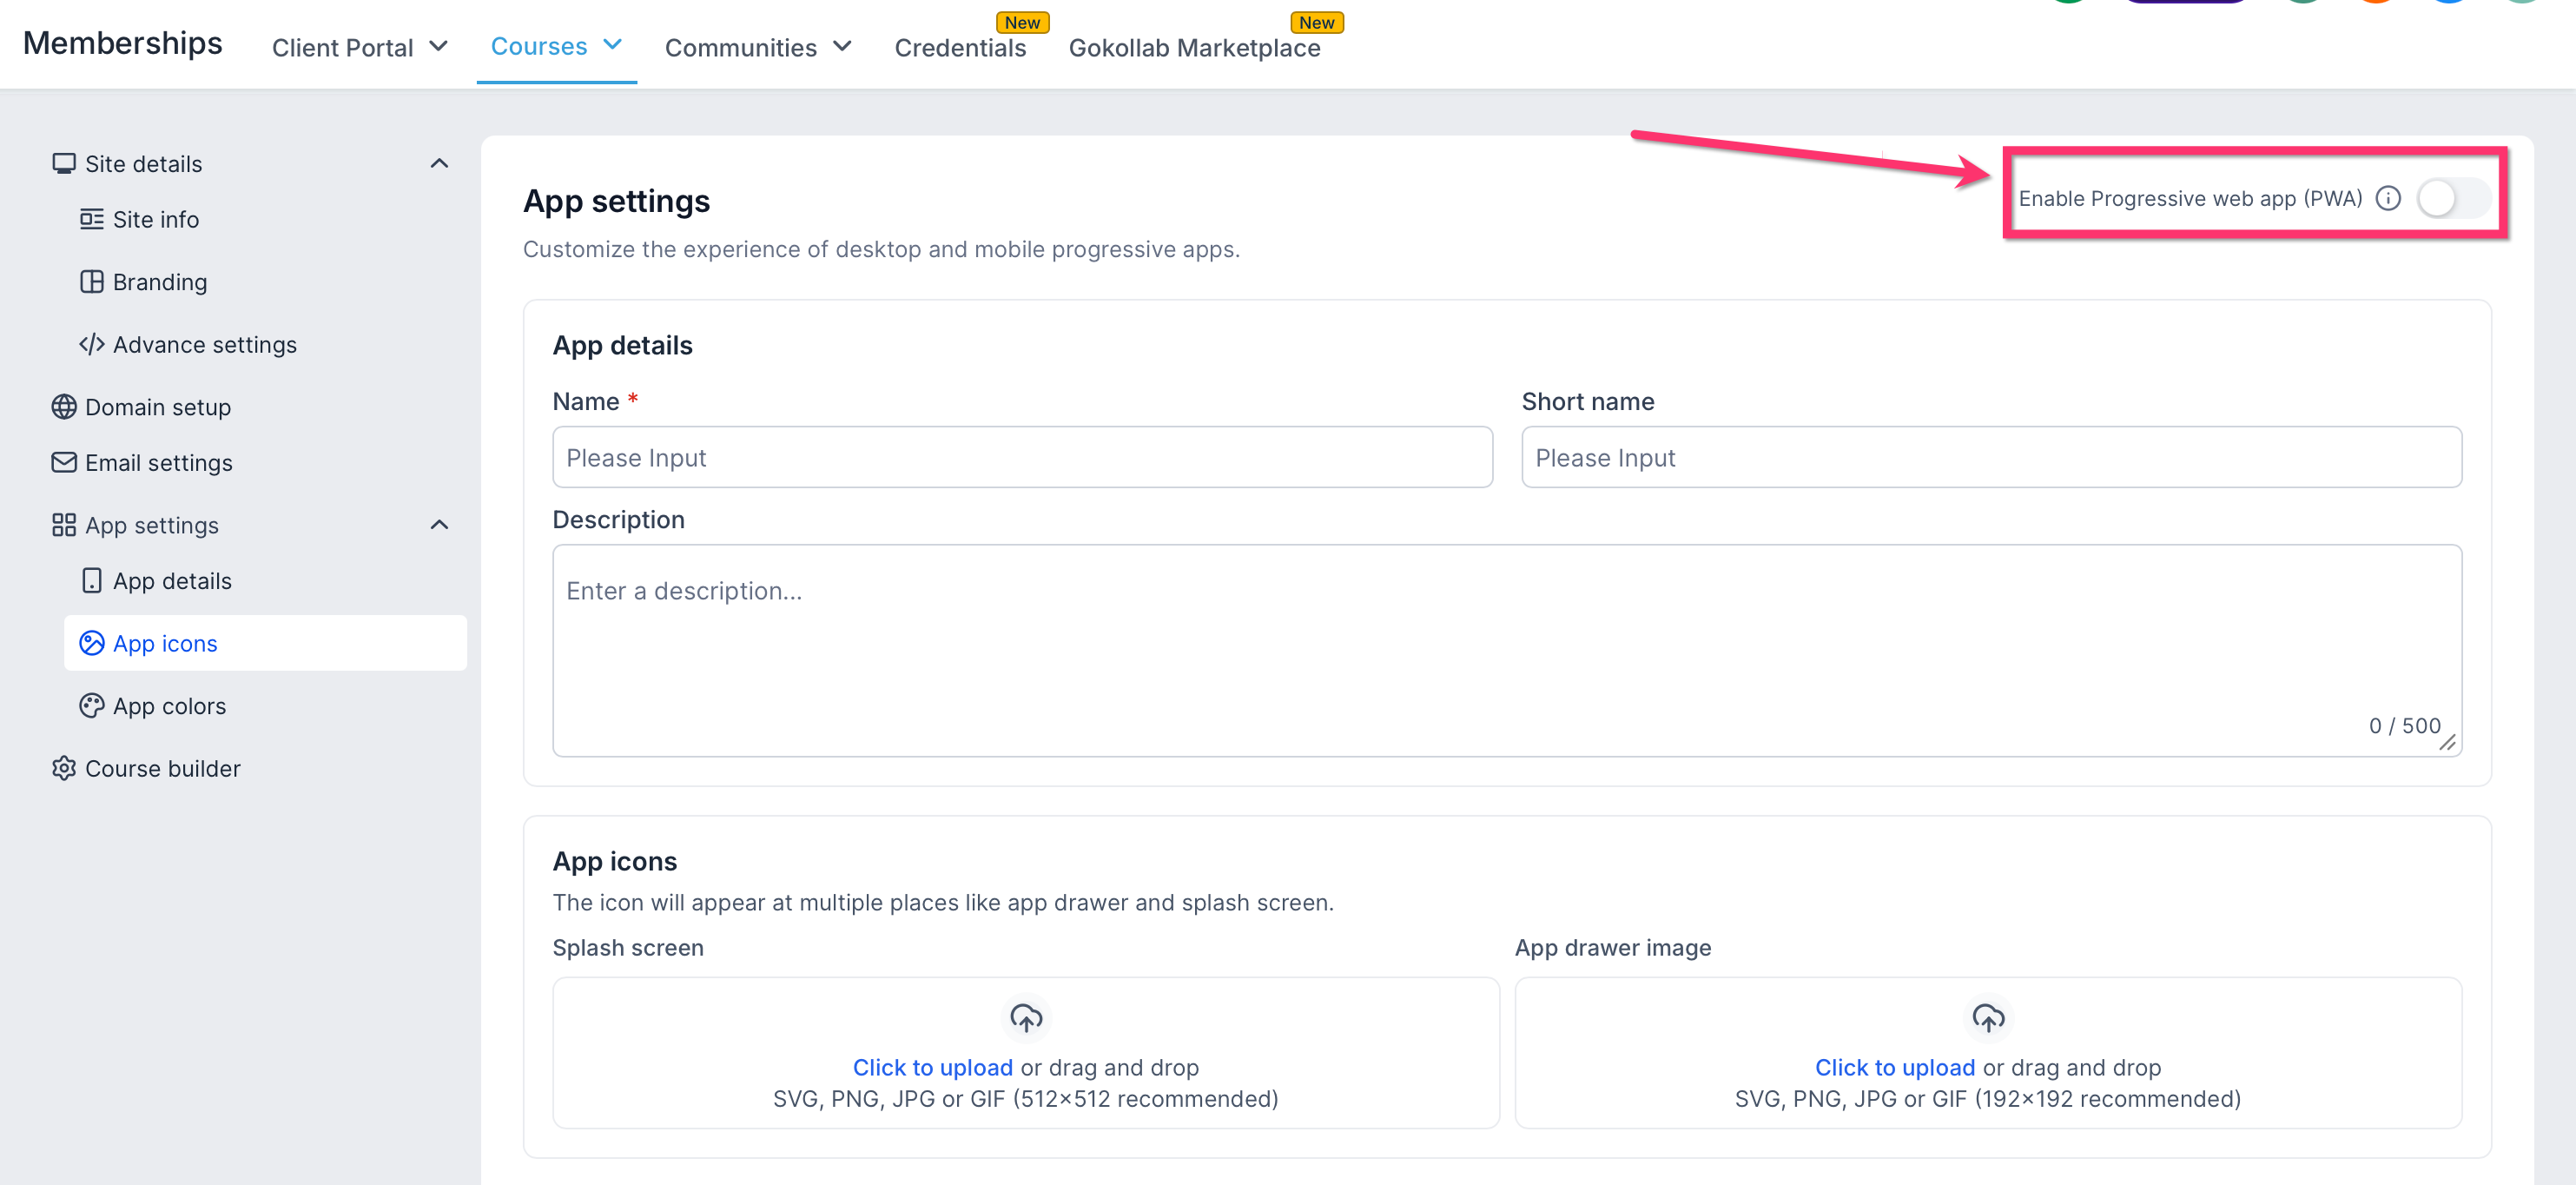
Enabling PWA installation allows your users to “install” your app on their devices just like a native app, improving accessibility and engagement. Once enabled, After PWA installation is enabled, learners can install it from supported browsers. The available installation option and wording vary by browser, operating system, and device.
Step 4: Customize Your PWA Settings
Once you’ve toggled Enable PWA to “on” inside the App Settings area, you can next define how your PWA appears and behaves. This is where the real customization begins—giving your app its name, identity, and look.
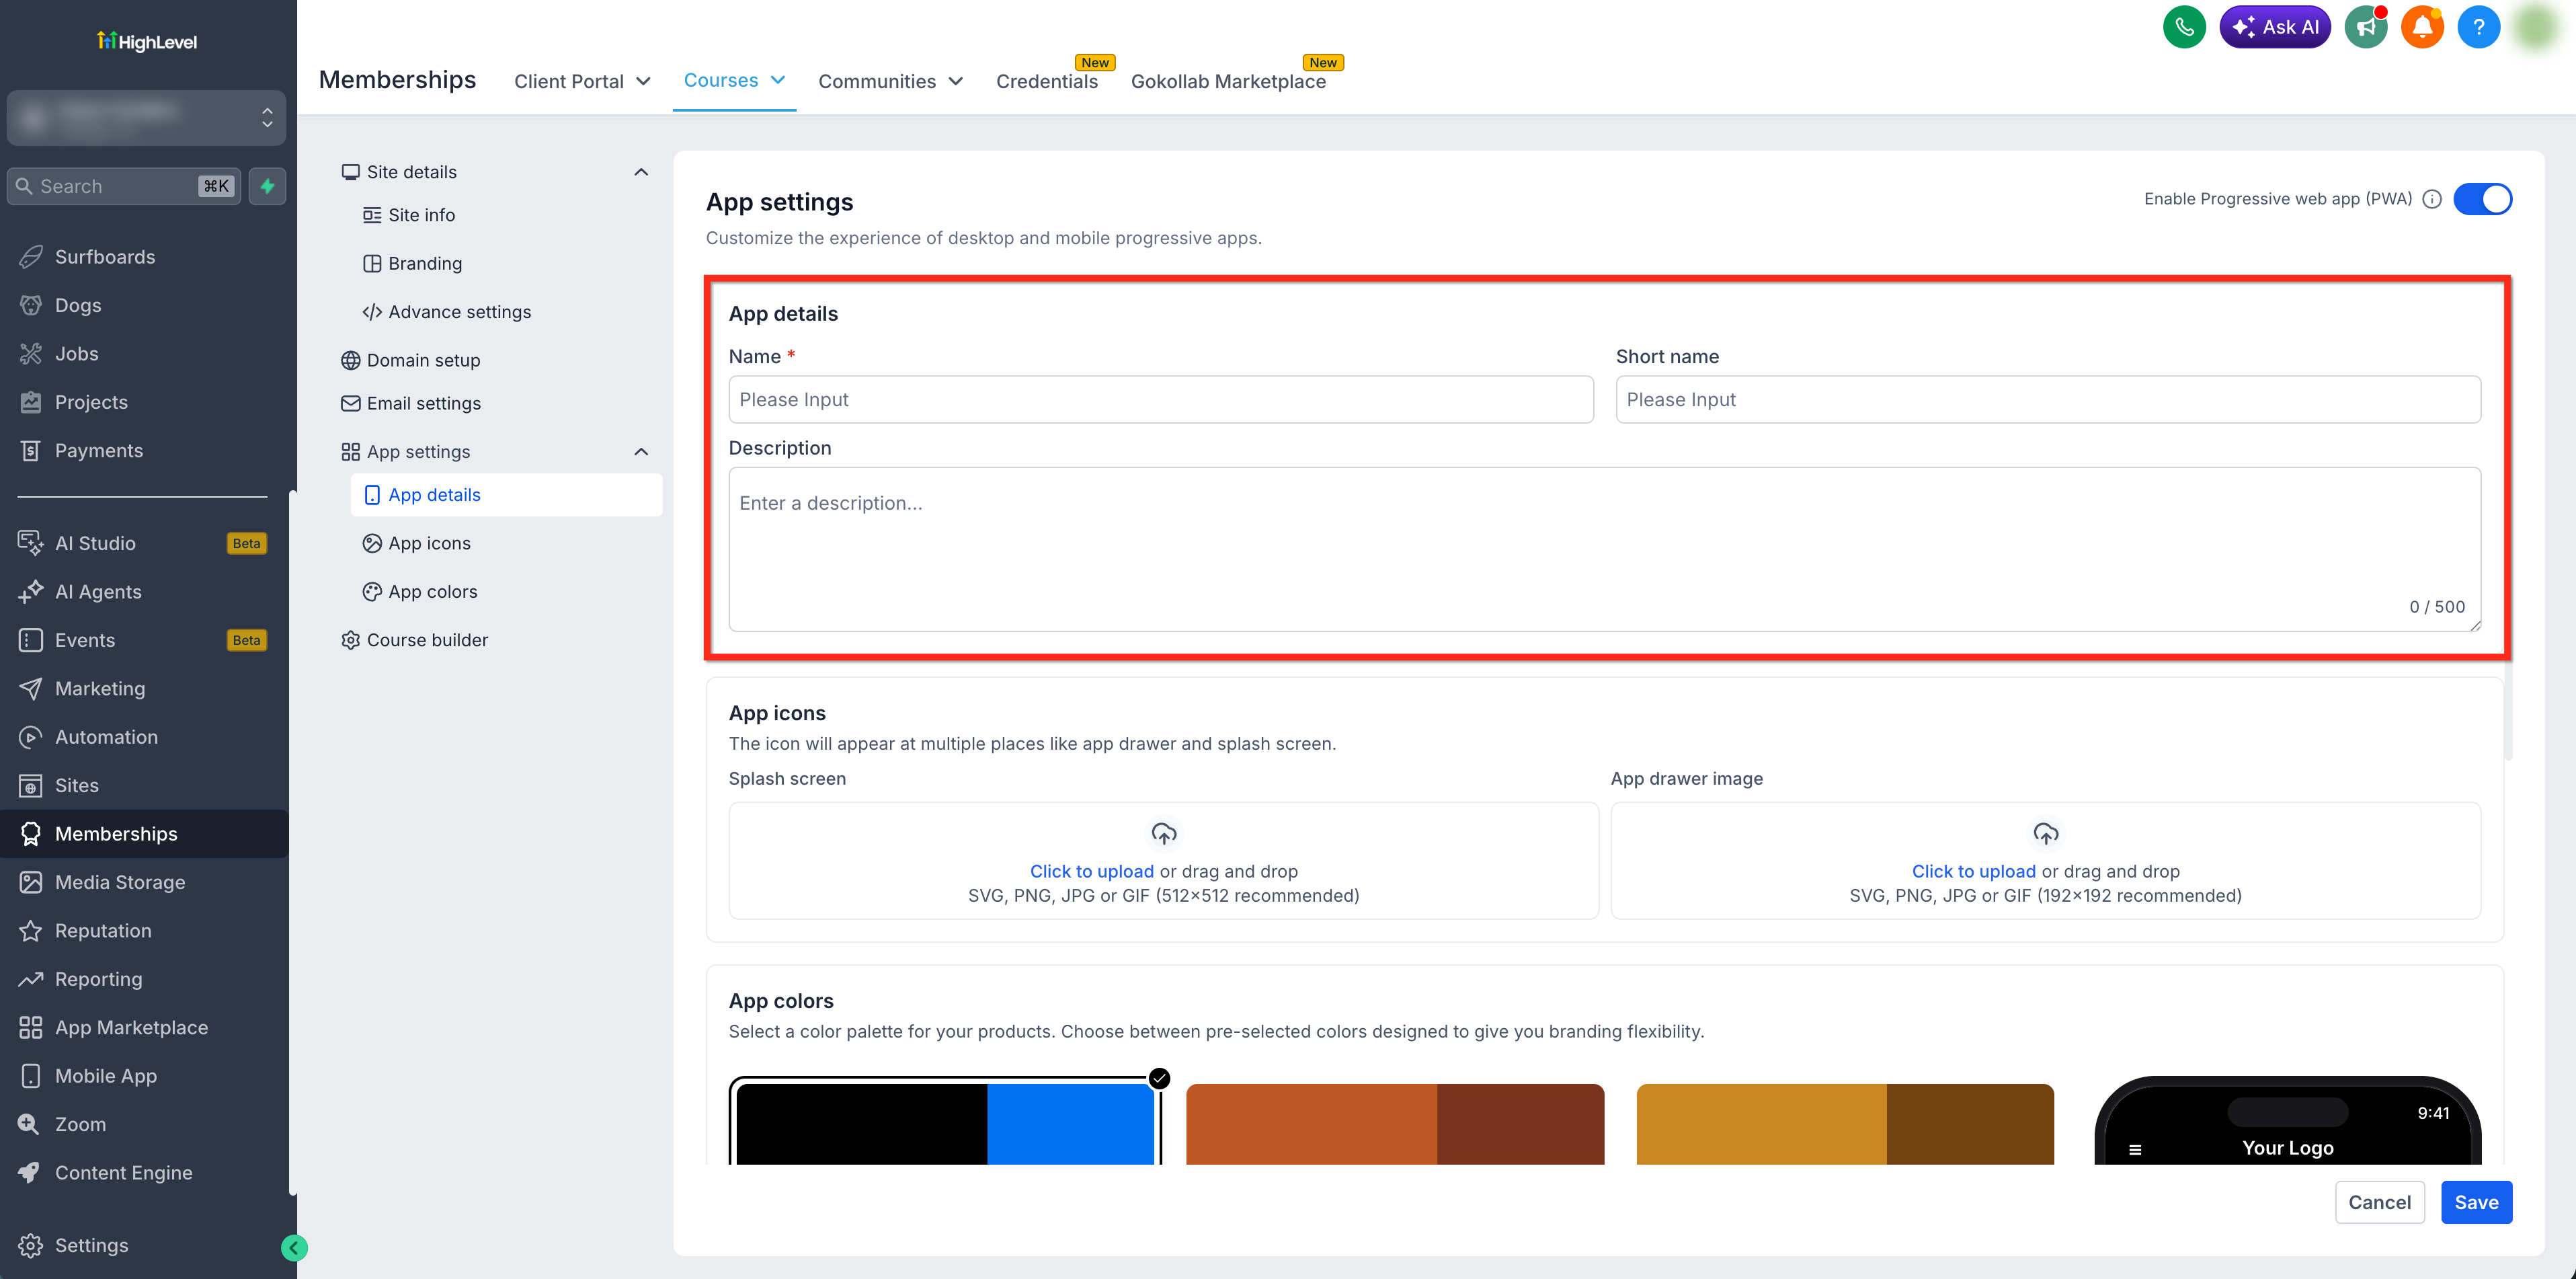
App Name, Short Name & Description
These fields shape how your app is presented to users across devices:
Name: This is your full app name, shown during installation prompts and in the app title bar.
Short Name: A shortened version of your app name that appears on home screens or in tighter display areas (e.g., app folders).
Description: A brief sentence that tells users what your app is about. It’s helpful context, especially when users are installing your PWA from the browser prompt.
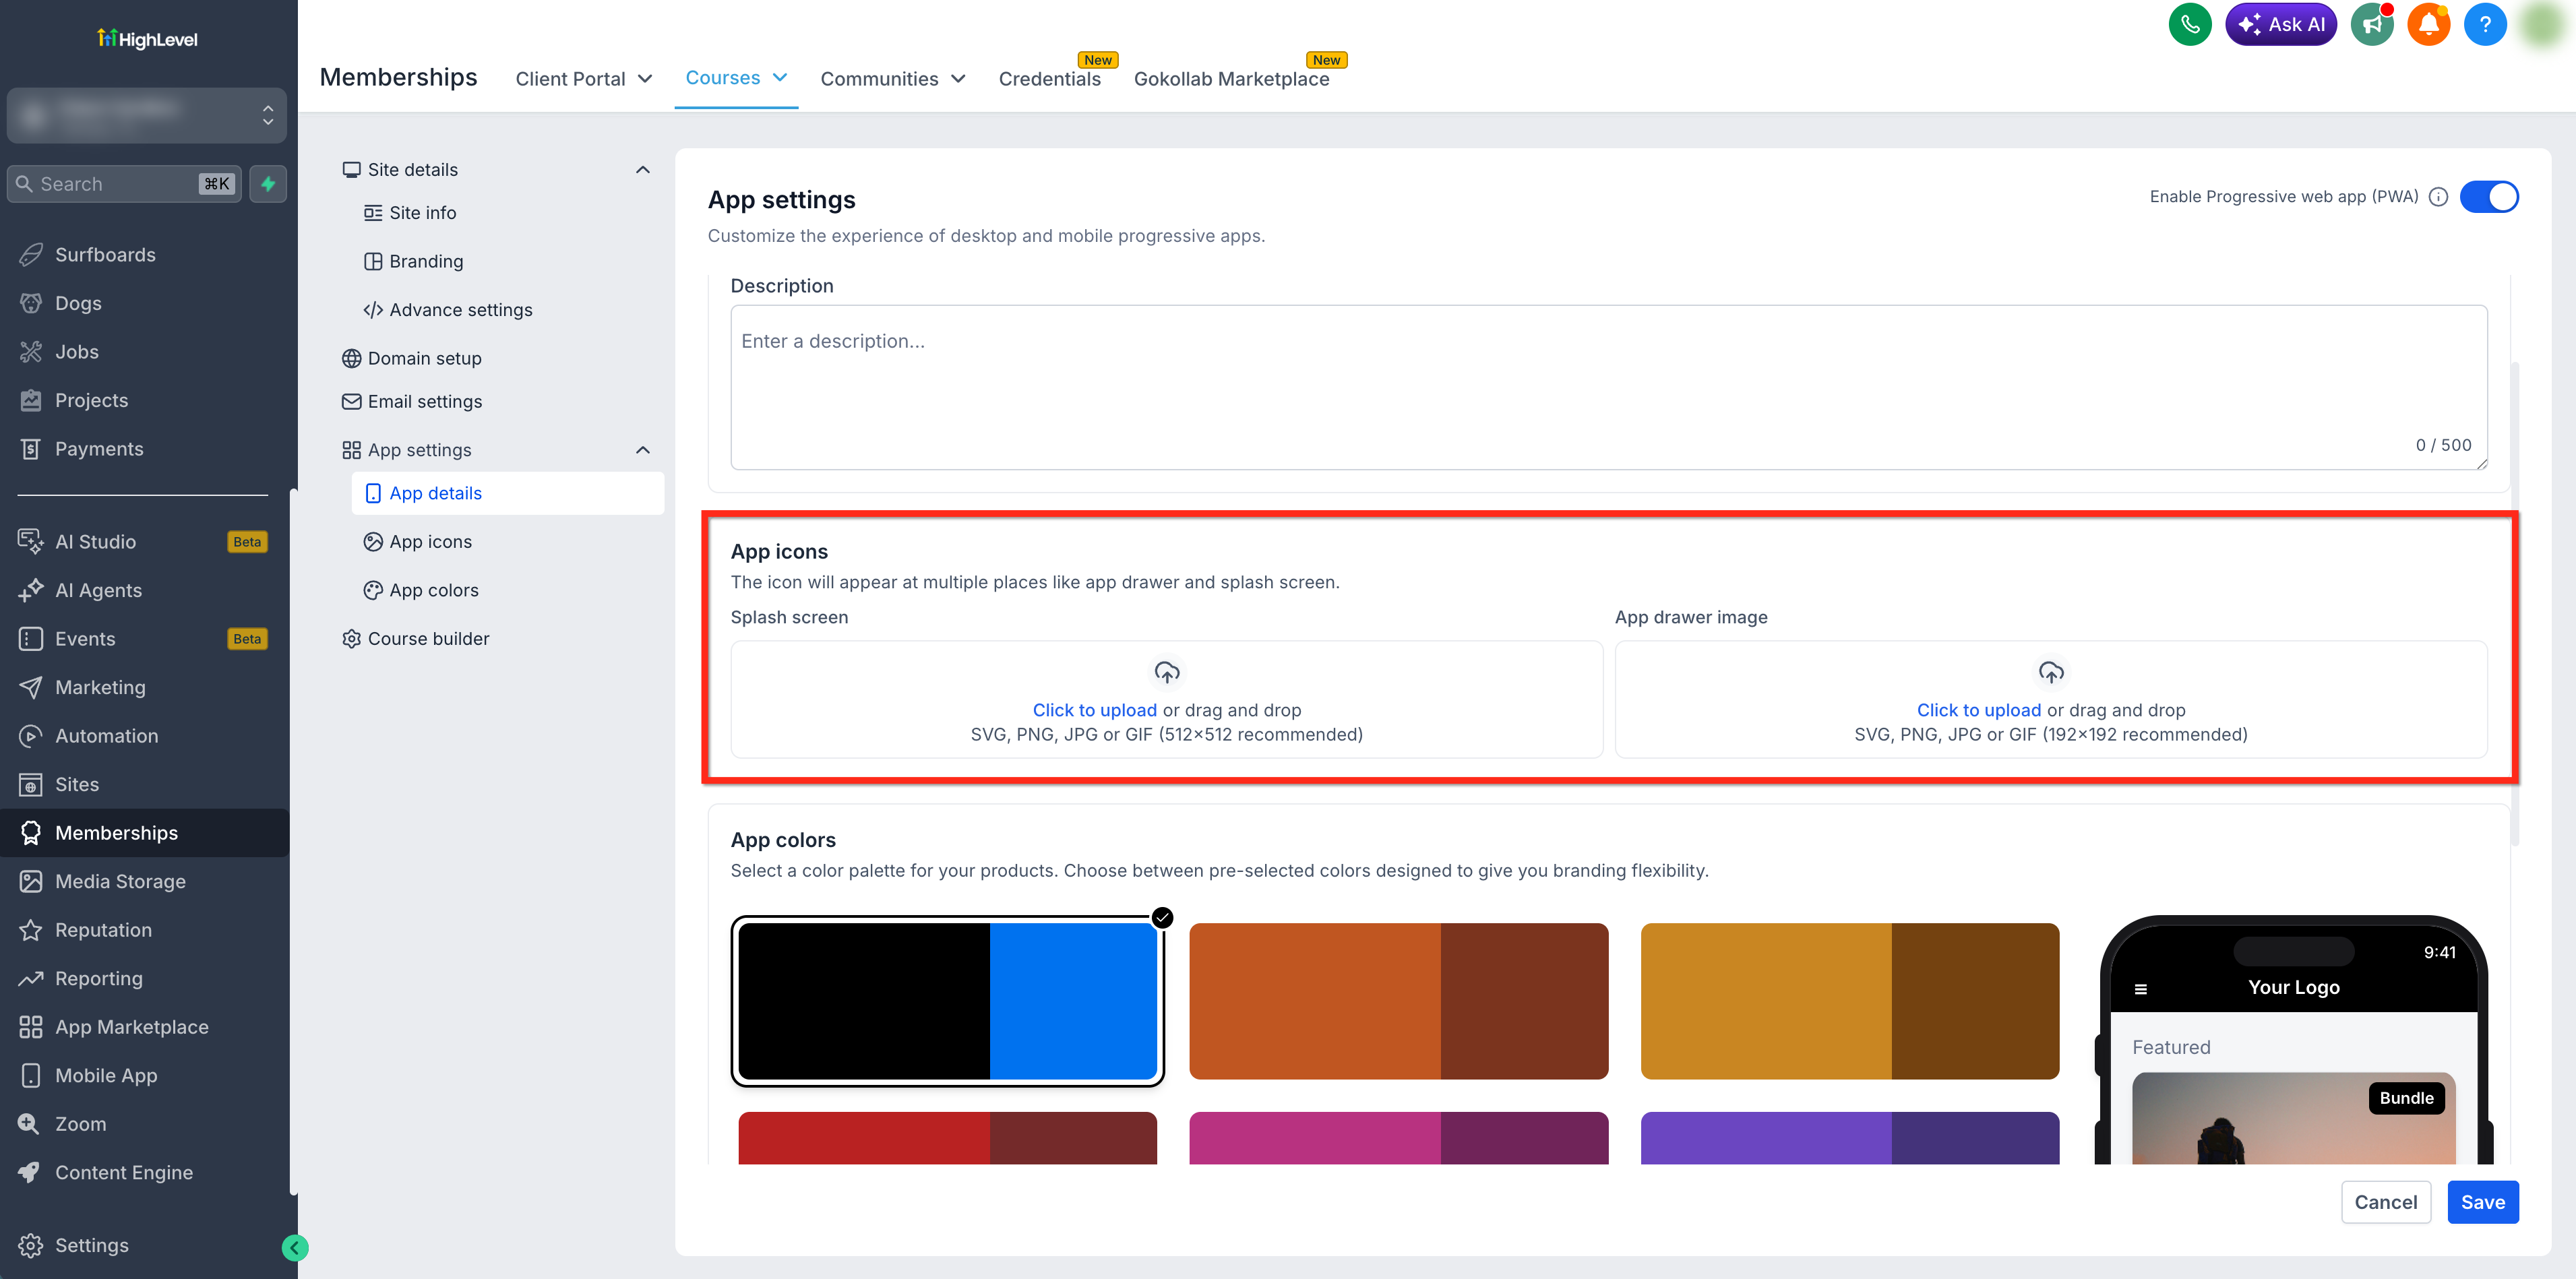
App Icon
You’ll need to upload two icons—a larger (512x512) and smaller (192x192) version. These are used across different devices and platforms, such as splash screens, app drawers, and home screens. While the system will automatically choose which icon to use based on screen size, we recommend uploading versions that match each dimension exactly. Icons must be in .jpg or .png format, and they should be visually identical to maintain brand consistency.
App Colors
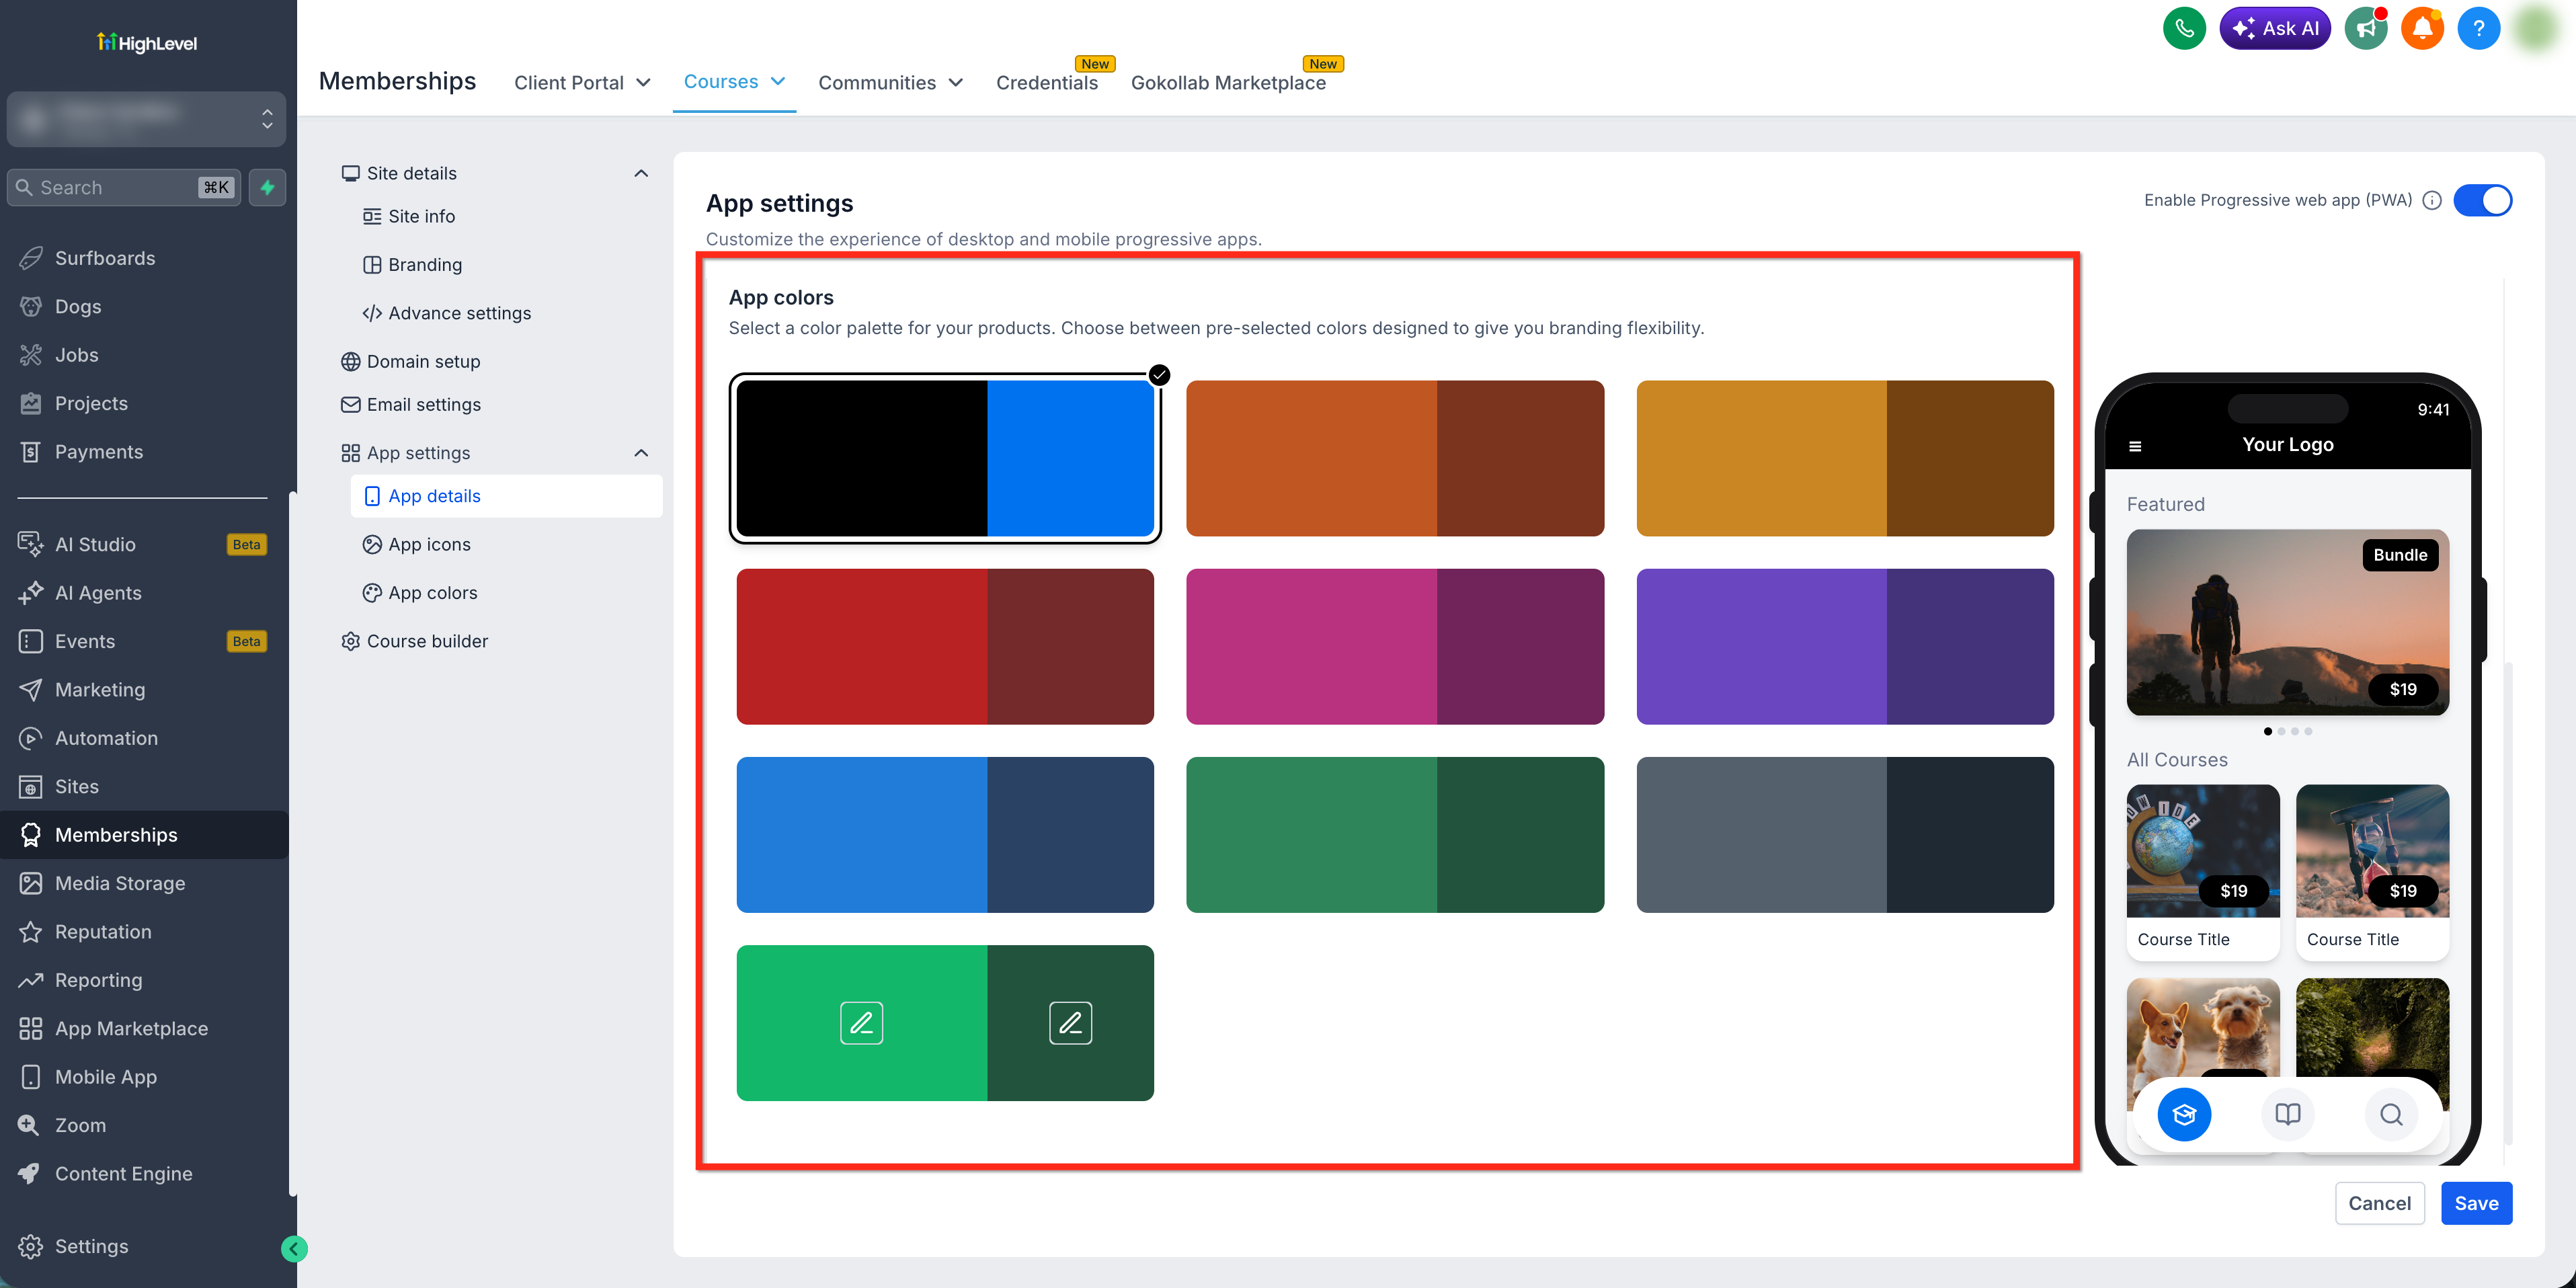
HighLevel offers a selection of predefined color palettes for your app theme. These colors affect the styling of UI elements like buttons and headers. You can’t manually enter custom hex codes right now, but the palette choices are designed for strong contrast and visual clarity across devices. Just click to select the one that best fits your brand.
Step 5: Save Your Settings
After you’ve entered your app details, uploaded icons, and chosen your theme color, make sure to click Save in the upper-right corner. If you don’t save, none of your changes will apply when users try to install your PWA.
How to Install the PWA
Installing the PWA on a Windows Computer
After you are done customizing and enabling your Membership PWA, all that is needed to be done by your client is for them to click on this icon in their Browser Address Bar in Chrome, when logging in to your Memberships Login Portal:

And it would allow them to access your PWA on their desktop as a shortcut:

Installing PWA on a Mac Computer
Chrome or Microsoft Edge
- Open the Membership login portal.
- Sign in to the membership account.
- Select the install icon in the browser address bar.
- Confirm the installation.
Safari on supported macOS versions
- Open the Membership portal in Safari.
- Select File > Add to Dock.
- Enter the app name.
- Select Add.

Installing PWA on an Android device:
For the most consistent installation experience, open the Membership login portal in Google Chrome. It can be installed by Adding the PWA to your Home Screen from your Chrome browser as in the video below.
- Sign in to the membership account.
- Open the Chrome menu.
- Select Install app or Add to Home screen.
- Follow the on-screen instructions.
Installing PWA on an iOS Mobile Device:
- Open the Membership login portal in Safari.
- Sign in to the membership account.
- Tap the Share icon.
- Select Add to Home Screen.
- Review the app name and tap Add.
Troubleshooting the Membership PWA
App Settings is not visible
Confirm that the location is using Legacy Memberships. The Membership PWA cannot be configured from the Client Portal experience.
The installation option does not appear
Confirm that PWA installation is enabled and the settings have been saved. Open the published Membership portal using HTTPS, sign in through a supported browser, and check the browser menu for Install app or Add to Home Screen.
Updated branding is not appearing
Remove the previously installed PWA, clear the relevant browser cache, reopen the Membership portal, and install the PWA again.
Users are opening Client Portal instead
Confirm which membership experience is active and switch to Legacy Memberships before using the Membership PWA.
Frequently Asked Questions
Q: Can I still submit my PWA to the App Store?
The Membership PWA is designed to be installed directly from a supported browser. Packaging it with a third-party native wrapper is outside HighLevel’s standard Membership PWA setup and may require developer support and separate compliance with Apple or Google requirements.
For a supported branded native app experience, review HighLevel’s Client Portal Branded Mobile App options.
Q: Does my PWA work offline?
An internet connection is generally required to sign in, load courses, and access current membership content. Previously loaded content may remain temporarily available depending on the device and browser, but complete offline access is not guaranteed.
Q: Can I send push notifications with a PWA?
Push-notification availability depends on the device, browser, operating system, and notification functionality supported by HighLevel. Installing the Membership PWA does not automatically enable push notifications.
Q: Do I need a developer to set up a whitelabel PWA?
No, HighLevel's interface makes it easy to configure without coding skills.
Related Articles
- How to Set Up the Client Portal
- Client Portal App – Custom Mobile App Notifications
- Legacy Membership to Client Portal Migration
Was this article helpful?
That’s Great!
Thank you for your feedback
Sorry! We couldn't be helpful
Thank you for your feedback
Feedback sent
We appreciate your effort and will try to fix the article