Number pools are a great way to track the calls driven by paid campaigns. Using number pools, you can attribute call-tracking conversations based on specific phone numbers being shown to leads that land on designated landing pages and websites. These numbers are only displayed on specific pages and are only shown to leads who take a specific course of action. They're also known as "call tracking codes," but we call them "number pools."
In this article, we'll go over how to set up number pools so you can start collecting data about your visitors.
Set Up a Number Pool for Call Tracking
You can't enter gclid in the URL to imitate Google ads anymore, it should be from the actual Google ads.
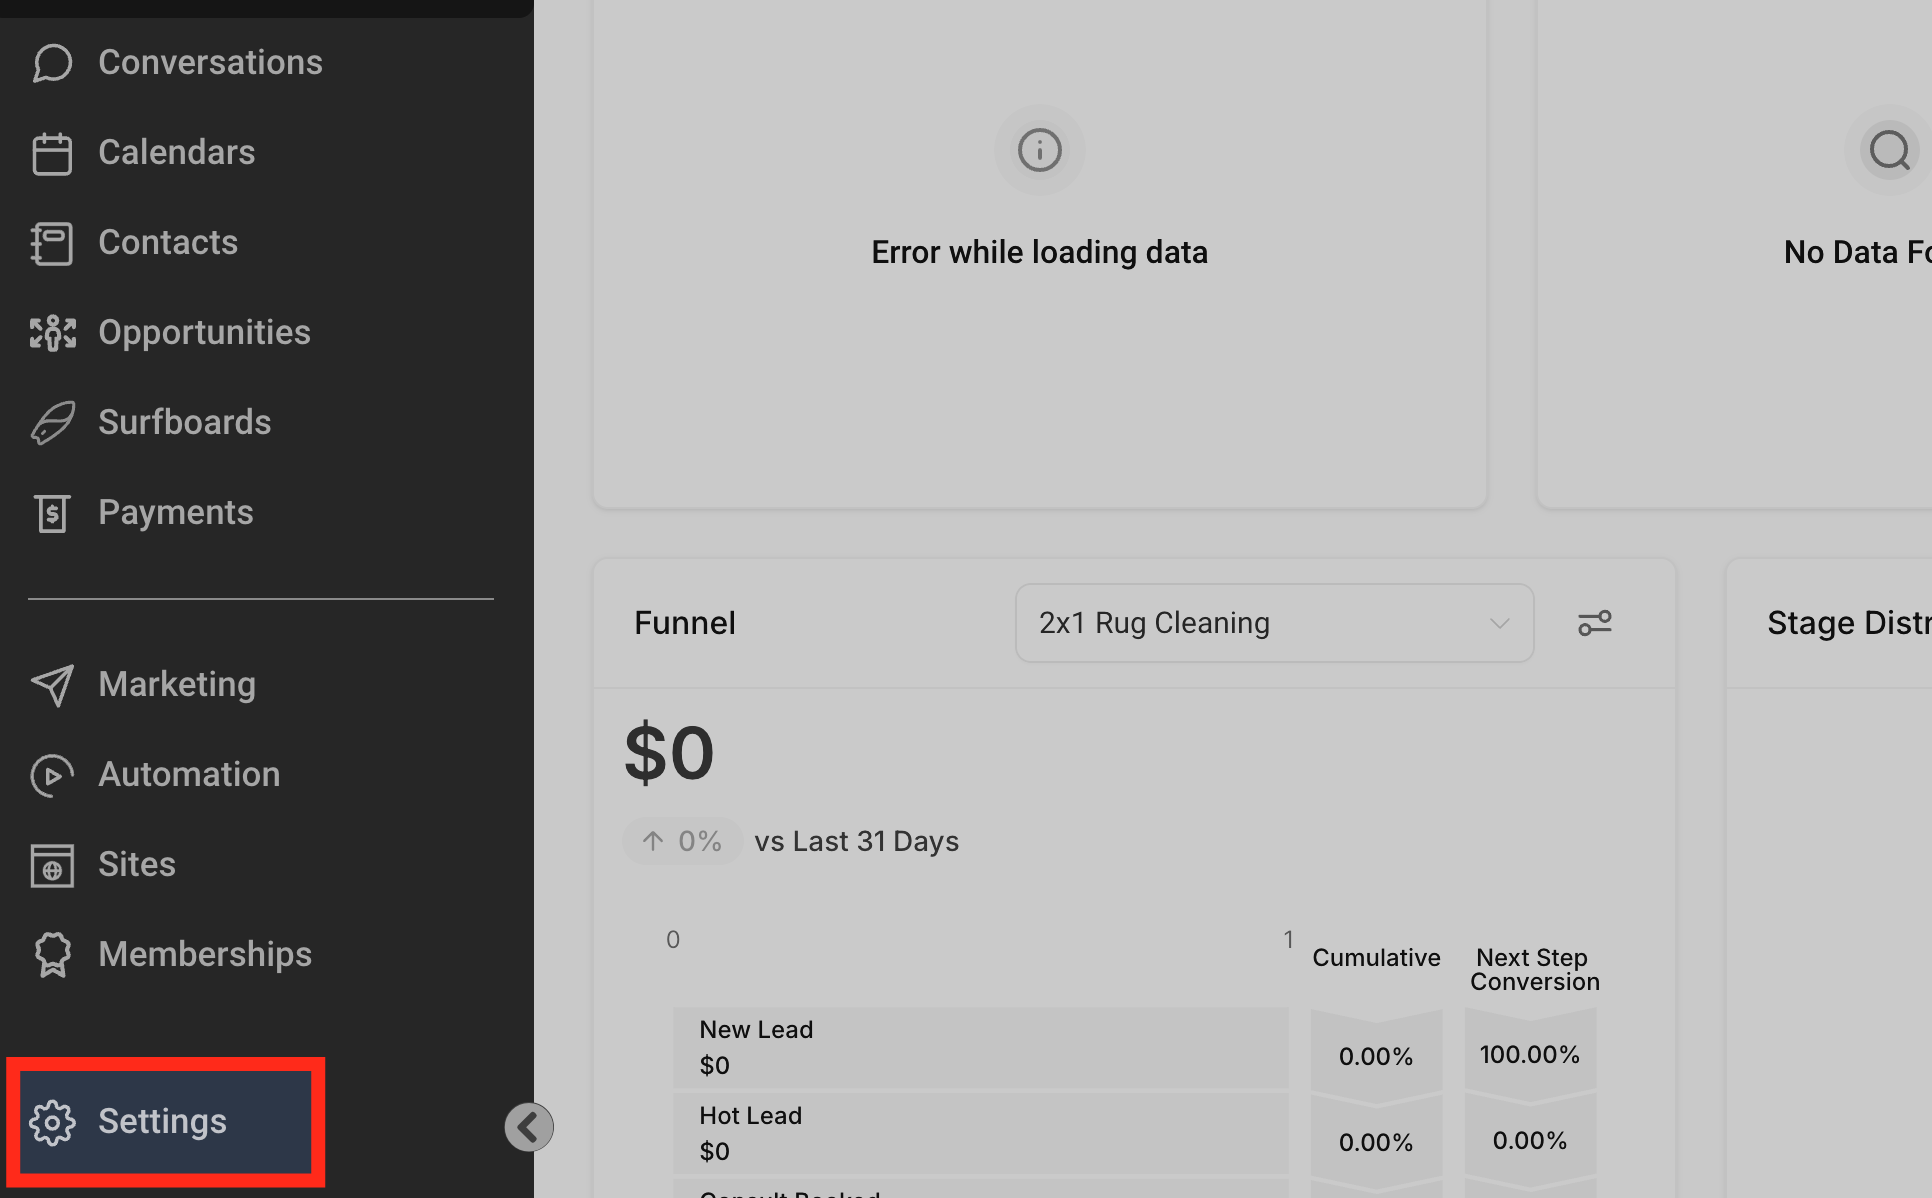
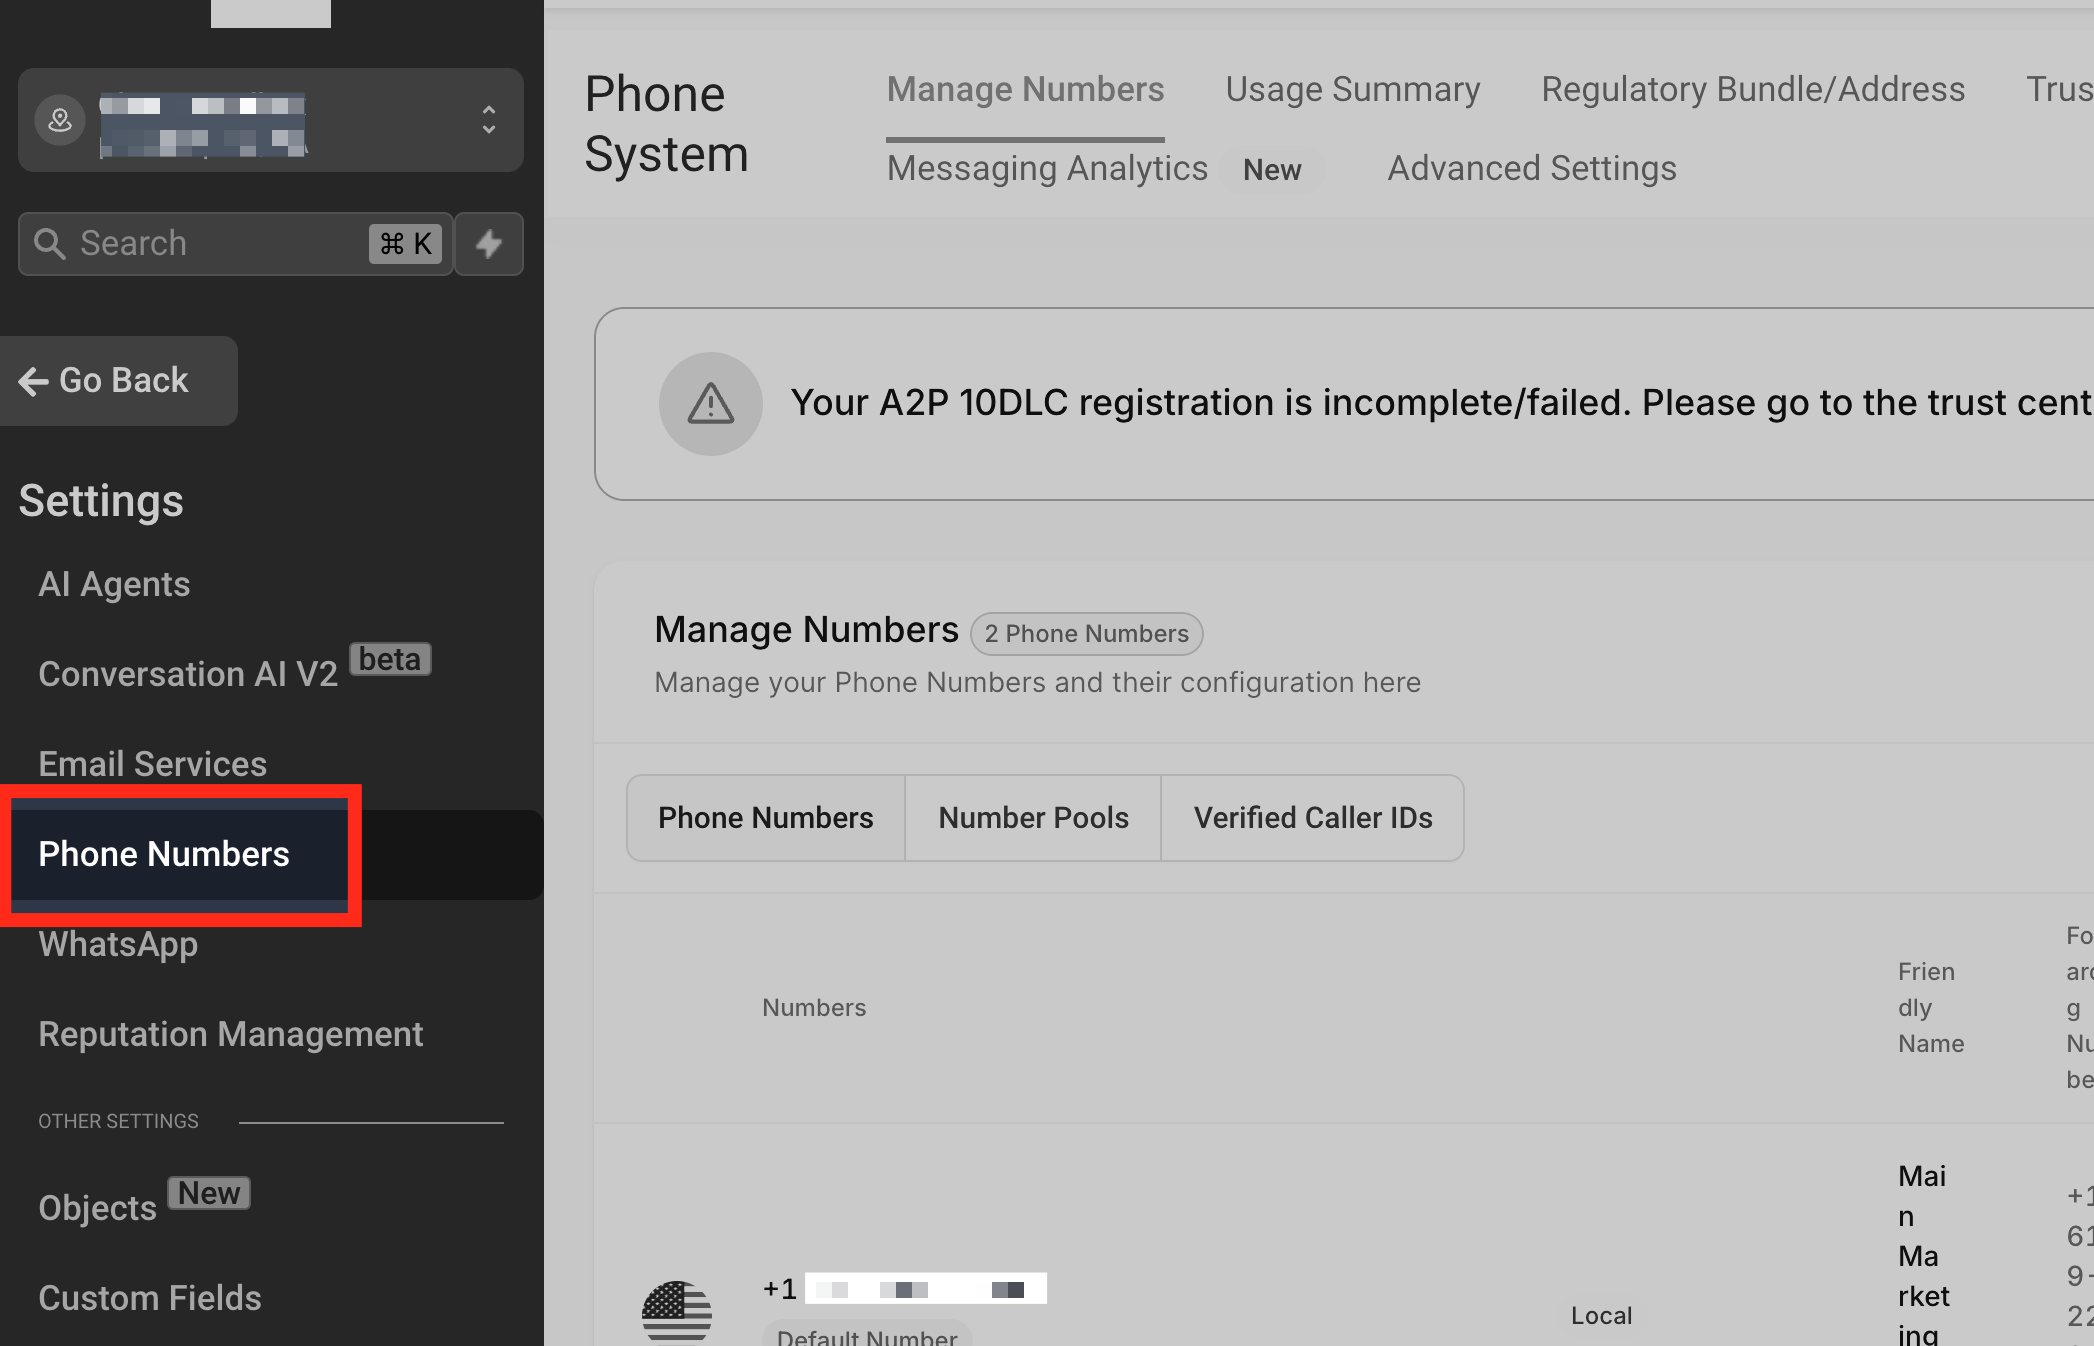
Then click on Phone Numbers
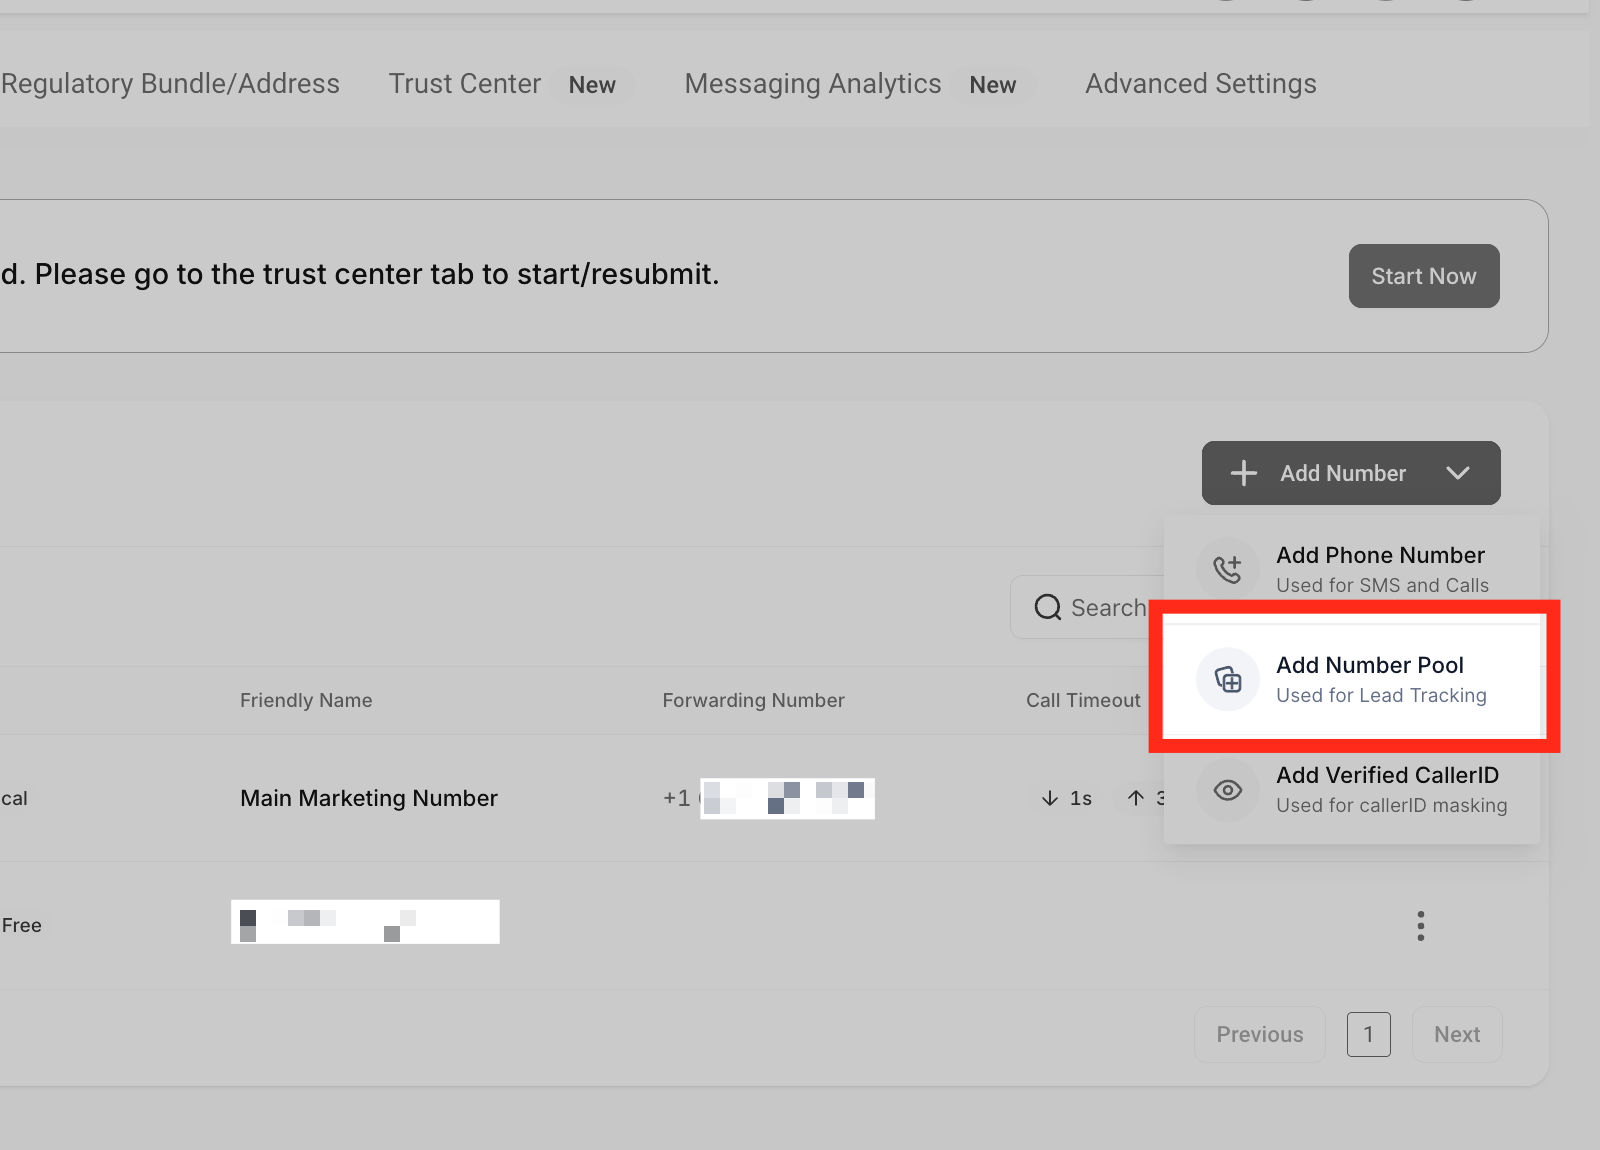
Click "Add Number Pool." You can find it under the "+ Add Number" dropdown menu located on the right side of the page.
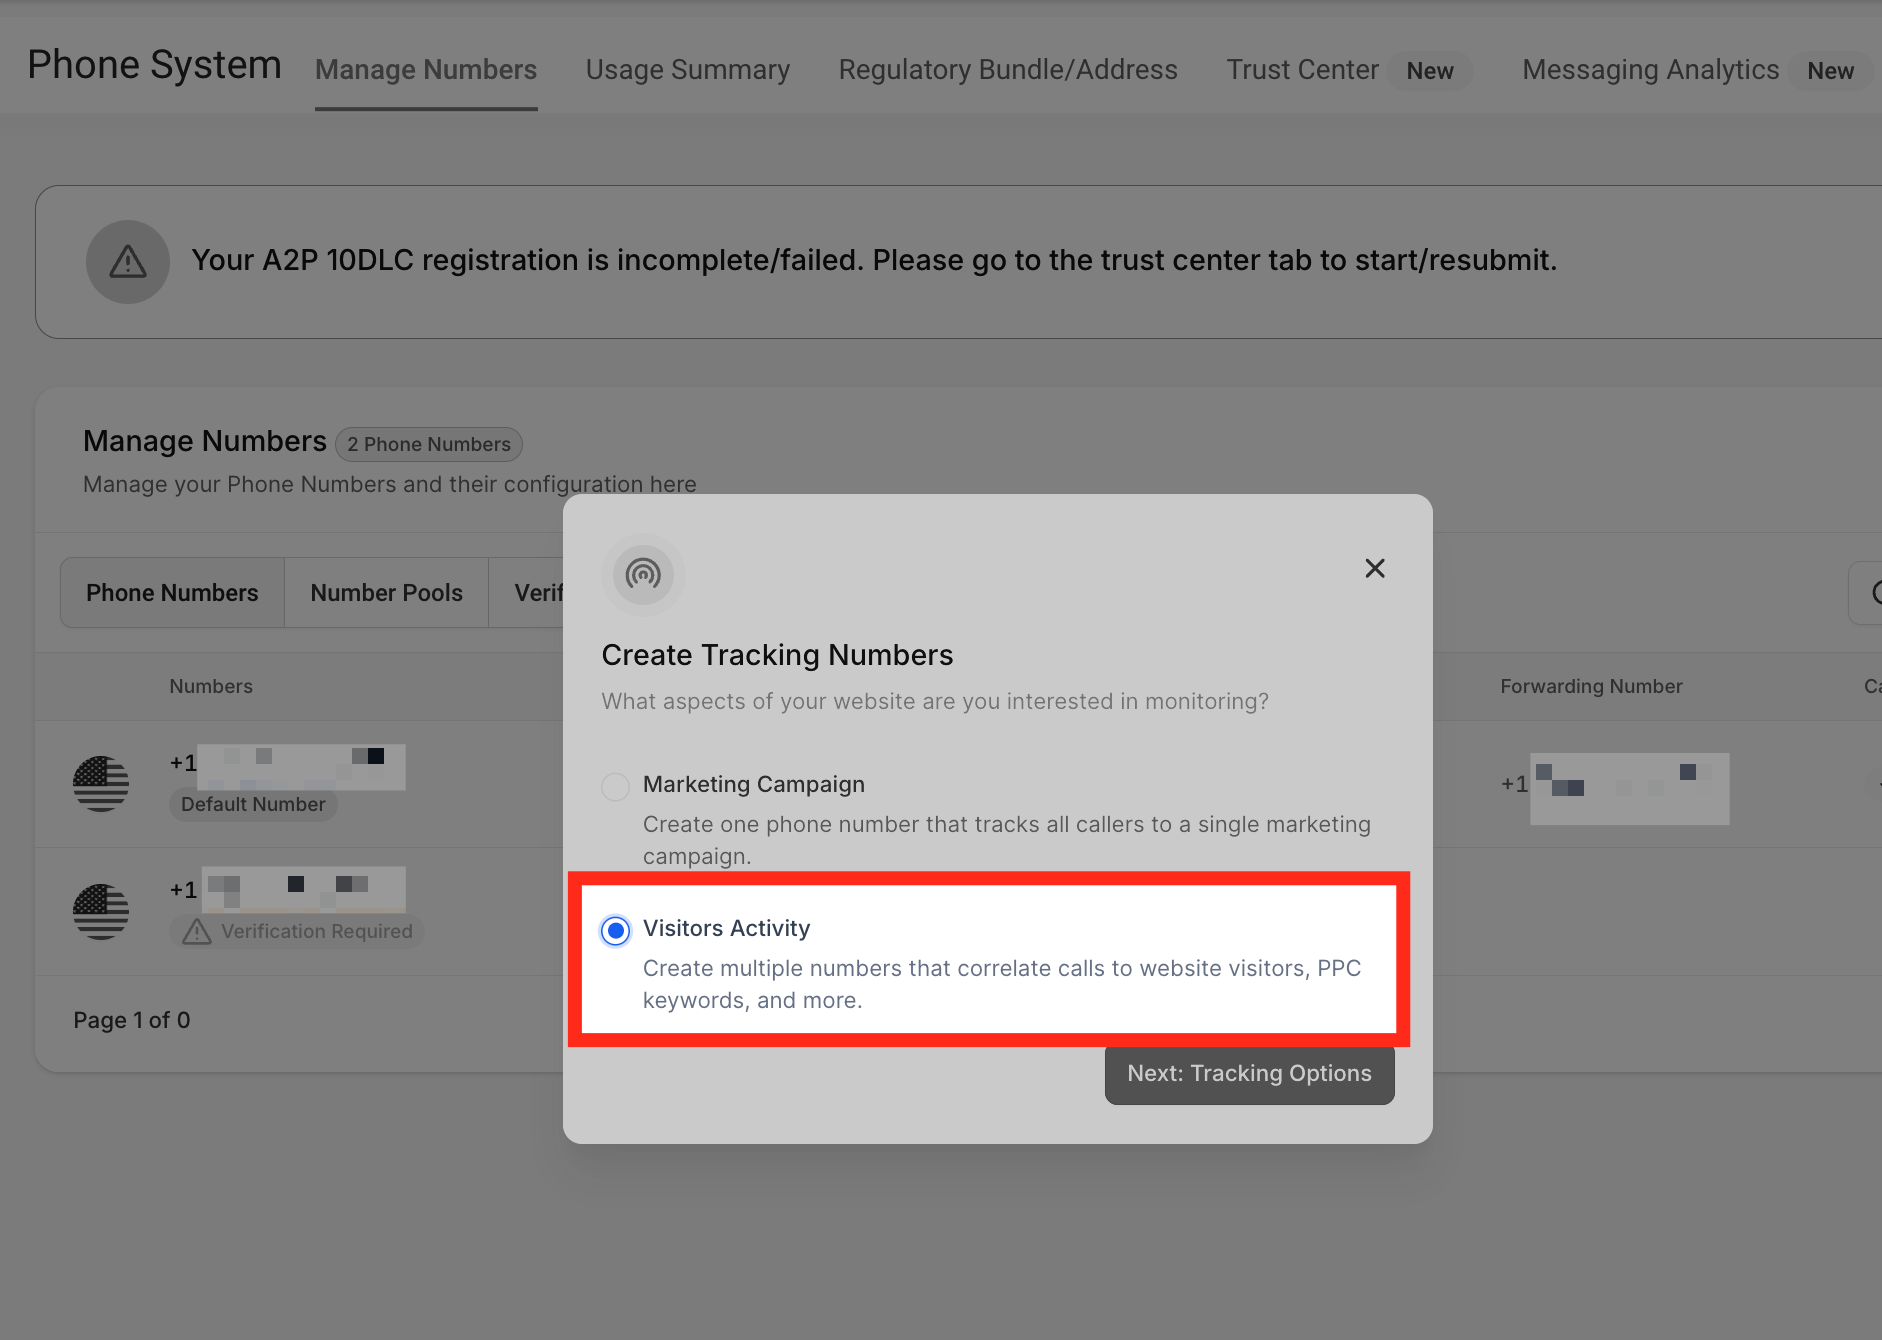
Since we are creating a number pool for call tracking purposes, we will select the "Visitors Activity" option.
From this list, select which visitors you want to track. Once you pick, click Next: Create Pool. We recommend tracking All visitors.
Note: If you select PPC search, the number on the website will only switch when the visitors are landing from a paid ad.
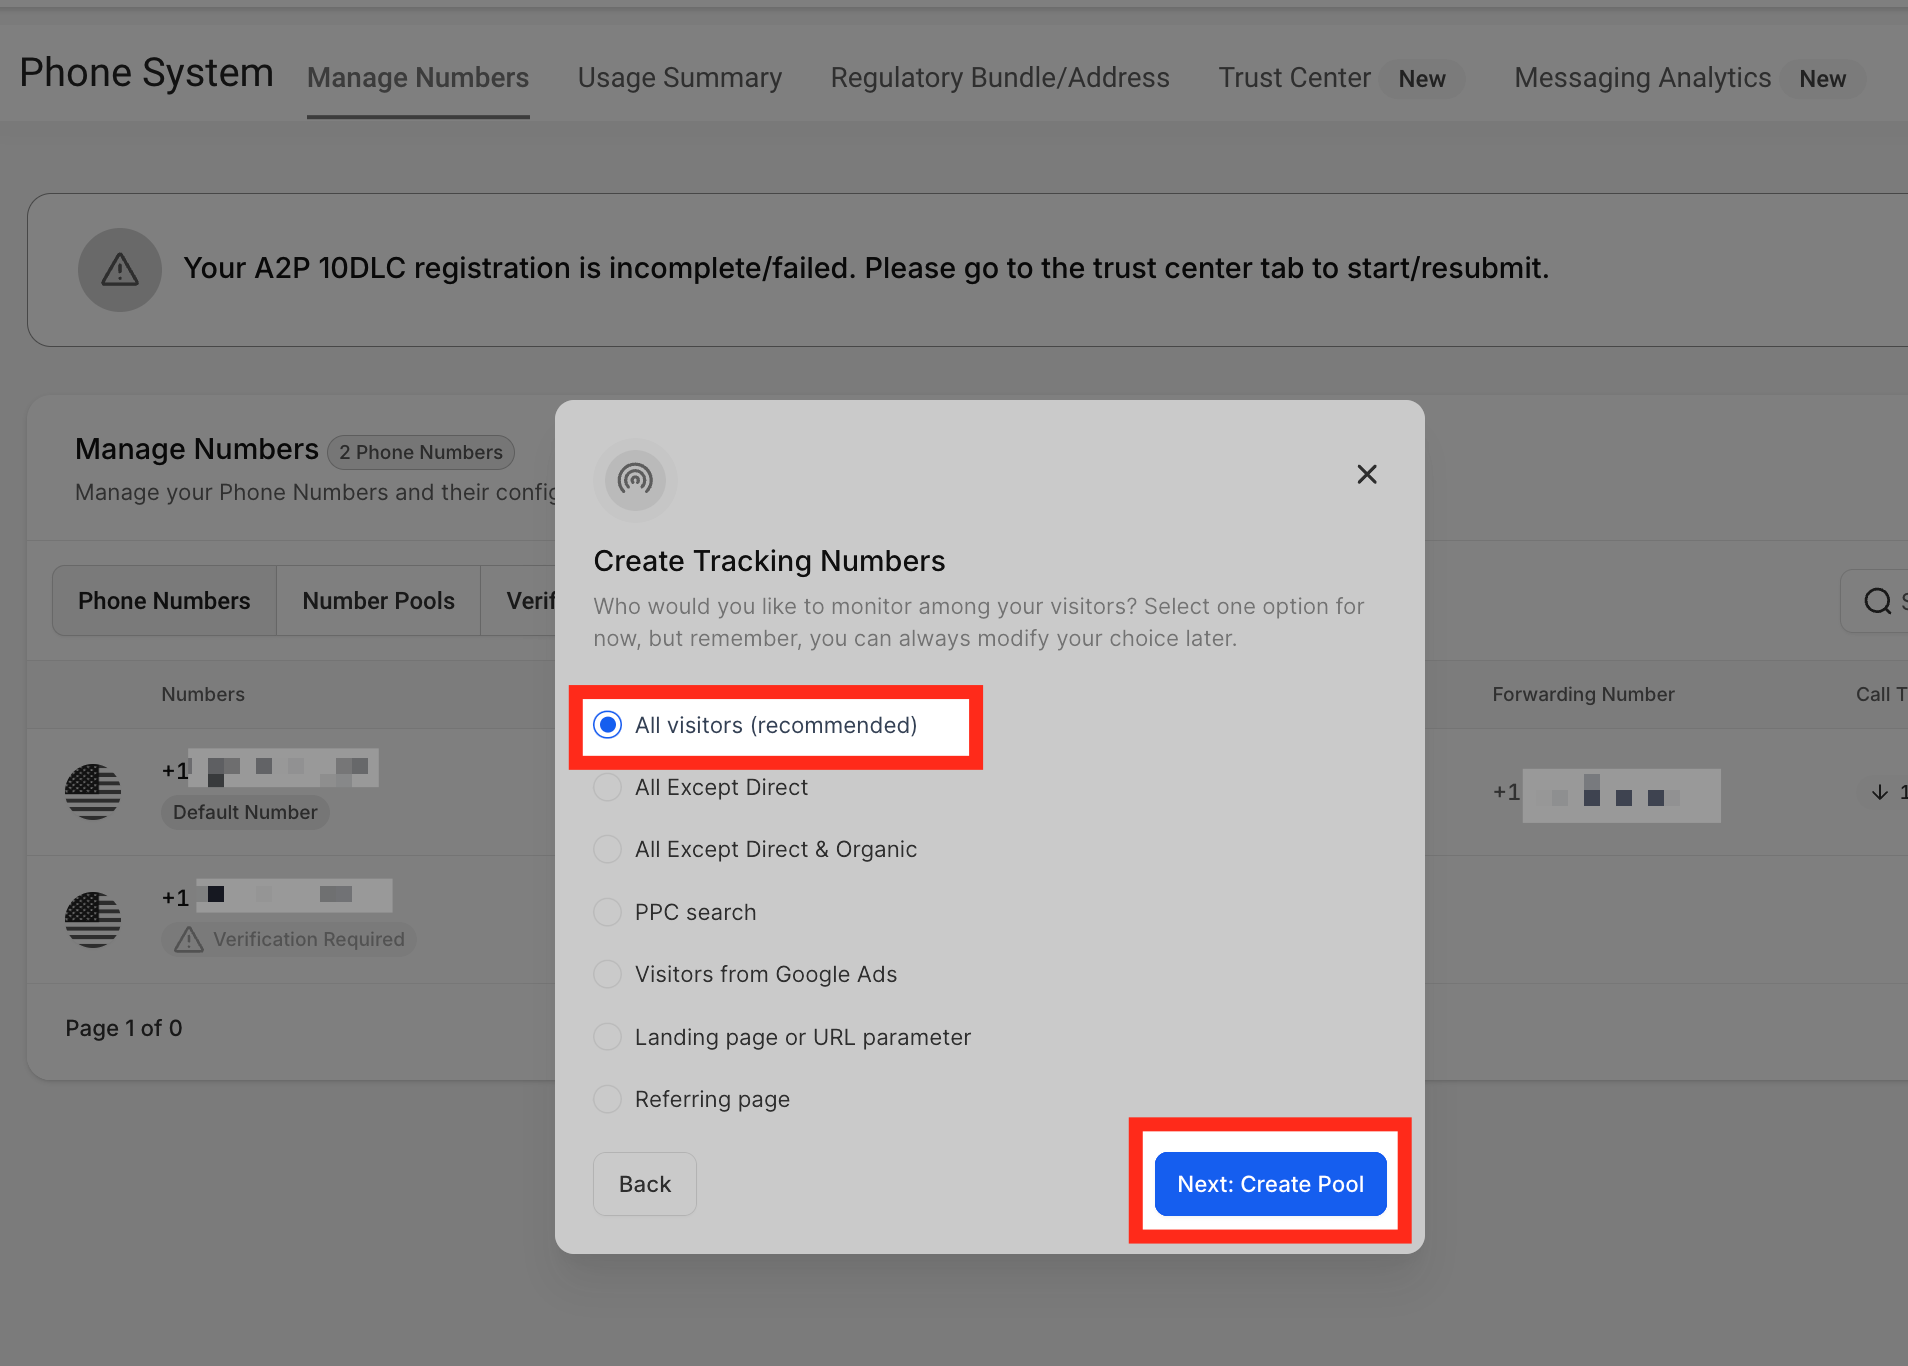
Number Name — In this field, you can name your tracking number.
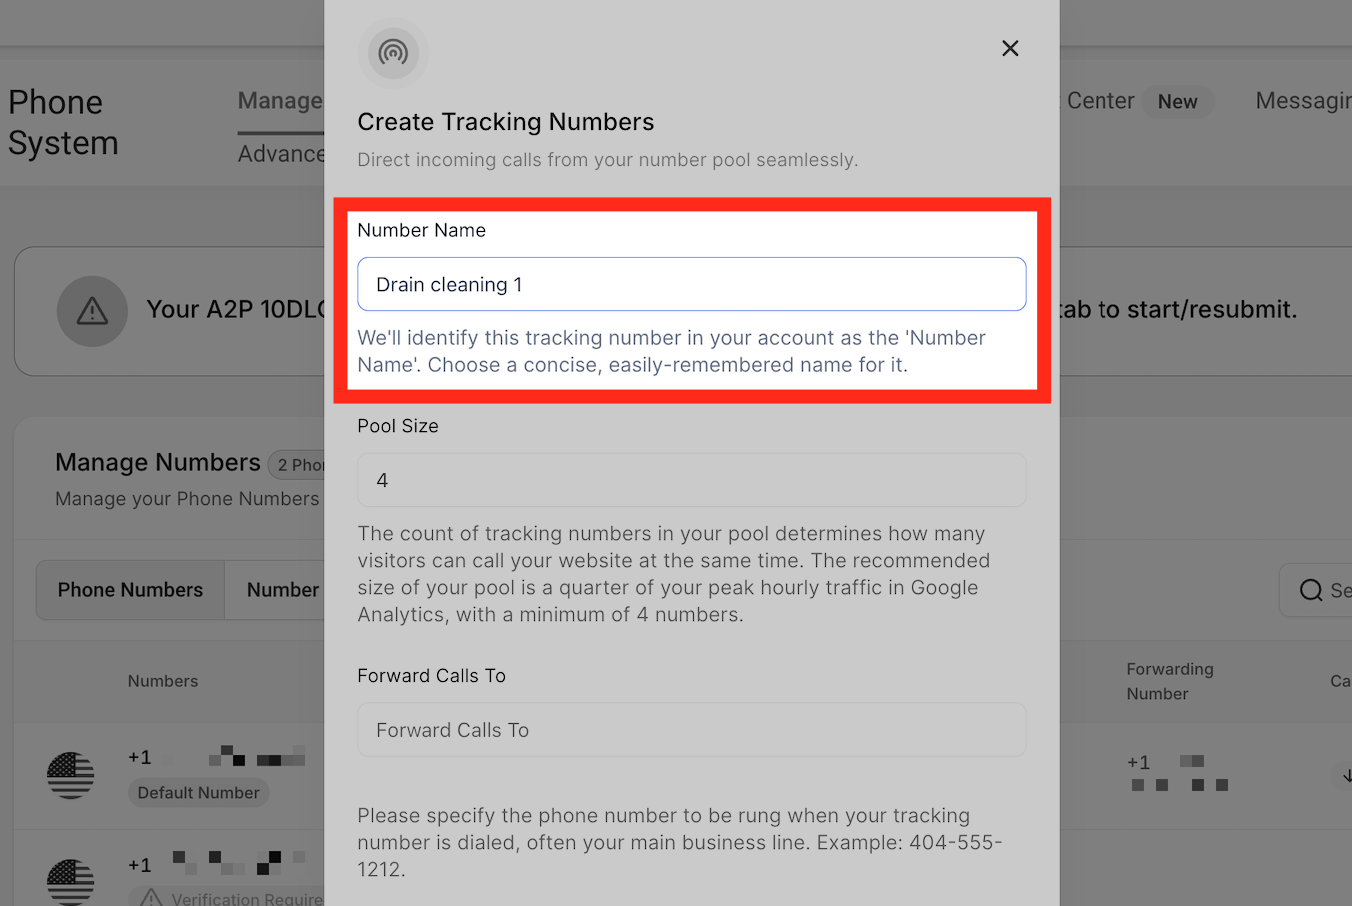
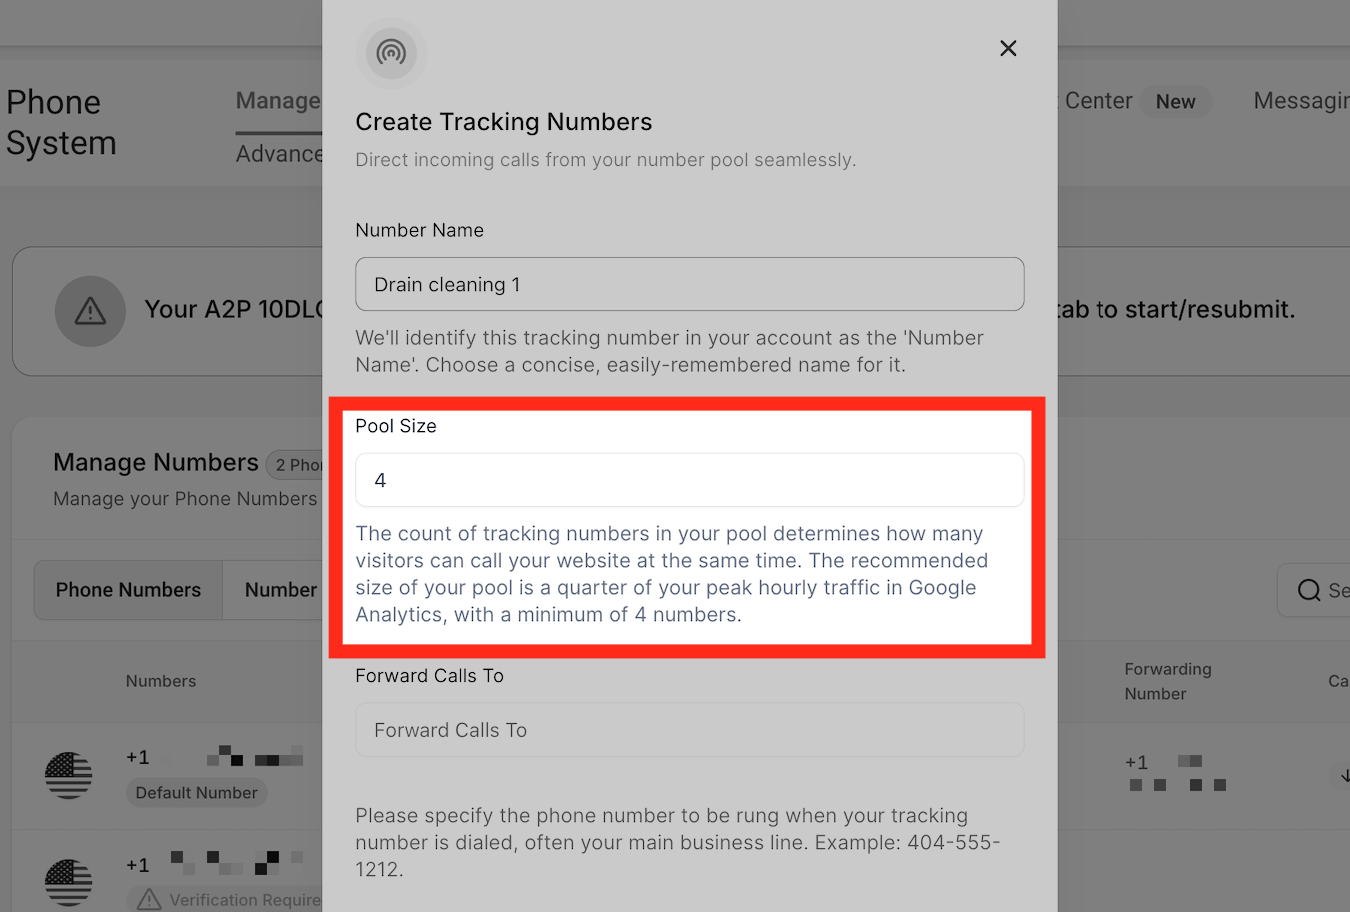
Pool Size — Each number pool has a minimum of 4 tracking numbers in it. You can decide the size of the pool depending on the volume of your calls. The more volume, the more tracking numbers will be needed.
Forwarding Number — Enter the main business number, or the number where you would like to receive calls whenever callers dial the tracking number.
You cannot use a Twilio/LC phone number as your forwarding number, as this will create a looping issue. Be sure to use a different external number to avoid call routing problems.
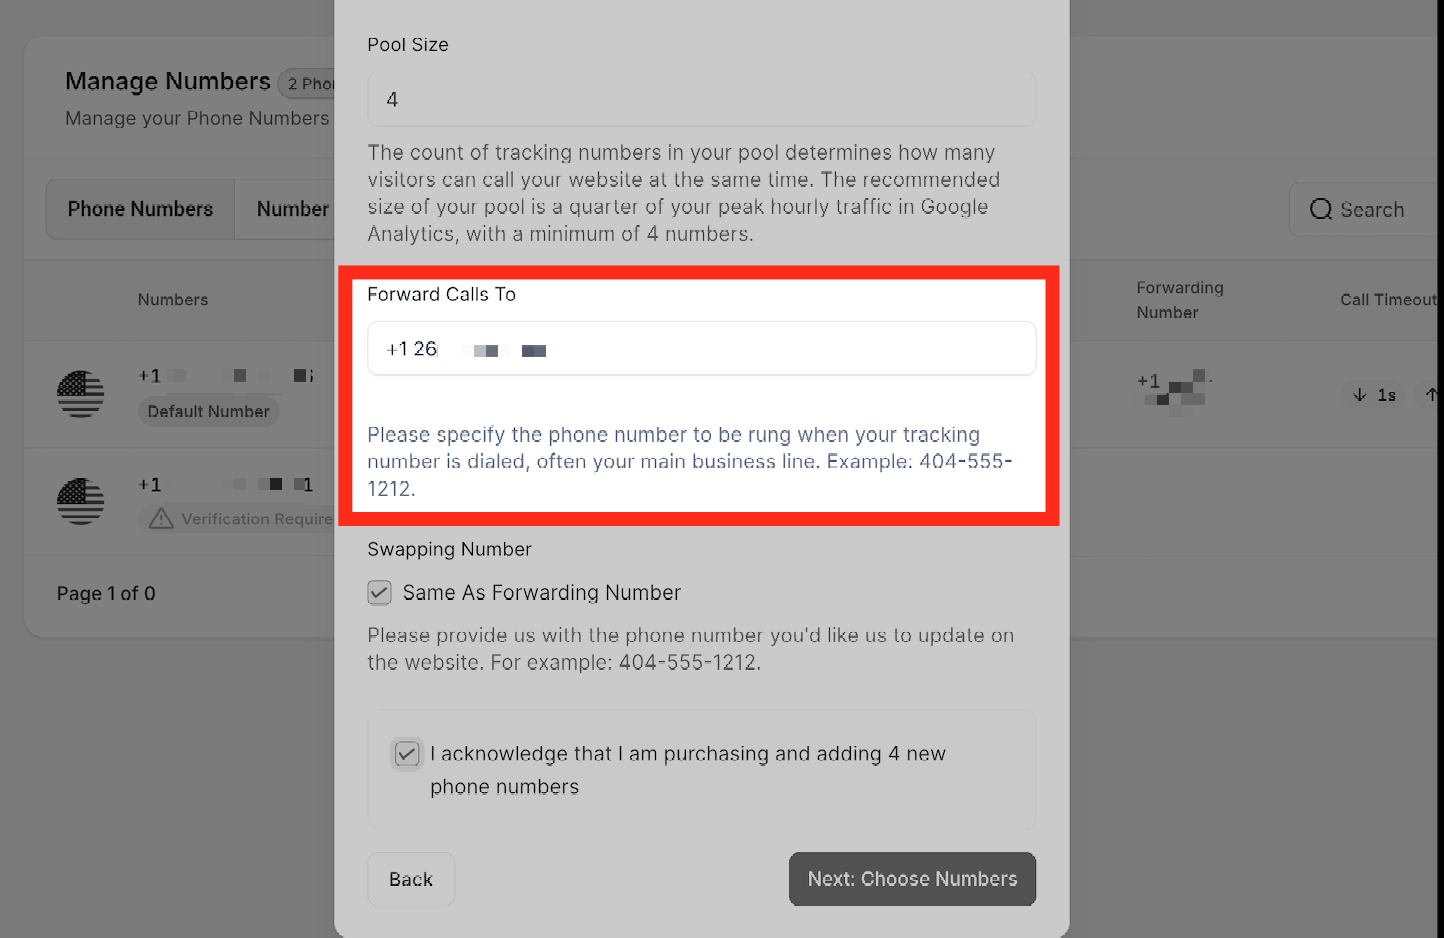
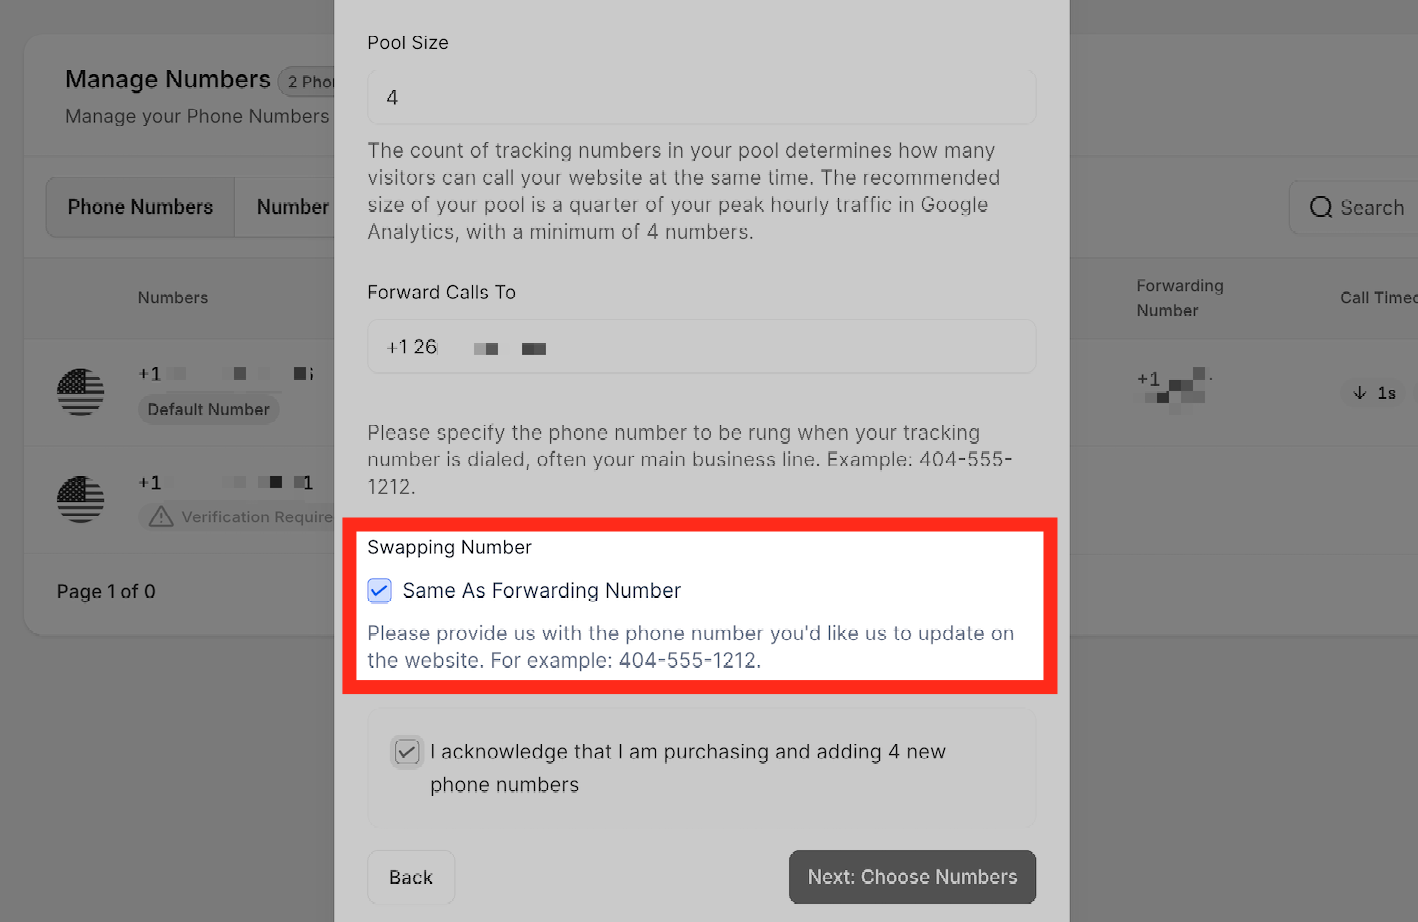
Swapping Number — Input the phone number you would like the system to update on your website. It can either be the same number as the forwarding number you set in the previous step, or you can uncheck the box to provide a different number.
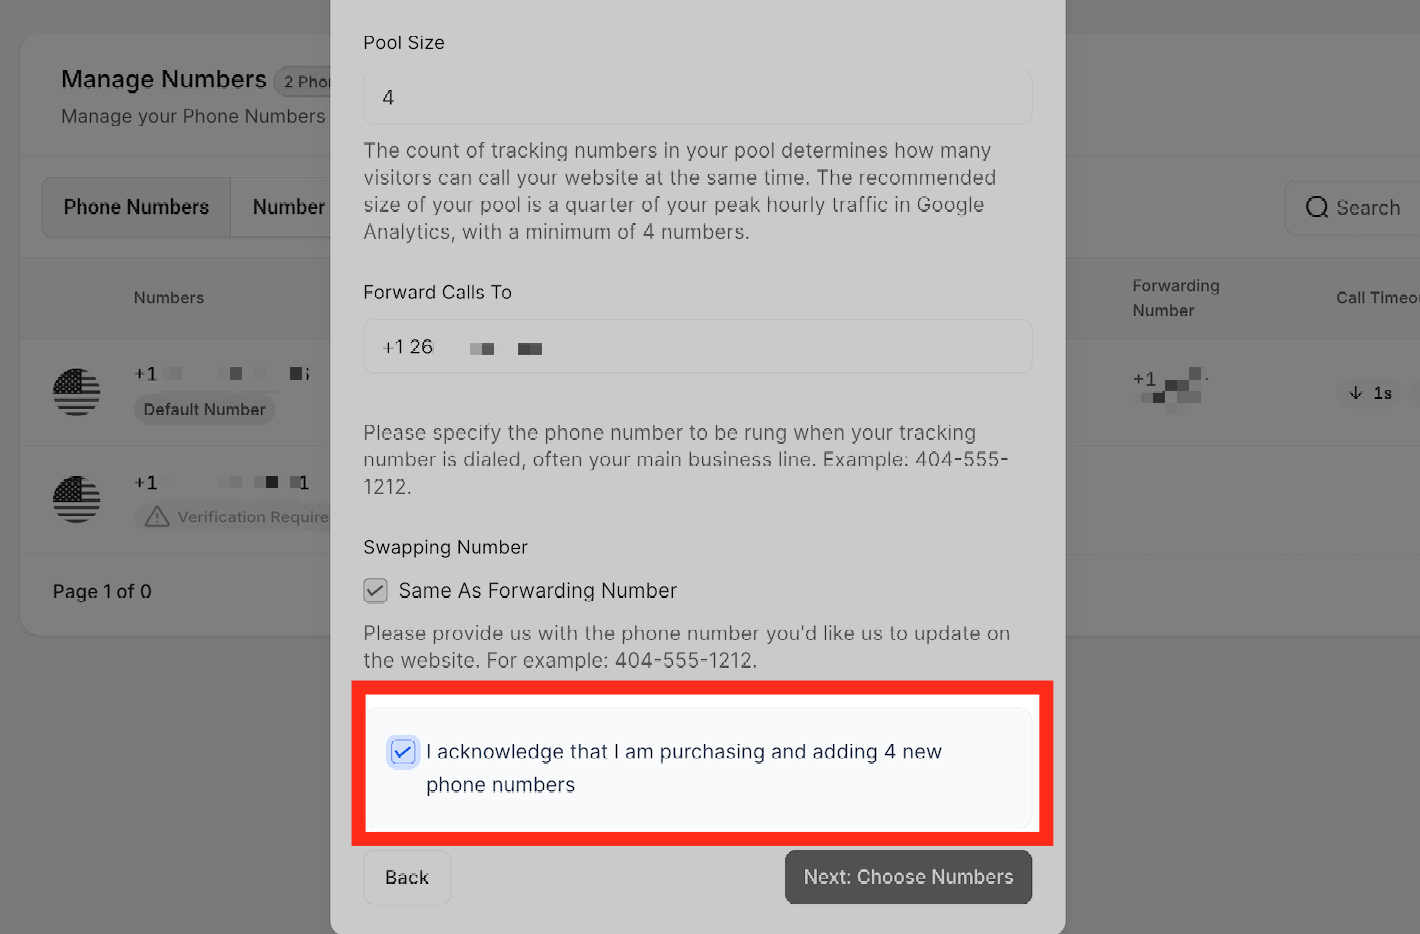
By checking this box, you acknowledge that you are purchasing 4 new phone numbers to add to your number pool.
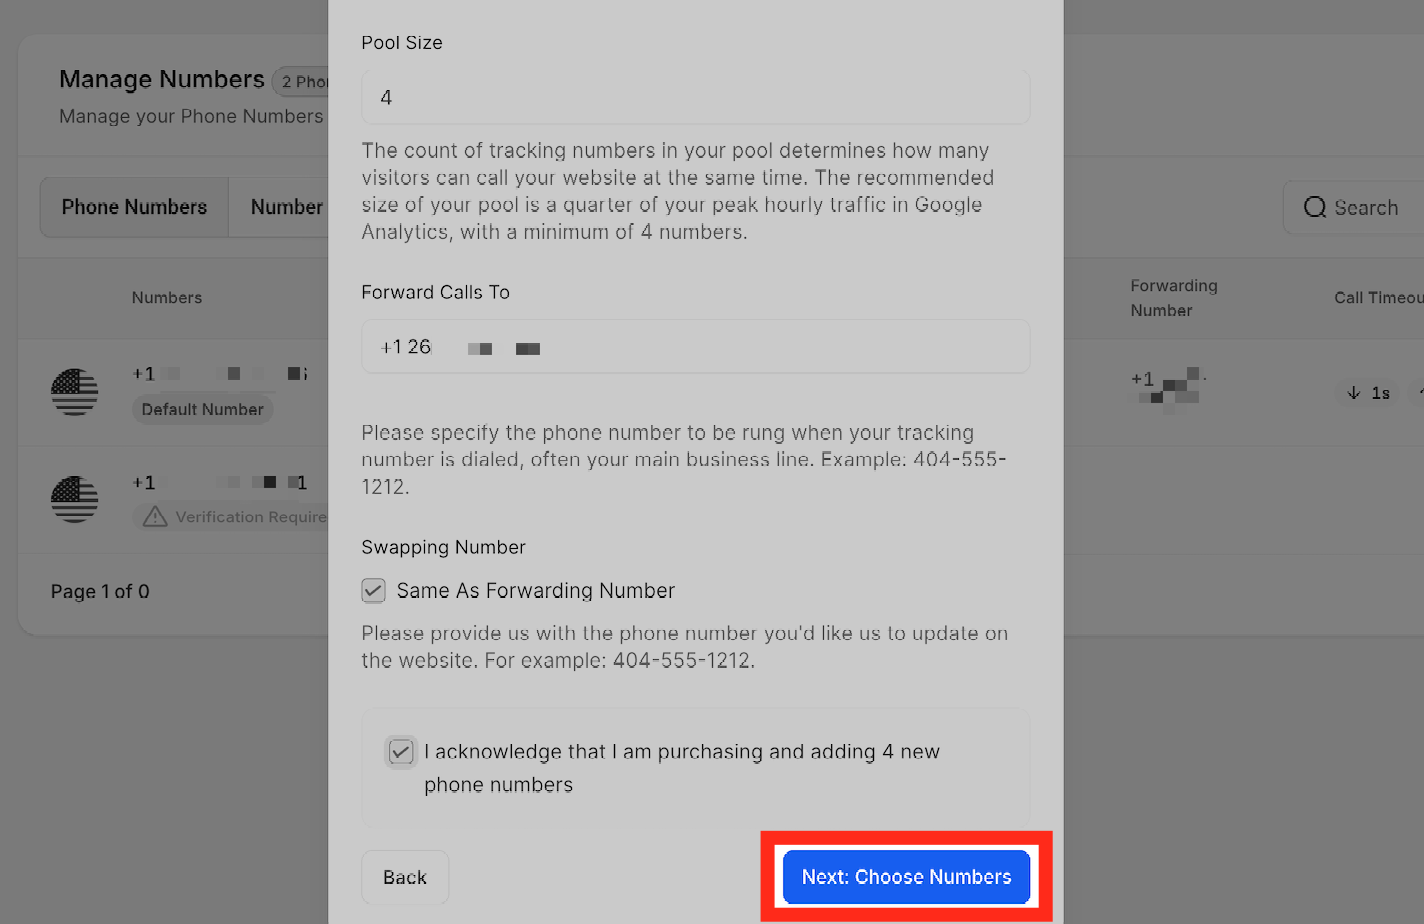
Once you fill out all the information, click Next: Choose Numbers.
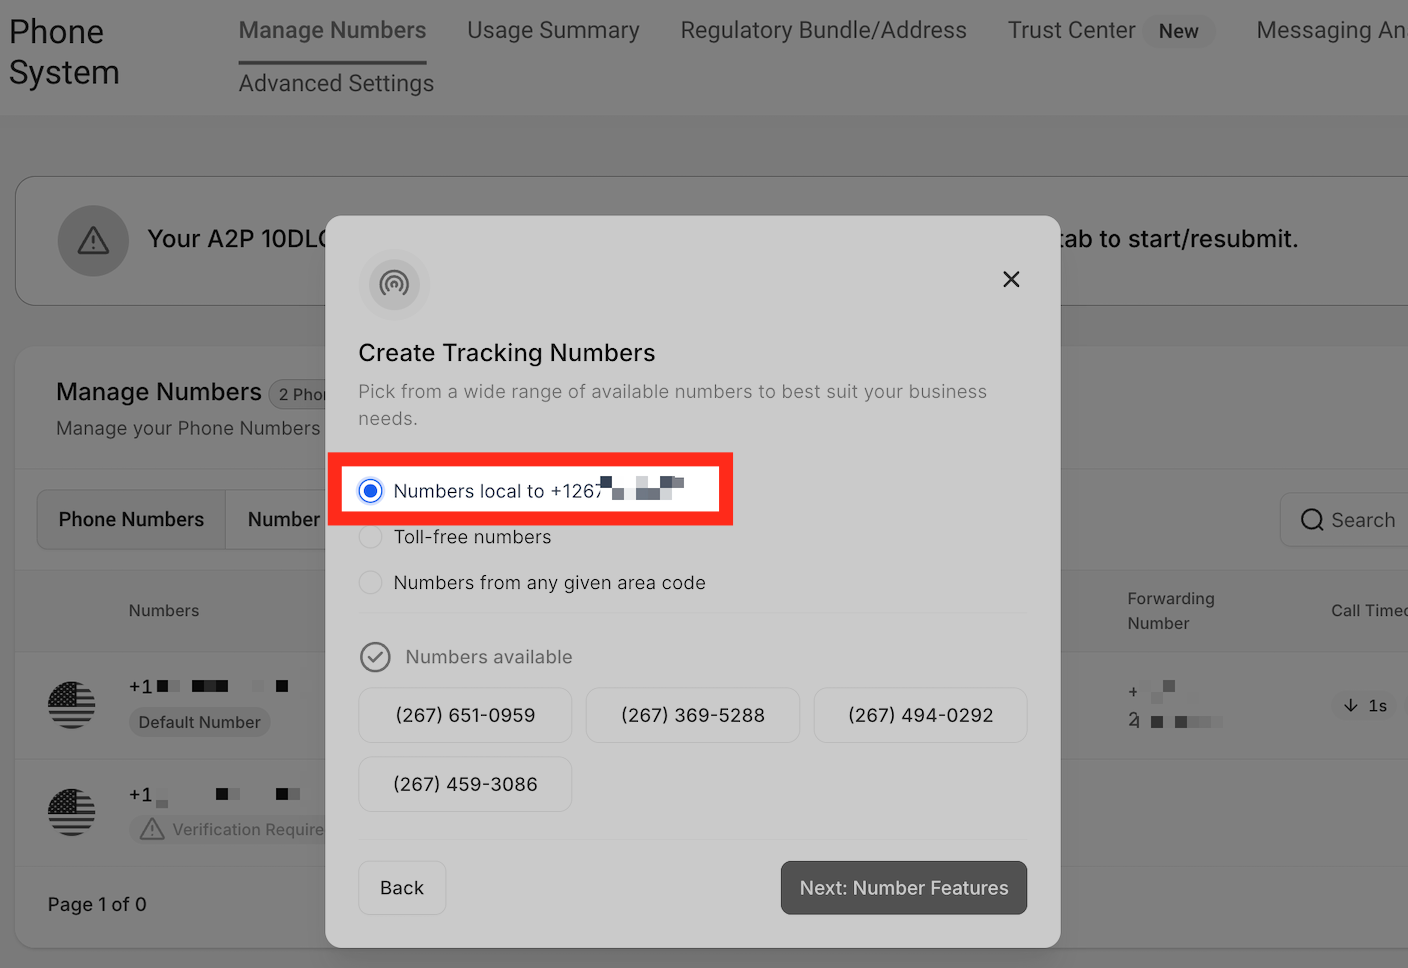
When creating tracking numbers, you have the option to choose phone number(s) local to the area code, a toll-free number, or numbers from any given area code.
Local Number — When you select local number, you will be shown 4 different phone numbers local to the phone number you have set as a "Forwarding Number" earlier in this process.
Toll-free numbers — This option gives you the ability to choose toll-free numbers for your number pool. Use this option when there are no numbers available in your desired area code.
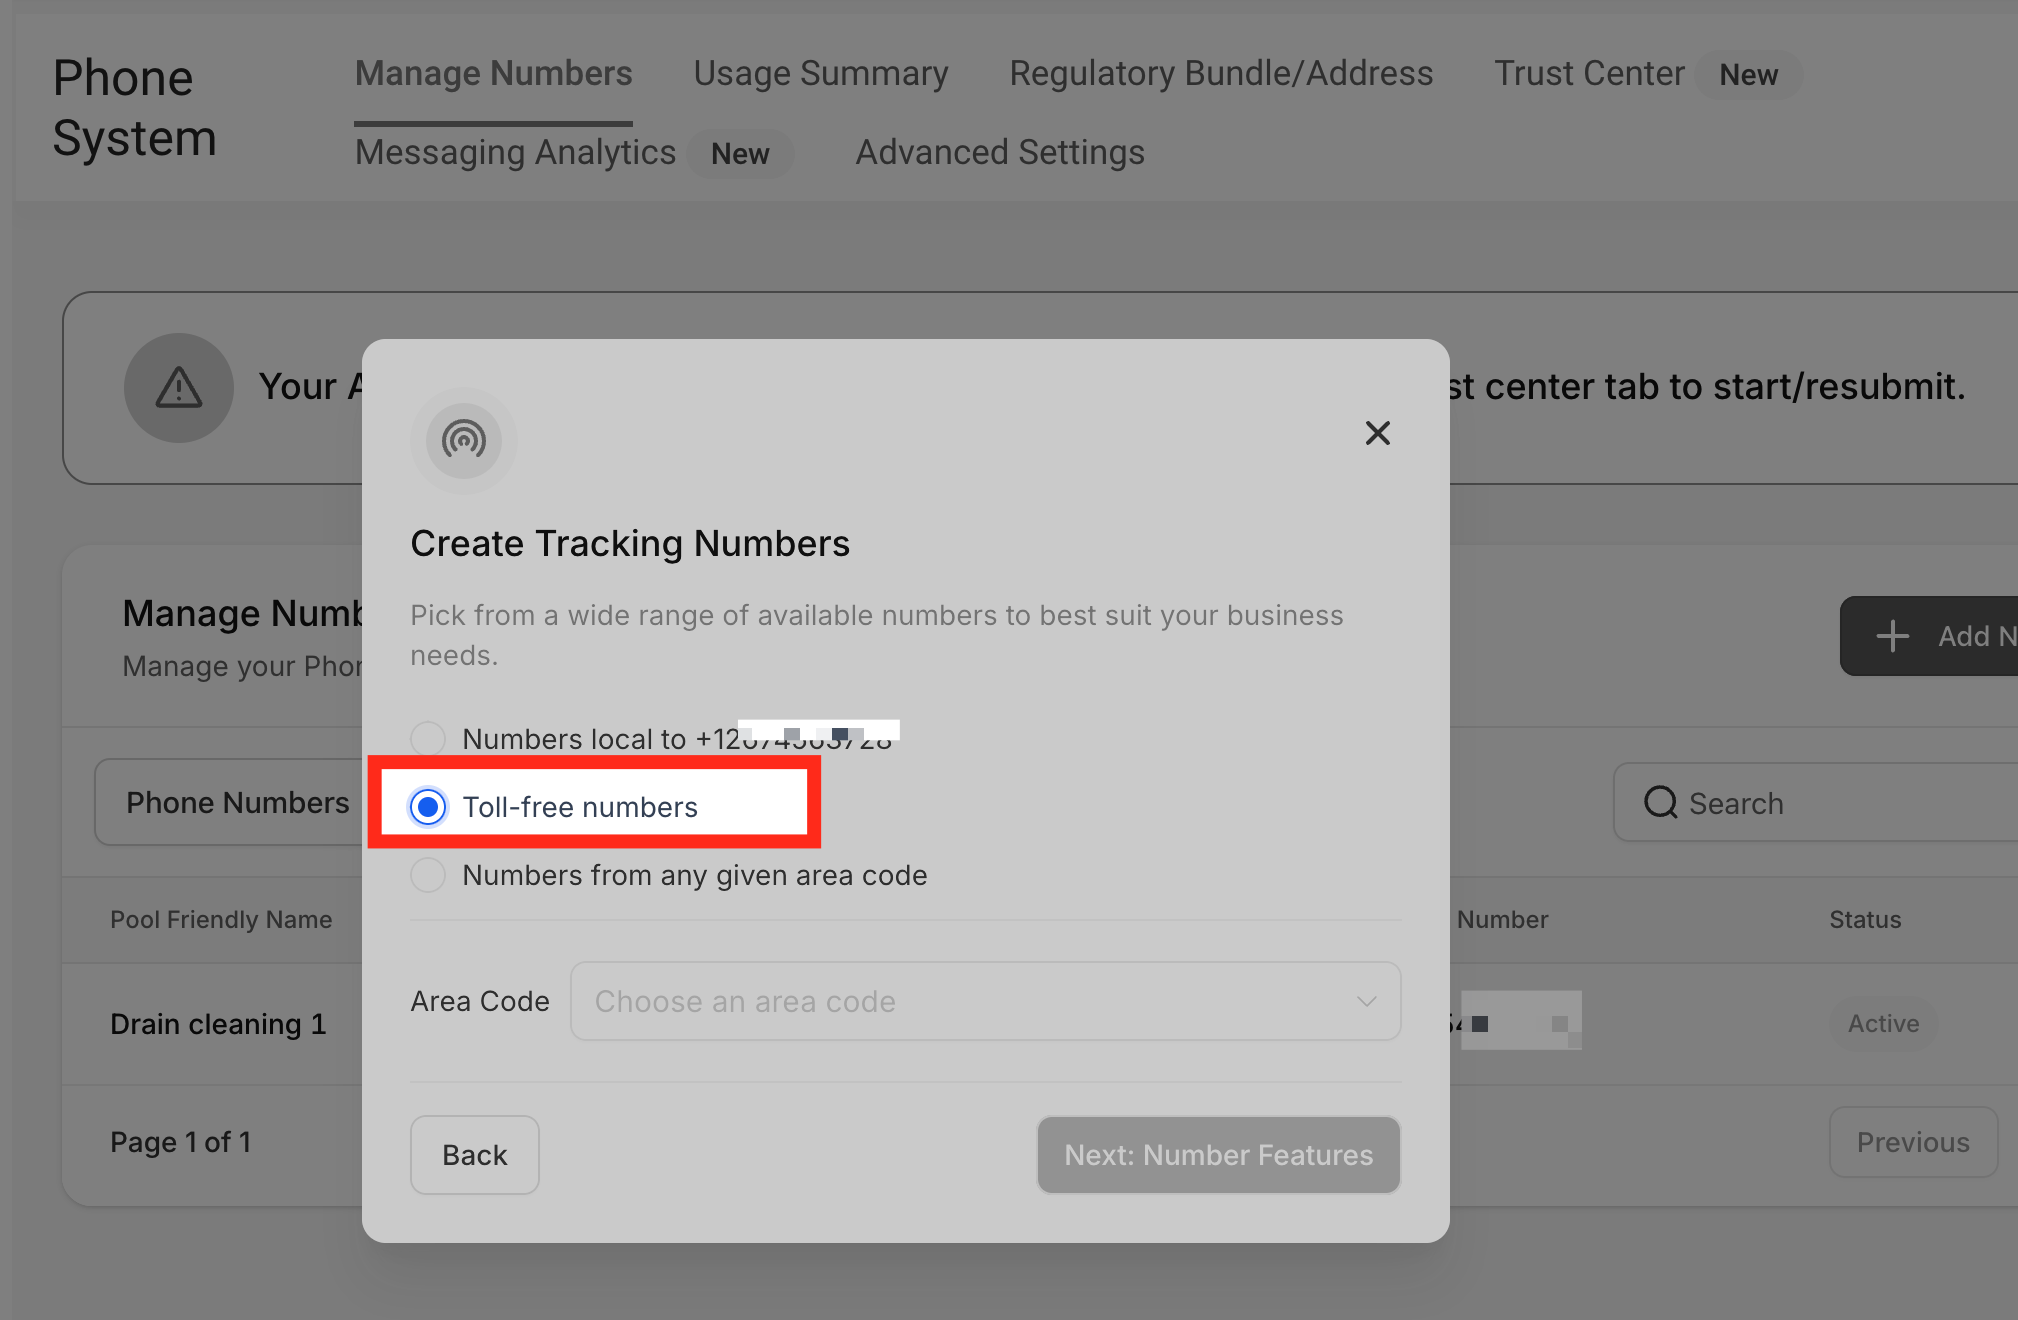
To see the available toll-free numbers, choose the area code from the dropdown menu.
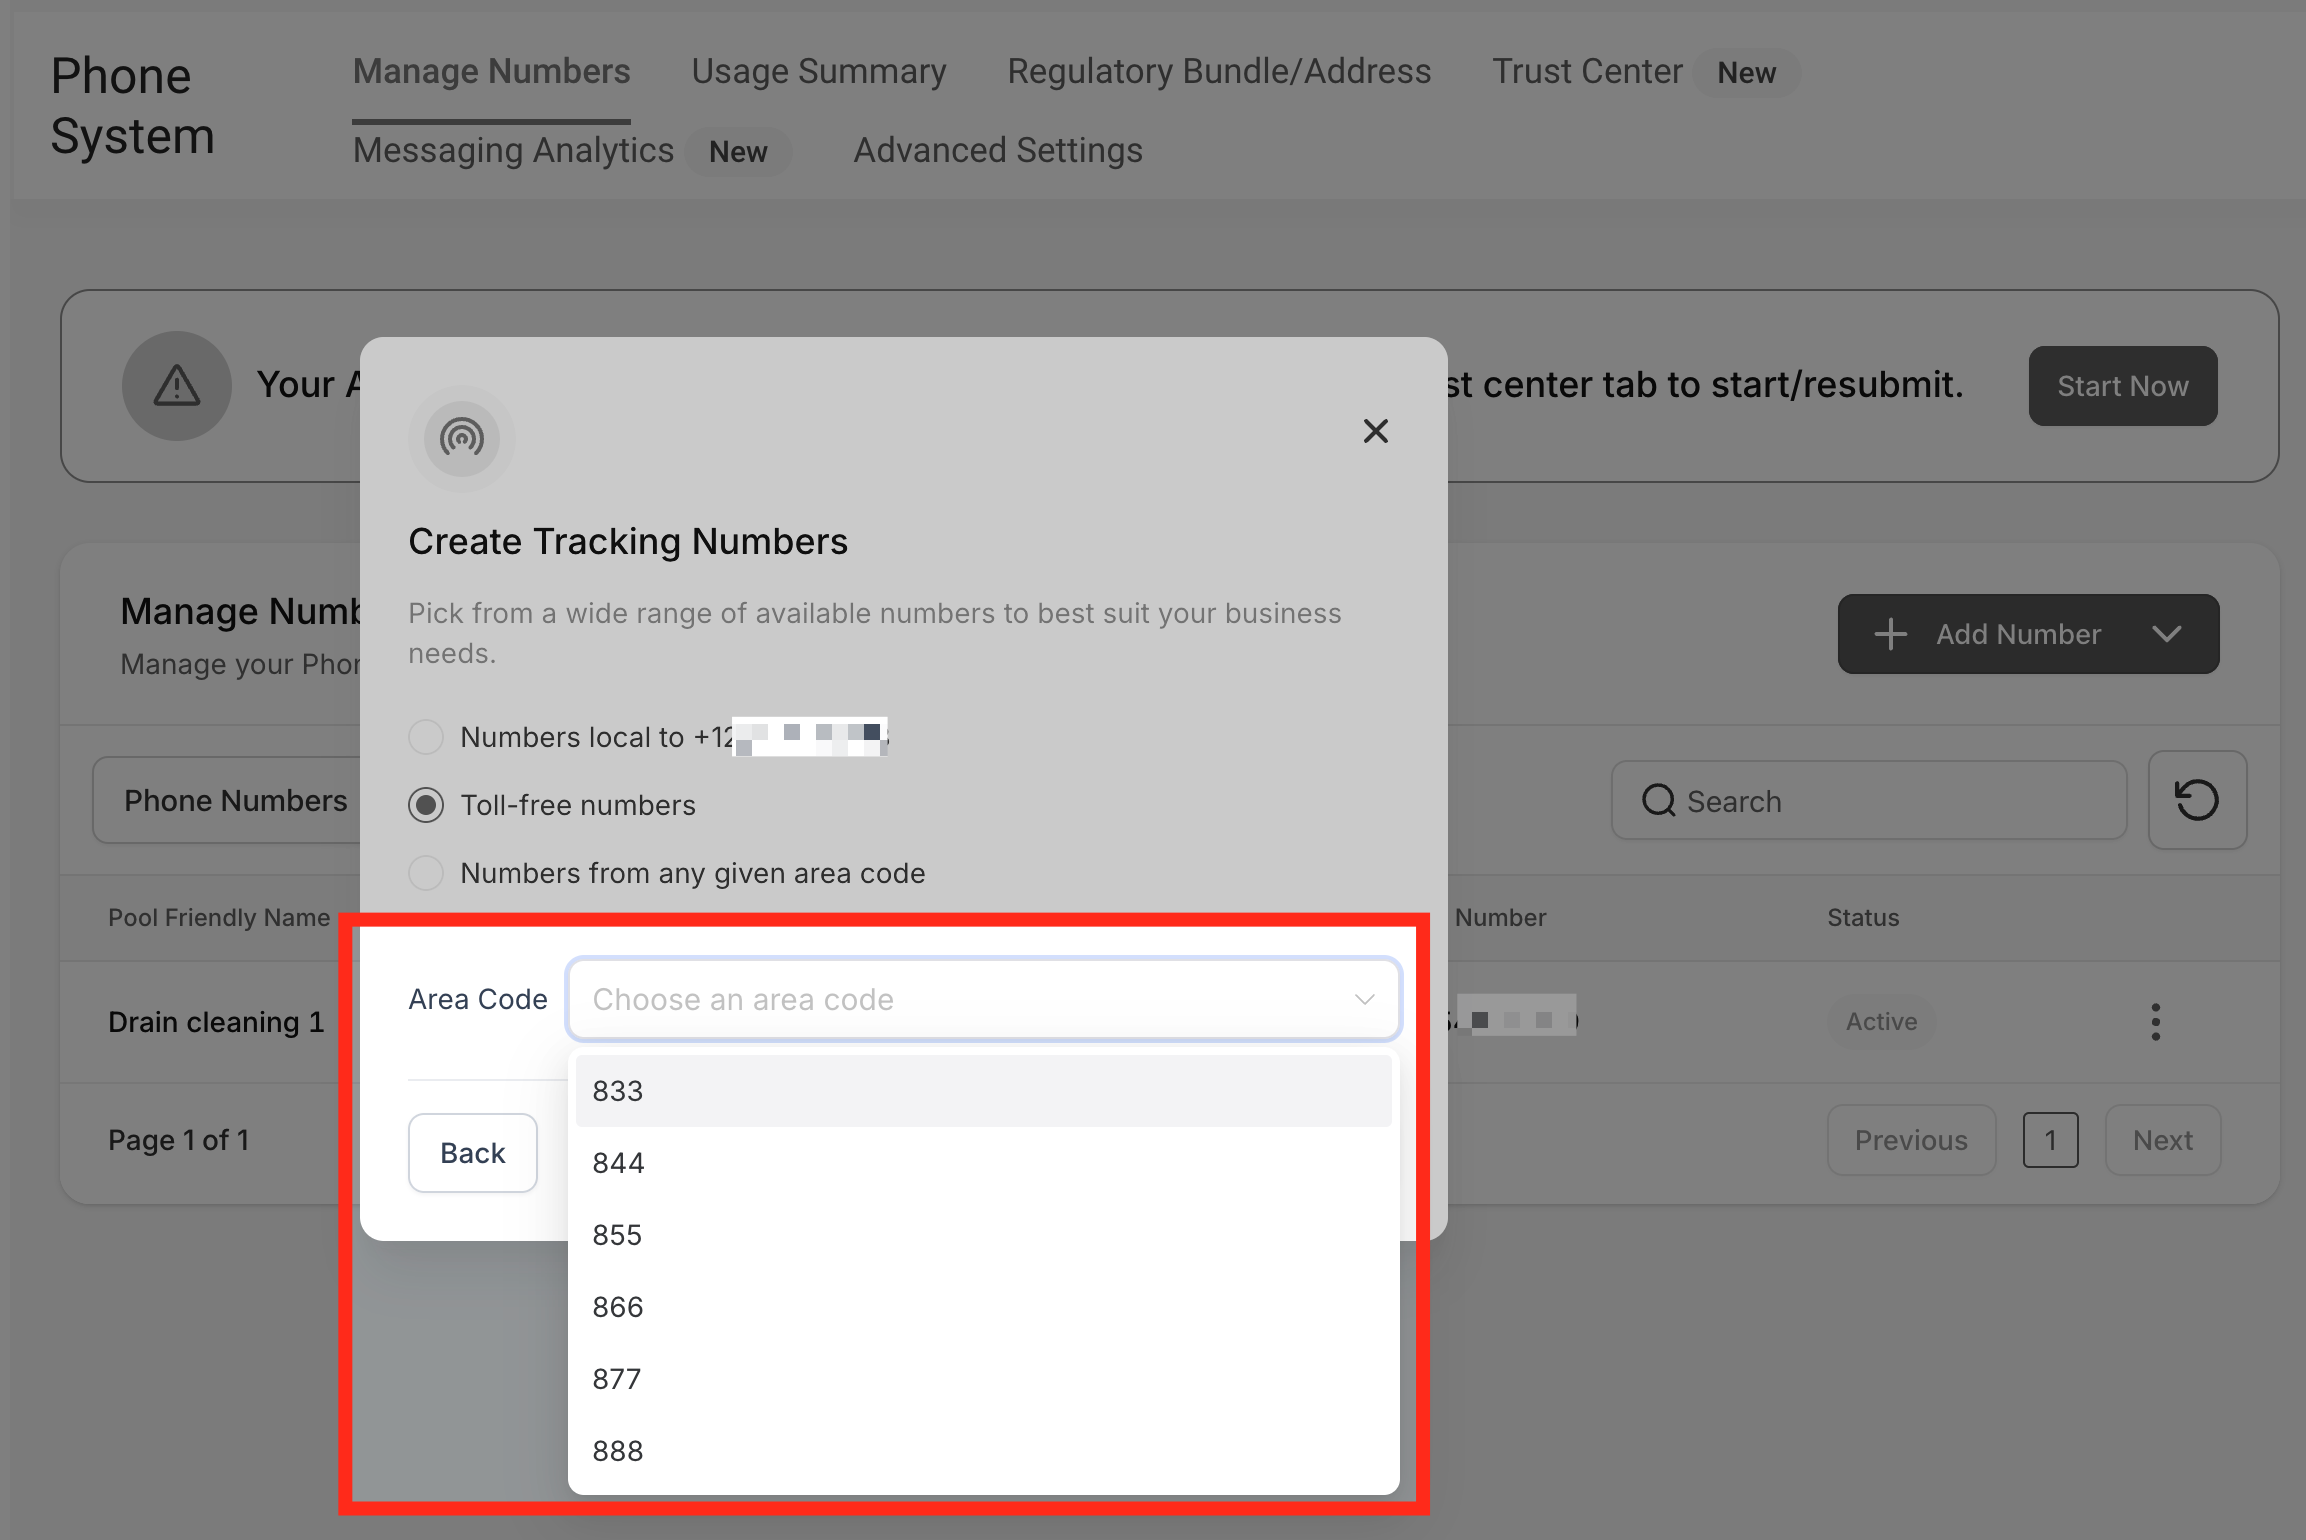
Numbers from any given area code — If you are open to choosing a phone number from a different region, just type the area code and click "Check Availability," and you will see the available phone numbers in a few seconds.
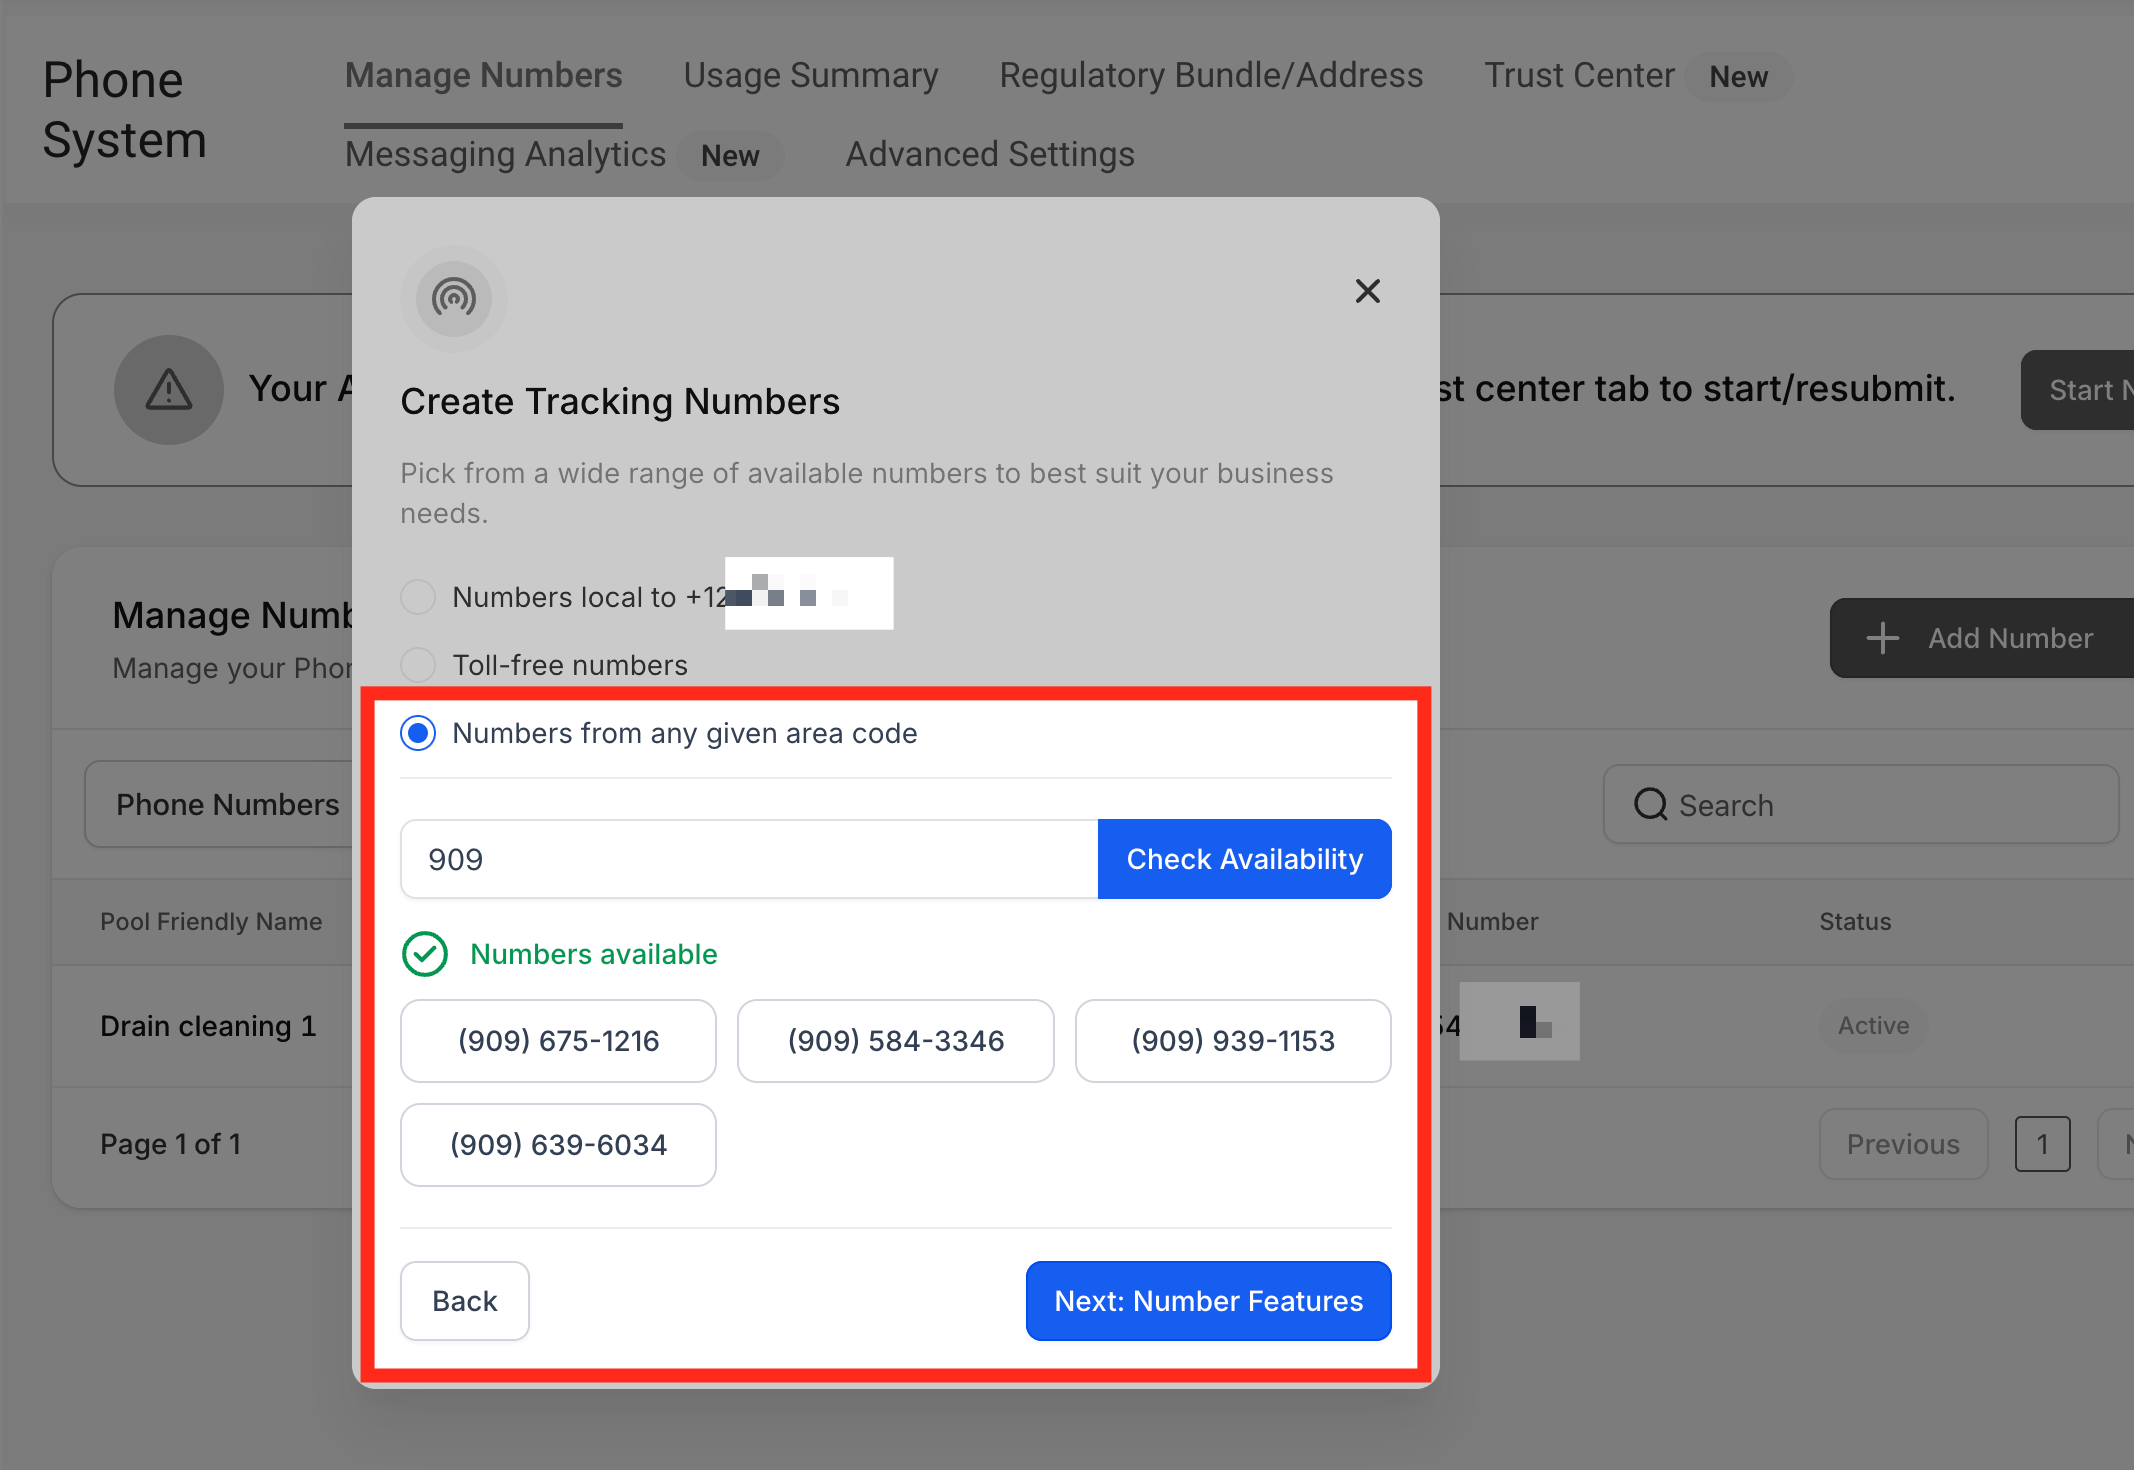
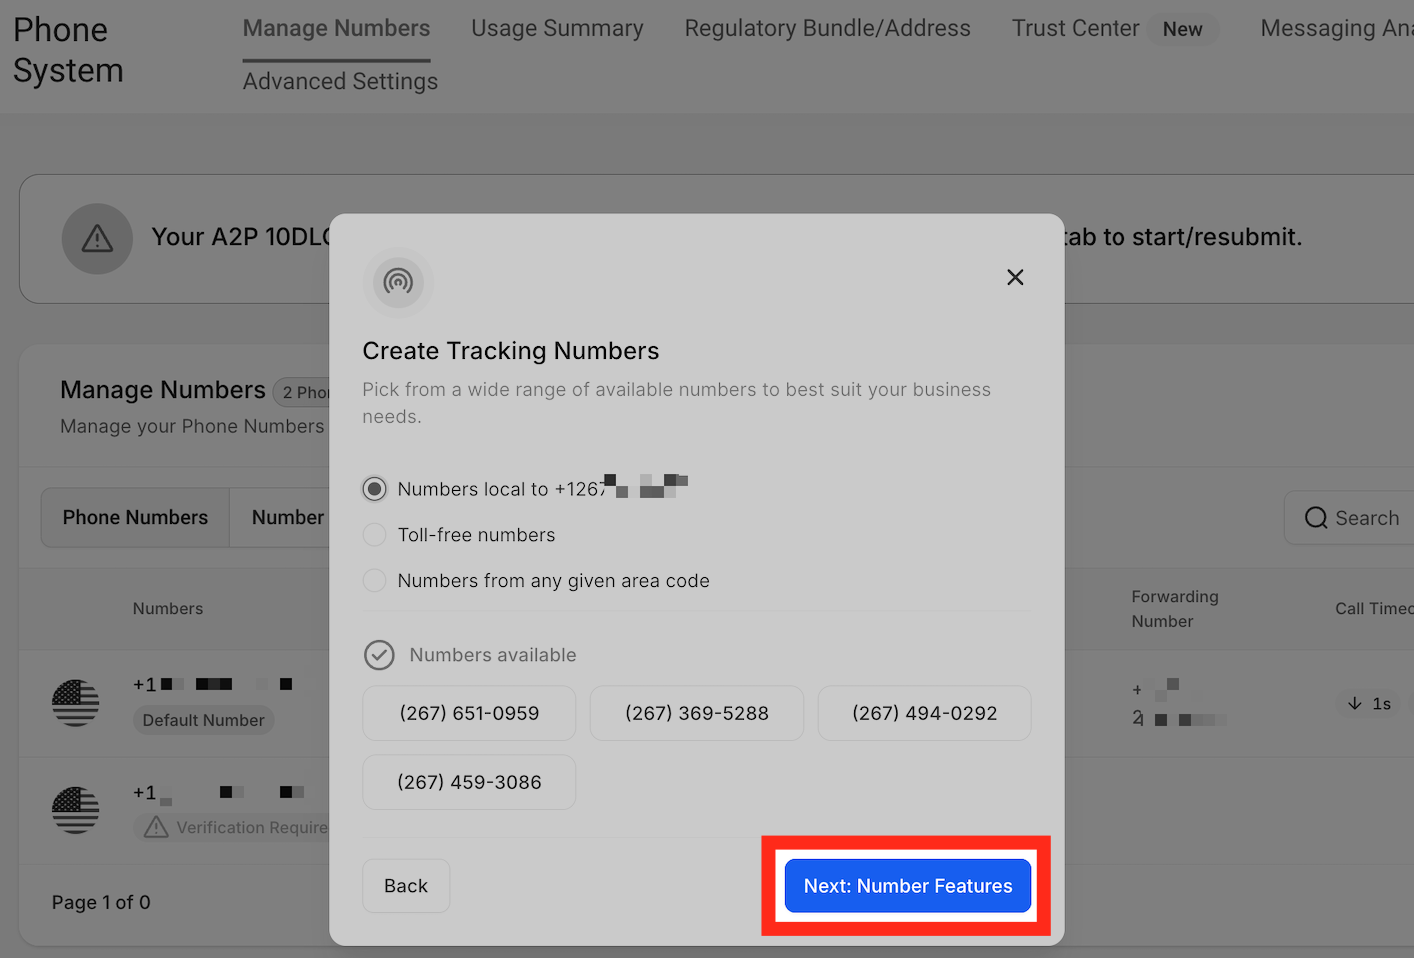
Once you've created a tracking number using any of the 3 methods above, let's move to the next steps — click "Next: Number Features."
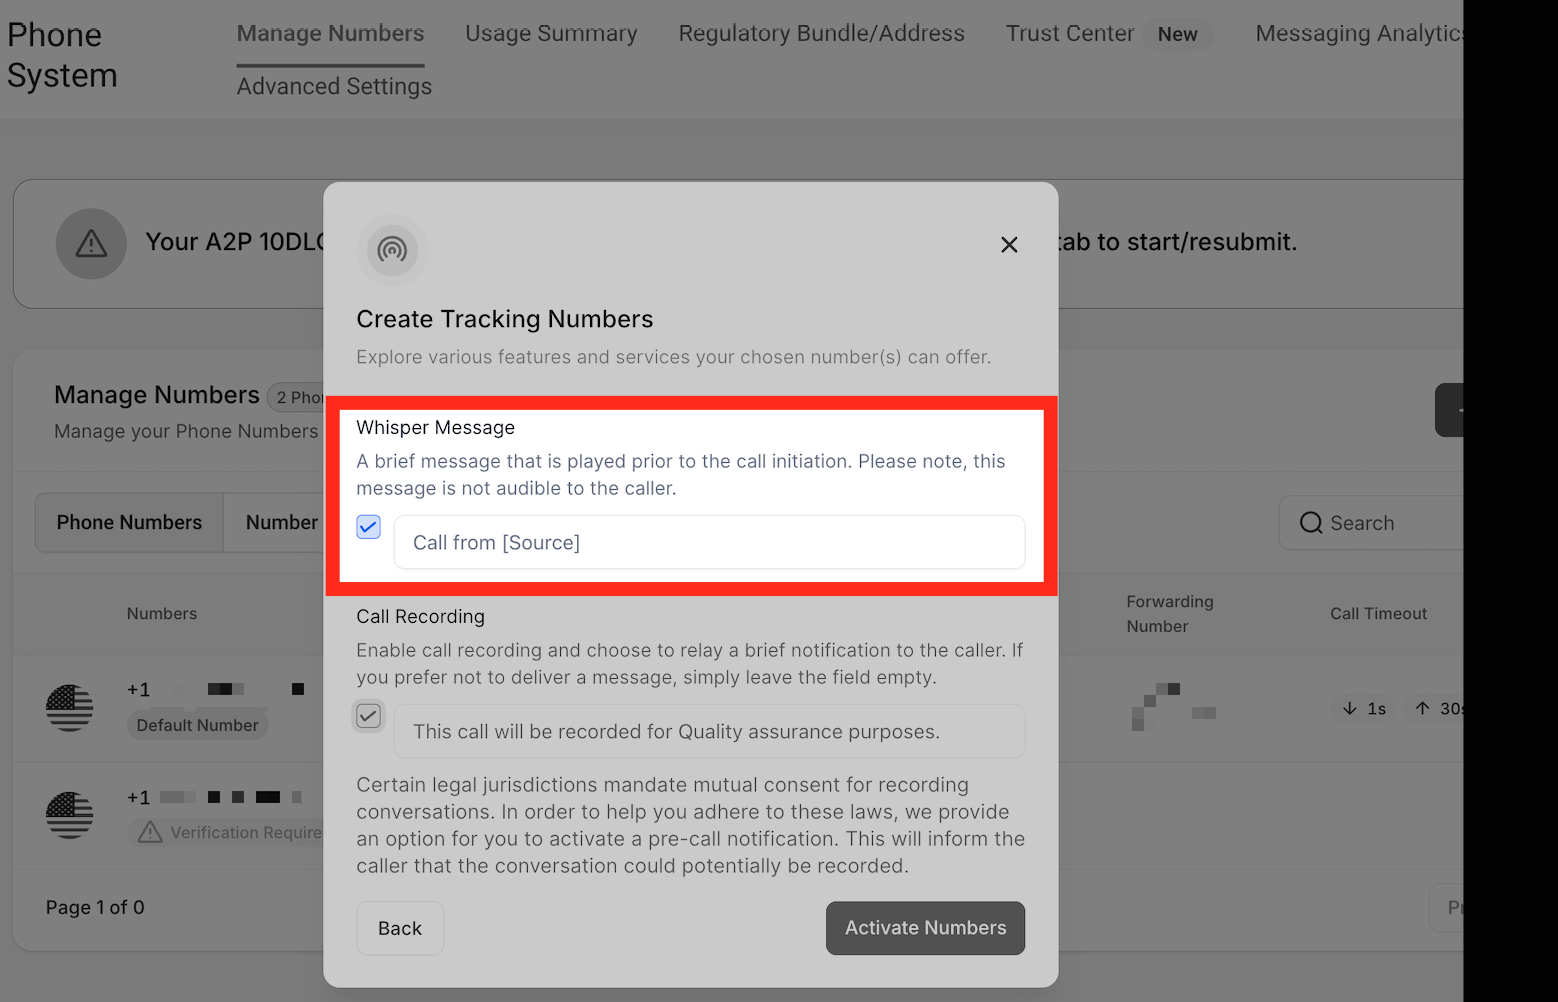
Whisper Message — When you receive a call, you will hear this message. If you set the whisper message as "Call from [Source]," it will sound something like "Call from a ad campaign." The caller cannot hear this message — it's only for you as a CRM user.
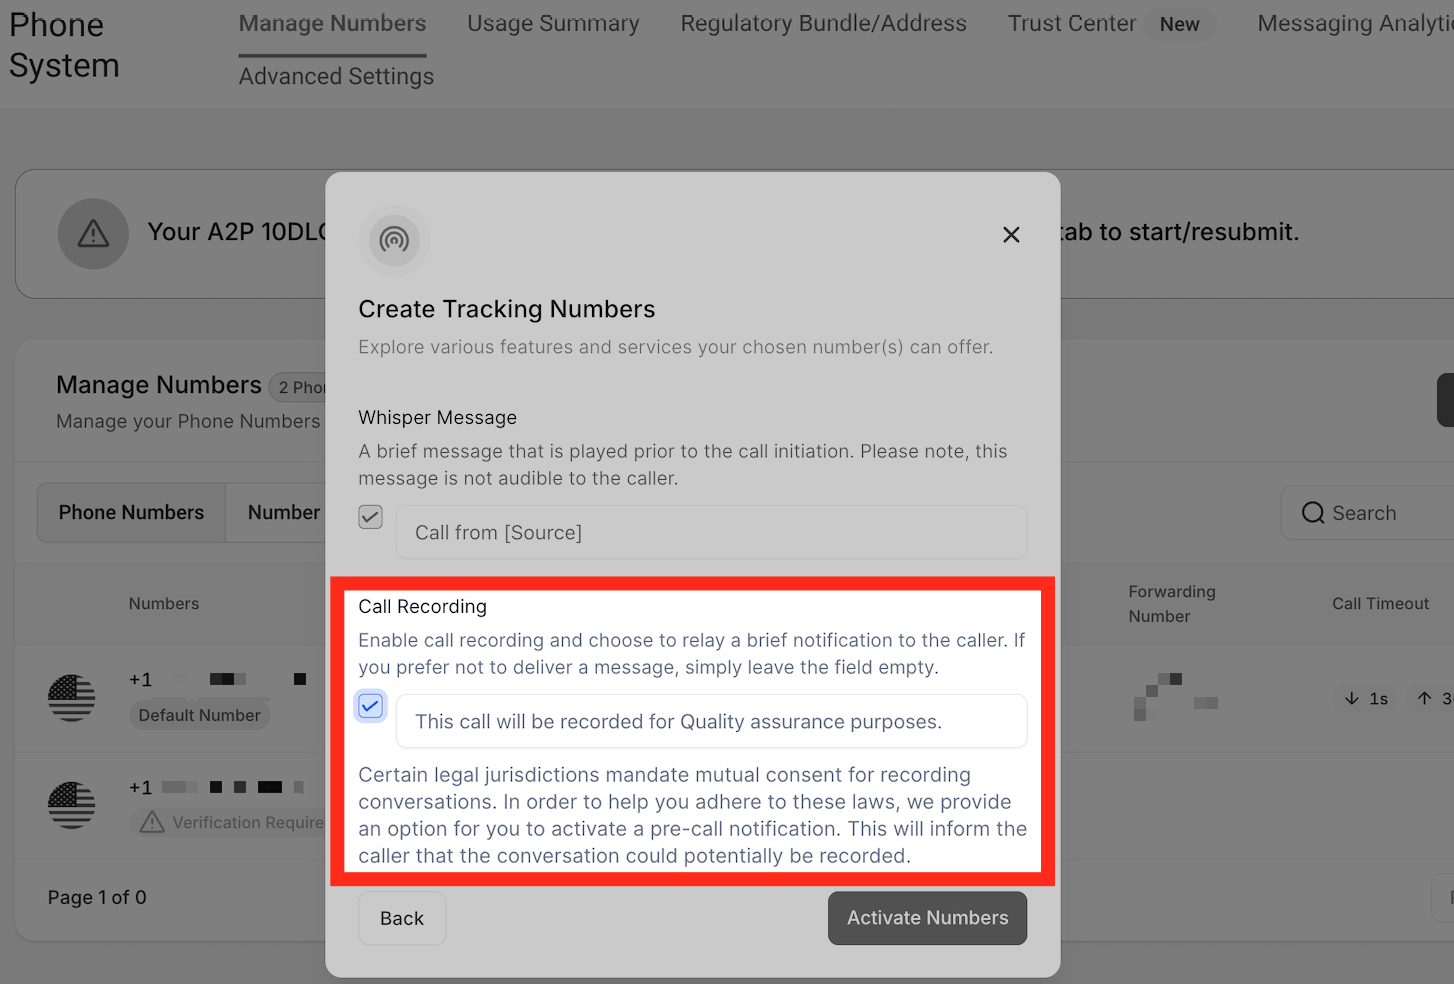
Call Recording — Use the checkbox to allow the system to record calls, and customize the message the caller hears, such as "This call will be recorded for quality assurance purposes."
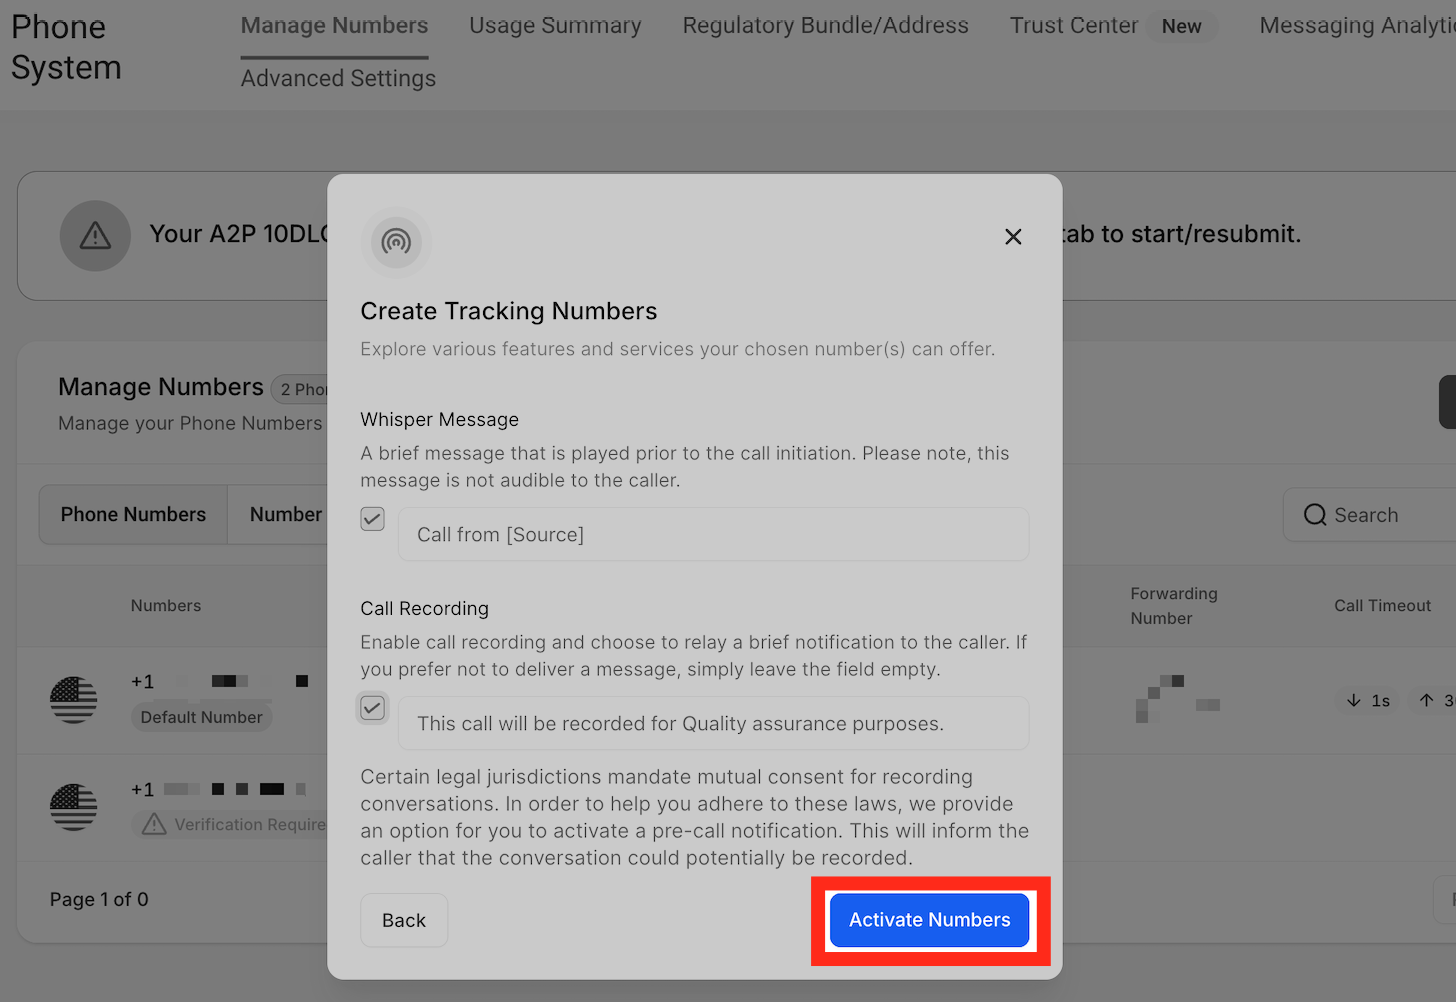
Click on Activate Number.
Integrate the Tracking Snippet on Your Website
Once you set up the number pool, you will need to integrate the snippet on your website. Below is the step-by-step process:
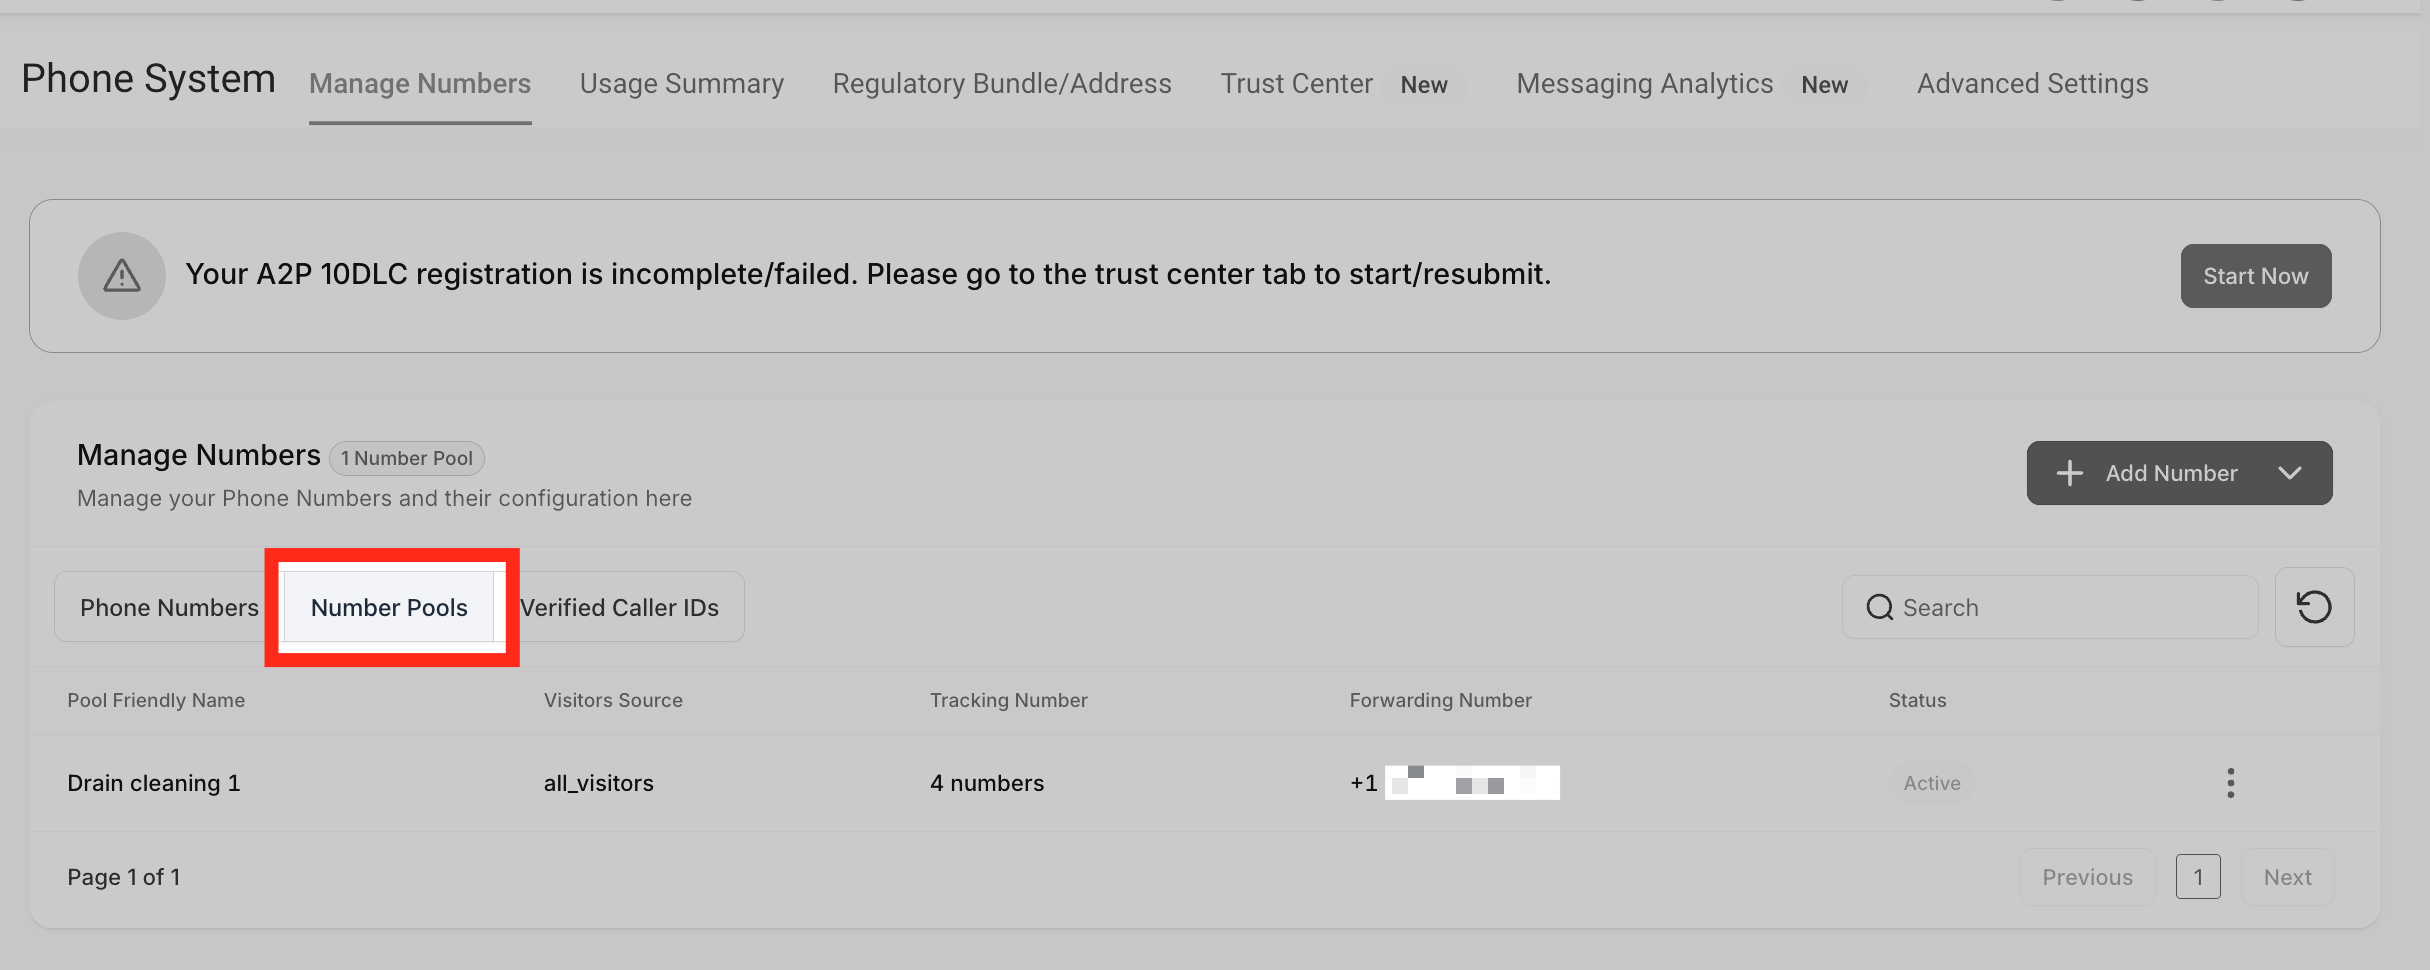
Go to Number Pools. Go to the number pool you want to use, then click the three dots.
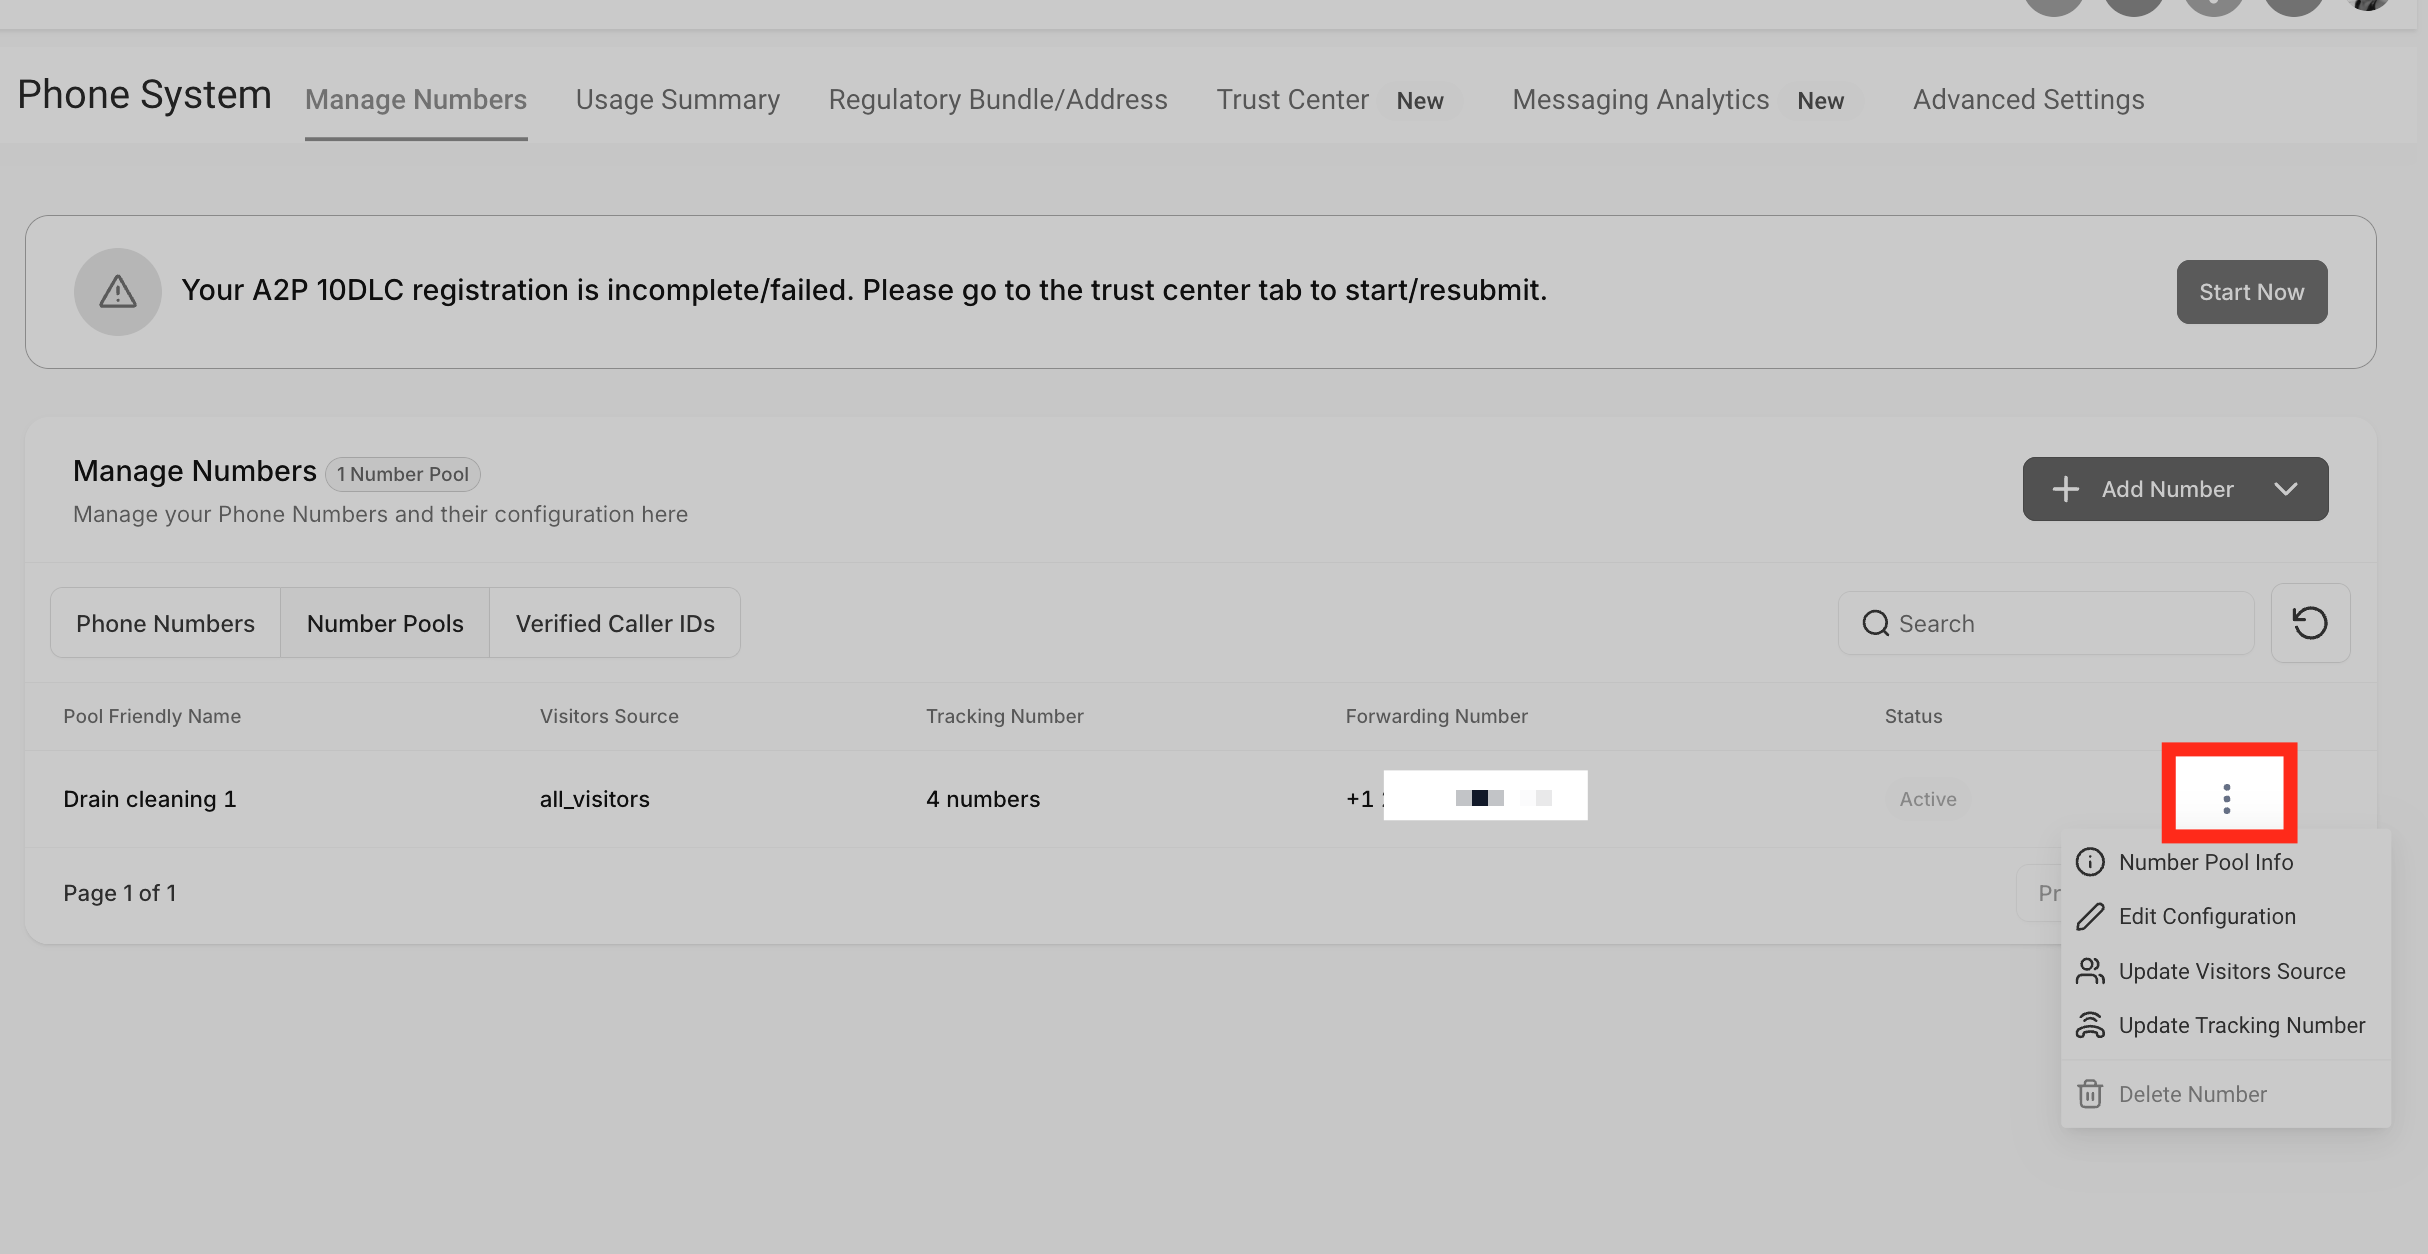
Click "Number Pool Info."
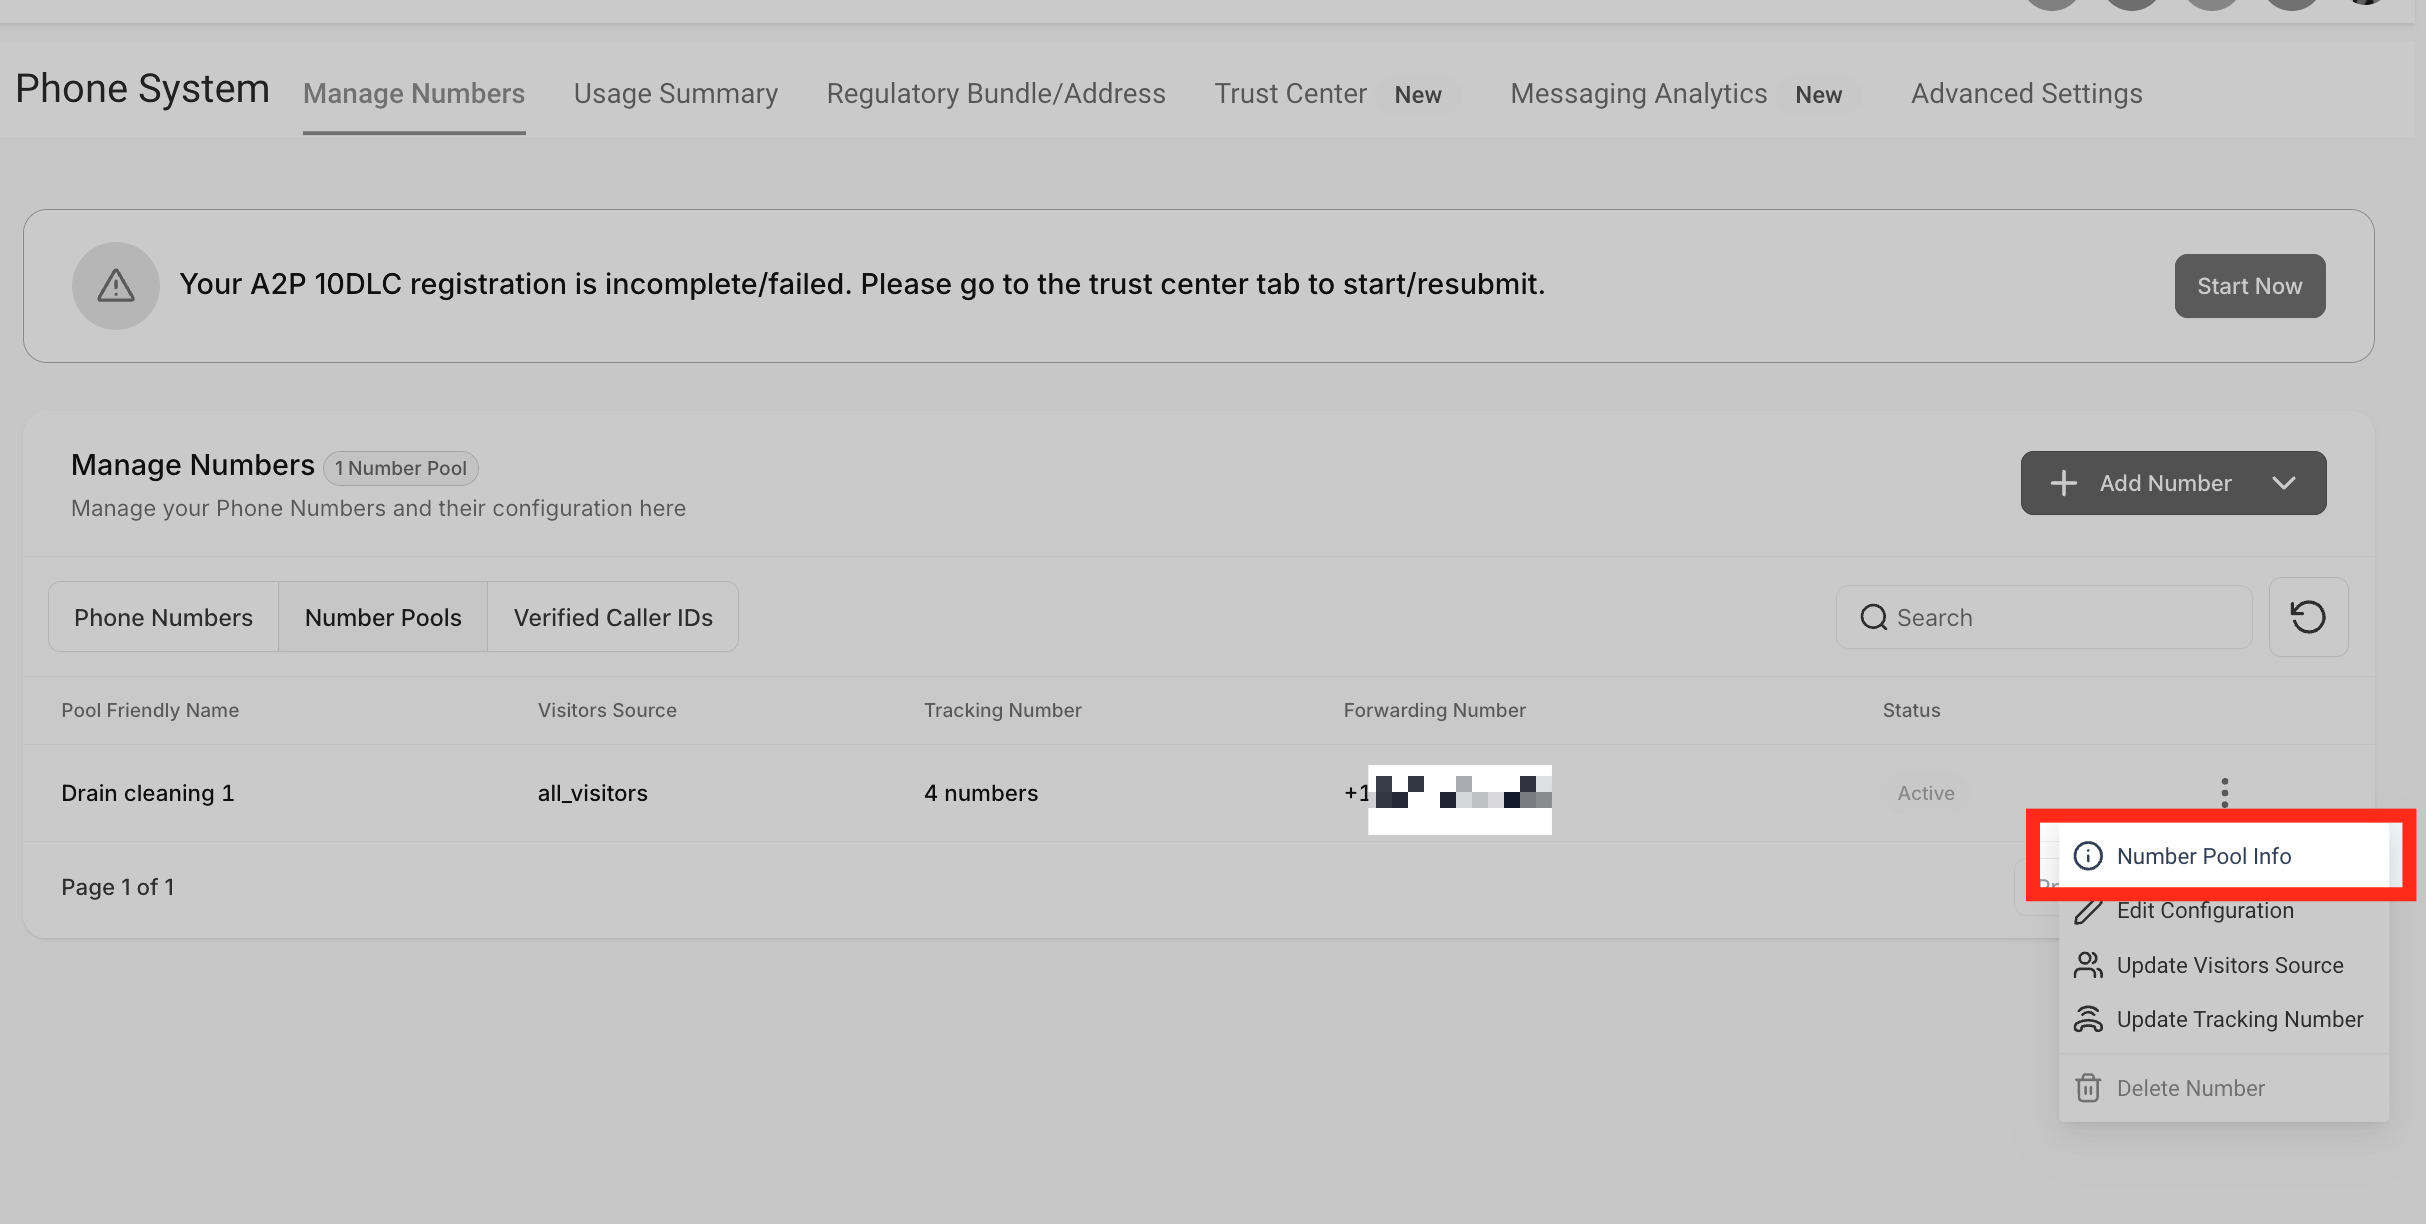
Copy the "Normal Snippet Code." This is the code we need to paste onto the Website/Funnel.
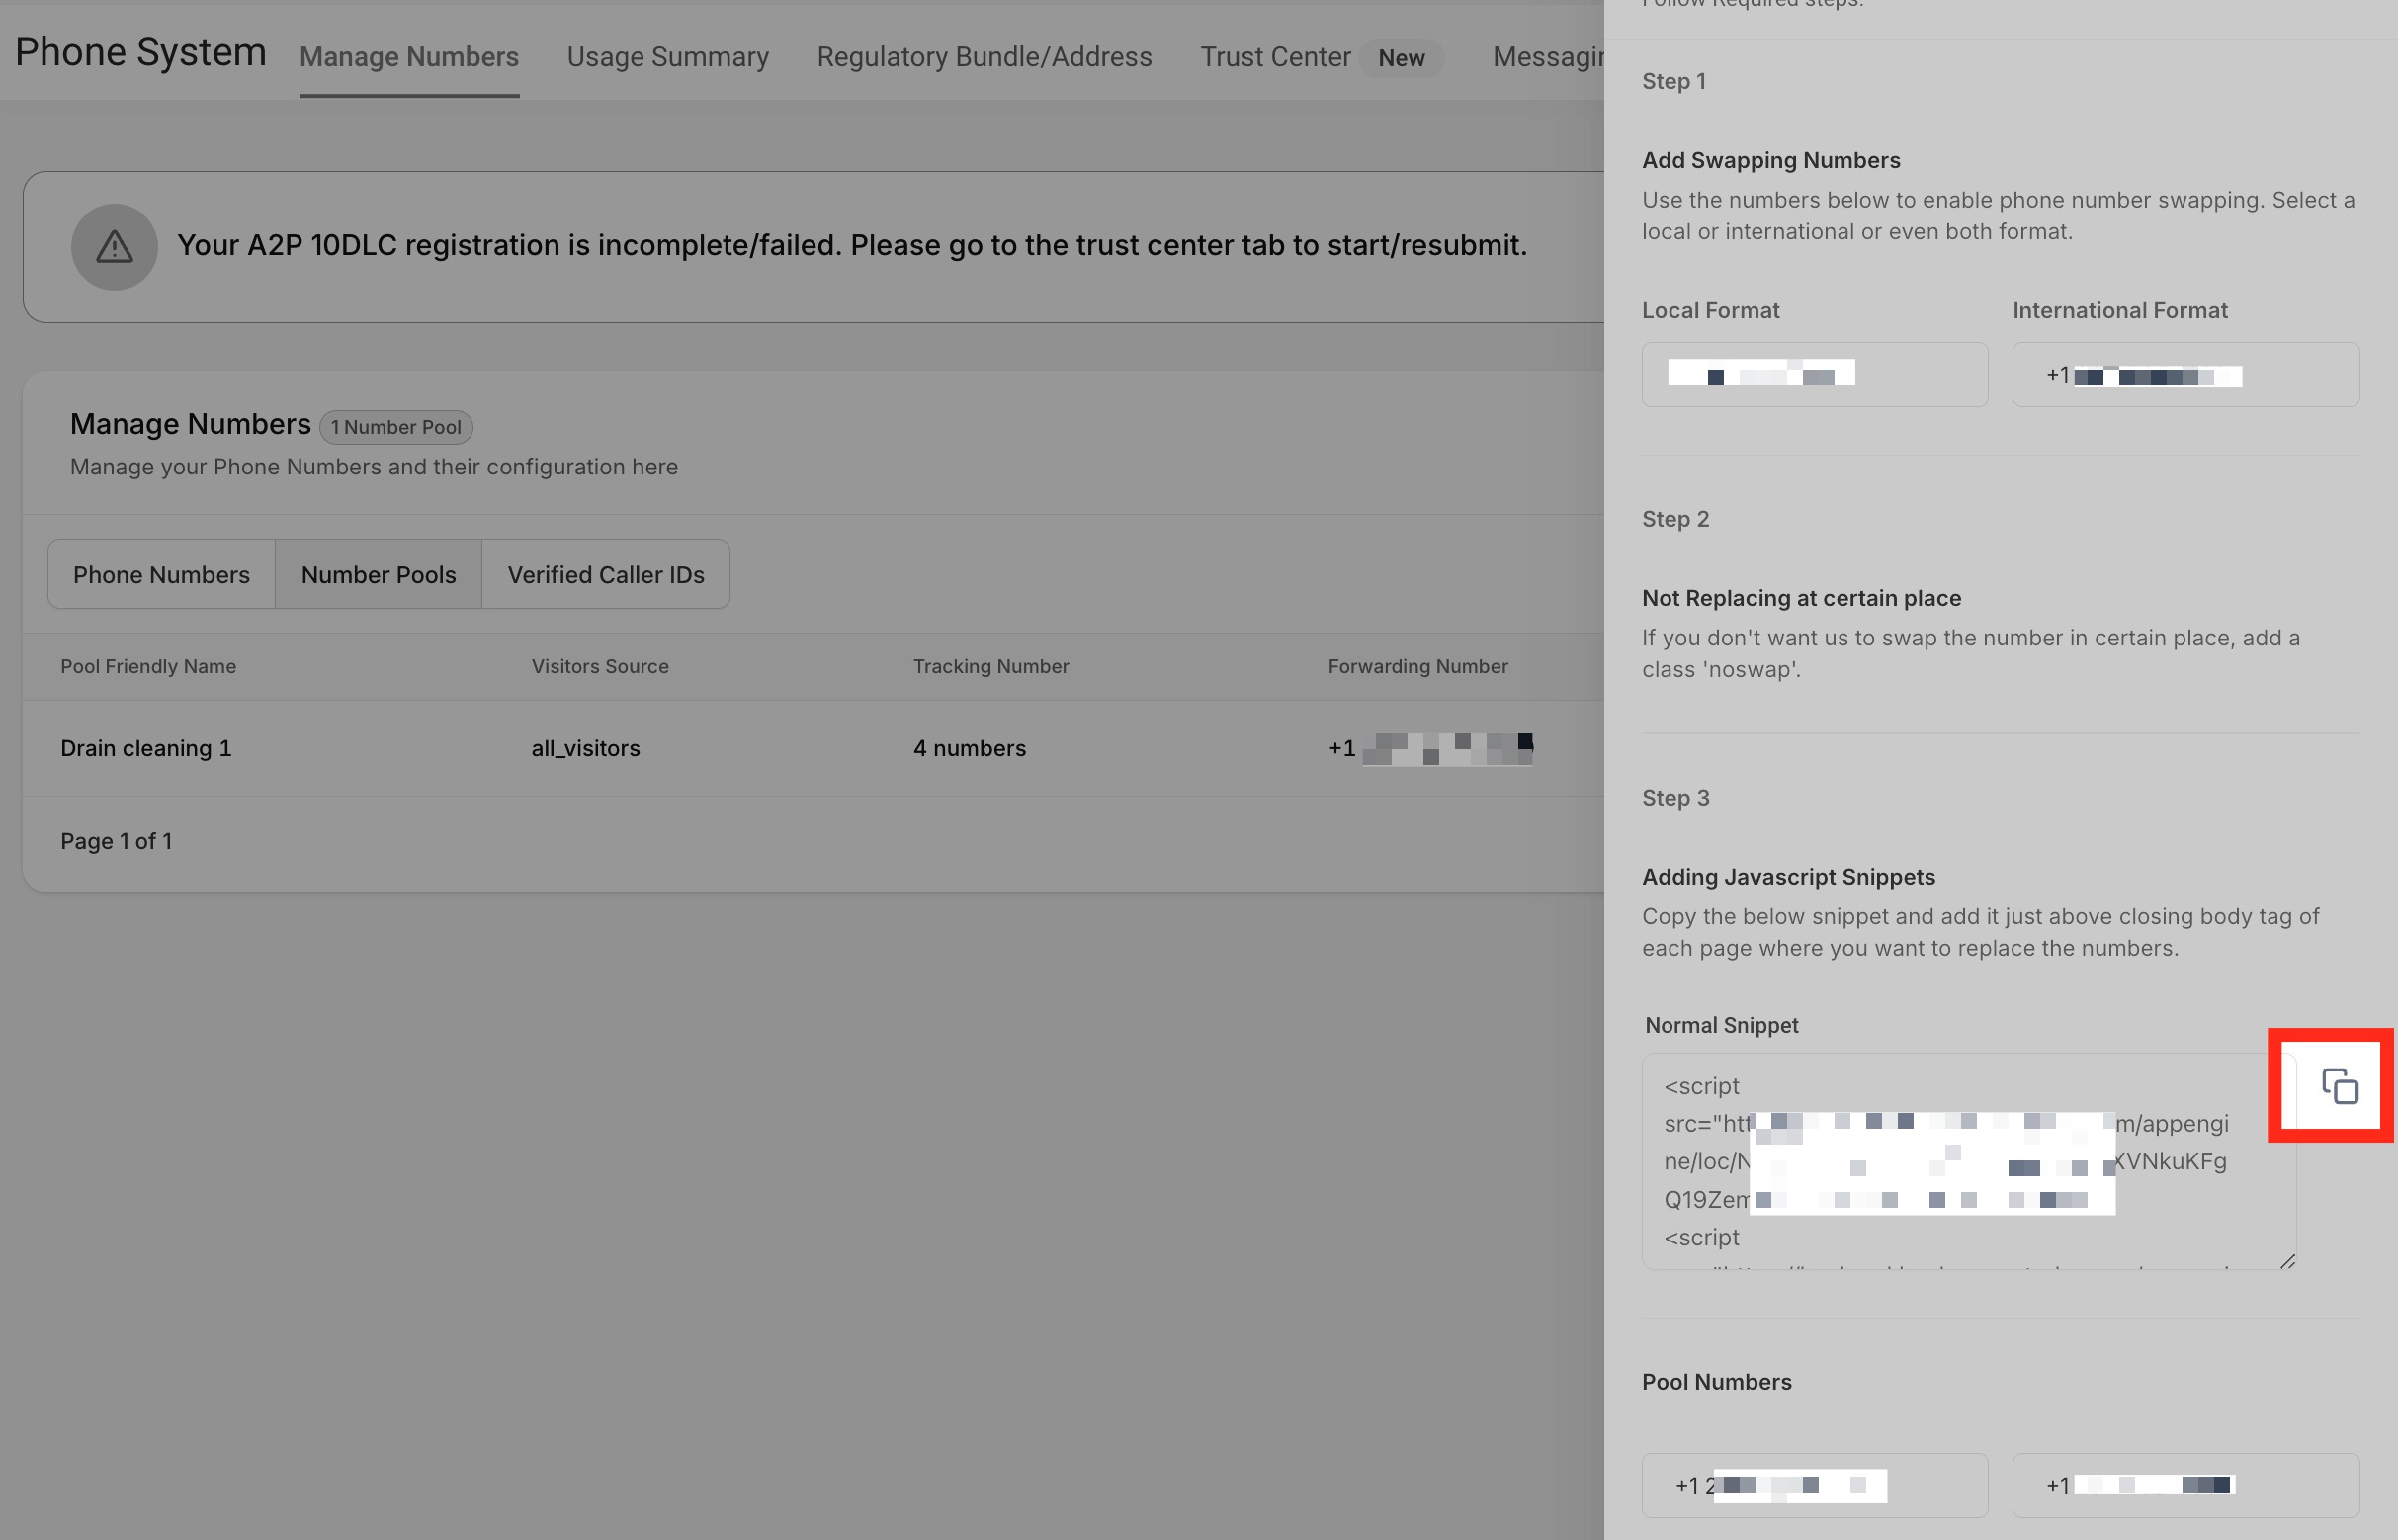
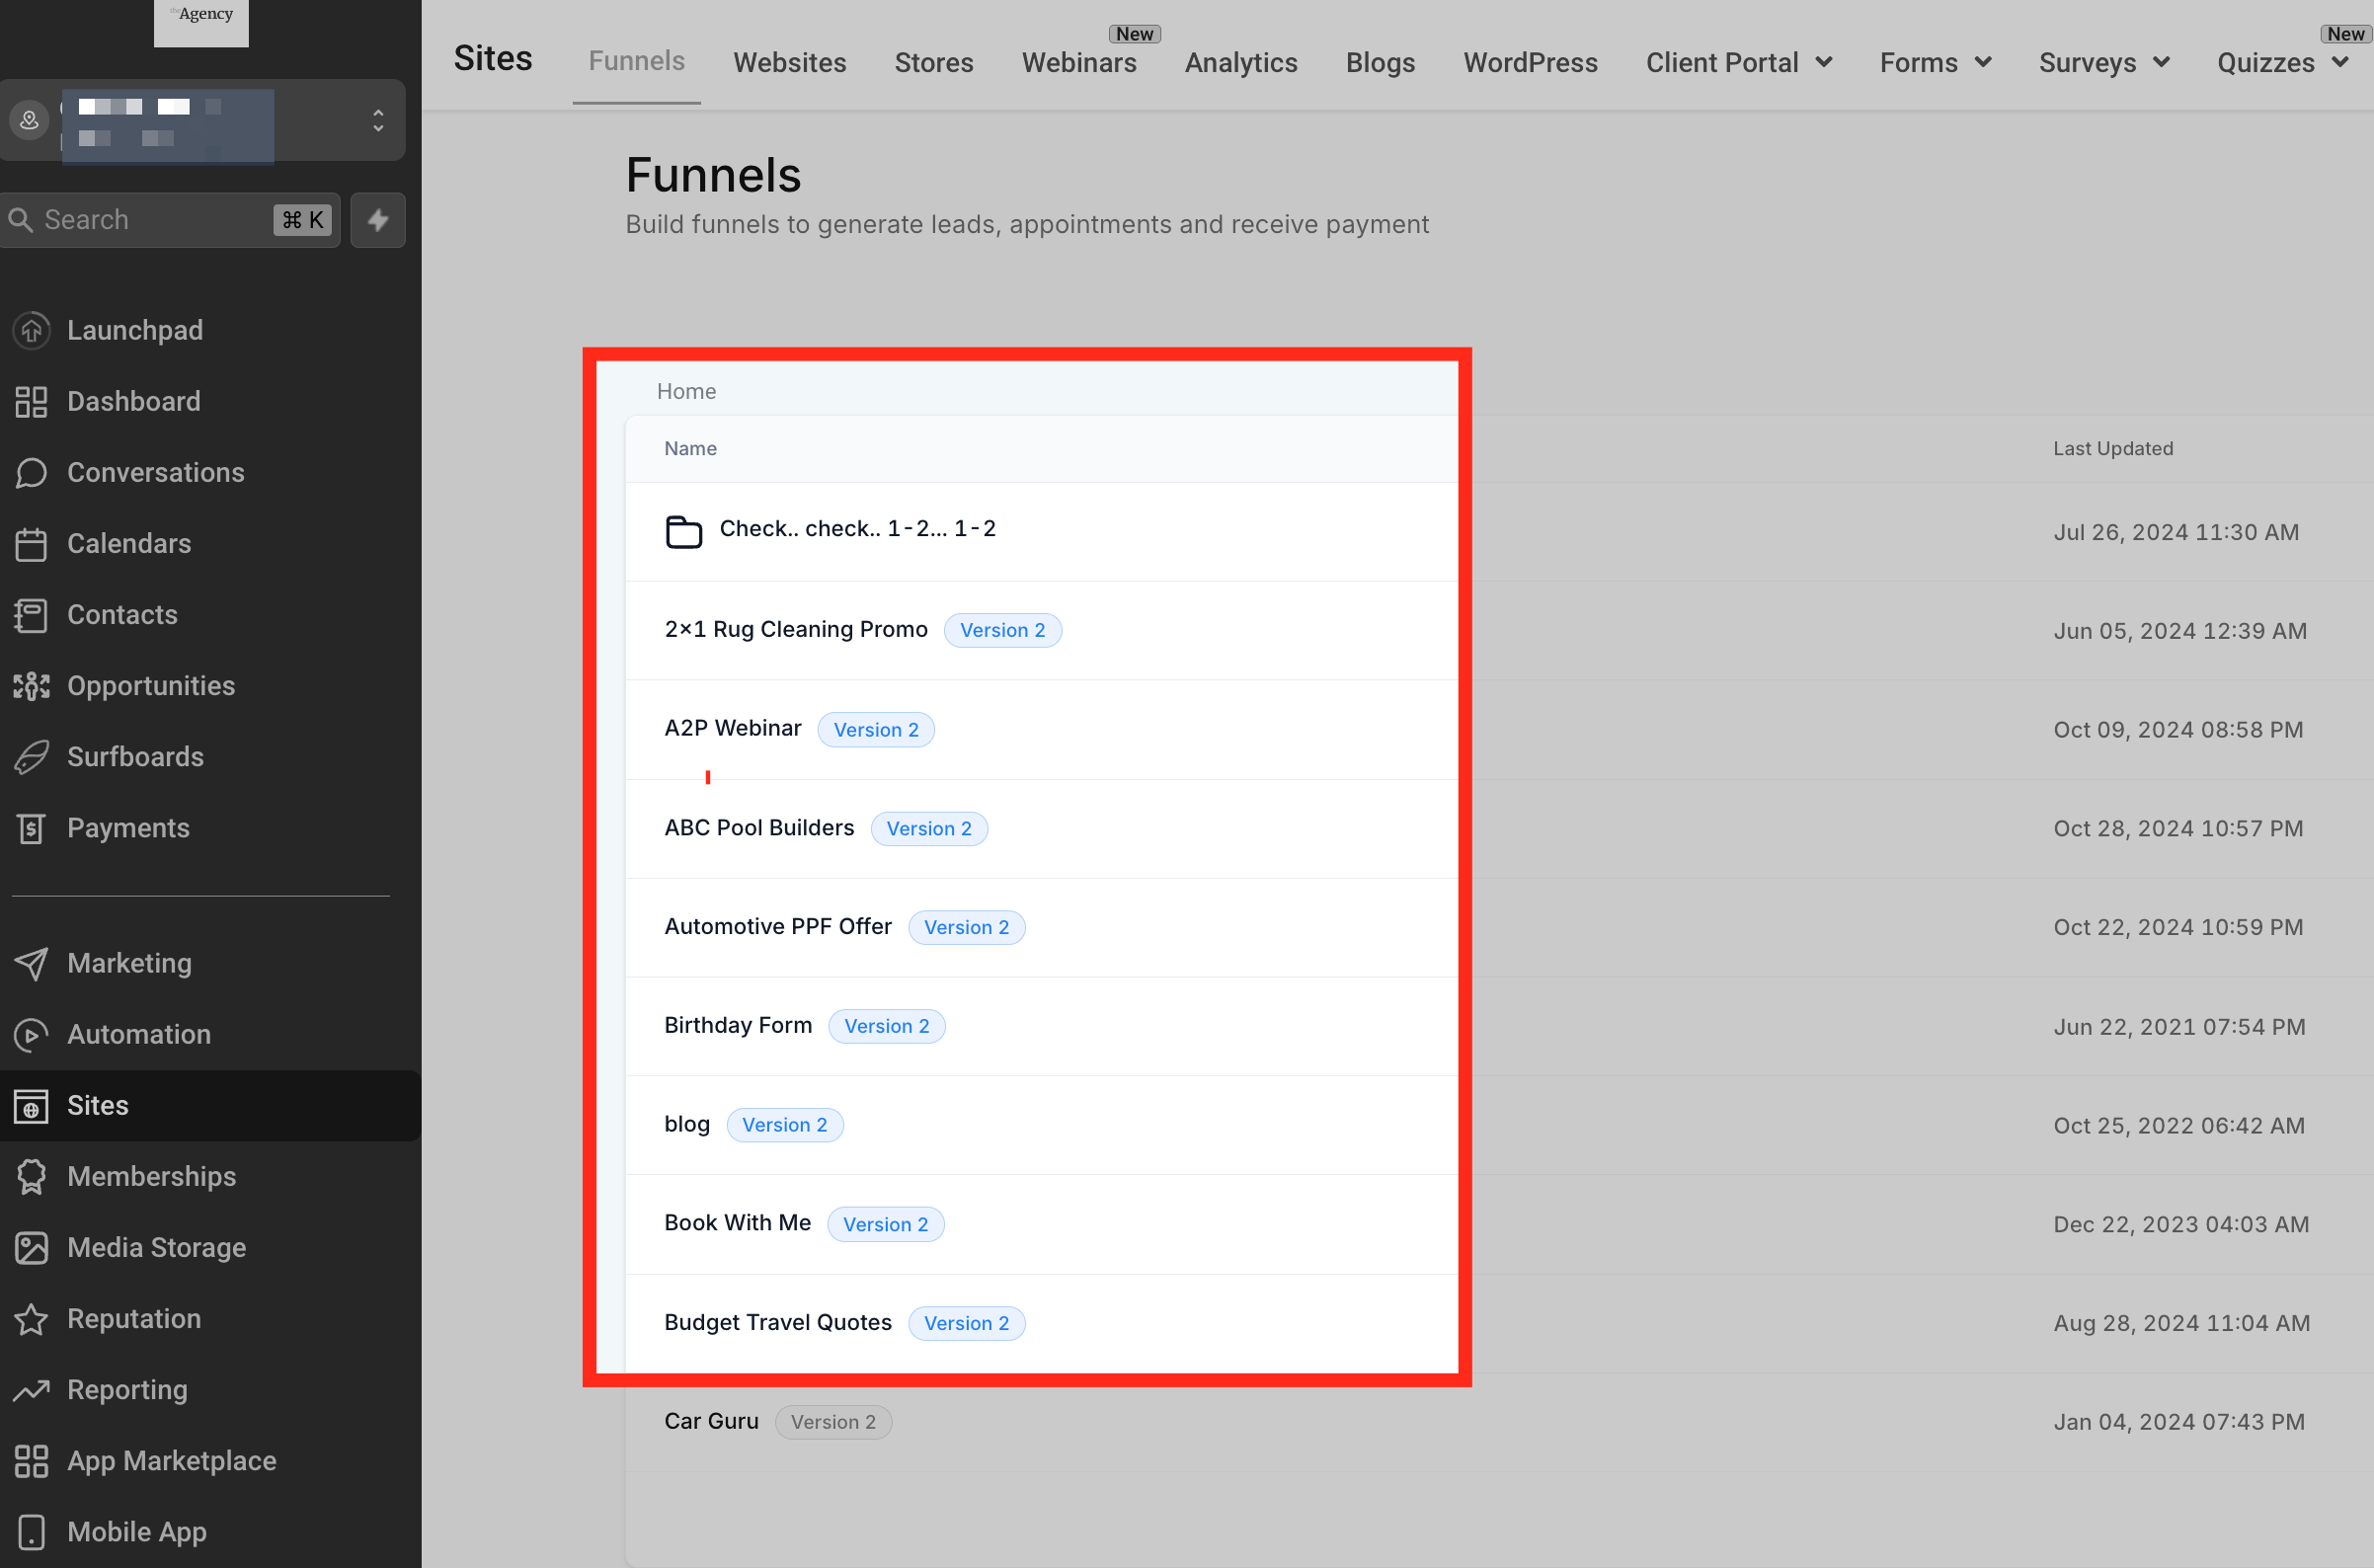
Head over to "Sites" section. Click on Funnels or Websites.
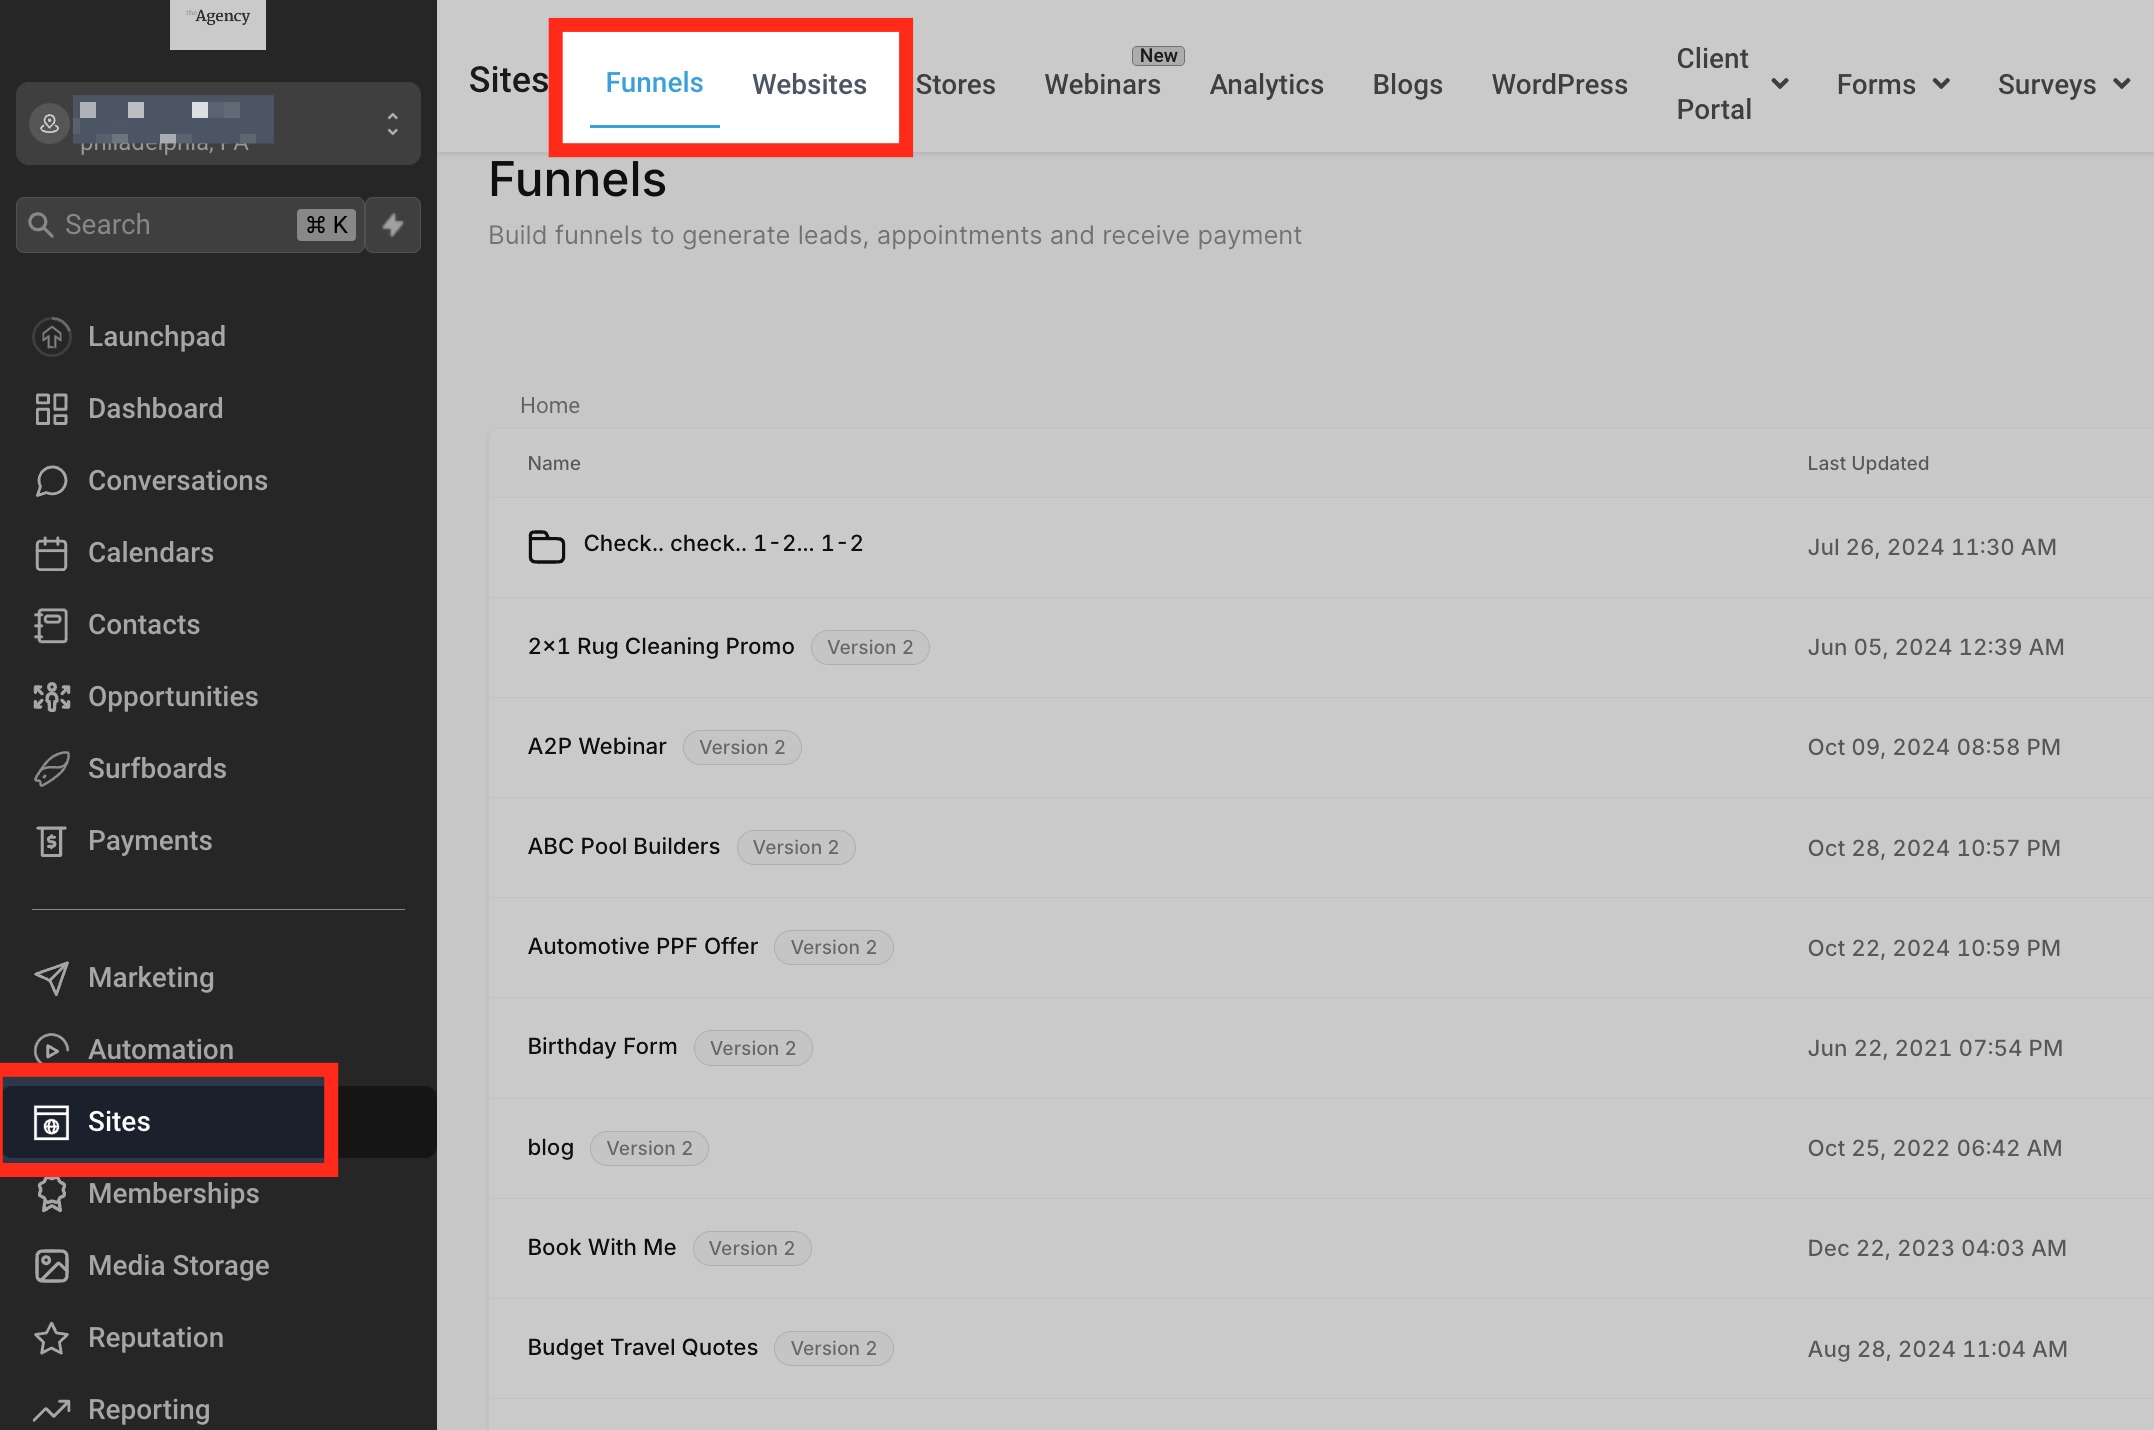
Click on Funnels or Websites. Click the funnel where you want to use the number pool.
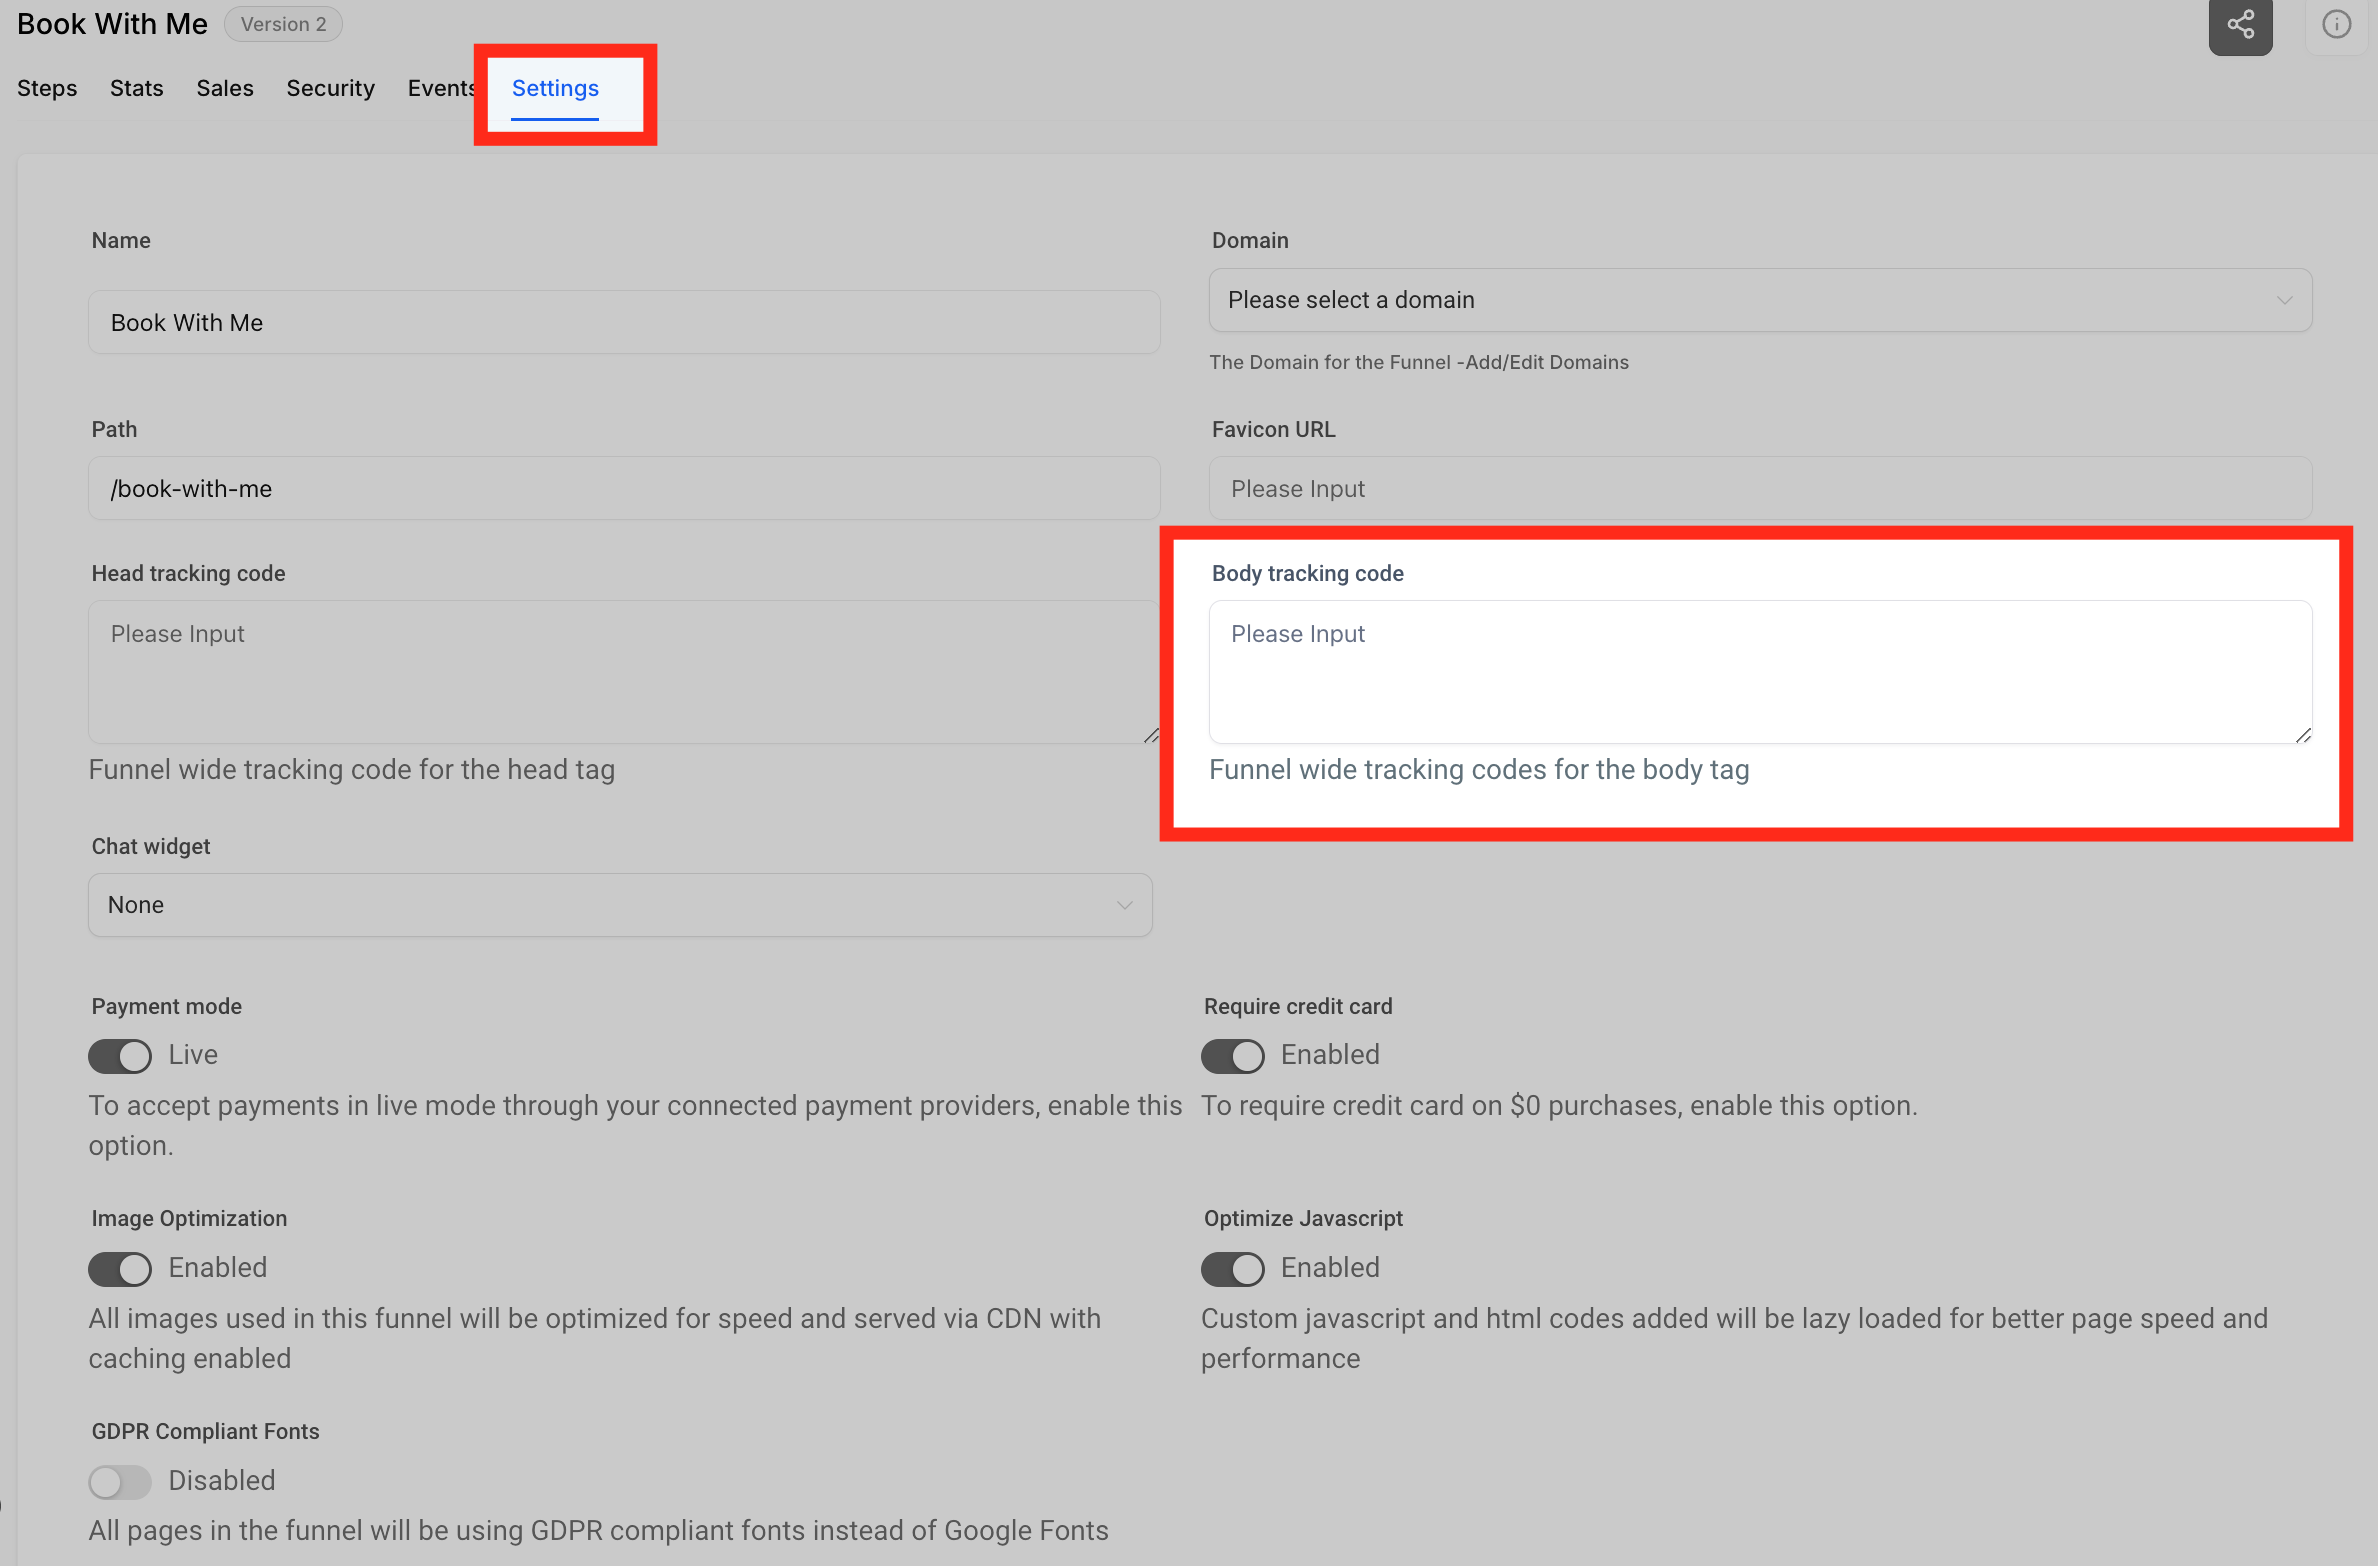
Once you are inside the funnel/website, click the "Settings" tab. Now paste the copied Normal snippet at the bottom of your Body Tracking code field.
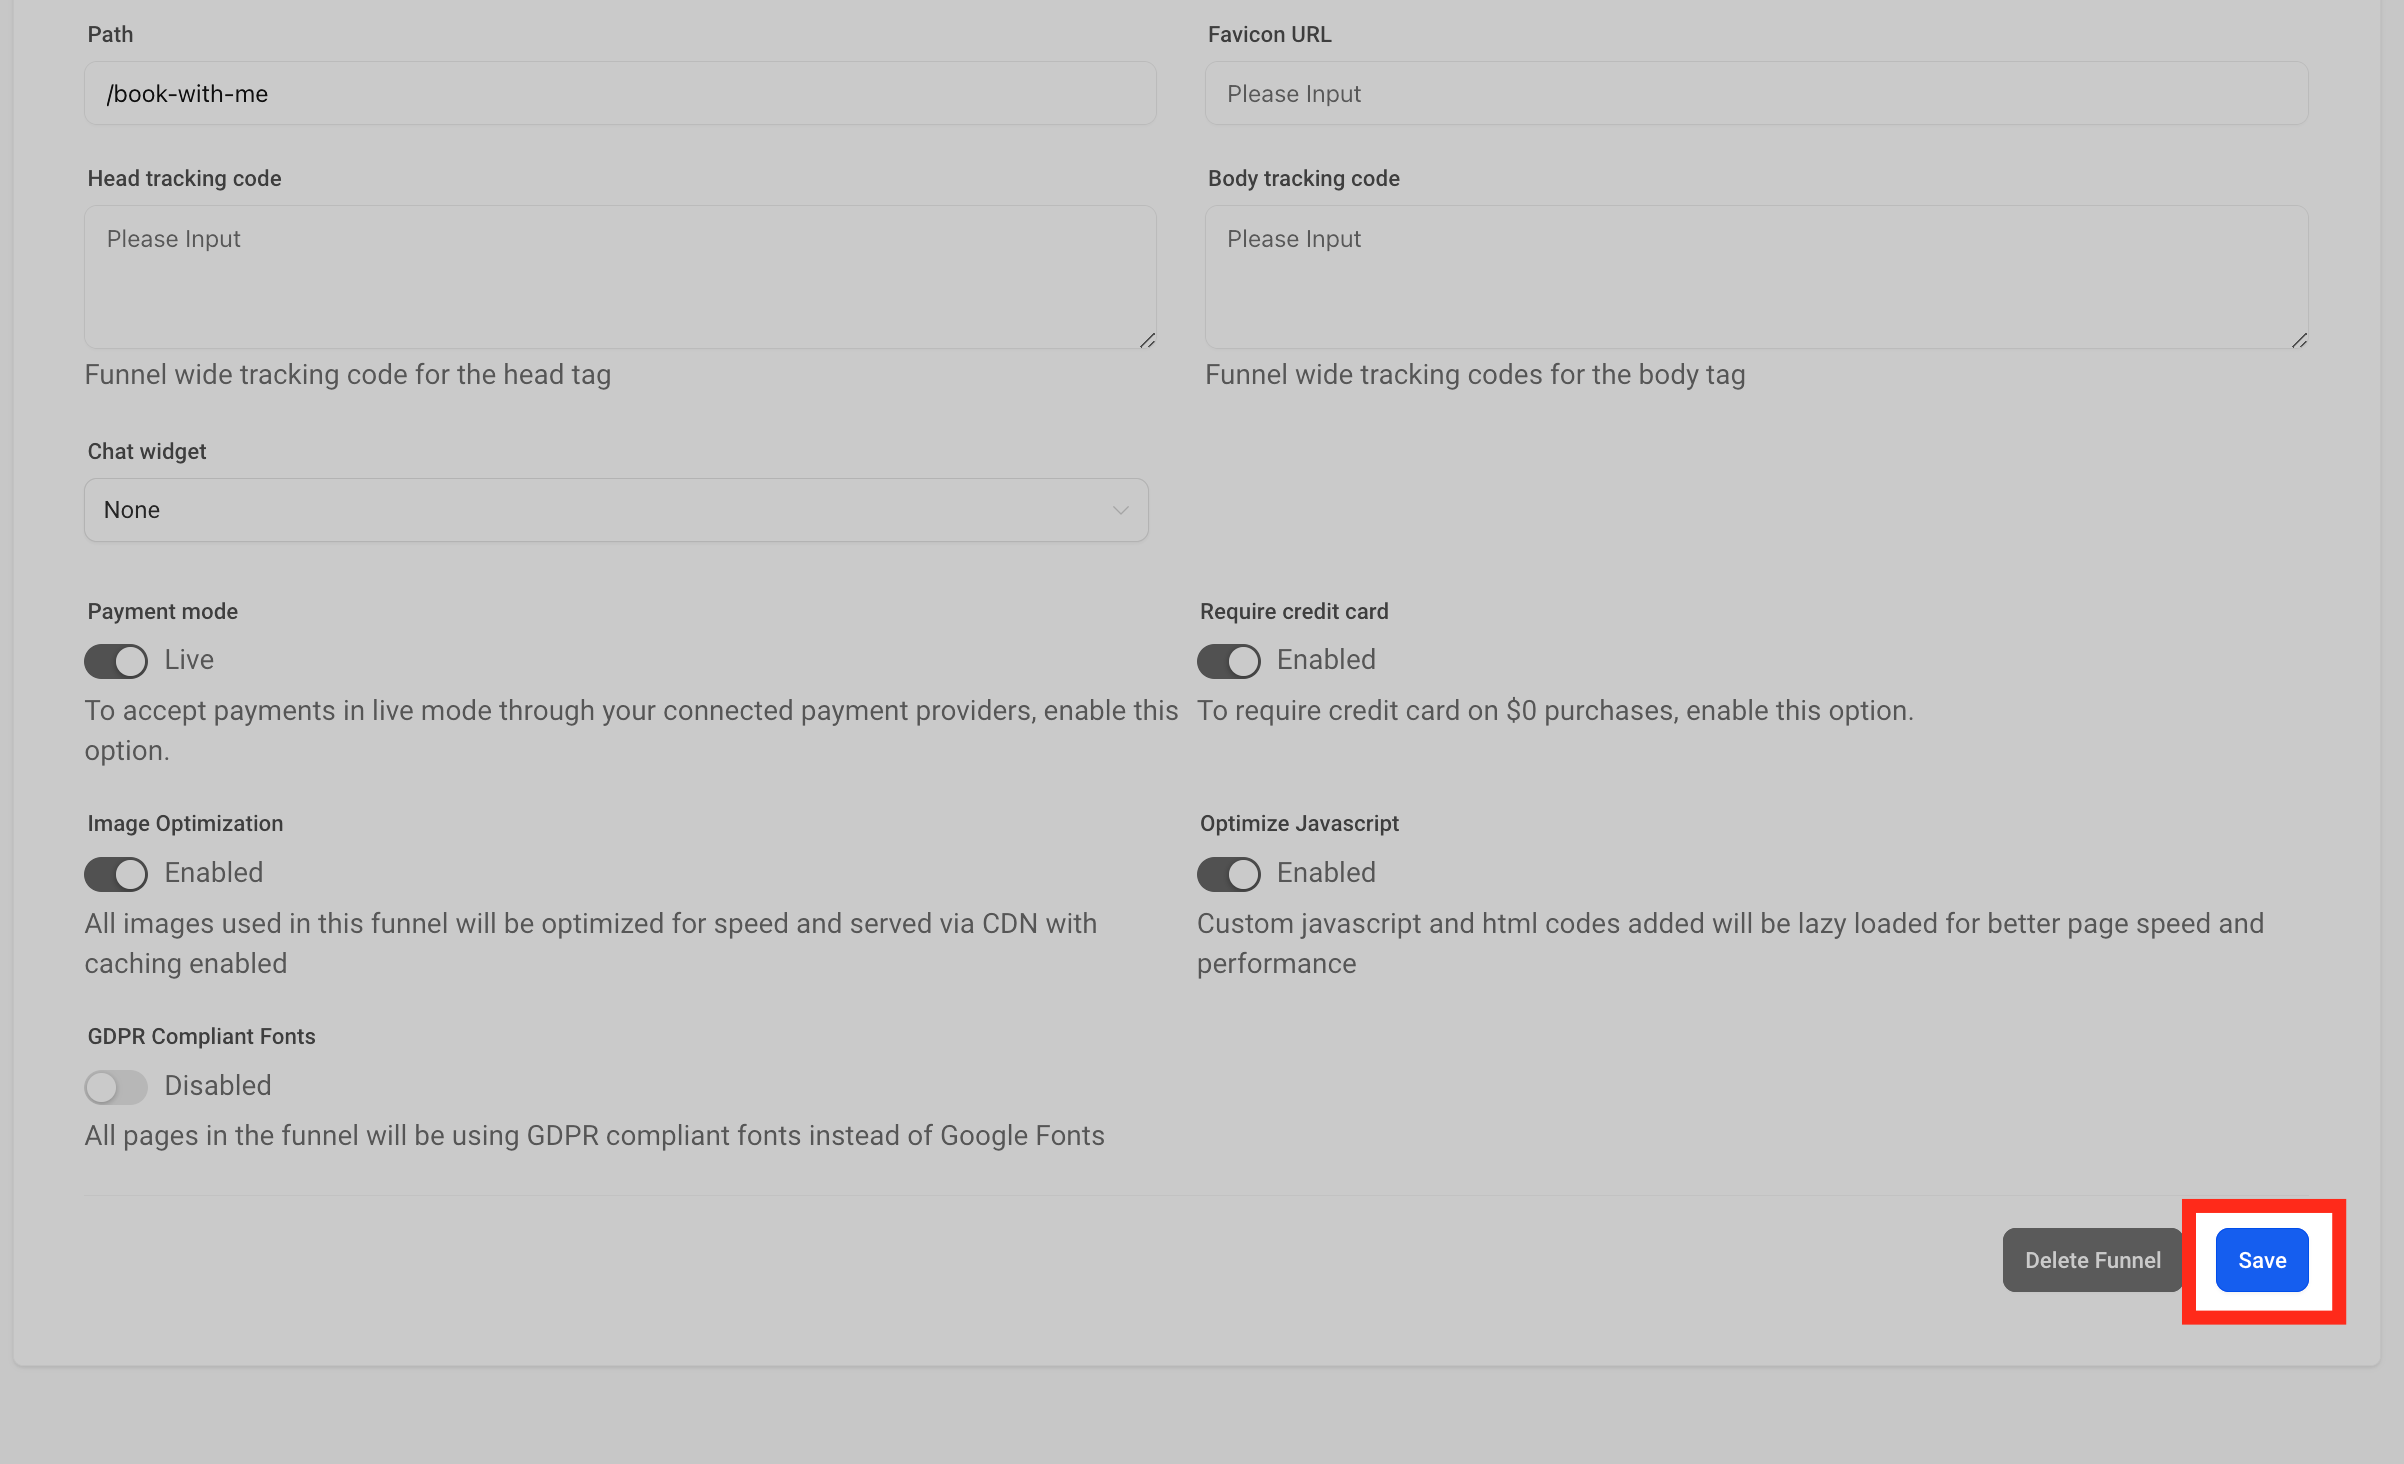
Click Save. This will swap the number within the entire Funnel/Website.
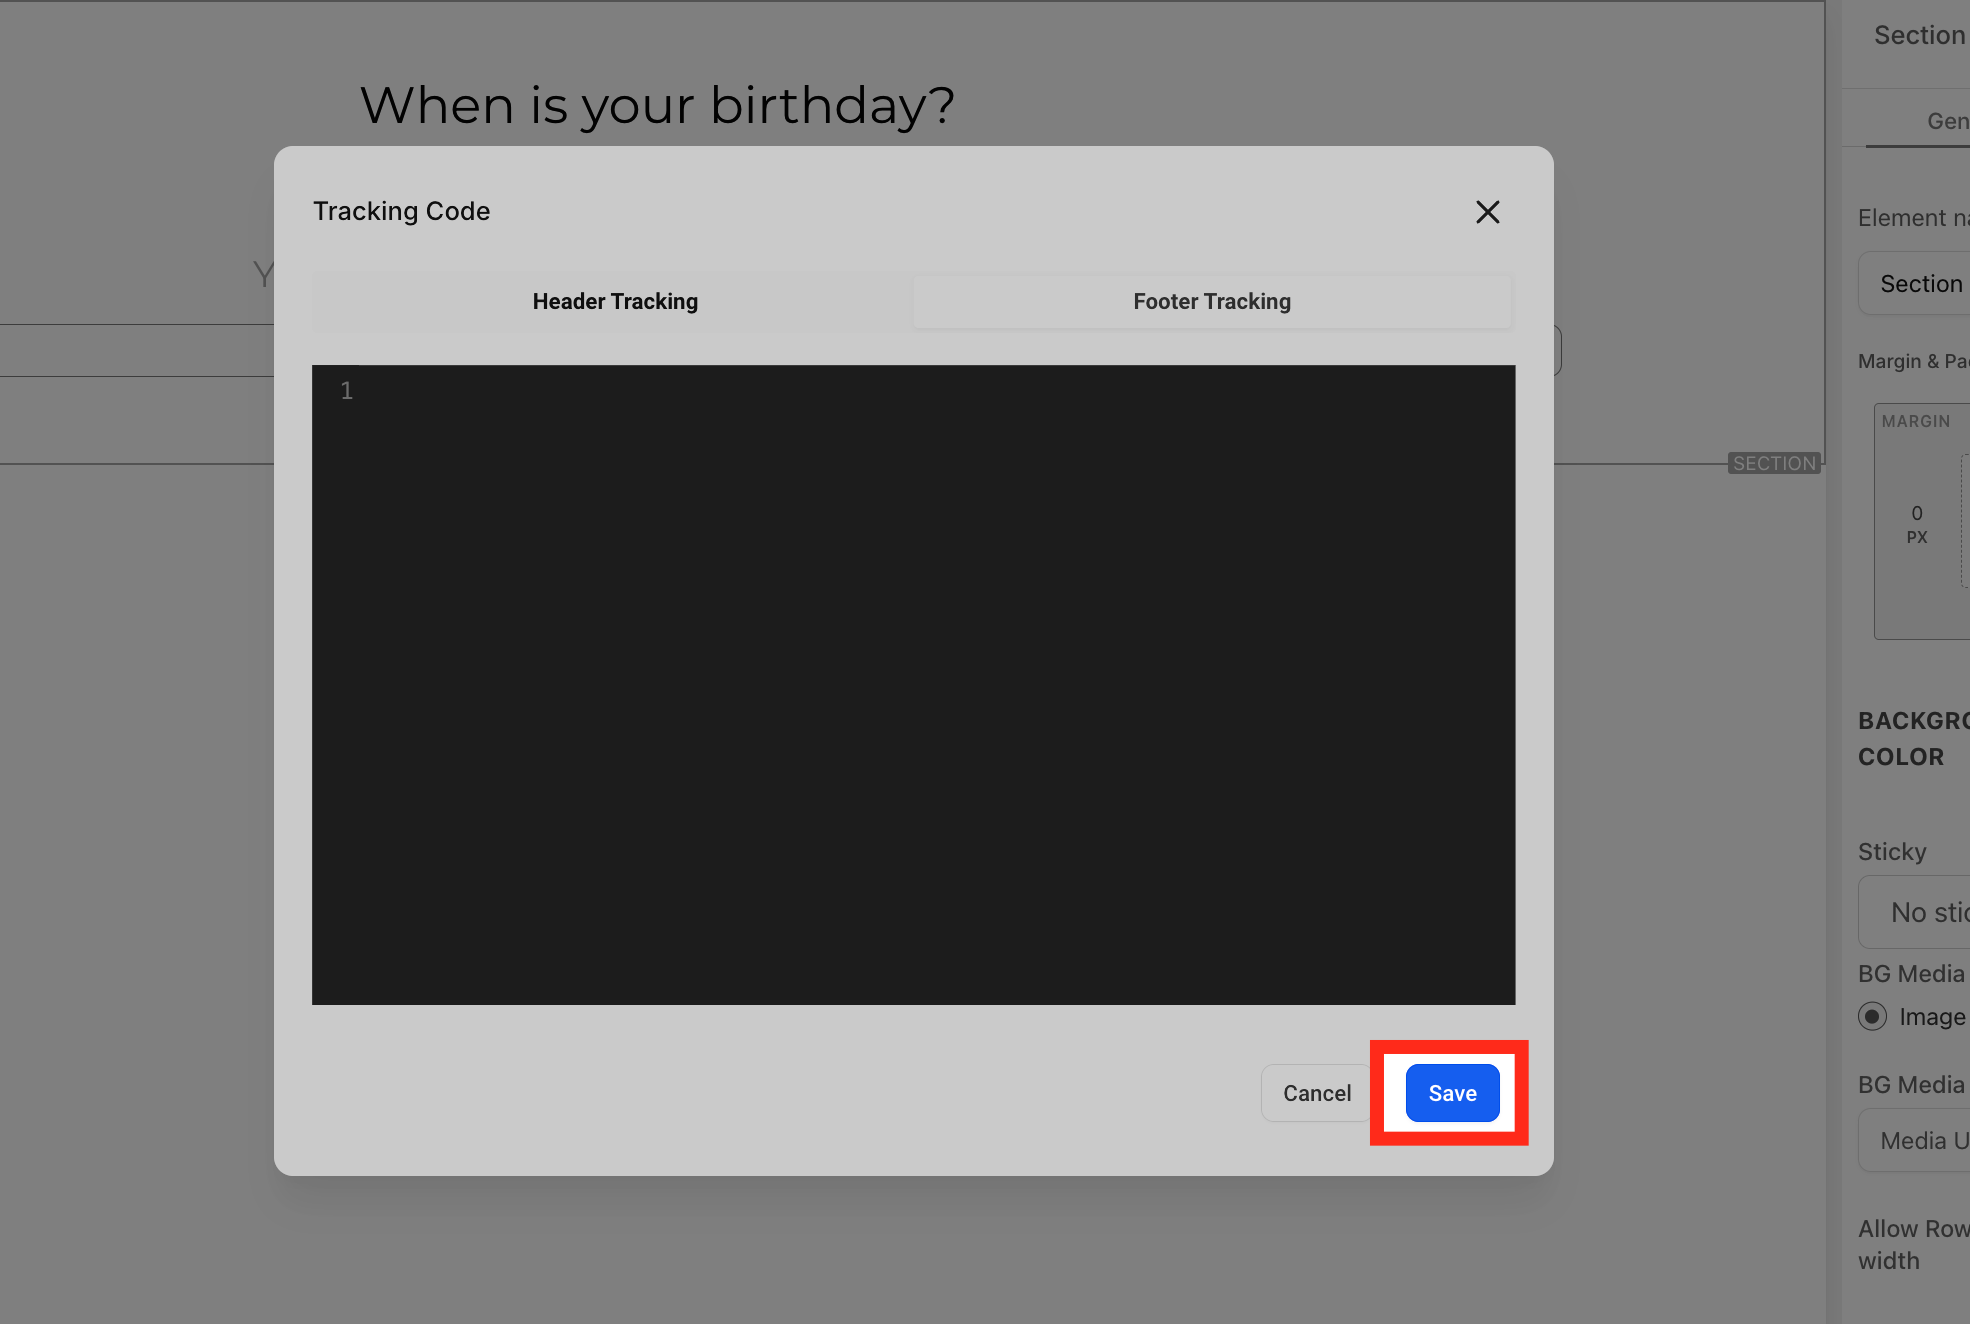
If you want the number to swap on one single funnel/website page instead, click the Tracking Code icon at the top left side.
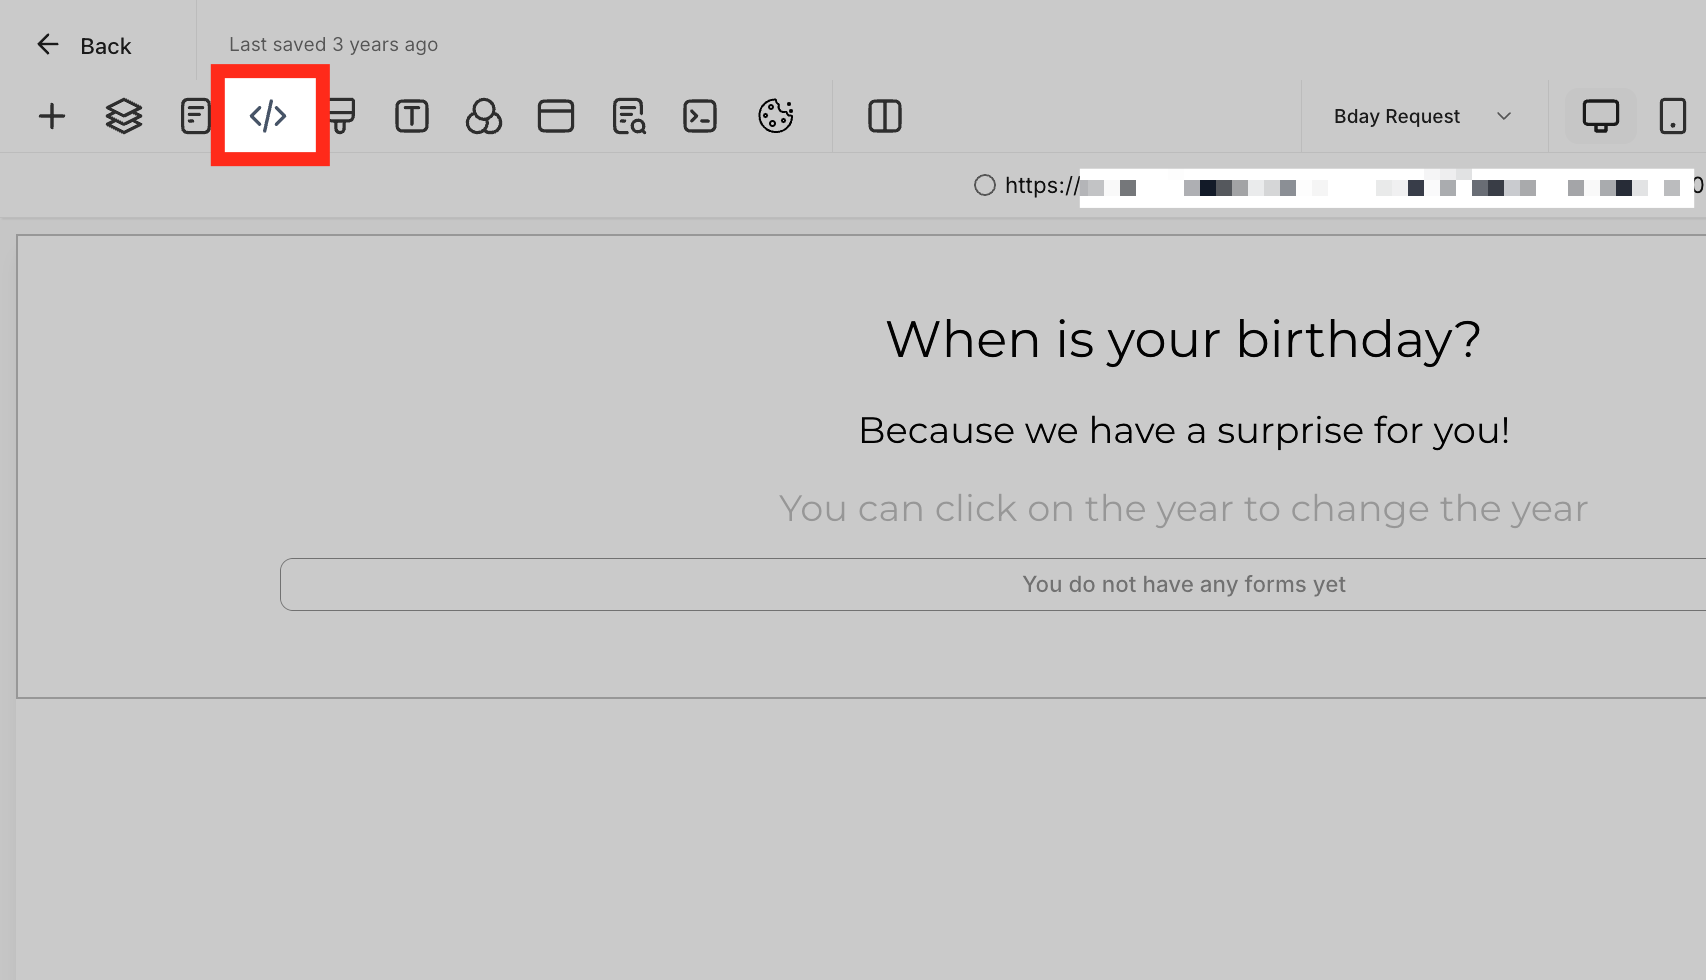
Click the "Footer Tracking" option on the right side, then paste the code in the code editor.


Click "Save" to proceed ahead.
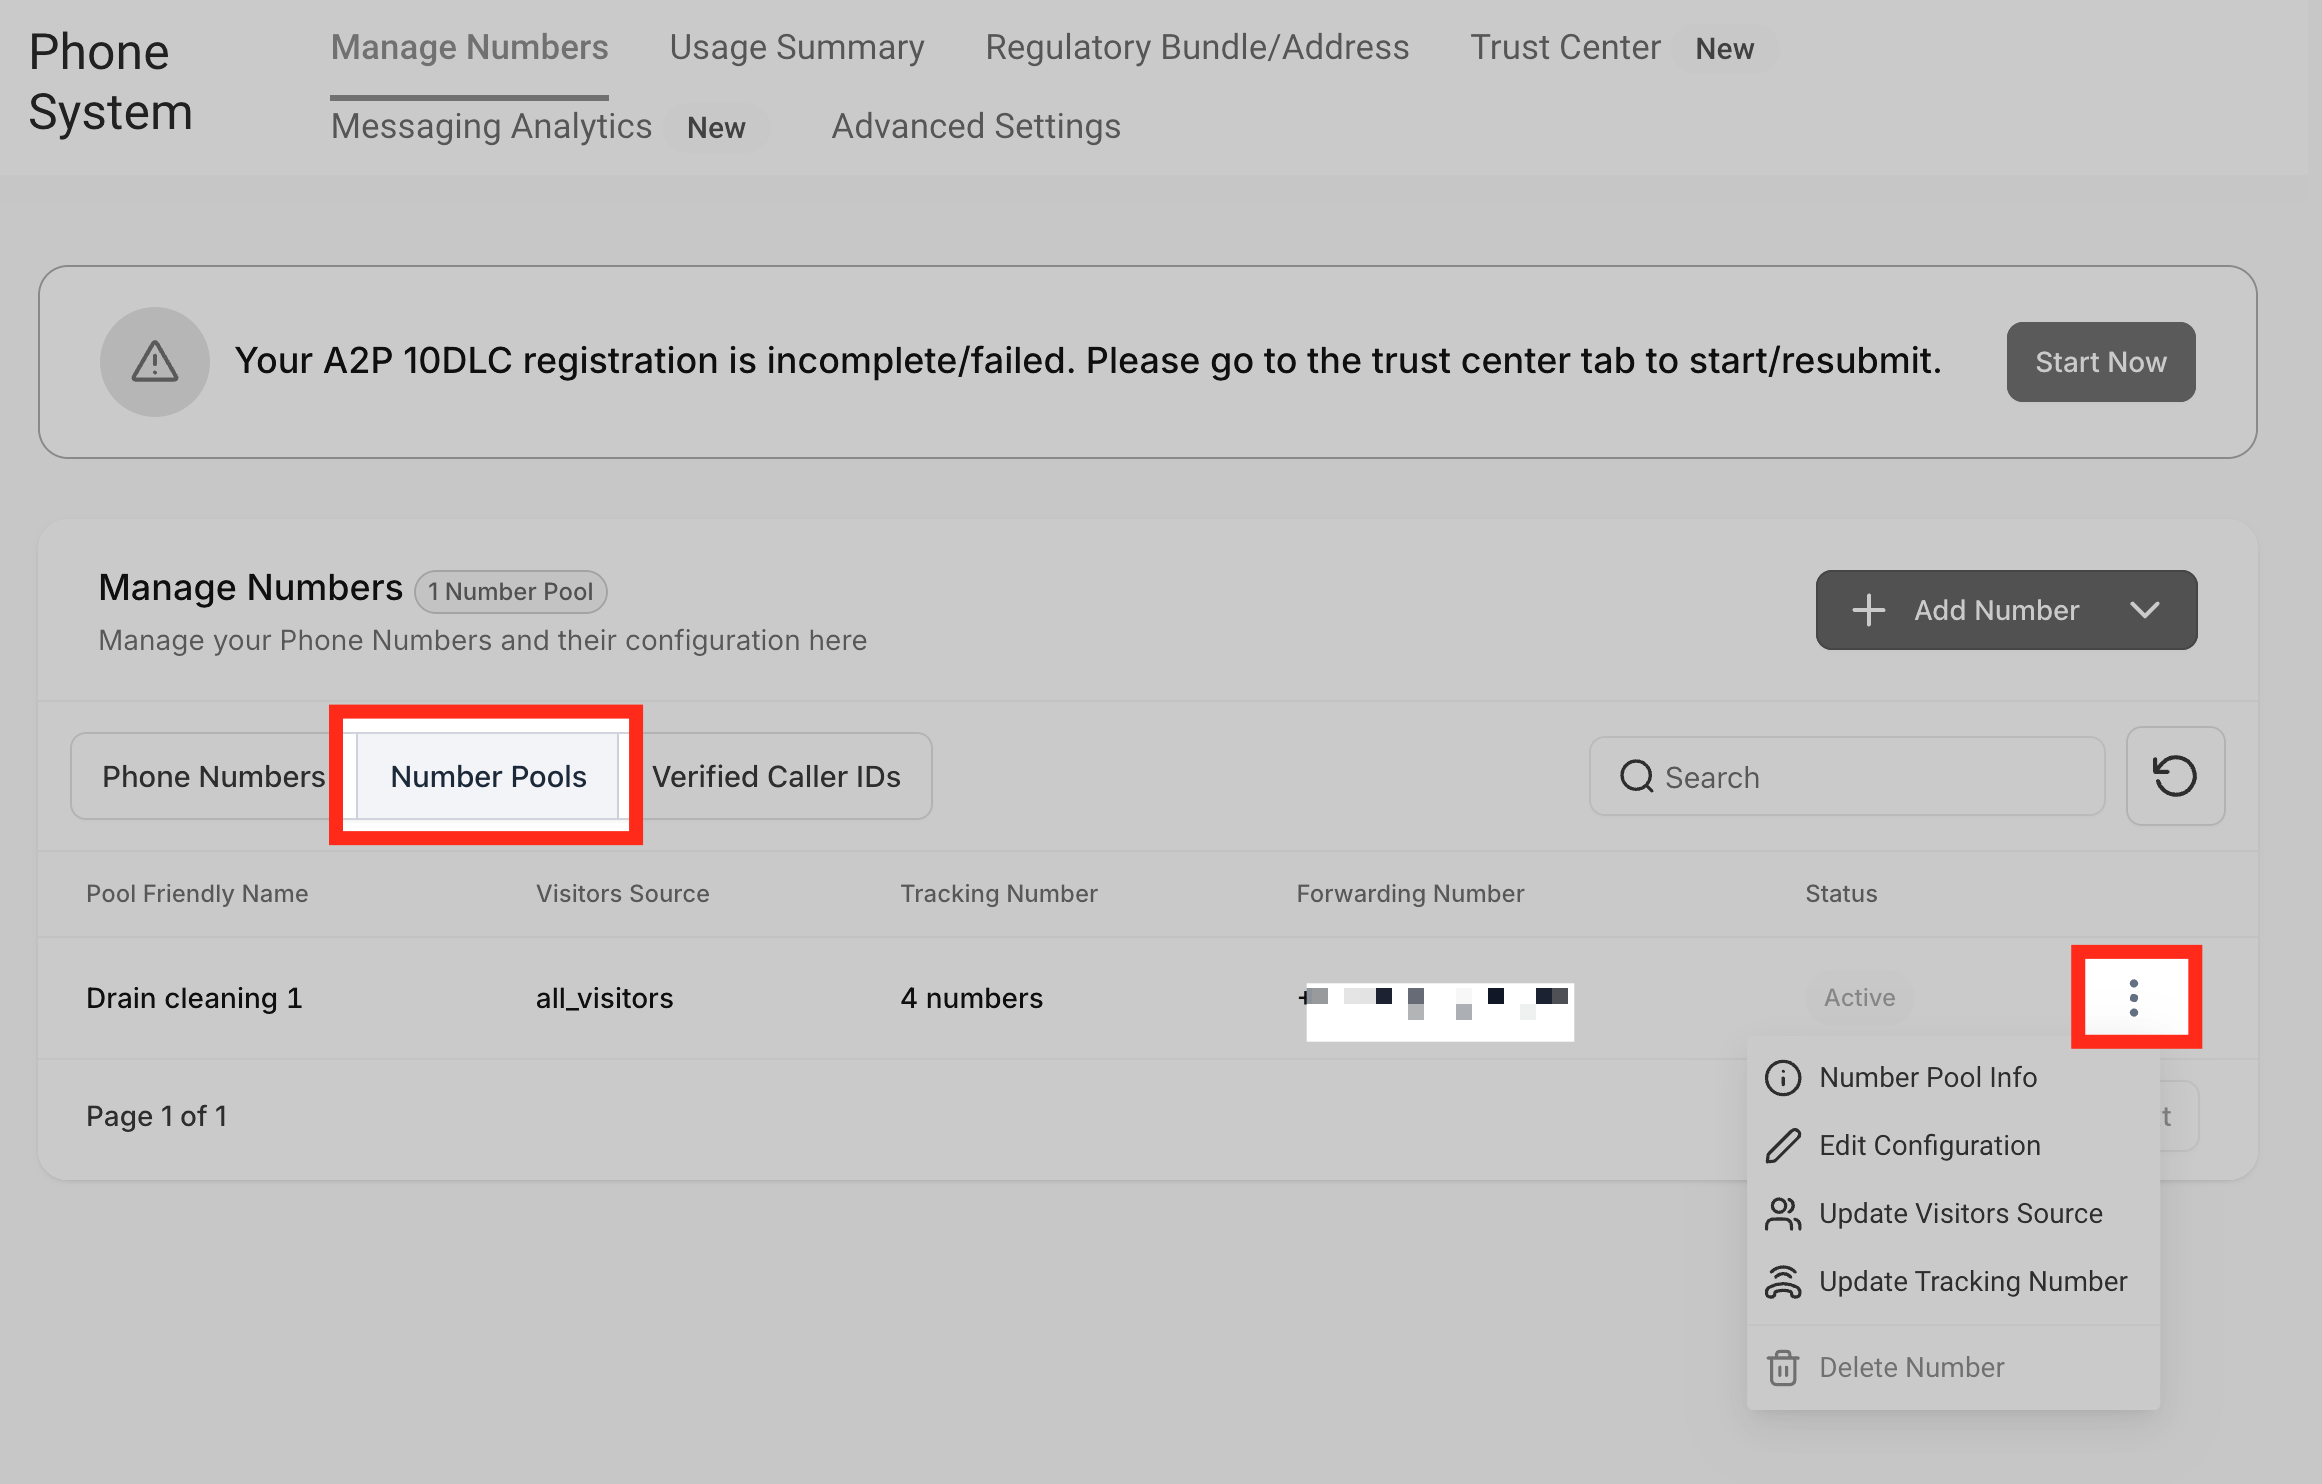
Go back to your number pool setup. Hover over the number pool you just created and click the three dots menu.
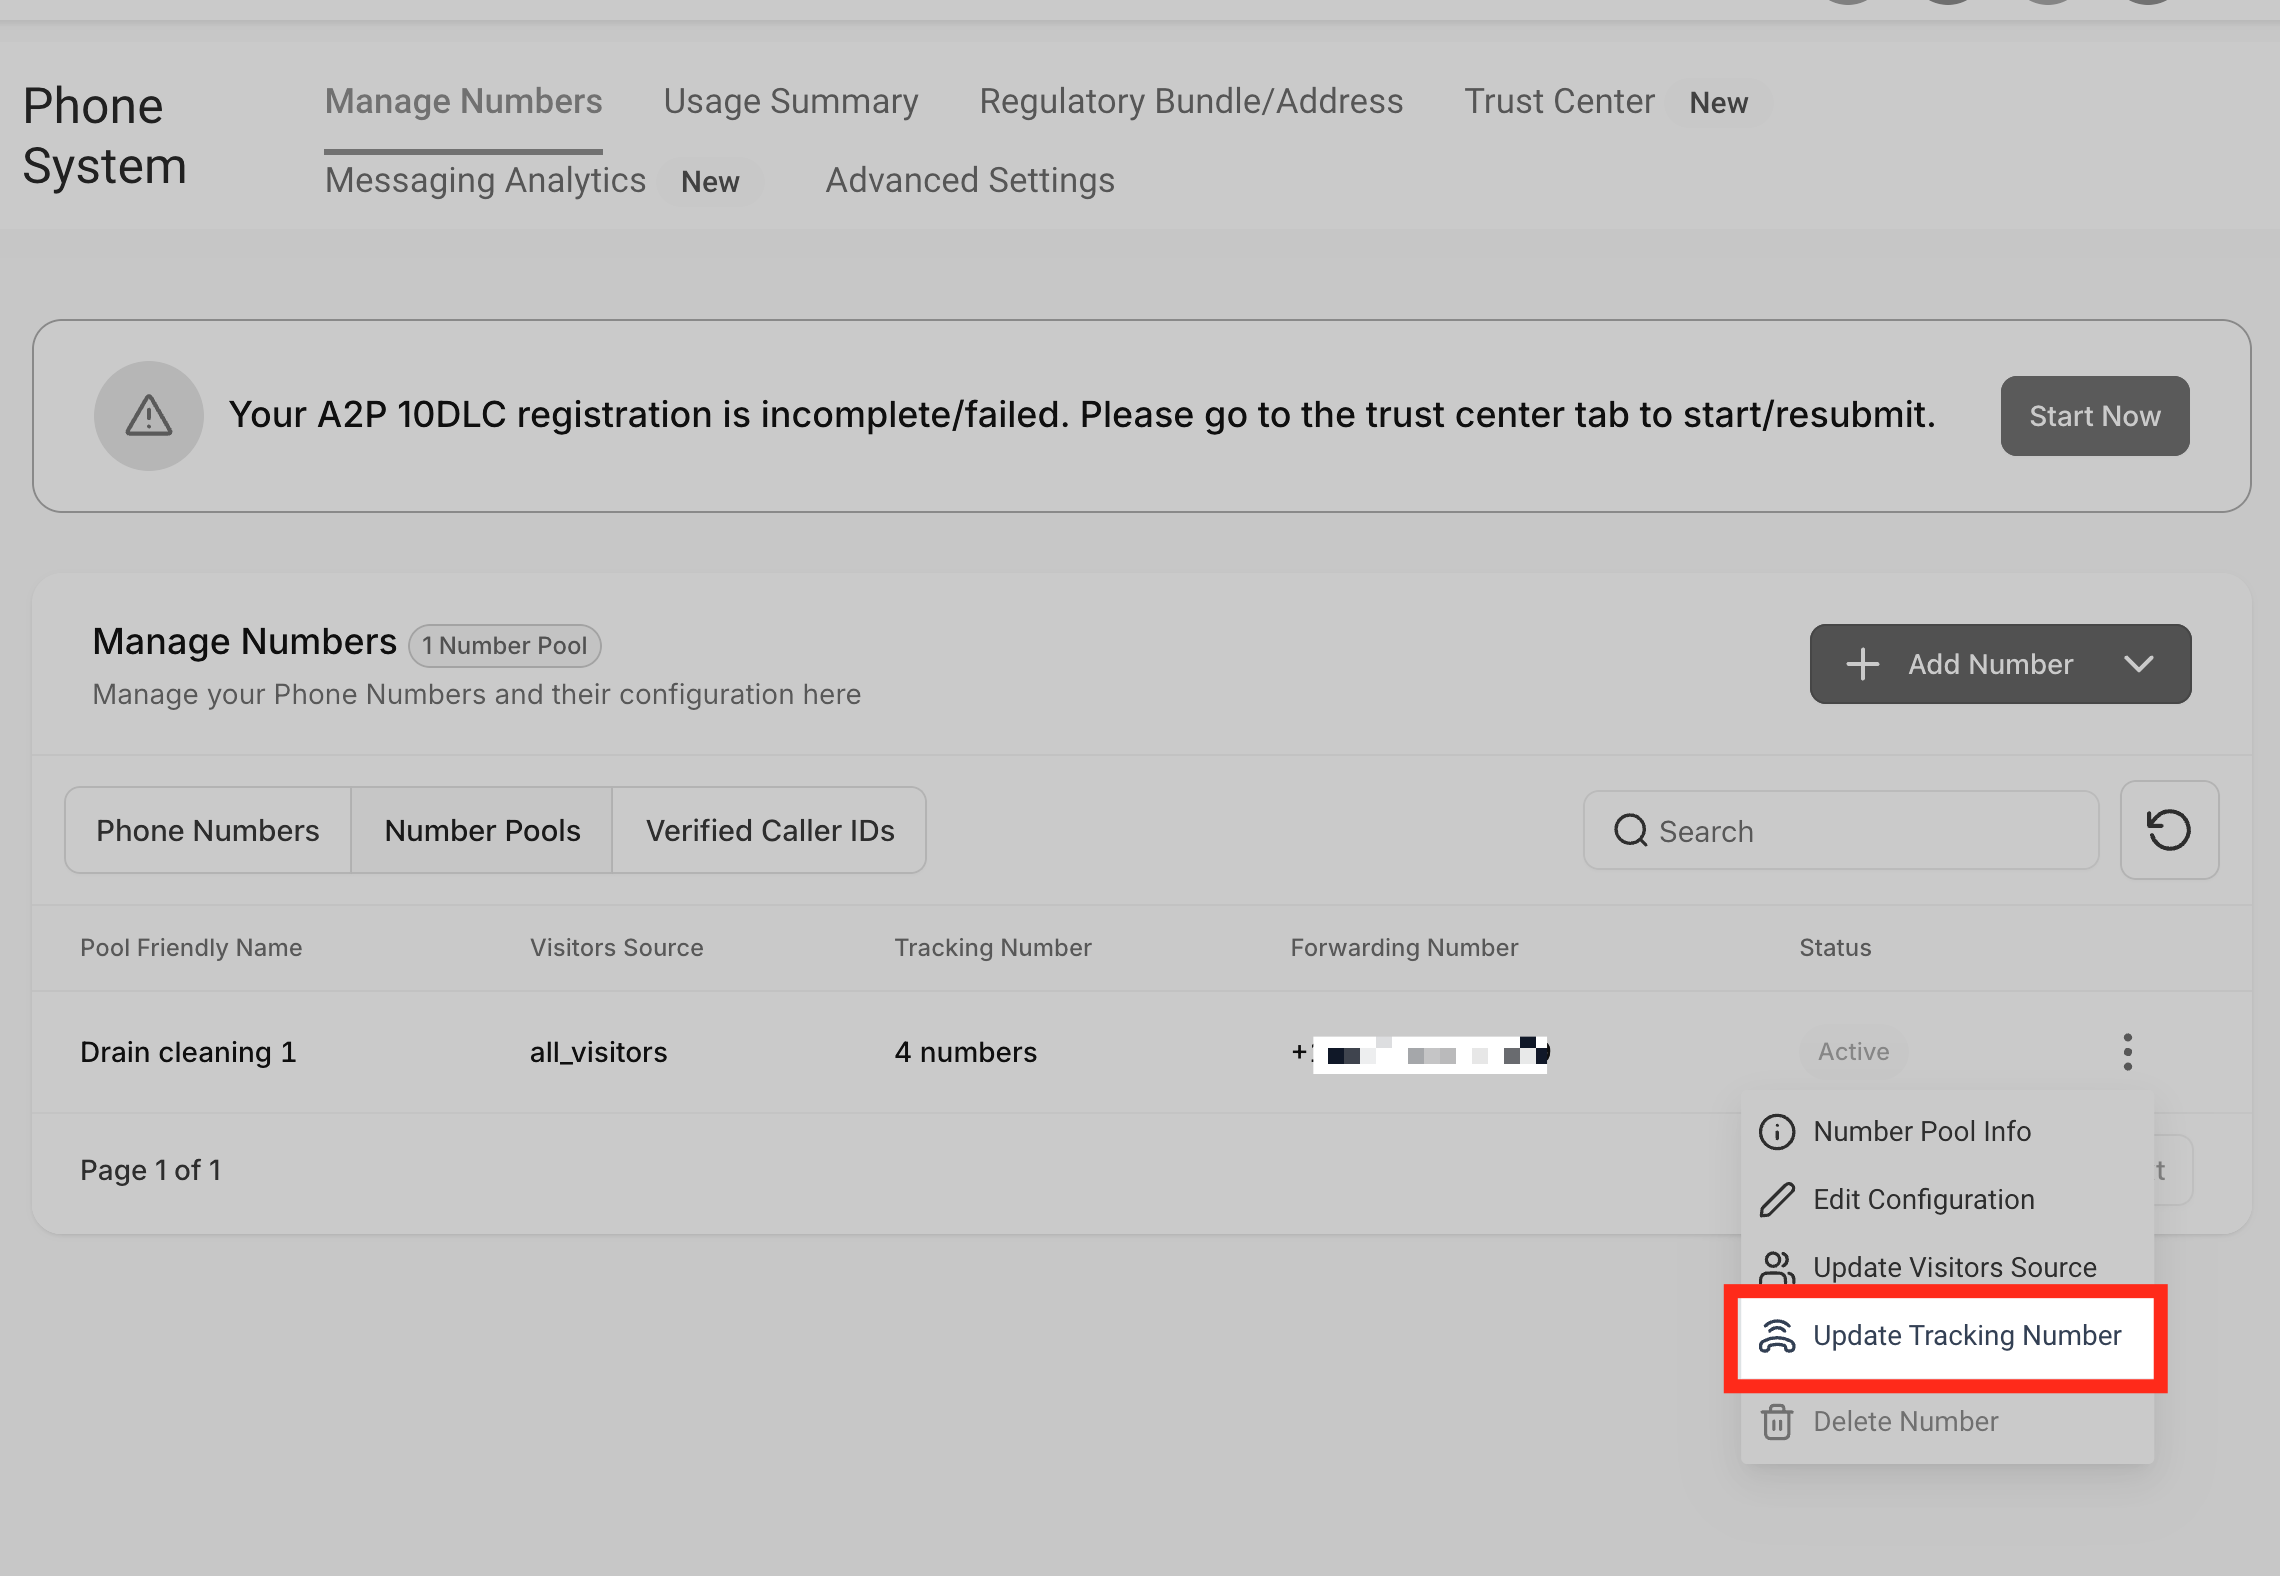
Click on "Update Tracking Number." Copy the swapping number and paste it on the Funnels/websites.
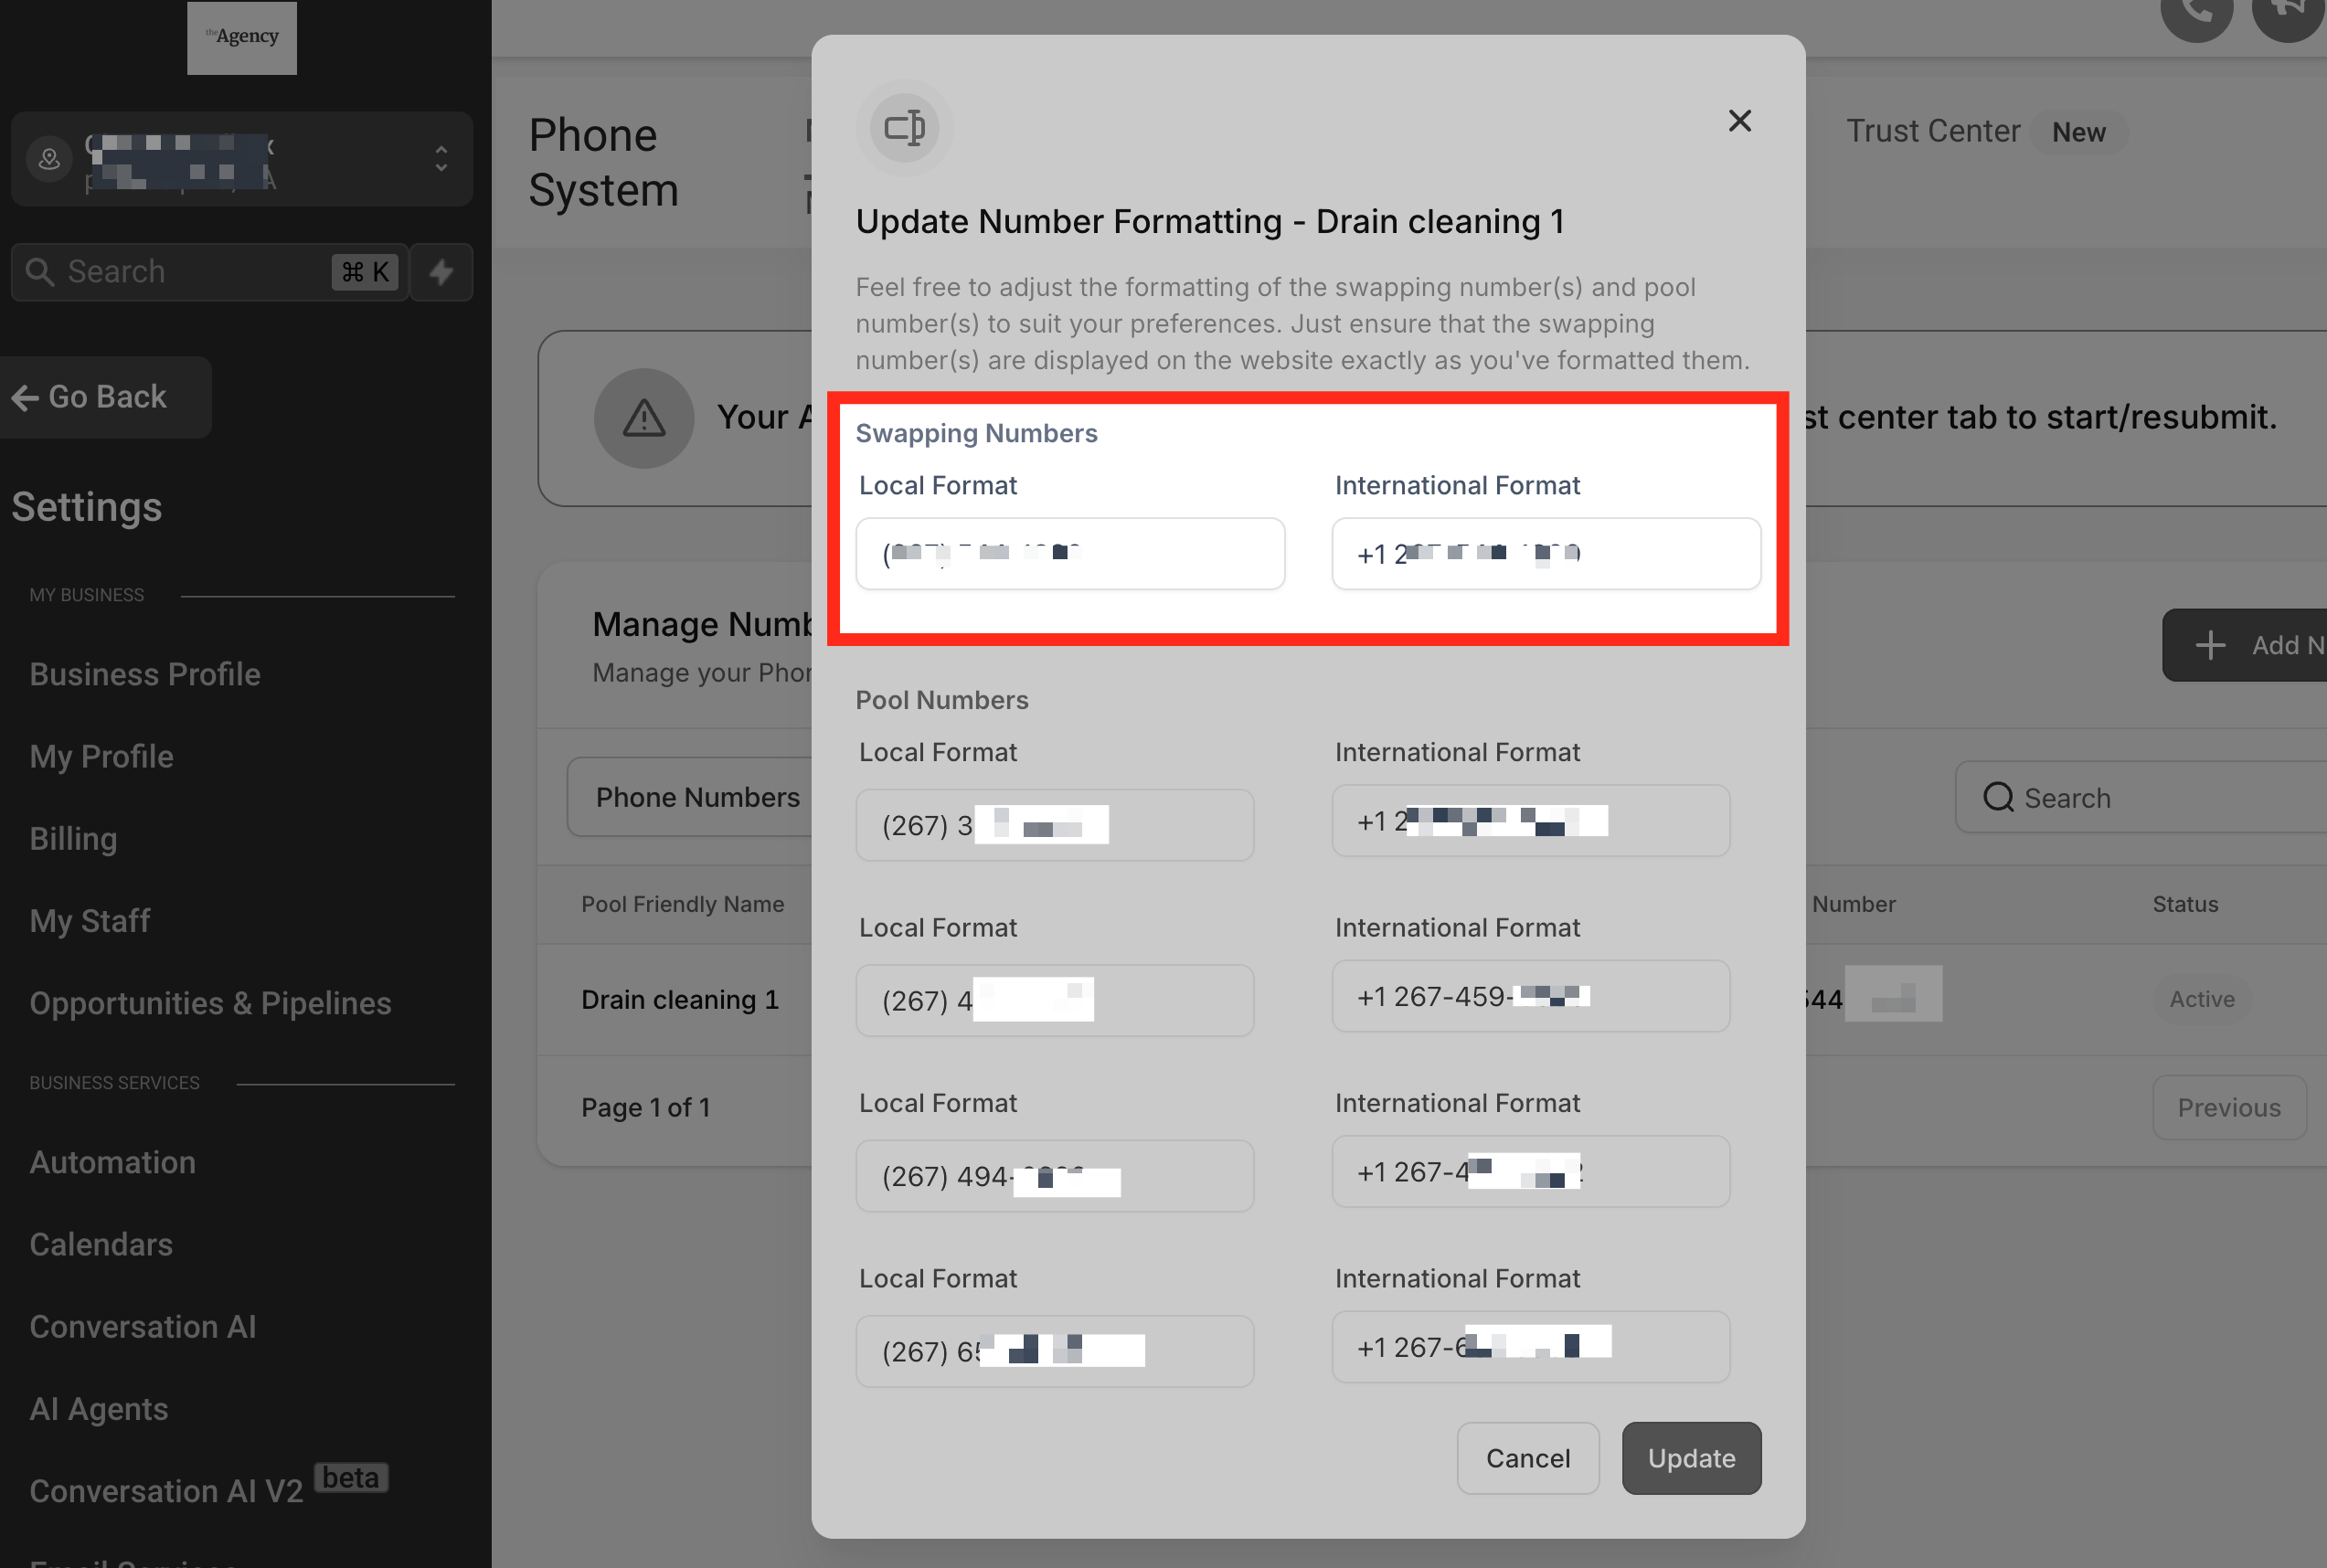
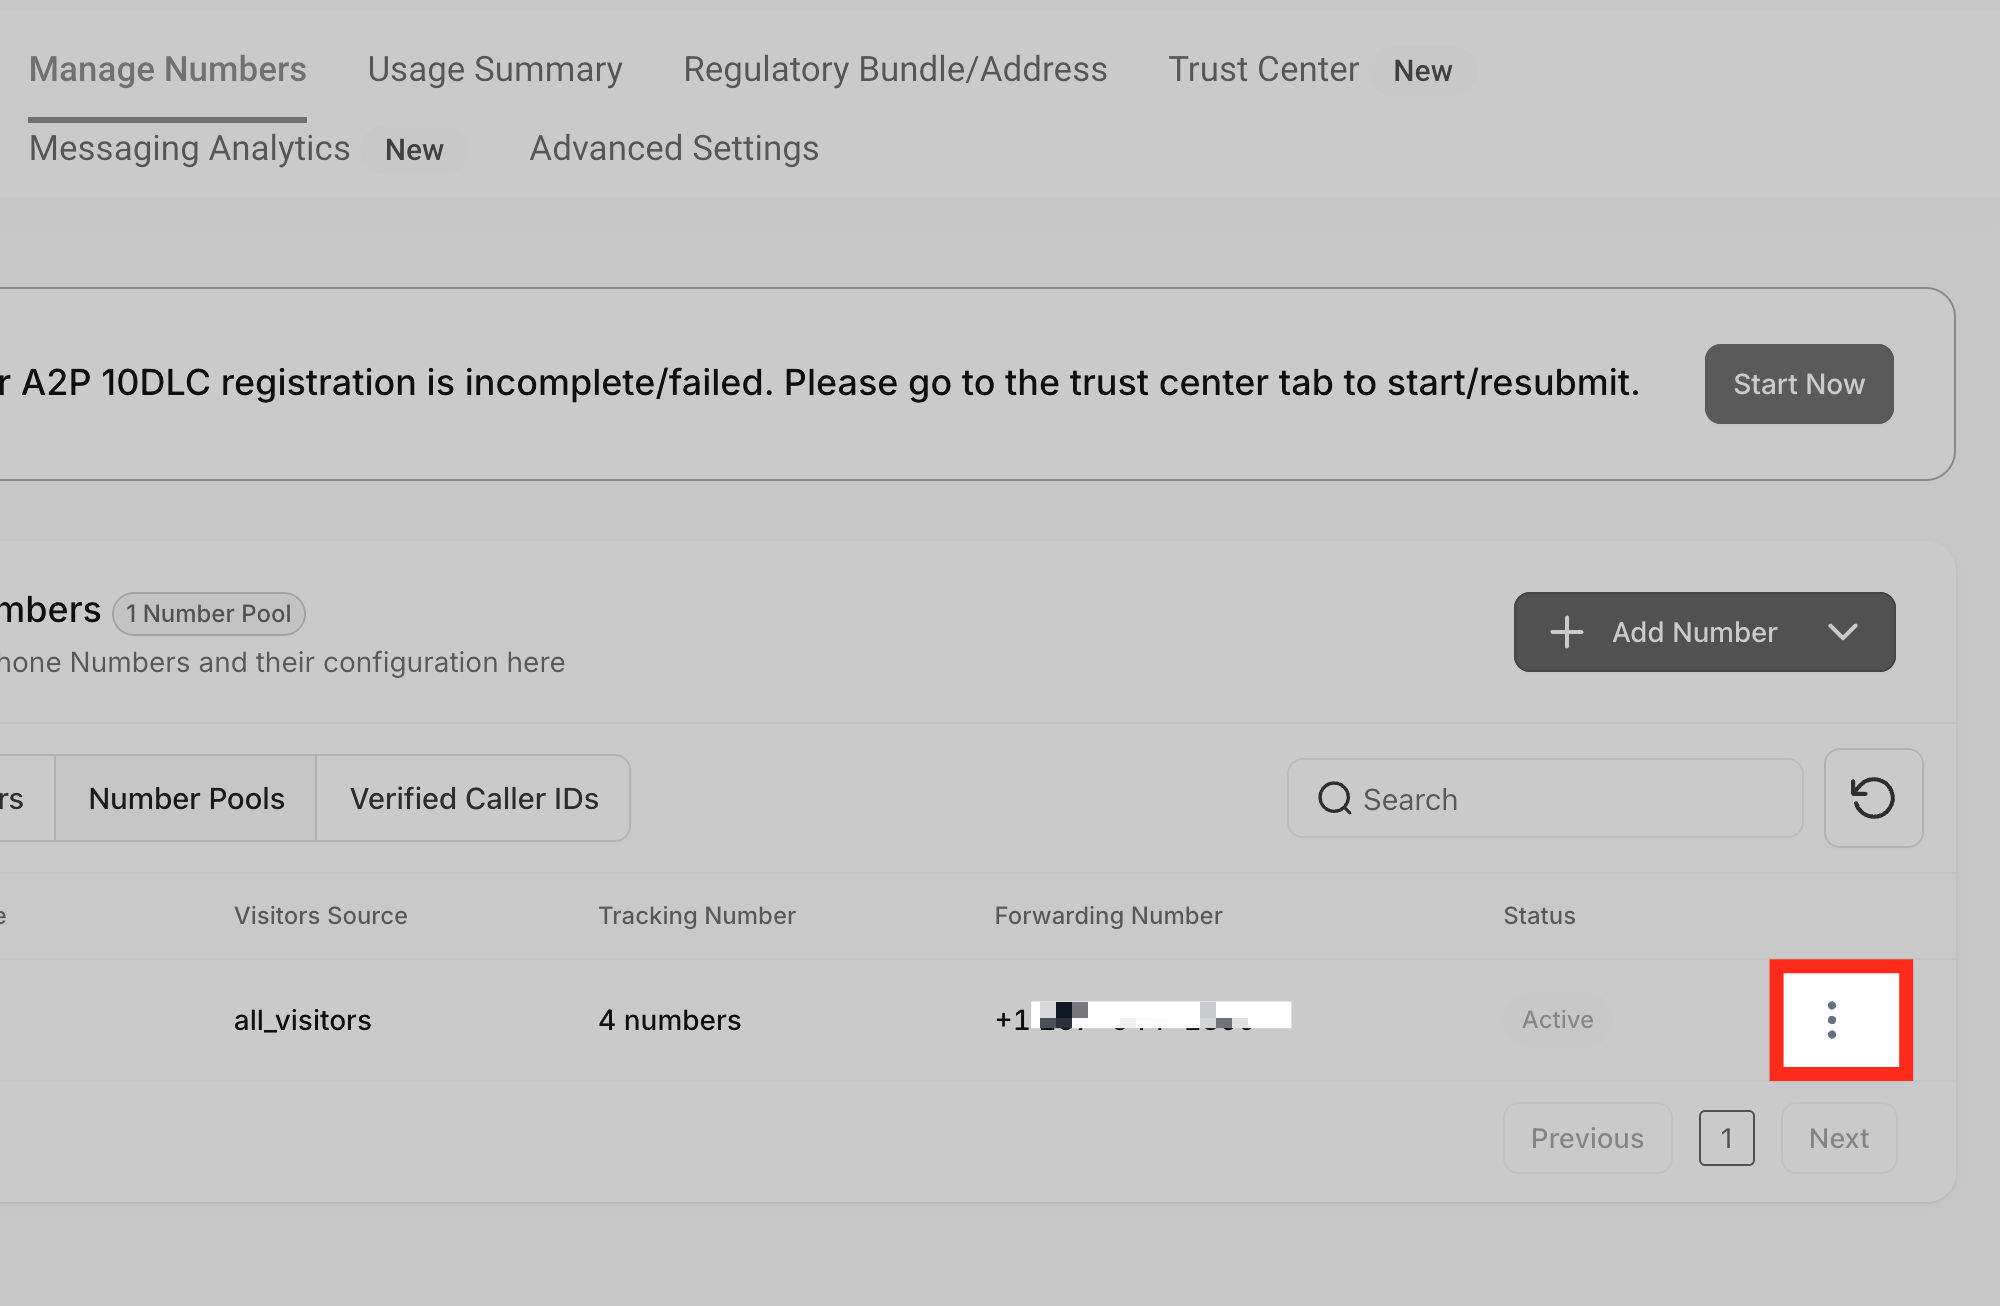
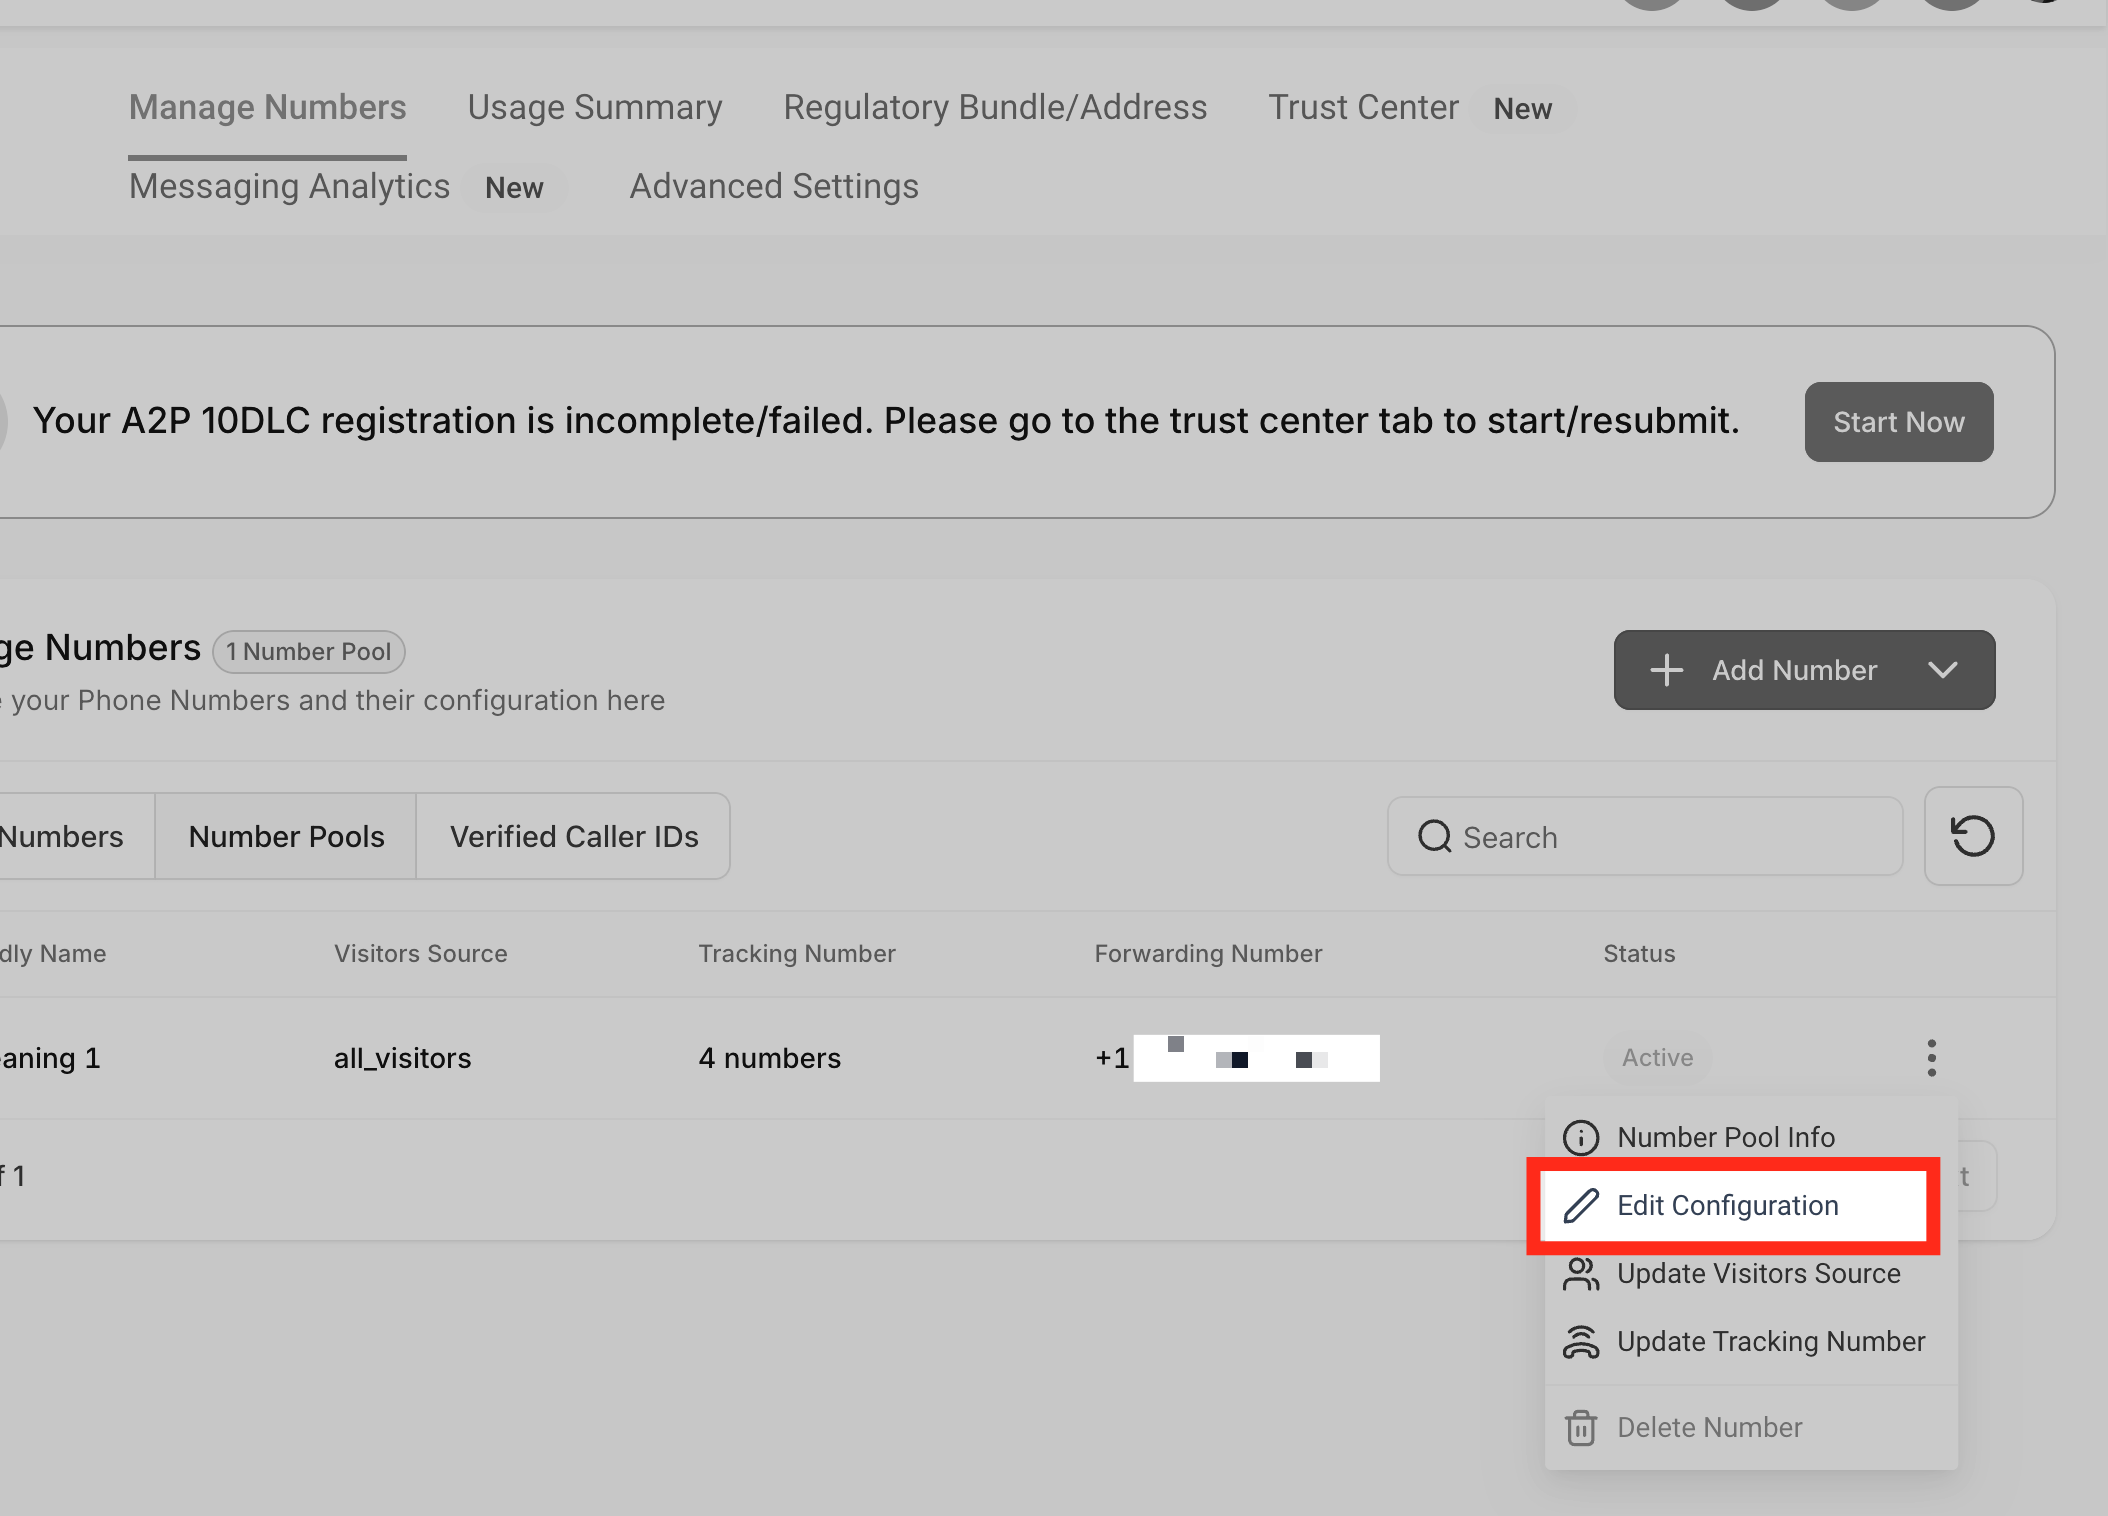
In order to update the swapping number, follow these steps: click the three dots menu, then click "Edit Configuration."
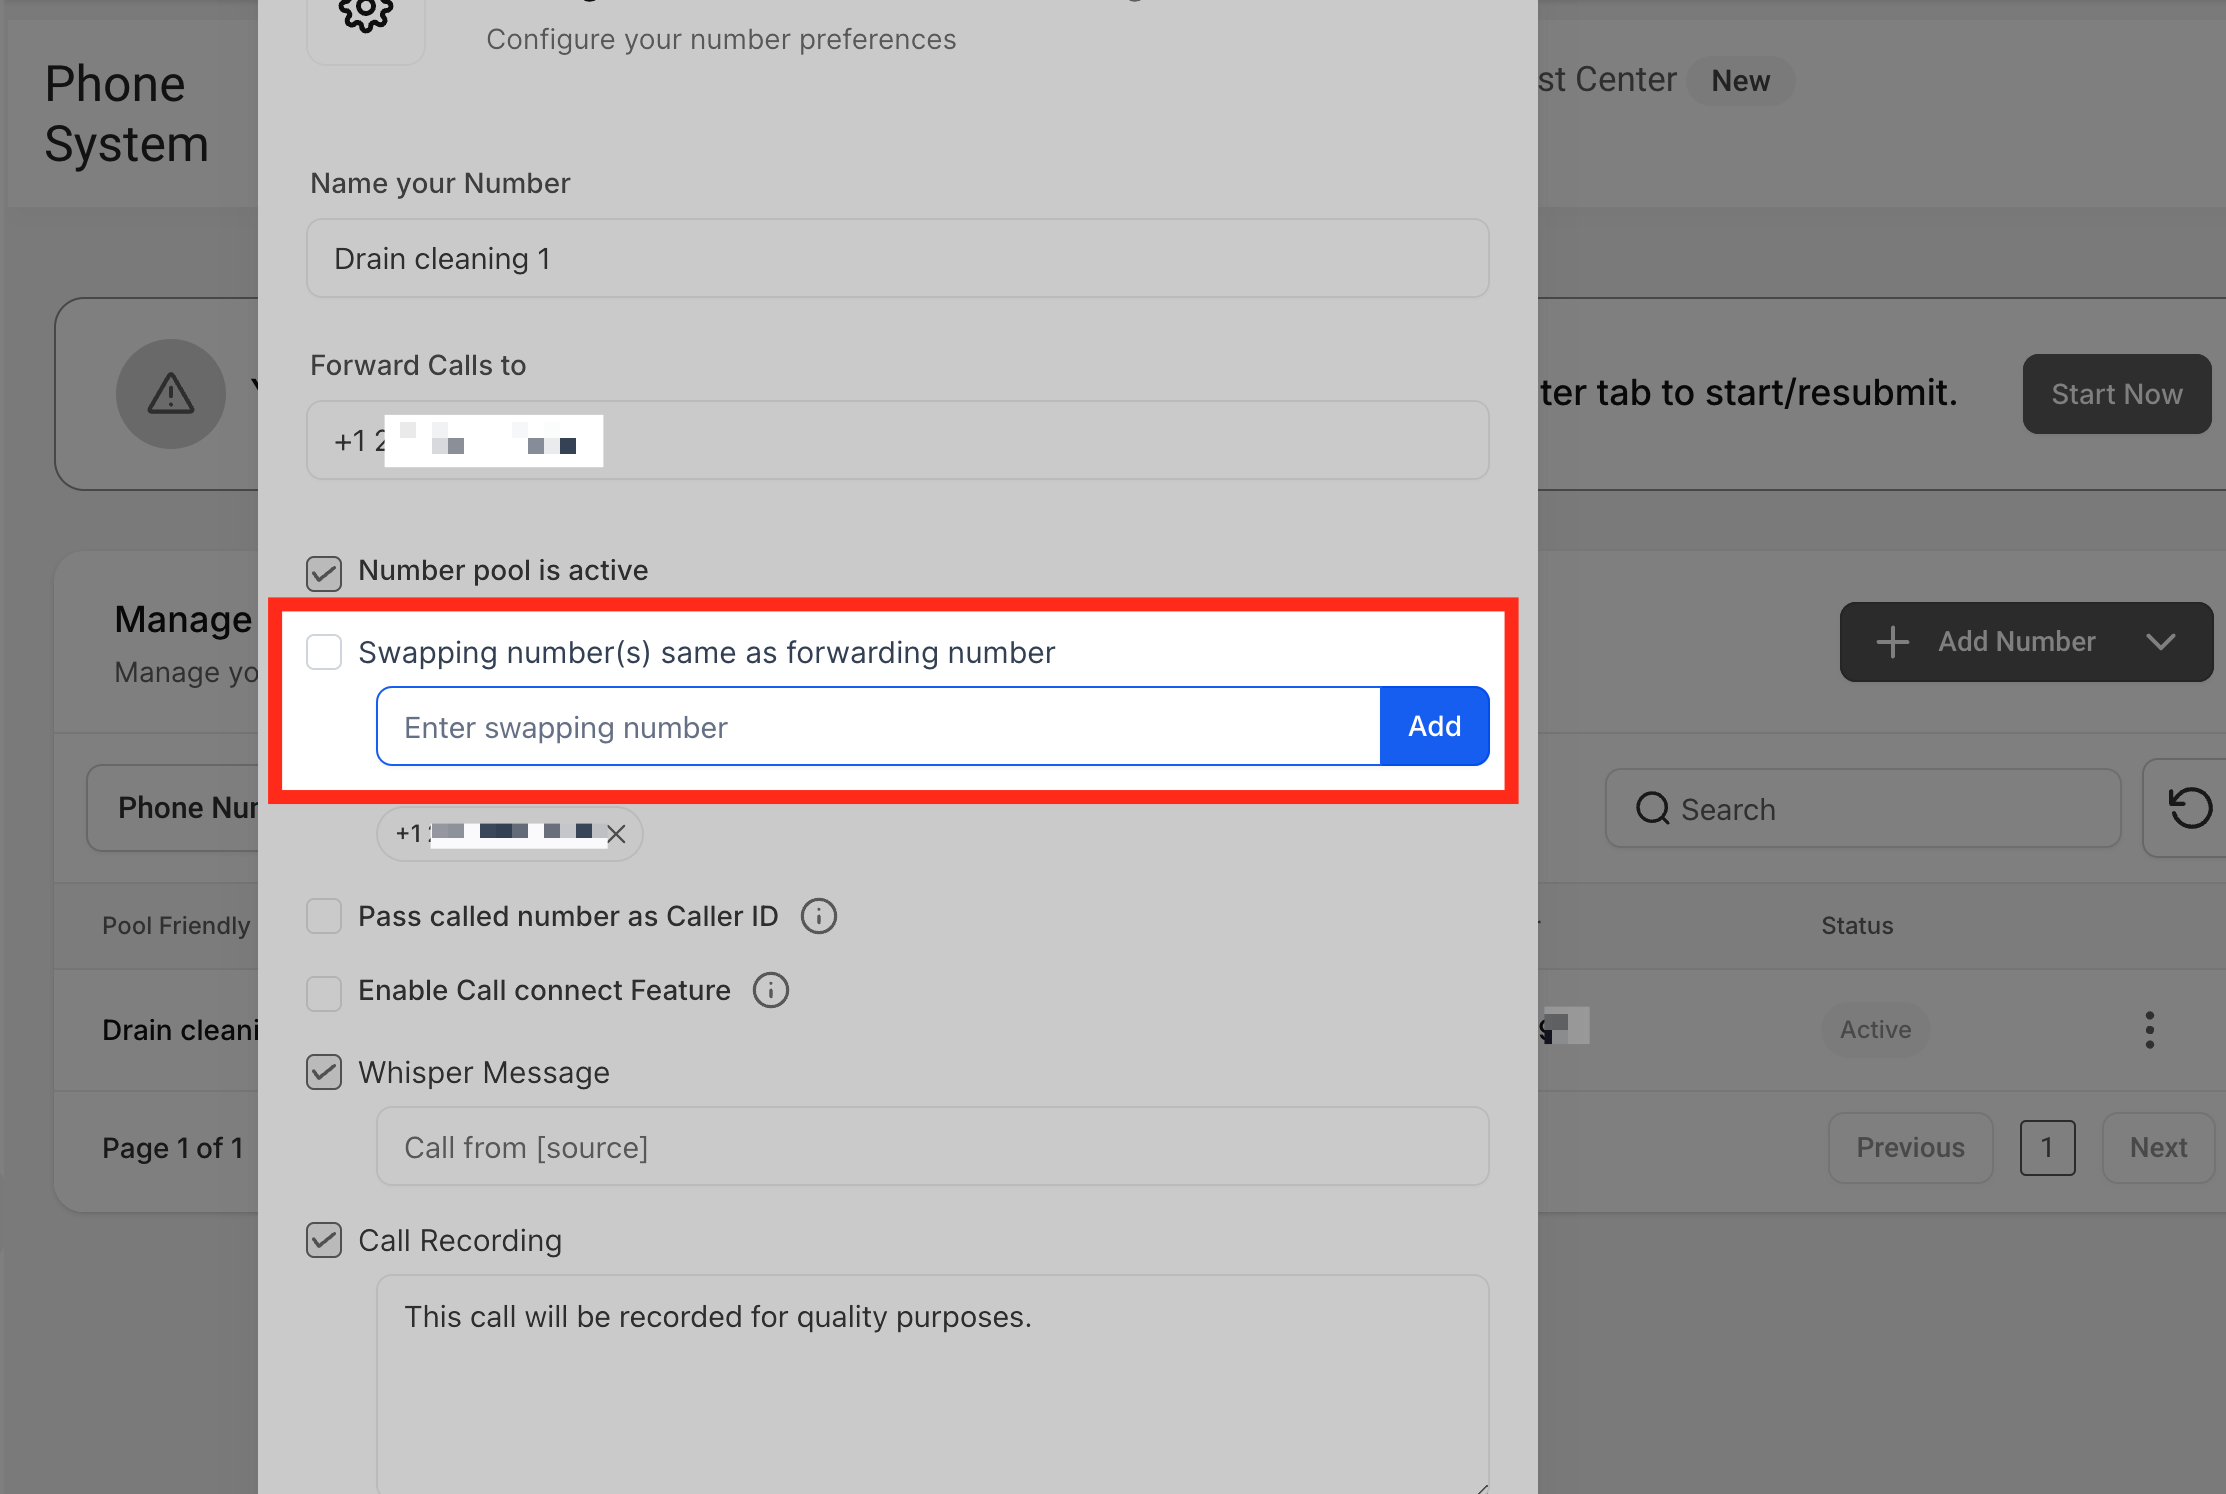
Uncheck the option "Swapping number(s) same as forwarding number" and set your own swapping number. Enter the swapping number in the respective field and click the "Add" button.
You cannot use a Twilio/LC phone number as your forwarding number, as this will create a looping issue. Be sure to use a different external number to avoid call routing problems.
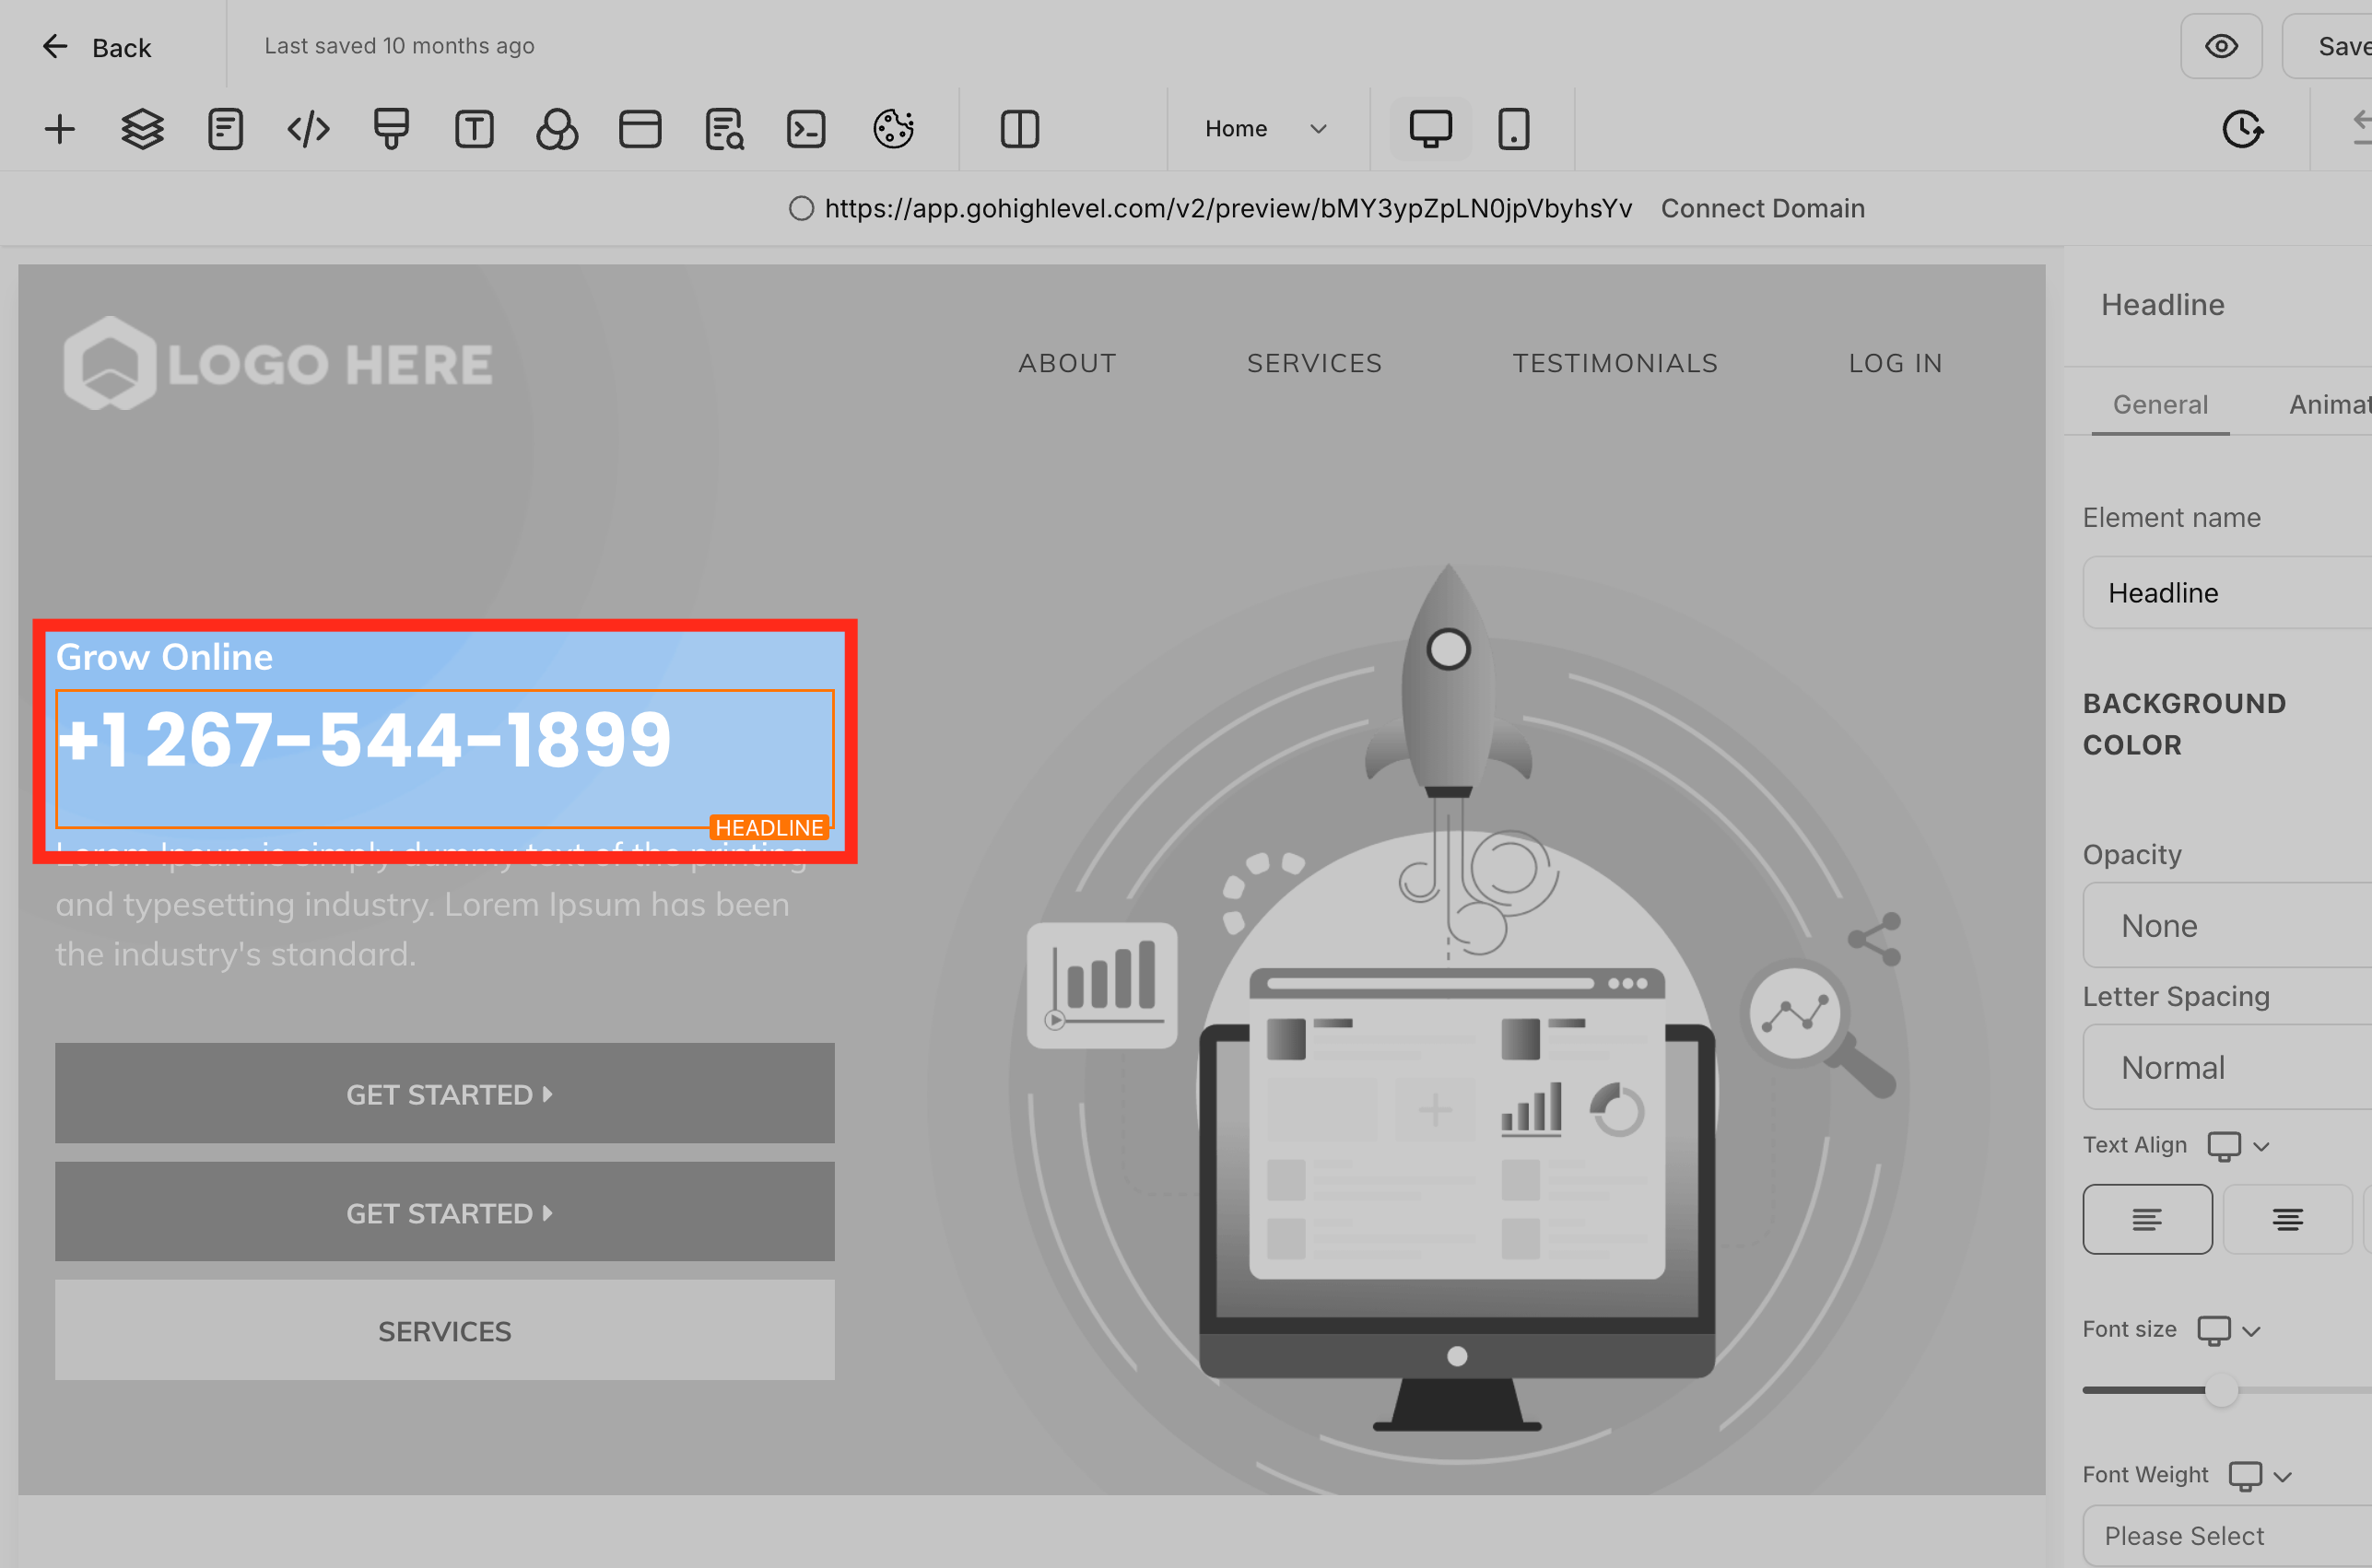
Now you can paste the swapping number on the website.
Once the number pool is set up and running, you can view the Keyword column under Reporting → Call Report.
Your website visitors search the keywords, then land on your website and call the tracking number — we're able to attribute the source and keyword in the call reporting tab.
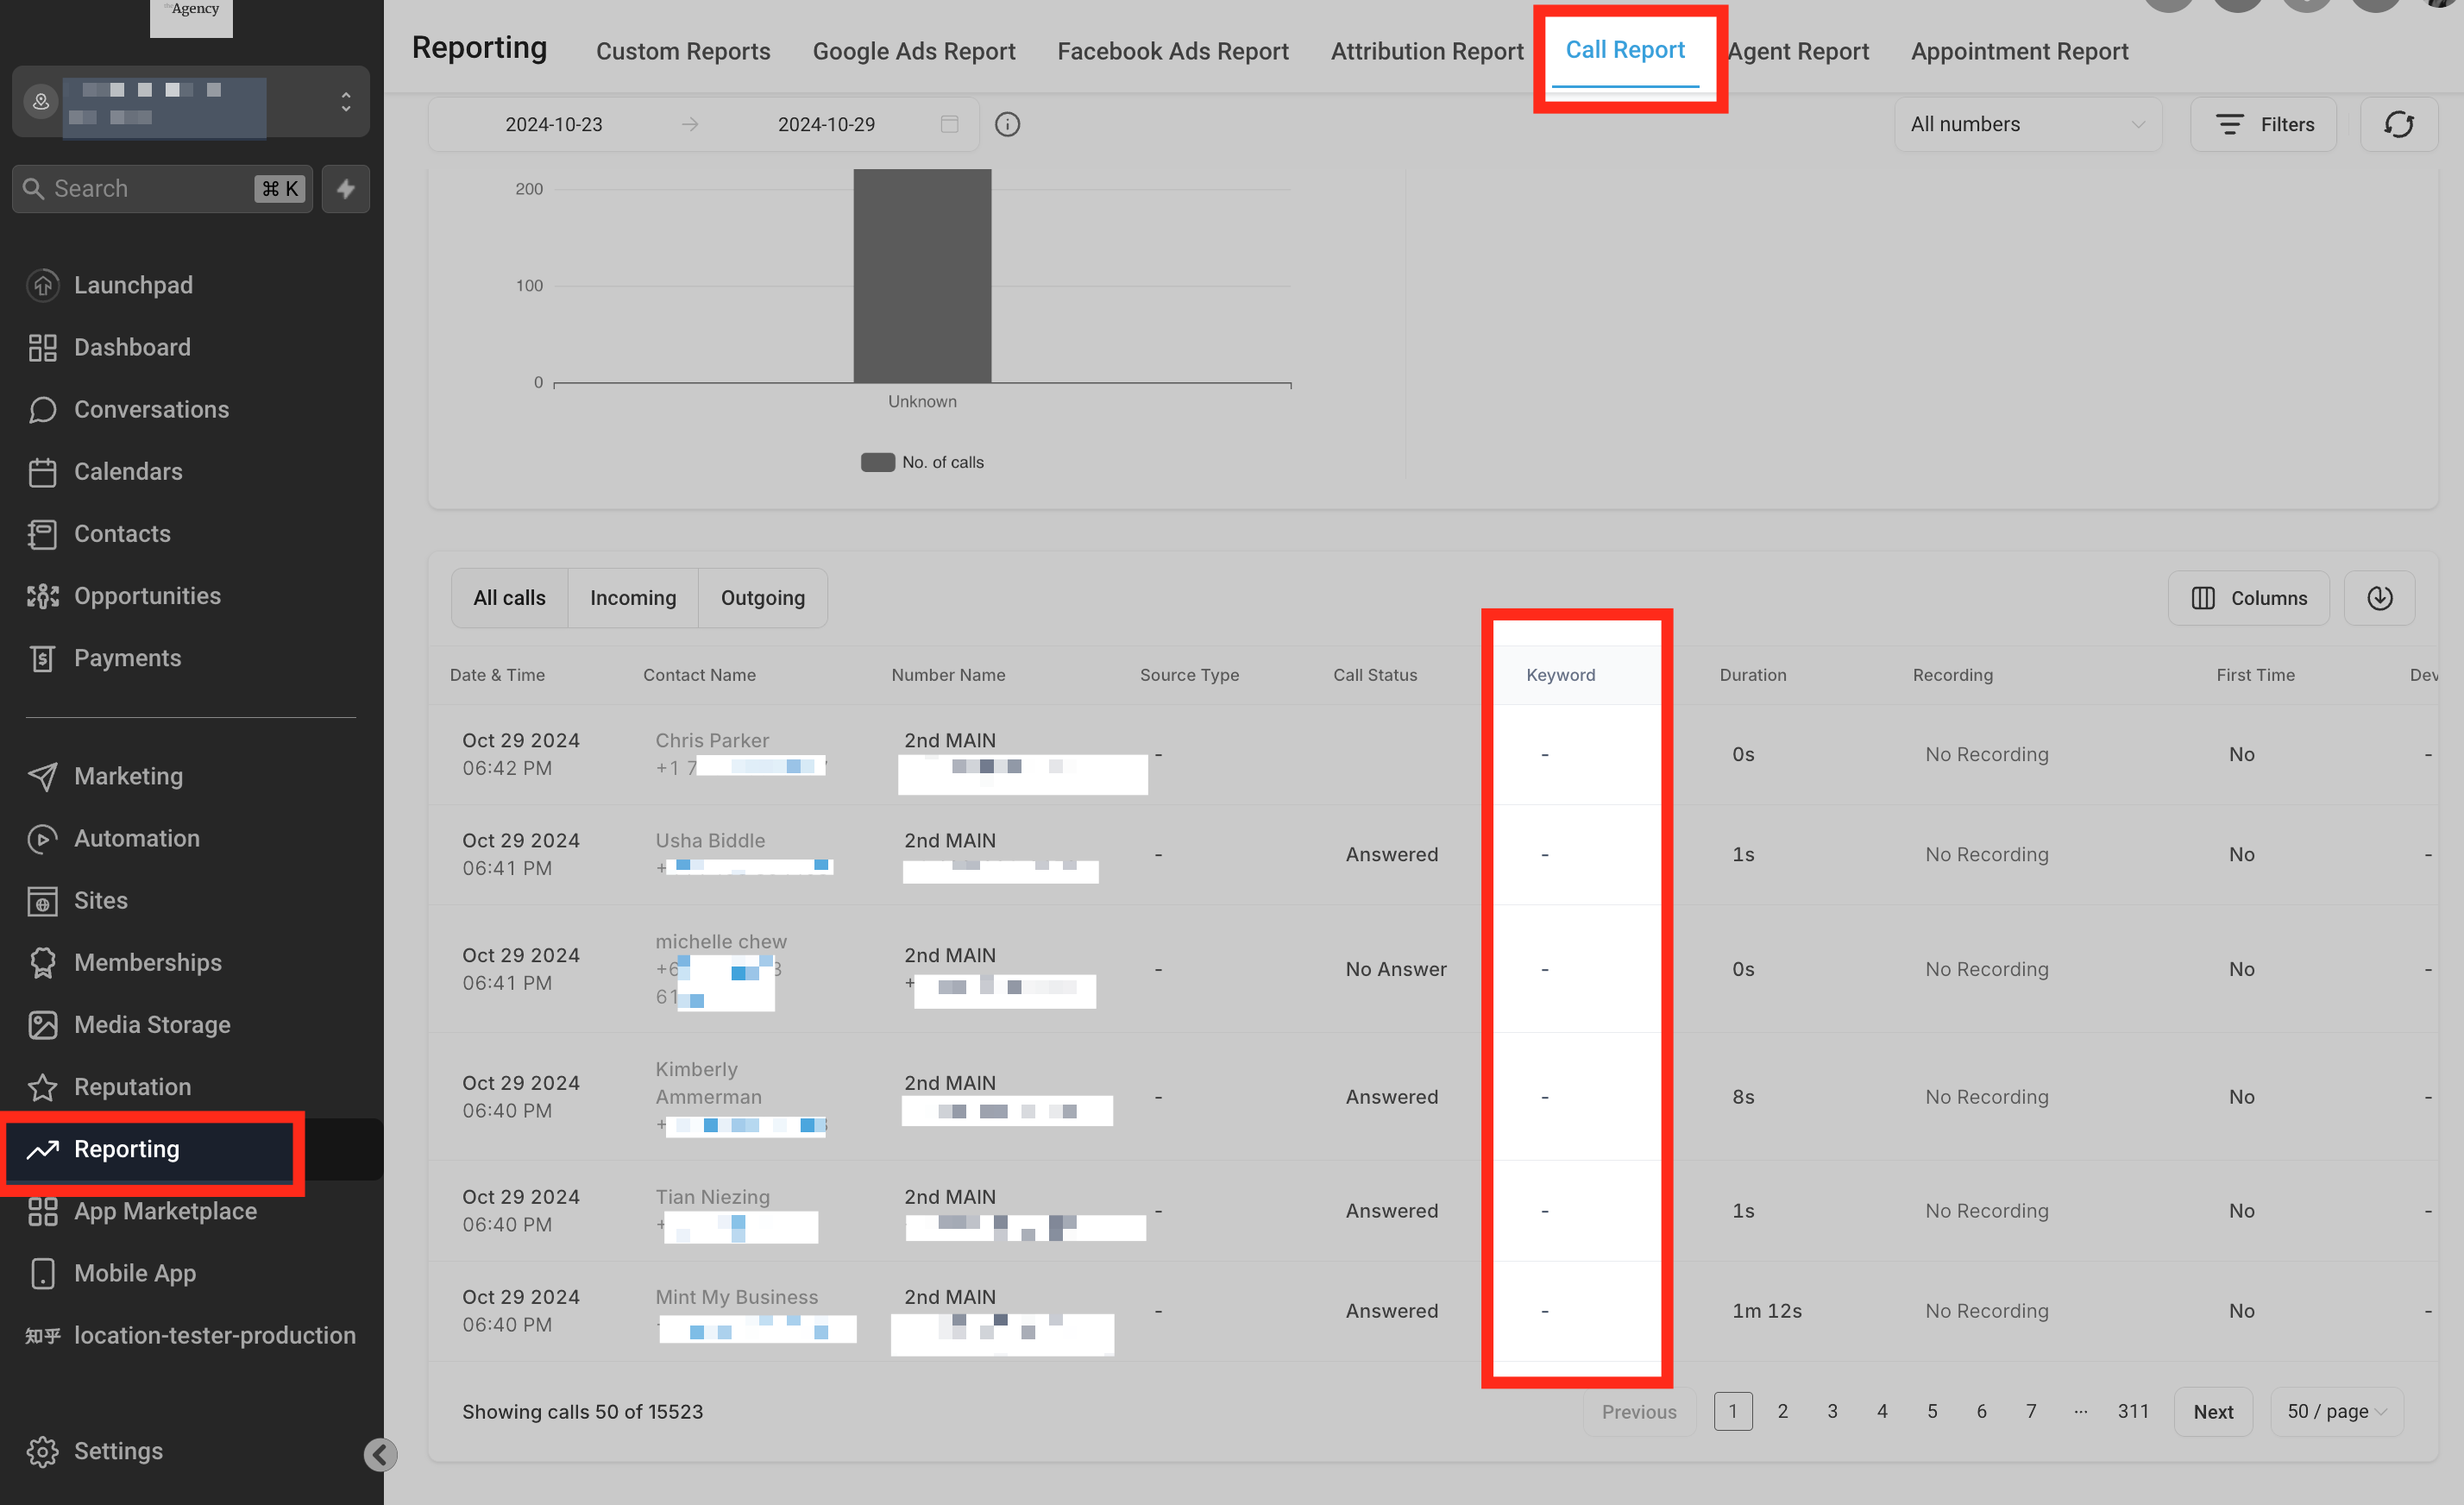
After you scroll to the right and click the arrow-down button, you can also look at the link the contact was visiting. You can also click the contact's name to view their activities:

How To Test Number Swapping
Once you've added the tracking script to the Body of your webpage, you can test that the number swap is working by opening an incognito browser.
You would enter the following into your incognito browser — yourwebsite.com/landing-page — then hit enter.
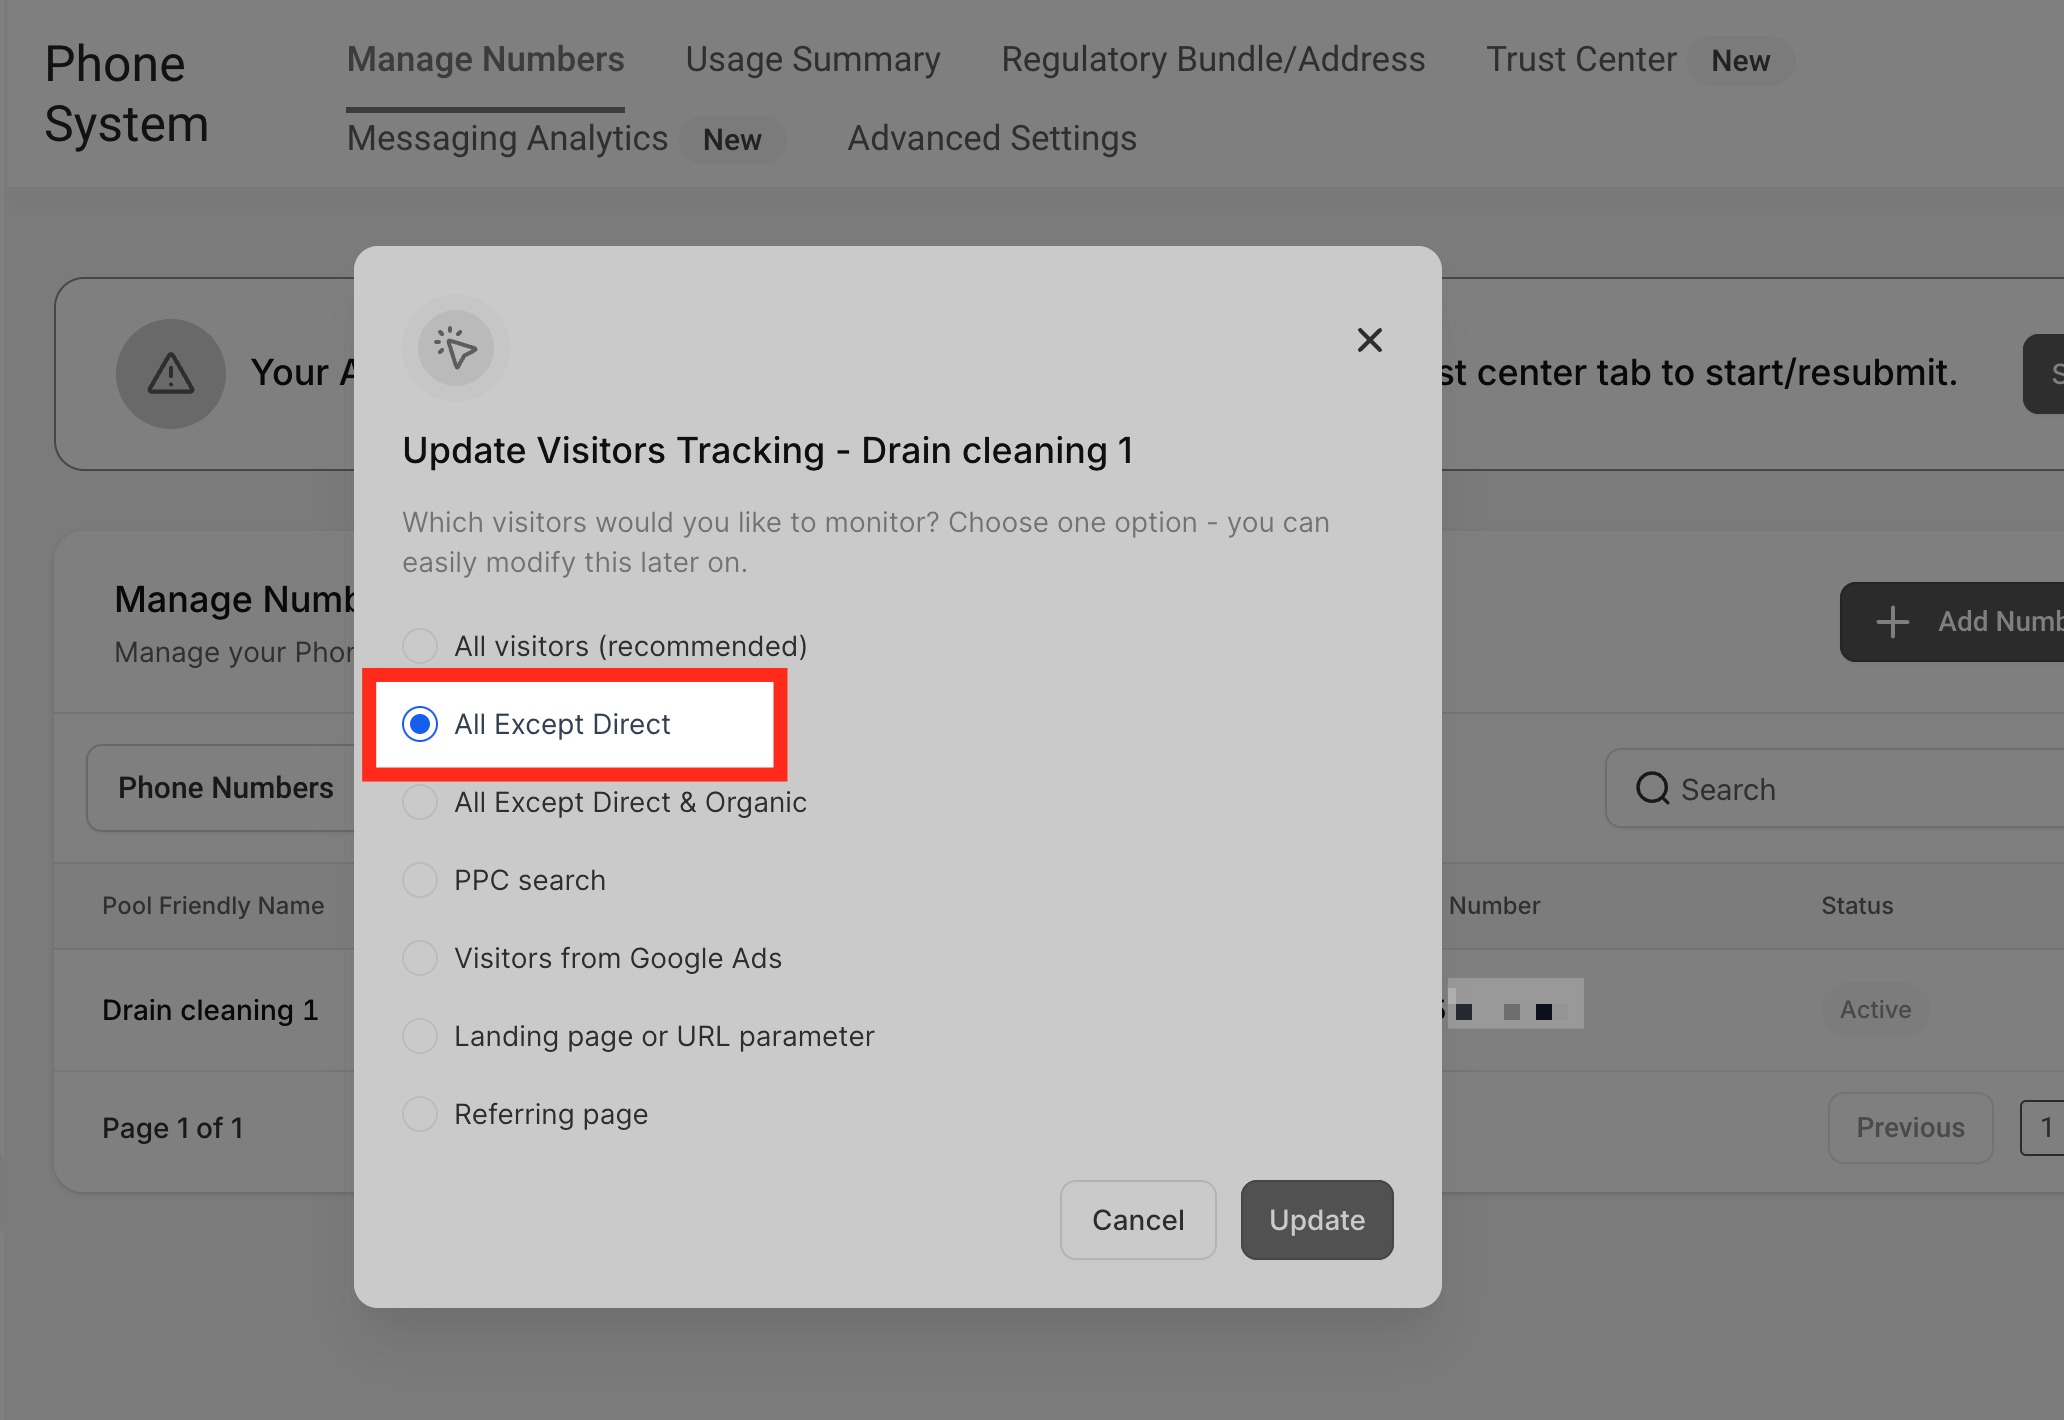
If the Tracking Option All Except Direct is selected, you must link the landing page URL from another webpage instead of entering the link directly from the browser to test.

E.g. link "Apple Smiles" with yourwebsite.com/landing-page.
How To Set Up Keyword Tracking
For the platform to display the keyword that was searched before the call was initiated, you'll need to add the following parameter to the ad URL in Google Ads: ?keyword={keyword}
So if you have a Google Ad with a URL like yourwebsite.com/landingpage, you would update that URL to be: yourwebsite.com/landingpage/?keyword={keyword}
Related: New Feature Released — Call Tracking!!
To Swap Numbers in a Button
You can use an anchor tag and set href with the phone number and text as you want.
e.g. <a href="tel:(972) 421-5139" class="btn btn-blue">Call Us</a>The phone number inside href="tel:..." should use the same format as the visible/swapping number. Number Pool matching does not automatically normalize local and international formats. For international numbers, use either local or E.164 formatting consistently throughout the page.
Group ID
It will help to swap only one number, but not each and every number, from different number pools — it finds the best matching number pool and swaps the number.
If the user is running two ads: if leads land on the first ad, the website will show one number; if they land on the second ad, the website will show a different number. You'll need to change the source according to the ad and set the group using a Group ID.
Edit the number pool → click Add/Edit Group Id → name the group Id → click Update.

You can click the information icon to copy the Group snippet to integrate it into the footer of your website:

Frequently Asked Questions

Was this article helpful?
That’s Great!
Thank you for your feedback
Sorry! We couldn't be helpful
Thank you for your feedback
Feedback sent
We appreciate your effort and will try to fix the article