ChatGPT campaigns use the same campaign, ad group and ad structure as your Meta, Google and LinkedIn campaigns. This article walks the whole build.
TABLE OF CONTENTS
- Before you begin
- Step 1: Start the campaign
- Step 2: Campaign settings
- Step 3: Locations and ChatGPT surfaces
- Step 4: URL parameters and audiences
- Step 5: Build the ad group
- Step 6: Write the ad
- Step 7: Review and publish
- Finding your campaign later
- Related
Before you begin
Connect your OpenAI ad account.
If you plan to use the Conversions objective, set up a data source and at least one conversion event first.
Have your landing page URL and a square image ready.
Step 1: Start the campaign
Go to Marketing → Ad Manager → Campaigns.
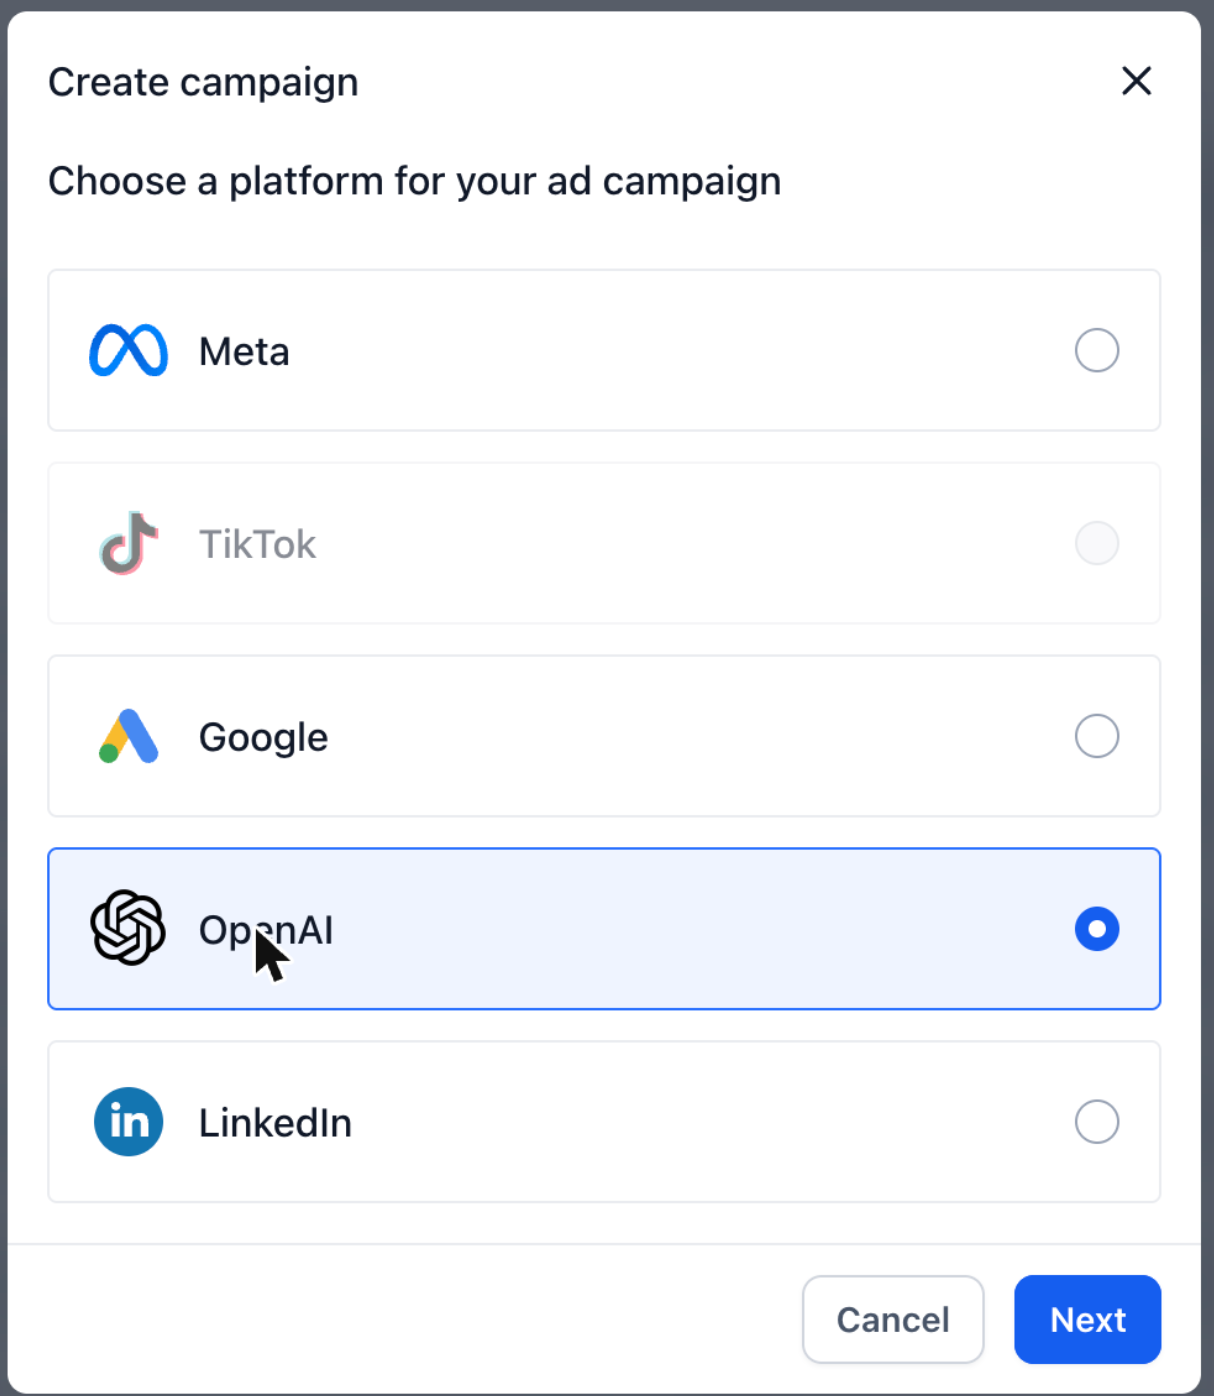
Click Create campaign.
Choose OpenAI, then click Next.
Choose Start from scratch, then click Next. Ad Manager templates for OpenAI campaigns are coming soon.
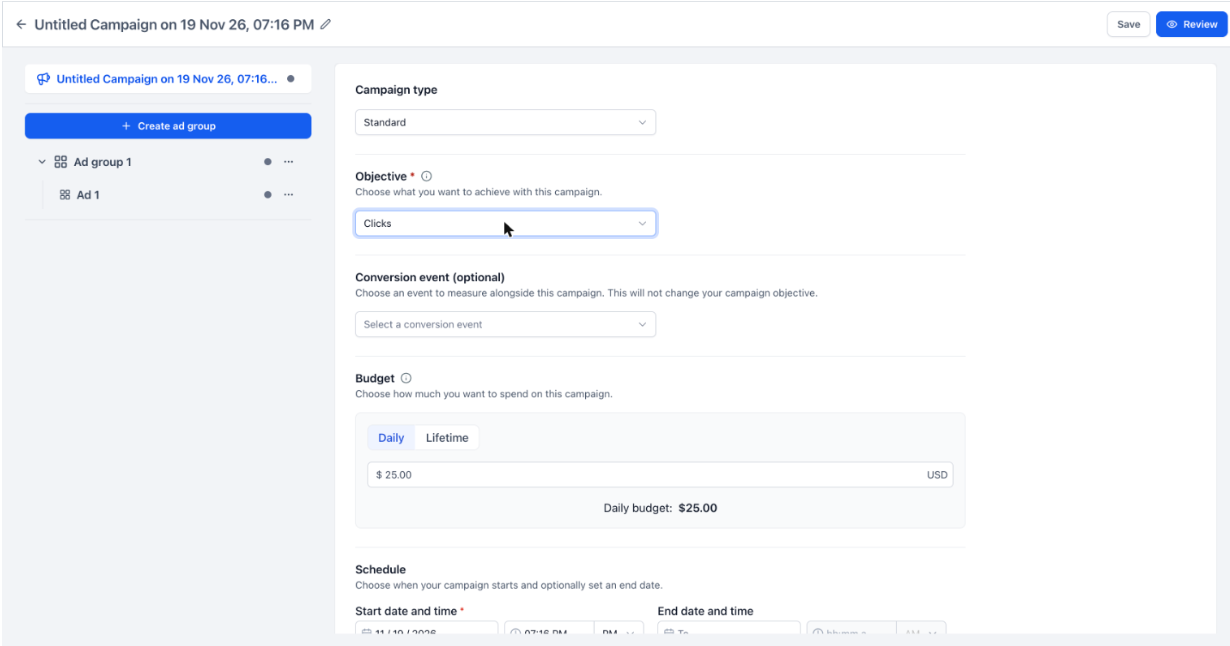
Ad Manager creates a draft and opens the builder. The left panel shows the campaign, its ad groups and the ads inside them. Use Save at any point to keep the draft and come back later.
Step 2: Campaign settings
Campaign type: Standard. This is the only type at launch.
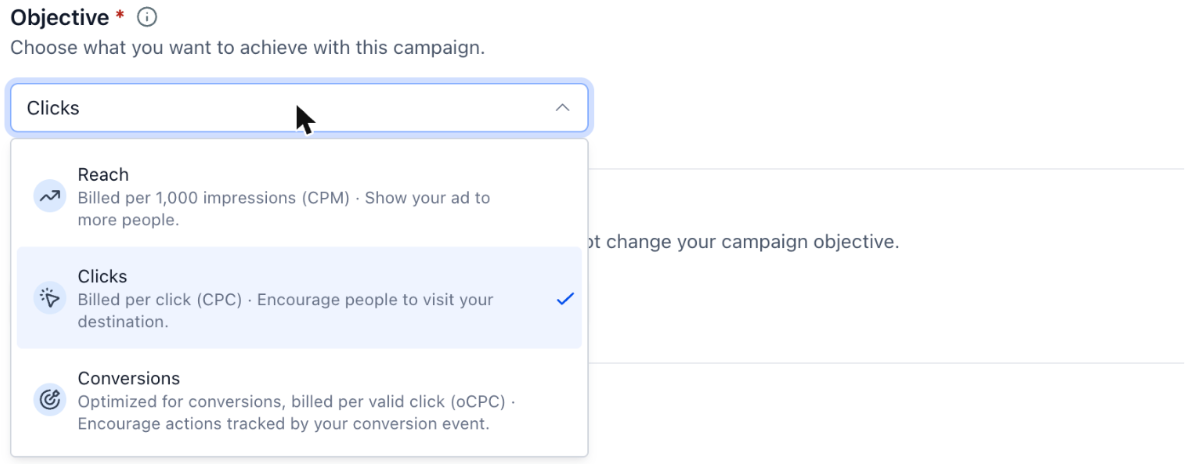
Objective: choose Reach, billed per 1,000 impressions (CPM), best for showing your ad to as many people as possible. Clicks, billed per click (CPC), best for driving visits to a destination. Or Conversions, billed per valid click (oCPC), optimised towards the conversion event you track.
Conversion event (optional): pick an event to measure alongside the campaign. This does not change what the campaign optimises for.
Budget: choose Daily or Lifetime and enter the amount. The currency comes from your connected ad account.
Schedule: set a start date and time. An end date and time is optional. Ad Manager shows the start time converted to UTC underneath, so check that line if your team works across timezones.
Step 3: Locations and ChatGPT surfaces
Under Locations, search for a country, region or city and add it. Each entry can be set to Include or Exclude, and the map on the right updates as you build the list. At least one location is required.
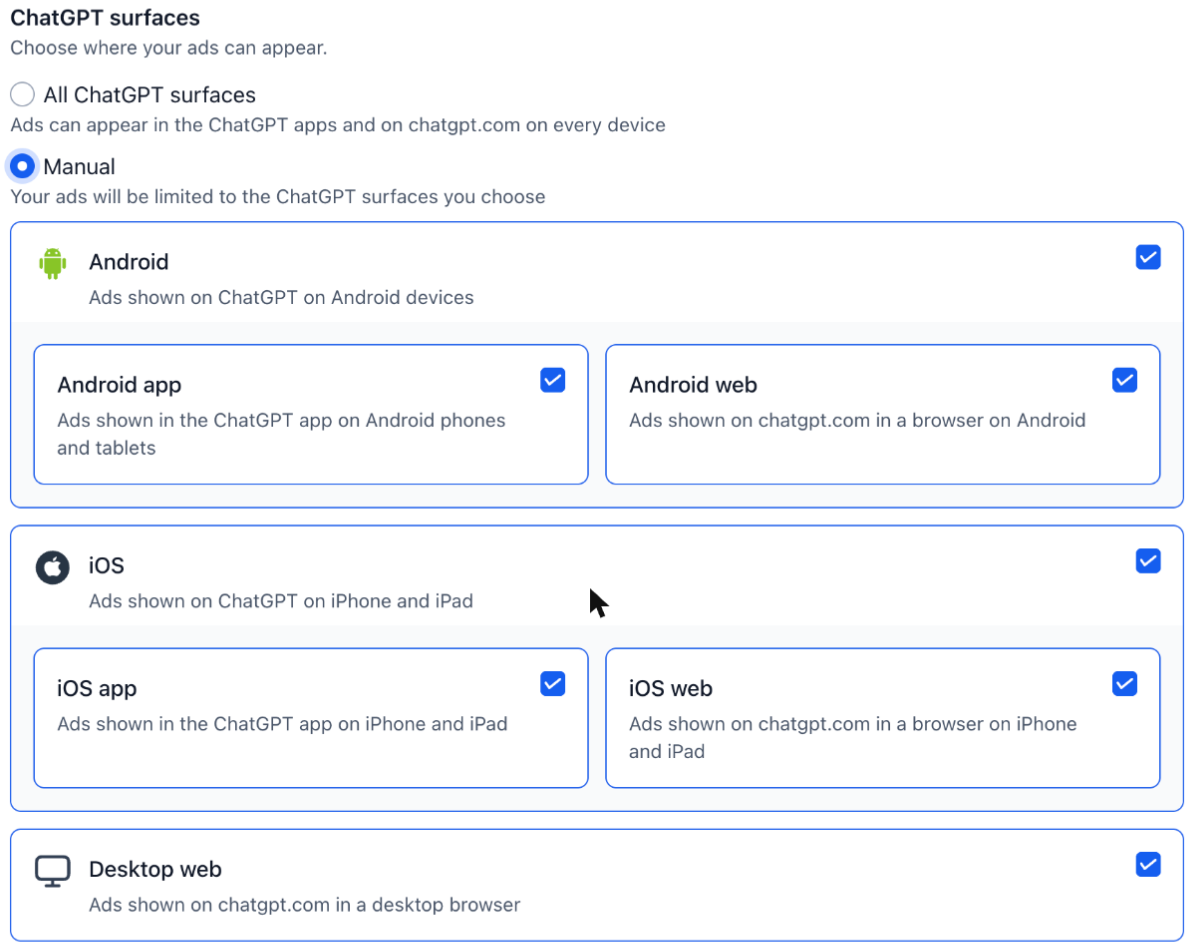
Then choose where your ads can appear:
All ChatGPT surfaces: ads can appear in the ChatGPT apps and on chatgpt.com on every device.
Manual: limit delivery to the surfaces you pick. The options are Android app, Android web, iOS app, iOS web and Desktop web. Android and iOS can each be switched on or off as a whole, or app and web chosen separately.
Start with all surfaces unless you have a reason to narrow, for example a mobile-only offer or a desktop-only checkout.
Step 4: URL parameters and audiences
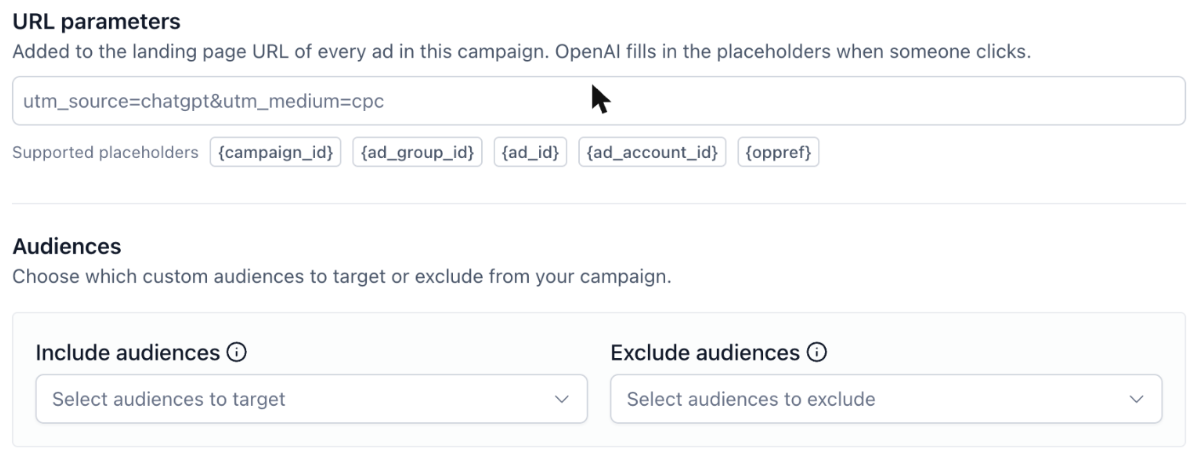
Anything you enter under URL parameters is added to the landing page URL of every ad in the campaign, for example utm_source=chatgpt&utm_medium=cpc. OpenAI fills in these placeholders at the moment someone clicks: {campaign_id}, {ad_group_id}, {ad_id}, {ad_account_id} and {oppref}.
Under Audiences, include or exclude custom audiences. See the separate article on creating custom audiences, including the 25,000 match minimum.
Step 5: Build the ad group
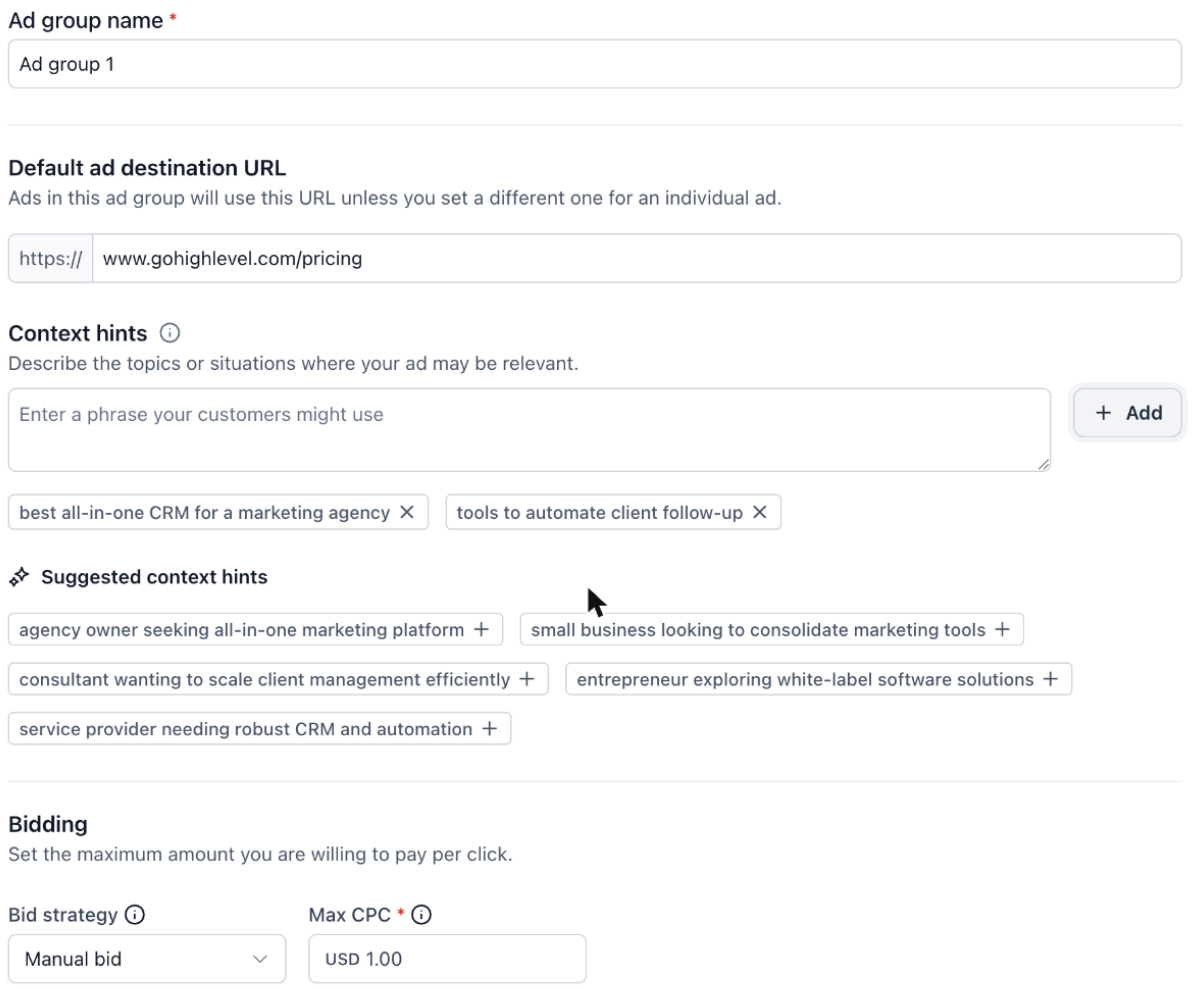
Select the ad group in the left panel. Ad groups hold ads that share the same targeting and bidding.
Ad group name: required.
Default ad destination URL: every ad in the group uses this URL unless you set a different one on the individual ad.
Context hints: describe the topics and situations where your ad is relevant, written the way a customer would say it. Type a phrase and click Add. Ad Manager also shows Suggested context hints based on your destination, and each one can be added with a single click.
Bidding: choose Manual bid and set a Max CPC, or choose Maximize results.
Use Create ad group in the left panel to add more ad groups, for example one per offer or per audience.
Step 6: Write the ad
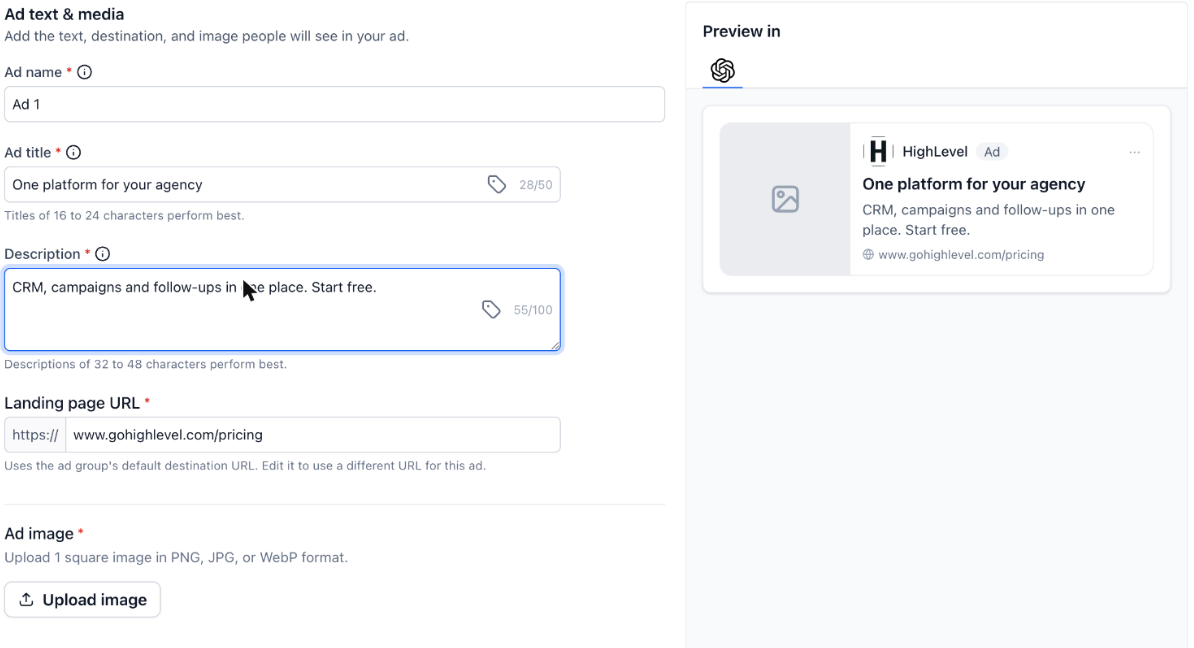
Select the ad in the left panel and fill in:
Ad name: internal only.
Ad title: up to 50 characters.
Description: up to 100 characters.
Landing page URL: pre-filled from the ad group's default. Edit it to send this ad somewhere else.
Ad image: one square image in PNG, JPG or WebP.
The Preview in ChatGPT panel on the right updates as you type, so you can see the ad exactly as someone will see it.
Step 7: Review and publish
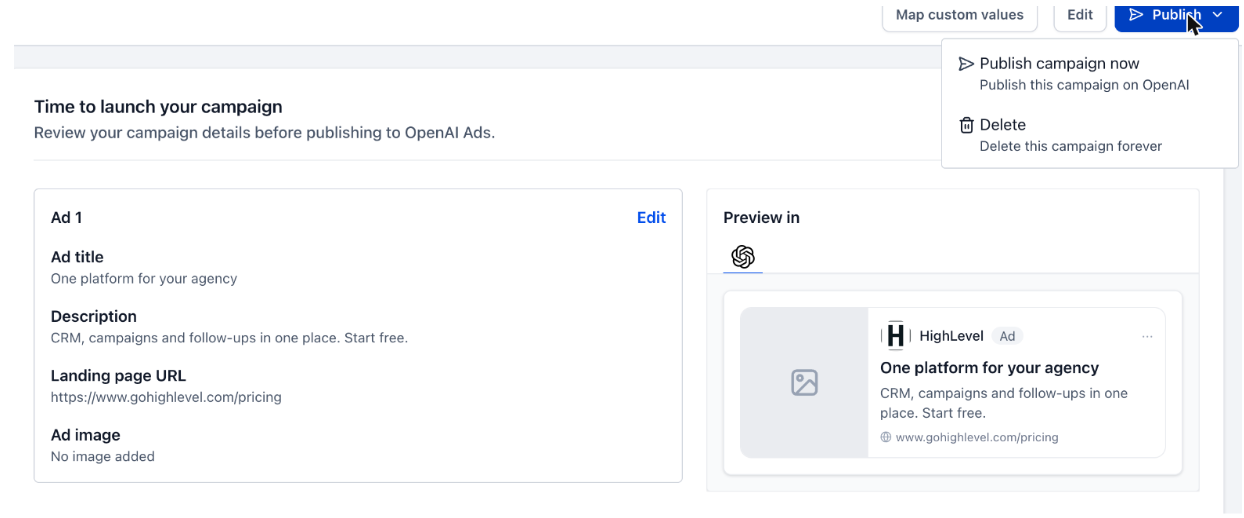
Click Review in the top right.
Check each ad's title, description, landing page URL and image against the preview.
Click Publish, then Publish campaign now to send the campaign to OpenAI Ads.
The same menu has a Delete option, which removes the campaign permanently.
Finding your campaign later
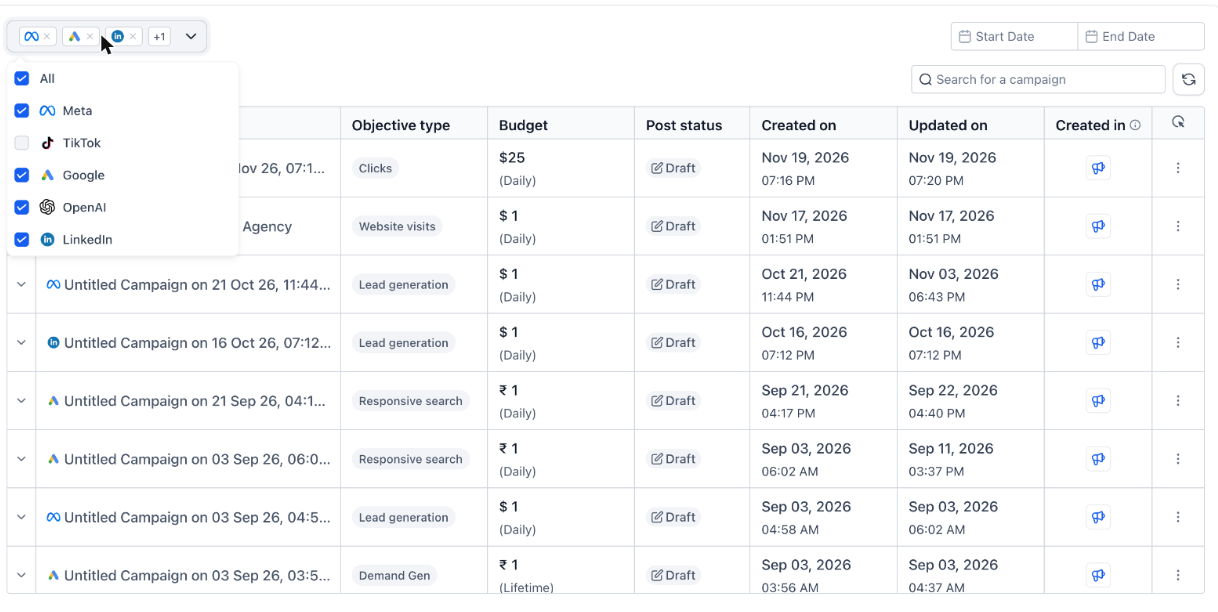
On the Campaigns tab, the platform filter at the top left now includes OpenAI. Tick only OpenAI to see ChatGPT campaigns on their own, or leave everything ticked to see all platforms together. The list shows objective type, budget, post status, and when each campaign was created and updated.
Related
Was this article helpful?
That’s Great!
Thank you for your feedback
Sorry! We couldn't be helpful
Thank you for your feedback
Feedback sent
We appreciate your effort and will try to fix the article