Overview
Custom values let you insert dynamic, location-specific data into your dashboards — so one dashboard automatically adapts to whichever sub-account is viewing it.
Instead of hardcoding a value like a business name or address, you insert a token (e.g. {{ location.name }}). When the dashboard is viewed, the token resolves to the actual value for that location.
Who can use this
Dashboard/Custom Report editors can configure custom values. Viewers see the resolved values.
Where custom values are supported
Wherever you see the {} button next to a text input, custom values are supported.
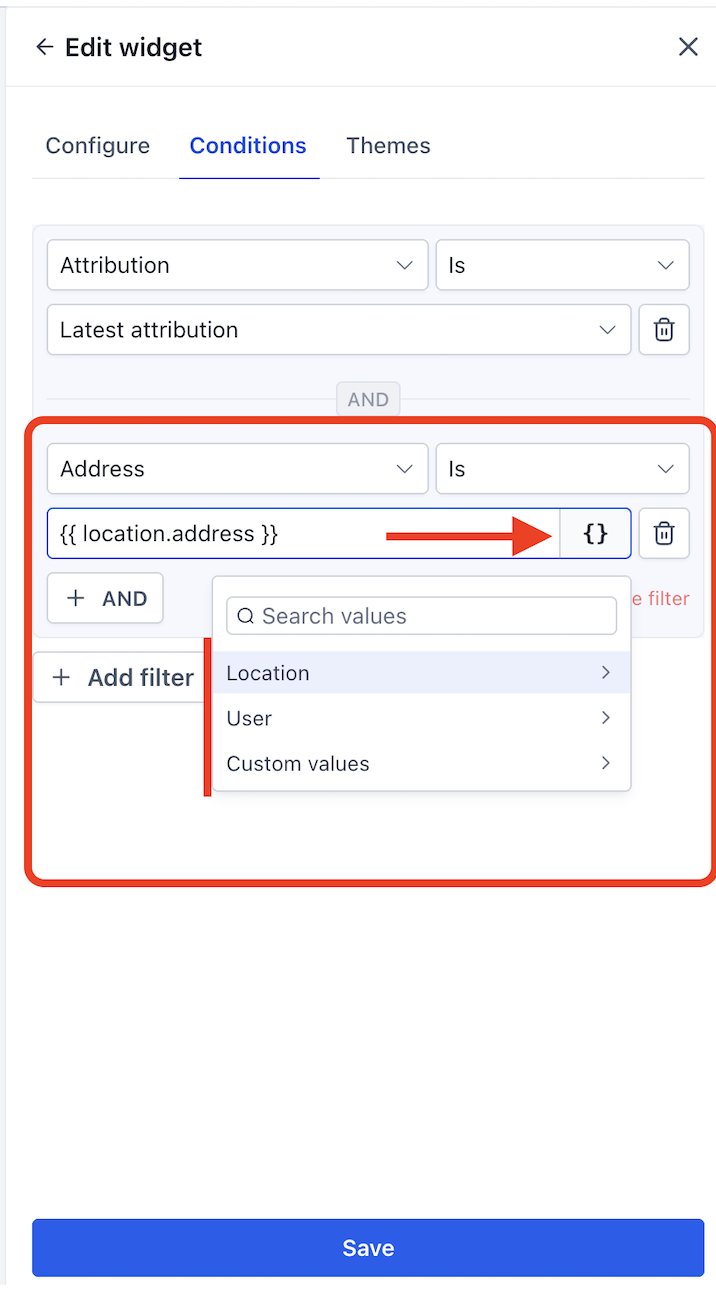
Widget conditions When adding a condition to a widget, click {} in the value field to insert a token instead of a static value.
Dashboard elements
- Embed — insert a token inside the URL field (e.g.
https://myagency.crm.com/embed/{{ location.id }}/page/main) - Title — insert a token in the title text field (e.g.
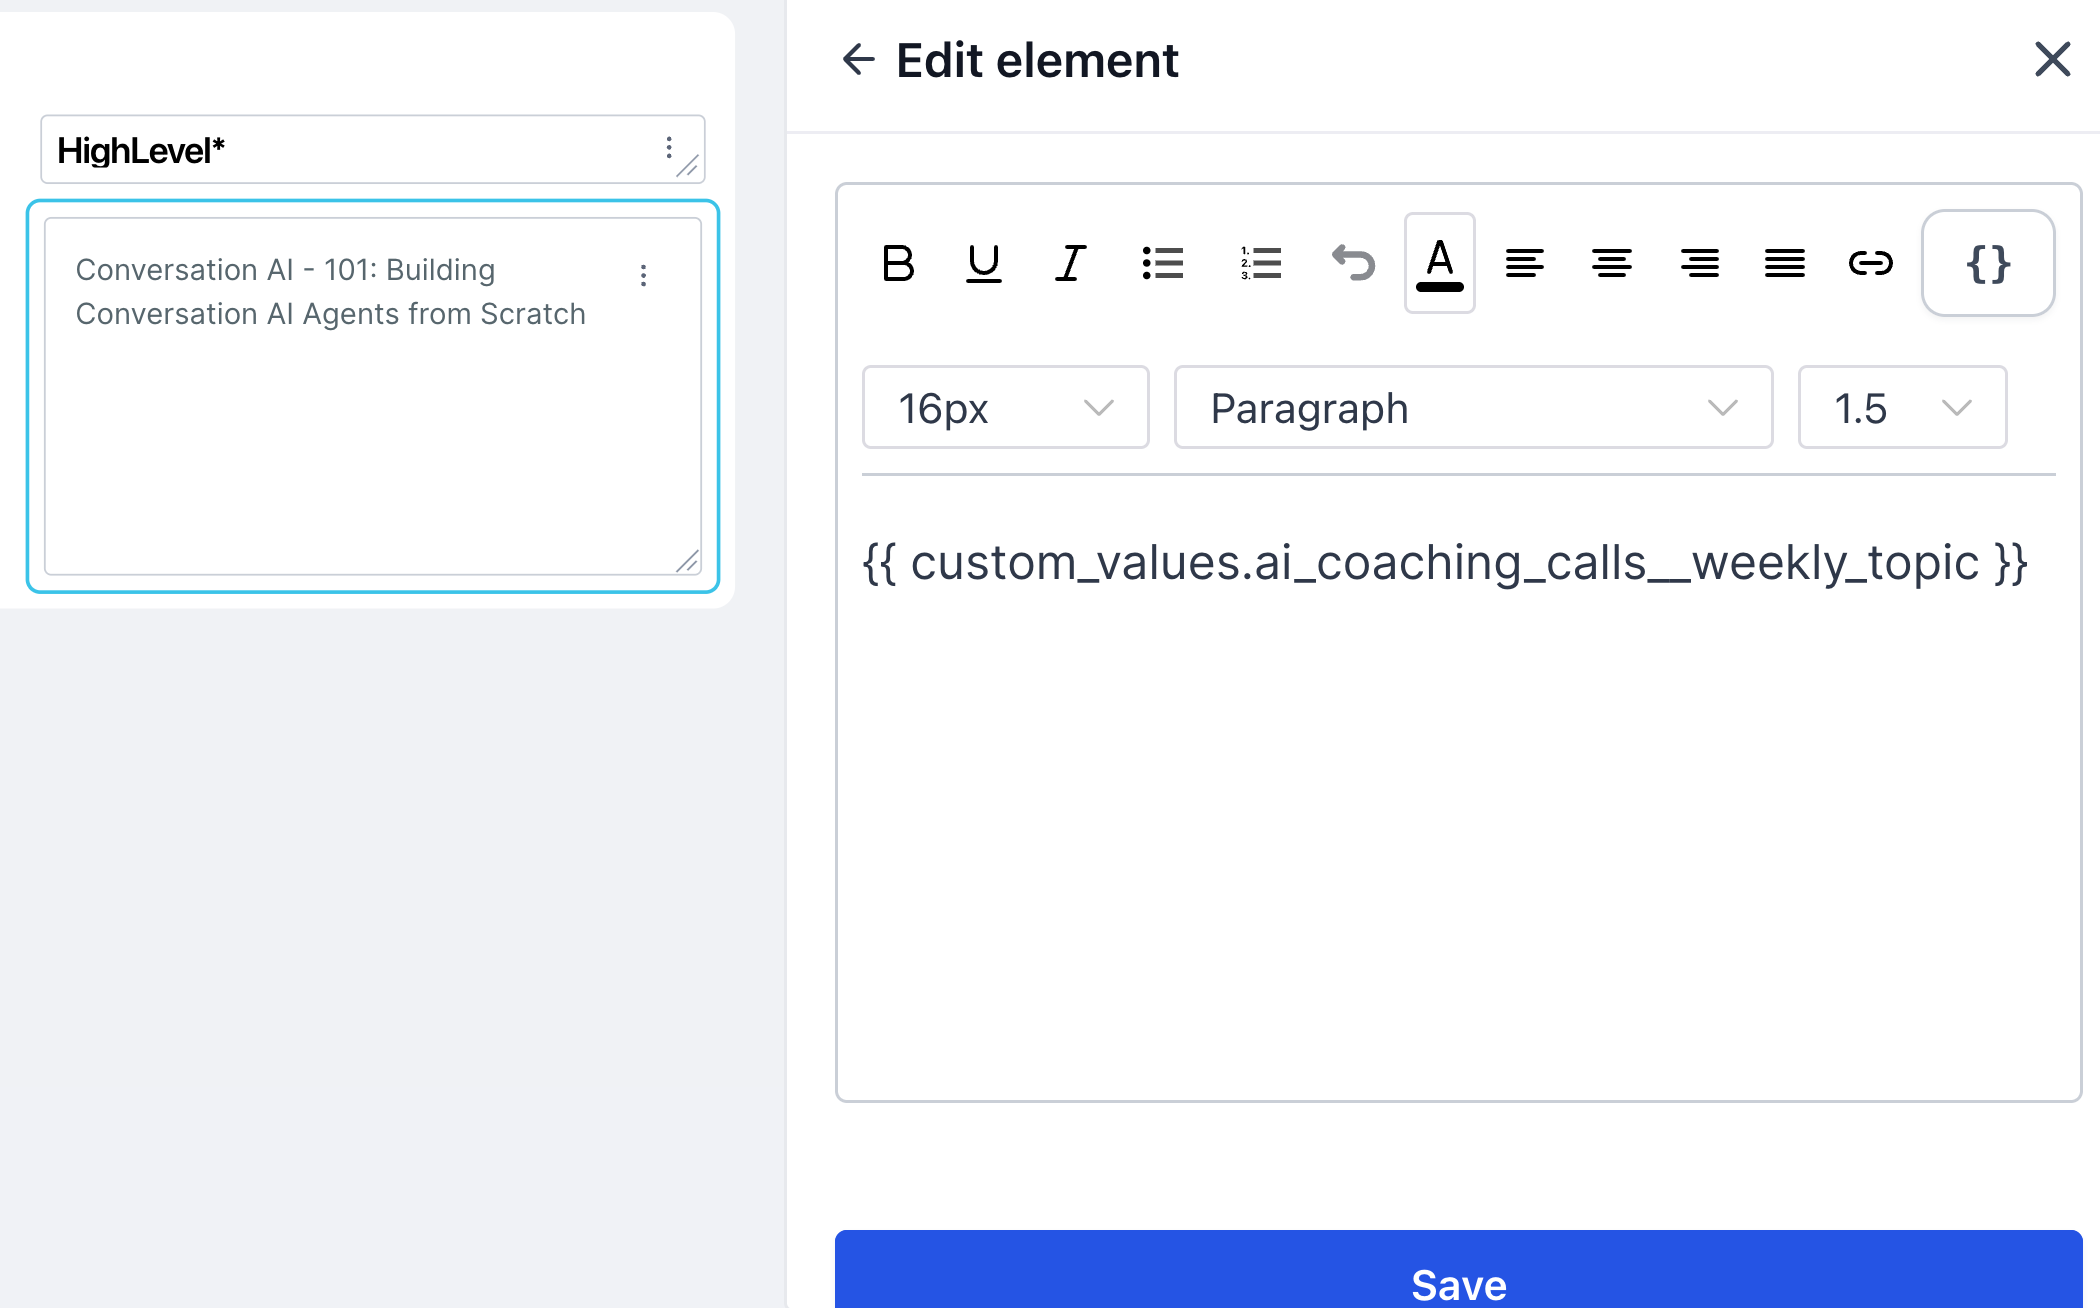
{{ location.name }} — Performance Dashboard) - Text box — insert a token inside the rich text editor; the token appears as plain text inline with your content
Available custom values
When you click {}, a picker opens with three categories:
Location Fields that resolve based on the sub-account:
- Location Id
- Location Name
- Phone
- Website
- Address
- City
- State
- Country
- Postal Code
- Timezone
User Fields that resolve based on the logged-in user:
- User Id
- Phone
- Role
- Type
- First Name
- Last Name
- Name
- Full Name
Custom values All values you have created under Settings → Custom values for that location. These appear organised by folder. You can search across all three categories using the search bar at the top of the picker.
How to insert a custom value — step by step
In widget conditions:
- Open a dashboard and click Edit mode.
- Add or edit a widget and go to the Conditions tab.
- Set the field (e.g. Address) and operator (e.g. Is).
- Click the {} button in the value input field.
- Browse or search — Location, User, or Custom values.
- Select a field. The token is inserted (
{{ }}). - Click Save.
In dashboard elements:
- Open a dashboard and click Edit mode.
- Click Add element and choose Embed, Title, or Text box.
- Click the {} button next to the relevant input field.
- Browse or search — Location, User, or Custom values.
- Select a field. The token is inserted.
- Click Save.
- Switch to View mode — the token resolves to the actual value for that location.
What happens when a token has no value
If a token cannot be resolved (e.g. the field has no value set for that location), it resolves as blank in view mode.
To avoid blank values:
- For Location and User fields — ensure the sub-account profile is complete under Settings.
- For Custom values — ensure the value has been created and filled in under Settings → Custom values for each location.
Setting up custom values
To use your own custom values beyond the built-in Location and User fields:
- Go to Settings → Custom values.
- Click + Add custom value.
- Enter a name and value. Optionally assign it to a folder.
- Click Create.
The custom value now appears in the {} picker under Custom values when editing your dashboard.
Frequently asked questions
1. Can I mix static text and tokens in the same field? Yes. You can type static text and insert tokens in the same field. For example: Welcome to {{ location.name }}. Your address is {{ location.address }}.
2. Does the dashboard re-resolve when I switch sub-accounts? Yes. When the sub-account context changes, all tokens resolve to the values for the active location.
3. Can viewers insert custom values? No. Only editors can insert custom values. Viewers see the resolved values only.
4. Is Image element supported? No. Custom values are supported in Embed - if the image is present as URL, it can be rendered via Embed.
Was this article helpful?
That’s Great!
Thank you for your feedback
Sorry! We couldn't be helpful
Thank you for your feedback
Feedback sent
We appreciate your effort and will try to fix the article