How to Add Your Own Email Service (MailGun) in Agency

Modified on: Thu, 18 Jun, 2026 at 4:46 AM

Email Infrastructure
How to Add Your Own Email Service (Mailgun) in Agency
Connect your own Mailgun account to the platform so your agency sends email through your infrastructure — with your own reputation, domain, and volume limits.
Overview

By default, your agency sends email through the platform's built-in LeadConnector Email System. If you have an existing Mailgun account with an established sending reputation, higher volume requirements, or a dedicated domain, you can connect it directly at the agency level.

This guide covers where to find the Email Services settings, the difference between the default and a custom service, and a complete step-by-step walkthrough for adding and activating Mailgun in your agency.

1

Where to Find Email Services

The Email Services settings live inside your agency account — not inside individual sub-accounts. Navigate here before making any changes:

  1. Log in to your Agency account
  2. Click Settings in the left sidebar
  3. Select Email Services
  4. Open the SMTP Service tab (also labeled Advanced Settings in some versions)
Tip

Your interface may show the tab as SMTP Service or Advanced Settings — both lead to the same configuration area.

2

Default vs. Custom Email Service

Your agency starts on the shared LeadConnector Email System. Connecting Mailgun replaces that with your own sending infrastructure. Here's how they compare:

FeatureDefault (LeadConnector)Custom (Your Mailgun)
Sending domainShared platform domainYour own verified domain
Sender reputationShared with other sendersFully owned by you
Volume limitsPlatform-managedBased on your Mailgun plan
Setup requiredNone — works out of the boxAPI key + domain configuration
Best forNew agencies getting startedAgencies with established sending history or high volume needs
Heads Up

Switching to a custom email service affects all outbound email sent from your agency. Make sure your Mailgun domain is fully verified and your API key has the correct sending permissions before activating.

Setup Guide
Adding Your Own Email Service (Mailgun)
Follow these five steps to connect your Mailgun account to your agency.
3

Step-by-Step: Adding Your Own Email Service (Mailgun)

Step 1
Open Email Services

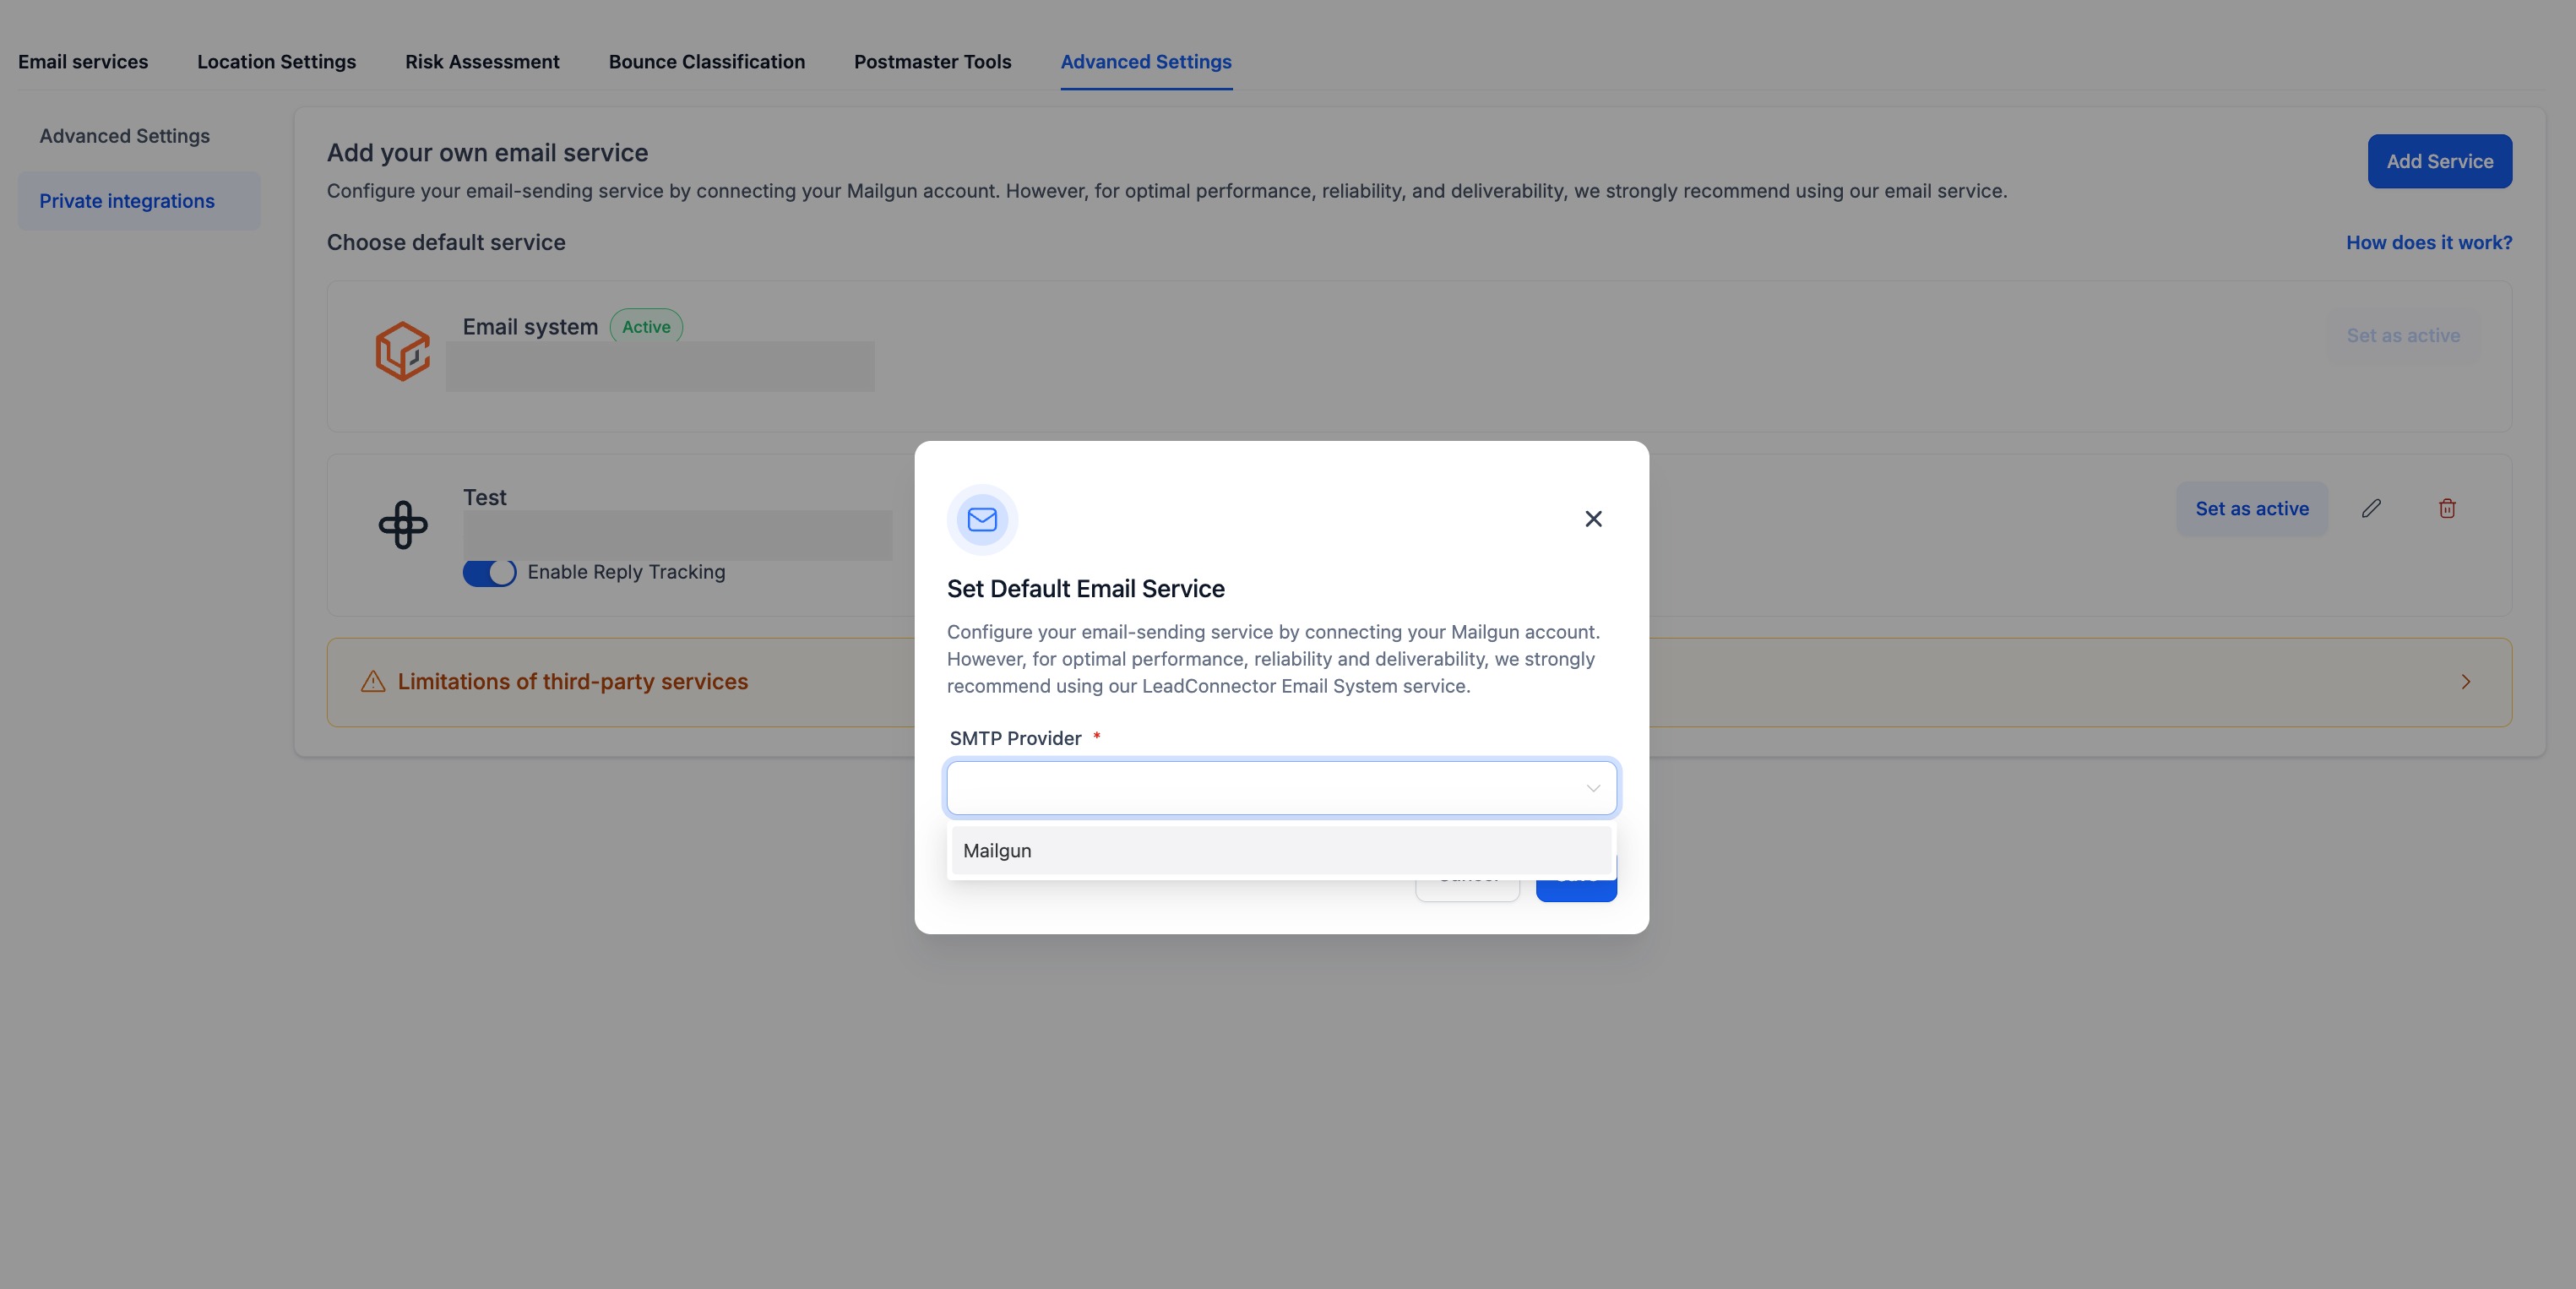
From your agency account, go to Settings → Email Services → SMTP Service tab.

Step 2
Click + Add Service

In the top-right corner of the page, click the + Add Service button. A popup titled Add your own email service will appear.

Step 3
Select Mailgun as Your SMTP Provider

From the list of available providers in the popup, select Mailgun.

SMTP provider selection screen showing Mailgun option
Select Mailgun from the provider list in the Add Service popup.
Step 4
Enter Your Mailgun Credentials

Fill in the required fields using details from your Mailgun account dashboard:

  • API Key — Your Mailgun API key. Found under Settings → API Keys in your Mailgun account.
  • Domain — Select the verified sending domain you want to use from the dropdown.
Mailgun credential form showing API Key and Domain fields
Enter your Mailgun API Key and select your sending domain.
Step 5
Save and Set as Active

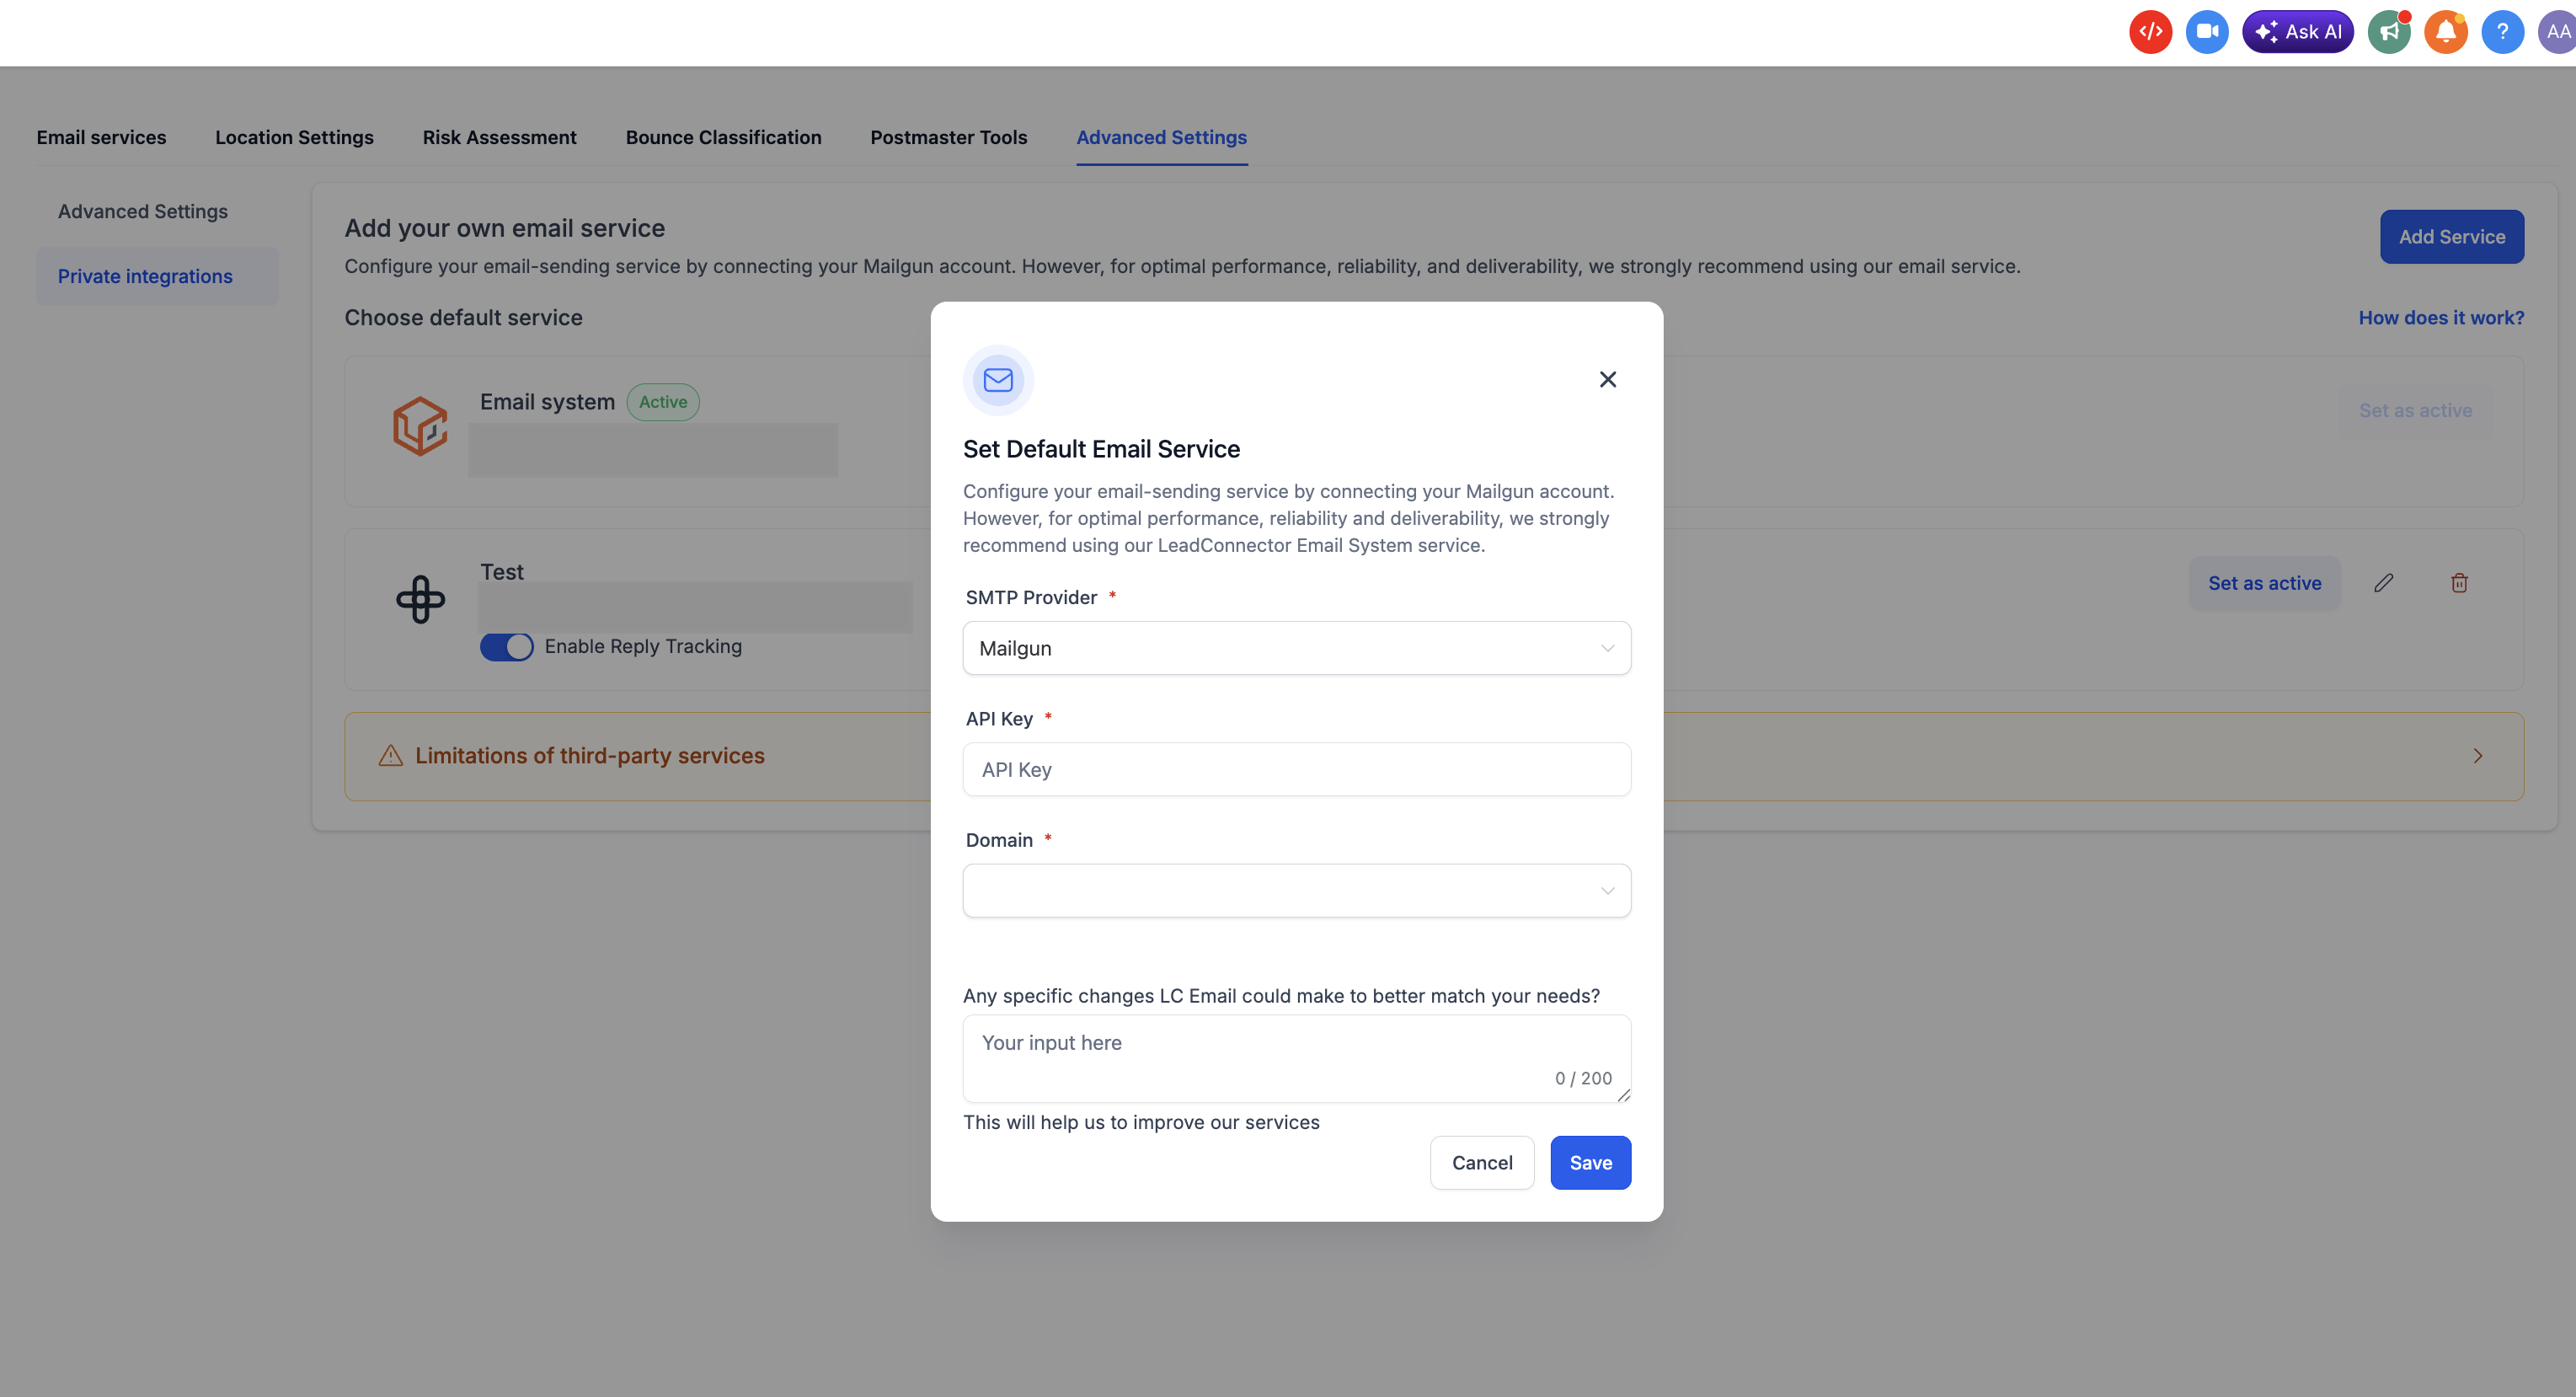
Once saved, your Mailgun service will appear in the list but won't be used until you activate it. To start using it:

  1. Find your newly added service in the list
  2. Click Set as Active
  3. Confirm the selection in the prompt that appears
You're All Set

Your agency will now send all outgoing email through your Mailgun account. You can return to Settings → Email Services at any time to switch services or add additional providers.

4

Frequently Asked Questions

Q: Does this setting apply to all sub-accounts under my agency?
Yes. The custom email service you set as active in Settings → Email Services applies at the agency level and becomes the default sending service for sub-accounts that have not configured their own. Individual sub-accounts can override this with their own service if needed.
Q: Where do I find my Mailgun API key?
Log in to your Mailgun account and go to Settings → API Keys. You'll see your Private API key listed there. If you haven't generated one yet, click Add new key. Make sure the key has sending permissions for the domain you plan to use.
Q: What if my domain doesn't appear in the dropdown?
Only verified Mailgun domains will appear in the domain dropdown. If your domain isn't listed, go to your Mailgun account and confirm the domain is fully verified (all DNS records — SPF, DKIM, and MX — must be in place). Once verified in Mailgun, return here and try again.
Q: Can I add more than one Mailgun service?
Yes. You can add multiple services — for example, separate entries for different Mailgun domains or accounts. However, only one service can be marked as Active at a time. The active service is what all agency-level outbound email will use.
Q: Can I switch back to the default service after activating Mailgun?
Yes. Go back to Settings → Email Services and set the LeadConnector Email System as active. This immediately reverts all agency-level outbound email to the platform's default sending infrastructure.
Q: Will switching affect emails that are already scheduled or in active workflows?
Emails already queued or mid-workflow will pick up the newly active service when they are processed. There is no rollback for emails already sent. Test your Mailgun setup during a low-traffic window if you want to minimize risk during the transition.
Q: Does using my own Mailgun account cost extra?
Connecting Mailgun is free on the platform side — there's no additional charge for using a custom SMTP service. However, Mailgun's own pricing applies based on the volume of emails you send through your Mailgun account. Review Mailgun's pricing at their website for details.

Was this article helpful?

That’s Great!

Thank you for your feedback

Sorry! We couldn't be helpful

Thank you for your feedback

Let us know how can we improve this article!

Select at least one of the reasons
CAPTCHA verification is required.

Feedback sent

We appreciate your effort and will try to fix the article