TABLE OF CONTENTS
- Overview
- About the Integration
- How to Set Up Browse AI
- List of Triggers
- List of Actions
- Example: Setting Up a Trigger (New Completed Task)
- Example: Setting Up an Action (Run Task)
- How to Test the Trigger and Action
- Common Use Cases
- Frequently Asked Questions
Overview
Browse AI is a no-code web scraping and monitoring platform built around Robots — trained scrapers that extract structured data from web pages. Each robot run is a Task; bulk runs queue many tasks of the same robot in one batch. The Browse AI integration brings these primitives directly into the Workflow Builder so customer-facing automations can react to completed scrapes — and drive Browse AI back the other way, running robots on demand and fetching the captured data.
About the Integration
The integration ships with two halves:
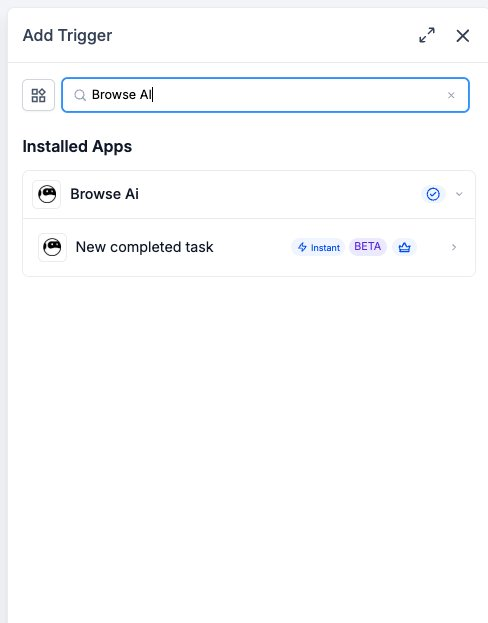
Trigger (Browse AI → Workflows): One instant trigger — New Completed Task — that fires when a Browse AI robot task finishes. Filterable by Robot and Select Operator.
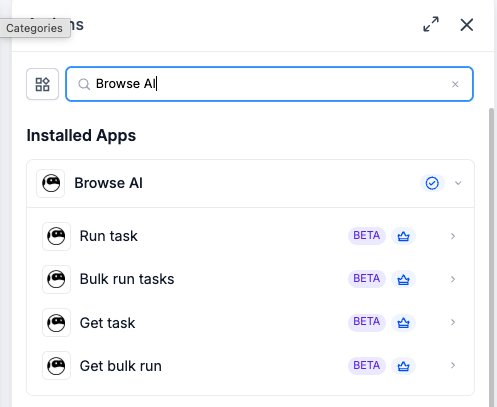
Actions (Workflows → Browse AI): Four actions covering single and bulk task execution, plus result retrieval by ID.
All actions and the trigger are flagged as premium workflow components — premium action credits apply at the standard automation rate. Browse AI usage (robot credits, task credits) is billed by Browse AI directly on your Browse AI account.
How to Set Up Browse AI
Before any Browse AI trigger or action can run, the integration has to be connected via API key.
Connect via the Workflow Builder (recommended)
Open Automation → Workflows and pick (or create) a workflow.
Add a Browse AI trigger or action — search for Browse AI in the Apps tab.
Select any Browse AI trigger or action.
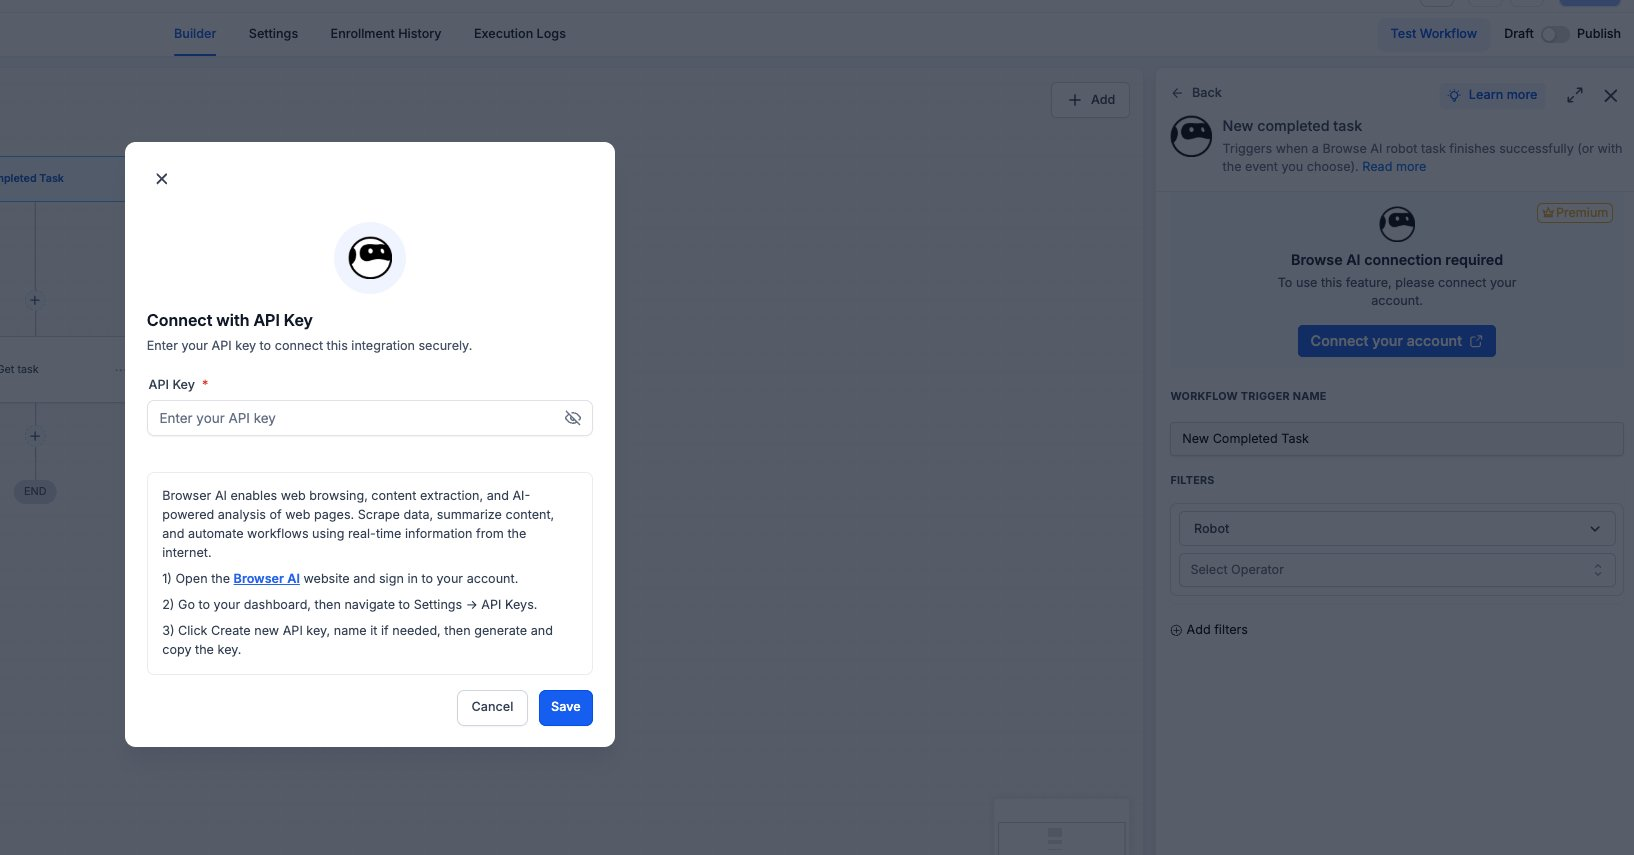
On the action card, click Connect your account.
In the modal, paste your Browse AI API key. To generate one: sign in to Browse AI, open your dashboard, navigate to Settings → API Keys, click Create new API key, name it (e.g. ‘Workflows integration’), and copy the value.
Click Save — the panel will update to show ‘Connected’.
Connect via Settings (alternative path)
Go to Settings → Integrations.
Locate Browse AI and click Connect.
Paste your Browse AI API key and click Save.
Managing multiple Browse AI accounts
If you connect more than one Browse AI account, every trigger and action panel exposes a Connected Account dropdown so each step can target a specific account. The default account is selected automatically when only one is connected.
List of Triggers
This release ships with a single trigger; the event type is configurable via filters.
List of Actions
Example: Setting Up a Trigger (New Completed Task)
This walkthrough wires up a workflow that fires every time a specific Browse AI robot finishes a task — and uses the captured payload as the source of all downstream actions.
Step 1: Add the trigger
Open the workflow and click Add Trigger.
Switch to the Apps tab and search for Browse AI.
Select New completed task from the trigger list.
Step 2: Configure the trigger
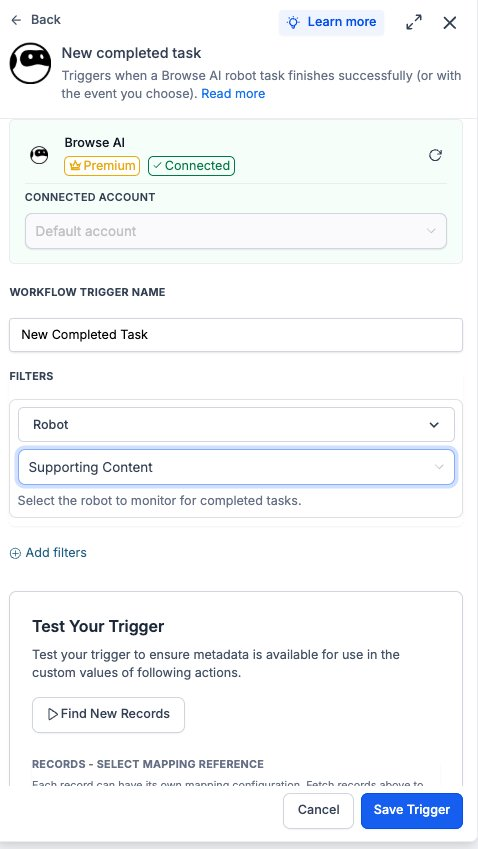
Connected Account — pick the Browse AI account this trigger should watch. Defaults automatically when only one account is connected.
Workflow Trigger Name — give it a meaningful label, e.g. ‘New Competitor Page Scrape’.
Filters → Robot — pick the Browse AI robot to monitor. The dropdown is populated from the connected account; the help text underneath reads ‘Select the robot to monitor for completed tasks.’
Filters → Select Operator (optional) — scope further by status, captured field value, or run input. Useful when one robot runs against many inputs and you only care about a subset.
Add filters — layer on additional conditions if the workflow should only fire under specific circumstances.
Step 3: Test the trigger
Click Find New Records inside the Test Your Trigger panel.
The system fetches the most recent matching completed tasks from Browse AI.
In the Records — Select Mapping Reference dropdown, pick one of the returned records. This locks the captured-data schema for downstream steps.
Click Save Trigger to finish.
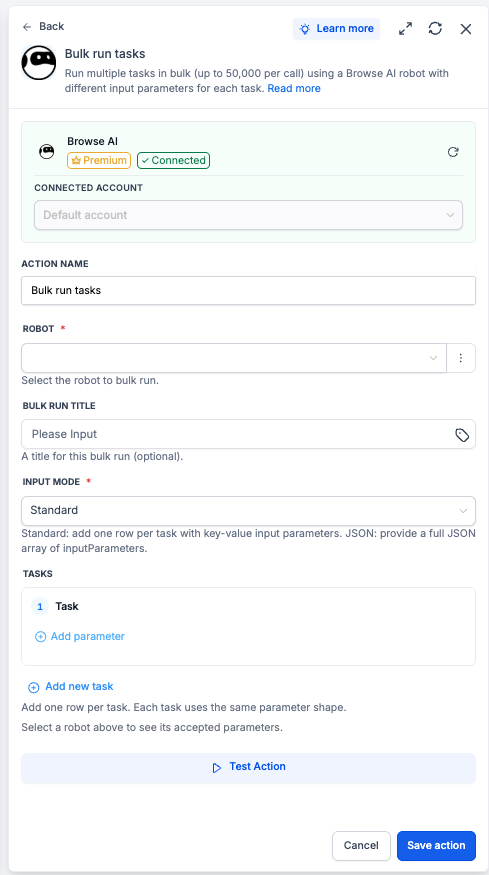
Example: Setting Up an Action (Run Task)
This walkthrough runs a Browse AI robot against a customer-submitted URL and continues the workflow once the captured data is available.
Step 1: Add the action
Inted, click Connect your account on the action card.
Paste your Browse AI API key and click Save.
Step 3: Configure the action
Action Name — a meaningful label, e.g. ‘Scrapside the workflow, click Add to insert a new step.
Open the Apps tab and select Browse AI.
Choose Run task from the action list.
Step 2: Connect (first time only)
If the integration is not yet connece Customer-Submitted URL’.
Robot — pick the Browse AI robot to run. The dropdown is populated from the connected account.
Input Parameters — each robot defines its own input shape (a URL, a search query, a list of fields, etc.). Pass workflow variables, e.g. {{form.submitted_url}}, into the corresponding fields.
Step 4: Continue the workflow with the result
Run Task returns a task ID. Two patterns:
Wait via trigger: if the workflow can branch, end this run with the task ID stored on the contact. A separate workflow listening on New Completed Task picks it up when the scrape finishes.
Wait via polling: if the scrape typically completes quickly, follow with a Wait step (e.g. 30s) and then a Get Task action using the returned task ID to fetch the captured data inline.
How to Test the Trigger and Action
Always test before publishing. Testing locks the payload schema and gives downstream steps a real record to map against.
Test the trigger
Inside the trigger panel, click Find New Records.
If no completed tasks appear, run the robot manually in Browse AI to generate a sample, then re-fetch.
Select the returned task as the mapping reference. Confirm the captured-data fields (the columns your robot extracts) appear in the payload preview.
Test the action
Inside the action panel, click Test Action.
The action runs against the live Browse AI account using sample values.
Open Browse AI and confirm the task appears under the robot’s run history.
If wrong, double-check the Robot ID and input parameter mapping, then re-test. Once happy, click Save action, then run a full Test Workflow before publishing.
Common Use Cases
Use Case 1: Competitor Monitoring with Instant Alerts
Goal: Catch competitor page changes as they happen.
Workflow Setup:
Trigger: New Completed Task (filtered to the competitor-page robot)
Action: Branch on a captured field (e.g. price, headline, status)
Action: Send internal notification (Slack/SMS/email) if the field changed
Example: A robot scrapes a competitor’s pricing page on Browse AI’s schedule. Each completion fires the workflow. If the price changed since the last run, the marketing team gets a Slack note with the old and new values.
Use Case 2: Customer-Submitted URL → On-Demand Scrape
Goal: Run a scrape against a URL the customer just provided, then continue the workflow with the captured data.
Workflow Setup:
Trigger: Form Submission (with a URL field)
Action: Run Task (using the submitted URL as the robot input)
Two-workflow split: end this workflow with the task ID saved on the contact
Second workflow — Trigger: New Completed Task → Find Contact by task ID → Update with captured data
Example: A customer submits a competitor URL through a request form. The workflow runs the relevant Browse AI robot against the URL and stores the task ID on the contact. When the scrape finishes, a second workflow finds the contact, parses the captured fields, and updates the CRM record. The customer gets a follow-up message with the analysis.
Use Case 3: Bulk Lead Enrichment from a CSV
Goal: Process a list of URLs or company names at scale and write the enriched data back to contacts.
Workflow Setup:
Trigger: File upload (CSV with N rows)
Action: Bulk Run Tasks (one task per row, passing the row’s values as the robot’s input parameters)
Wait or trigger on Bulk Run completion
Action: Get Bulk Run (fetch the aggregated results)
Action: For each result, update the matching contact in the CRM
Example: An agency uploads a CSV of 200 company websites. The workflow fires a Bulk Run Tasks step with one task per row. Once the bulk run completes, Get Bulk Run fetches every row’s captured data; the workflow loops over the results and updates each contact’s firmographic custom fields.
Frequently Asked Questions
Q: What is Browse AI?
Browse AI is a no-code web scraping and monitoring platform. Users train Robots (or pick from 250+ pre-built ones) to extract structured data from web pages, then run them on demand or on a schedule. Each robot run is a Task; bulk runs queue many tasks of the same robot in a batch.
Q: Are Browse AI actions premium workflow actions?
Yes. All four actions and the trigger are flagged as premium and consume premium action credits at the standard automation rate. Browse AI usage (robot credits, task credits) is billed by Browse AI directly on your Browse AI account.
Q: Is the trigger Instant or polled?
Instant — it is webhook-backed. The workflow fires within seconds of the robot task completing in Browse AI.
Q: How do I get my Browse AI API key?
Sign in to Browse AI, open your dashboard, go to Settings → API Keys, click Create new API key, name it (e.g. ‘Workflows integration’), and copy the value. Paste it into the API Key field on the Browse AI connection screen.
Was this article helpful?
That’s Great!
Thank you for your feedback
Sorry! We couldn't be helpful
Thank you for your feedback
Feedback sent
We appreciate your effort and will try to fix the article