This article explains how to use the AI Image Generation action in workflows to create images with AI. You’ll find step-by-step configuration instructions, details on available models and settings, how to access the generated image, practical use cases, and answers to common questions.
Note: This is a premium action. Using this action will incur additional charges per execution.TABLE OF CONTENTS
- What is AI Image Generation Action in Workflows?
- Key Benefits of AI Image Generation Action
- Action Details
- How to Use the AI Image Generation Action
- How to Access the Generated Images
- Use Cases
- Tips for Better Results
- Pricing
- Frequently Asked Questions
- Related Articles
What is AI Image Generation Action in Workflows?
The AI Image Generation action, available under AI Actions in Workflows, lets you generate images using AI models directly inside your automation. You provide a text prompt describing the image you want, choose a model and quality level, and the action returns a generated image stored at a publicly accessible URL. Generated images are saved automatically in Media Storage and are available as variables in downstream actions – so you can attach them to emails, send them over SMS, post them to social channels, or pass them to external systems.
Key Benefits of AI Image Generation Action
- Multiple AI Models: Choose from a range of image models to match your quality, style, and speed requirements.
- Prompt Enhancement: Refine a rough prompt into a detailed one with a single click, producing noticeably better output.
- Ready-to-Use Templates: Start from a pre-written prompt for common formats like product mockups, social posts, promo flyers, and lifestyle imagery.
- Brand Consistency: Apply your existing Design Kit and Brand Voice to keep generated images aligned with your brand.
- Dynamic Prompts: Build prompts from custom values so each contact, product, or webhook payload produces a different image.
- Automatic Storage: Every generated image is saved to Media Storage at a publicly accessible URL, ready to use anywhere.
Action Details
| Field | Description |
|---|---|
| Action Name | A custom name used to identify the action in the workflow and execution logs. |
| Model | The AI model used to generate the image. |
| Quality | The image generation quality. Available options are Auto, High, Medium, and Low. |
| Prompt | A text description of the image to generate. Supports custom values from contact fields, webhook data, or previous workflow actions. |
| Templates | Pre-written prompts for common image types. Selecting a template fills the prompt field, which you can then edit. |
| Reference images | Optional images provided to the model as visual context alongside the prompt. Add up to five images using System upload, Media library, or URL. The URL field supports custom values from previous actions, webhook payloads, or contact fields. |
| Additional Settings | Optional settings for size, background, output format, Design Kit, and Brand Voice. |
How to Use the AI Image Generation Action
Step 1: Add the Action
- Go to Automation > Workflows.
- Create a new workflow or edit an existing one.

- In your workflow, click the + icon to add a new action, then find AI Image Generation under AI Actions and select it. Give the action a clear, descriptive name so it’s easy to identify on the canvas.

Step 2: Select the Model
Inside the prompt section, choose the AI model you want to use for generation. The following models are available:
- GPT Image 2
- GPT Image 2.5 Flare
- GPT Image 2.5 Sunburst
- Gemini 3 Pro Image (Nano Banana Pro)
- Gemini 3.1 Flash Image (Nano Banana 2)
- Gemini 2.5 Flash Image (Nano Banana)
Different models produce different visual styles and handle text-in-image, photorealism, and composition differently. If you’re not sure which to pick, try the same prompt across two models and compare the output.

Step 3: Set the Quality
Click the quality selector to open the quality options.
By default this is set to Auto, which lets the system pick an appropriate level for your prompt. You can also explicitly choose High, Medium, or Low.
Higher quality produces more detailed images but takes longer to generate.

Step 4: Write the Prompt
In the prompt input box, describe the image you want to generate.
Be specific about the subject, style, setting, lighting, and composition – more detail generally produces better results. The prompt field supports custom values, so you can insert contact fields, webhook data, or output from previous actions to build dynamic prompts.
Click the Enhance Prompt button above the prompt input box to have AI expand and refine what you’ve written. This adds detail around style, lighting, and composition that you might not have specified, and typically produces noticeably better output. You can edit the enhanced prompt further before saving.

Step 5: Start From a Template (Optional)
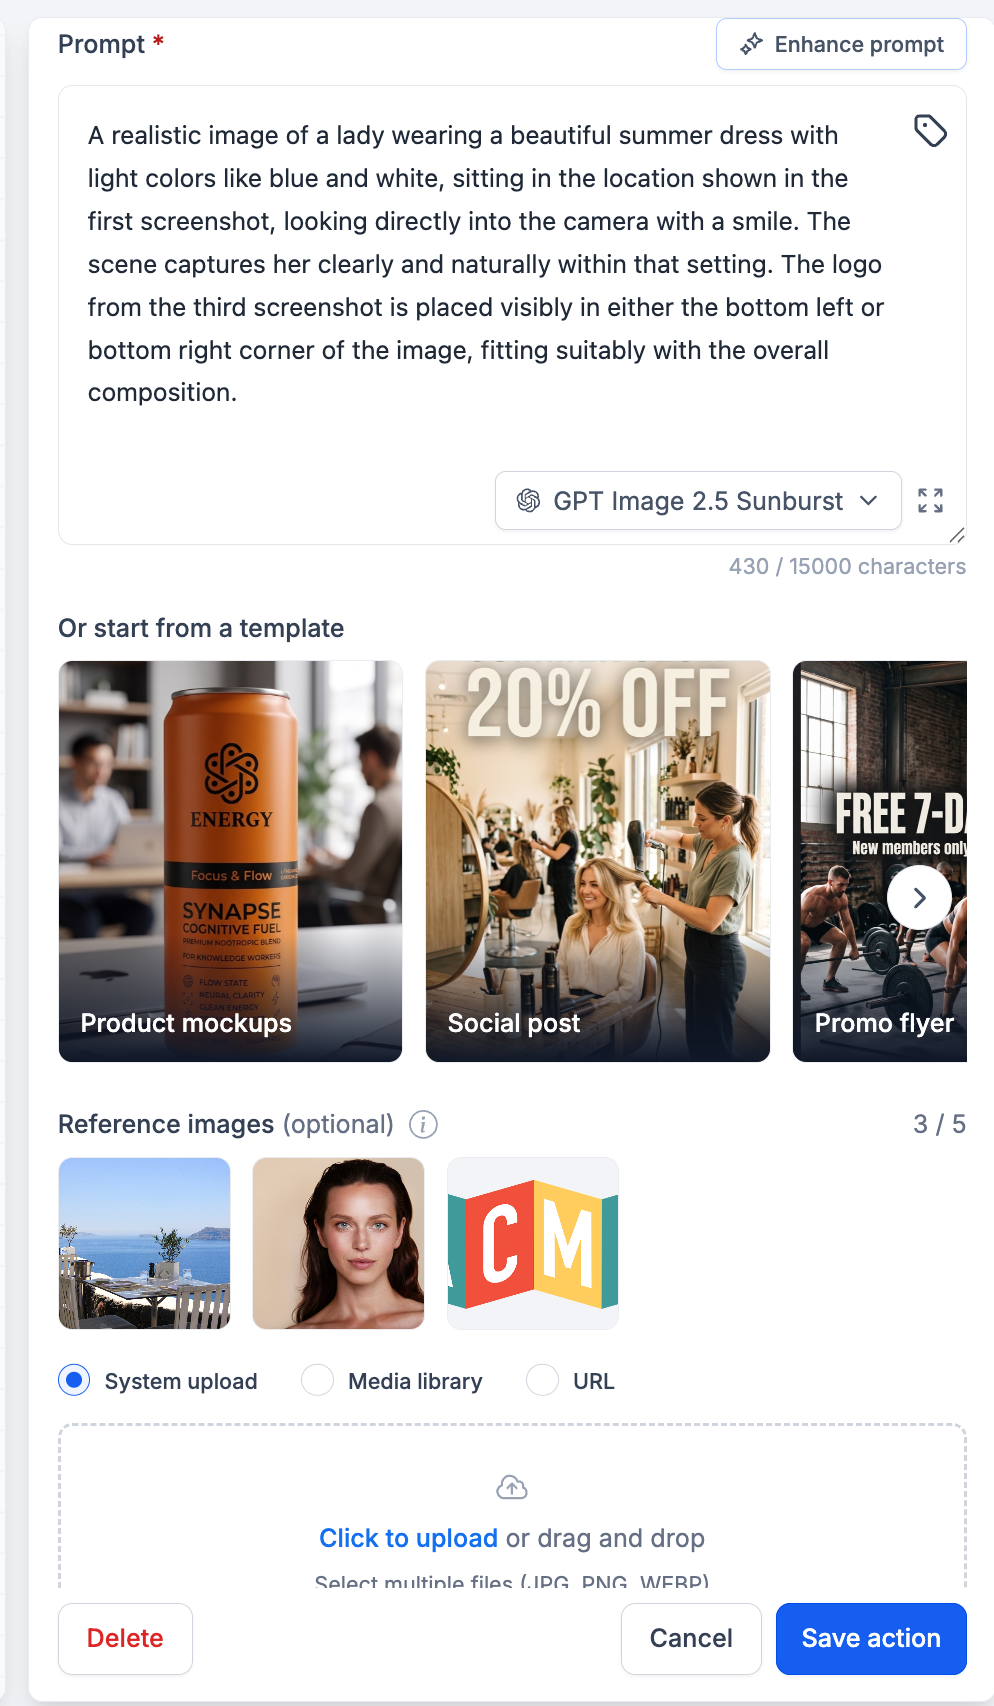
Instead of writing a prompt from scratch, you can start from one of four templates shown below the prompt box:
- Product Mockups – Product shots and mockup presentations.
- Social Post – Graphics sized and styled for social media feeds.
- Promo Flyer – Promotional flyers and offer announcements.
- Lifestyle – Lifestyle and in-context scene imagery.
Clicking a template pre-fills the prompt field with a ready-written prompt for that format. You can then tweak it to match your specific requirement before saving.

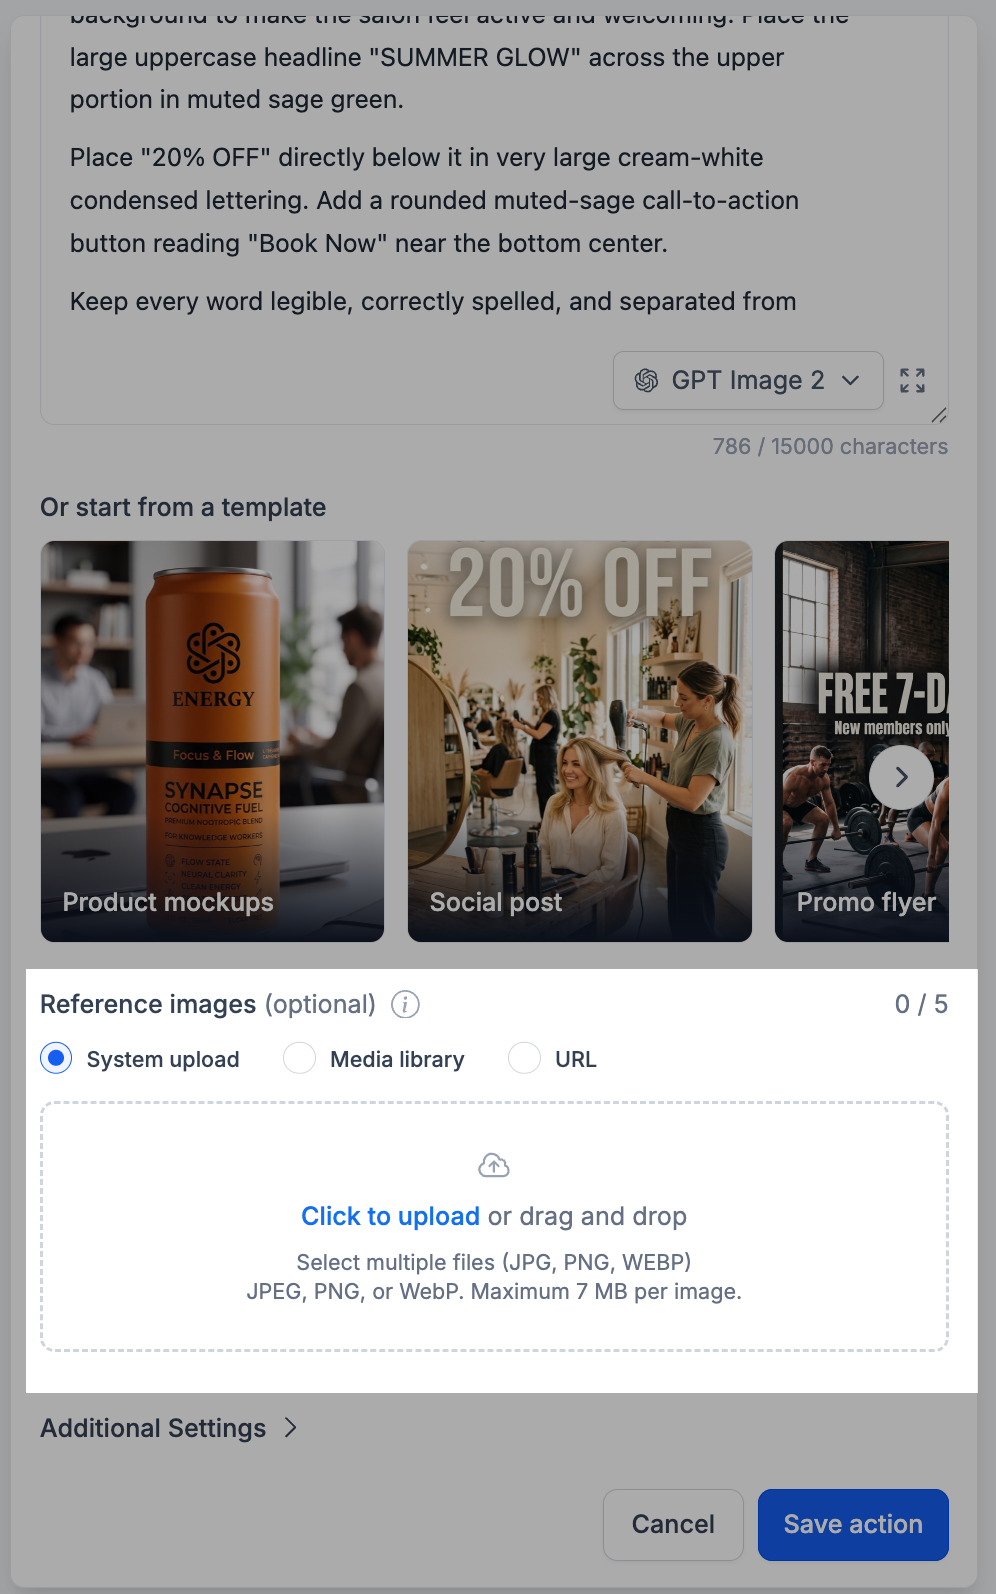
Step 6: Reference Images (Optional)
You can attach up to five images to the action as visual context. These images are passed to the image model together with your prompt, so you can control the setting, the subject, or brand elements directly rather than describing them in words alone.
When using GPT Image 2.5, reference images provide stronger consistency across new settings, styles, compositions, and variations. The model can preserve recognizable subjects, lighting, textures, distinctive features, and other elements from the source image. You can also prompt GPT Image 2.5 to replace a specific element, such as a product, background, or text, while keeping the subject, composition, and brand treatment consistent.
Adding Reference Images
The Reference images section sits below the templates. Choose one of three sources:
| Source | How it works |
| System upload | Upload image files directly from your computer. Click to upload or drag and drop – you can select multiple files at once. |
| Media library | Browse and select images already stored in your Media Library. |
| URL | Enter the URL of an image and click Add. This field supports custom values, so the URL can come from a previous action, a webhook payload, or a contact field. |
Referring to Reference Images in Your Prompt
Reference images are passed in the order you add them, and you can refer to them by position in your prompt – for example, “the location shown in the first reference image” or “the logo from the third reference image.” This lets you tell the model what role each image plays rather than leaving it to infer.
Example: Combining a Setting, a Subject, and a Logo
In this example three reference images were added – an environment, a person, and a brand logo – and the prompt describes how each should be used.
1.Setting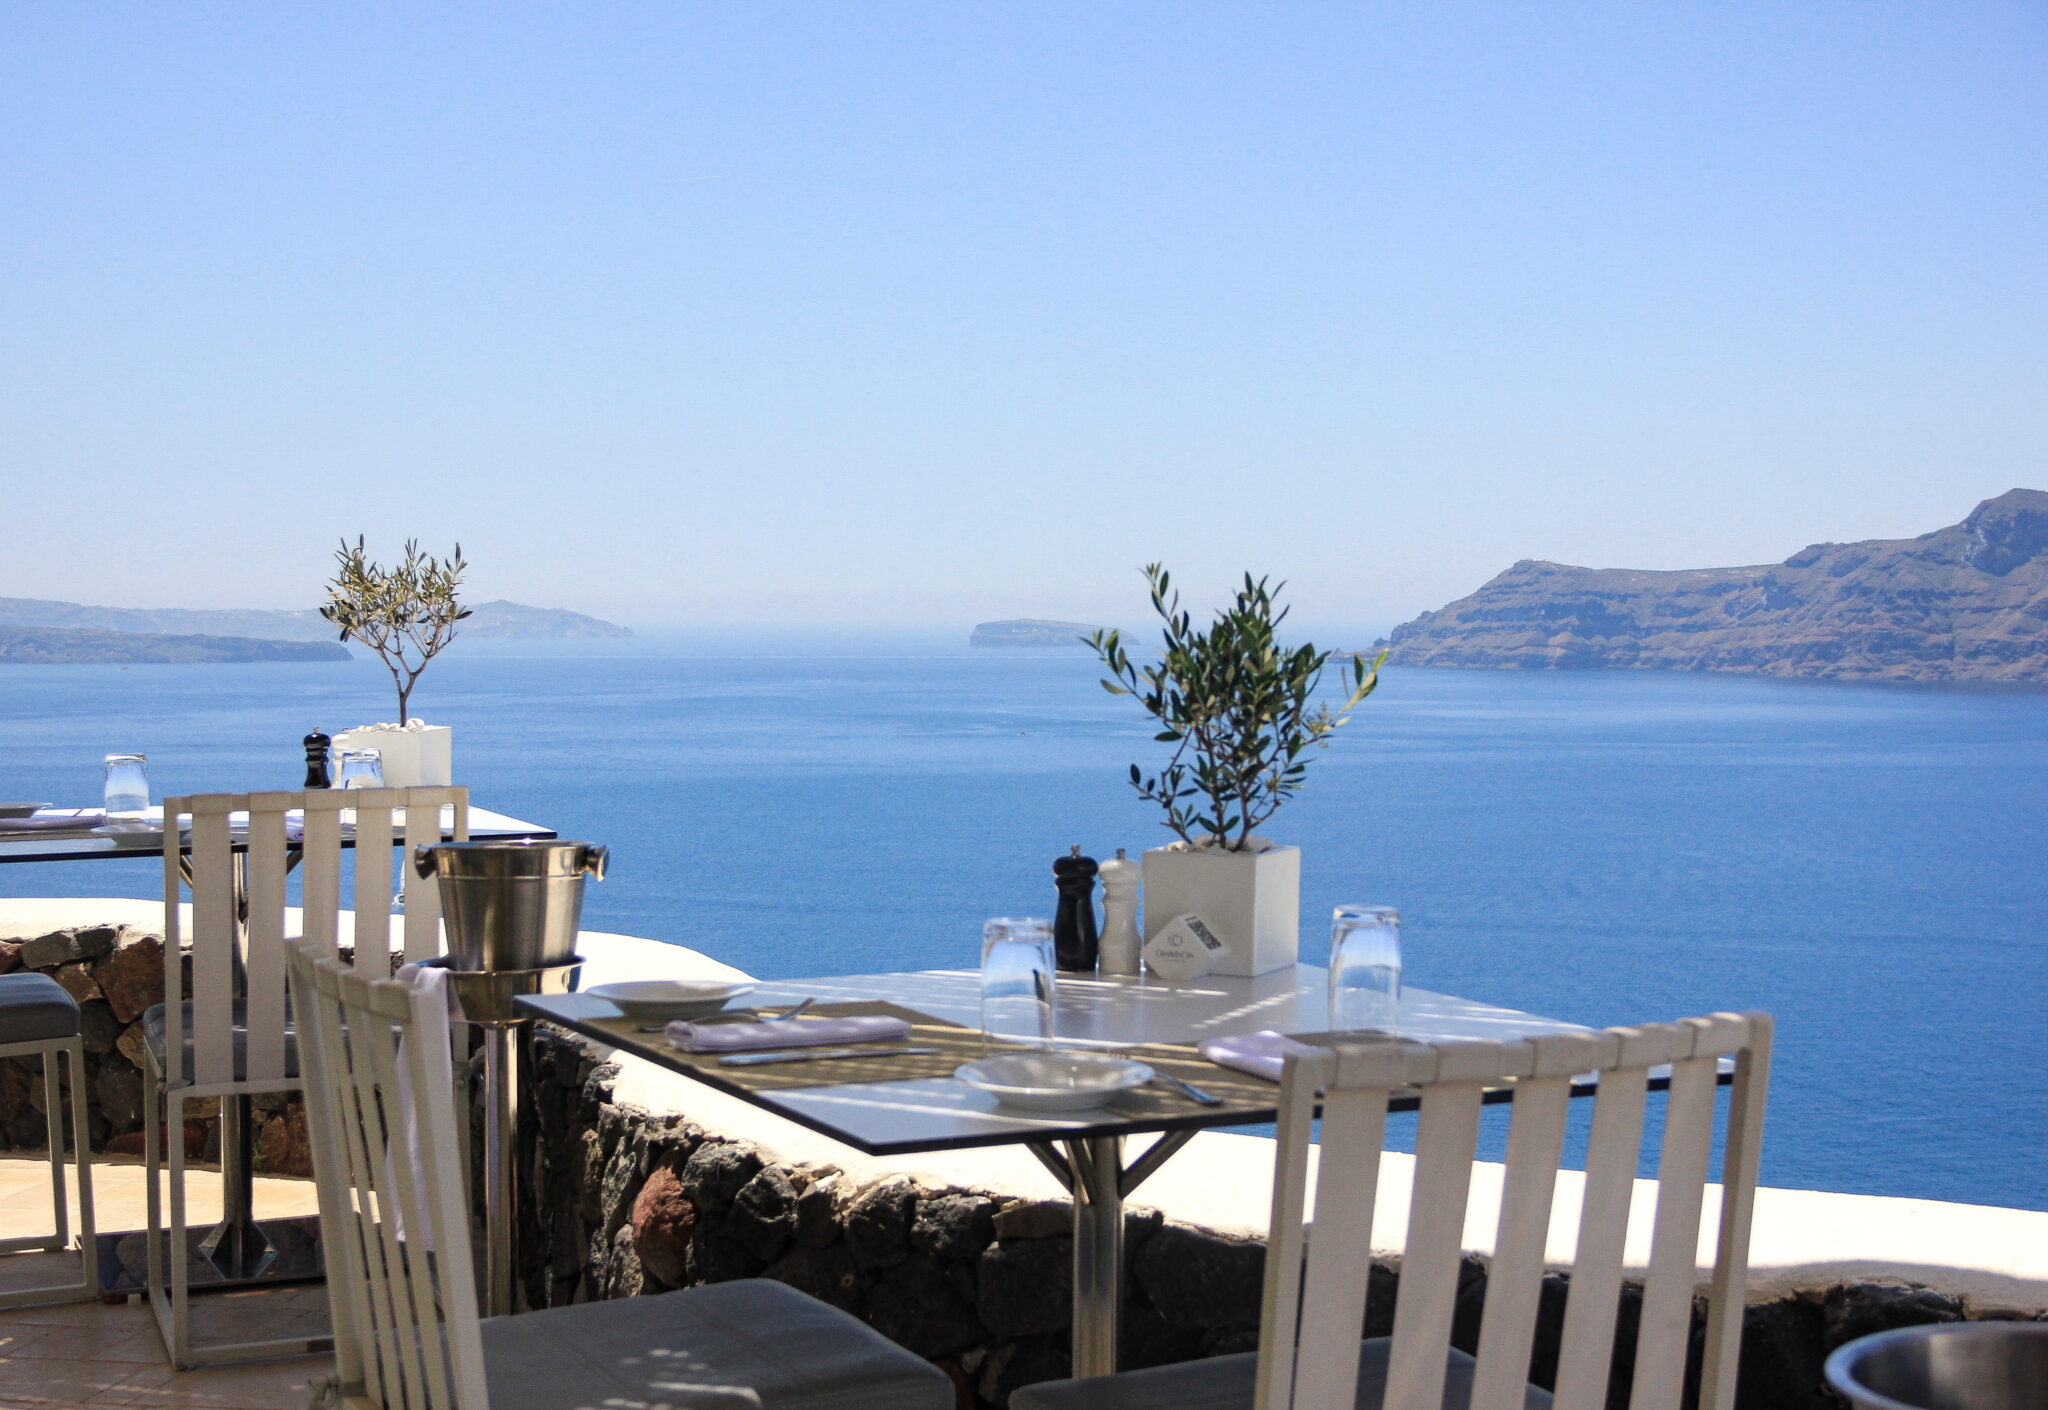 | 2.Subject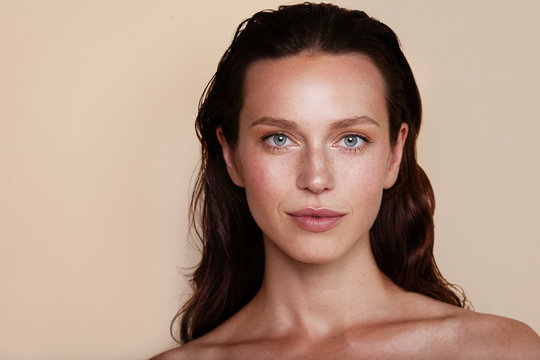 | 3.Logo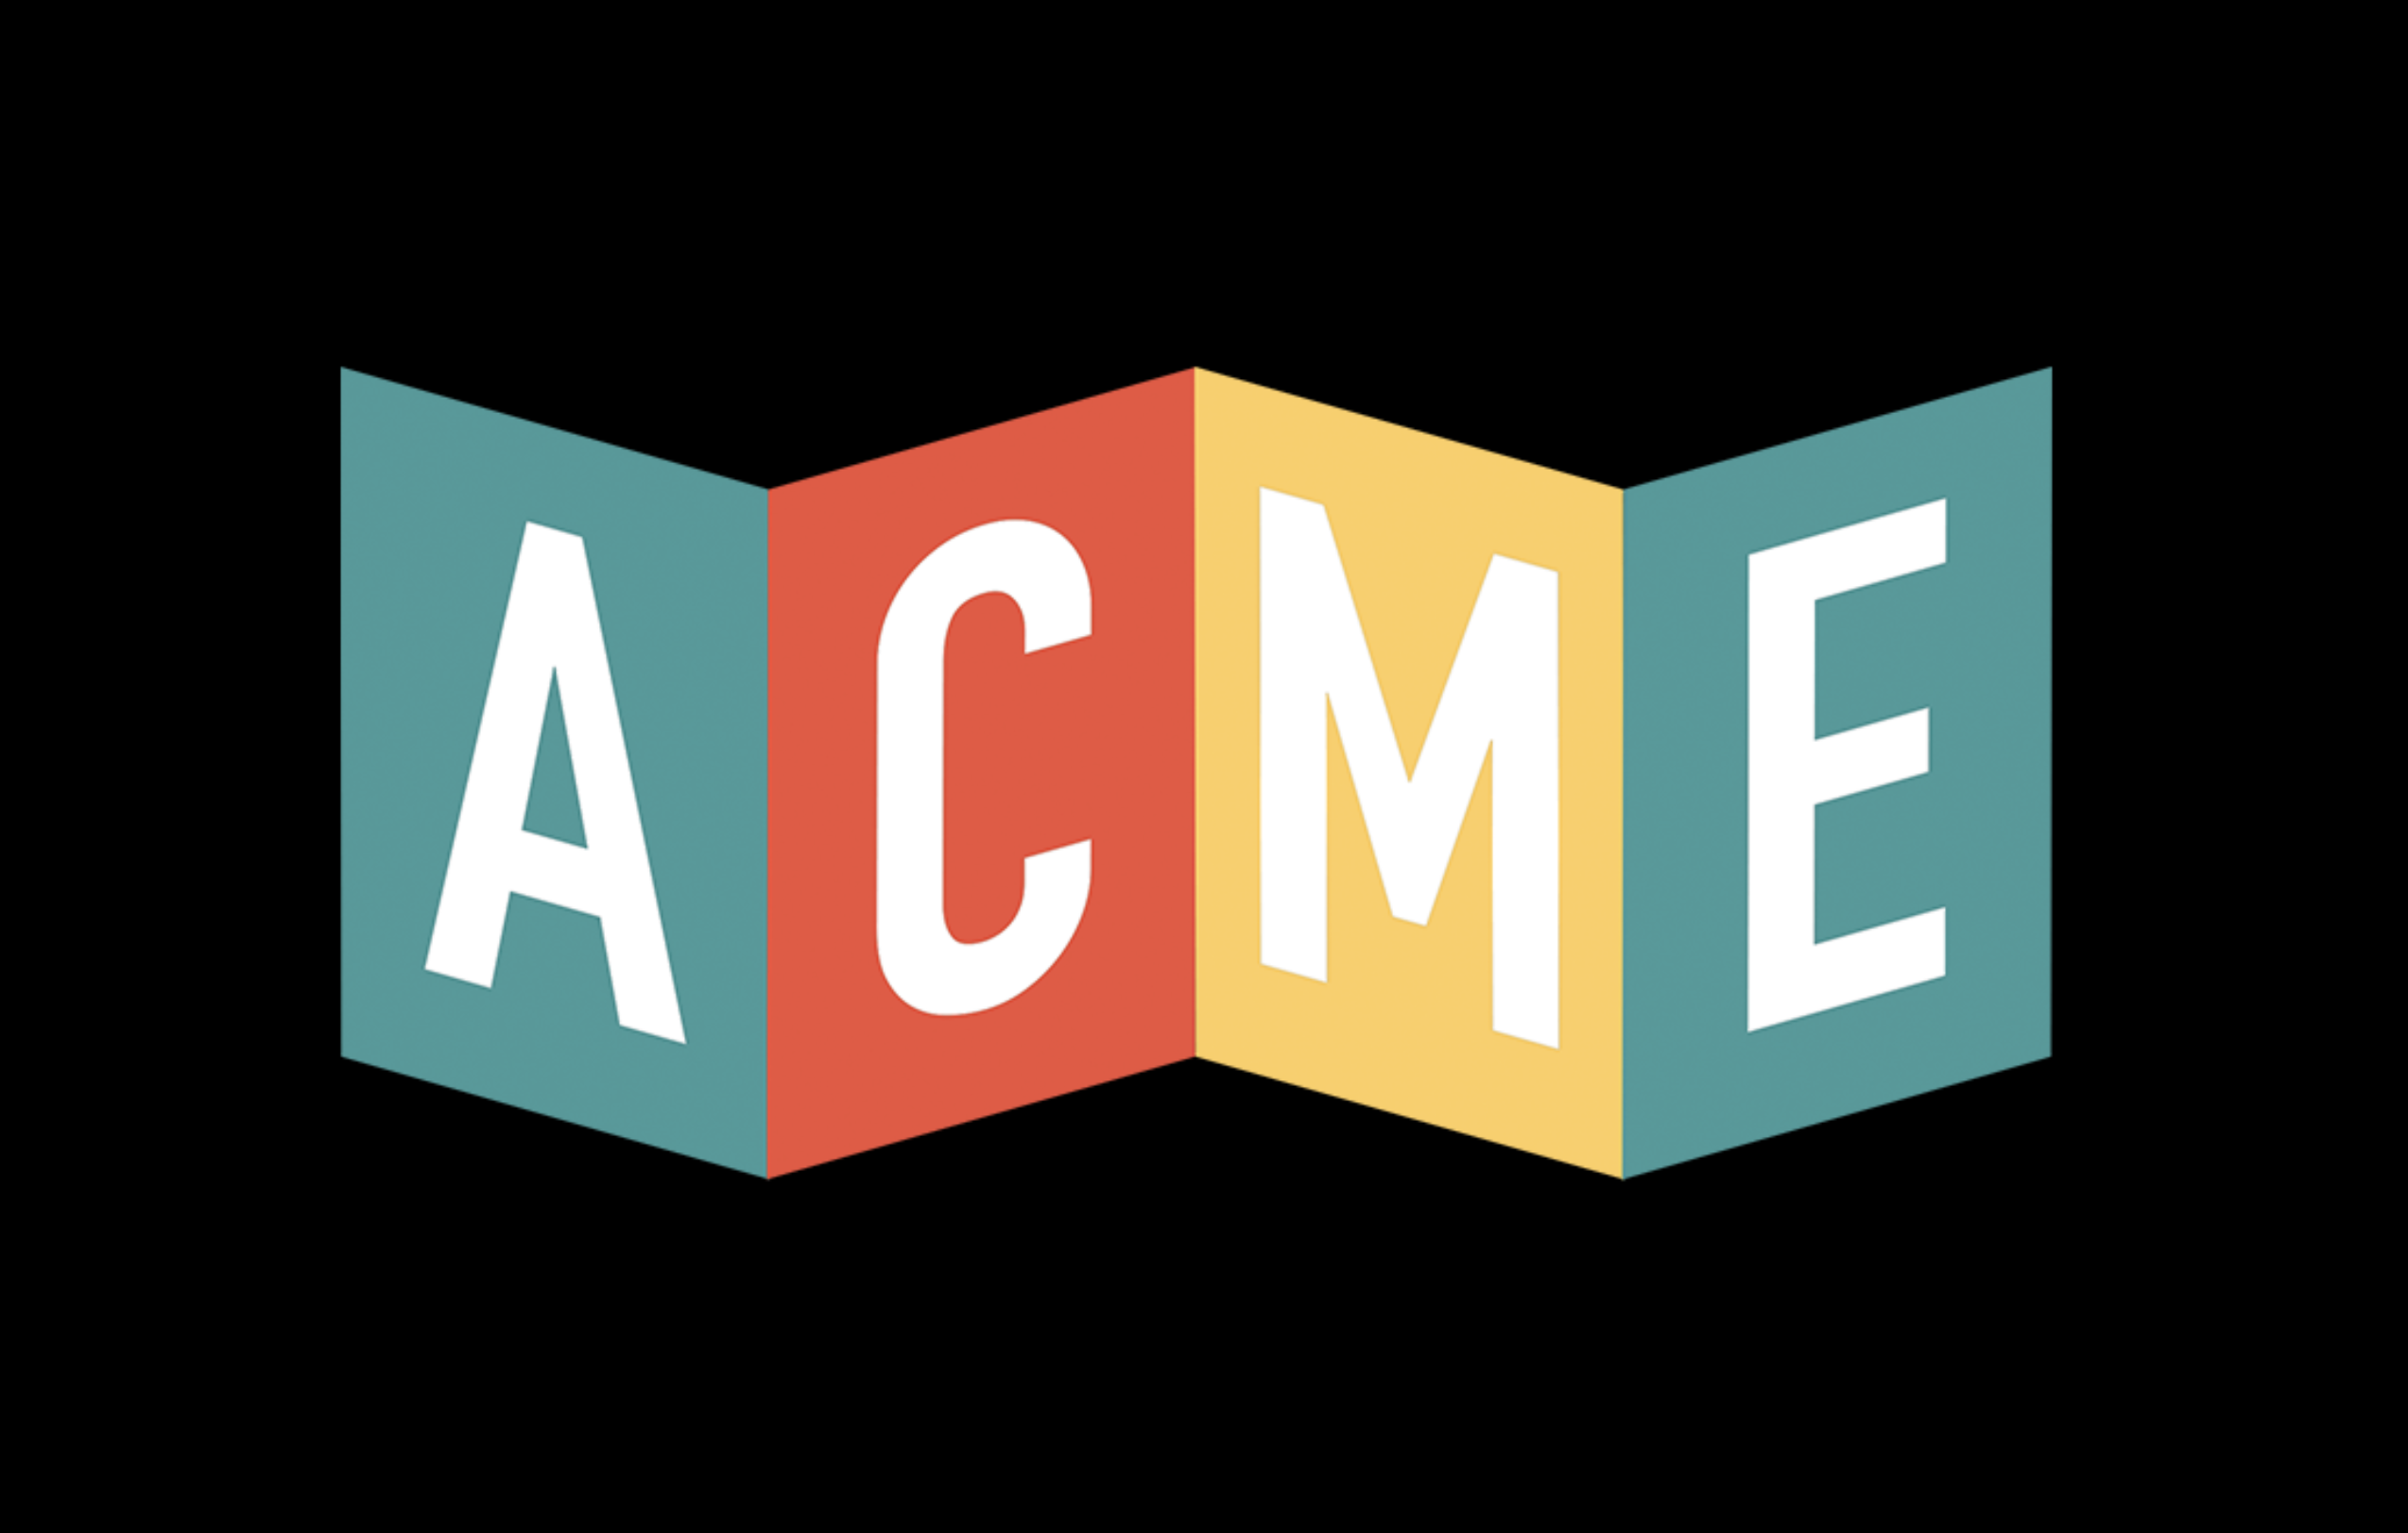 |
The prompt then refers to each image by its position:
“A realistic image of a lady wearing a beautiful summer dress with light colors like blue and white, sitting in the location shown in the first reference image, looking directly into the camera with a smile. The scene captures her clearly and naturally within that setting. The logo from the third reference image is placed visibly in either the bottom left or bottom right corner of the image, fitting suitably with the overall composition.”
The generated image places the subject from the second reference into the setting from the first, with the logo from the third applied in the corner:

Step 7: Additional Settings (Optional)
Expand Additional Settings to fine-tune the output format and apply your brand assets.
| Setting | Description |
| Size | The aspect ratio of the generated image – Square, Landscape, or Portrait. The exact pixel dimensions for each option are shown below the selector. |
| Background | Whether the generated image uses a transparent or opaque background. Defaults to Auto; you can also select Opaque. Transparent backgrounds are useful for logos, product cut-outs, and overlays. |
| Output Format | The file format of the generated image – PNG, JPEG, or WebP. Use PNG for transparency, JPEG for smaller photo files, and WebP for web-optimized delivery. |
| Design Kit | Applies a Design Kit style from your account to guide the generated image, keeping visuals consistent with your existing design system. |
| Brand Voice | Applies your Brand Voice details to guide the generated image, providing the AI with additional brand context. |
Note: Design Kit and Brand Voice options pull from the assets already set up in your account. If you haven’t configured them yet, set them up first and they’ll become selectable here.
Step 8: Save the Action
Once your prompt and settings are configured, save the action. The generated image will be available as a variable in all downstream actions once the workflow executes.

How to Access the Generated Images
Once the action executes, the generated image is available in two places.
1. As Custom Values in Downstream Actions
In any action after the AI Image Generation step, open the custom value picker and navigate to AI Image Generation. Select the generated image to see three available values:
- Image URL: The publicly accessible URL of the generated image. Opening this link displays the image directly, and you can download it from there. Use this value to attach the image to emails, send it over SMS/MMS, or pass it to an external system via web-hook.
- Image File Path: The storage path of the generated image file.
- Image File Name: The file name of the generated image.

2. In Media Storage
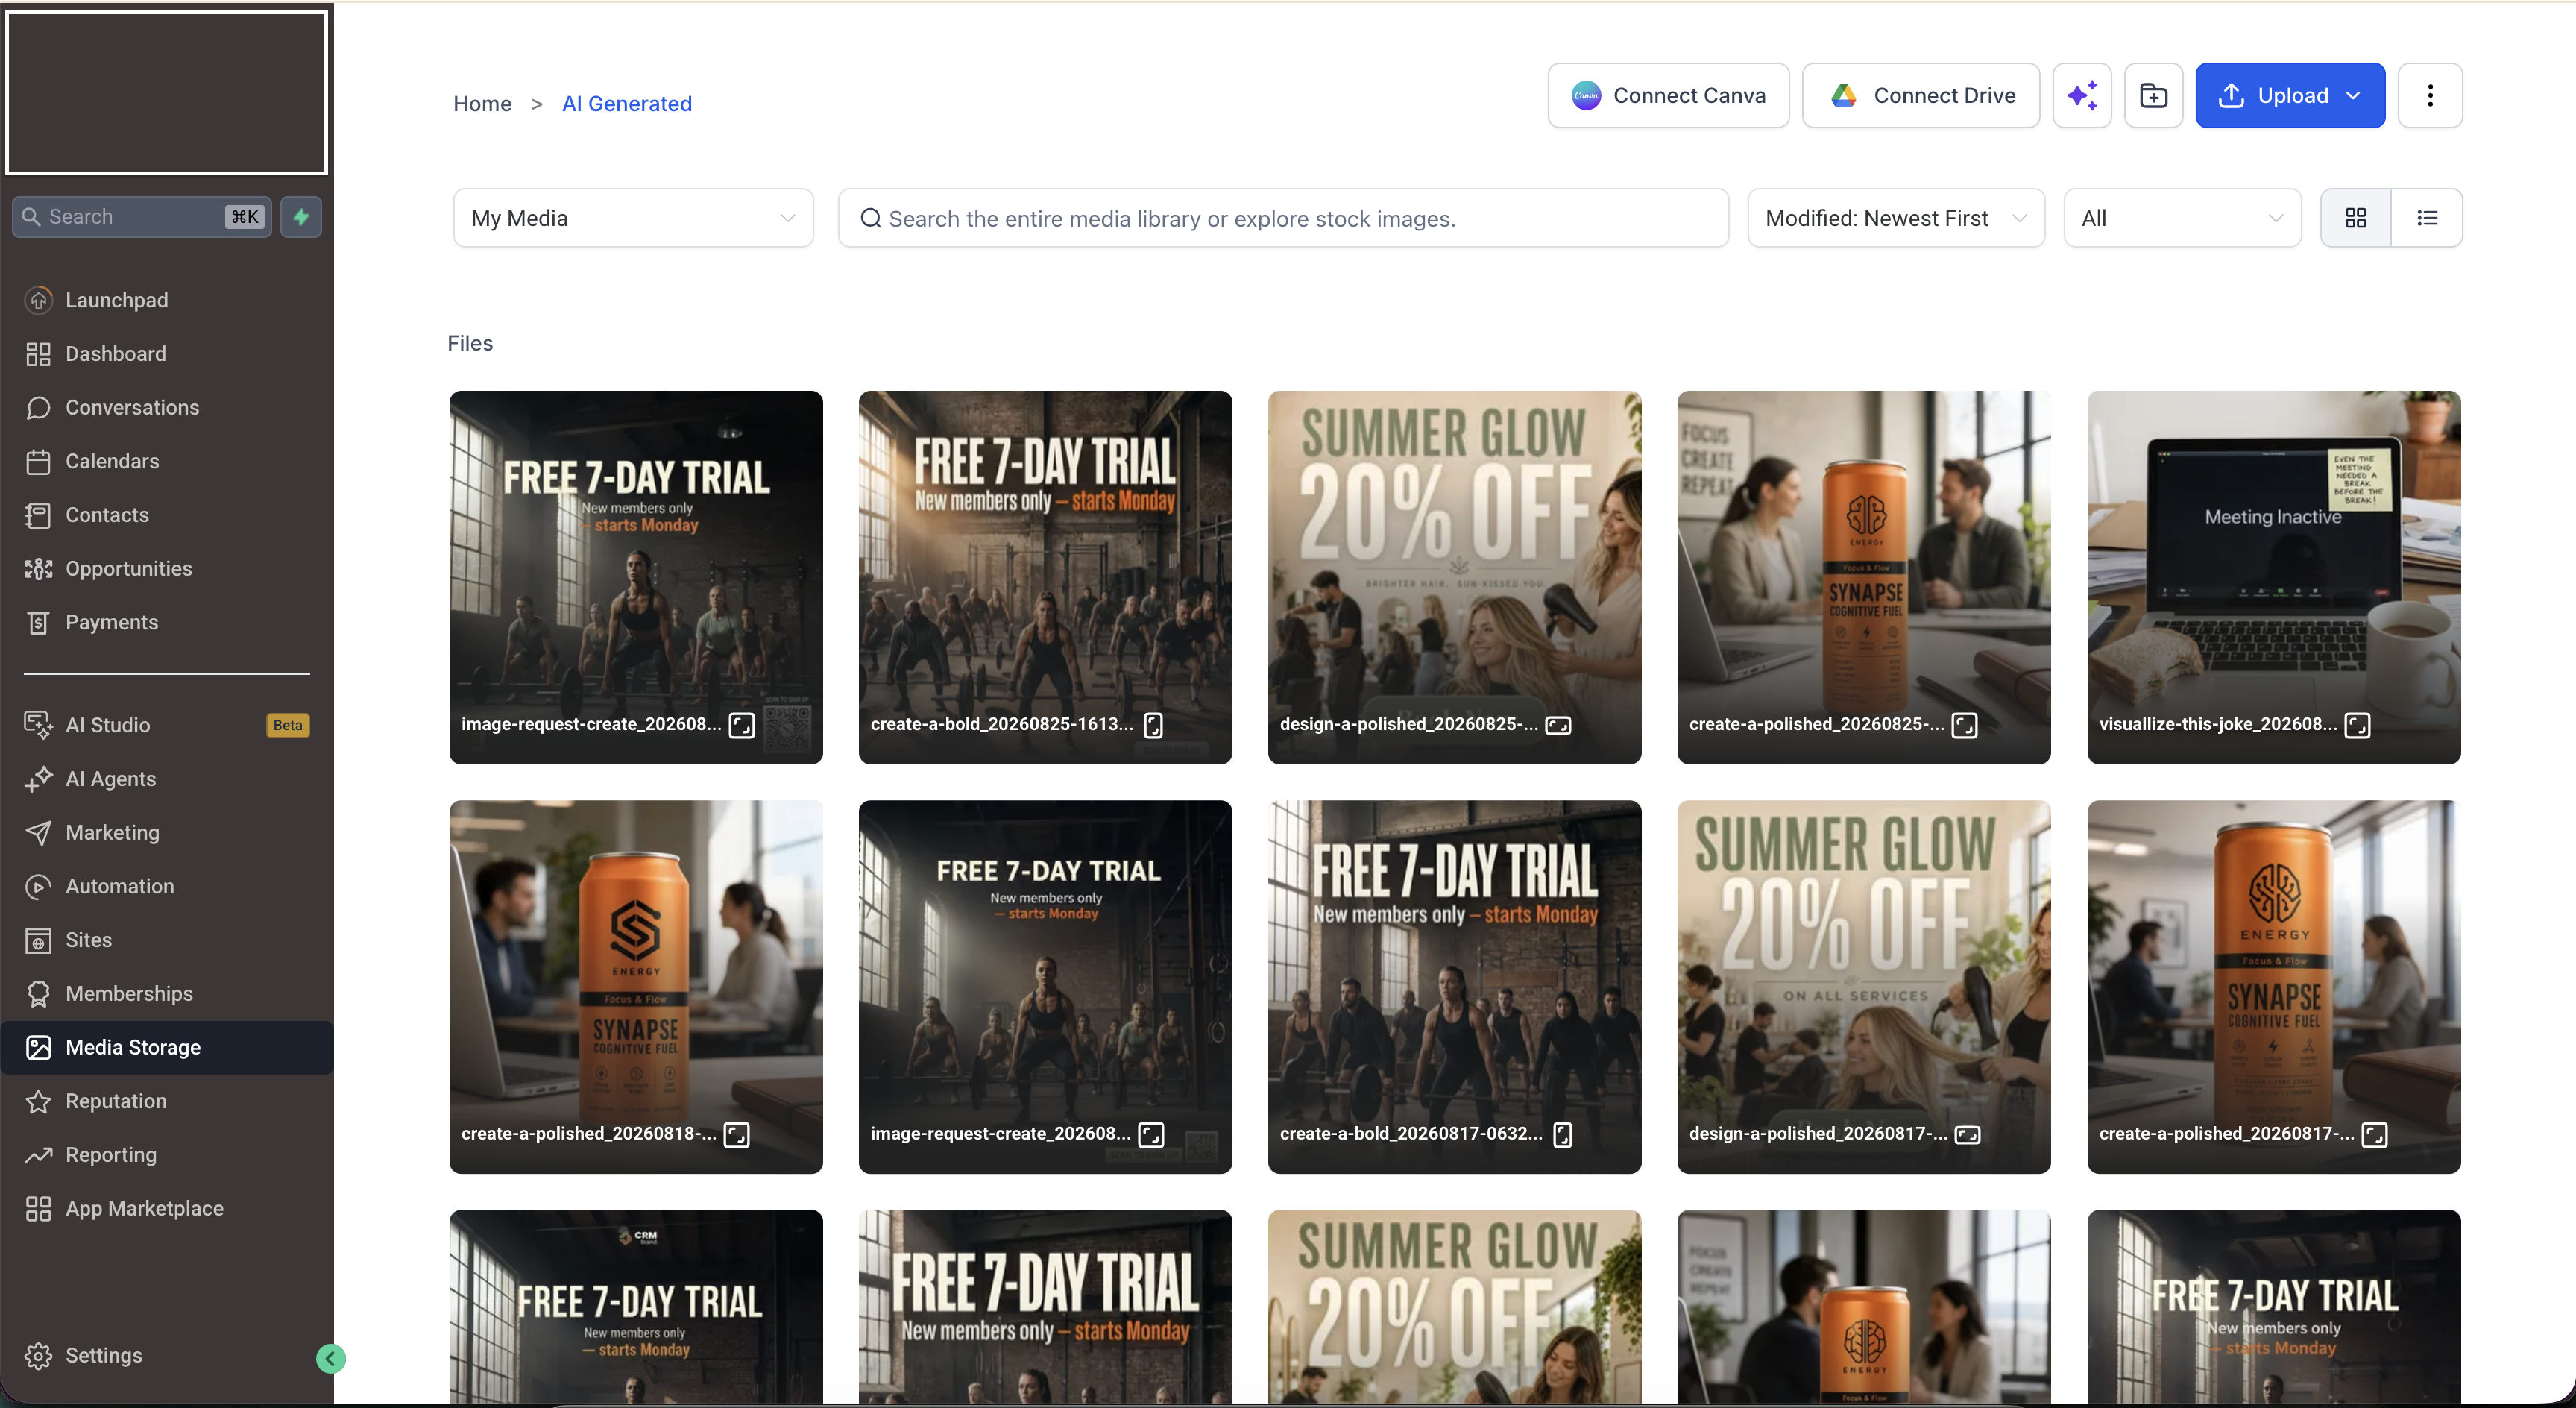
Every generated image is automatically saved to Media Storage. You can browse, download, and reuse these images from there at any time, just like any other uploaded asset – including in emails, funnels, websites, and social posts built outside the workflow.
Use Cases
1. Generating Product Mockups from Incoming Requests
Scenario: You want to produce quick product mockups or visual concepts to share with clients without waiting on a designer. Requests arrive from an external system – a Google Sheet, a form, or a partner platform – with a short description of what’s needed.
Setup:
- Trigger: Inbound Webhook (carrying the product description)
- Action 1: AI Image Generation – Product Mockups template, with the incoming description inserted into the prompt as a custom value. Apply your Design Kit for brand consistency.
- Action 2: Send Email – Include the Image URL so the client receives the mockup immediately.
2. Personalized Campaign Visuals
Scenario: You want each contact in a campaign to receive a visual tailored to their interest, location, or purchase history – rather than one generic stock image for everyone.
Setup:
- Trigger: Contact Tag Added (e.g., “campaign-enrolled”)
- Action 1: AI Image Generation – Build the prompt using contact custom values so the image reflects that contact’s segment. Apply Brand Voice for tone consistency.
- Action 2: Send Email or MMS – Use the Image URL as the campaign visual.
3. On-Demand Images from Conversations
Scenario: A customer interacting with your bot asks for a visual – a design concept, a room layout, a styled product shot. You want to generate and return it in the conversation without human involvement.
Setup:
- Trigger: Customer Replied / Conversation AI handoff
- Action 1: AI Image Generation – Use the customer’s message content as the prompt input.
- Action 2: Send SMS/MMS – Return the Image URL to the customer in the same conversation thread.
More Ideas
- Social content pipelines: Generate post graphics automatically whenever a new blog, offer, or announcement is published, so visuals keep pace with your content calendar.
- Promo and event flyers: Produce flyers for recurring promotions, seasonal offers, or local events without a design request each time.
- Catalog and listing visuals: Generate consistent lifestyle or white-background shots across a product range, useful where photography for every SKU isn’t practical.
- Creative variations for testing: Produce several visual directions for the same campaign concept and test which performs best before committing to final production.
- Blog and article imagery: Generate on-brand featured images as part of a content publishing workflow, replacing generic stock photography.
Tips for Better Results
- Be specific in your prompt. Describe the subject, style, setting, lighting, and mood rather than just naming the object.
- Use Enhance Prompt when starting from a short or rough description – it fills in detail the model needs.
- Apply Design Kit and Brand Voice for anything customer-facing, so output stays on-brand rather than generic.
- Match Size to the destination – Square for social feeds, Landscape for email headers and banners, Portrait for stories and mobile.
- Test your prompt on a few sample contacts before publishing a workflow that runs at volume.
- Save prompts that work well. Reusing a proven prompt structure gives more consistent results than rewriting each time.
Pricing
Image generation is billed per execution. The figures below give you an idea of what generating an image normally costs. Most generations fall within this range.
Note: Treat these figures as a planning estimate rather than a fixed rate.
| Metric | Cost per image | In cents |
|---|---|---|
| Median | $0.0388 | 3.88¢ |
| Average | $0.0499 | 4.99¢ |
Your actual cost per image will vary depending on how you configure the action. The main factors are:
- Model – the AI model you select.
- Quality – the quality level you set (Auto, High, Medium, or Low).
- Size – the image size you generate at.
- Additional context – applying a Design Kit or Brand Voice passes extra context to the model, which can shift the cost.
Frequently Asked Questions
Q: How much does it cost to generate an image?
Generating an image normally costs between $0.0388 (3.88¢) and $0.0499 (4.99¢). Your actual cost depends on the model, quality level, and image size you select, and on whether you apply a Design Kit or Brand Voice. See the Pricing section above for more detail.
Q: Where is the generated image stored?
Every generated image is automatically saved to Media Storage and hosted at a publicly accessible URL. You can access it through the custom value picker in downstream actions or browse to it directly in Media Storage.
Q: Which model should I choose?
Use GPT Image 2.5 Flare for creator and social content, product visuals, visual search, quick prototyping, and high-volume generation.Use GPT Image 2.5 Sunburst for premium campaign creative and polished product imagery when you need tighter control across edits.
Other models remain available for different visual requirements. If you are unsure, run the same prompt through multiple models and compare the results before publishing your workflow.
Q: What does the Quality setting affect?
Quality controls the level of detail in the generated image. Auto (the default) lets the system choose an appropriate level for your prompt. High produces the most detailed output but takes longer to generate; Low is faster and lighter. Choose based on whether the image is customer-facing or an internal draft.
Q: Can I use dynamic data in the prompt?
Yes. The prompt field supports custom values, so you can insert contact fields, webhook payload data, or output from previous actions. This lets a single workflow generate a different image for every contact or every incoming request.
Q: What does Enhance Prompt do?
It uses AI to expand and refine your prompt, adding detail around style, composition, and lighting that you may not have specified. This typically produces noticeably better output. You can review and edit the enhanced prompt before saving the action.
Q: Do I have to use a template?
No. Templates are a starting point, not a requirement. You can write your own prompt from scratch, or apply a template and then edit the pre-filled prompt to match your exact requirement.
Q: How do I get a transparent background?
Open Additional Settings and set the Background option. The default is Auto; you can also select Opaque. For transparency to be preserved in the final file, choose PNG or WebP as the output format – JPEG does not support transparency.
Q: What are Design Kit and Brand Voice used for?
Both give the AI additional context so generated images align with your brand. Design Kit applies your visual style, while Brand Voice supplies your brand details. These options pull from the assets already configured in your account – if you haven’t set them up, configure them first and they’ll appear as selectable here.
Q: Can I send the generated image to an external system?
Yes. Because the image is hosted at a publicly accessible URL, you can pass the Image URL value to any downstream action – including outbound web-hooks to deliver it to an external platform.
Related Articles
Was this article helpful?
That’s Great!
Thank you for your feedback
Sorry! We couldn't be helpful
Thank you for your feedback
Feedback sent
We appreciate your effort and will try to fix the article