Need to offer a client a custom SaaS subscription price without modifying your standard SaaS plans? Special Prices allow agencies to create one-time custom pricing for existing sub-accounts during SaaS activation.
This feature is useful for:
- Promotional pricing
- Enterprise contracts
- Legacy pricing migrations
- Temporary discounts
- Custom client agreements
Special Prices work only when manually converting an existing sub-account into SaaS Mode.
TABLE OF CONTENTS
- What are Special Prices for SaaS Sub-Accounts?
- Key Benefits of Special Prices
- Set Up a Special Price
- Reactivating Cancelled Special-Price Subscriptions
- Frequently Asked Questions
- Related Articles
What are Special Prices for SaaS Sub-Accounts?
Special Prices allow you to override the default SaaS plan pricing configured in SaaS Configurator for a specific sub-account.
Instead of editing your public SaaS plans or manually creating temporary Stripe products, HighLevel creates a hidden custom pricing object for that subscription behind the scenes.
This allows agencies to maintain standard pricing while offering flexible pricing arrangements for specific clients.
Key Benefits of Special Prices
- Offer custom pricing without modifying standard SaaS plans
- Create one-time promotional or contract pricing
- Avoid manually creating Stripe products and prices
- Keep subscriptions tied to the existing sub-account
- Reuse matching special-price configurations automatically
Set Up a Special Price
Special Prices are configured during the “Switch to SaaS” process for an existing sub-account.
Step 1: Open Manage Client
- From Agency View, navigate to Sub-Accounts
- Select the desired sub-account
- Click Manage Client
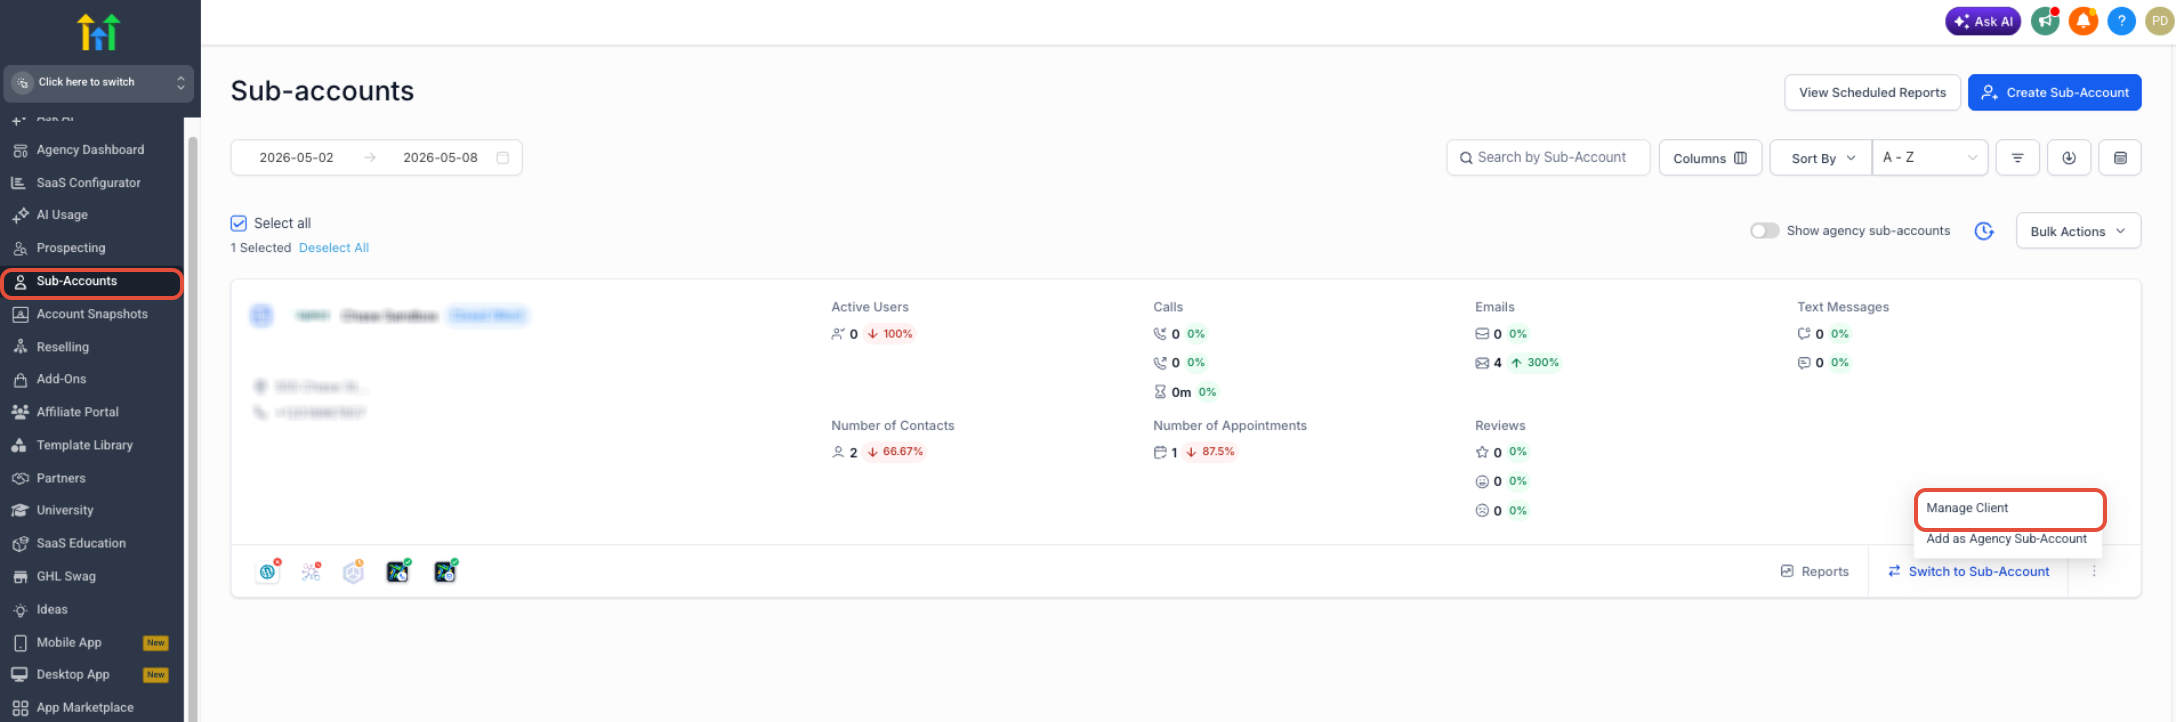
Use image showing:
- Agency View
- Sub-Accounts list
- Manage Client button
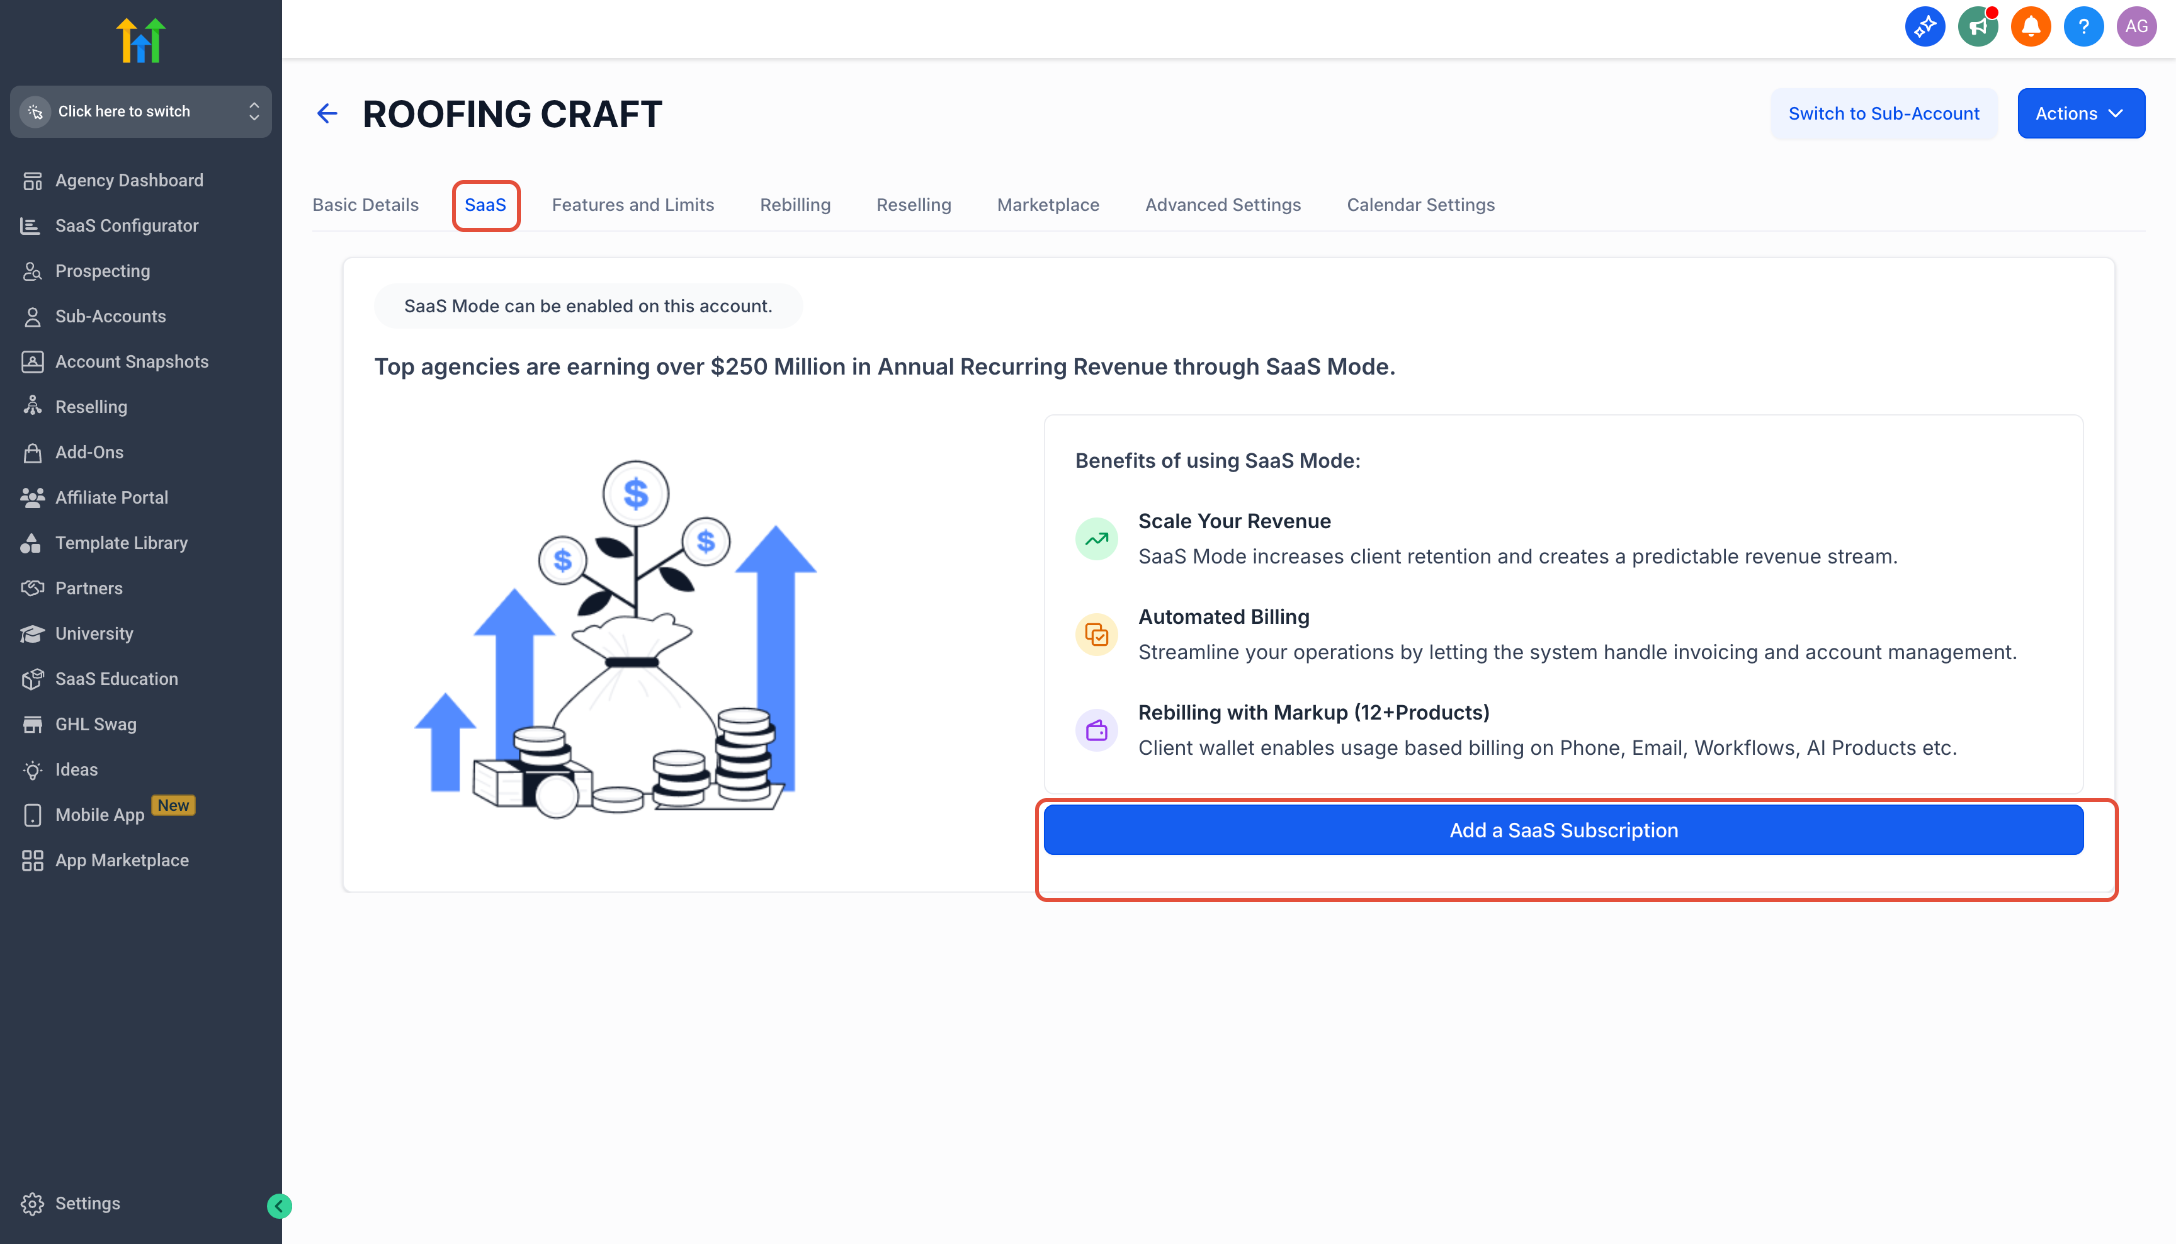
Step 2: Add a SaaS Subscription
- Open the SaaS tab
- Click Add a SaaS Subscription
- Select the payment provider
- Choose an existing Stripe customer or create a new customer
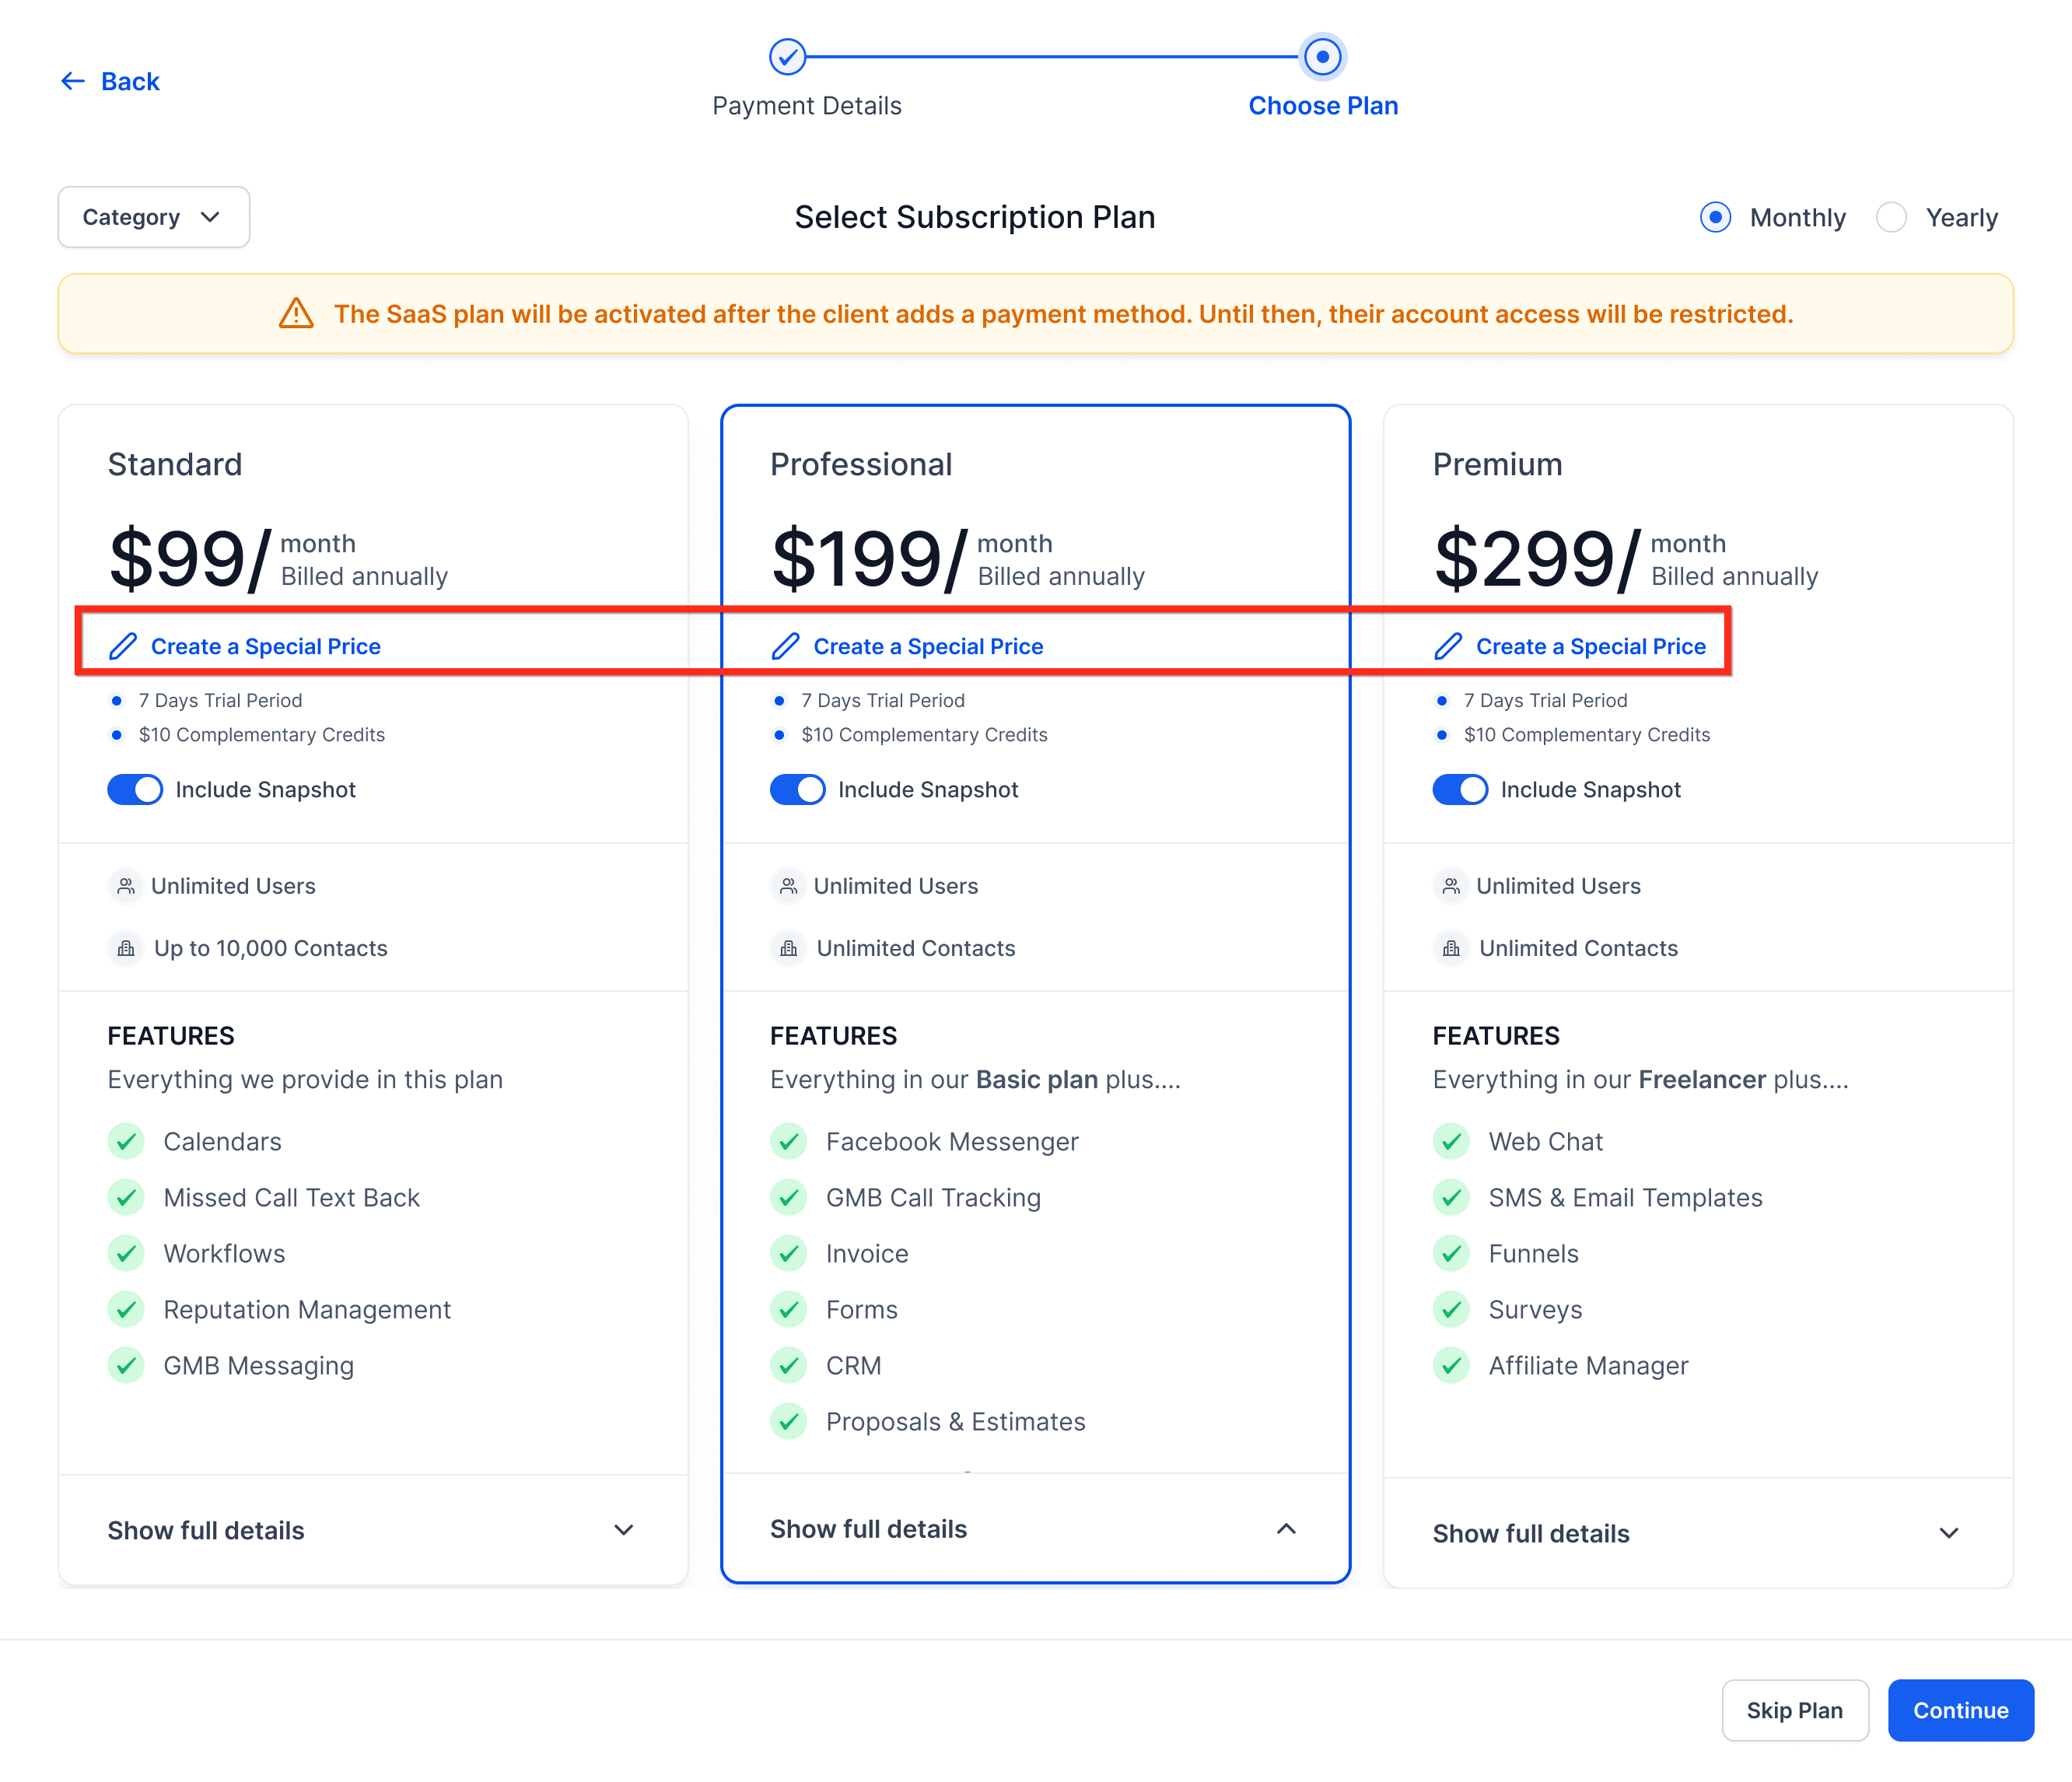
Step 3: Create a Special Price
- On the Select Subscription Plan screen, click Create a Special Price under the desired plan
- Enter:
- Custom amount
- Currency
- Billing interval (monthly or yearly)
- Custom amount
- Click Save Price
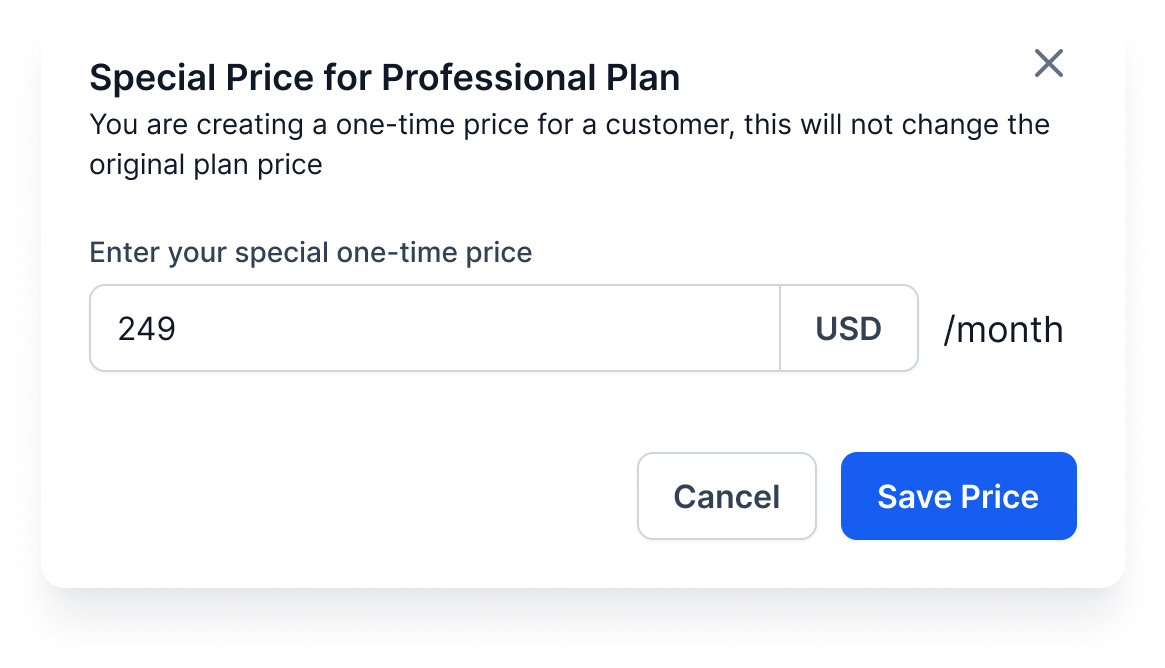
Special Price Configuration
When creating a special price:
- The original SaaS plan remains unchanged
- The custom price applies only to the selected subscription
- HighLevel checks whether an identical special price already exists
- Existing matching prices may be reused automatically
Step 4: Confirm Subscription
- Select the newly created Special Price
- Review the subscription details
- Click Continue or Activate
The sub-account remains in the same location and the subscription activates using the custom pricing.
Reactivating Cancelled Special-Price Subscriptions
When reactivating a cancelled subscription using a special price, the payment modal now correctly displays the configured custom pricing amount.
Previously, some reactivation flows could display an incorrect amount during checkout.
This issue has been resolved and reactivated subscriptions now correctly reflect the intended special pricing.
No additional setup is required.
Frequently Asked Questions
Q: Does creating a Special Price modify my original SaaS plans?
A: No. Your standard SaaS Configurator plans remain unchanged.
Q: Can I create Special Prices for new customers using public checkout links?
A: No. Special Prices currently work only when manually converting an existing sub-account to SaaS Mode.
Q: Can I customize the billing interval?
A: Yes. Special Prices support both monthly and yearly billing intervals.
Q: Will HighLevel reuse existing Special Prices automatically?
A: Yes. If an identical special price already exists with the same amount, currency, interval, and product, the system may reuse it automatically.
Q: Can I upgrade or downgrade a client using a Special Price later?
A: Yes. Subscriptions can later be changed to another standard or special price.
Related Articles
- Convert Existing Sub-Account to SaaS Mode Subscription
- SaaS Mode – Full Setup Guide + FAQ
- 2FA for New SaaS Sub-Accounts
Was this article helpful?
That’s Great!
Thank you for your feedback
Sorry! We couldn't be helpful
Thank you for your feedback
Feedback sent
We appreciate your effort and will try to fix the article