Learn how Sender Preferences work, how to configure default sender and test-recipient details, how those defaults apply to new campaigns, and how sender verification affects campaign sending.
What Are Sender Preferences?
Sender Preferences are account-level defaults used when creating new email campaigns and test sends. They can populate Sender Name, Sender Email, Test Recipient(s), and Custom Reply fields automatically, while still allowing campaign-level overrides.
Sender Preference Fields
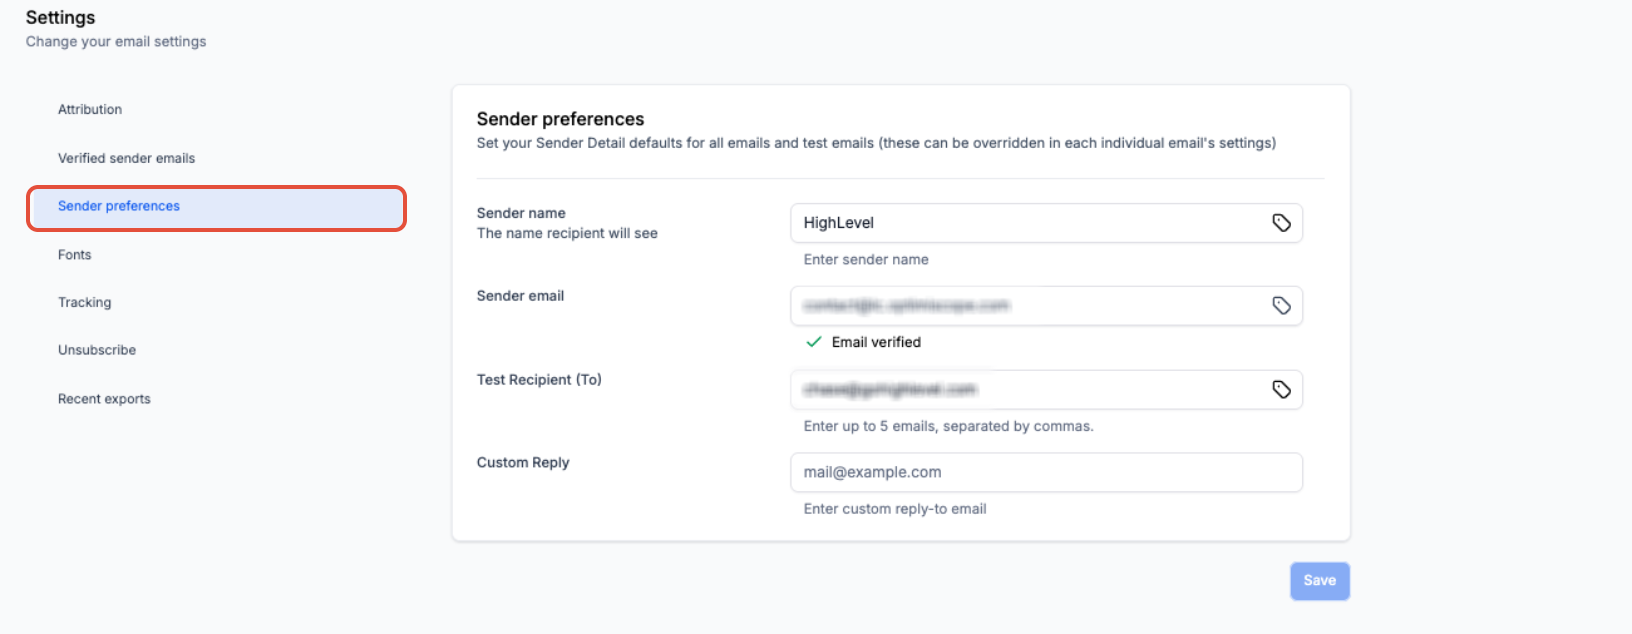
Each field controls a different part of the sender or testing experience. Configure only the defaults you want HighLevel to prefill when creating new campaigns or sending tests.
Sender Name
The name recipients see as the sender of the email. Use a recognizable business, brand, or team name.
Sender Email
The email address recipients see in the From field. Use a valid sender address and complete any verification required by HighLevel before sending.
HighLevel may require From Email verification before an address can be used in an email campaign. Sender-domain requirements can also vary depending on whether the account uses a shared domain, dedicated LC Email domain, or another email provider.
Important: A saved Sender Email does not override sender-domain validation. Review any verification, domain, or deliverability warnings shown when sending or scheduling the campaign.
Test Recipient(s)
Add up to 5 email addresses, separated by commas, to use as default recipients for test emails. These can be team, QA, or stakeholder inboxes used to review campaigns before sending.
Custom Reply
Enter a different email address when replies should go somewhere other than the Sender Email. If left blank, replies use the applicable default reply behavior.
Note: Where the tag icon is available, supported custom values can be used instead of static sender information.
How to Configure Sender Preferences
Configure Sender Preferences once to prefill sender and testing details when creating new email campaigns and test sends.
- Go to Marketing → Emails → Campaigns.
- Click the Settingsgear icon.
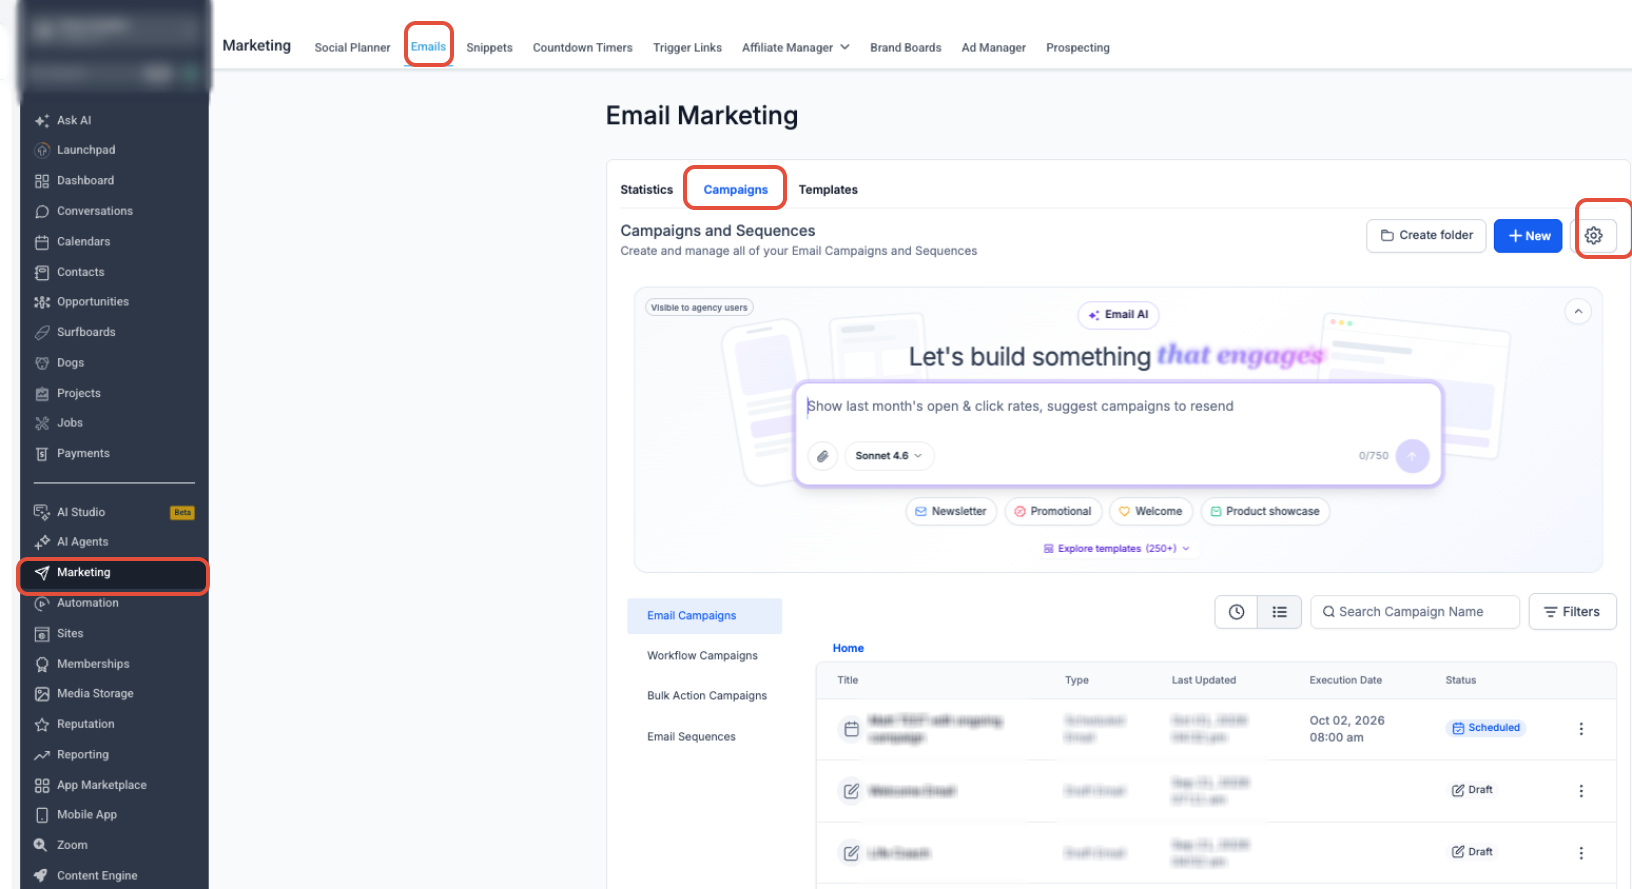
- Select Sender Preferences
- Enter the default Sender Name.
- Enter the default Sender Email.
- Add up to five Test Recipient(s) if needed.
- Enter a Custom Reply address if replies should go somewhere different.
- Click Save.
How Sender Preferences Are Applied
Sender Preferences act as starting values for new email campaigns and test sends. They do not automatically replace sender details already stored in existing drafts or scheduled campaigns.
Sender details can still be overridden for an individual campaign when needed.
Cloned campaigns: A cloned campaign inherits the sender values stored in the original campaign rather than automatically replacing them with newly updated Sender Preferences. Review sender details after cloning.
Frequently Asked Questions
Was this article helpful?
That’s Great!
Thank you for your feedback
Sorry! We couldn't be helpful
Thank you for your feedback
Feedback sent
We appreciate your effort and will try to fix the article