User roles and permissions control what each user can access and manage within a Sub-Account. You can assign Admin or User roles, configure module and granular permissions, restrict supported record visibility with Only Assigned Data, and copy permission settings between users.
TABLE OF CONTENTS
- What Are User Roles and Permissions?
- Set Up Sub-Account Roles and Permissions
- Restrict Visibility with Only Assigned Data
- Copy Permissions Between Users
- Module-Specific Granular Permissions
- Frequently Asked Questions
- Related Articles
What Are User Roles and Permissions?
Sub-Account roles and permissions determine which features, data, and actions a user can access within a specific Sub-Account.
Each user has one of two roles:
- Admin: Provides administrative access within the Sub-Account, subject to supported granular permissions.
- User: Provides access according to the permissions configured for that user.
Access can be further customized with module permissions, granular permissions, and Only Assigned Data.
Set Up Sub-Account Roles and Permissions
Configure each user's role and permissions based on the access required for their responsibilities.
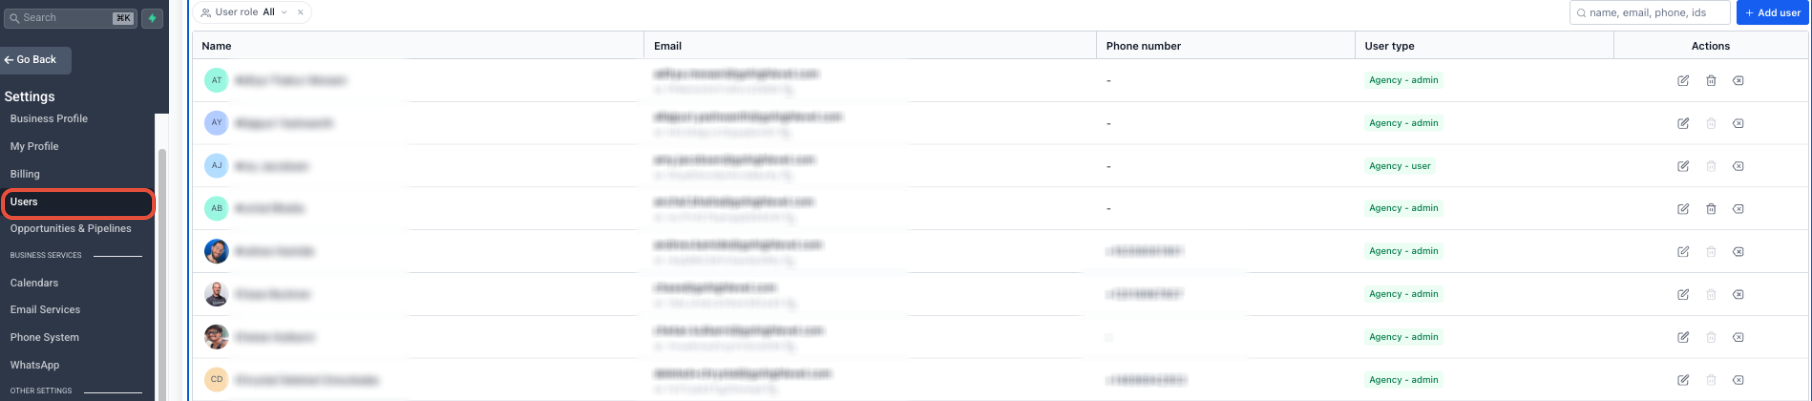
Step 1: Open Users
Open the Sub-Account you want to manage, then go to Settings → Users.
Step 2: Open or Add a User
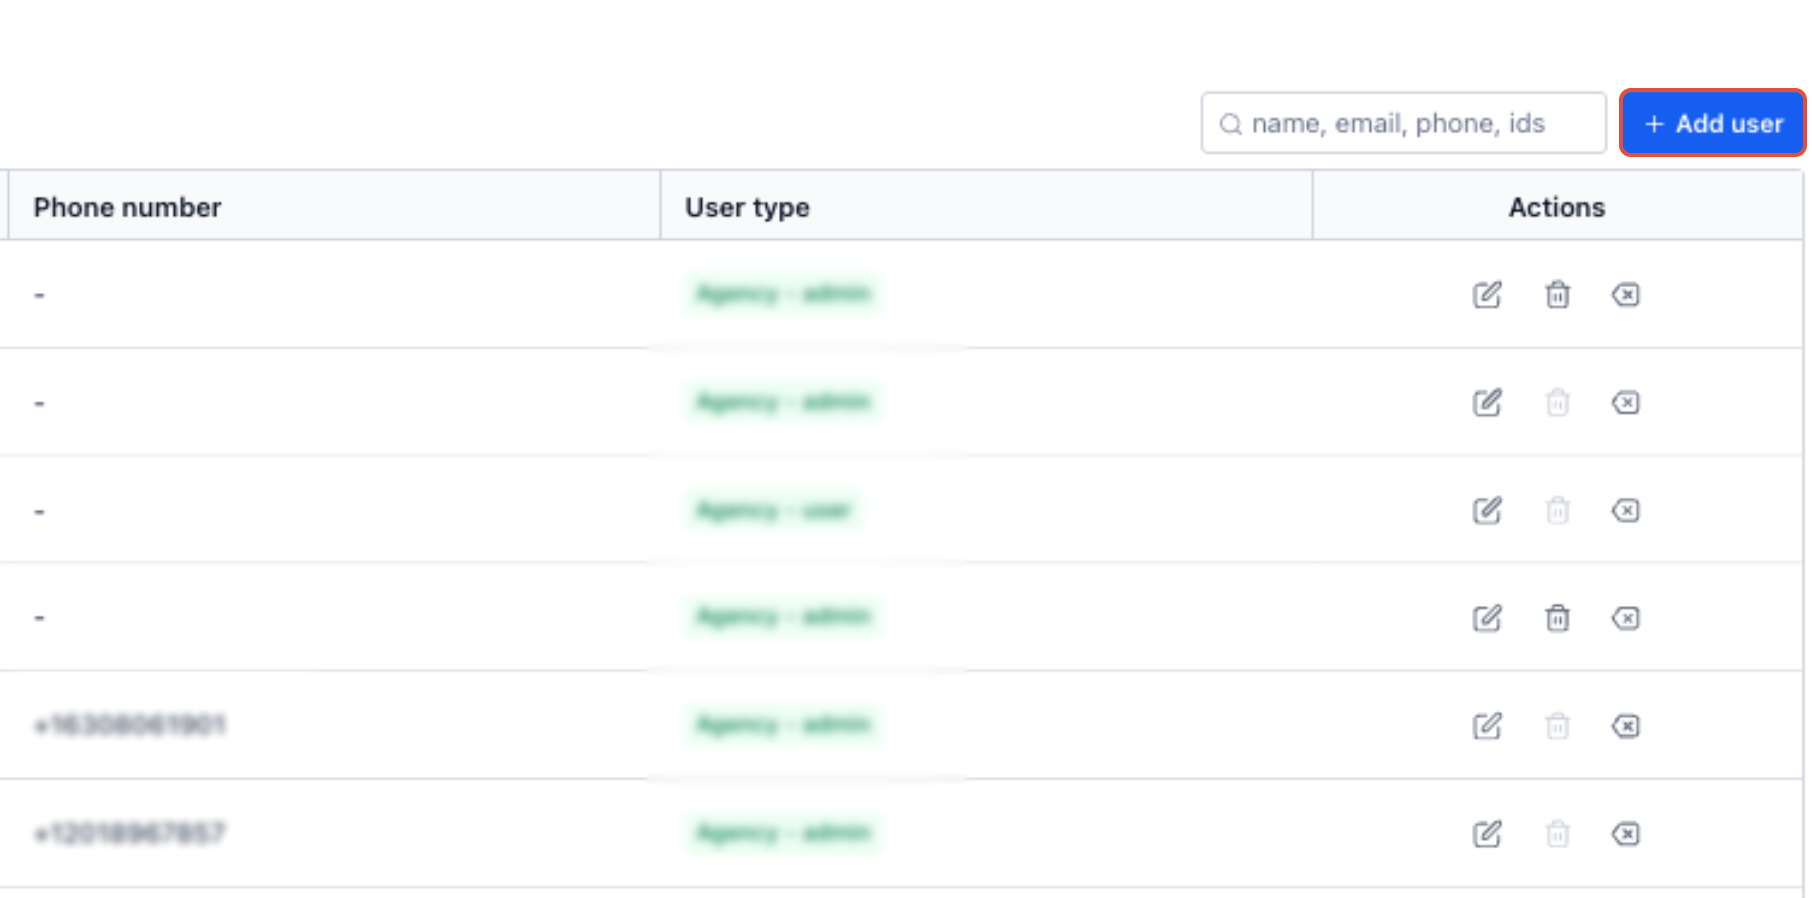
Open an existing user to edit their access, or click + Add User
The refreshed Users experience includes user search, redesigned add/edit flows, clearer role and permission controls, and improved user-management guidance.
When creating a user, available settings can also include call-forwarding and voicemail configuration. If the email address already belongs to an existing user, follow the guidance shown in the Users experience instead of creating a duplicate.
Step 3: Assign the User's Role
Open Roles & Permissions, then select the appropriate role:
- Admin: Administrative access within the Sub-Account, subject to supported configurable permissions.
- User: Access is controlled by the permissions configured for that user.

Step 4: Configure Module and Granular Permissions
Use the available permission controls to enable or restrict access to supported modules and actions.
For Forms, Surveys, Quizzes, and QR Codes, use the module control and the available View & manage permission.
Affiliate Manager Payout Permission
Under Marketing, the Pay Affiliate Manager Payout permission controls whether an eligible admin can process affiliate payouts.
- Sub-Account Admins: The permission is enabled by default and can be enabled or disabled.
- Sub-Account Users: Users cannot process affiliate payouts.
When the permission is disabled, supported payout actions such as Pay or Pay Payout are not shown in Affiliate Manager.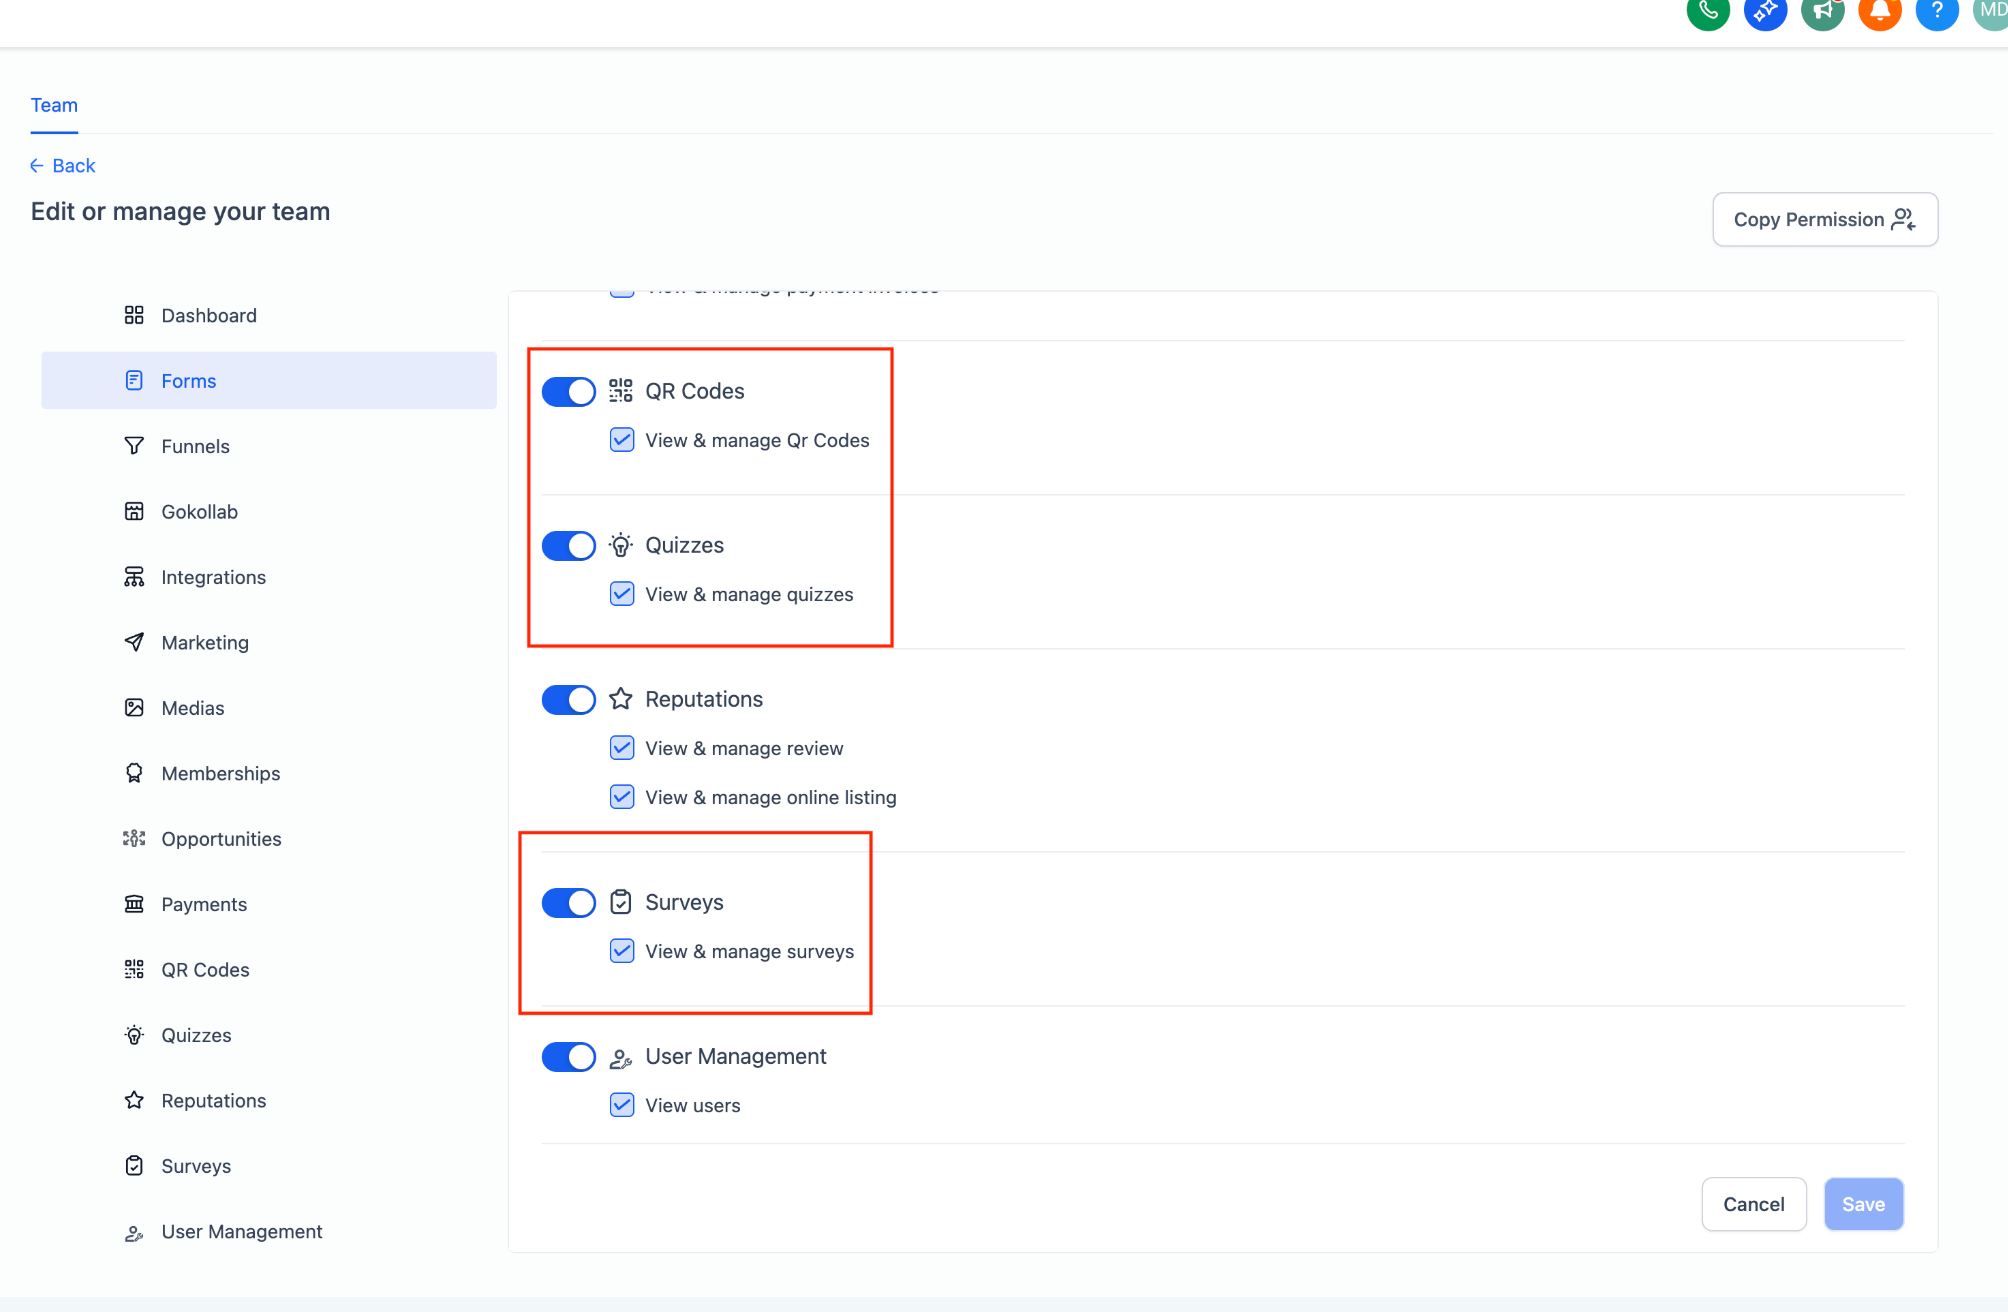
Step 5: Configure Only Assigned Data
Enable Only Assigned Data when a user's supported record visibility should be limited to data assigned to them.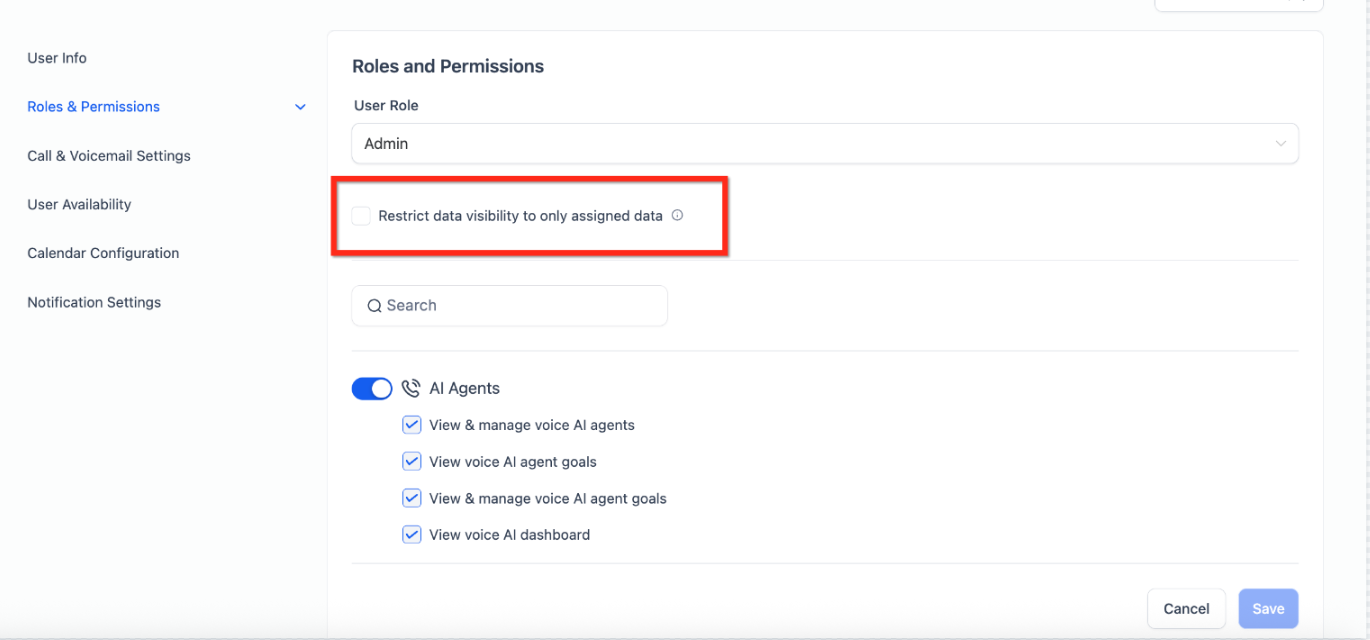
Step 6: Save Your Changes
Click Save to apply the user's role and permission settings.
Restrict Visibility with Only Assigned Data
Only Assigned Data limits a user's visibility to supported records associated with that user. This is useful when users should focus on their own assigned work instead of viewing data belonging to other users.
Depending on the supported module, assigned data can include:
- Contacts assigned to the user
- Opportunities owned by the user
- Appointments or tasks associated with the user
For example, a sales user can be restricted to their assigned contacts and opportunities instead of viewing another user's pipeline data.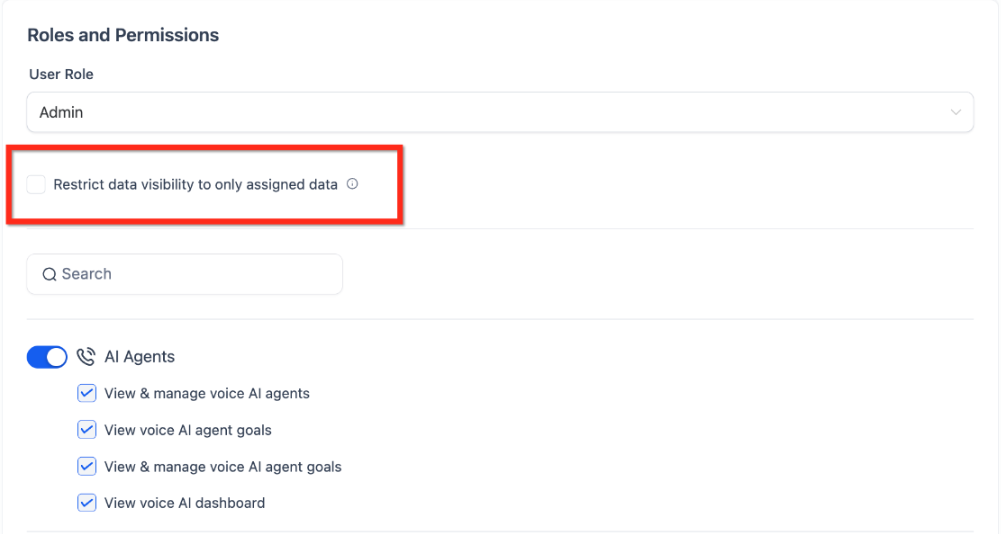
Copy Permissions Between Users
Copy Permissions lets you reuse an existing user's granular permission configuration instead of configuring each permission manually.
- Go to Settings → Users.
- Open the applicable user, or click + Add Employee to create a new user.
- Select Roles & Permissions.
- Click Copy Permissions.
- Select the source user from the Copy Permissions dropdown.
- Click Copy to apply the permission configuration.
Review the destination user's responsibilities before saving to confirm that the copied permissions are appropriate.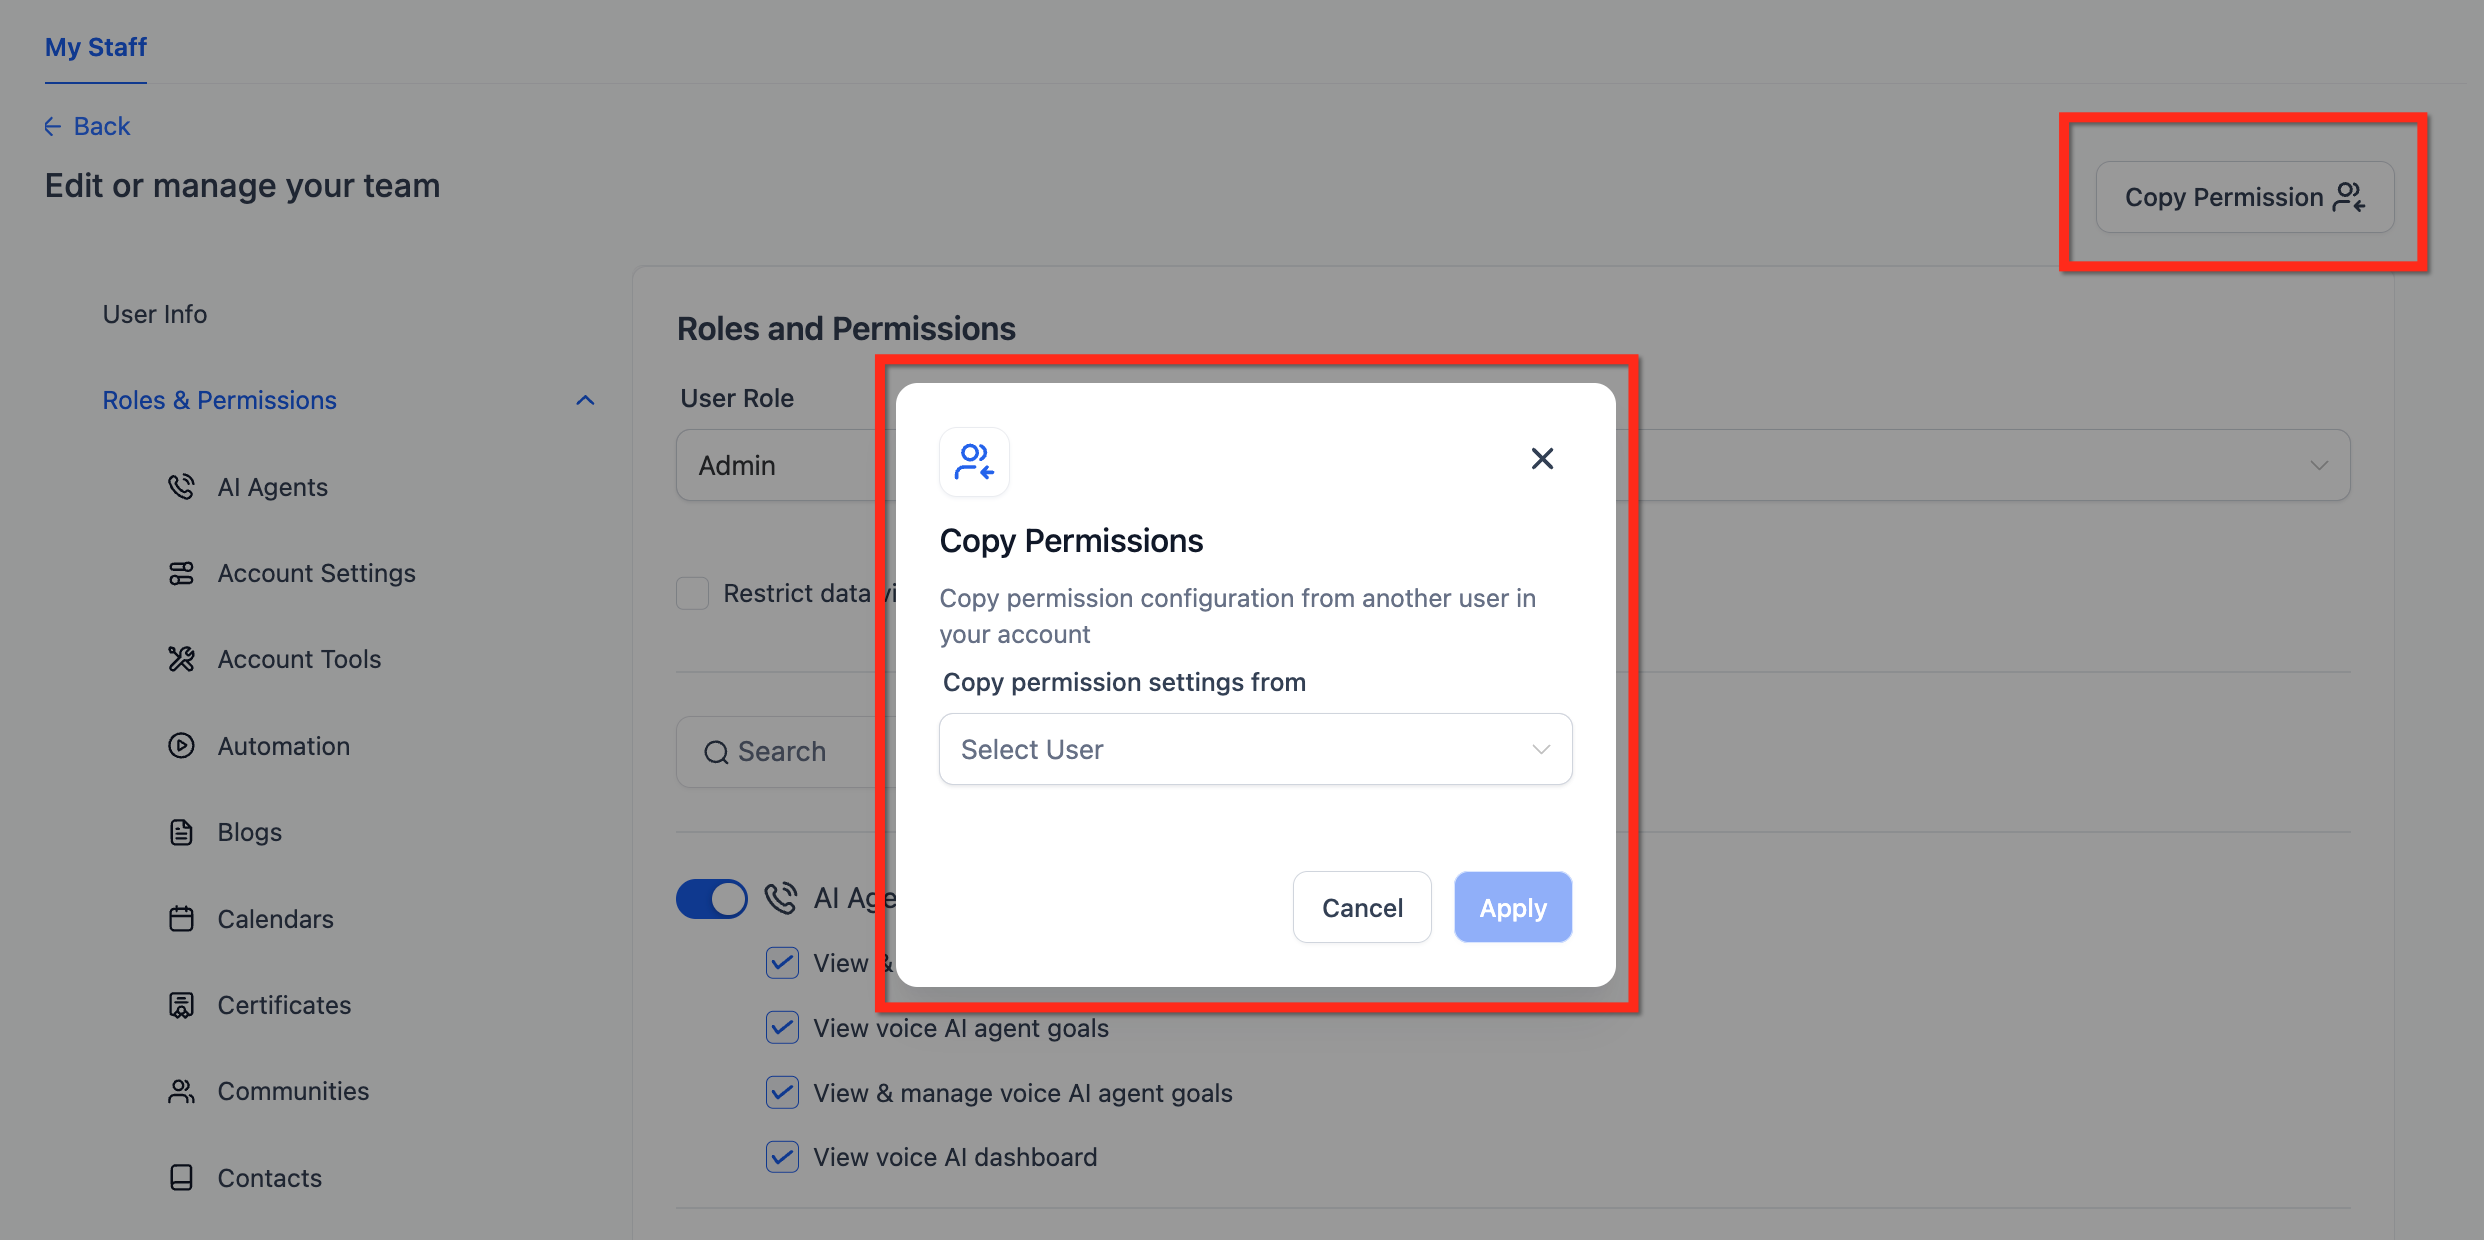
Module-Specific Granular Permissions
Granular permissions provide more precise control over supported actions inside individual modules. Available permissions depend on the user's role and the features available in the Sub-Account.
Supported permission areas can include:
- AI Agents — including supported Managed Agents, Voice, and Chat functionality
- AI Studio
- Account Settings
- Account Tools
- Automation — including Workflows
- Blogs
- Calendars
- Certificates
- Communities
- Contacts
- Conversations
- Dashboard
- Forms
- Funnels
- GoKollab
- Integrations
- Marketing
- Media
- Memberships
- Opportunities
- Payments
- QR Codes
- Quizzes
- Reputation
- Surveys
- User Management
- WordPress
Frequently Asked Questions
Q: What happens if I disable a module for a user but it is used in a workflow?
The user will not be able to access the disabled module, but existing workflows can continue to run. Make sure an authorized user retains the access required to manage those automations.
Q: Can I assign different permissions for calendars?
Yes. Calendar permissions support granular controls that can limit supported calendar access and management capabilities.
Q: Can I bulk assign permissions across multiple users?
No. Use Copy Permissions to copy a permission configuration from one user to another.
Q: What is the difference between an Agency Admin and a Sub-Account Admin?
An Agency Admin operates at the agency level, while a Sub-Account Admin has administrative access within the applicable Sub-Account.
Q: Can a user manage multiple Sub-Accounts without being an Agency Admin?
Yes. An Account-type user can be assigned access to selected Sub-Accounts without receiving agency-wide access.
Related Articles
- Admin vs. User Roles and Permission Scopes
- User Permissions, Assigned Data, and Owners
- Manage Agency User Roles and Permissions in HighLevel
- Voice AI Agent Permissions
- SaaS vs. Sub-Account Permissions
- Workflow Folder Permissions
Was this article helpful?
That’s Great!
Thank you for your feedback
Sorry! We couldn't be helpful
Thank you for your feedback
Feedback sent
We appreciate your effort and will try to fix the article