Tracking and managing opportunities efficiently is key to maintaining a streamlined sales process. The Pipeline Stage Changed Workflow Trigger automates actions when an opportunity moves from one stage to another, ensuring timely follow-ups, notifications, and updates. This guide will walk you through what this trigger does, its benefits, and how to configure it for optimized pipeline management.
TABLE OF CONTENTS
- What is the Pipeline Stage Changed Workflow Trigger?
- Key Benefits of the Pipeline Stage Changed Workflow Trigger
- Configuring the Pipeline Stage Changed Workflow Trigger
- Frequently Asked Questions
What is the Pipeline Stage Changed Workflow Trigger?
The Pipeline Stage Changed Workflow Trigger activates when an opportunity moves from one stage to another within a sales pipeline. It helps businesses automate workflows based on stage transitions, ensuring that no lead falls through the cracks. This trigger allows users to define actions that should occur when an opportunity progresses, regresses, or is reassigned to a new pipeline stage.
Key Benefits of the Pipeline Stage Changed Workflow Trigger
- Automates Follow-Ups: Ensures that each stage change prompts timely notifications, keeping sales reps engaged with prospects.
- Reduces Manual Work: Eliminates the need for manually tracking pipeline movements, freeing up time for strategic sales activities.
- Enhances Pipeline Visibility: Provides real-time insights into opportunity progress, allowing better forecasting and decision-making.
- Customizable Filtering: Allows users to set up workflows based on specific conditions such as pipeline, stage, assigned user, or lead value.
- Improves Response Time: Automates outreach and internal communication, ensuring quick action at crucial sales stages.
Configuring the Pipeline Stage Changed Workflow Trigger
Access Workflow Builder
Navigate to Automation > Workflows in your CRM dashboard. Click Create New Workflow or edit an existing one.

Choosing the Workflow Trigger
Click + Add New Trigger and search for Pipeline Stage Changed in the list. Select Pipeline Stage Changed as the trigger.

Name your Trigger
Give your workflow trigger a clear and descriptive name that reflects its purpose. This helps you quickly identify the trigger’s function when managing multiple workflows.

Setting Up Filters
Filters help you control when and how a workflow is triggered by setting specific conditions that must be met. Instead of triggering the workflow for every opportunity change, filters allow you to target only the ones that matter most to your business. Whether you want to automate actions for opportunities in a specific pipeline, those assigned to a certain team member, or only when a deal is marked as lost for a particular reason, filters give you the flexibility to refine and customize your automation. This ensures that workflows are more precise, relevant, and aligned with your sales process.
Assigned To Filter
The Assigned To filter ensures that workflows are triggered based on the user assigned to an opportunity. This filter is particularly useful for directing follow-ups, assigning tasks, or notifying specific team members when an opportunity moves through the pipeline.

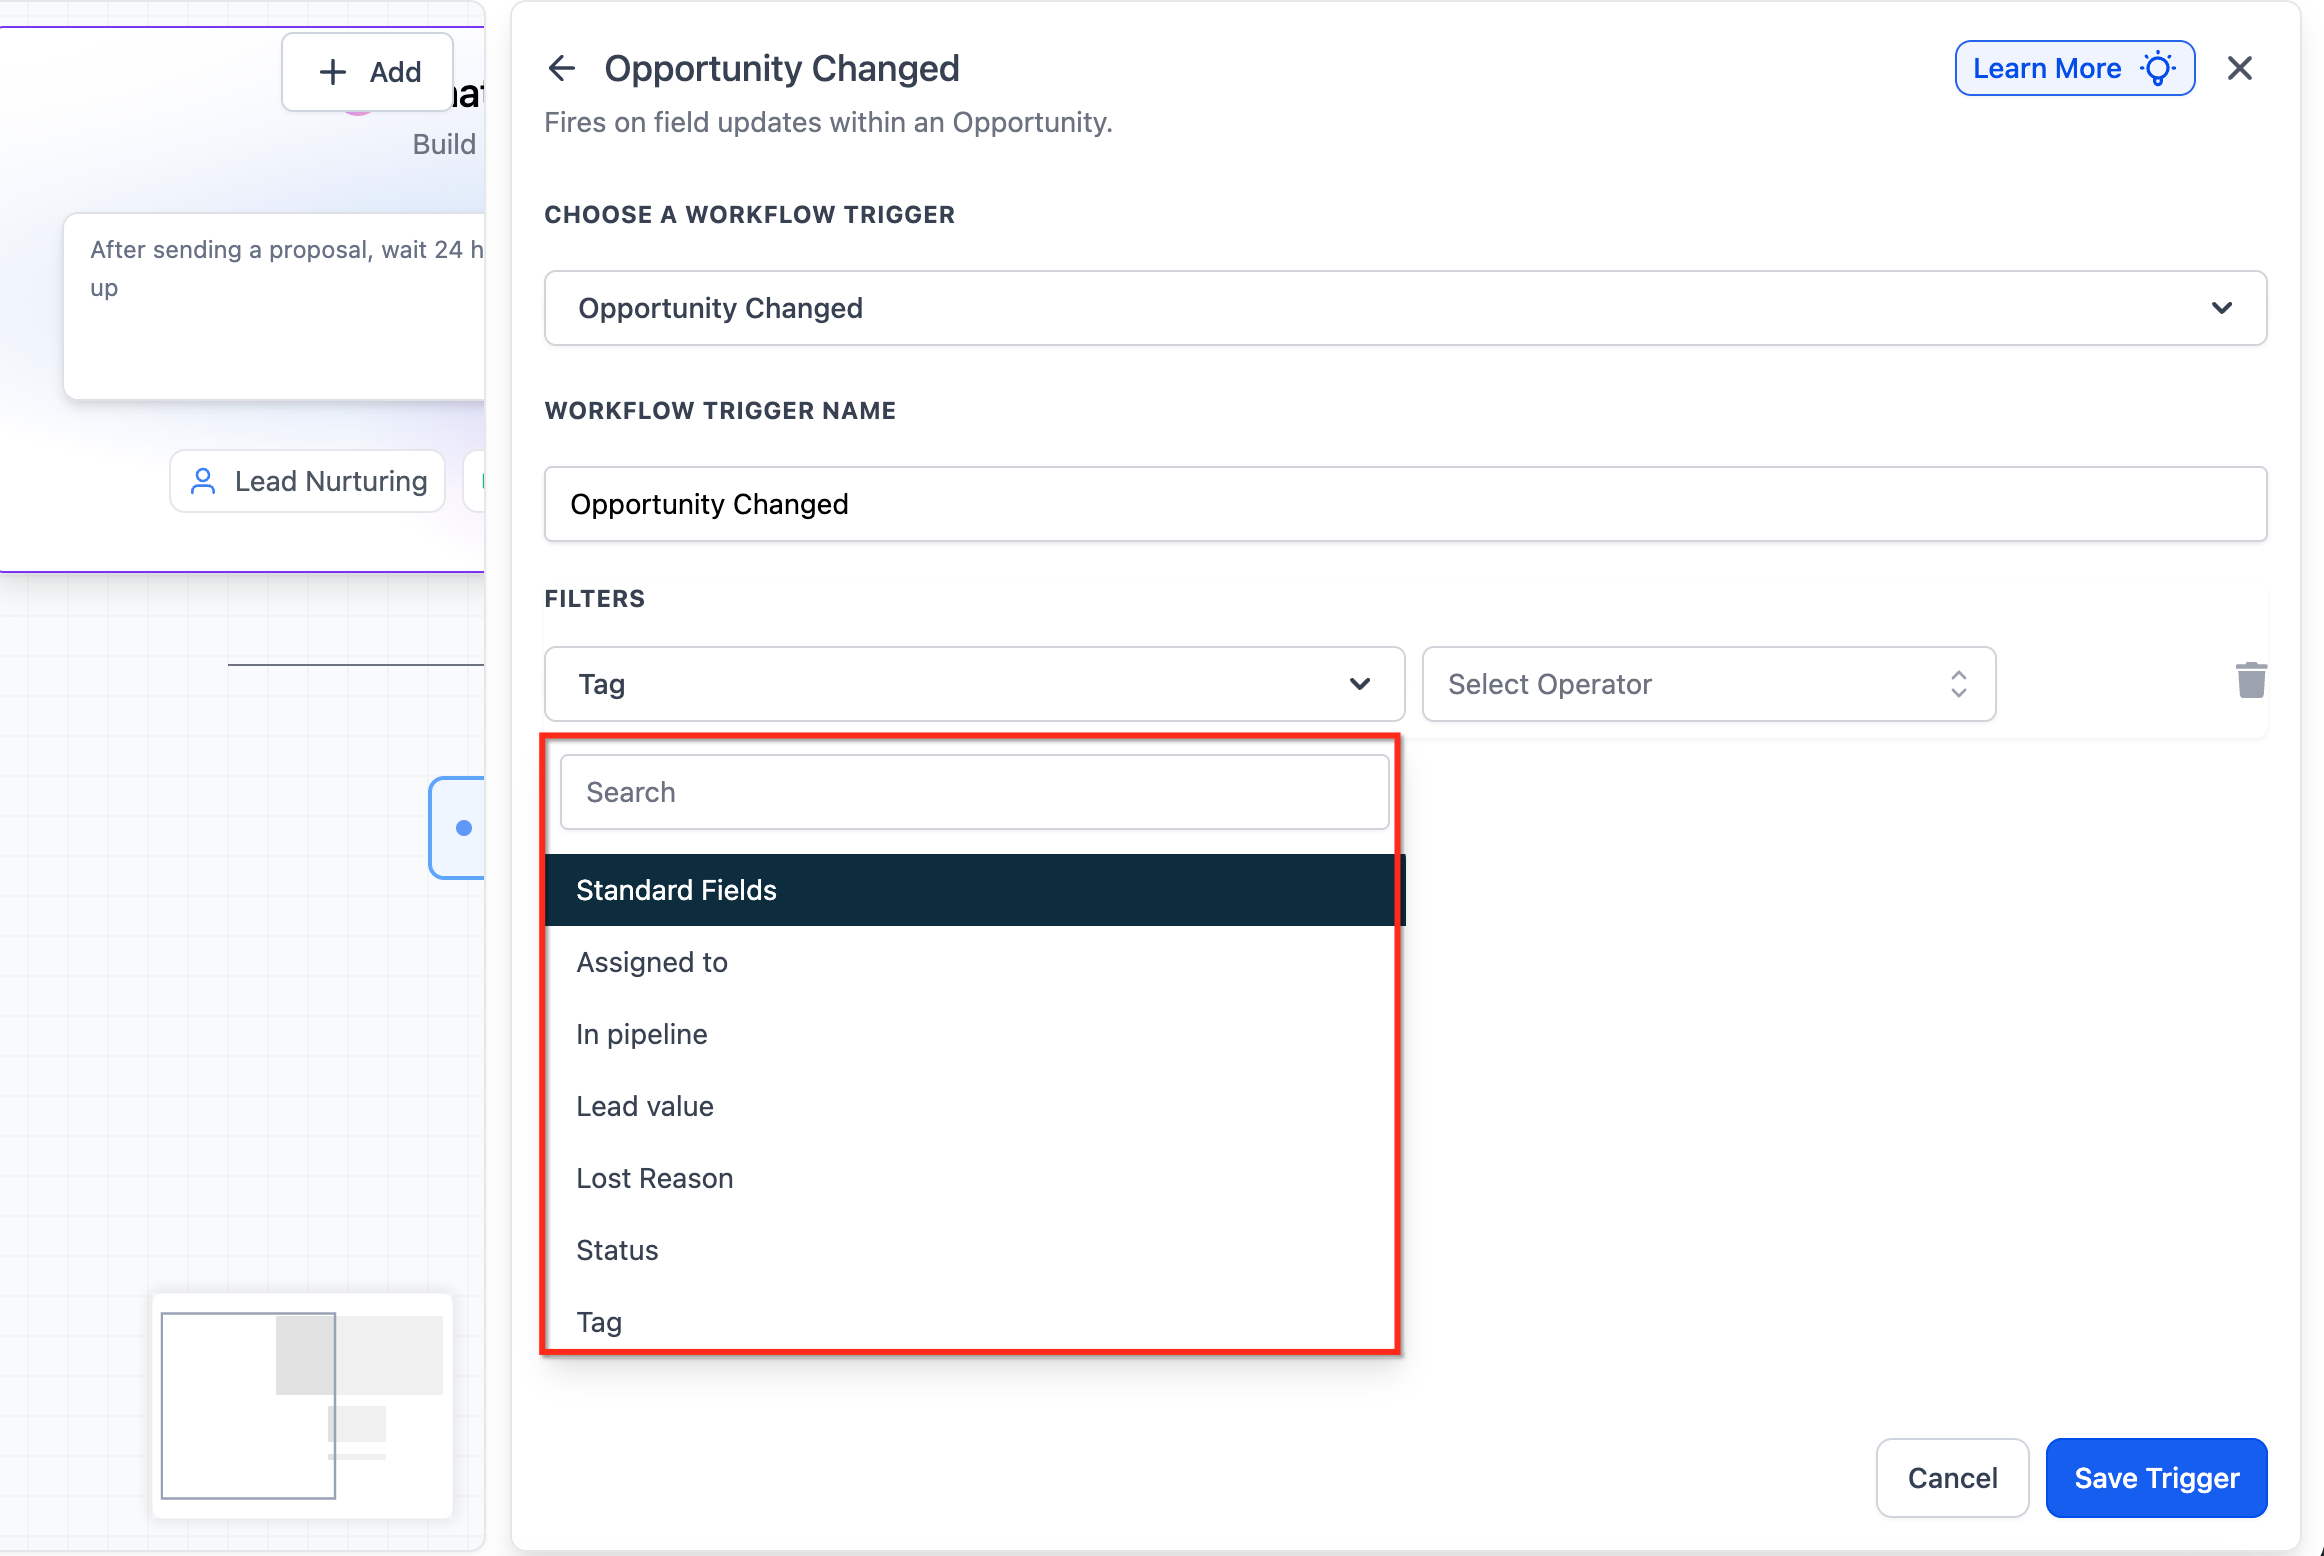
Tag filter (formerly “Has Tag”)
Use Tag filters to trigger workflows only for opportunities that match specific tag conditions. The Tag filter allows you to trigger workflows only when an opportunity contains a specific tag, making it particularly useful for segmenting opportunities, prioritizing leads, and automating targeted actions. Tags serve as labels to categorize opportunities based on attributes such as lead type, priority, source, or other relevant classifications. When setting up the Tag filter, you can specify which tag(s) must be present for the workflow to activate, ensuring automation is applied to the right opportunities.
Example: If an opportunity is tagged as “High Priority,” the workflow activates when it moves to the next stage.

In Pipeline Filter
The In Pipeline filter limits the workflow trigger to a specific pipeline, ensuring that automation is only activated for opportunities within the selected pipeline. This filter is particularly useful for businesses managing multiple pipelines for different sales processes, client types, or service offerings. By specifying a pipeline, users can ensure that workflows are applied only to relevant opportunities, preventing unnecessary automation across unrelated pipelines.
Example: The workflow only activates when an opportunity moves within the “Enterprise Sales” pipeline.

Lead Value Filter
The Lead Value filter triggers workflows based on the monetary value assigned to an opportunity. This allows businesses to automate actions depending on the financial significance of a lead, ensuring that high-value deals receive appropriate follow-ups while lower-value opportunities are handled differently.
Example: If an opportunity’s value exceeds $10,000, notify the sales manager.

Lost Reason Filter
The Lost Reason filter triggers workflows when an opportunity is marked as Lost and a specific reason is assigned, allowing businesses to track why deals are being lost, automate follow-up actions, and implement strategies to recover potential customers or prevent similar losses in the future. When an opportunity moves to the Lost stage in the pipeline, users can assign a reason (e.g., “Price Too High,” “Competitor Chosen,” “No Response”), ensuring that workflows activate only when a particular lost reason is selected.
Example: If the lost reason is “Budget Constraints,” send an automated follow-up email offering a flexible pricing plan.

Pipeline Stage Filter
The Pipeline Stage filter triggers workflows when an opportunity moves to a specific stage within a pipeline. This allows businesses to automate actions based on stage transitions, ensuring timely follow-ups, task assignments, or notifications as opportunities progress. Users can define which stage transition should activate the workflow, making it easier to manage leads and track sales pipeline movements efficiently.
Example: When an opportunity moves from “Negotiation” to “Closed Won,” notify the finance team.

Status Filter
The Status filter triggers workflows based on the current status of an opportunity. This ensures that automation is executed when an opportunity reaches a specific stage in the sales process, helping teams track and manage their pipeline effectively. Users can select from the following status options:
- Open: The opportunity is still active and in progress.
- Won: The deal has been successfully closed.
- Lost: The opportunity was not converted into a sale.
- Abandoned: The opportunity is no longer being pursued.
Example: If an opportunity is marked as “Won,” trigger a welcome email sequence.

Defining Workflow Actions
Once the trigger is set, define the actions that should follow when an opportunity changes stages.
- Send a Notification: Notify the assigned sales rep about the stage change.
- Update Opportunity Details: Modify fields such as status, priority, or tags automatically.
- Create a Follow-Up Task: Assign a task to the sales team to reach out to the prospect.
- Trigger Another Workflow: Activate additional workflows based on opportunity progression.
- Send an Email to the Contact: Automate customer communication based on pipeline movement.
Saving and Publishing the Workflow
- After configuring filters and actions, click Save Trigger to apply changes.
- Ensure all necessary workflow steps are in place, then click Publish to activate automation.
- Test the workflow by manually moving an opportunity through stages to confirm expected behavior.
Frequently Asked Questions
Q1: What happens if an opportunity is moved manually?
If an opportunity is manually moved to another stage, the workflow still triggers, provided it meets the configured filter conditions.
Q2: Can I use multiple filters within the same workflow?
Yes, you can combine multiple filters to create highly specific automation rules, such as triggering actions only when an opportunity in a particular pipeline and stage is assigned to a specific user.
Q3: How does this trigger interact with other opportunity-based triggers?
The Pipeline Stage Changed trigger is independent of other triggers like Opportunity Status Changed or Opportunity Created. If needed, you can configure workflows using multiple triggers to cover different automation needs.
Q4: What if an opportunity moves back to a previous stage?
If an opportunity regresses to a prior stage, the workflow will trigger again, provided the conditions match.
Q5: Can I track historical stage movements using this trigger?
No, this trigger only activates upon real-time stage transitions. However, you can review historical changes in the opportunity’s activity log.
Was this article helpful?
That’s Great!
Thank you for your feedback
Sorry! We couldn't be helpful
Thank you for your feedback
Feedback sent
We appreciate your effort and will try to fix the article