Managing opportunities efficiently is essential for maintaining an organized and effective sales pipeline. The Opportunity Changed workflow trigger in HighLevel automates actions whenever an opportunity record is updated, ensuring real-time responsiveness to changes. Unlike the Opportunity Status Changed trigger, which only tracks status updates, this trigger provides broader functionality by detecting modifications such as lead value adjustments, stage movements, reassignments, and custom field updates. This guide will walk you through its benefits, configuration, and best practices to help you streamline your CRM automation.
TABLE OF CONTENTS
- What is Opportunity Changed Workflow Trigger?
- Key Benefits of Opportunity Changed Workflow Trigger
- Backward Compatibility
- Configuring the Opportunity Changed Trigger
- Example Use Cases
- Frequently Asked Questions
What is Opportunity Changed Workflow Trigger?
The "Opportunity Changed" workflow trigger in HighLevel automates actions when any changes occur in an opportunity record. Unlike "Opportunity Status Changed," which only tracks status updates, this trigger can respond to broader modifications such as updates to lead value, pipeline stage, assignment, or custom fields. This flexibility enables businesses to streamline workflows and maintain real-time accuracy in their CRM.
Key Benefits of Opportunity Changed Workflow Trigger
- Comprehensive Tracking: Automate actions based on any change in an opportunity, not just status updates.
- Real-Time Notifications: Notify team members immediately when an opportunity is updated.
- Enhanced CRM Accuracy: Ensure automated record-keeping and data consistency.
- Improved Sales Pipeline Management: Trigger follow-ups or task assignments when opportunities are modified.
- Customizable Automation: Apply workflow filters to tailor automation for specific opportunity changes.
- Flexible Filter Operators: Event-Based Operators: Use “Has Changed,” “Has Changed To,” and “Equals” operators to trigger workflows only when specific opportunity fields are updated.
Backward Compatibility
Existing Opportunity Changed workflows continue using their current behavior unless manually updated.
No existing workflows are affected by the new operators or date field support.
Configuring the Opportunity Changed Trigger
Setting up this trigger allows businesses to automate workflow actions based on updates to opportunities in the CRM. Follow these steps:
Step 1: Access the Workflows Builder
Log in to your HighLevel account, navigate to Automations > Workflows, and either create a new workflow or open an existing one.

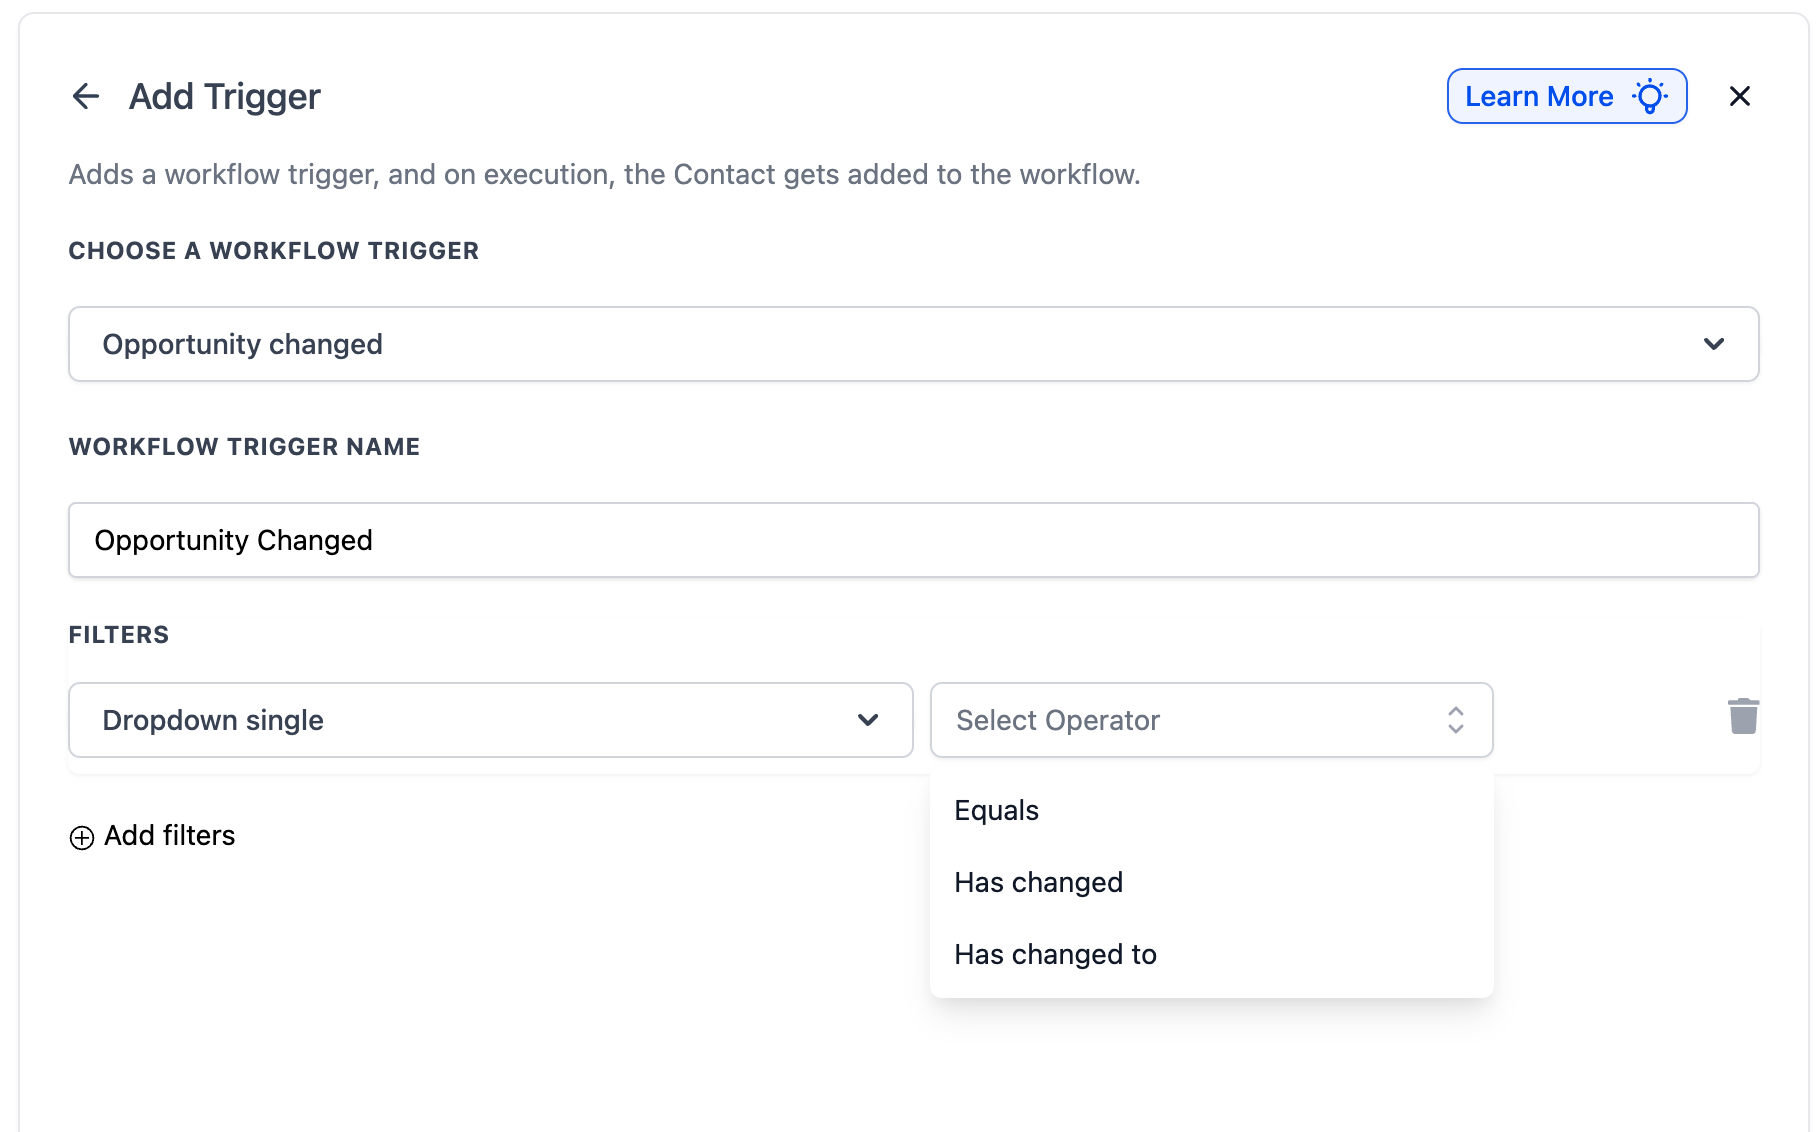
Step 2: Add the "Opportunity Changed" Trigger
Click + Add New Trigger, then search for Opportunity Changed in the list of available triggers. Once found, select it to proceed with the configuration.

Step 3: Naming the Trigger
Give your trigger a clear and descriptive name that reflects its purpose. A well-named trigger makes it easier to identify workflows, especially when managing multiple automations within the system.

Step 4: Applying Filters
Filters help fine-tune your workflow so it only triggers when specific changes happen to an opportunity.
Assigned To Filter
The Assigned To filter triggers the workflow when an opportunity is reassigned to a different team member. This is particularly useful for sales and support teams that manage leads collaboratively. By using this filter, businesses can automate follow-up actions when ownership of an opportunity changes, ensuring a smooth handoff between team members.
Available operators:
• Has Changed: Triggers when the assigned user changes to any other user.
• Has Changed To: Triggers only when the opportunity is assigned to a specific user you select.
• Equals: Triggers when any change occurs on opportunities currently assigned to a specific user
For example, if a high-value lead is reassigned to a senior sales representative, the workflow can automatically notify the new owner, update internal records, or trigger a follow-up sequence. This helps maintain accountability and ensures that opportunities are not overlooked during the transition.

Tag filter (formerly “Has Tag”)
Use Tag filters to control when Opportunity Changed should fire based on opportunity tags.
The Tag filter allows you to trigger a workflow based on tags assigned to an opportunity. This filter ensures that automation is only activated when an opportunity contains a specific tag, providing more control over workflow execution.
For example, if a tag like “Hot Lead” or “Follow-Up Needed” is applied to an opportunity, the workflow can be configured to send automated follow-up emails, notify sales reps, or move the lead to a different pipeline stage. This is especially useful for segmenting leads, prioritizing high-value opportunities, and triggering specific actions based on lead categorization.

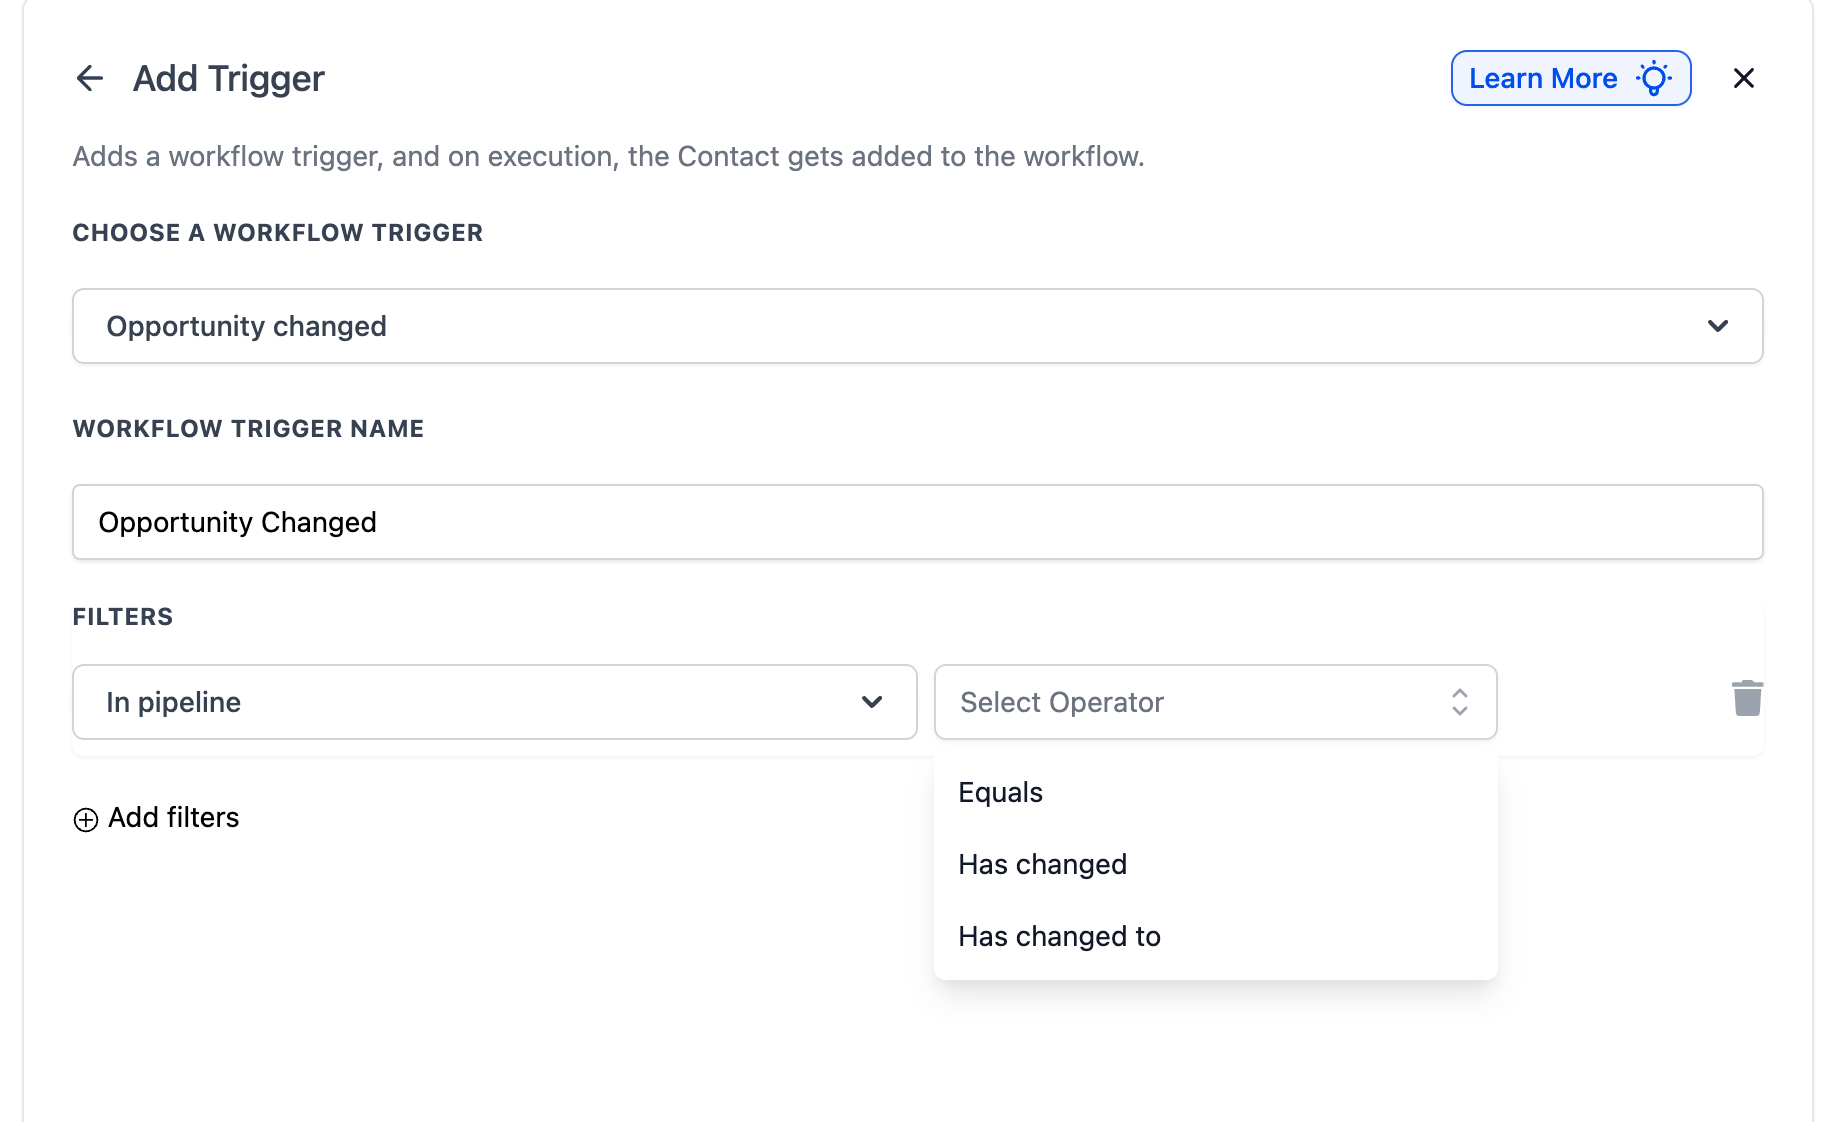
In Pipeline Filter
The In Pipeline filter triggers the workflow when an opportunity undergoes a change within a specific pipeline. This ensures that automation is only activated for opportunities that belong to the selected pipeline, allowing for more targeted workflow execution.
Available operators:
• Has Changed: Triggers when the opportunity moves to any different pipeline.
• Has Changed To: Triggers only when the opportunity moves to a specific pipeline
you select.
• Equals: Triggers when any change occurs on opportunities within a specific pipeline.
For instance, if a lead moves within the Sales Pipeline, but not the Customer Support Pipeline, the workflow can be configured to trigger only for the sales-related changes. This is particularly useful for businesses with multiple pipelines handling different processes, such as sales, onboarding, and client retention. By applying this filter, teams can ensure that workflows are executed within the appropriate context, reducing unnecessary automation triggers and improving workflow efficiency.
Lead Value Filter
The Lead Value Change filter triggers a workflow when the monetary value of an opportunity increases or decreases. This allows businesses to automate actions based on changes in potential revenue, ensuring that important updates do not go unnoticed.
For example, if a lead’s value is increased—perhaps due to an upsell or a revised quote—the workflow can notify the sales team, adjust pipeline stages, or send a custom follow-up email. Conversely, if the lead value decreases, the system can alert the account manager for review or trigger retention strategies to prevent loss.

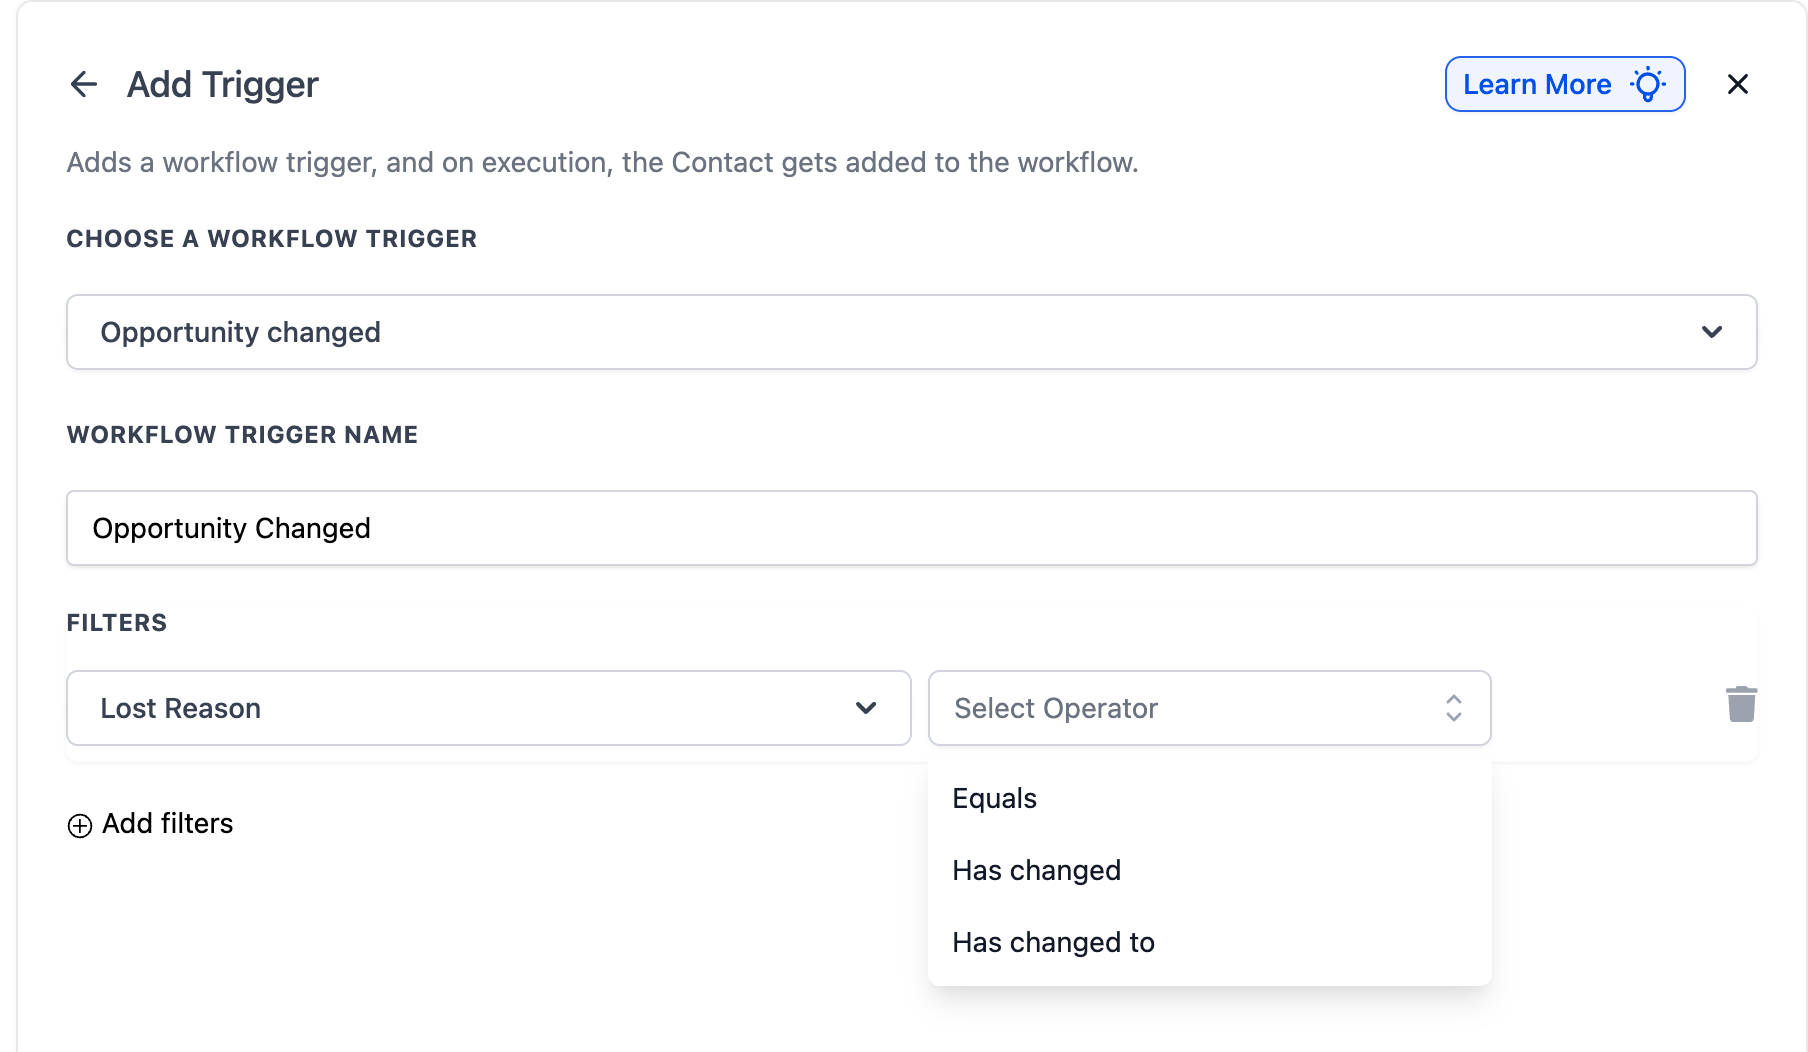
Lost Reason Filter
The Lost Reason filter allows businesses to automate workflows when an opportunity is marked as Lost and a reason is assigned. This filter helps track and respond to lost deals strategically, enabling businesses to improve their sales approach and customer retention efforts.
To refine how this filter works, users can choose between the following filter operators:
Has Changed: • Equals: Triggers when an opportunity currently contains the selected lost reason value.
Has Changed To: Triggers the workflow only when the lost reason is updated to a specific value. For example, if the lost reason is changed to “Price Too High”, the system can send an automated follow-up email with a discount offer.
Equals: Triggers when any change occurs on opportunities that have a specific lost
reason assigned.
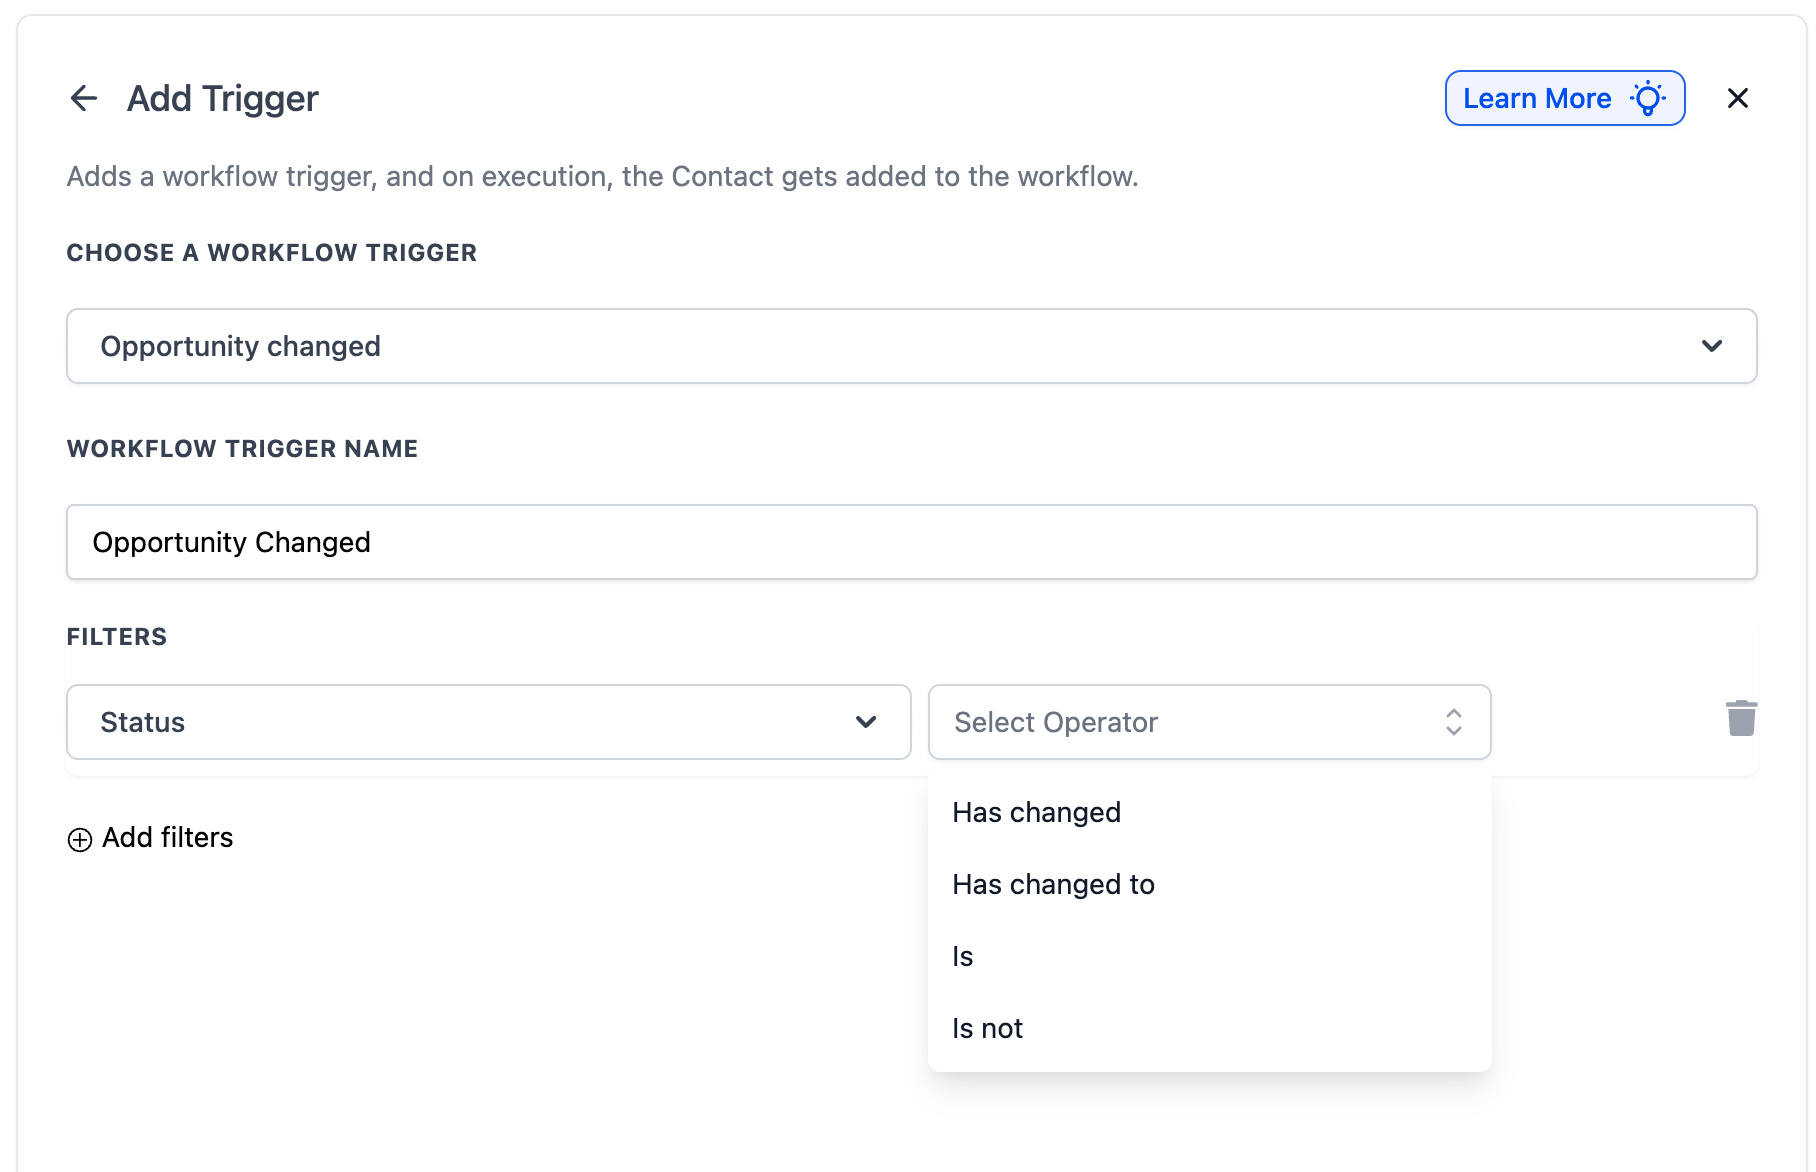
Status Filter
The Status filter allows workflows to trigger based on the current status of an opportunity. This ensures that actions are executed when an opportunity reaches a specific stage in the pipeline, helping teams track and manage their sales progress more efficiently.
The available filter operators for refining this filter include:
Is: Triggers the workflow when an opportunity matches the selected status. For example, if “Won” is selected, the workflow will activate only when an opportunity is marked as Won.
Is Not: Triggers the workflow when an opportunity does not match the selected status. This can be useful when filtering out certain statuses from triggering workflows, such as ignoring “Abandoned” opportunities.
Has Changed: Triggers when the status changes to any other status.
Has Changed To: Triggers only when the status changes to a specific value you
select.
After selecting an operator, users can choose from the available status options in the dropdown.
Checkbox Fields ( Opportunity Custom Field Filters )
Filter opportunities based on checkbox custom field changes.
• Added: Triggers when specific checkbox options are added/checked.
• Removed: Triggers when specific checkbox options are removed/unchecked.
• Equals: Triggers when any change occurs on opportunities where the checkbox
equals specific values.
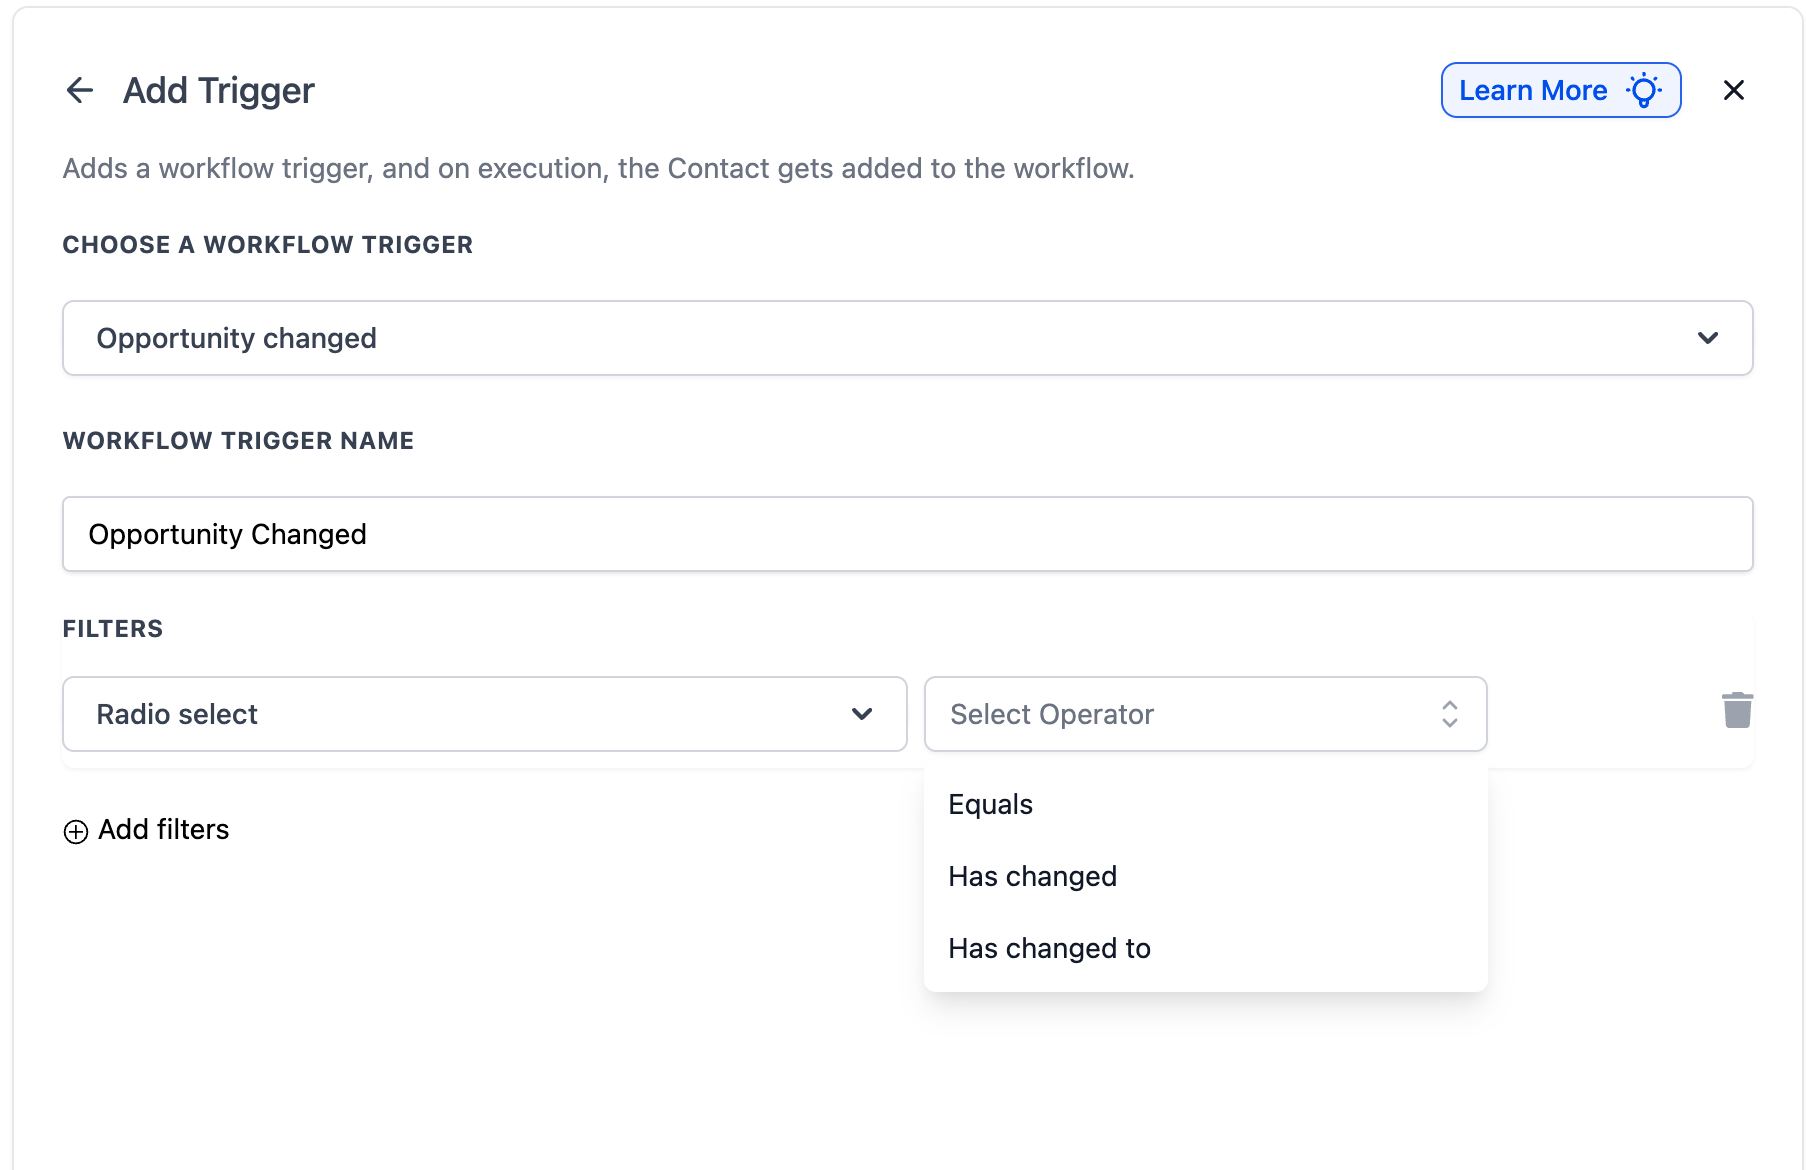
Radio Select Fields ( Opportunity Custom Field Filters )
Filter opportunities based on radio select custom field changes.
• Has Changed: Triggers when the radio select value changes to any other option.
• Has Changed To: Triggers only when the radio select changes to a specific value
you select.
• Equals: Triggers when any change occurs on opportunities where the radio select
equals a specific value .
Dropdown Fields (Single & Multiple in Opportunity Custom Field Filters)
Filter opportunities based on dropdown custom field changes. Works the same for both
single-select and multi-select dropdowns.
• Has Changed: Triggers when the dropdown value changes.
• Has Changed To: Triggers only when the dropdown changes to specific values you
select.
• Equals: Triggers when any change occurs on opportunities where the dropdown
equals specific values.
Date Fields ( Opportunity Custom Field Filters )
Date custom fields are now fully supported inside the Opportunity Changed trigger.
• Has Changed: Triggers when the date field value changes.
• Has Changed To: Triggers only when the date field changes to a specific date you
select.
• Equals: Triggers when any change occurs on opportunities where the date field
equals a specific date.
Step 4: Set Up Workflow Actions
Once the trigger is set up, define the actions such as:
- Send Email or SMS Notification: Notify sales reps about opportunity updates.
- Assign a Task: Automatically create a follow-up task in the CRM.
- Update Contact Record: Modify customer details based on opportunity changes.
- Trigger Another Workflow: Link this trigger with other workflows for advanced automation.
Step 5: Save, Test, and Publish
- Click Save Trigger to finalize settings.
- Run a test to ensure the workflow functions correctly.
- Once verified, click Publish to activate the automation.
Example Use Cases
- Trigger a workflow only when an opportunity status changes to “Won”
- Notify a team member when opportunity ownership changes
- Start onboarding when a custom install date is added
- Trigger follow-up automation when a checkbox field is checked
Frequently Asked Questions
Q: How is this different from the "Opportunity Status Changed" trigger?
The "Opportunity Changed" trigger tracks any change within an opportunity, including assignment, lead value, pipeline, and custom fields. "Opportunity Status Changed" only activates when an opportunity’s status (e.g., Open, Won, Lost) is modified.
Q: Can I set multiple filters for a single workflow?
Yes! You can combine multiple filters, such as tracking only high-value leads that are reassigned to a senior sales rep.
Q: How do I test if my workflow is working correctly?
After setting up the trigger, manually update an opportunity and check if the workflow executes the expected actions. Review workflow logs to troubleshoot any issues.
Q: Does this trigger work with opportunity custom fields?
Yes! You can configure the trigger to activate when specific custom fields are updated within an opportunity record.
Q: What is the difference between "Has Changed," "Has Changed To," and "Equals"
operators?
"Has Changed" triggers when that particular field value changes to anything. "Has Changed To" triggers
only when a field changes to a specific value you select. "Equals" triggers when any change
happens to an opportunity that currently has that specific field value.
Q: Can I use date custom fields as filters now?
Yes! Date custom fields are now available as filters in the Opportunity Changed trigger. You
can use "Has Changed," "Has Changed To," or "Equals" operators to trigger workflows
based on date field changes.
Q: Will my existing Opportunity Changed workflows break?
No. Existing workflows continue using their current behavior unless manually updated.
Related Articles
Was this article helpful?
That’s Great!
Thank you for your feedback
Sorry! We couldn't be helpful
Thank you for your feedback
Feedback sent
We appreciate your effort and will try to fix the article