This guide covers everything in HighLevel Events: creating Ticketed and RSVP events, selling tickets, building your event content and pages, managing registrations and check-in, and giving attendees the Attendee App in your Client Portal. It is written from the event owner's point of view: everything you set up and manage as the organizer.
TABLE OF CONTENTS
- What are Events?
- Key features at a glance
- Before You Begin
- Custom notifications (announcements)
- Managing Registrations and Check-In
- Registrations
- Check-in
- Frequently Asked Questions
What are Events?
Events lets you create, sell and run events directly inside your HighLevel sub-account, instead of using a separate event platform. Every registration becomes a contact in your CRM, alongside your payments and marketing tools.
With Events you can:
Create Ticketed or RSVP events, in person or online
Sell tickets with multiple pricing tiers and coupons
Build a public event page and checkout that match your brand
Add a schedule, speakers, exhibitors, sponsors and ads
Manage registrations, send notifications and check attendees in by QR code
Give attendees the Attendee App: their tickets, agenda, networking and live updates in your Client Portal on the web, iOS, Android and your own branded app
Key features at a glance
Before You Begin
Events lives under Memberships → Events in your sub-account.
The Attendee App (optional) runs on your Client Portal. If prompted, click Upgrade Client Portal the first time you turn it on (it takes about a minute).
Set up your Client Portal domain and branding first so attendees see your brand (see Client Portal settings for the Attendee App, below).
To sell paid tickets, have a payment provider connected in Payments.
Step 1: Create an Event
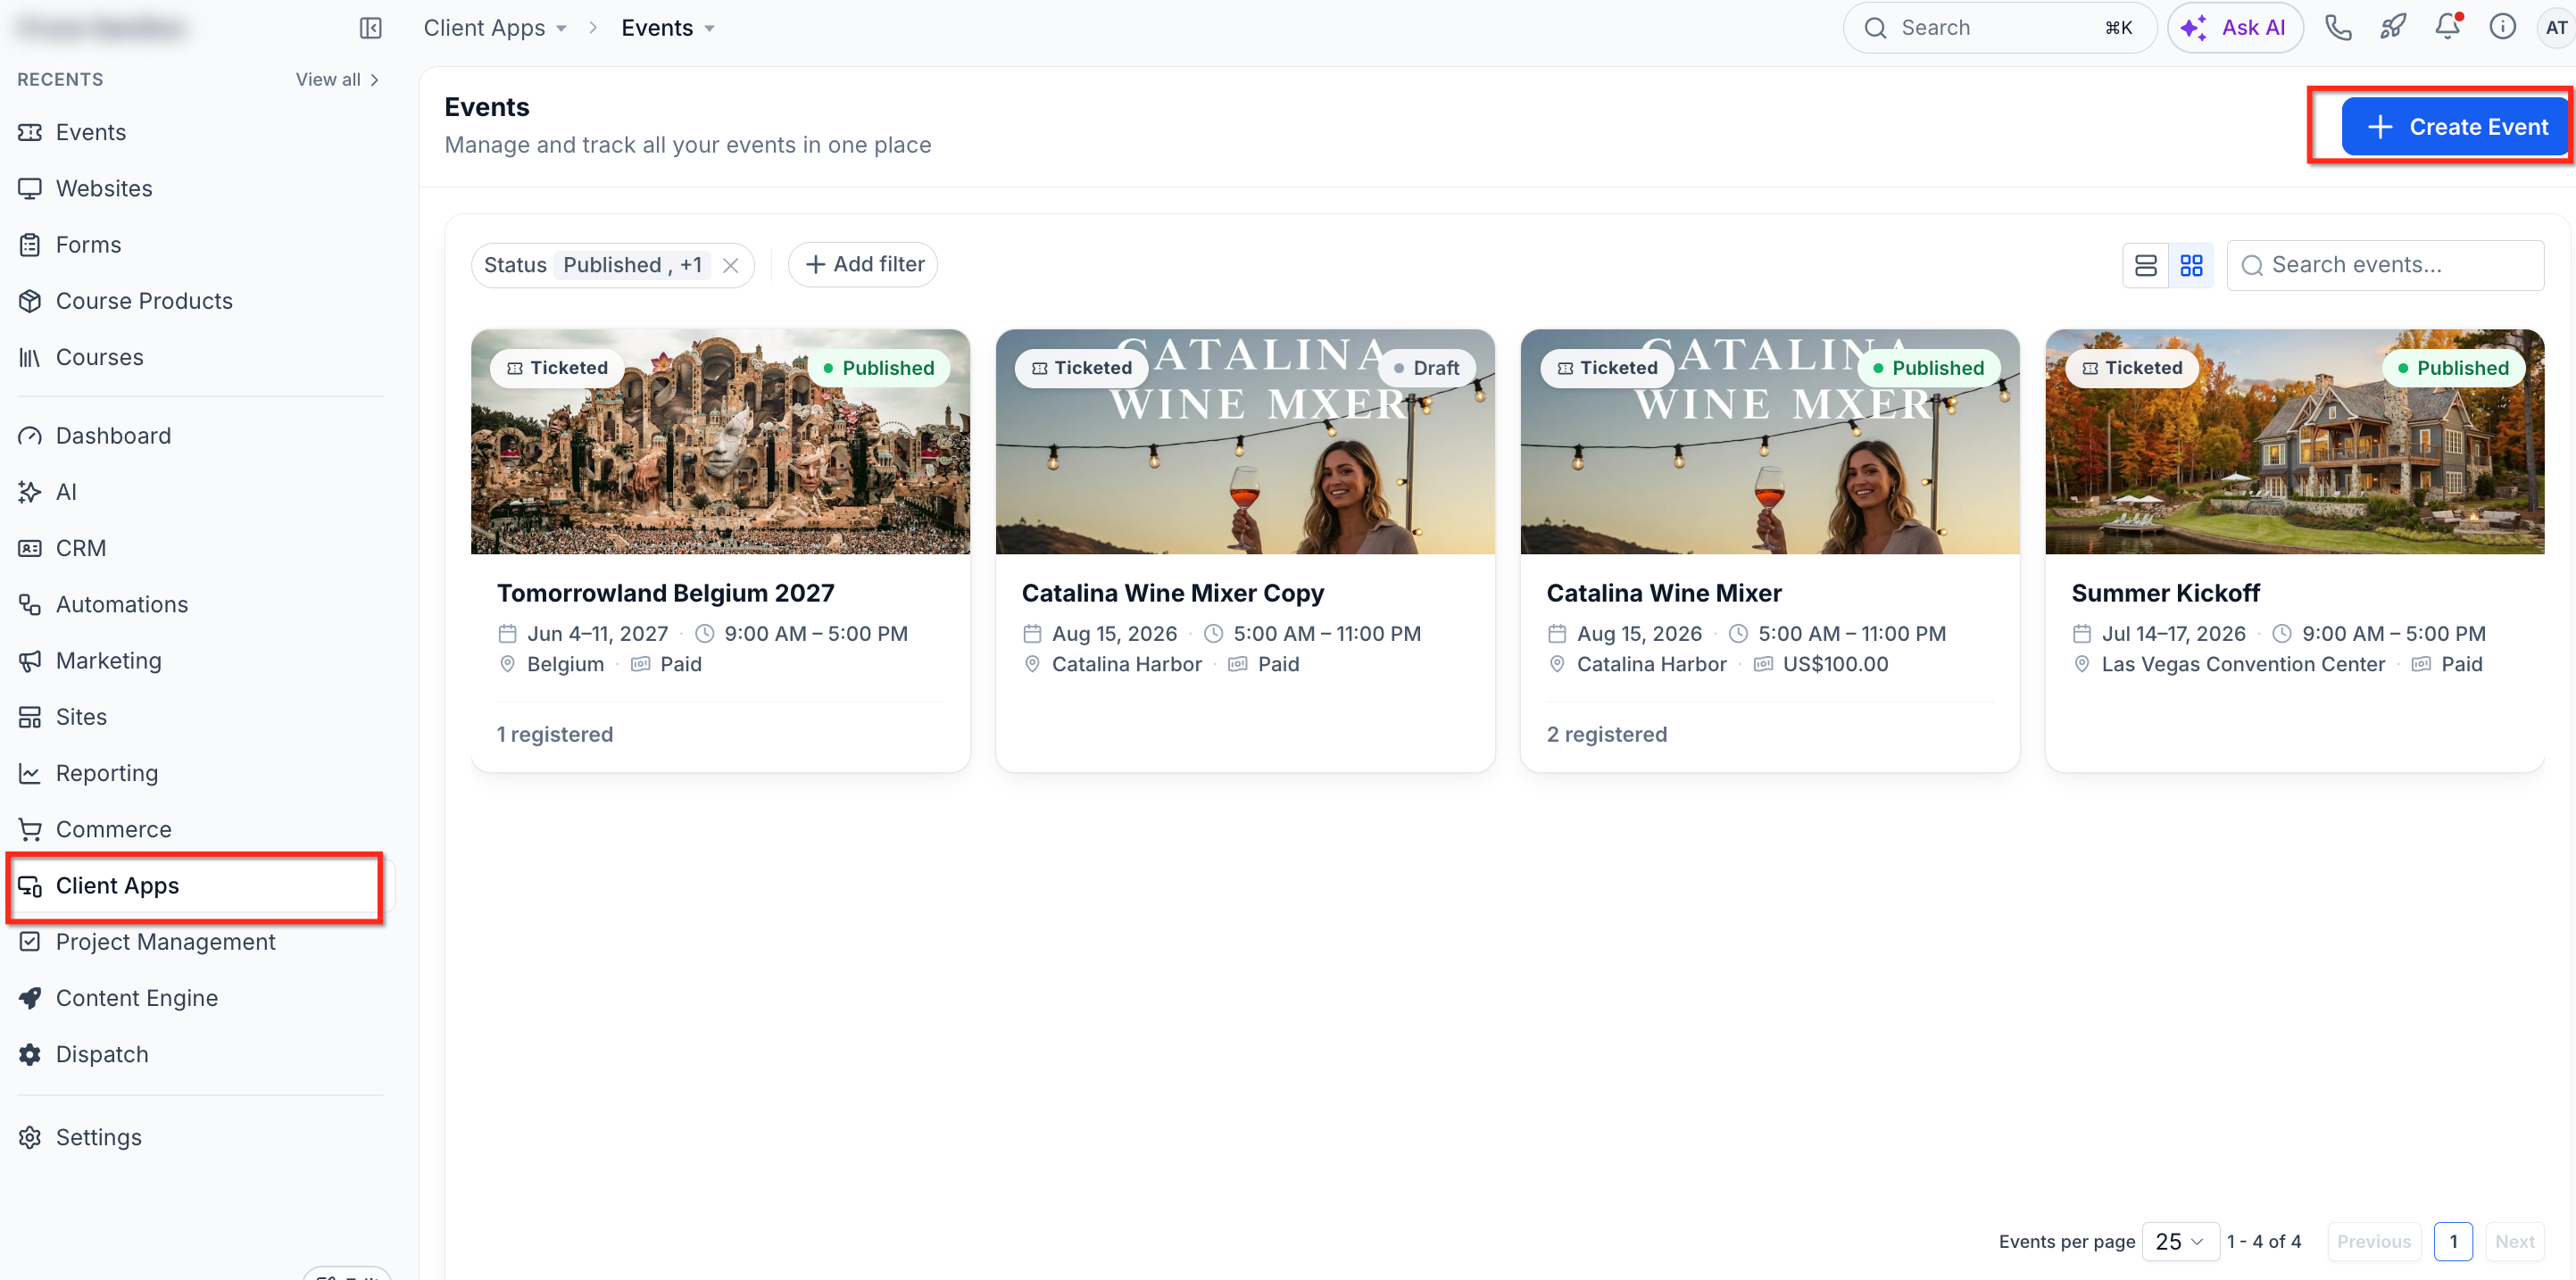
Go to Client Apps → Events and click Create Event.
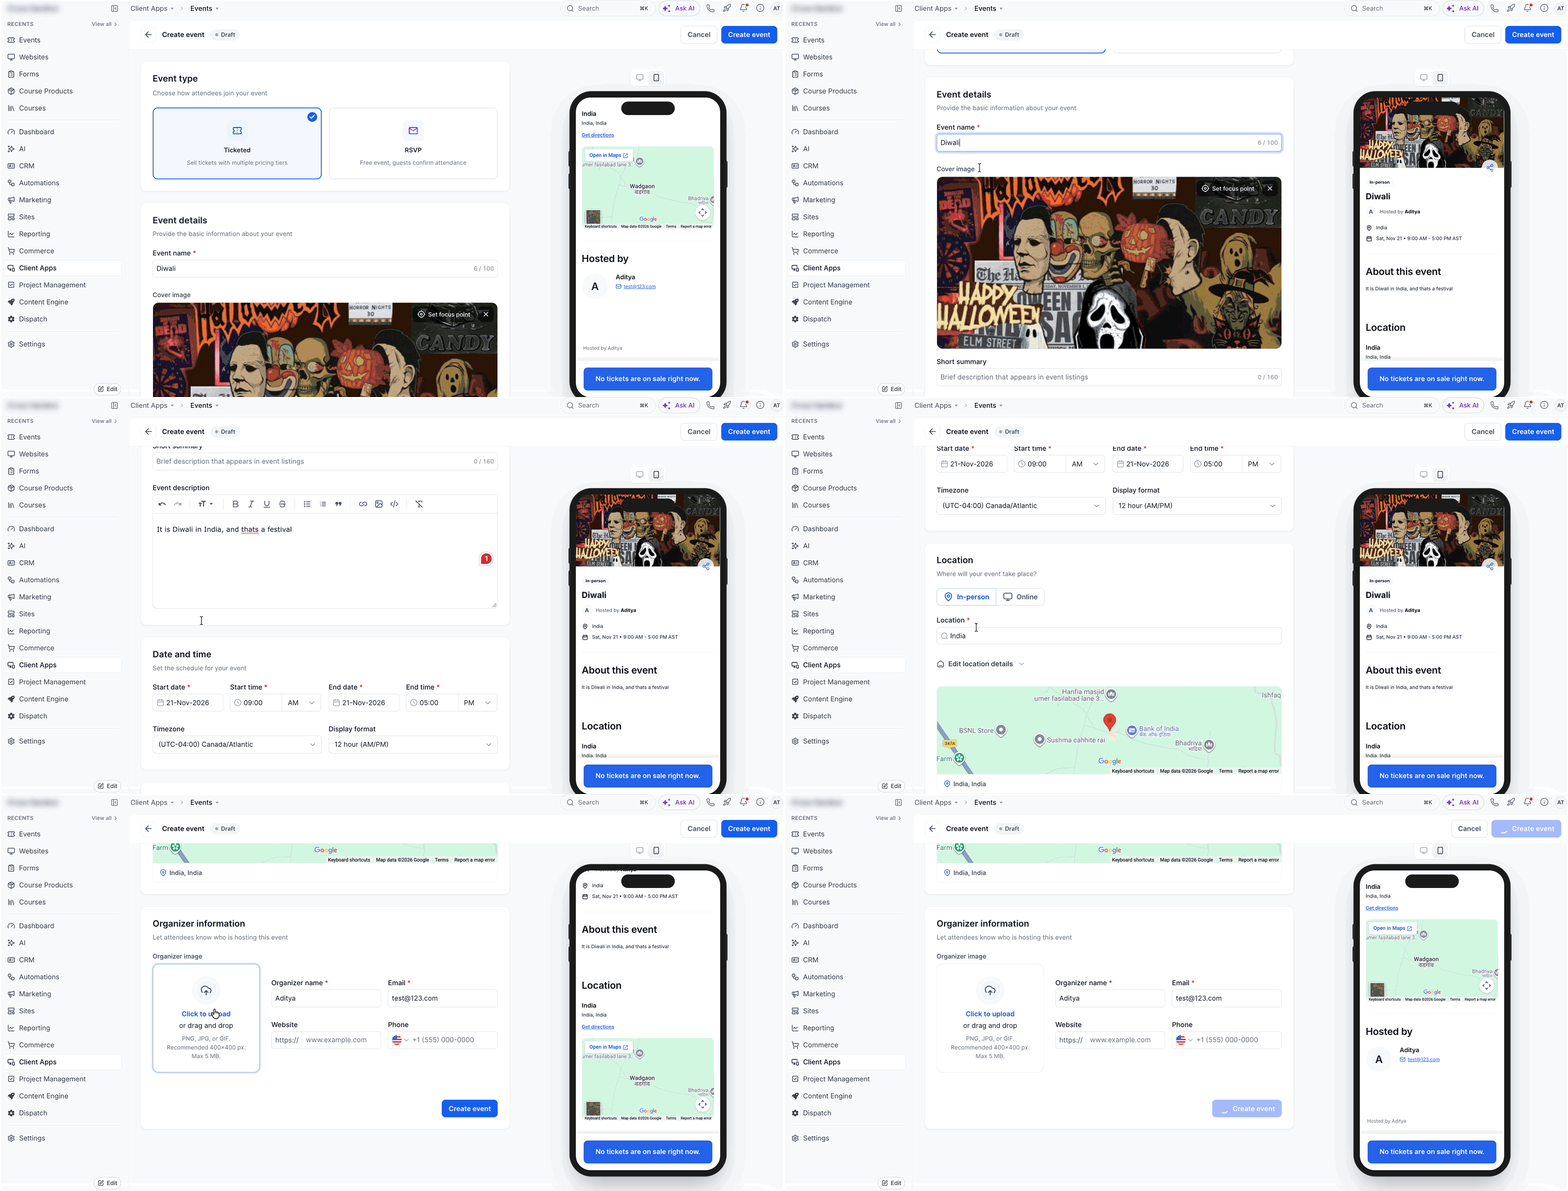
Choose the event type, then click Continue.
Fill in the event details (below) and save.
The events list shows each event's type (Ticketed or RSVP), status (Draft or Published), date, format and registration count. You can filter by status, search, and switch between grid and list views.
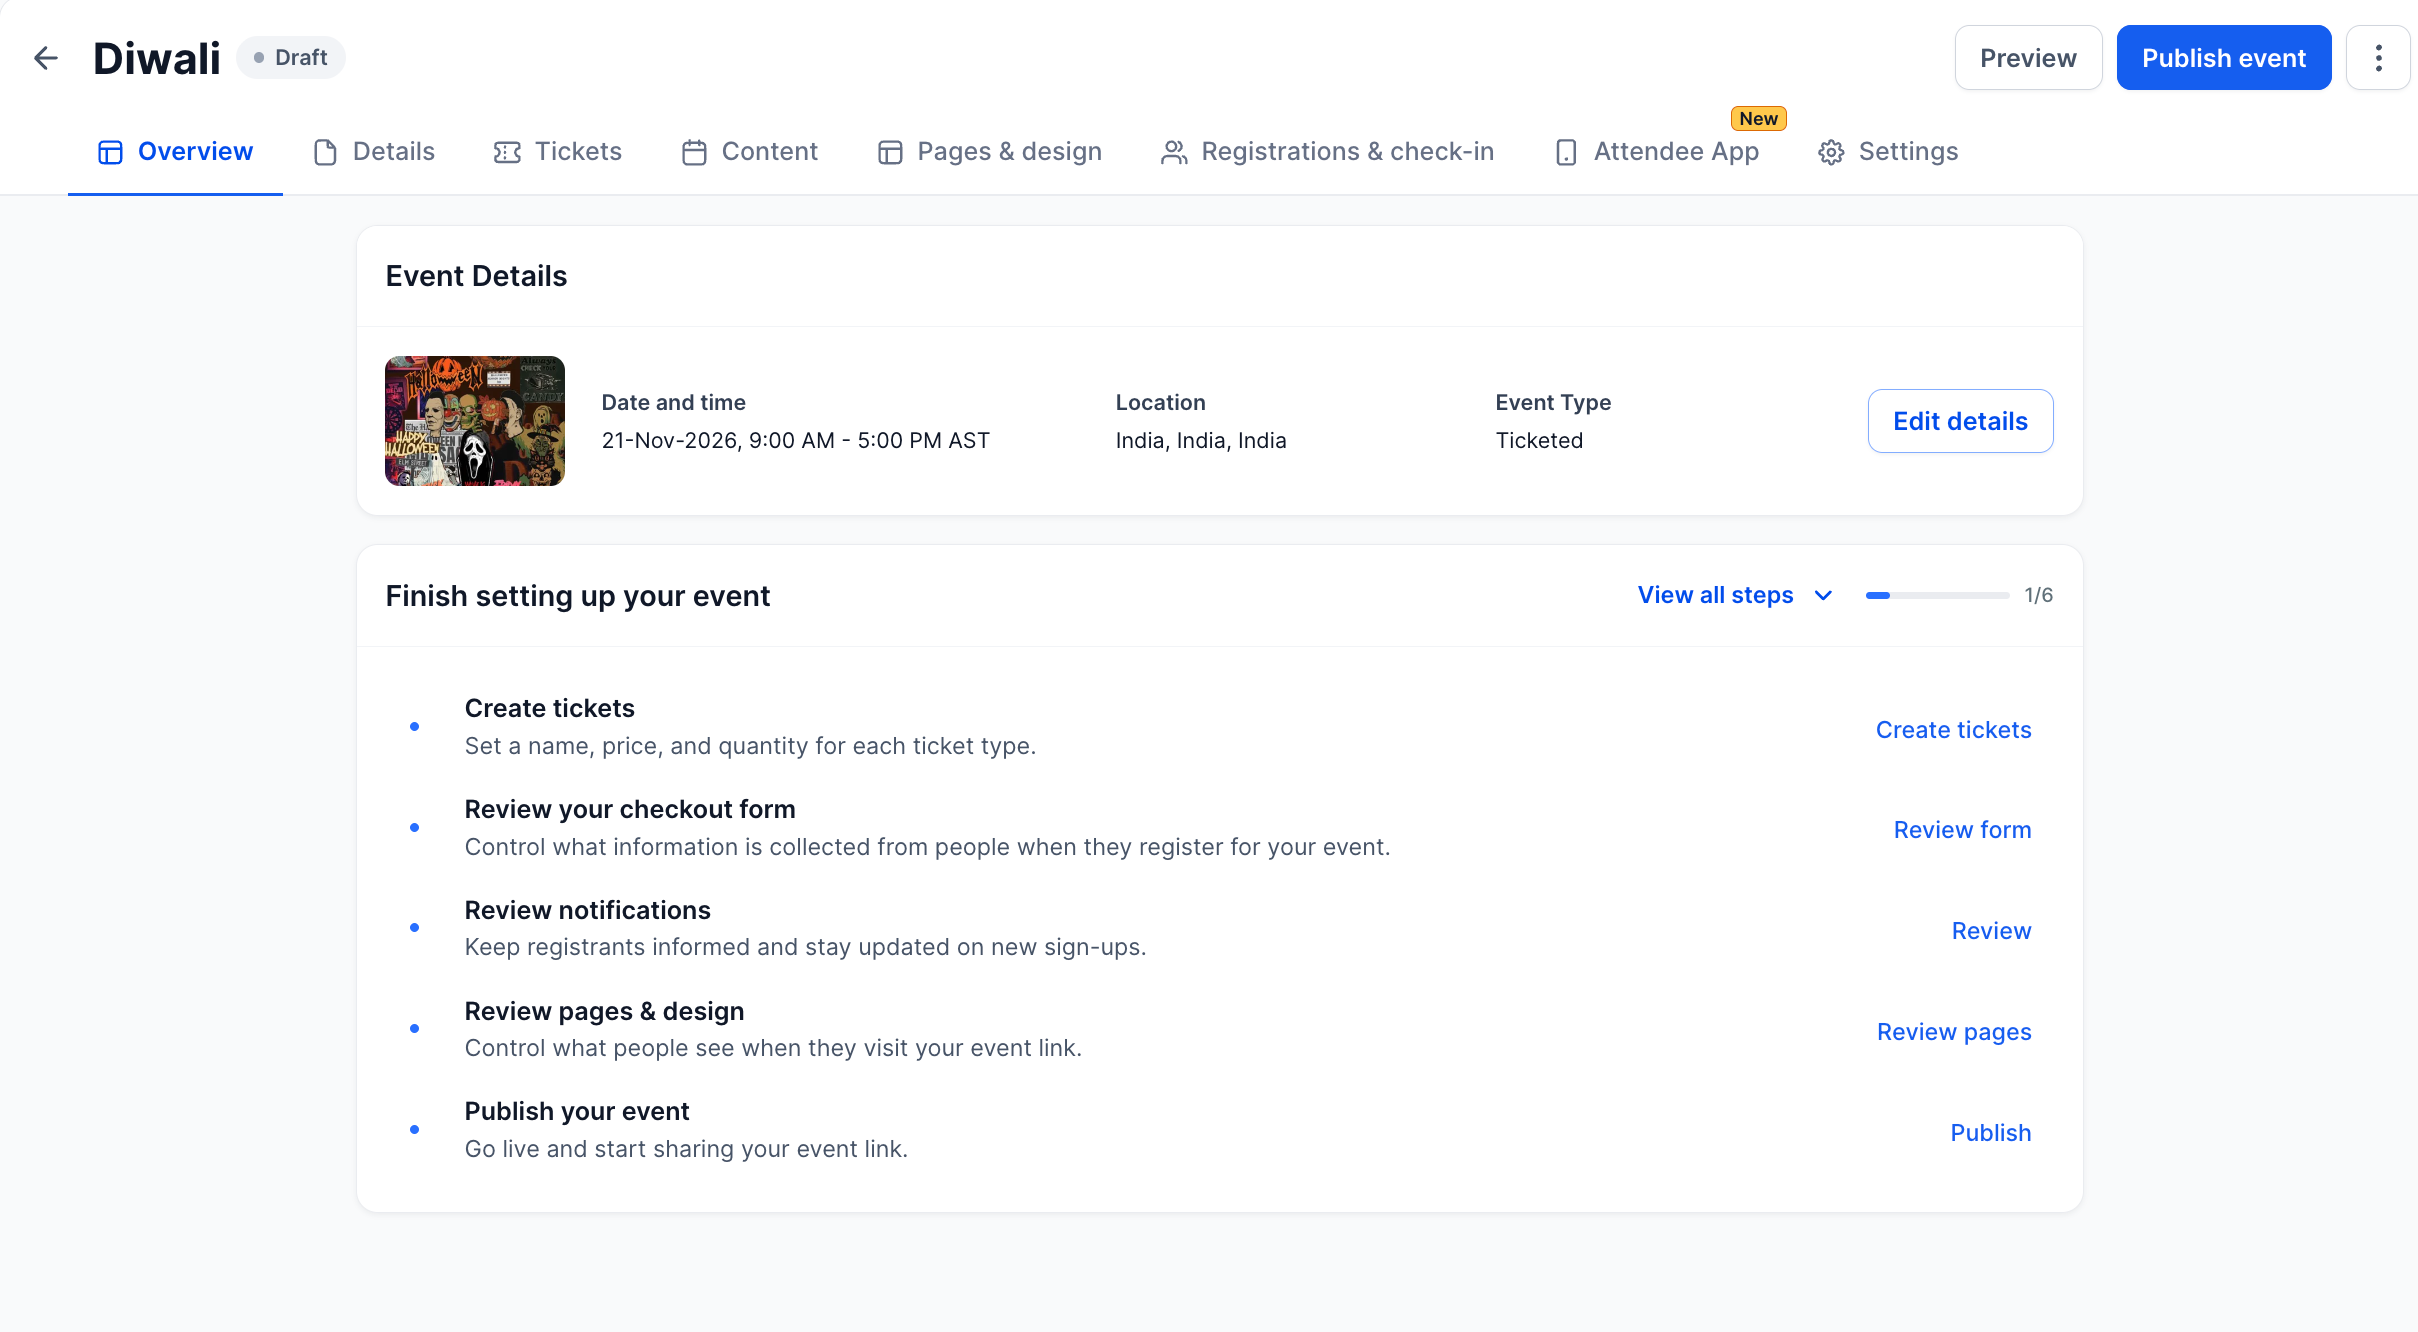
Event setup checklist
The event Overview tab tracks six setup steps and shows recent registrations:
Complete your event details
Create tickets
Review your checkout form
Review notifications
Review pages & design
Publish your event
After the event ends, the Overview tab shows an Event Summary with registrations, tickets, checked-in count and check-in rate. Use Clone Event at the top to copy an event.
Step 2: Add Event Details
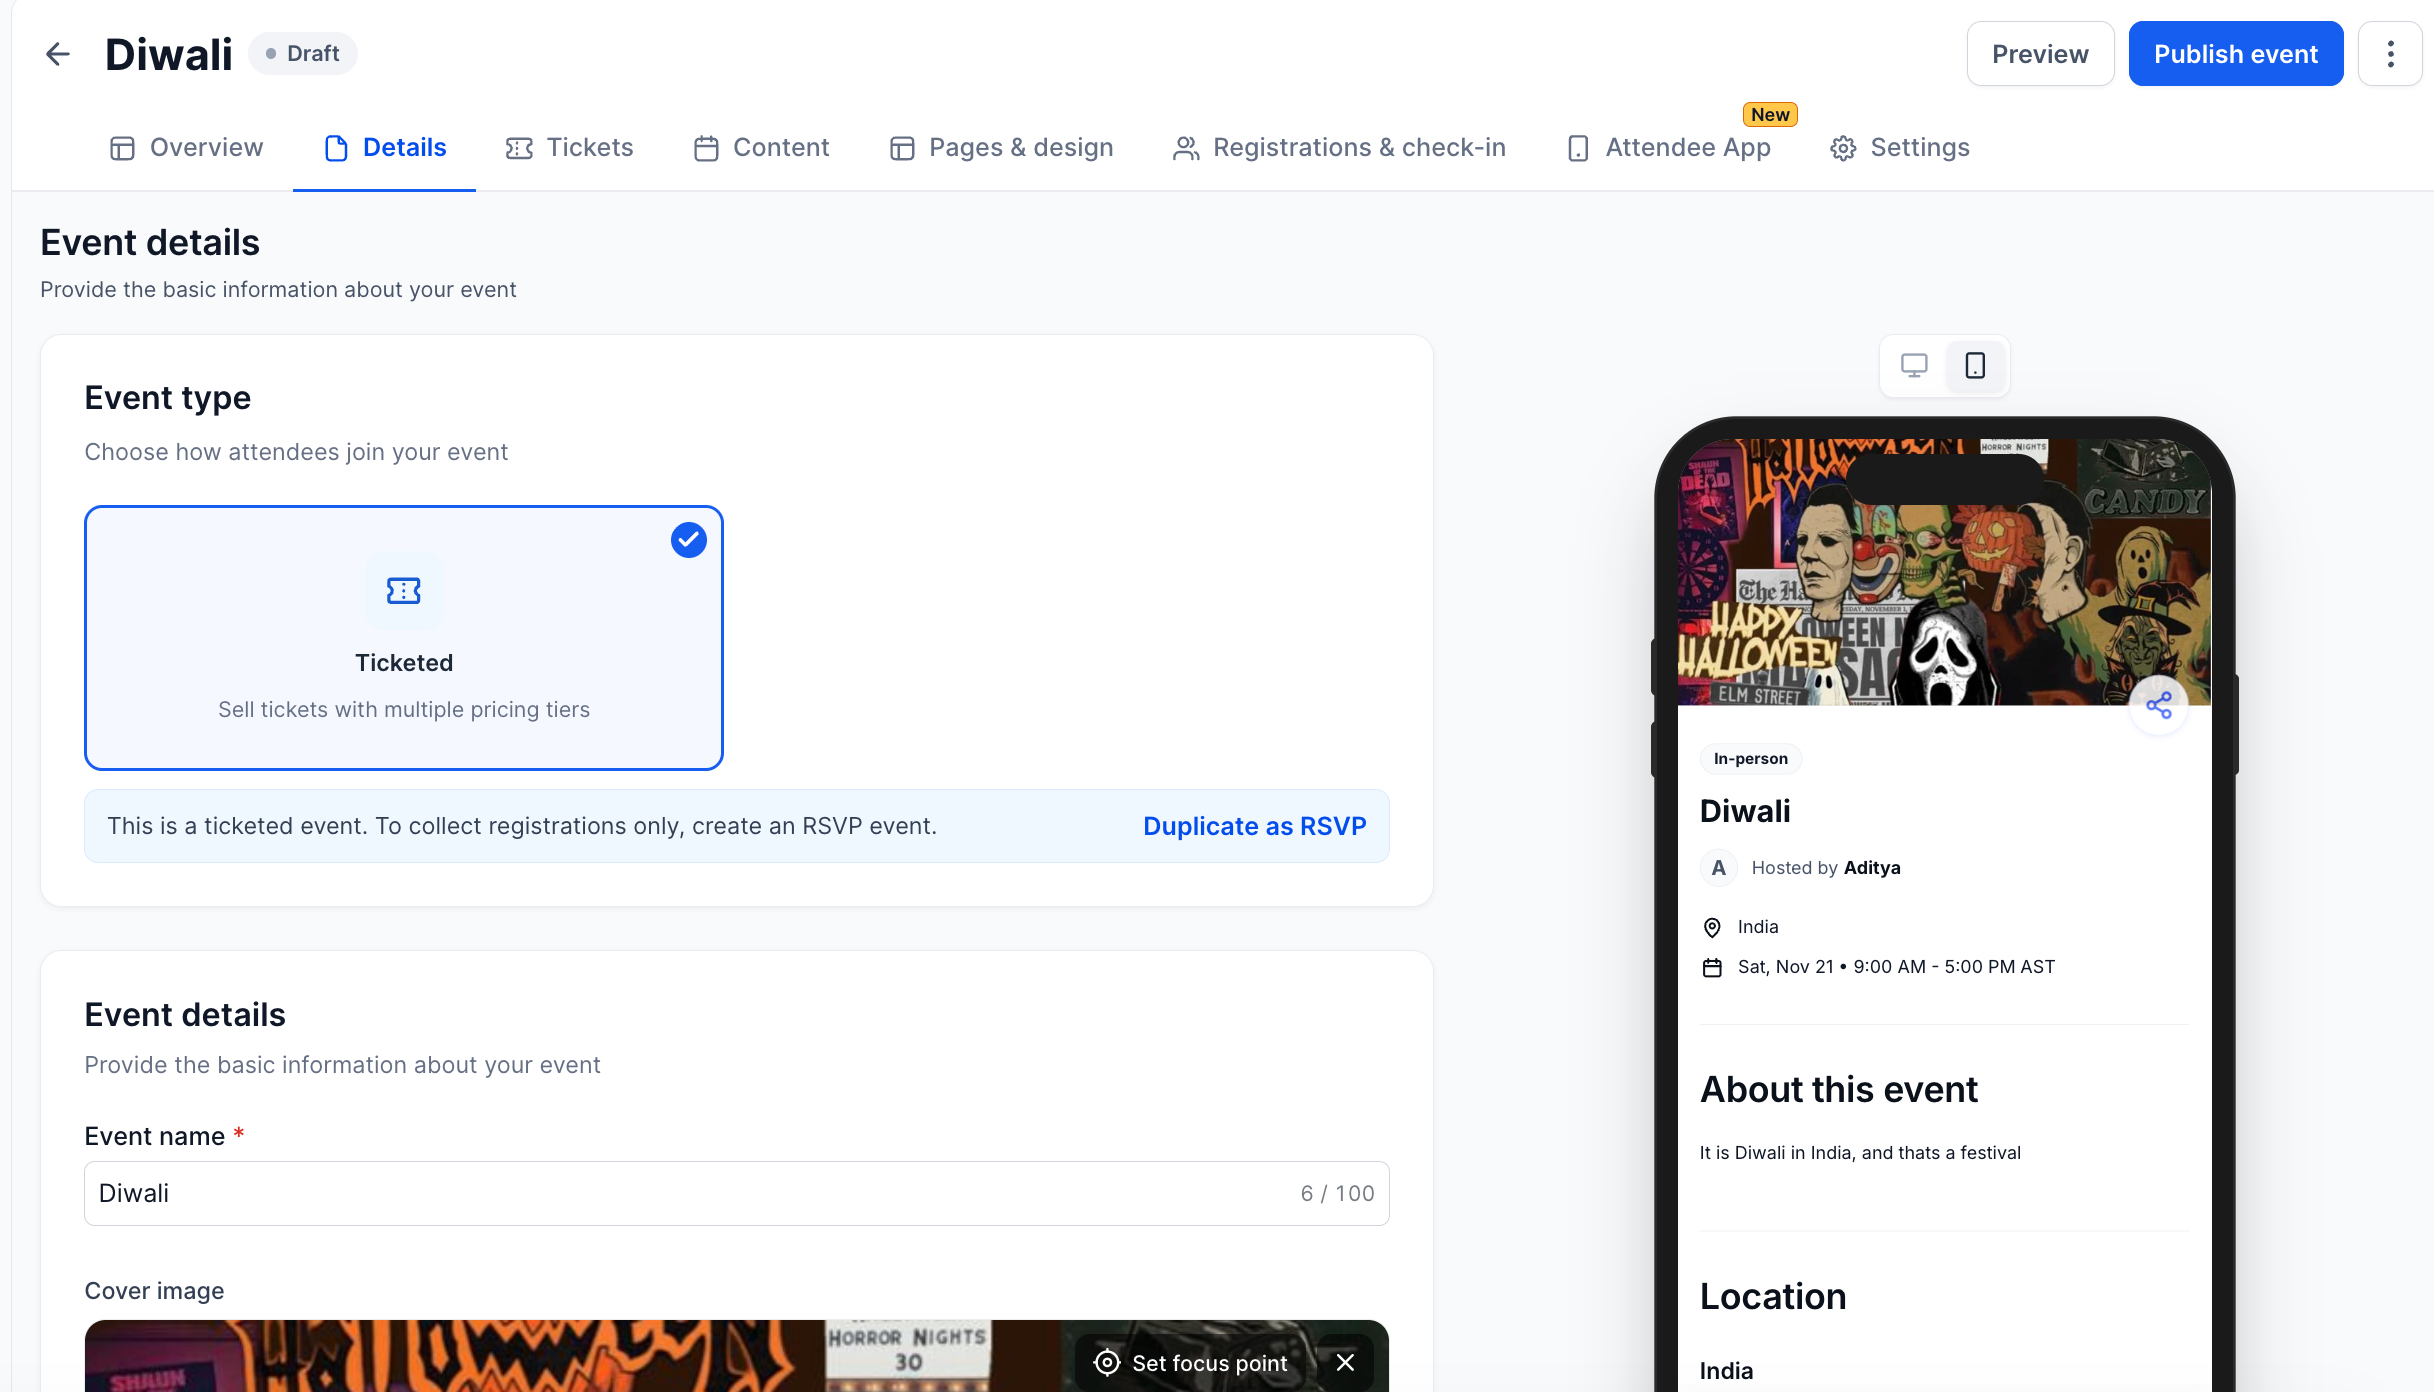
Open the Details tab. A live desktop and mobile preview updates as you type.
Online events
For online events, add the details attendees see on the online attendee page:
Online event access: for example, Hidden until event starts, so the join link stays hidden until the event begins.
Page title and Join link (required).
An optional image (1600 × 800 px recommended) and Joining instructions, such as a password or room name.
Step 3: Set Up Tickets and Coupons
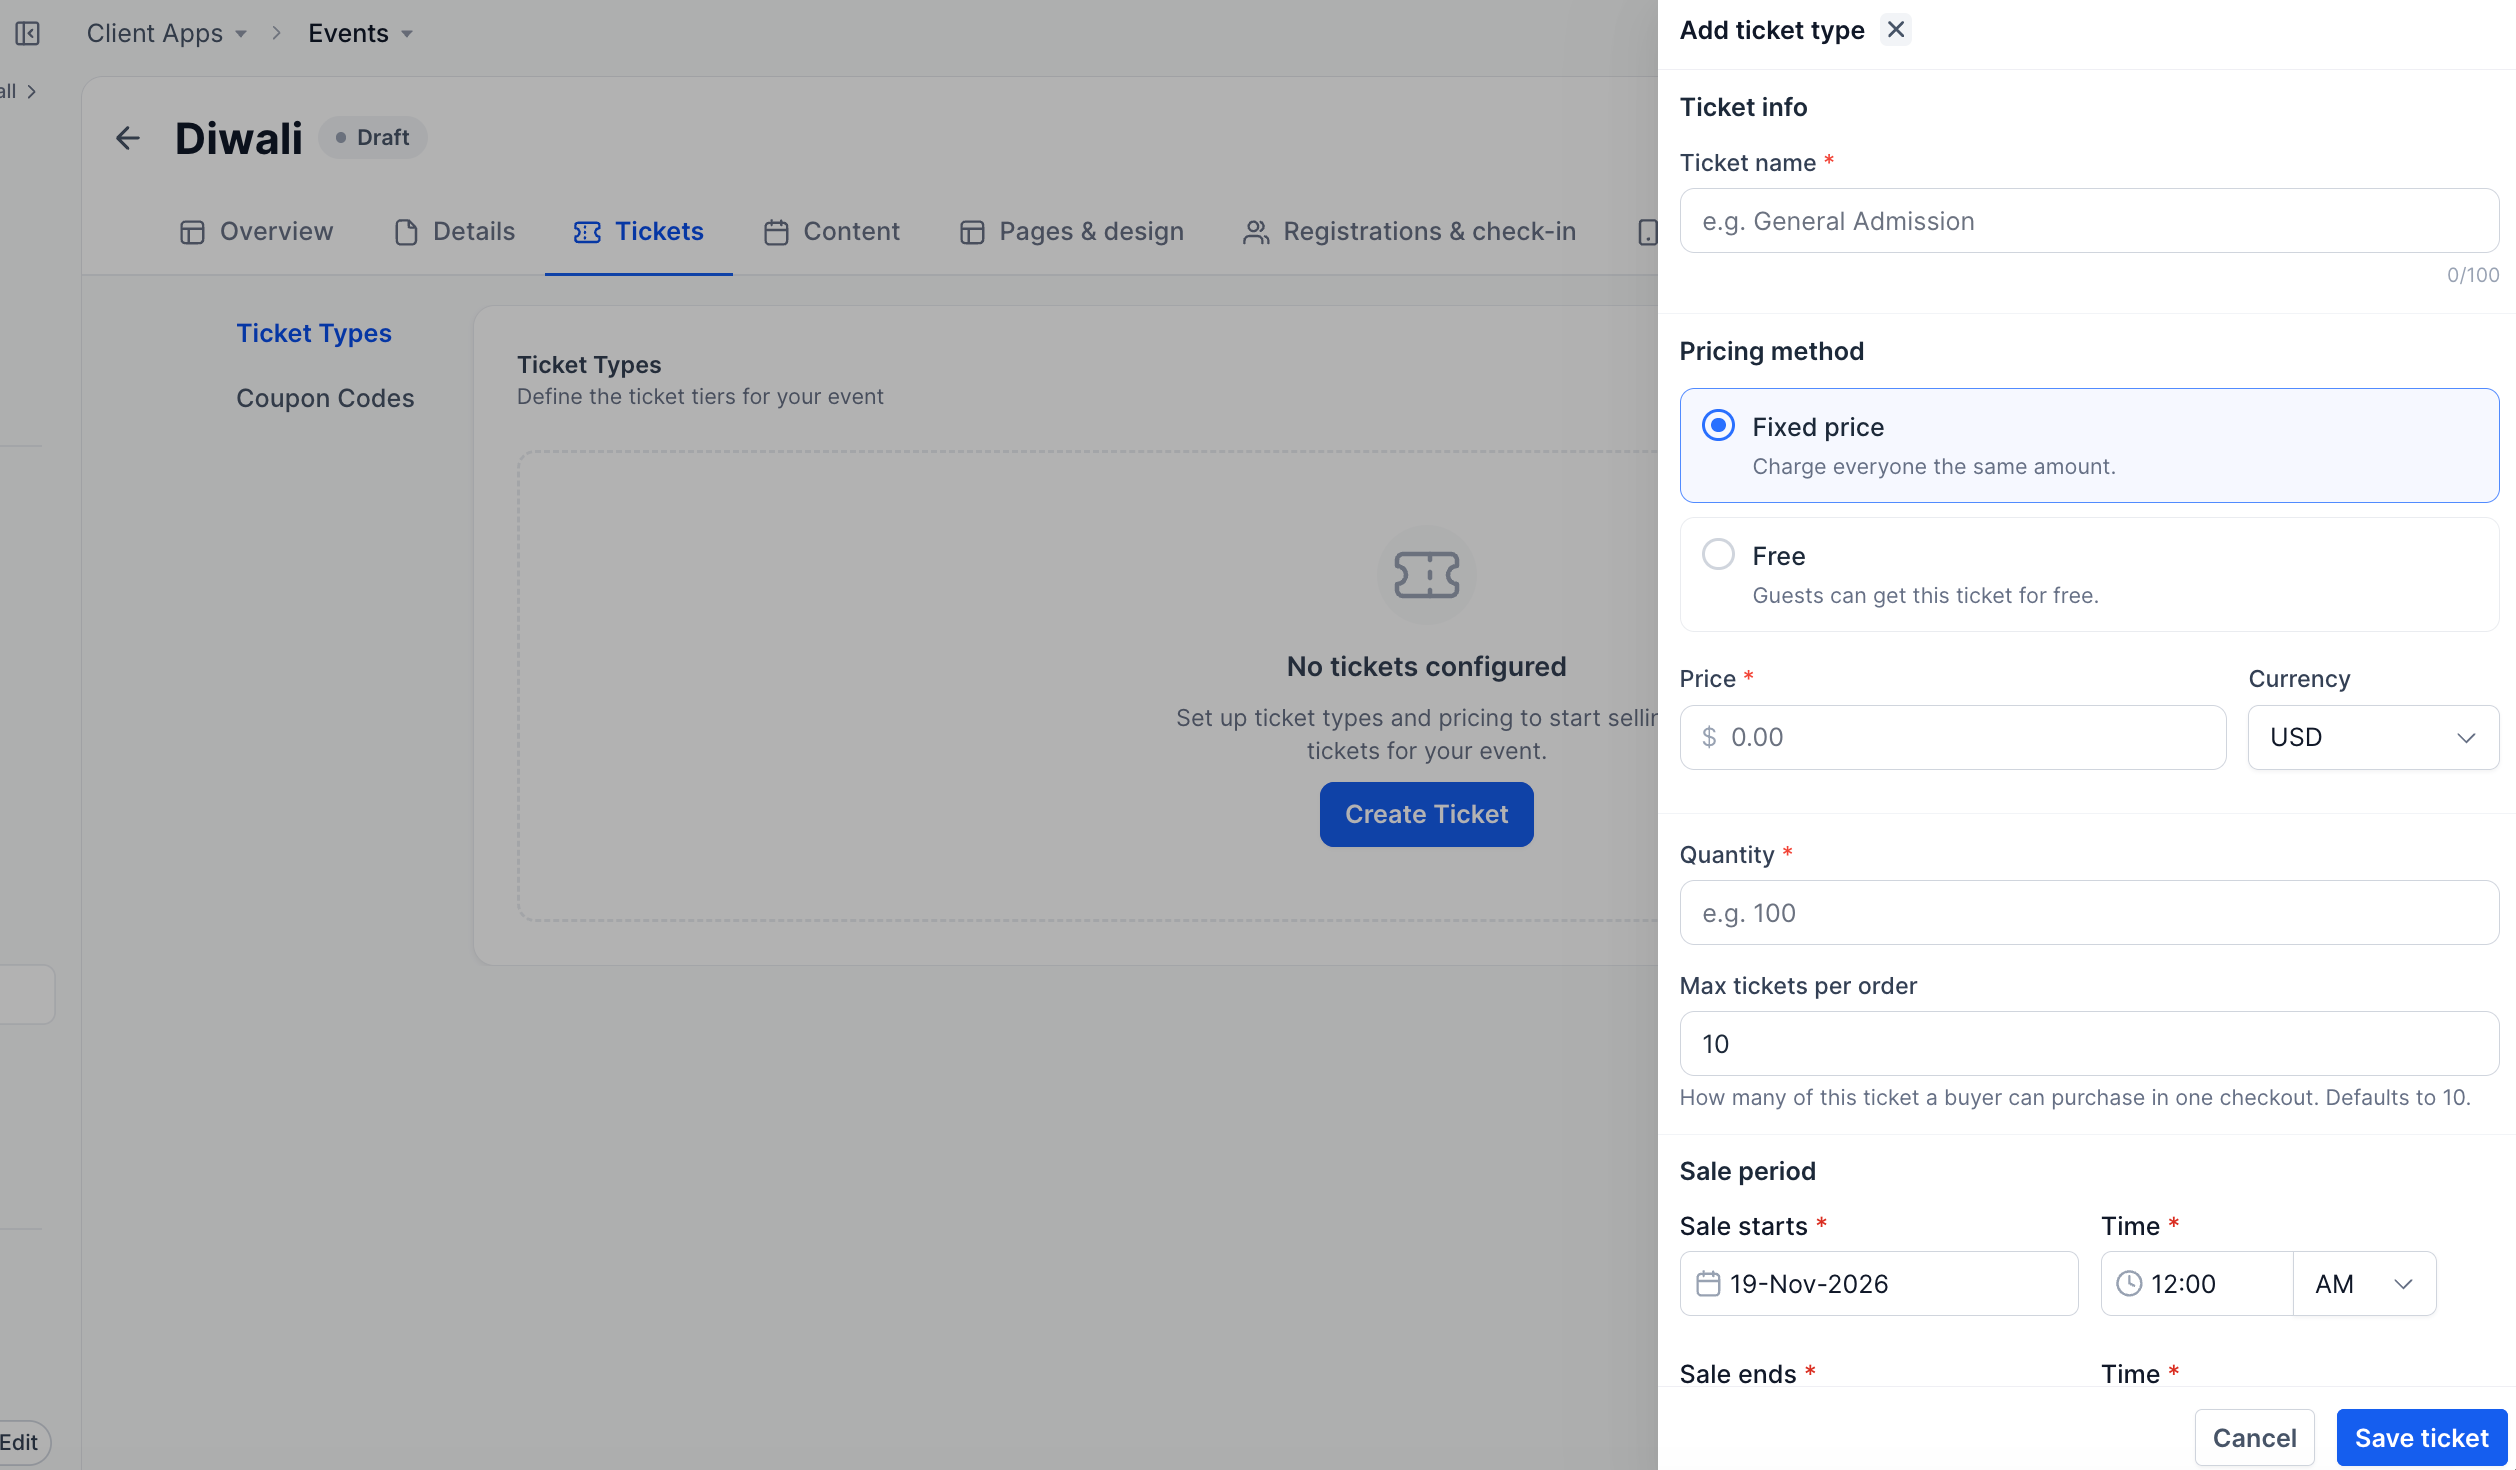
Ticket types
Go to Tickets → Ticket Types → Add Ticket Type. Choose Create new or Reuse from another event.
Drag ticket types to reorder them. Each card shows sale dates, status (for example, On Sale) and how many have sold.
Coupon codes
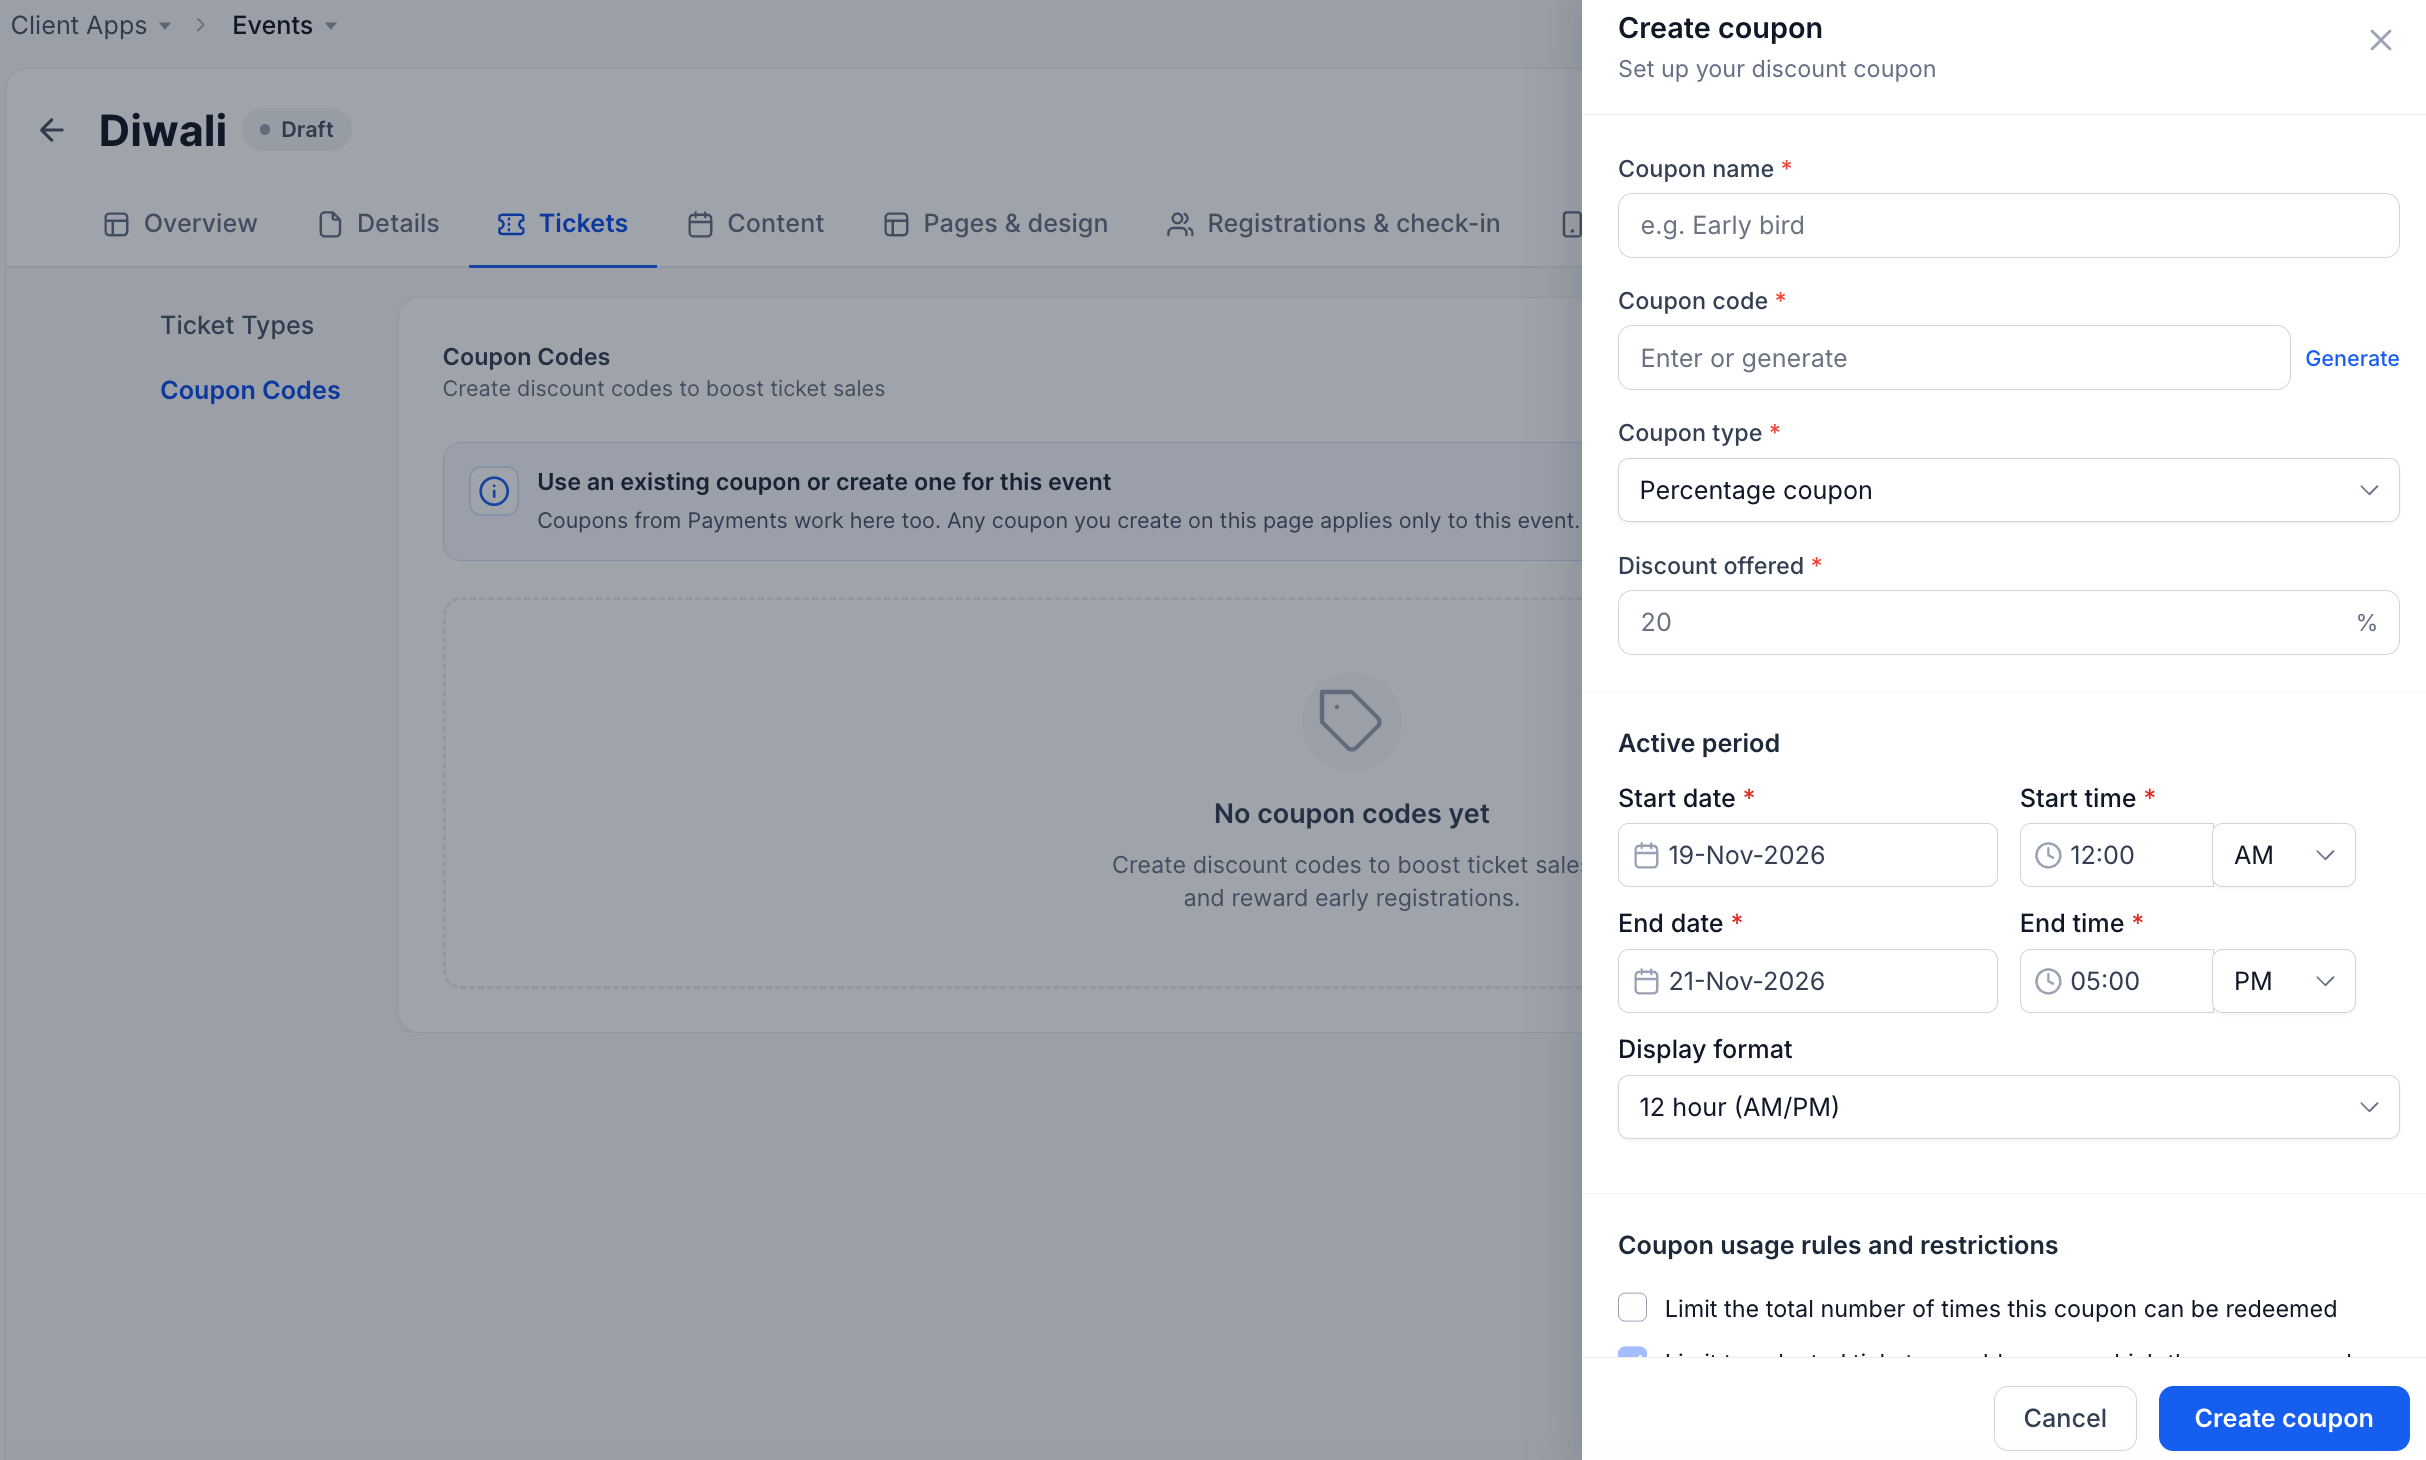
Go to Tickets → Coupon Codes → Add Coupon Code. Coupons from Payments work here too; a coupon created on this page applies only to this event.
Coupon name and code (use Generate for a random code)
Coupon type (for example, percentage) and discount
Active period (start and end date and time)
Usage rules: total redemption limit, limit to selected tickets or add-ons, and once per customer
Attendees apply coupons at checkout, including in the Client Portal.
Step 4: Add Event Content
The Content tab holds everything that powers the agenda, people and partner pages. Schedules and speakers can be reused from another event.
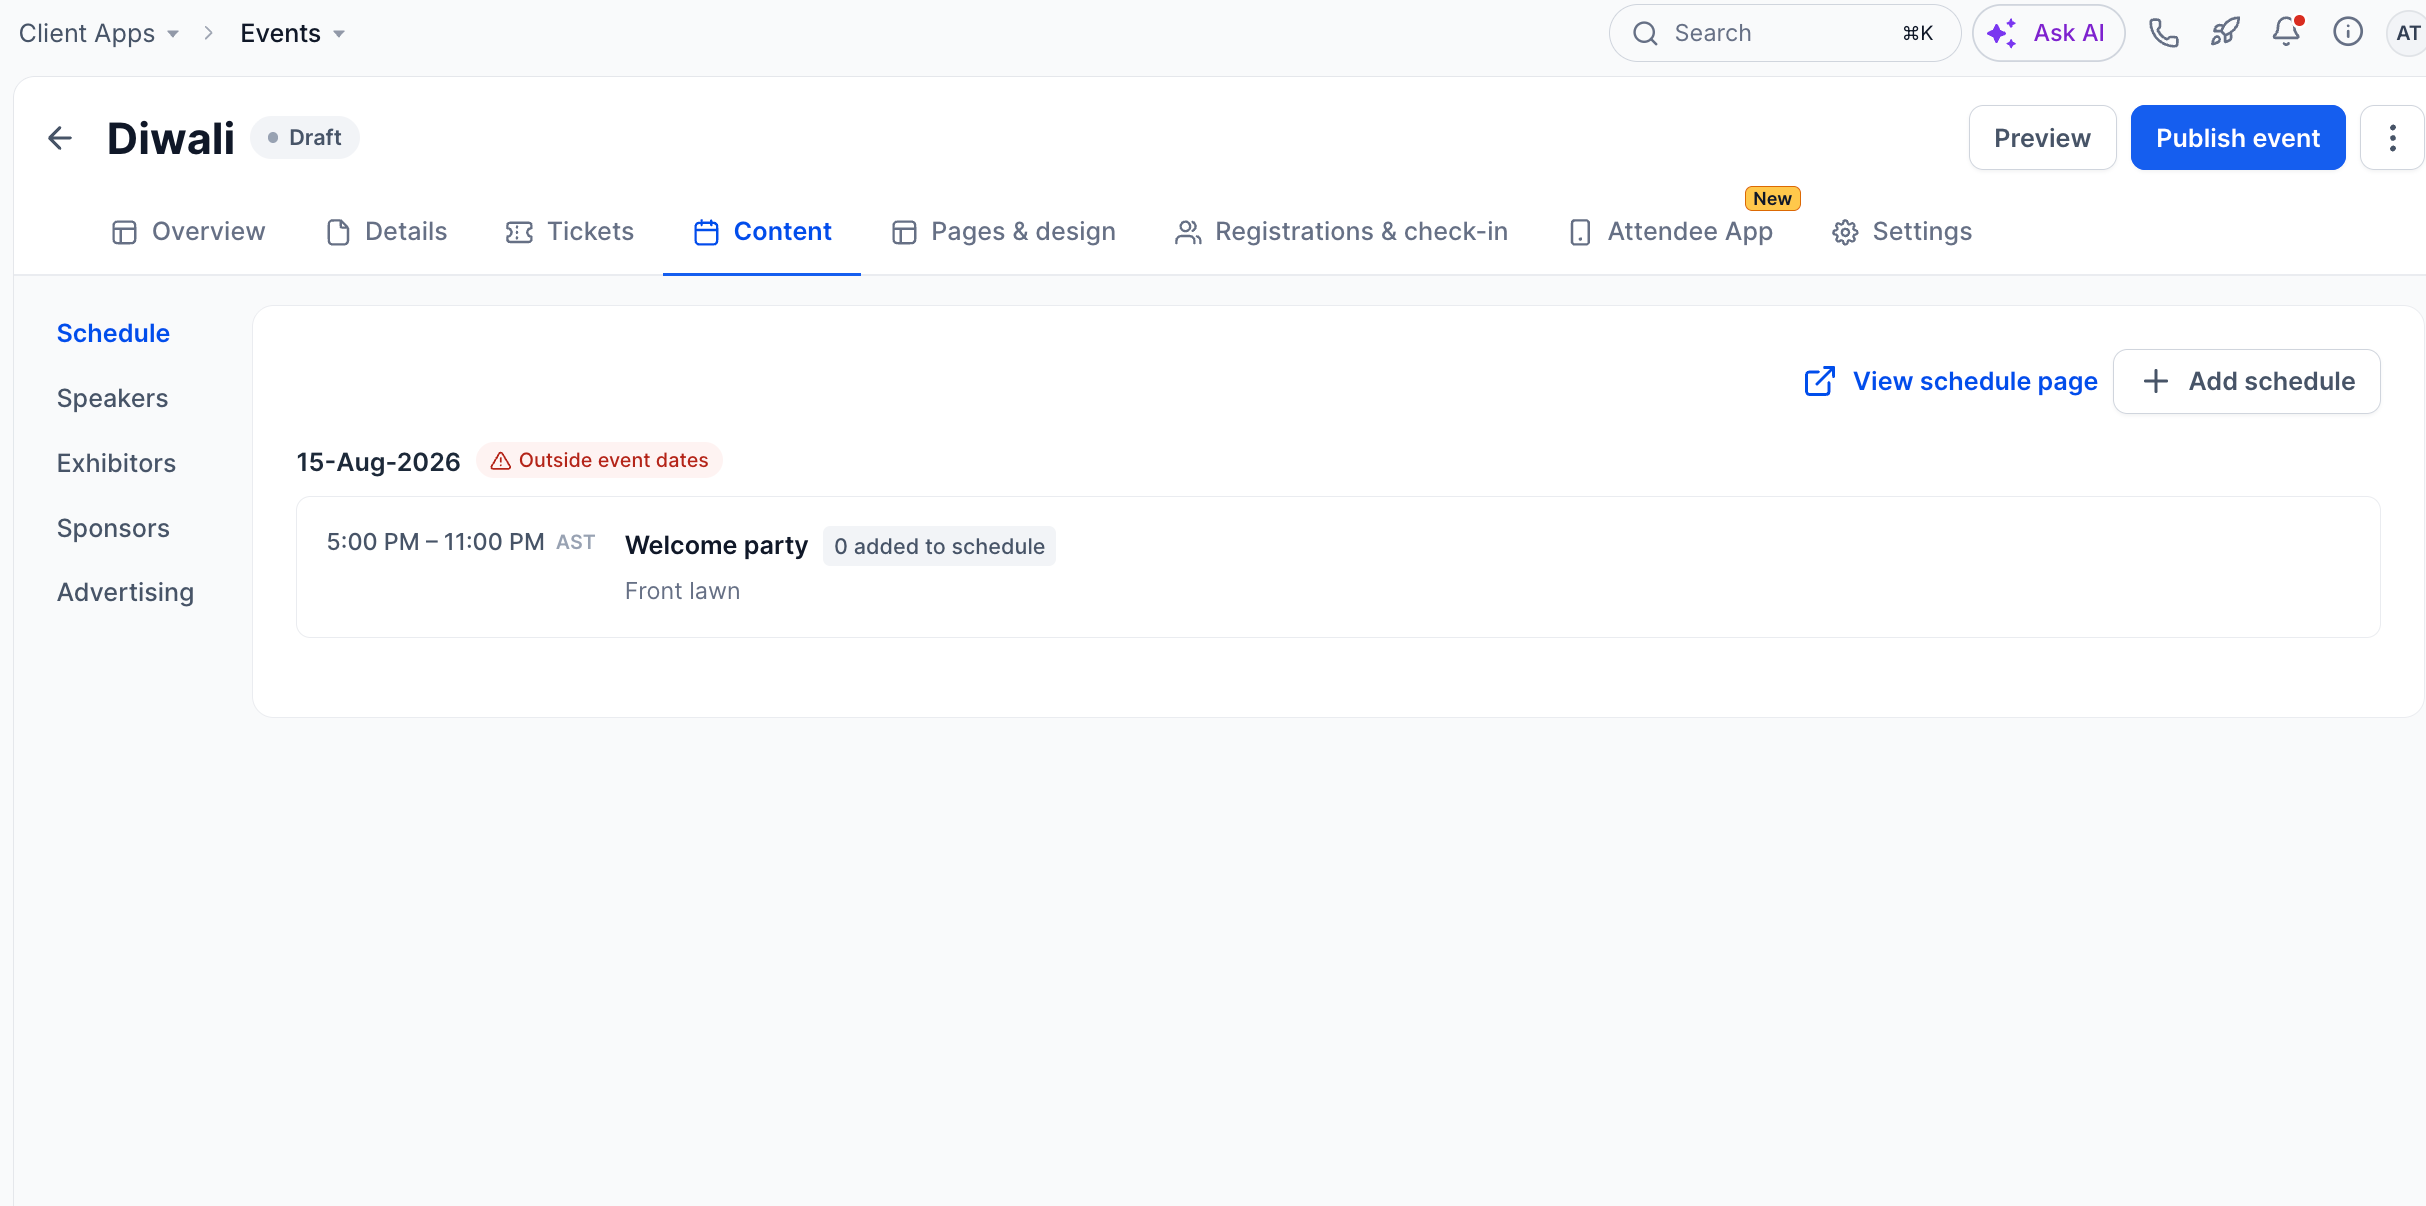
Schedule (agenda)
Go to Content → Schedule → Add schedule.
Speakers
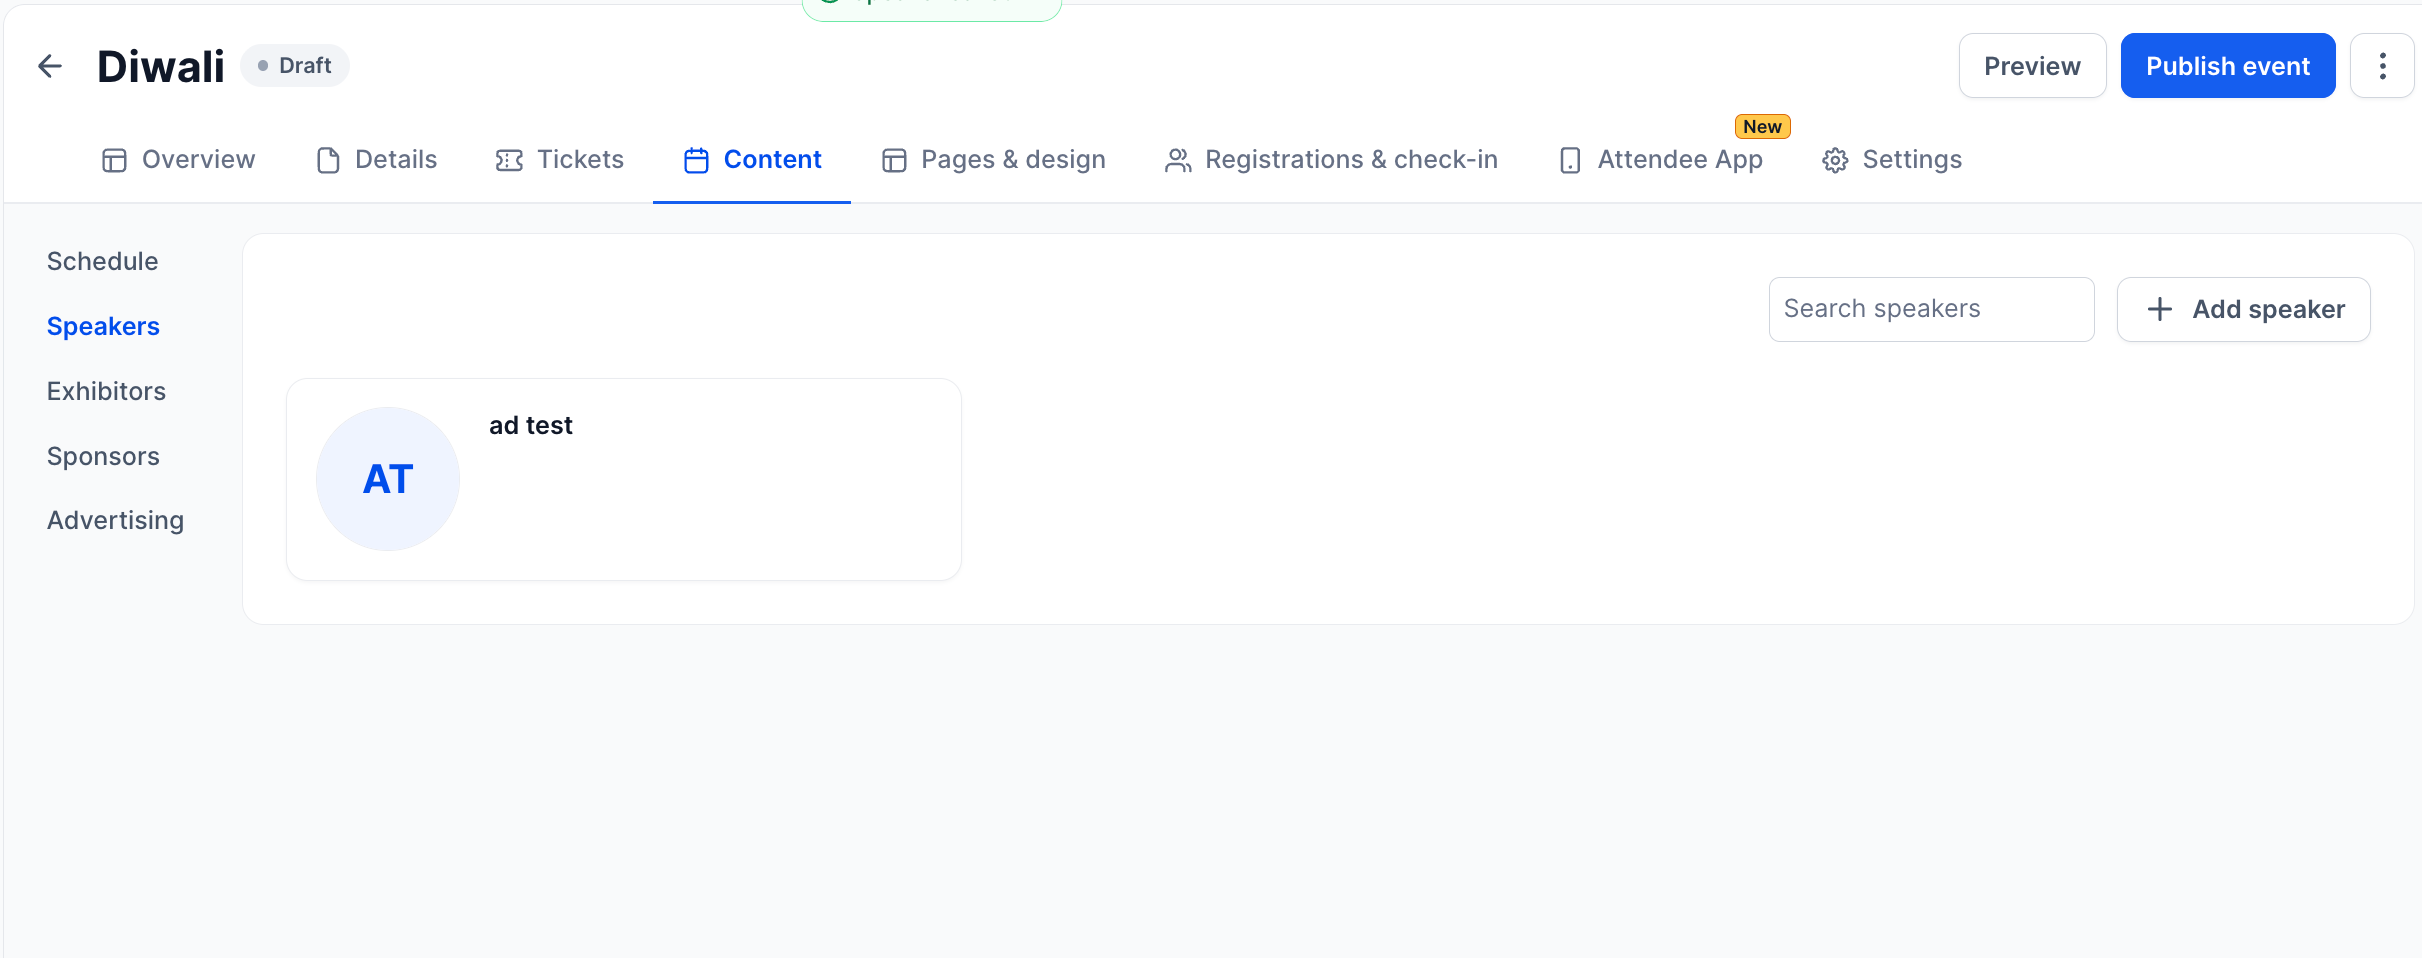
Go to Content → Speakers → Add speaker. Search your CRM contacts by name or email; their details fill the form, and anything already on the contact stays locked. You can also reuse speakers from another event. Speakers get their own profile page in the app, showing their role, bio and the sessions they are speaking at.
Exhibitors
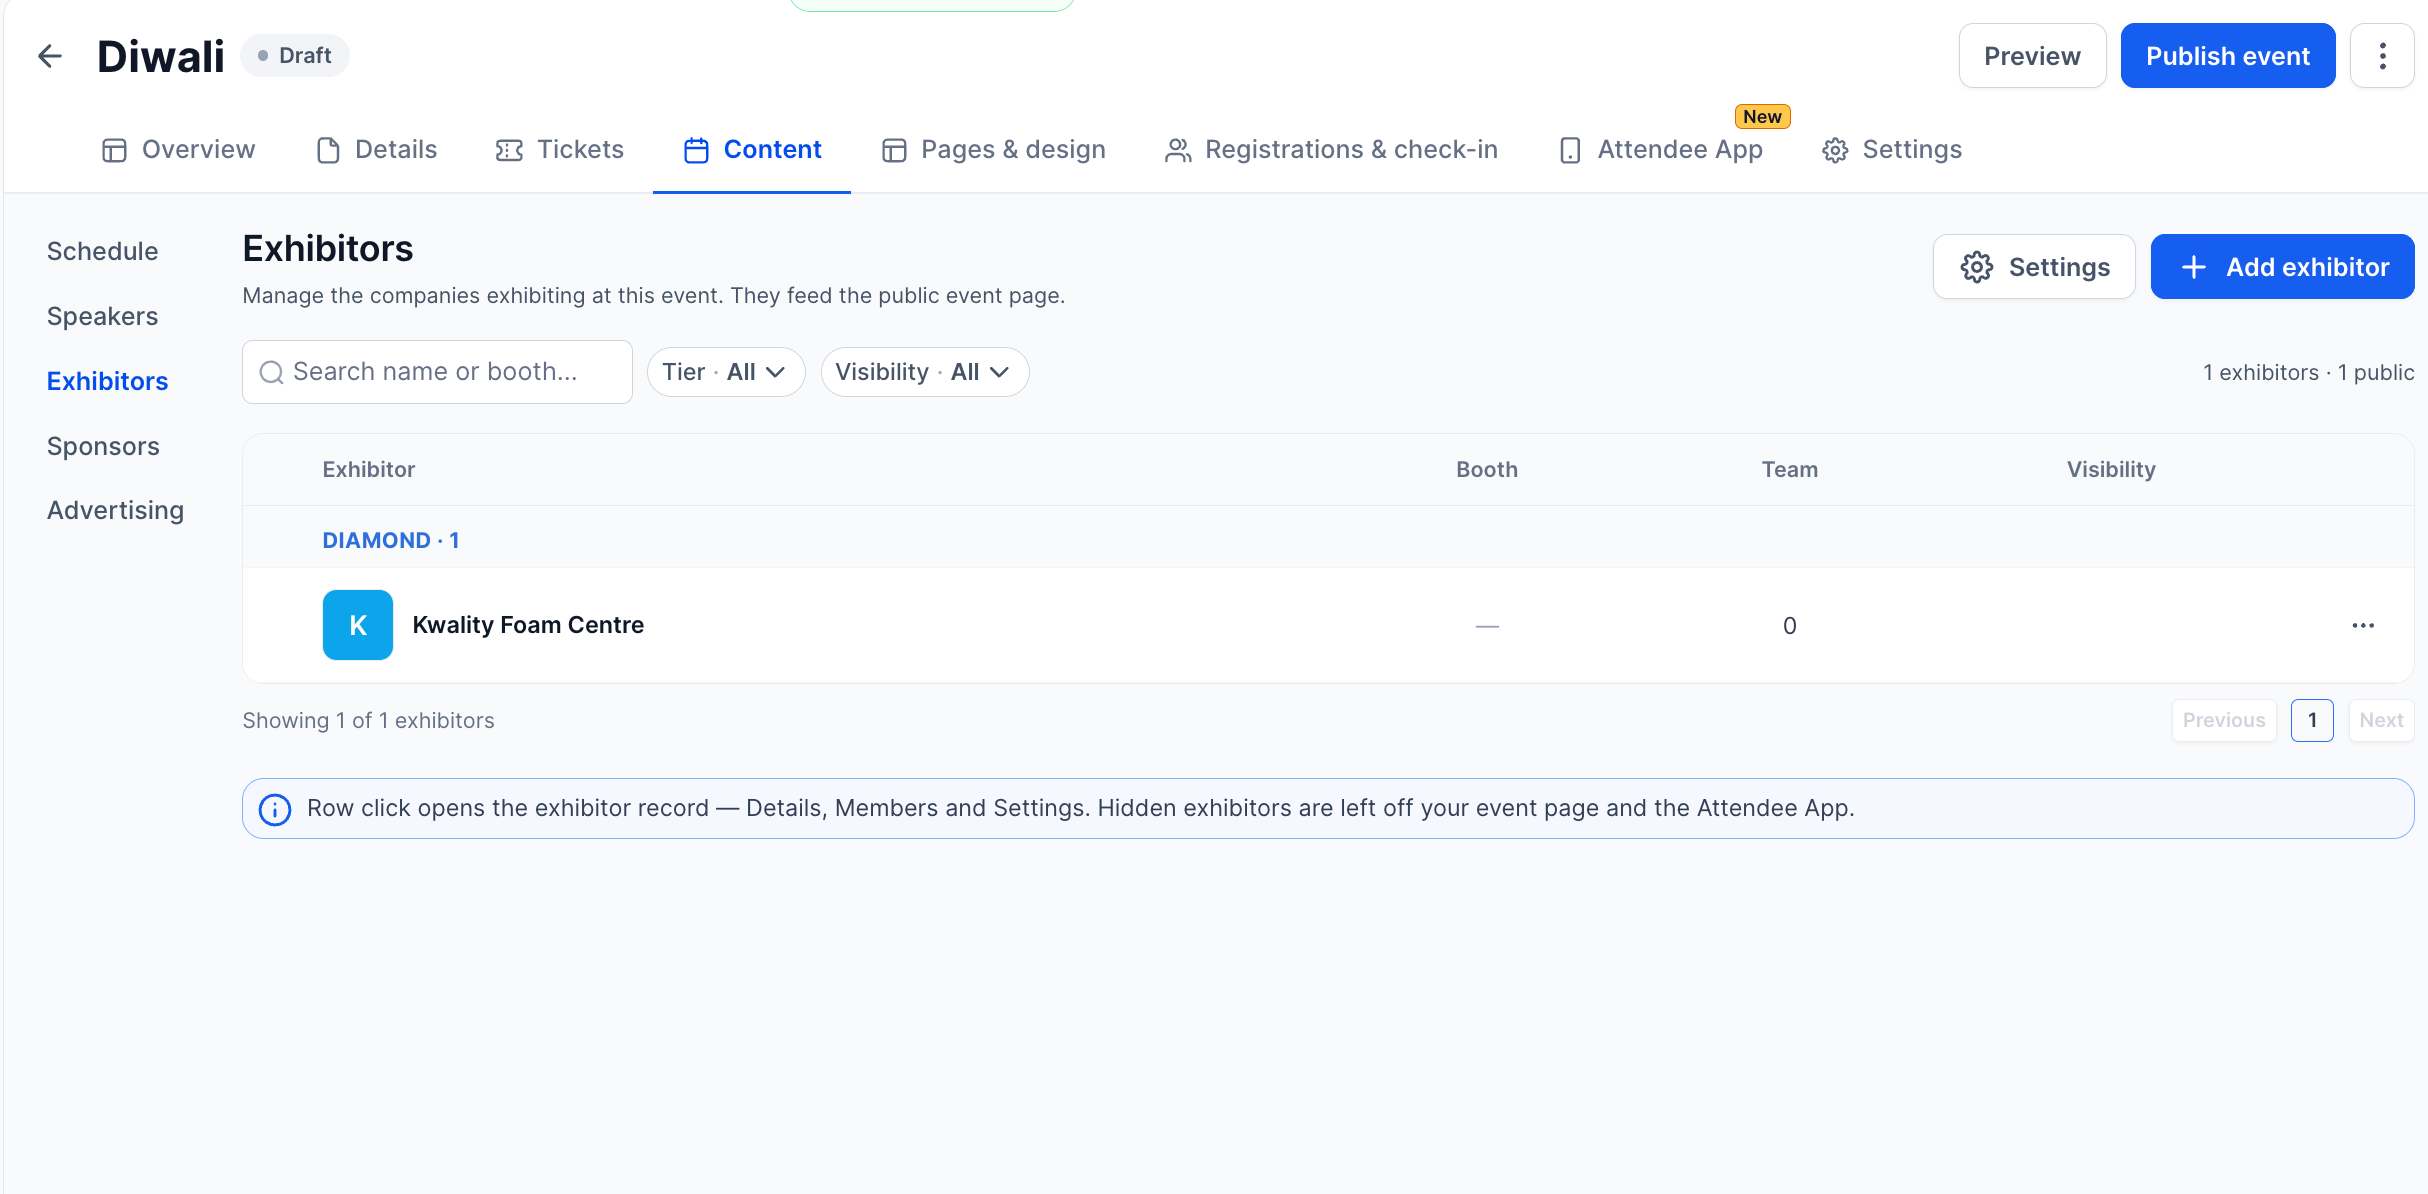
Go to Content → Exhibitors → Add exhibitor and enter the company name, tier, booth number and contact email.
Use Settings to manage tiers. Defaults are Diamond, Platinum, Gold, Silver and Bronze; you can rename, reorder, add or delete tiers.
Tiers are optional. Exhibitors without a tier show in a single group.
Invite booth team members so they can work the booth and capture leads.
Click a row to open the exhibitor record (Details, Members and Settings). Hidden exhibitors are left off your event page and the Attendee App.
Sponsors
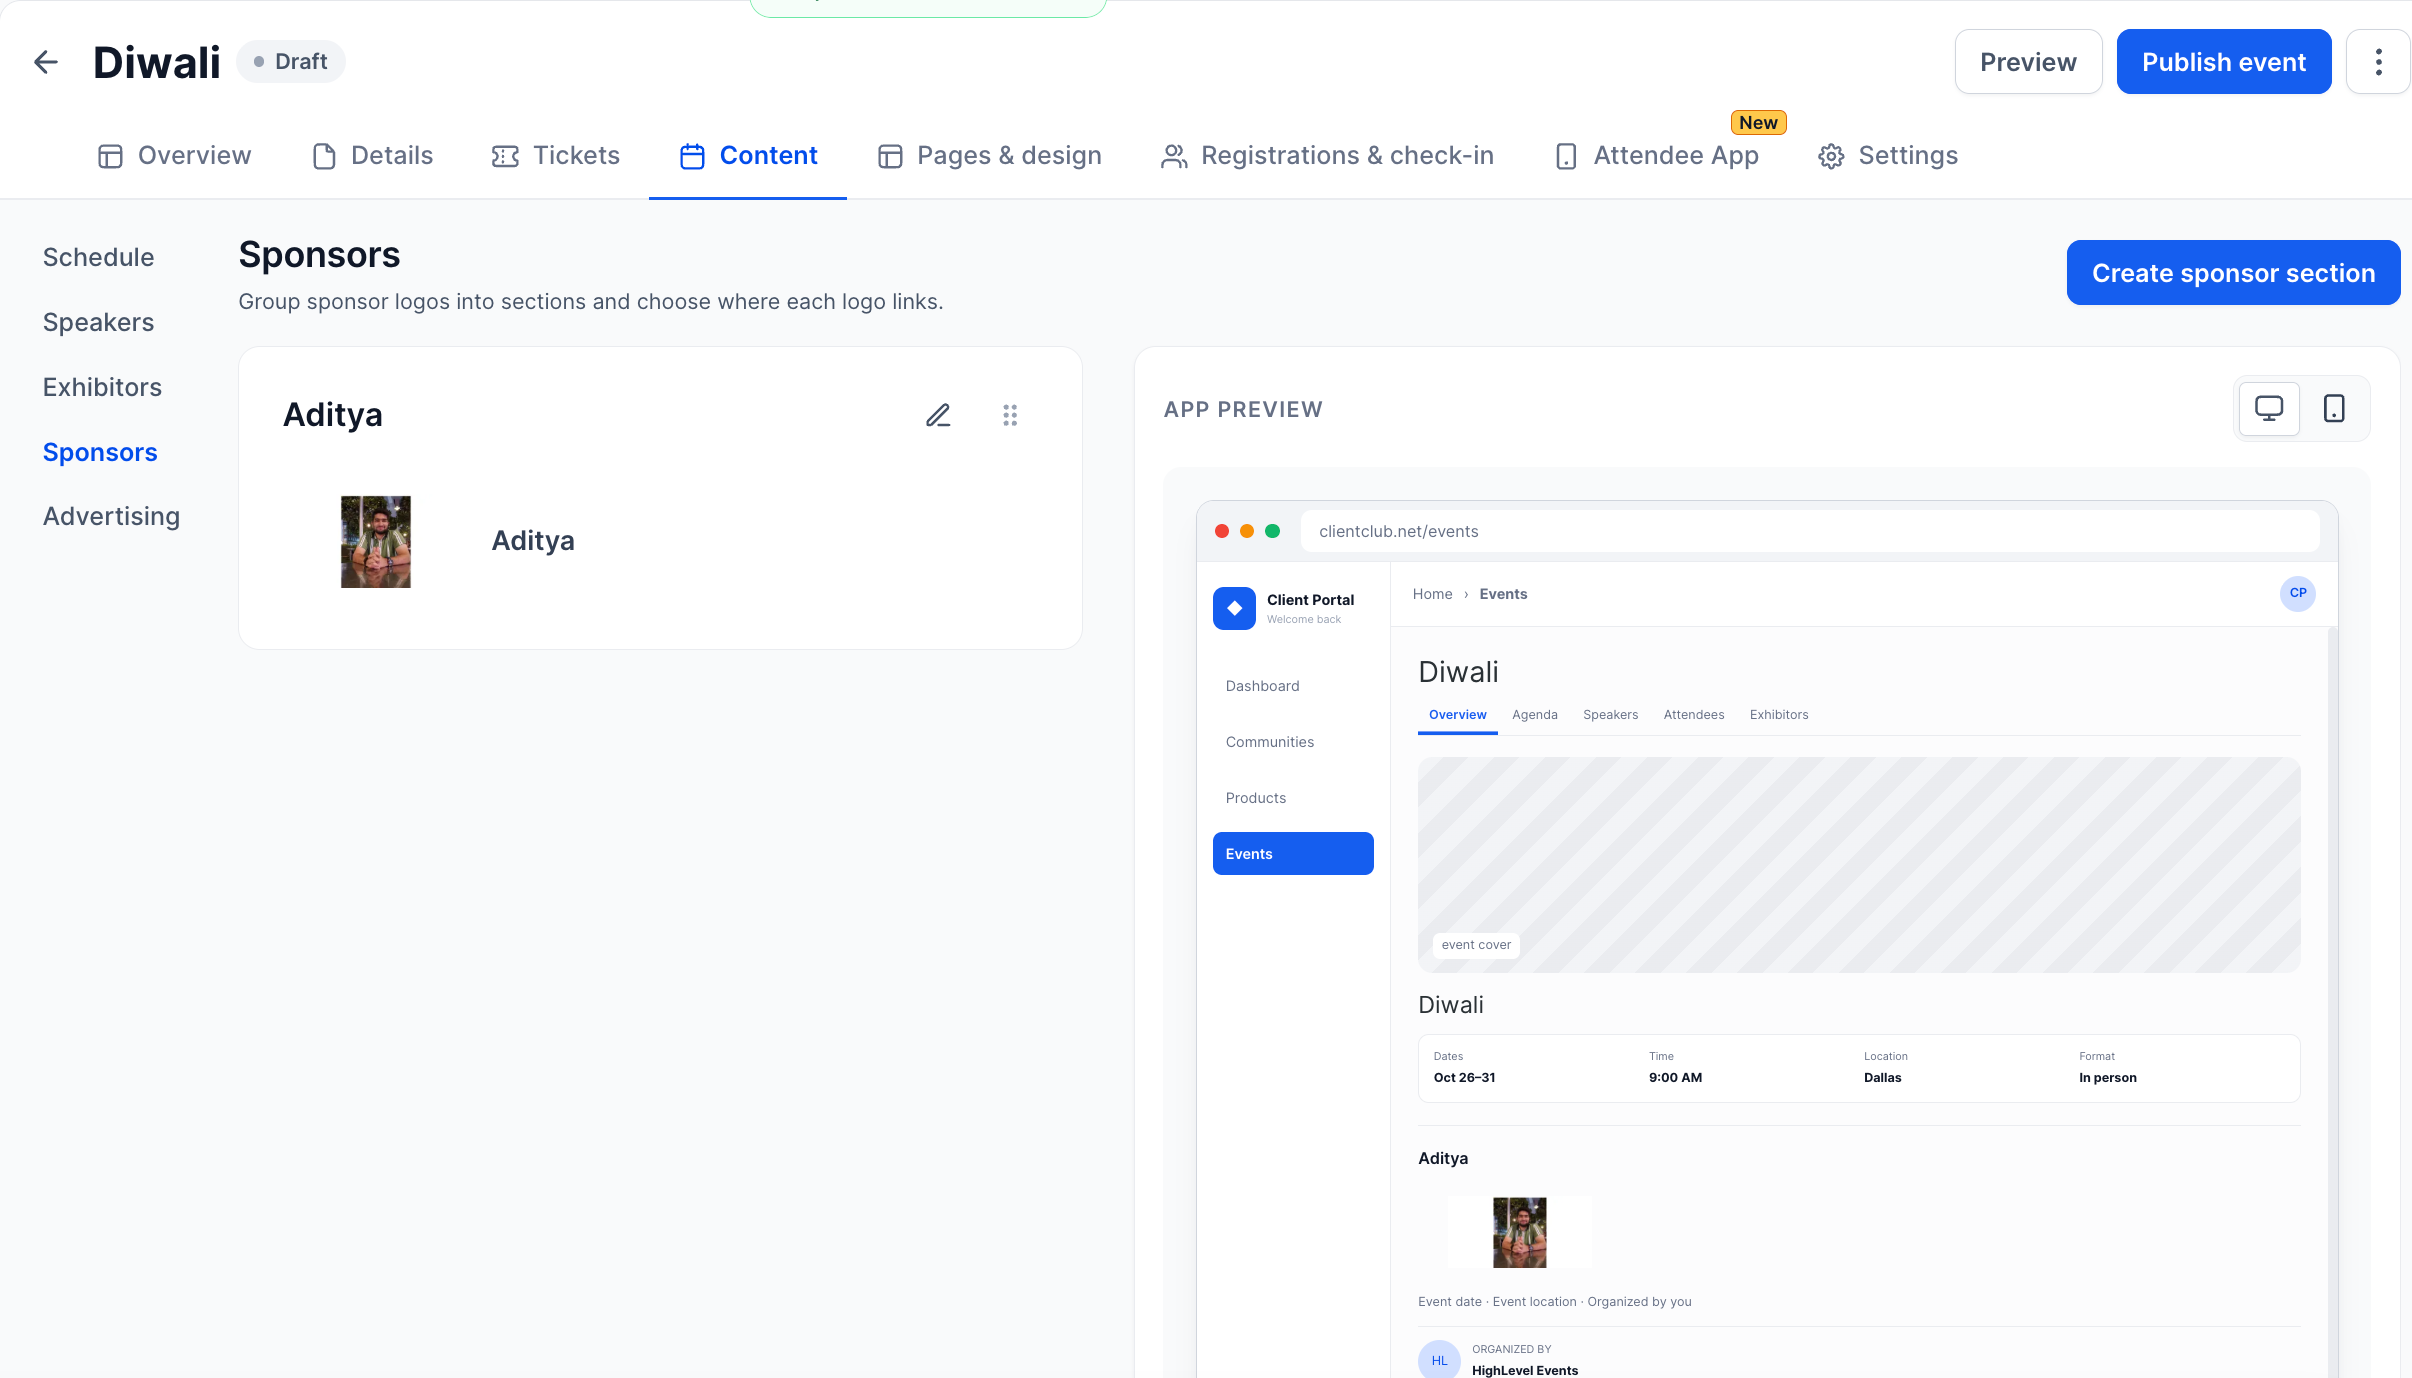
Go to Content → Sponsors → Create sponsor section. Give the section a title (for example "Premium partners"), then Add a sponsor for each logo:
Sponsor name and logo (800 × 400 px recommended, PNG or JPG, max 5 MB)
Redirection: No link, External URL, or an Exhibitor profile
Visibility: Everyone, Event members, or Specific roles
Create multiple sections to show sponsors in tiers, so every partner gets the visibility they paid for.
Advertising
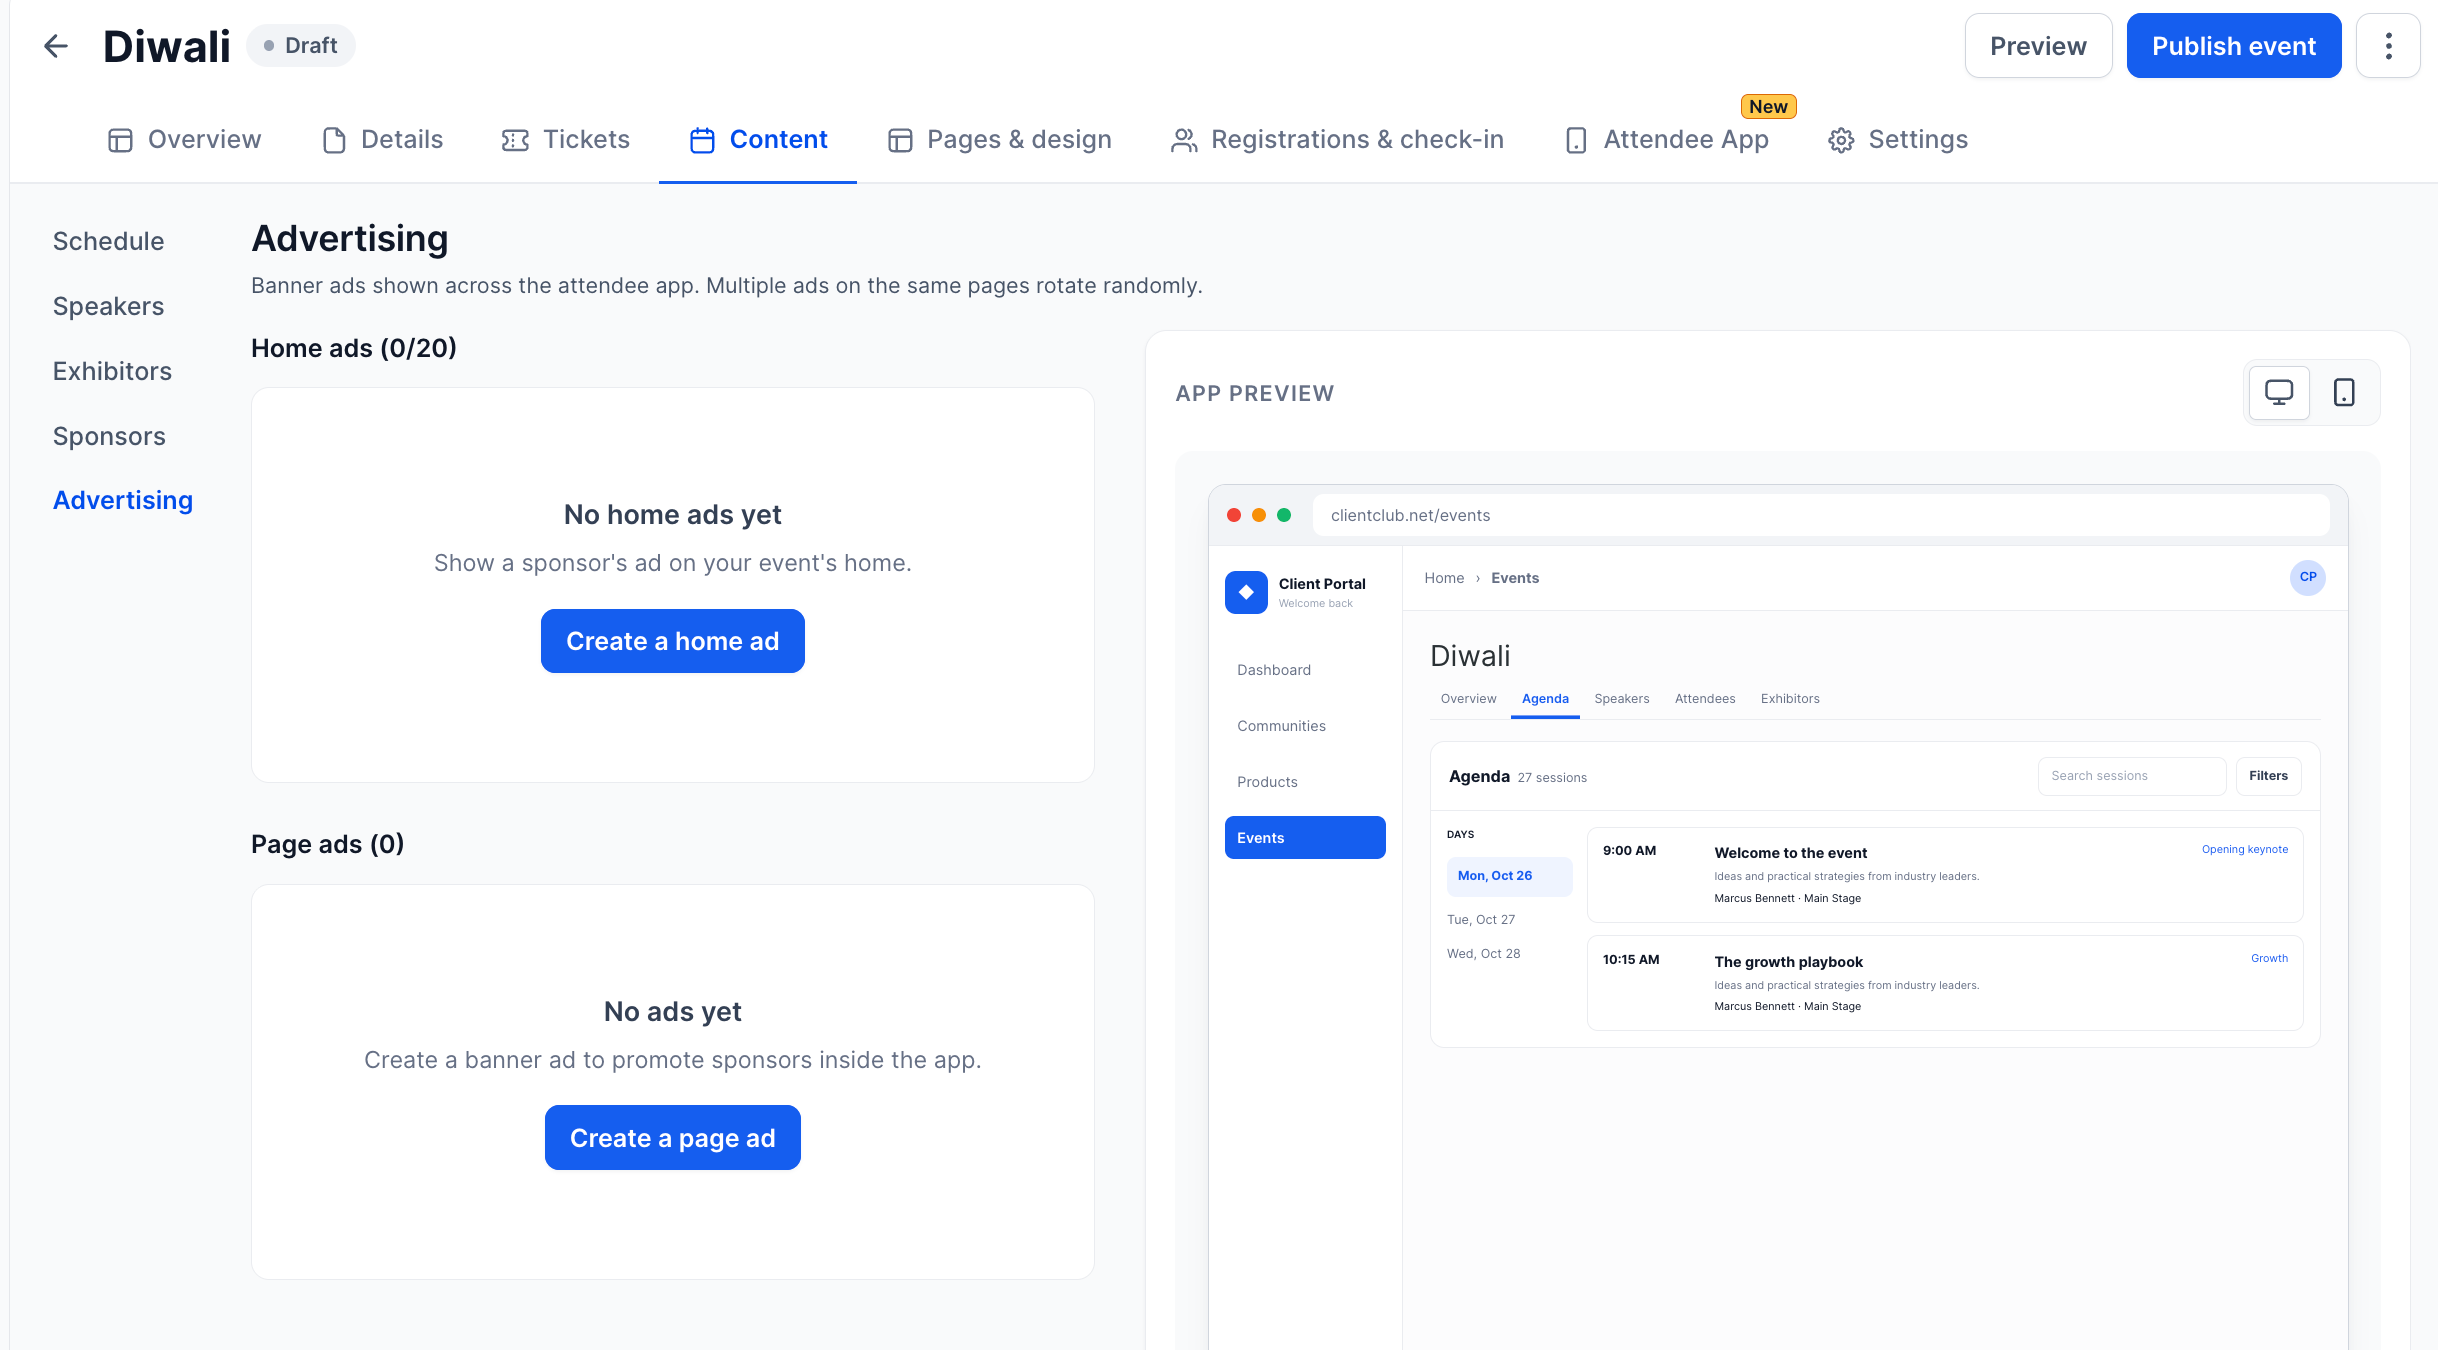
Go to Content → Advertising to sell ad placements to sponsors. A live app preview shows how ads will look.
For each ad, upload a web image (2520 × 180 px recommended) and a mobile image (720 × 180 px), add an image description for screen readers, choose a redirection link, and set visibility (Everyone, Event members or Specific roles). Multiple ads on the same page rotate randomly.
Step 5: Customize Pages and Design
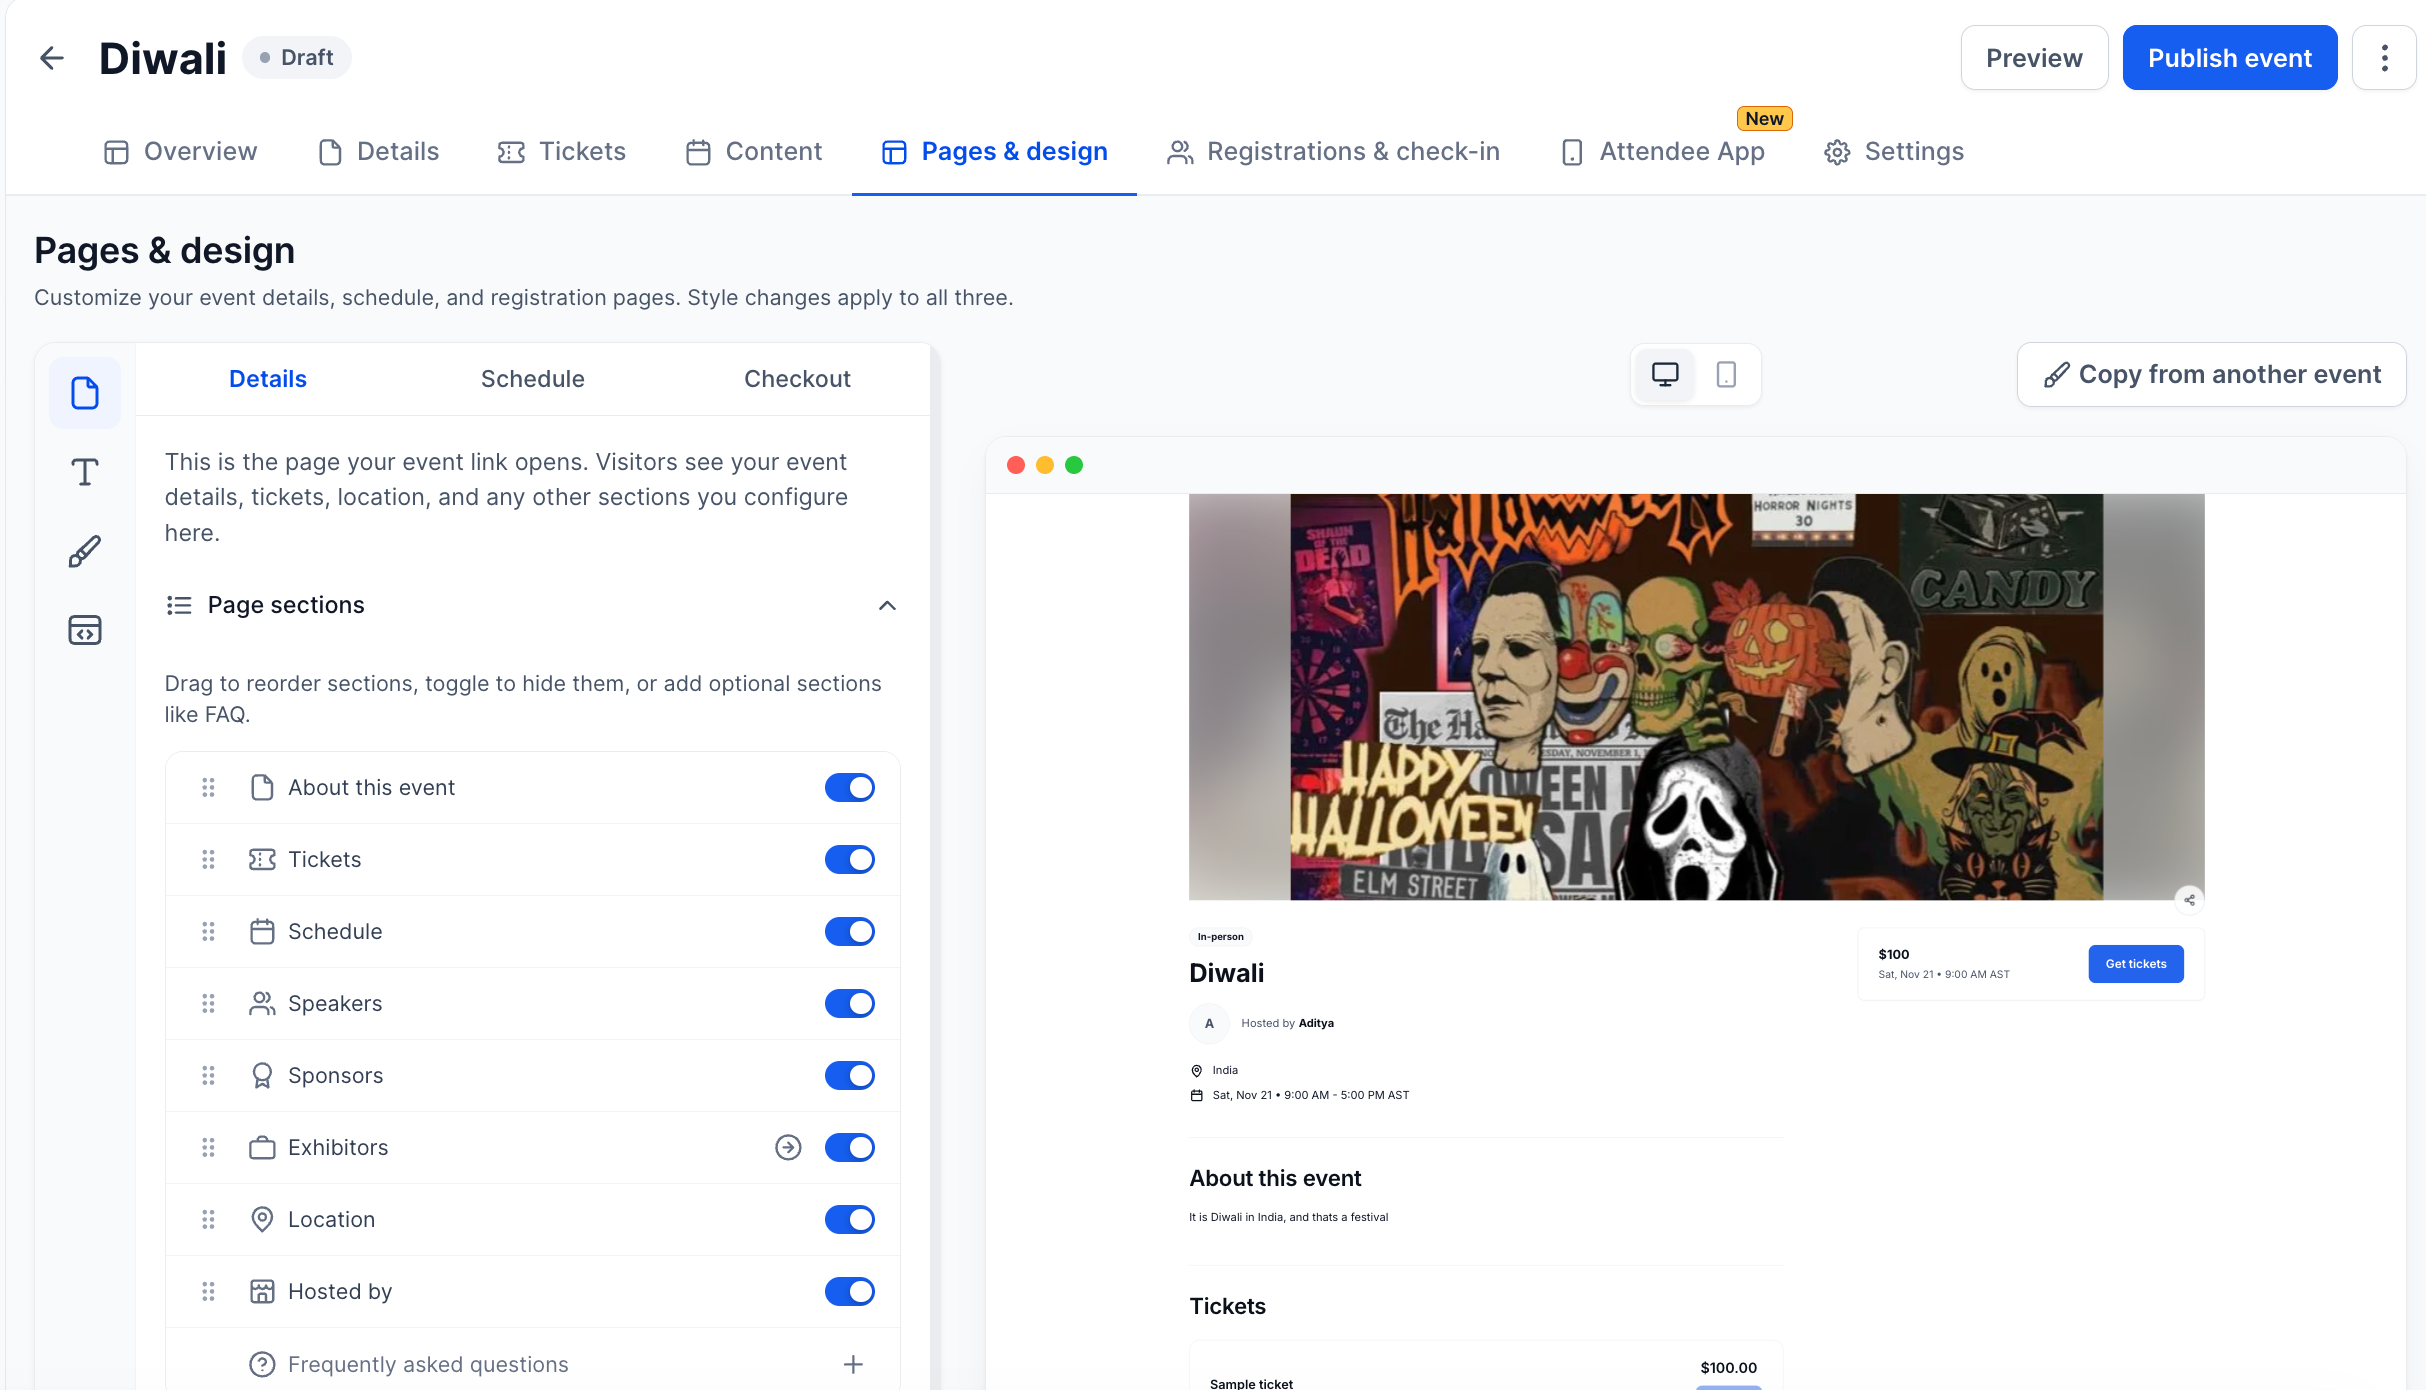
The Pages & design tab controls the public event page, schedule page and checkout. Style changes apply to all three. Use Copy from another event to reuse a design.
Step 6: Configure Event Settings
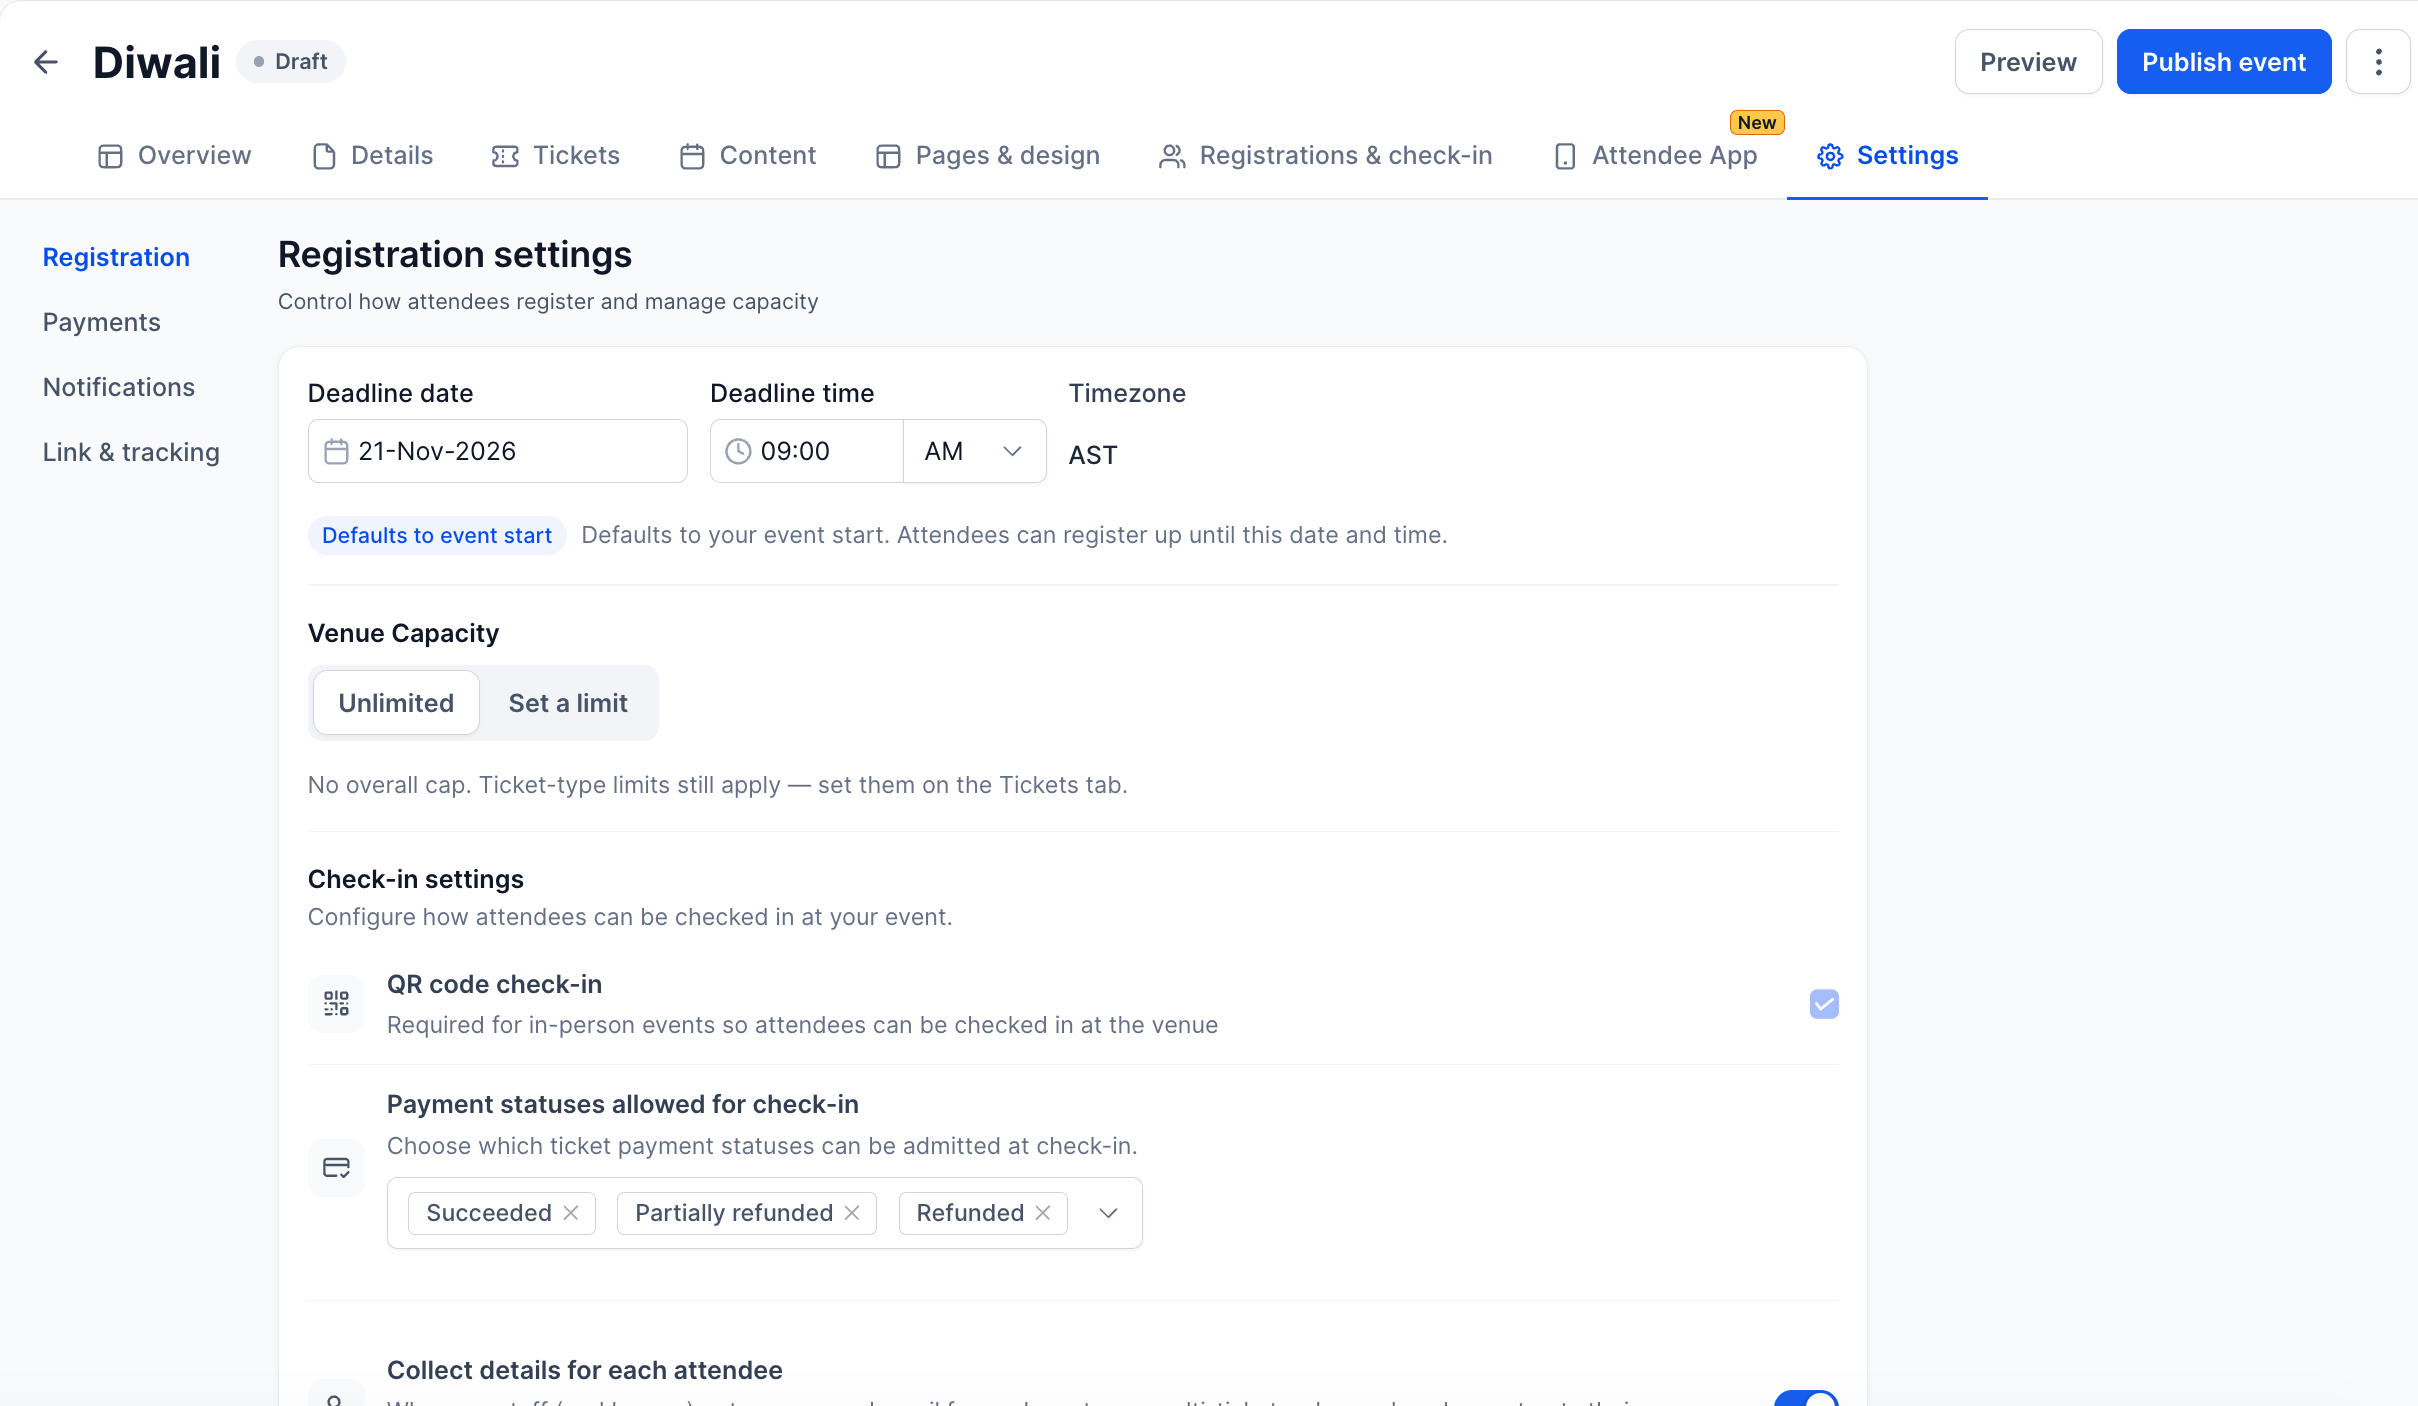
Registration
Deadline: date and time registration closes (defaults to event start).
Venue capacity: Unlimited, or set an overall cap. Ticket-type limits still apply.
Collect details for each attendee: name and email for every seat on a multi-ticket order, so each guest gets their own ticket.
Timezone settings: show times in the visitor's timezone, collect visitor timezone for reminders, and show the timezone next to event times.
Check-in settings (in-person events): QR code check-in, and which payment statuses are allowed to check in.
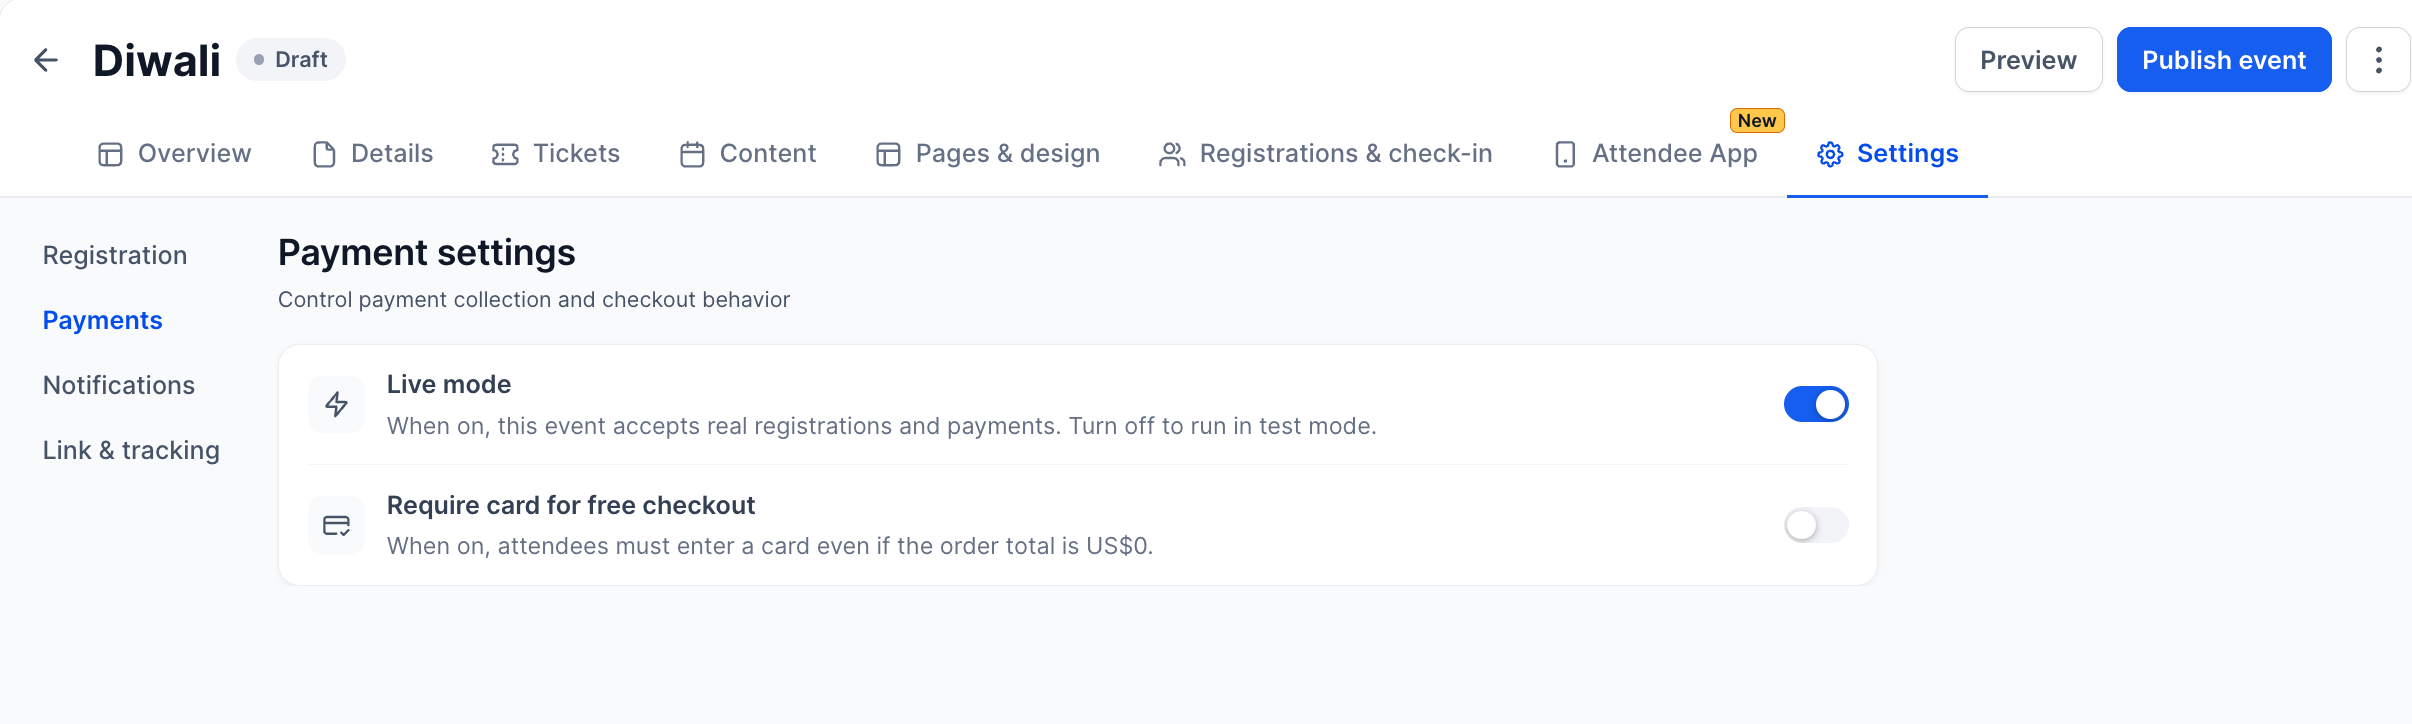
Payments
Live mode: on for real registrations and payments; off to run in test mode.
Require card for free checkout: ask for a card even when the order total is zero.
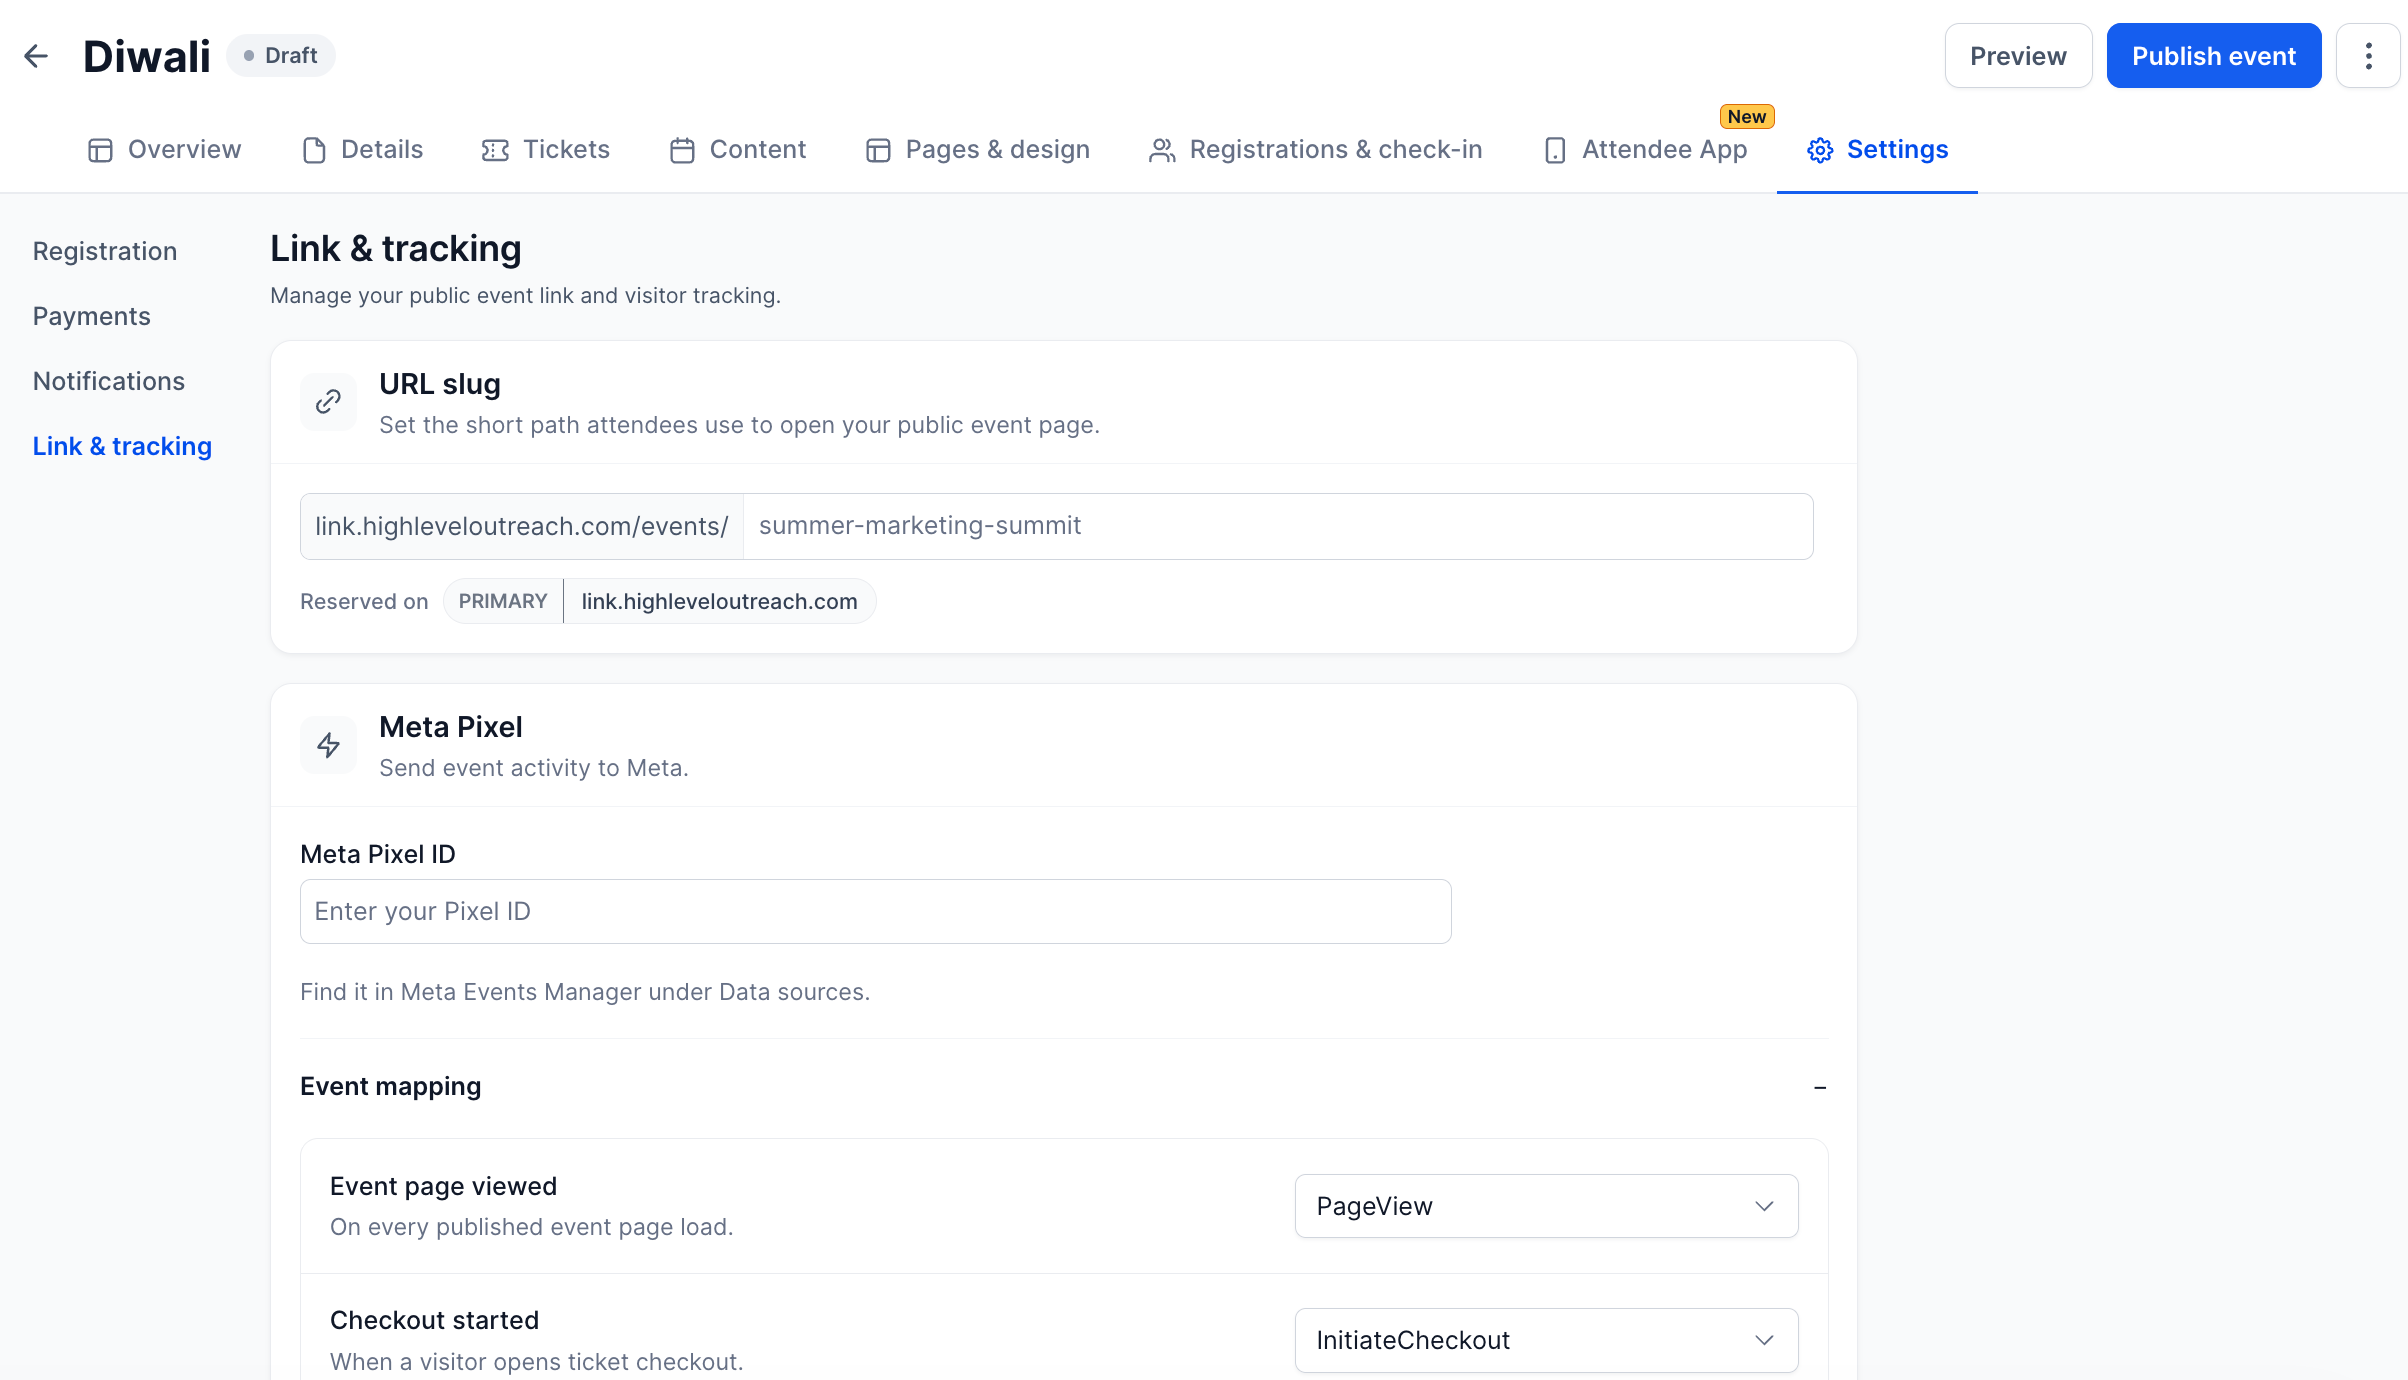
Link & tracking
URL slug: the short path for your public event page (needs a branded or white-label domain).
Meta Pixel: send event activity to Meta. Events map to PageView, InitiateCheckout, AddToCart, SubmitApplication, AddPaymentInfo and Purchase.
Favicon: the browser tab icon for this event.
Embed code: add the event page to another website.
Step 7: Set Up the Attendee App (Client Portal)
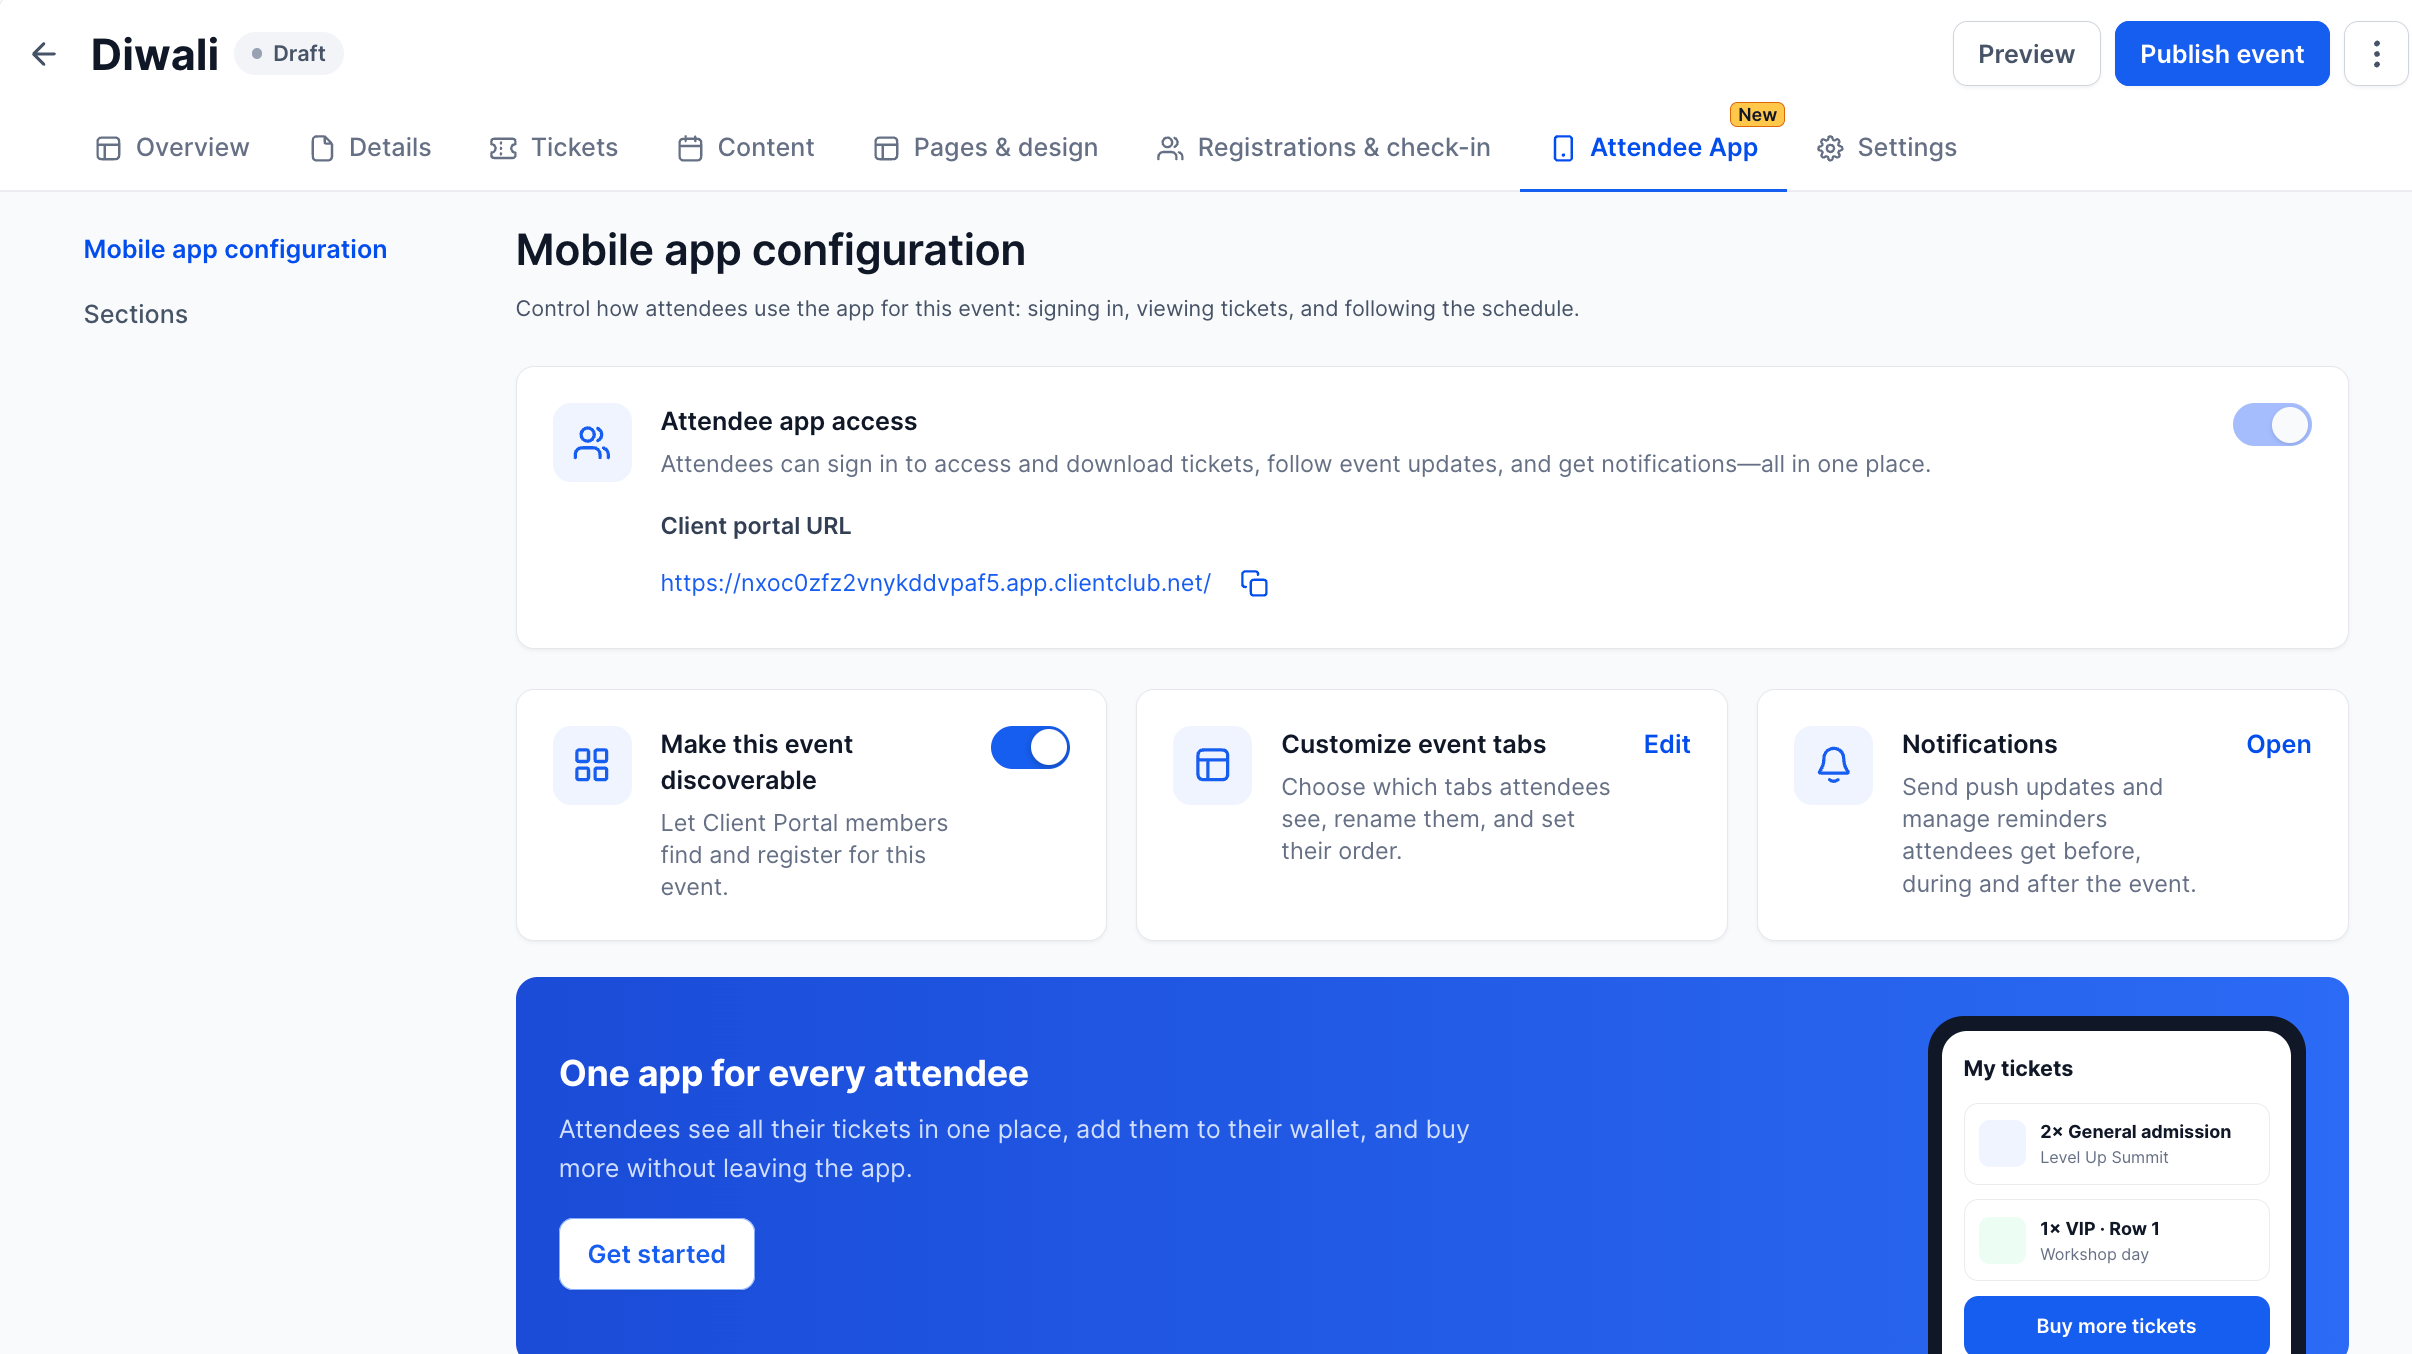
Open the event and go to the Attendee App tab.
Turn on Attendee app access. If prompted, click Upgrade Client Portal first.
Copy the Client portal URL to share with attendees.
Turn on Make this event discoverable to list it for all Client Portal members. Leave it off to show the event only to the people taking part.
Click Edit on Customize event tabs to set up app sections.
Click Open on Notifications to review messages and reminders.
Customize app sections
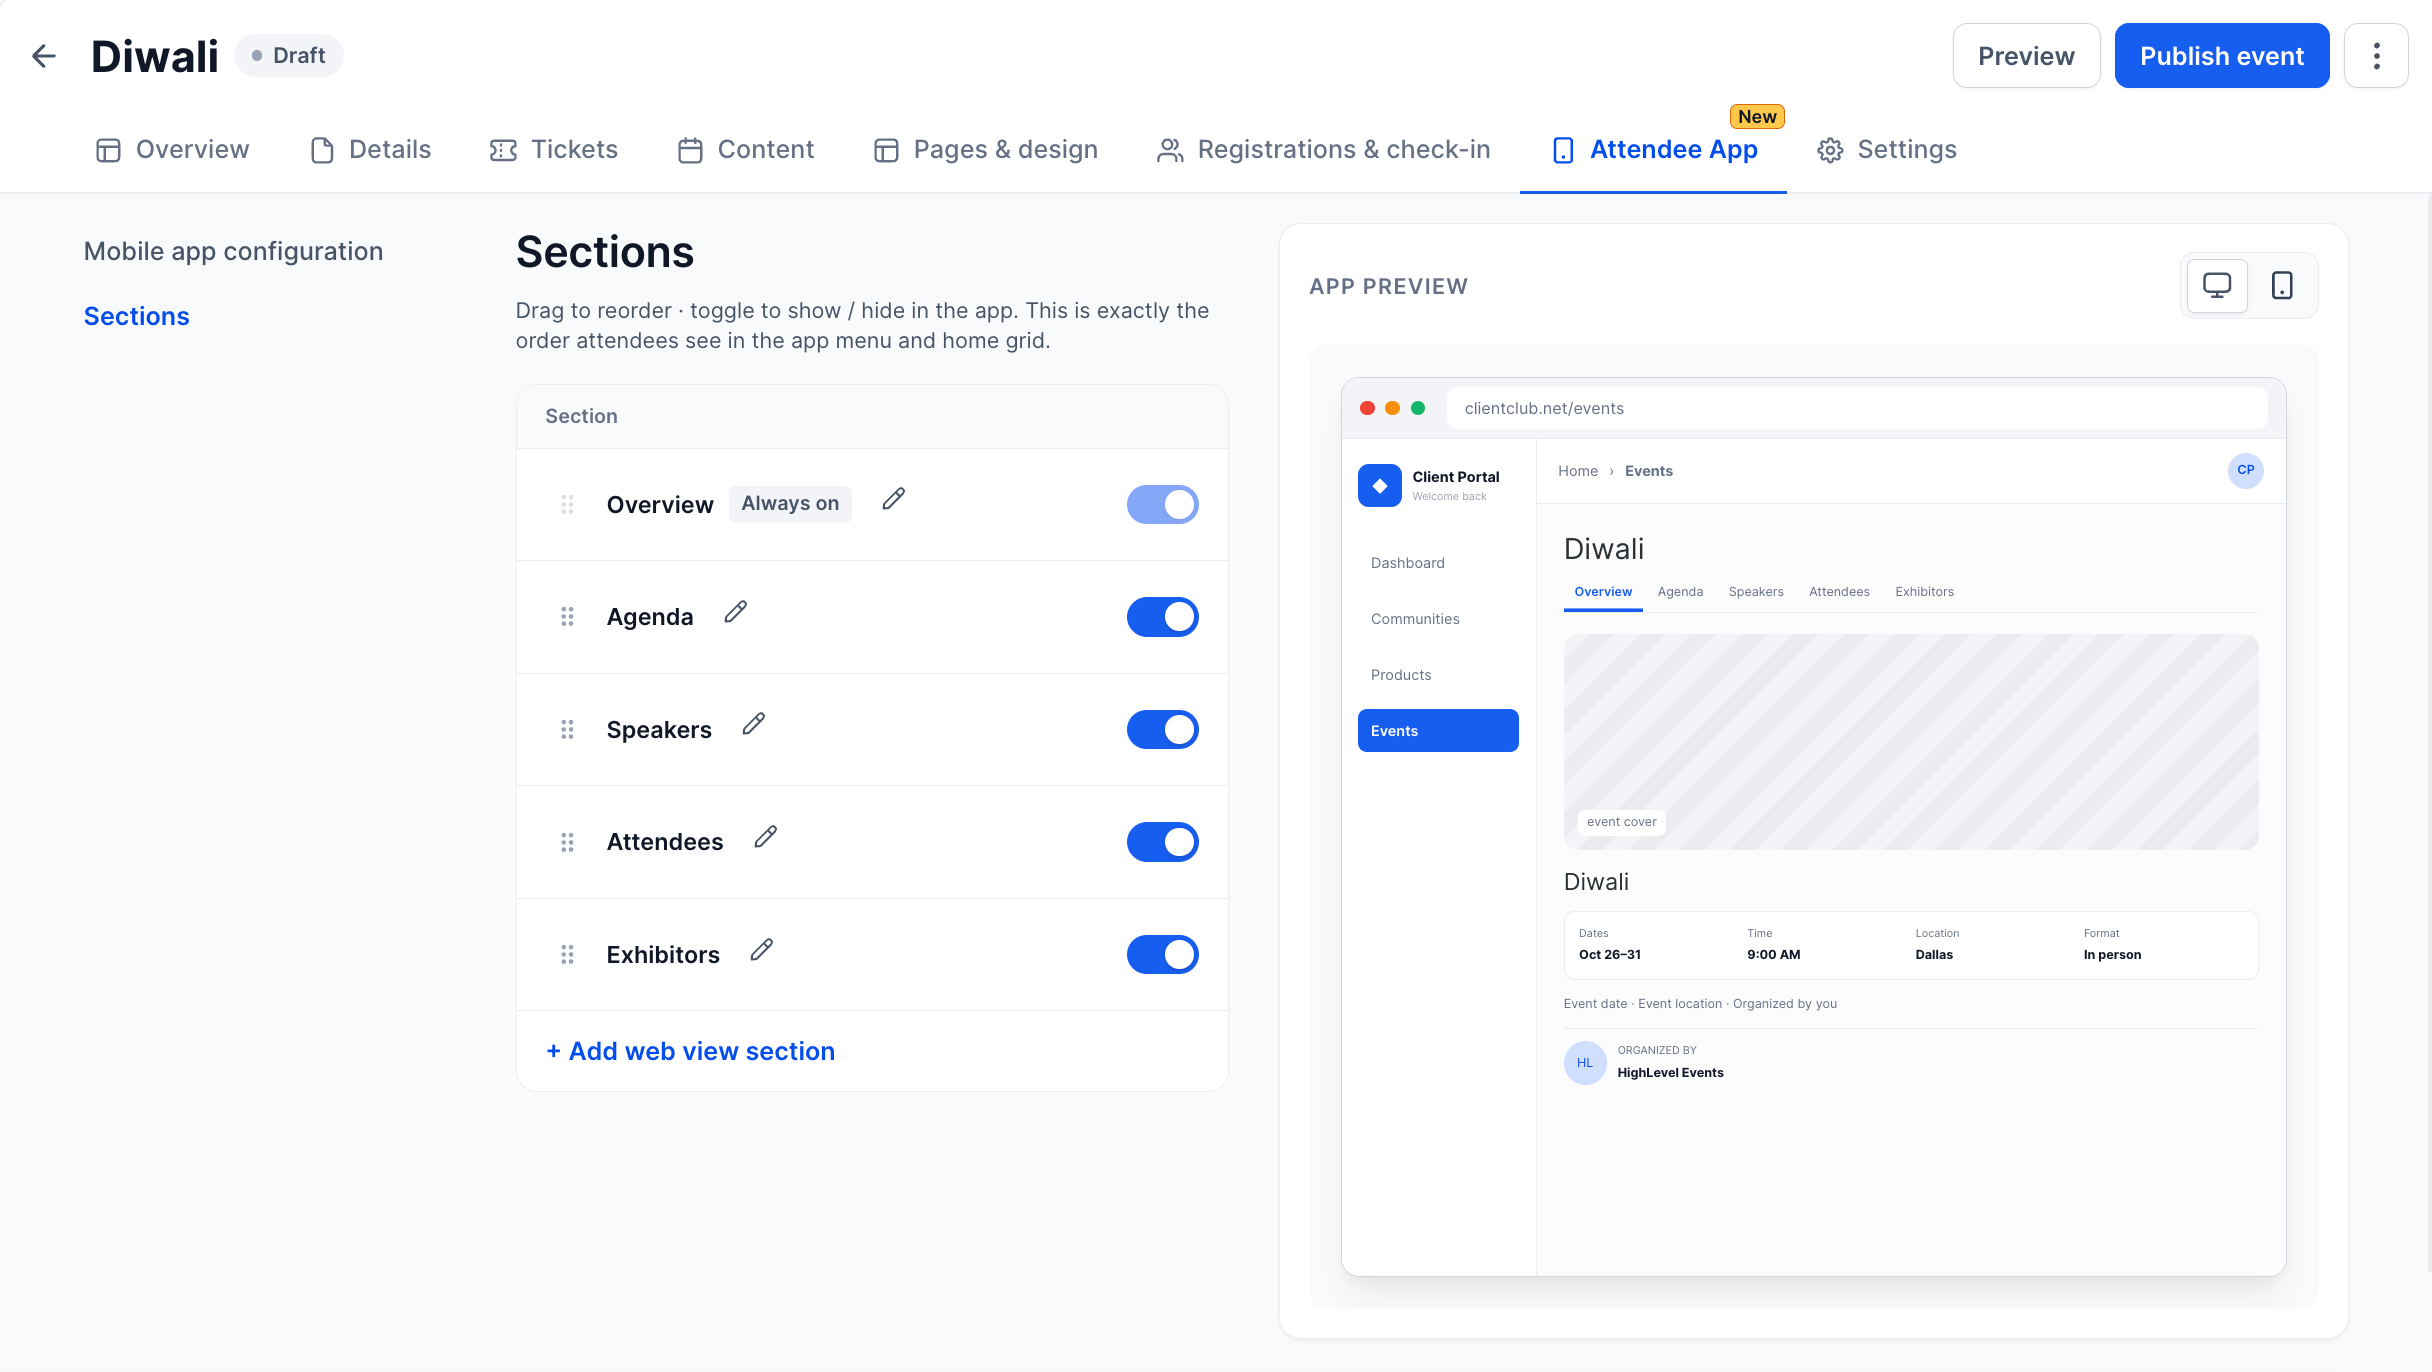
Under Attendee App → Sections, drag to reorder sections and toggle them on or off. This is exactly the order attendees see in the app menu and home grid. Overview is always on. Click the pencil to rename any section.
Click + Add web view section to add your own content:
Each section has a label and a visibility setting (for example, Event members). Use this for venue maps, swag stores, restaurant lists, recordings and more.
Client Portal settings for the Attendee App
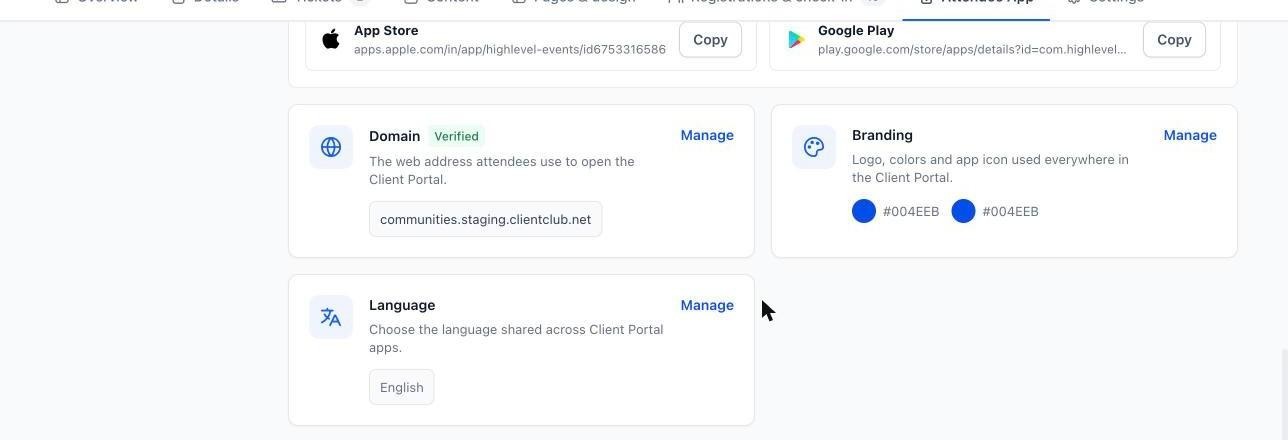
Lower on the Attendee App tab, these Client Portal settings are shared across every event you run. Set them once:
App links: App Store and Google Play links to share so attendees can download the app.
Domain: the web address attendees use to open the Client Portal.
Branding: logo, colors and app icon used across the Client Portal.
Language: the language shared across Client Portal apps.
Client Portal settings shared across all your events.
Turning the Client Portal on or off
You can turn the Client Portal on or off for an event at any time with the Attendee app access toggle at the top of the Attendee App tab.
On: members sign in to the Client Portal (web, mobile app or your branded app) and see all their tickets, the agenda and event updates together in one place.
Off: the event keeps working as is on its standalone event page. People can still view the event, register and buy tickets, and receive their confirmations. The only difference is that members can't sign in to the Client Portal to see all their tickets together.
Step 8: Set Up Notifications
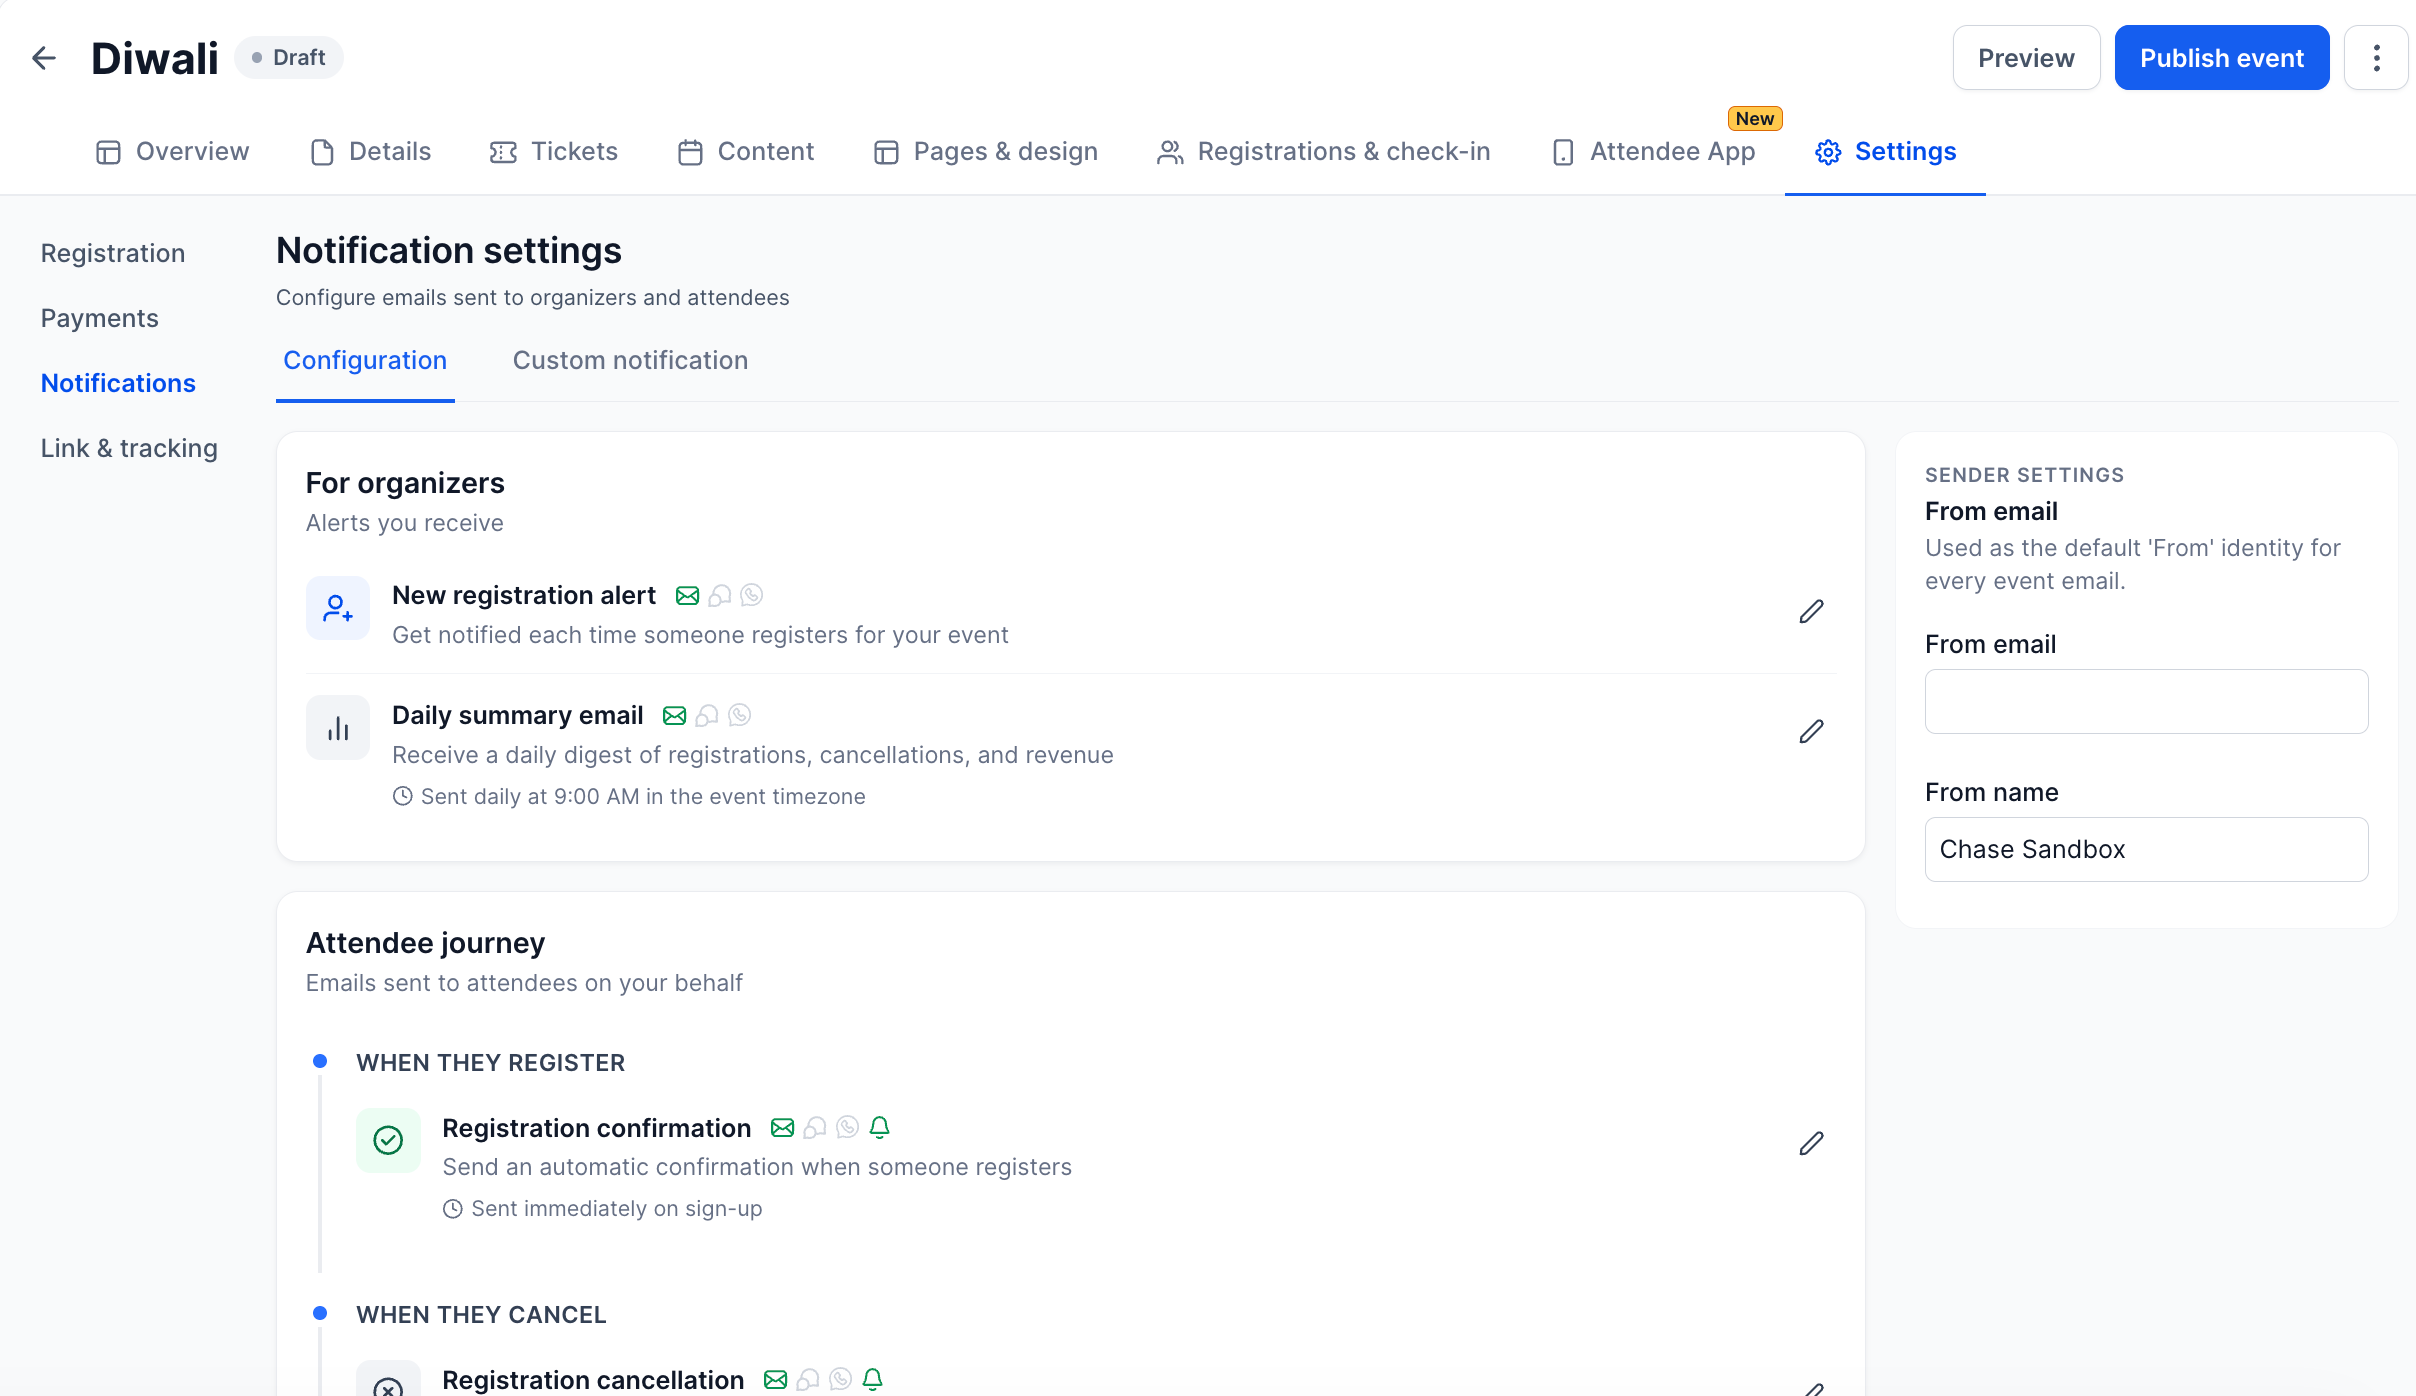
Go to Settings → Notifications (or click Open on the Notifications card). On the Configuration tab, turn each message on or off and edit it.
Under Sender settings, set the From email and From name used for every event email.
Custom notifications (announcements)
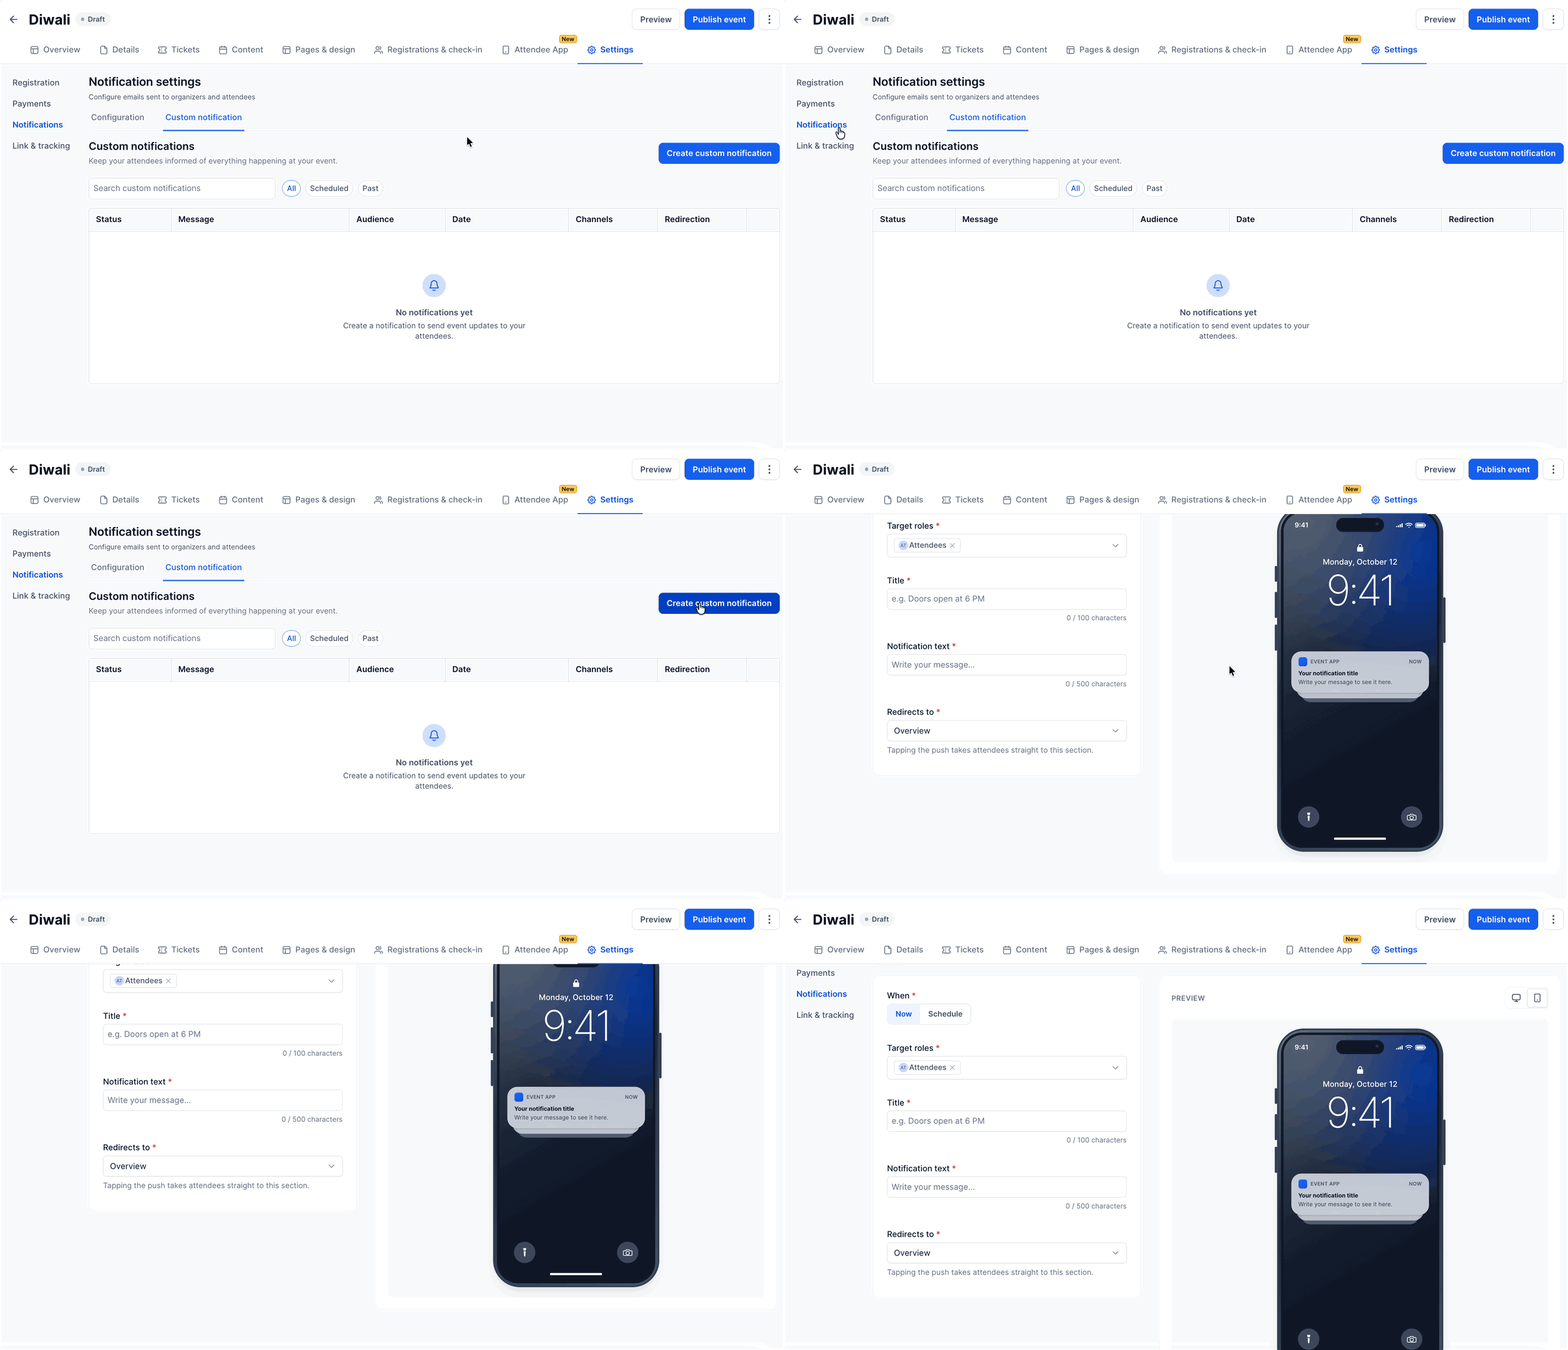
Go to Settings → Notifications → Custom notification and click Create custom notification.
Choose When: Now or Schedule.
Pick Target roles, such as Attendees, Speakers or Exhibitors.
Enter a Title (up to 100 characters) and Notification text (up to 500 characters).
Choose Redirects to: the app section the push opens, such as Agenda.
Check the lock-screen preview and send or schedule.
The custom notification list shows status, audience, date, channels and redirection, and can be filtered by Scheduled or Past.
Managing Registrations and Check-In
Open the Registrations & check-in tab.
Registrations
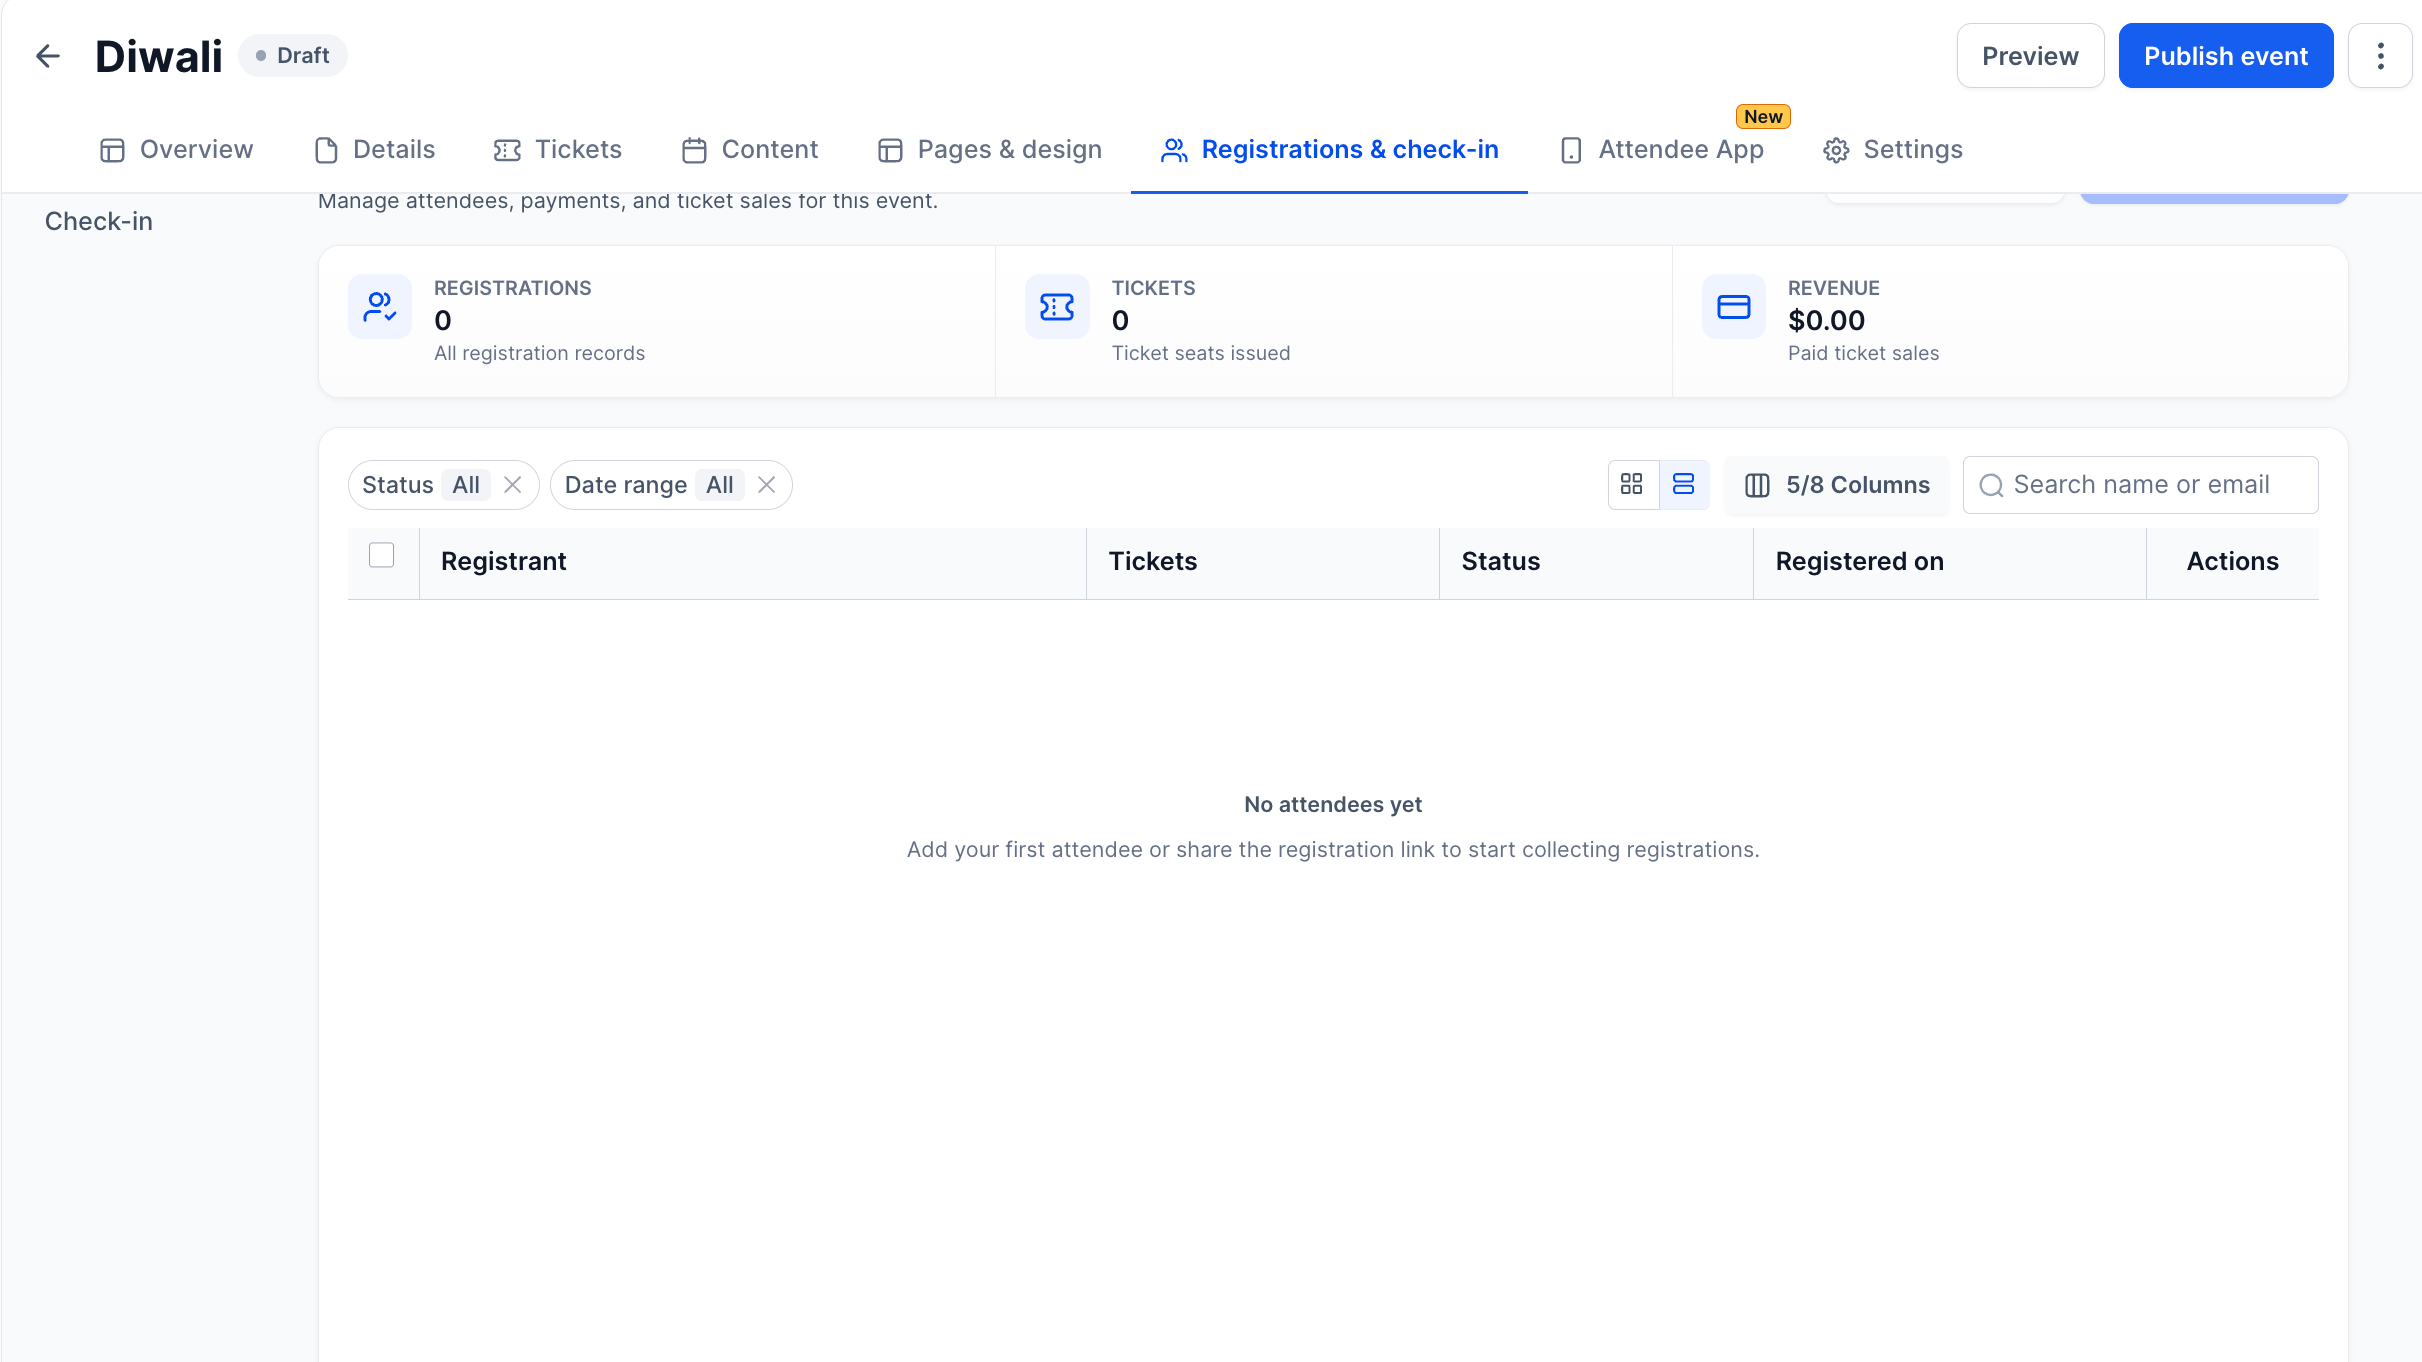
See totals for registrations, tickets issued and revenue, plus a searchable list you can filter by status and date range. Switch views and choose which columns to show.
Add Attendee to register someone manually.
Export CSV to download registrations.
From a row's actions menu: View details, Hide, Resend confirmation (Email, SMS or WhatsApp) or Cancel registration. Refunds for paid tickets are also handled here.
Check-in
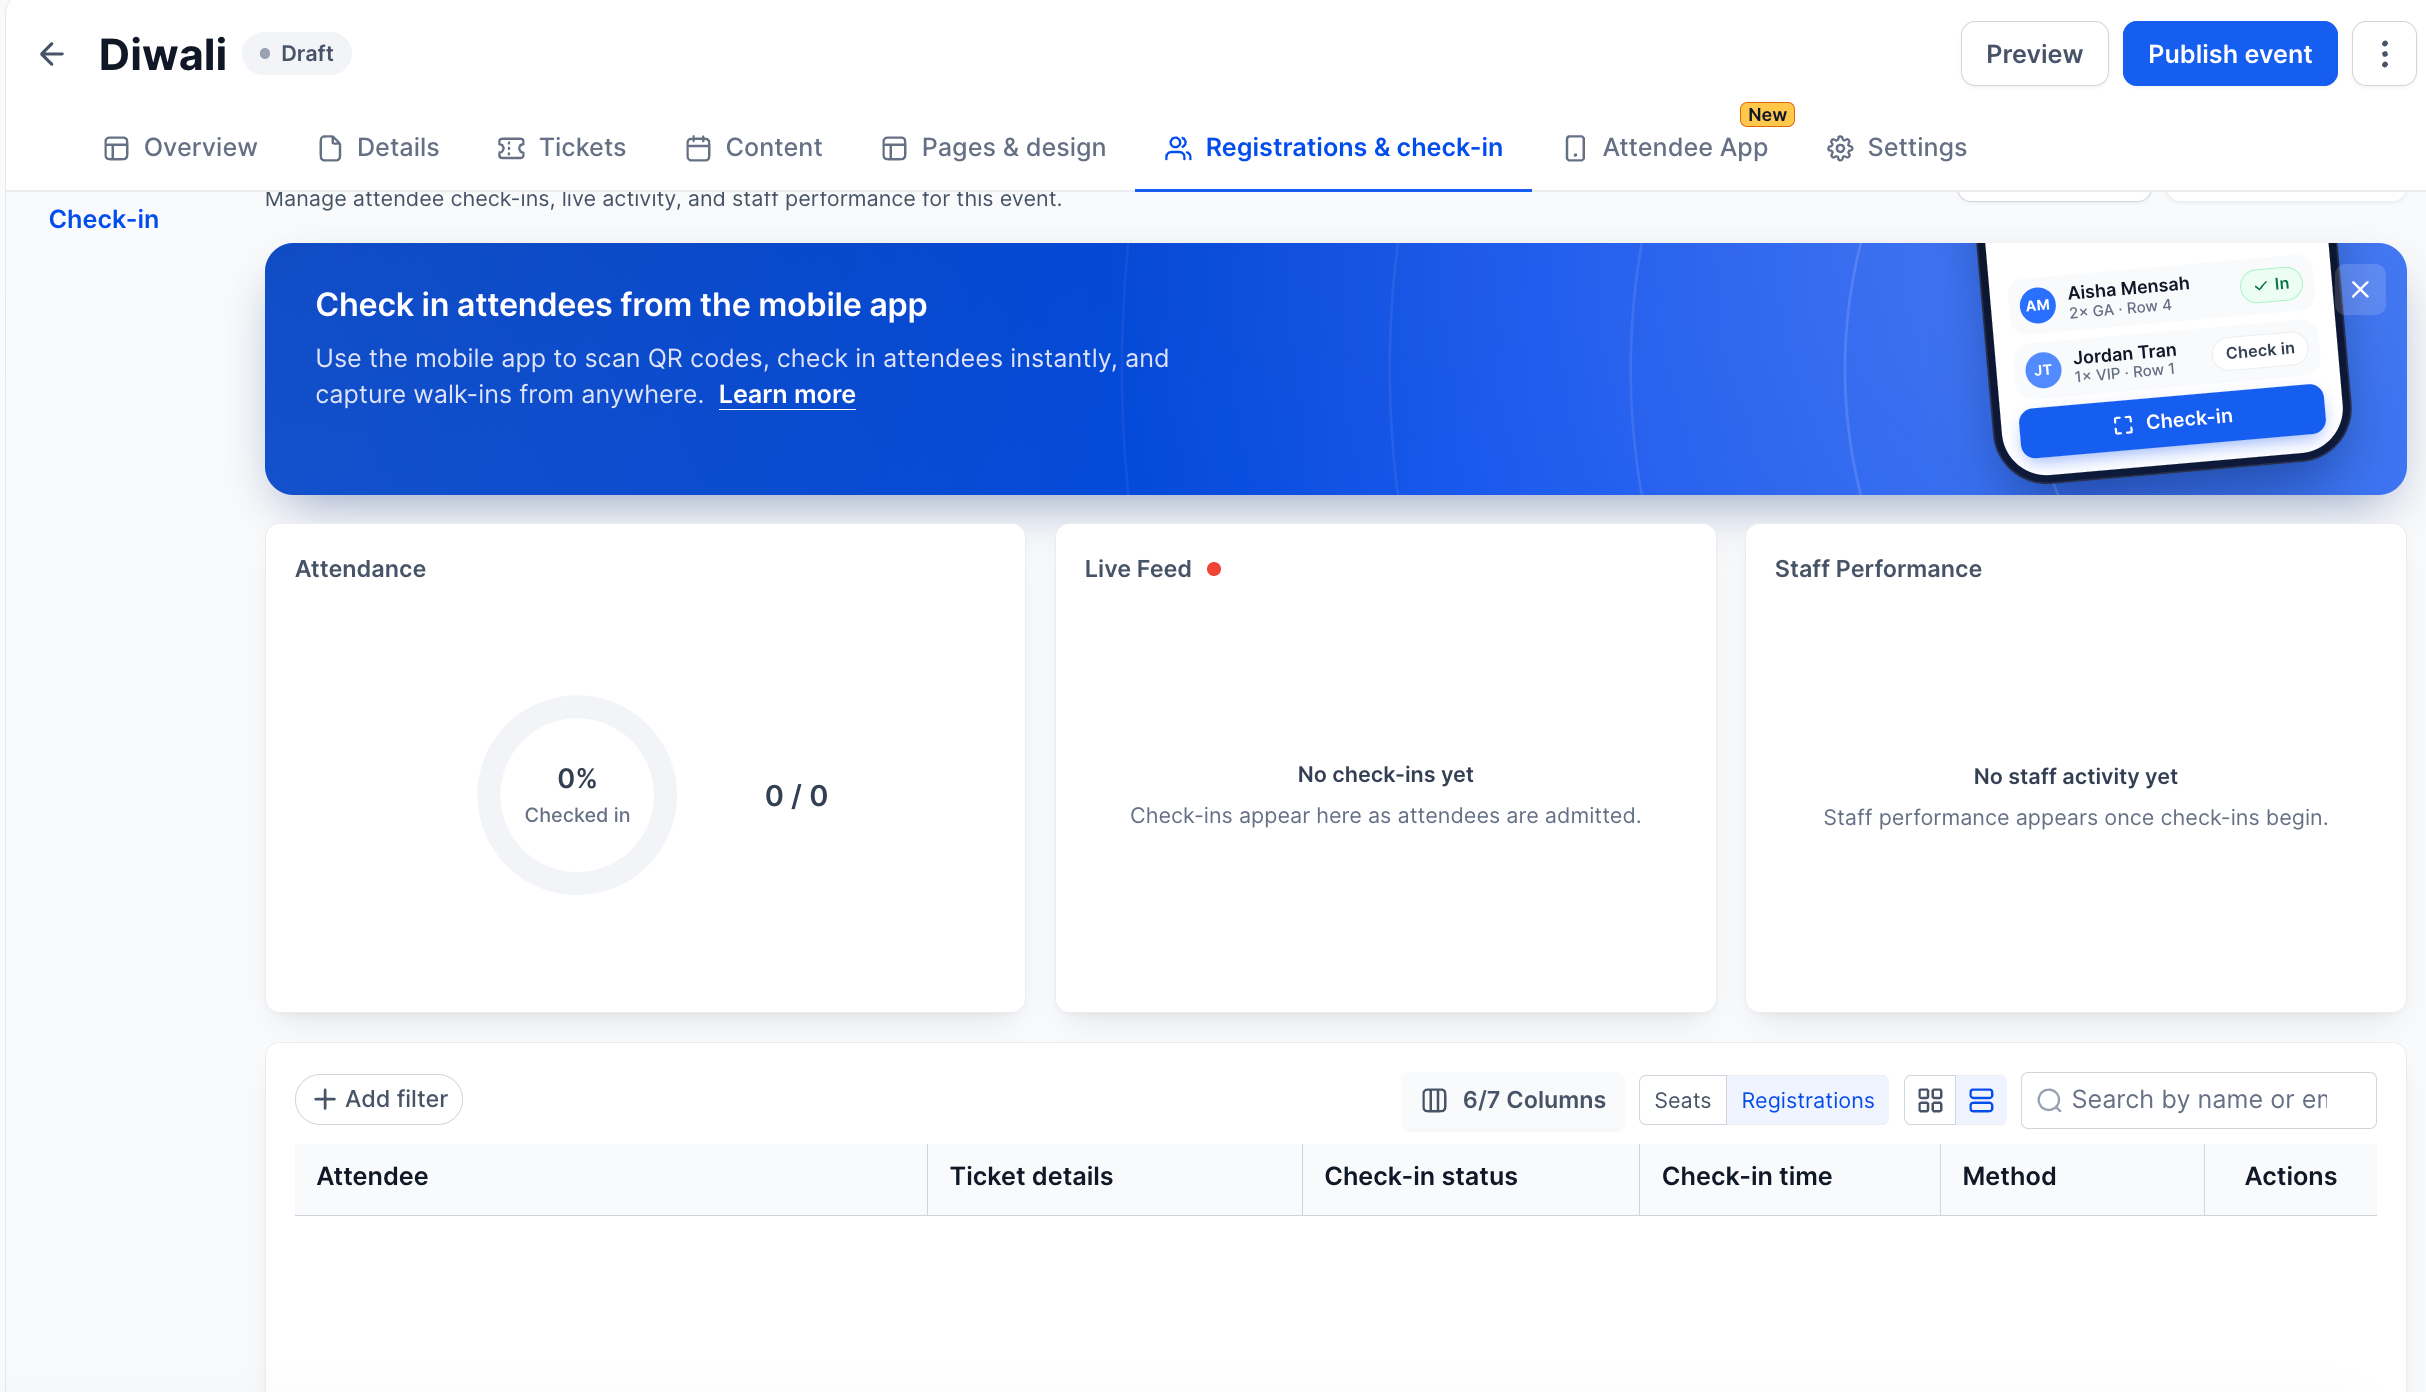
The Check-in view shows attendance by ticket type, a live feed of check-ins, and staff performance.
Use Refresh for the latest numbers and Export CSV to download check-in data.
To check people in, open the Events app in your mobile app, select the event and tap Scan to check in to scan an attendee's QR ticket. Manual check-in and walk-ins are also supported. You choose which payment statuses can check in under Settings → Registration.
Frequently Asked Questions
Q. Do attendees need a separate password?
No. Attendees go from checkout straight into the event in the Client Portal.
Q. What happens to people who registered before I turned on the app?
They get access automatically when you turn on Attendee app access.
Q. Can I keep an event private?
Yes. Leave Make this event discoverable off. Only the people taking part will see it.
Q. Can I show a session only to VIP ticket holders?
Yes. In the session, use Show only to attendees with these tickets.
Q. Where can attendees use the app?
On the web at your Client Portal domain, in the Client Portal mobile app on iOS and Android, or in your branded app.
Q. Can I change an event from Ticketed to RSVP?
No. Create a new event, or use Duplicate as RSVP on the Details tab.
Q. Do several ads in the same spot all show?
Yes. Multiple ads on the same page rotate randomly.
Q. Can attendees hide themselves from the attendee list?
Yes. Members choose whether they appear in the attendee list.
Was this article helpful?
That’s Great!
Thank you for your feedback
Sorry! We couldn't be helpful
Thank you for your feedback
Feedback sent
We appreciate your effort and will try to fix the article