HighLevel Events lets you create, publish, and manage Ticketed and RSVP events from your sub-account. Use this guide to configure registration, tickets, schedules, public pages, notifications, and attendee check-in.
Note: With the new Custom Navigation, the location of this feature may have changed. To find it, navigate to Client Apps → Events
TABLE OF CONTENTS
- What are Events?
- Event Types and Locations
- Multilingual Support for Events
- How To Setup Events
- Attendee Experience
- Event Notifications
- Frequently Asked Questions
- Related Articles
What are Events?
Events provides a single place to create public event pages, manage registrations, sell tickets, and check in attendees. Unlike Event Calendars and Community Events, it supports standalone public-facing events with ticketing, schedules, speakers, and attendee tracking.
Event Types and Locations
Choose the event type and location that match how attendees will register and join. These choices determine whether payment and location details are needed.
| Category | Option | What It Does |
|---|---|---|
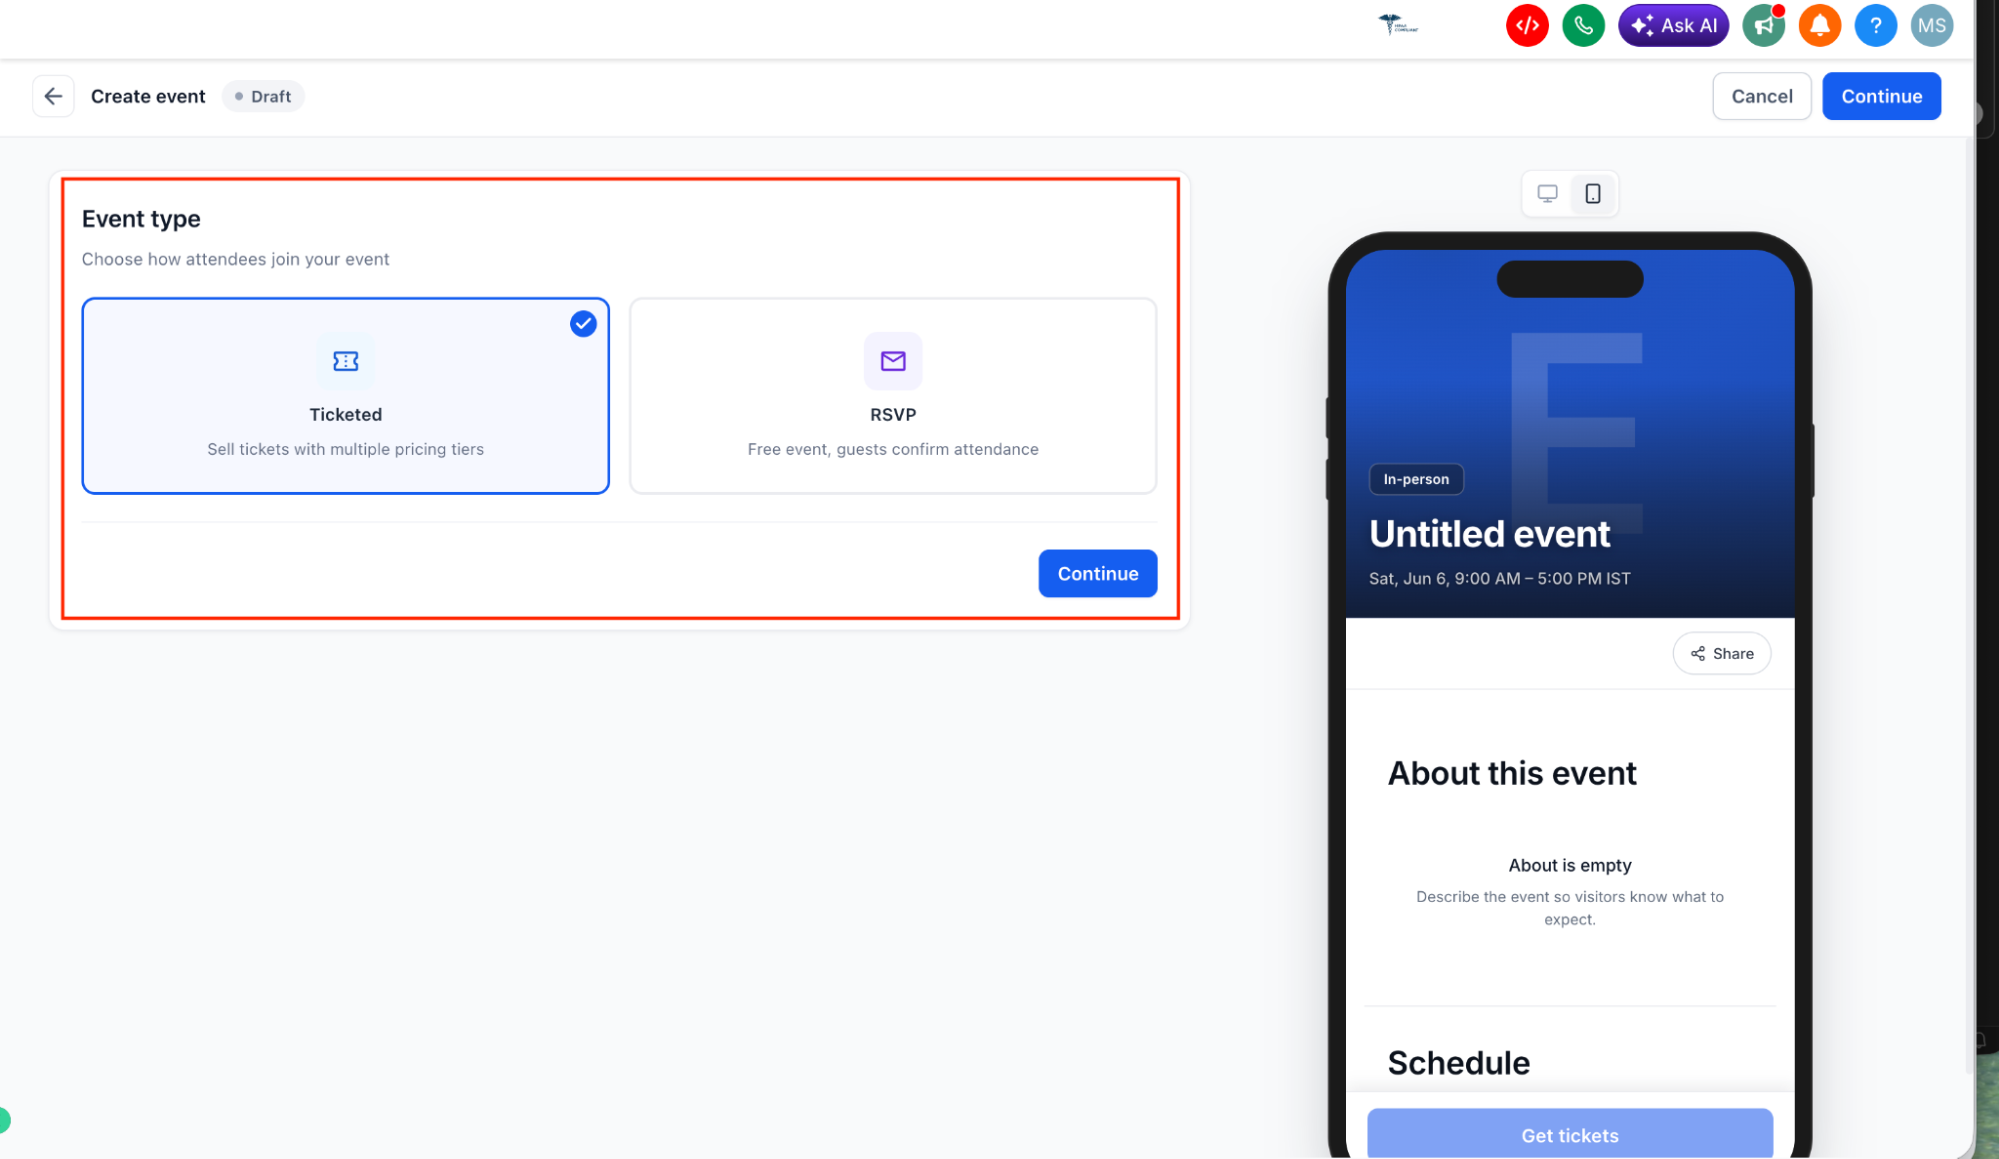
| Event Type | Ticketed | Offers free or paid tickets through a checkout flow. |
| Event Type | RSVP | Collects free registrations without payment. |
| Location | In-person | Displays a venue address, map, and directions. |
| Location | Online | Provides joining instructions and a meeting link. |
Important: You cannot switch between Ticketed and RSVP after creating an event.
Multilingual Support for Events
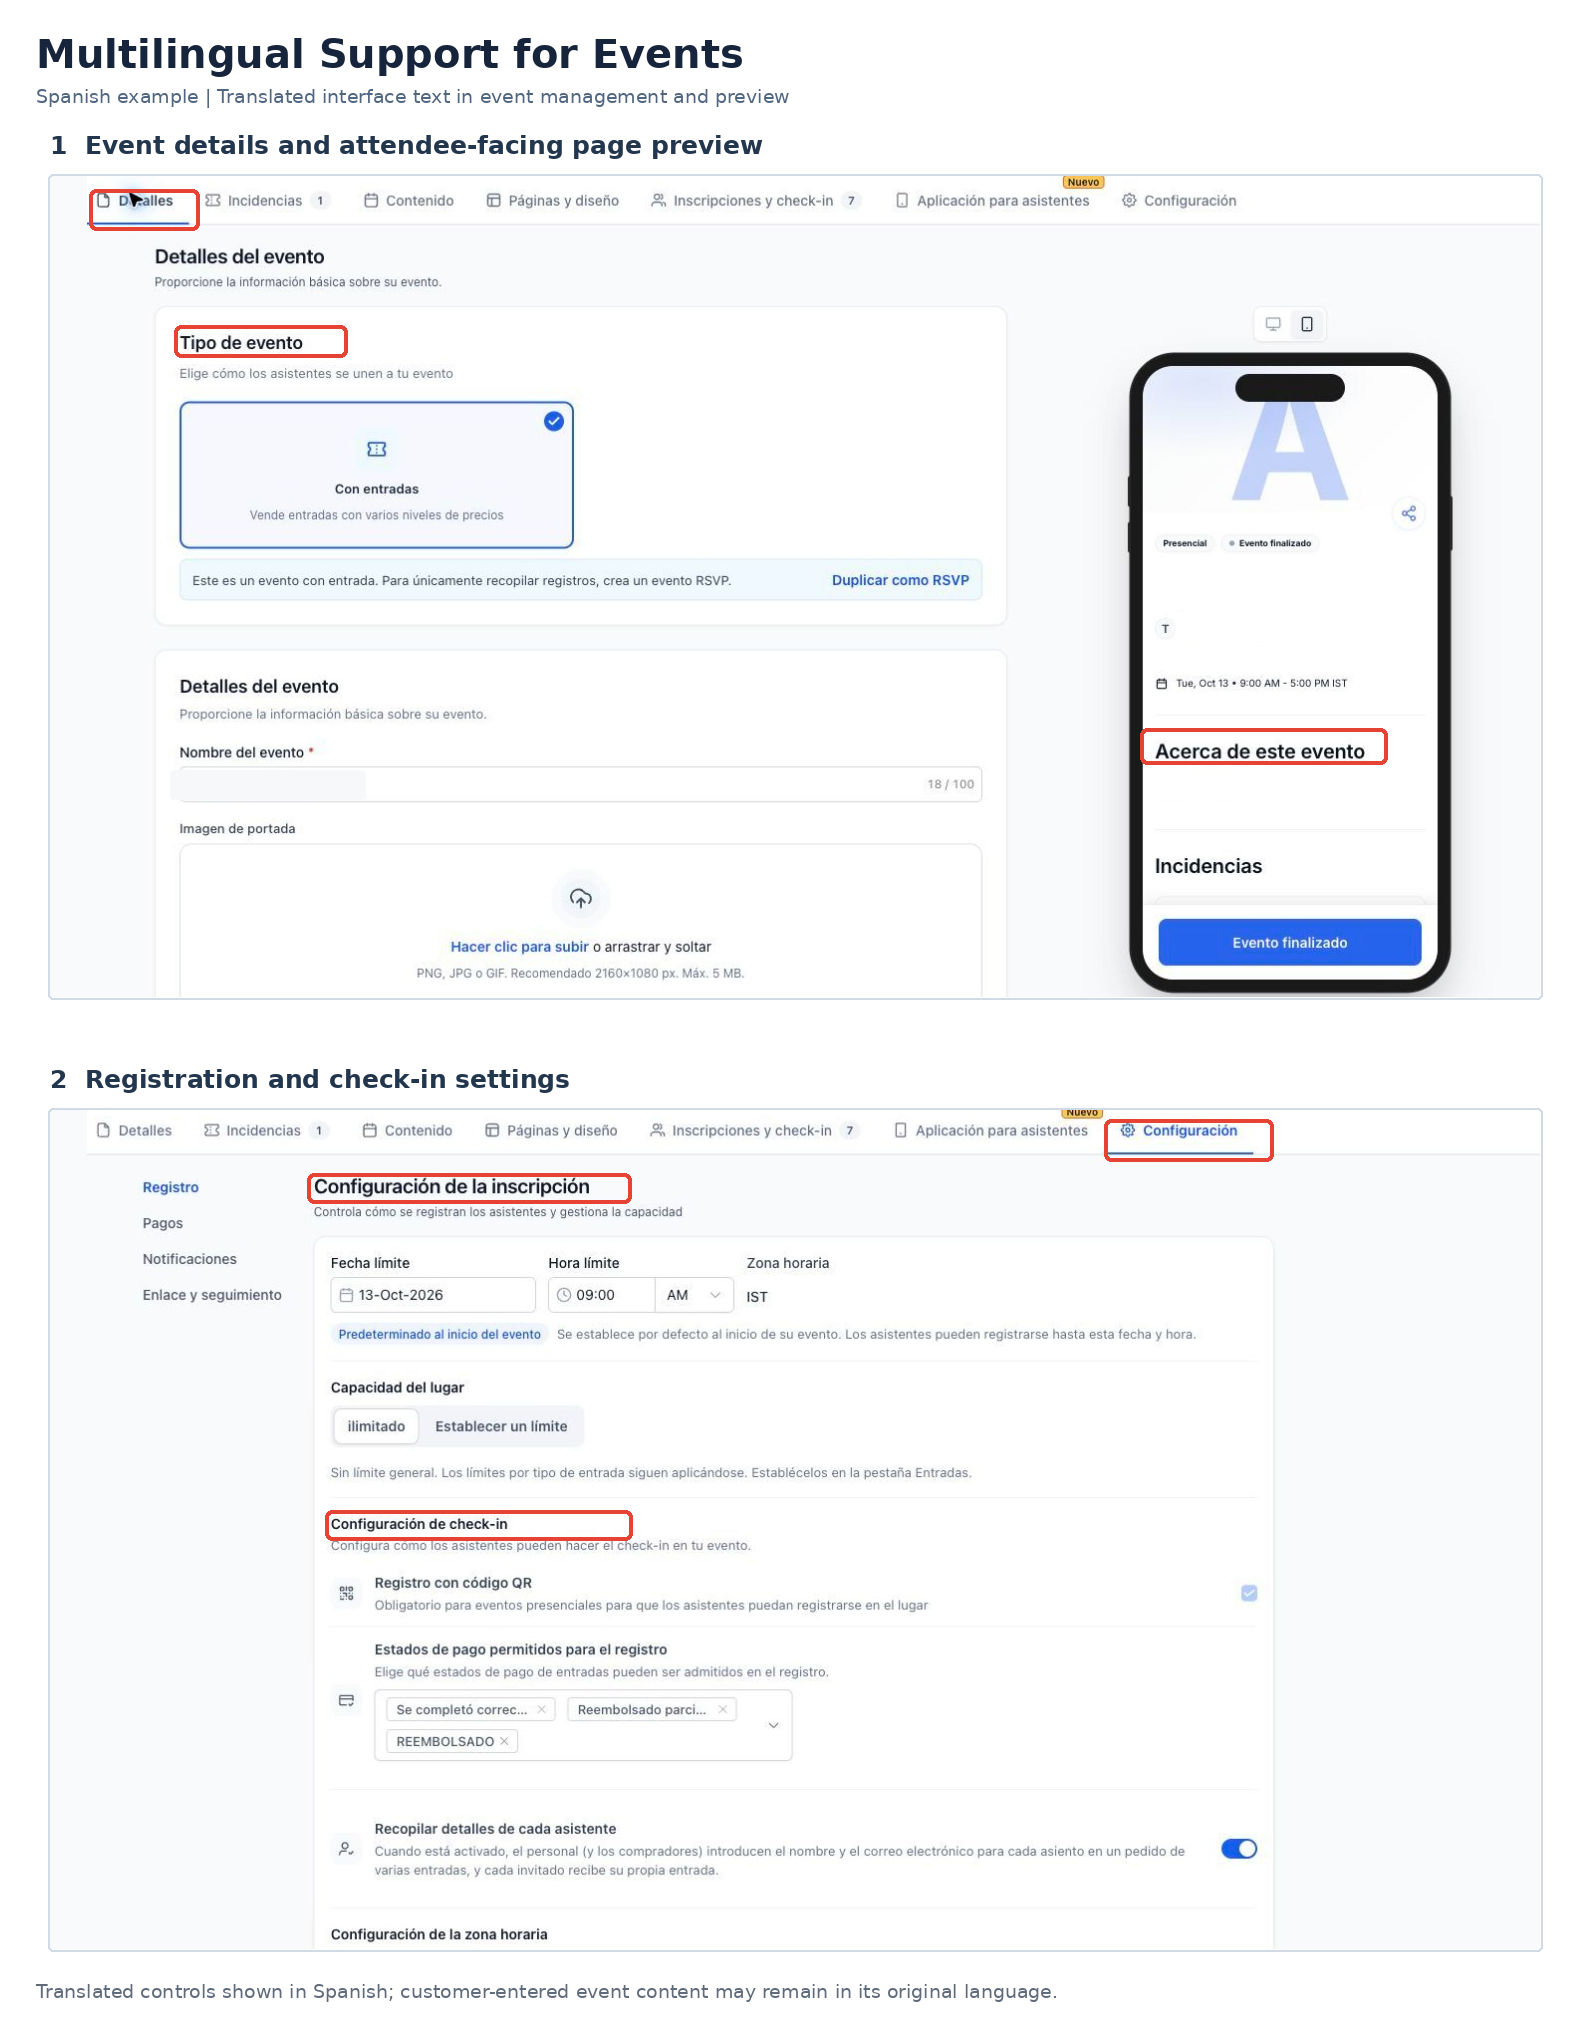
Events displays available translations in the user's selected language, making event management and registration easier for international audiences. Missing translations appear in English.
Translated Experiences
Multilingual support covers both organizers and attendees:
- Organizers: Event creation, management, and settings.
- Attendees: Registration, checkout, tickets, and the Attendee App.
- Interface text: Labels, tooltips, validation messages, and empty states.
Supported Languages and Preferences
Events supports 13 languages: English, Spanish, French (Canada), French (France), Portuguese (Brazil), Portuguese (Portugal), German, Dutch, Italian, Danish, Norwegian, Finnish, and Swedish.
For HighLevel users, language settings are available at:
- Sub-account default: Sub-Account View > Settings > Business Profile > Platform Language.
- Individual preference: Sub-Account View > Settings > My Profile > Platform Language.
Events uses available translations for the selected language and falls back to English for untranslated text.
How To Setup Events
Follow the setup sequence to create your event, configure attendee registration, publish the page, and manage participants. Optional settings can be completed as needed.
Create a New Event
Start by defining your event type, public details, timing, location, and organizer.
Step 1: Open Events
From Sub-Account View > Memberships > Events, select + Create Event. The Events dashboard also lets you search and filter existing events by status.

Step 2: Choose Your Event Type
Select Ticketed for free or paid ticket checkout, or RSVP for free registration without payment.
Step 3: Add Event Details
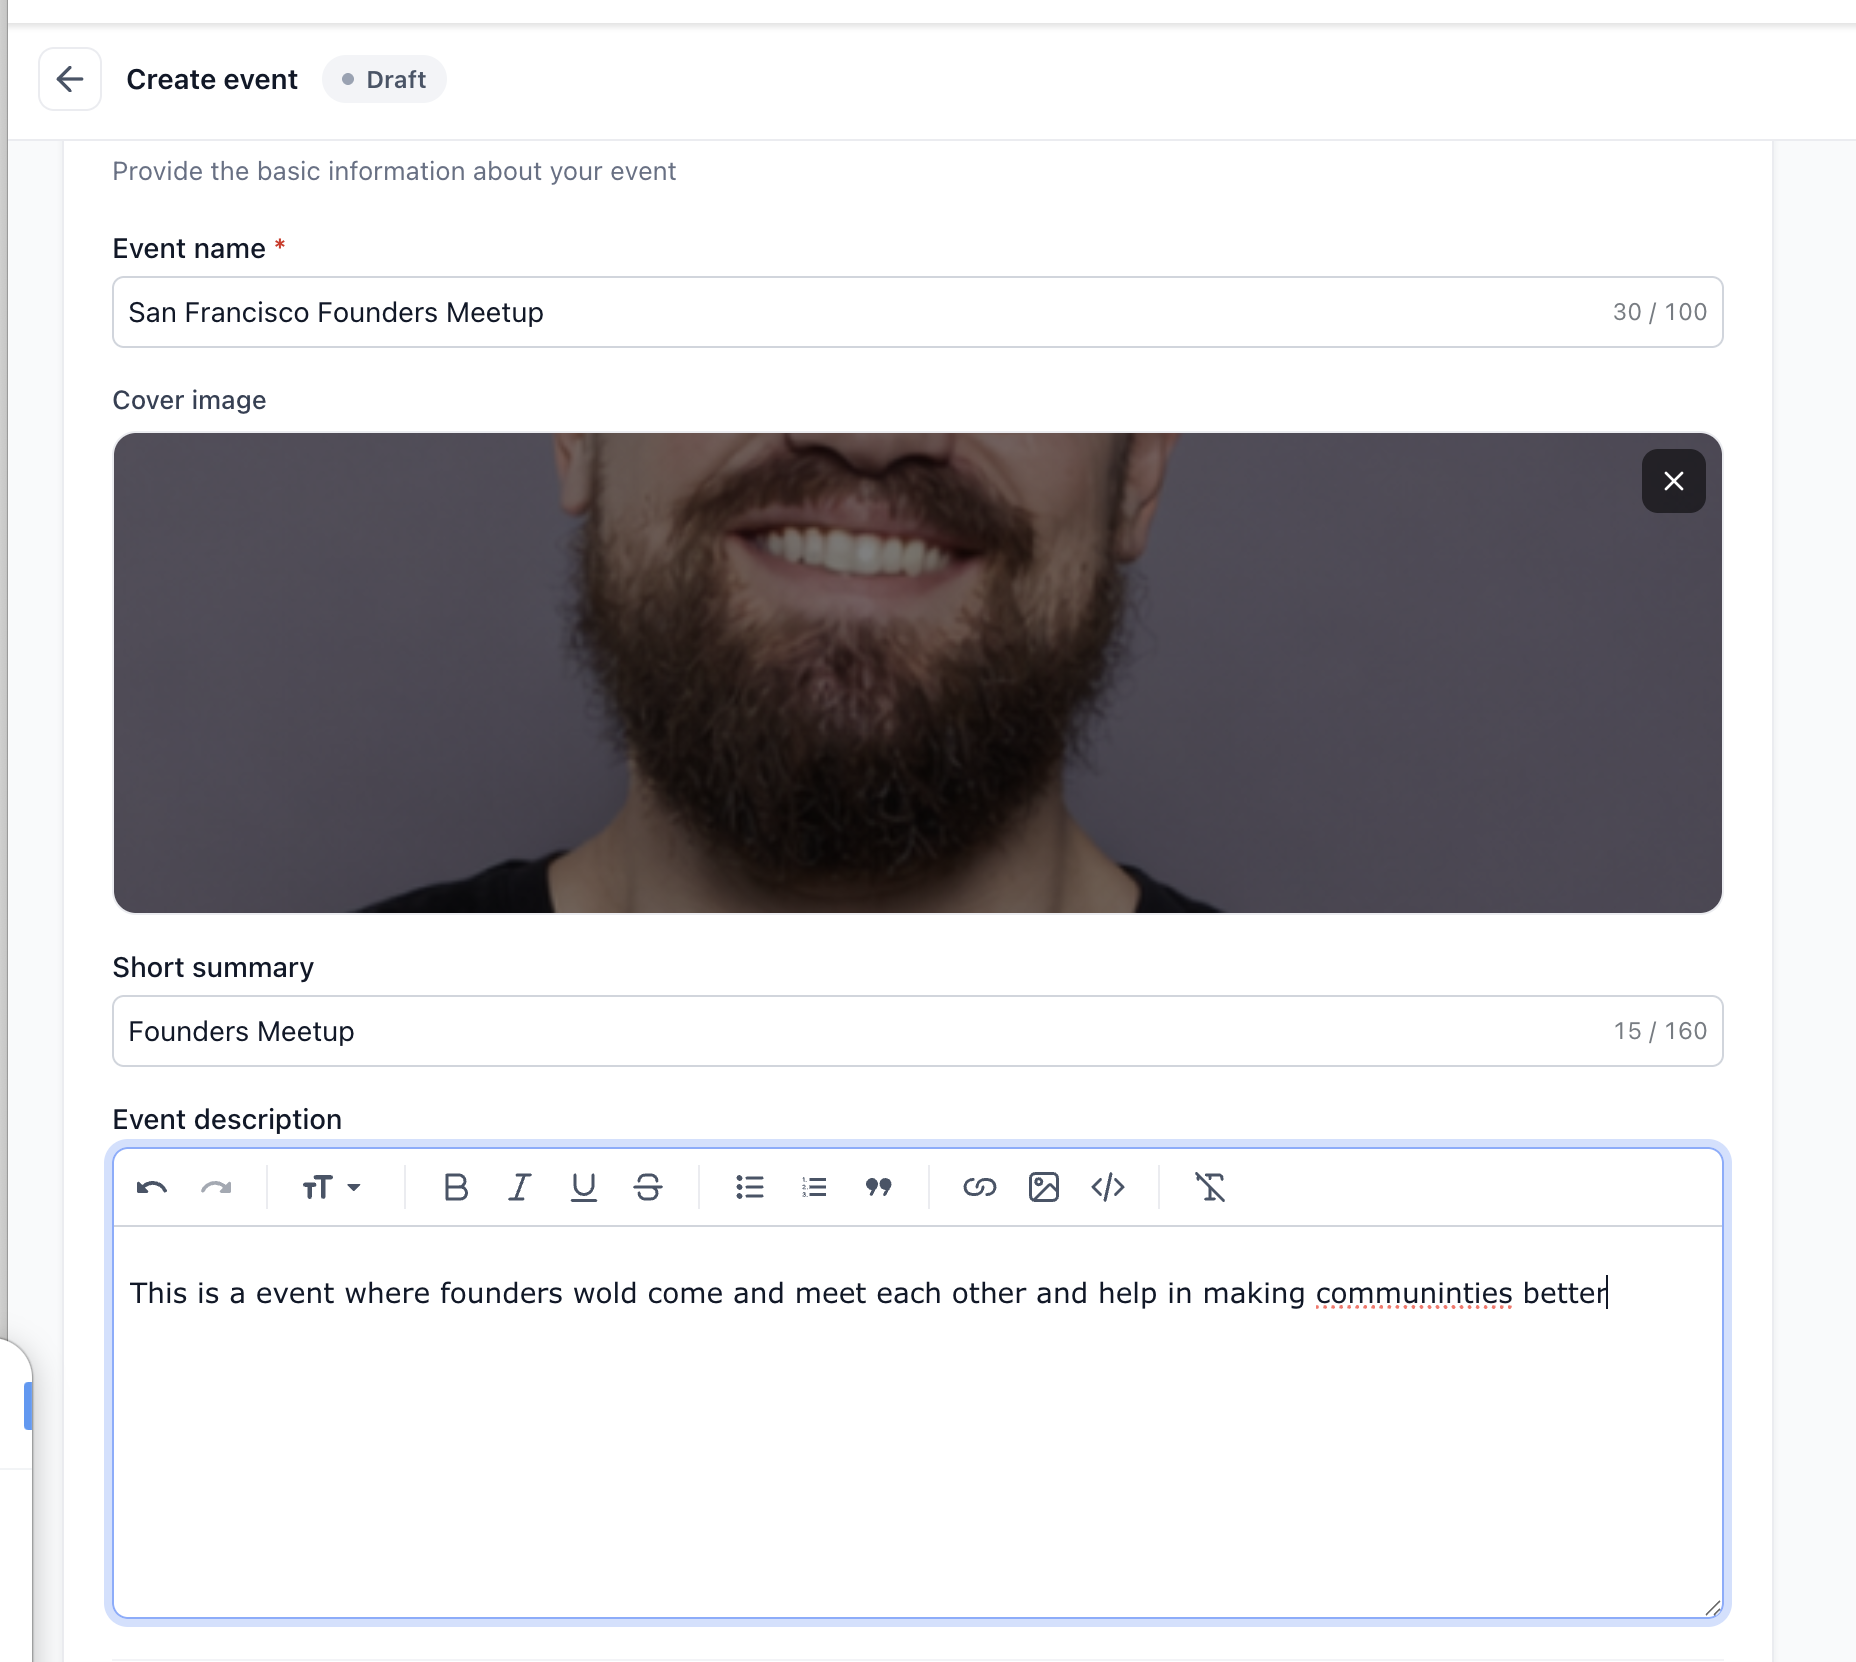
Complete the event information shown on the public page:
- Event name: Up to 100 characters.
- Cover image: PNG, JPG, or GIF; recommended 1920 × 1080 px; maximum 5 MB.
- Short summary: Up to 160 characters.
- Description: Add formatted text, links, lists, or images.
Step 4: Set the Date and Time
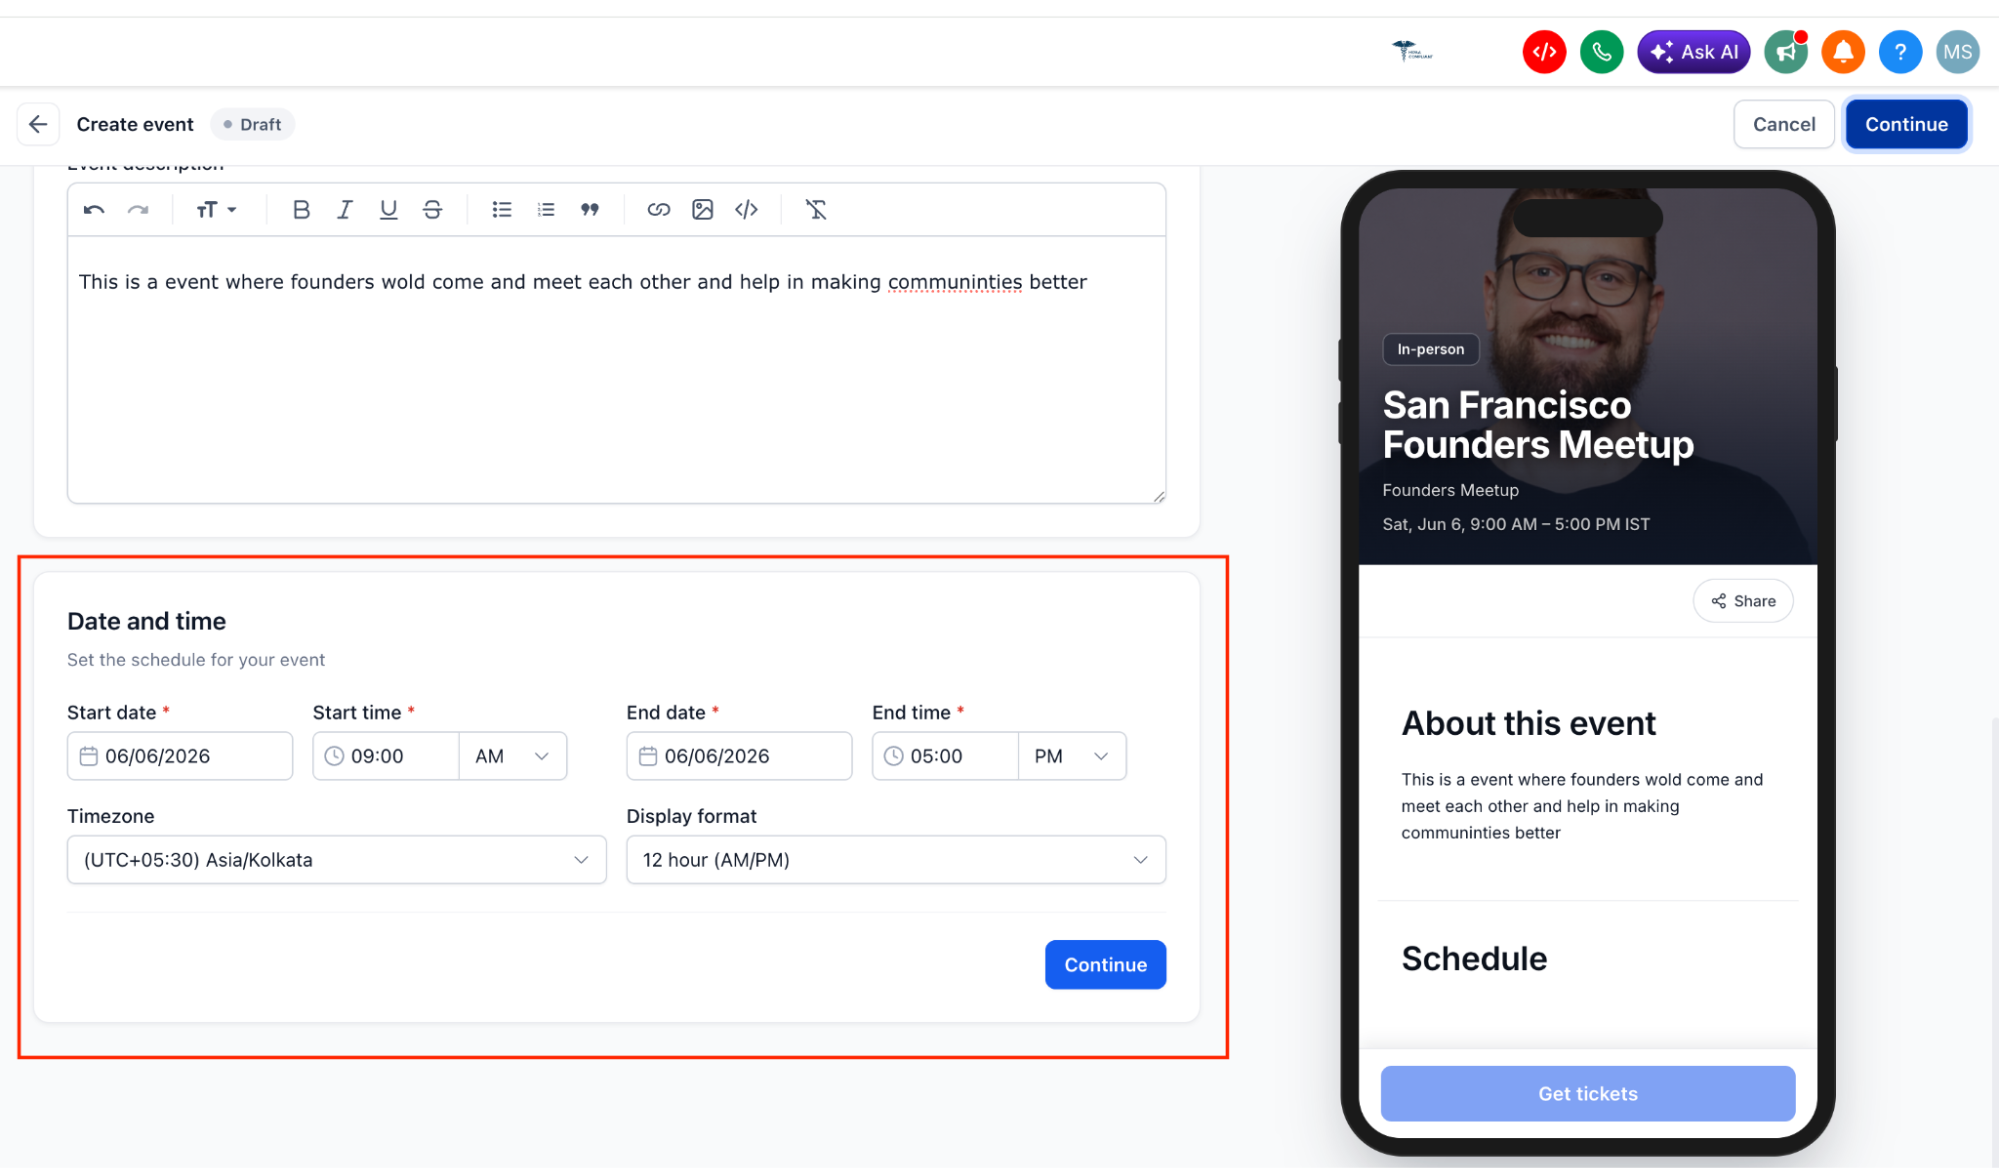
Enter the start and end dates and times, select the event Timezone, and choose a 12-hour or 24-hour Display format. Ticket sales, sessions, and coupon periods use the selected event timezone.
Step 5: Set the Location
- In-person: Enter a physical address. The location and country information appear across relevant attendee pages, tickets, maps, and notifications.
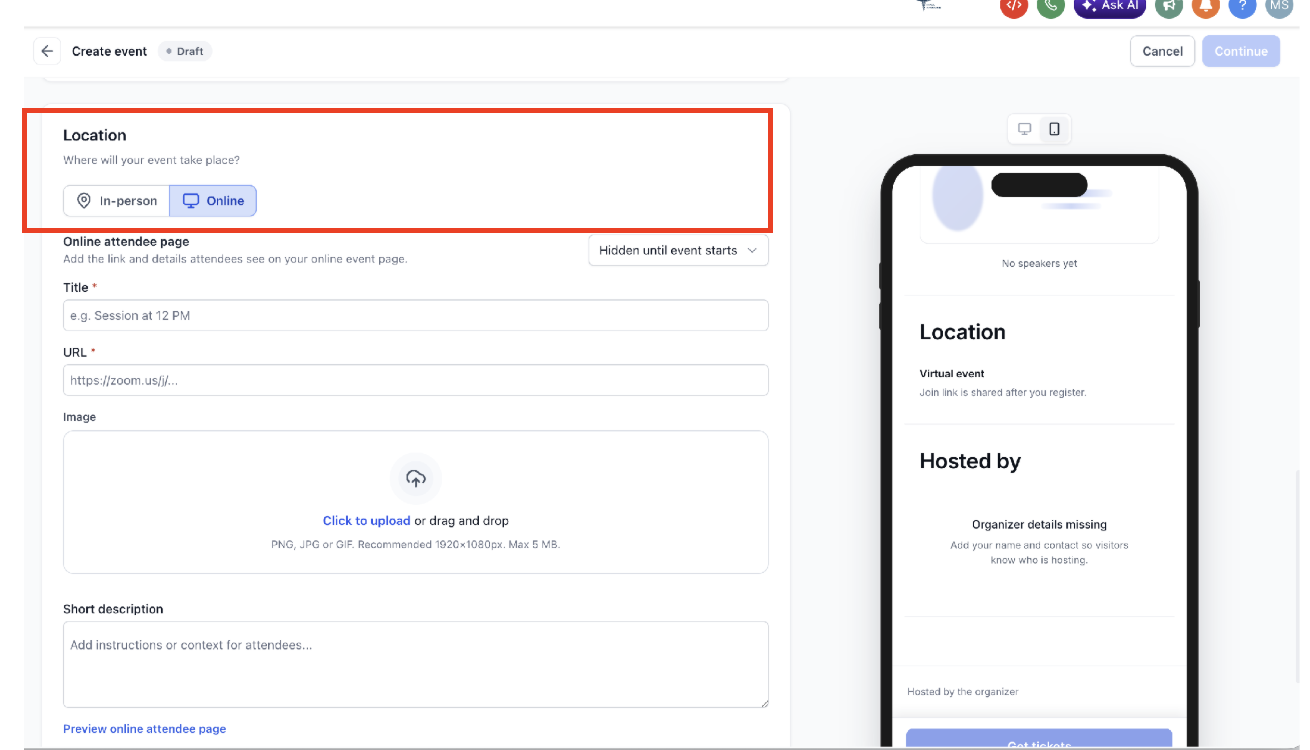
- Online: Add a session title, meeting URL, optional image, and joining instructions. Keep the link hidden until the event begins or use a Custom schedule to control its visibility.
Step 6: Add Organizer Information
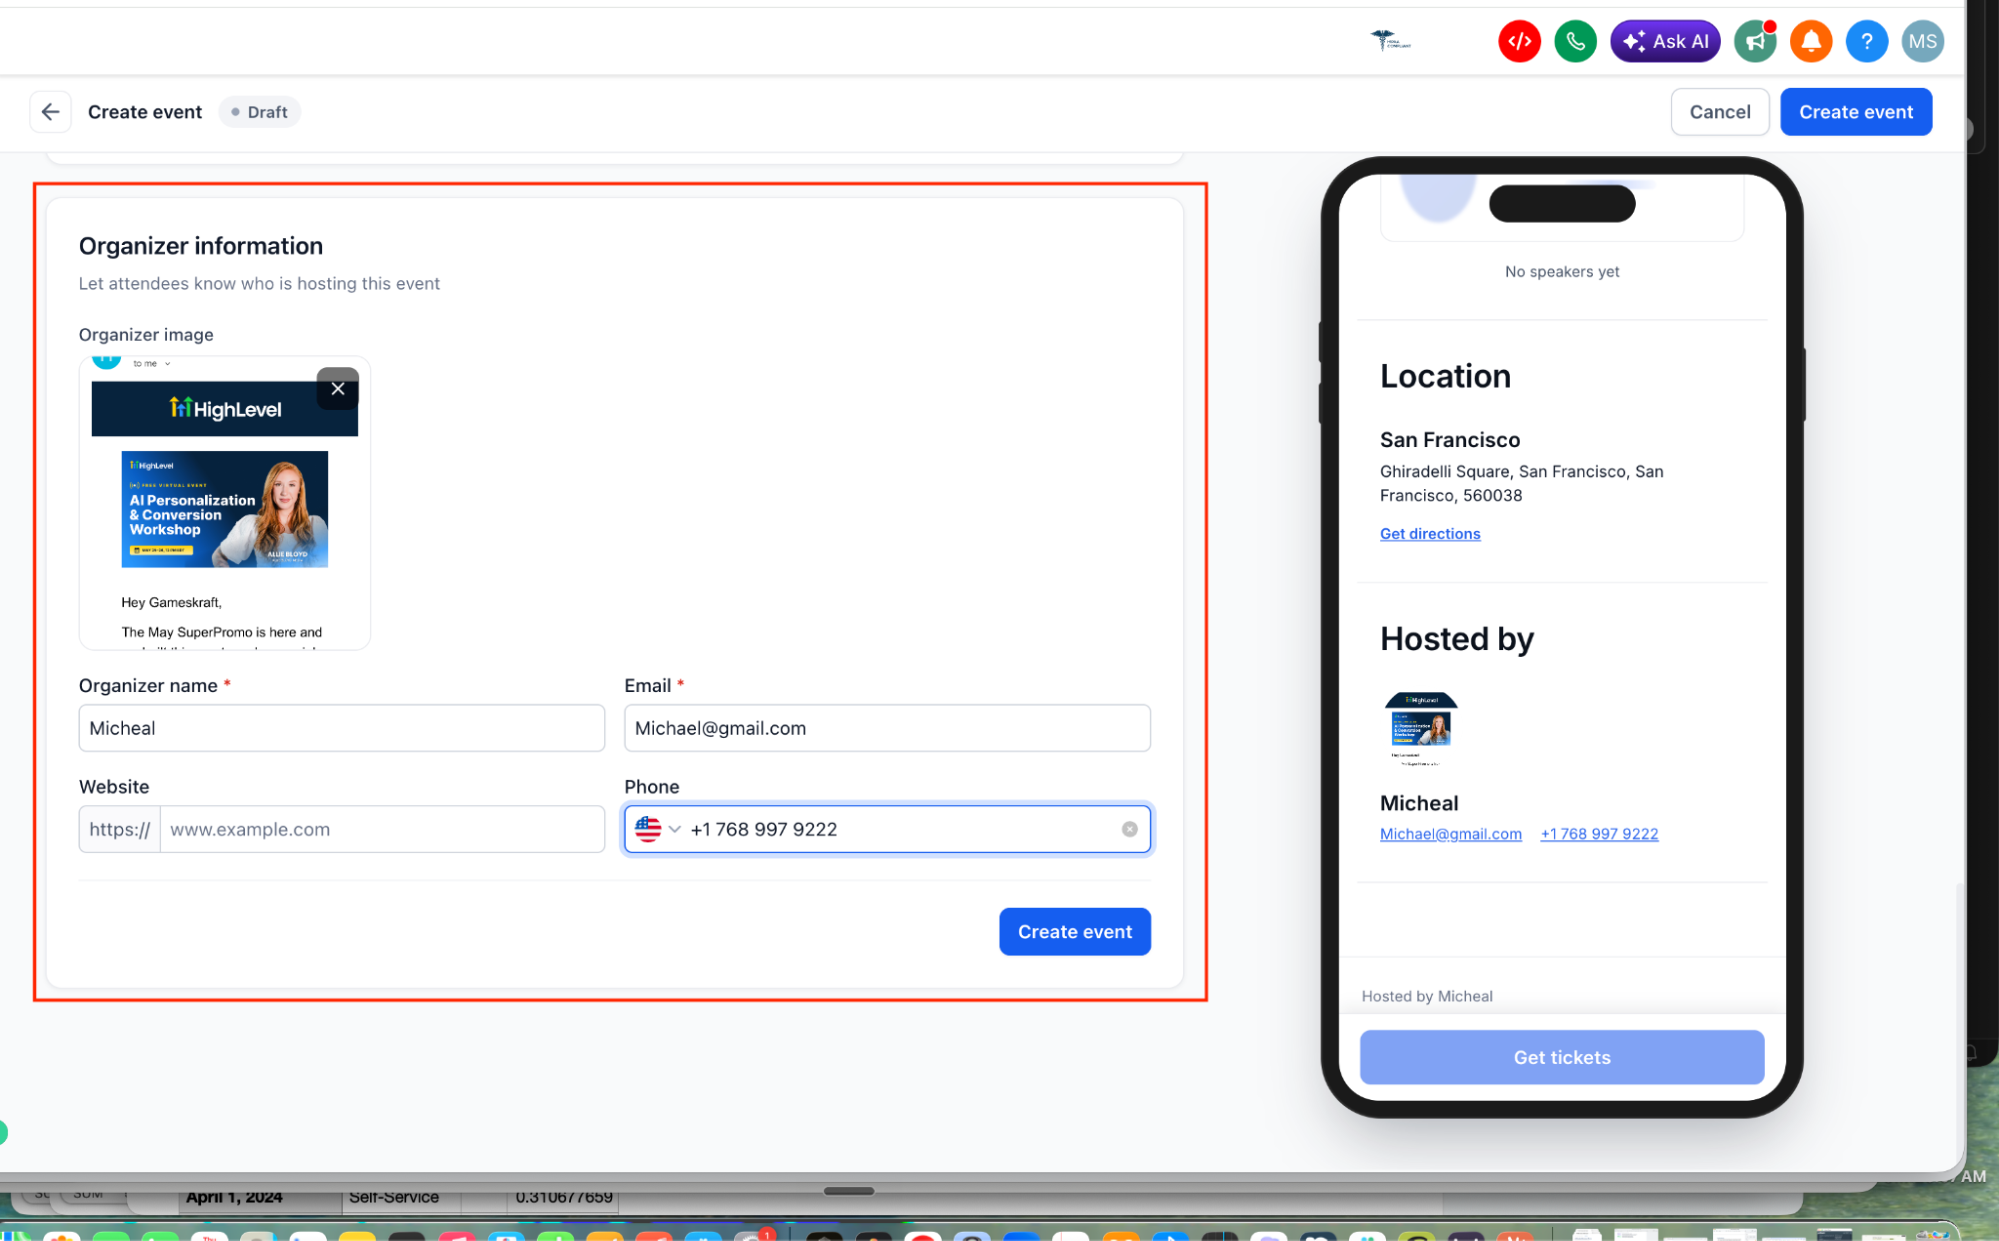
Enter the required Organizer name and Email address. You can also add a website, phone number, and organizer image (recommended 400 × 400 px, maximum 5 MB).
Select Create event. The event is saved as a Draft until published.
Configure the Event
From Sub-Account View > Memberships > Events, select the event to open its dashboard. Configure the relevant tabs before publishing.
Step 7: Create Ticket Types
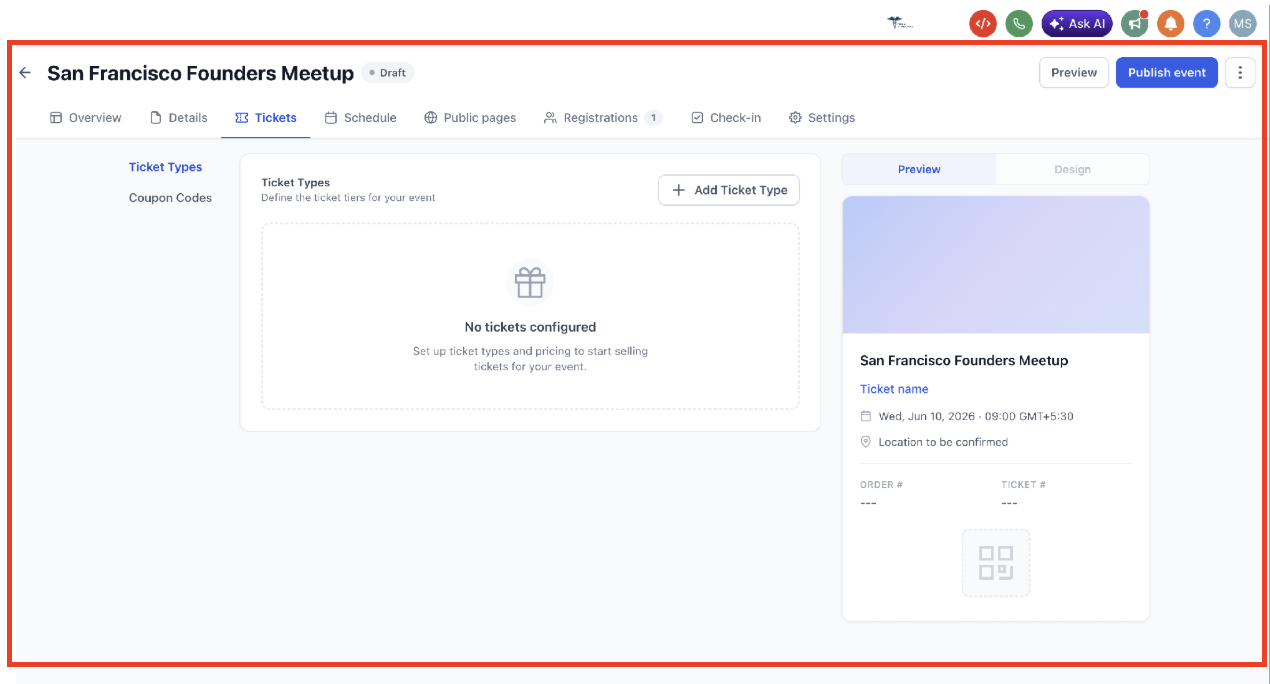
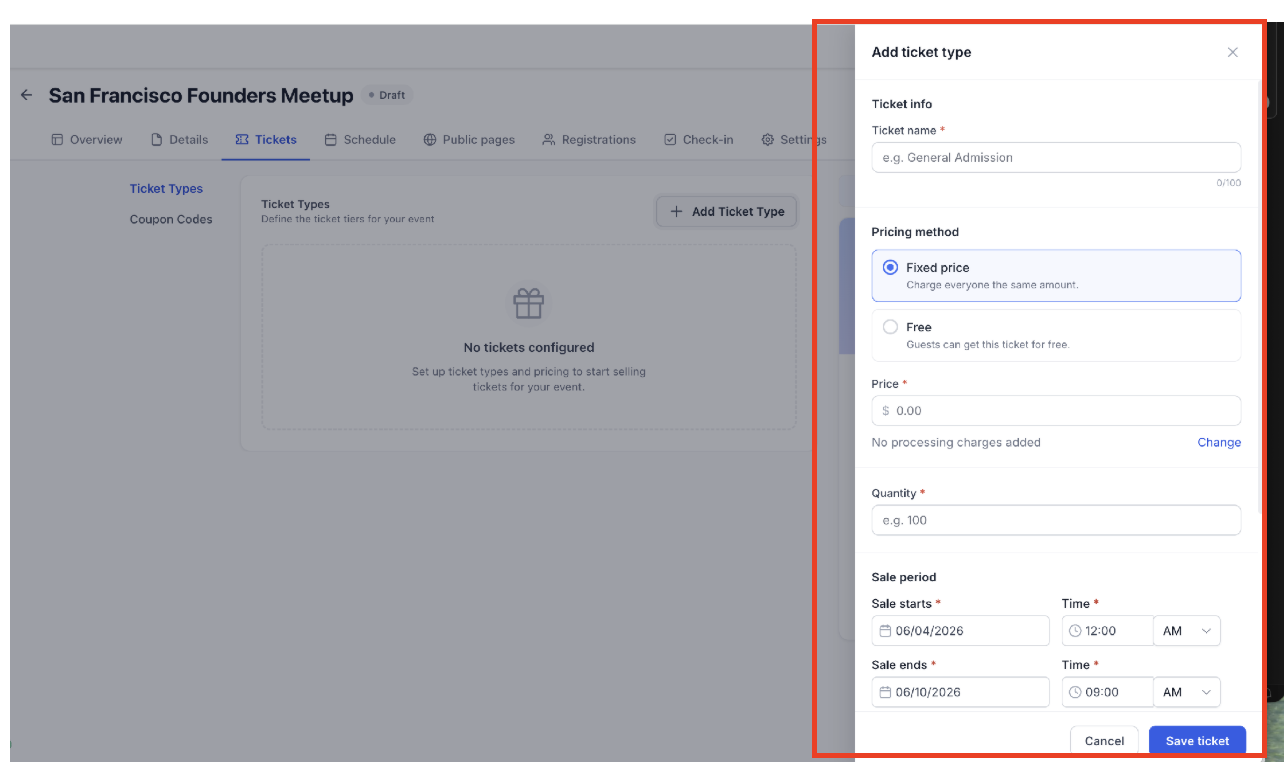
For Ticketed events, select Tickets > + Add Ticket Type. Set the ticket name, Fixed price or Free pricing, quantity, and sale period. You can mix free and paid tickets.
The Tickets tab shows each ticket's status, including On Sale, Paused, Hidden, Not Yet on Sale, and Sale Ended. Sale periods use the event timezone.
Step 8: Add Coupon Codes (Optional)
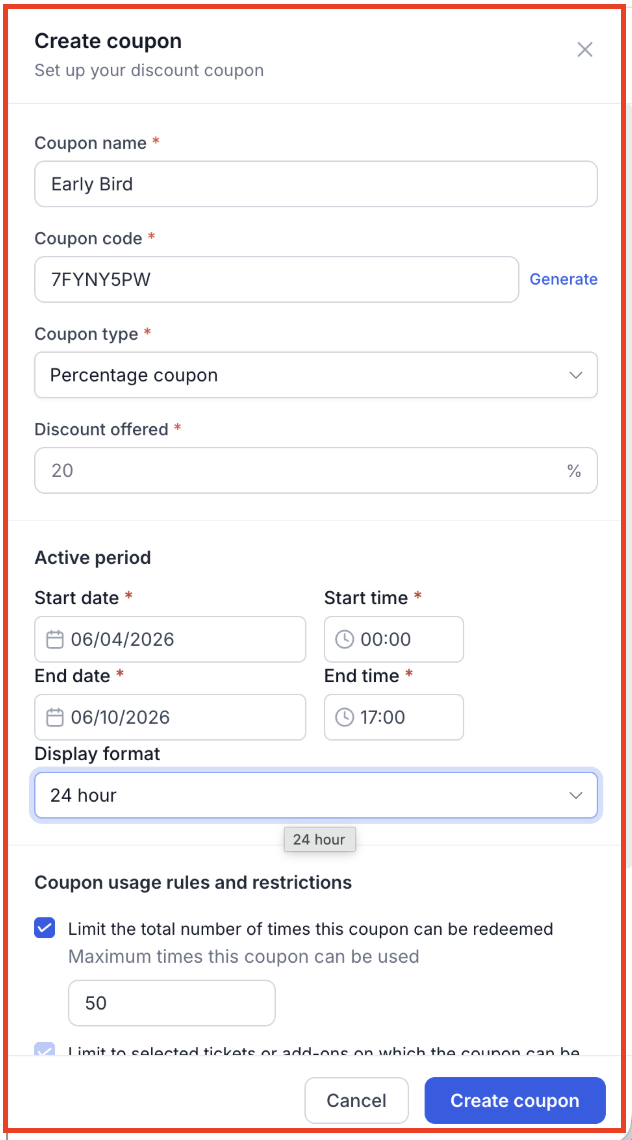
Select Tickets > Coupon Codes to configure a coupon name, code, percentage discount, active period, and optional usage limits or ticket restrictions. Attendees enter the code using Have a coupon code? during ticket selection.
Note: Event coupon codes apply only to Events.
Step 9: Add Schedule and Speakers (Optional)
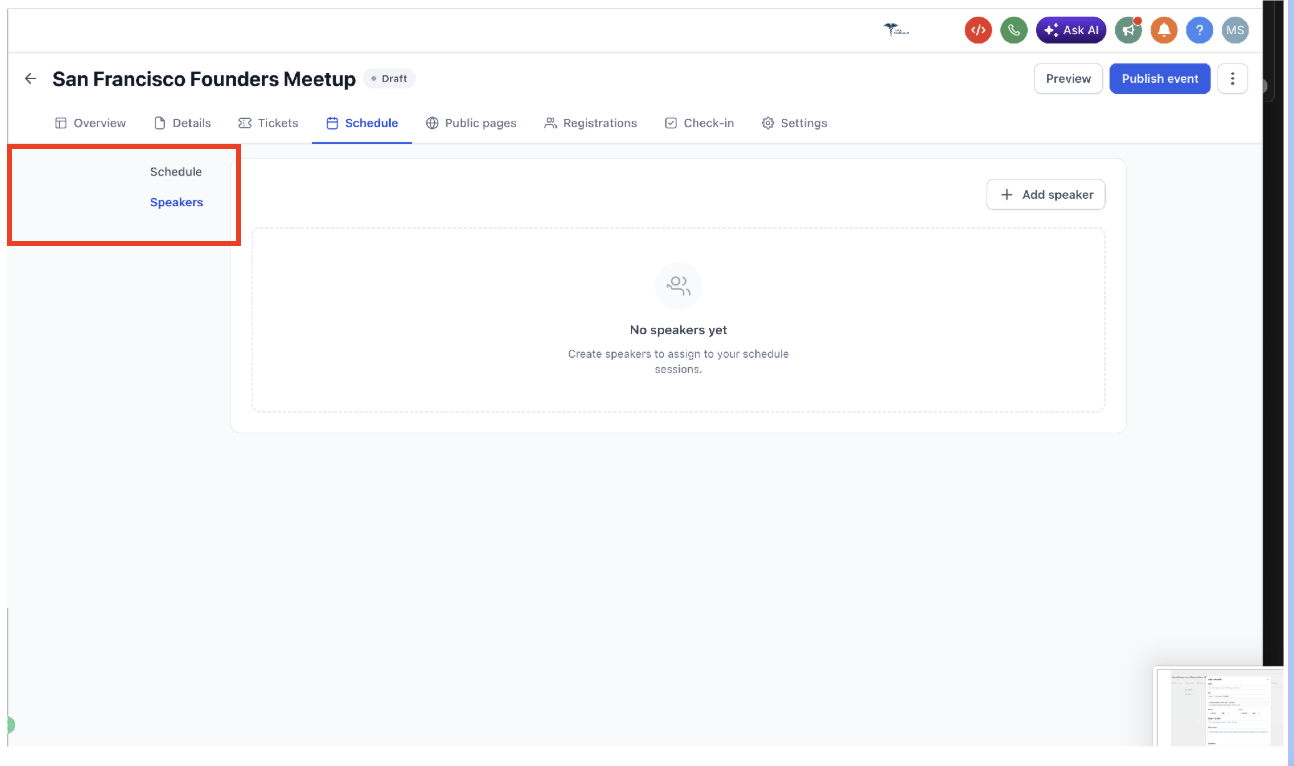
In Schedule, select Add schedule to enter a session title, time within the event window, stage or location, description, and assigned speakers.
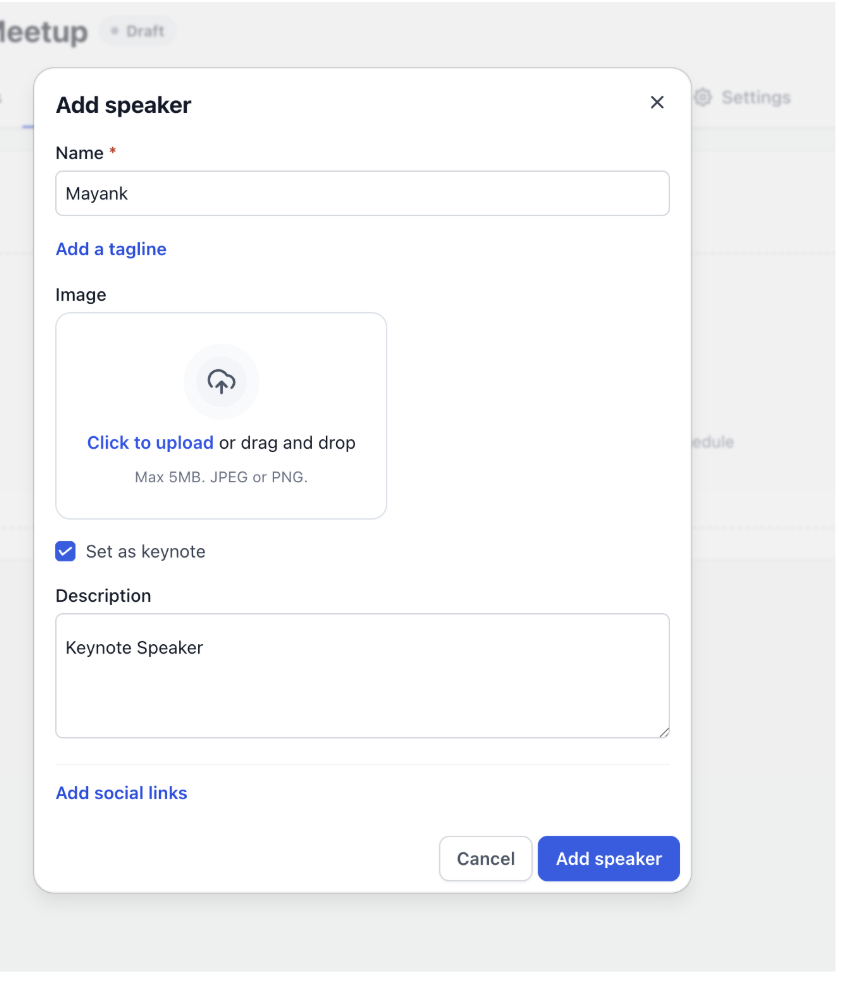
In the Speakers sub-navigation, select + Add speaker to enter the speaker's name, photo, tagline, description, keynote status, and social links.
Step 10: Customize the Public Event Page
Select Pages & Design to configure event details, schedule, and checkout pages. Customize page sections, colors, typography, and templates.
In Checkout, configure the title and additional form fields. First name, last name, and email remain required. Use the mobile and desktop previews to review the result.

Step 11: Configure Settings and Sharing
Select Settings and review:
- Registration: Deadline (defaults to event start), total capacity (0 for unlimited), and check-in eligibility.
- Live mode: Enable before accepting real payments. With Live mode off, the event operates in test mode.
- Notifications: Organizer and attendee emails, sender name, and sender email.
- Link & Tracking: URL slug, Meta Pixel and event mapping, favicon, and embed code. Favicon uploads support PNG or JPG up to 5 MB.

Step 12: Publish your Event
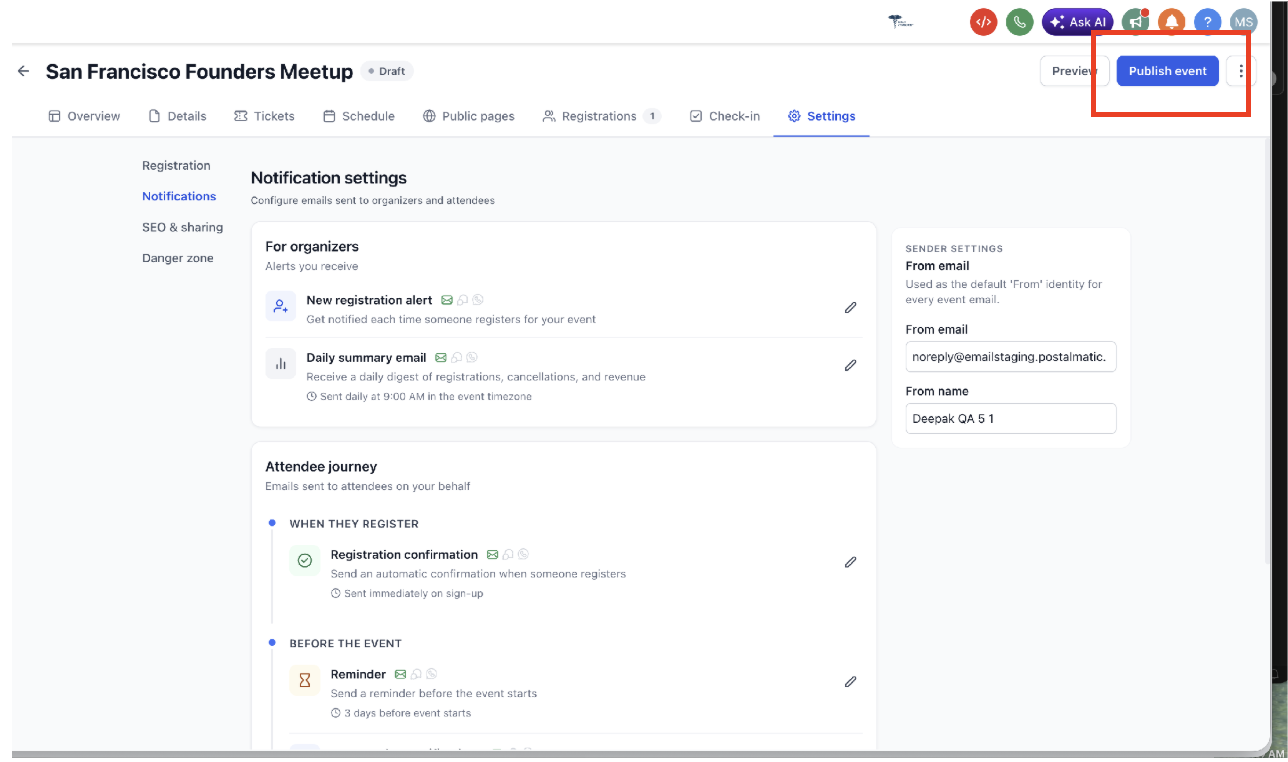
Select Publish event to make the public registration page available. After publishing, use the event's three-dot menu to share or duplicate it, unpublish it while keeping registrations, archive it, or delete it permanently.
Manage the Event
After publishing, use the event dashboard to review registrations, manage attendees, and handle check-in.
Step 13: Manage Registrations and Check-in
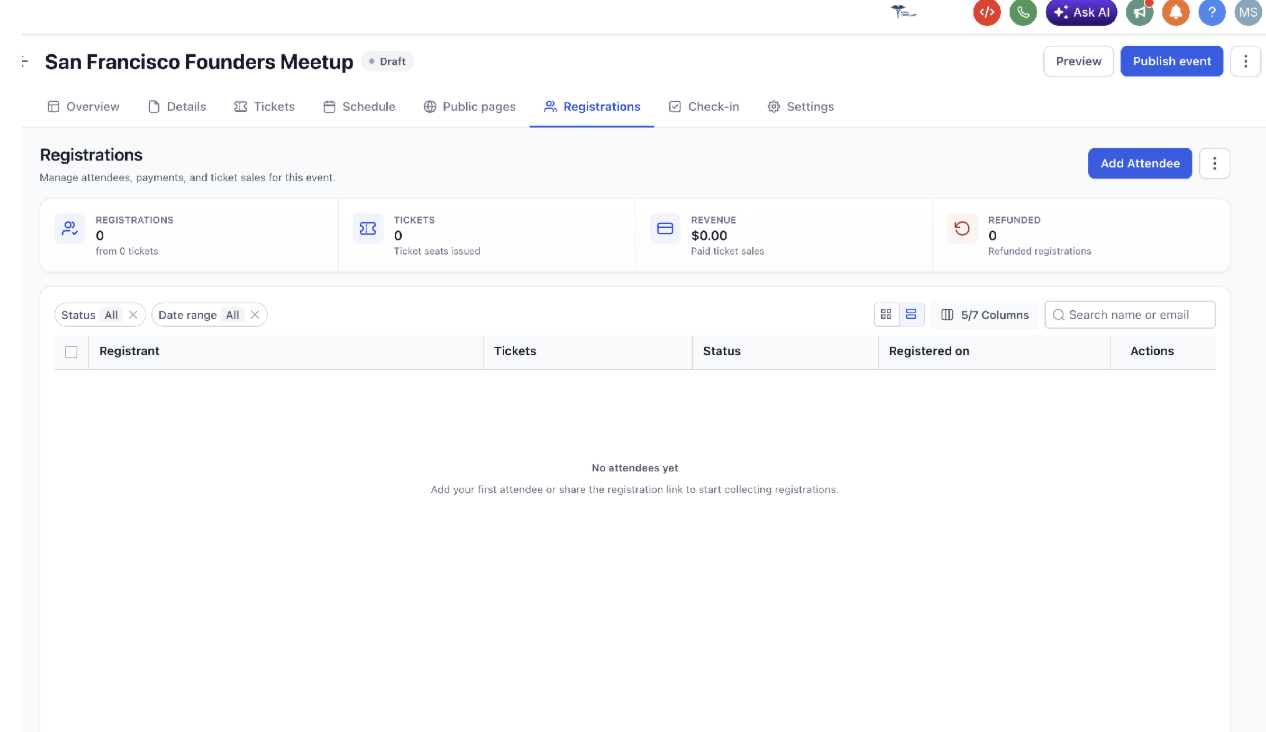
- Registrations: Review attendees, tickets, revenue, and refunds. Search or filter registrations, or use Add Attendee to register someone manually.
- Check-in: Scan attendee QR codes. Entry depends on the payment statuses allowed in the event's check-in settings.
Attendee Experience
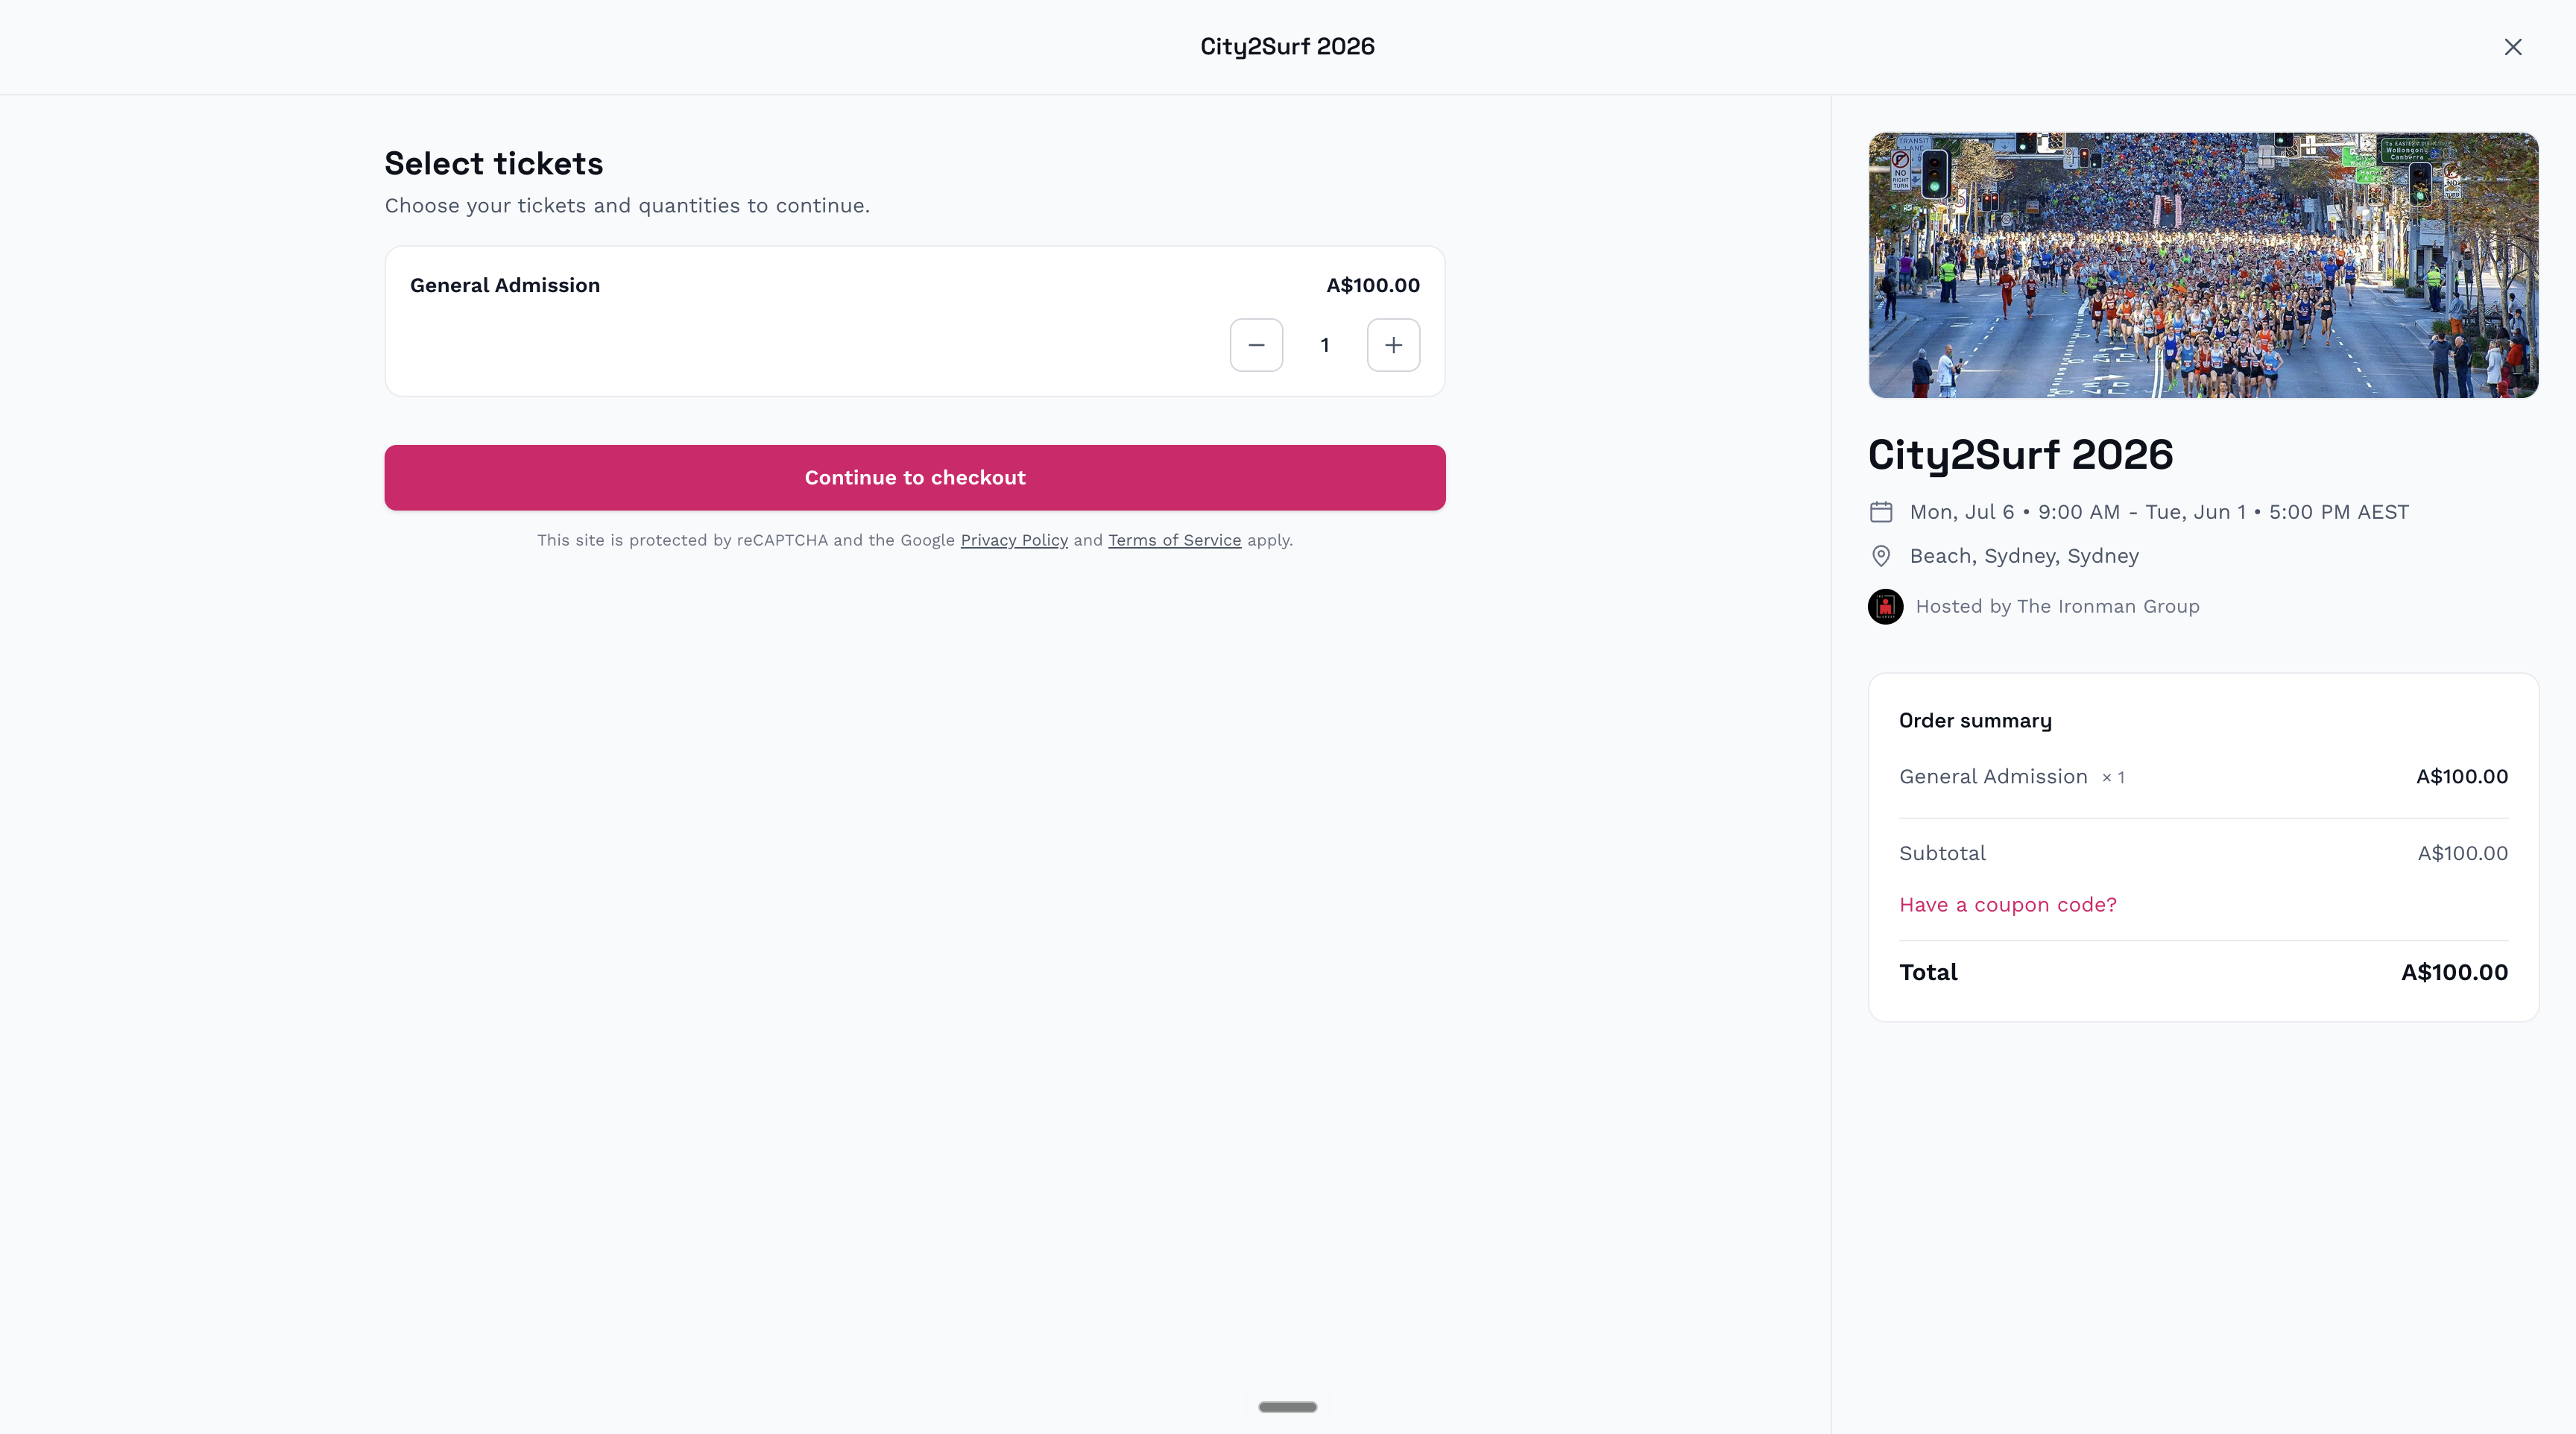
Attendees use the public event page to select tickets, complete registration or payment, and access confirmation details. The checkout flow displays event information and the order summary.
Ticket Selection
Attendees select ticket types and quantities and can apply a coupon when available.
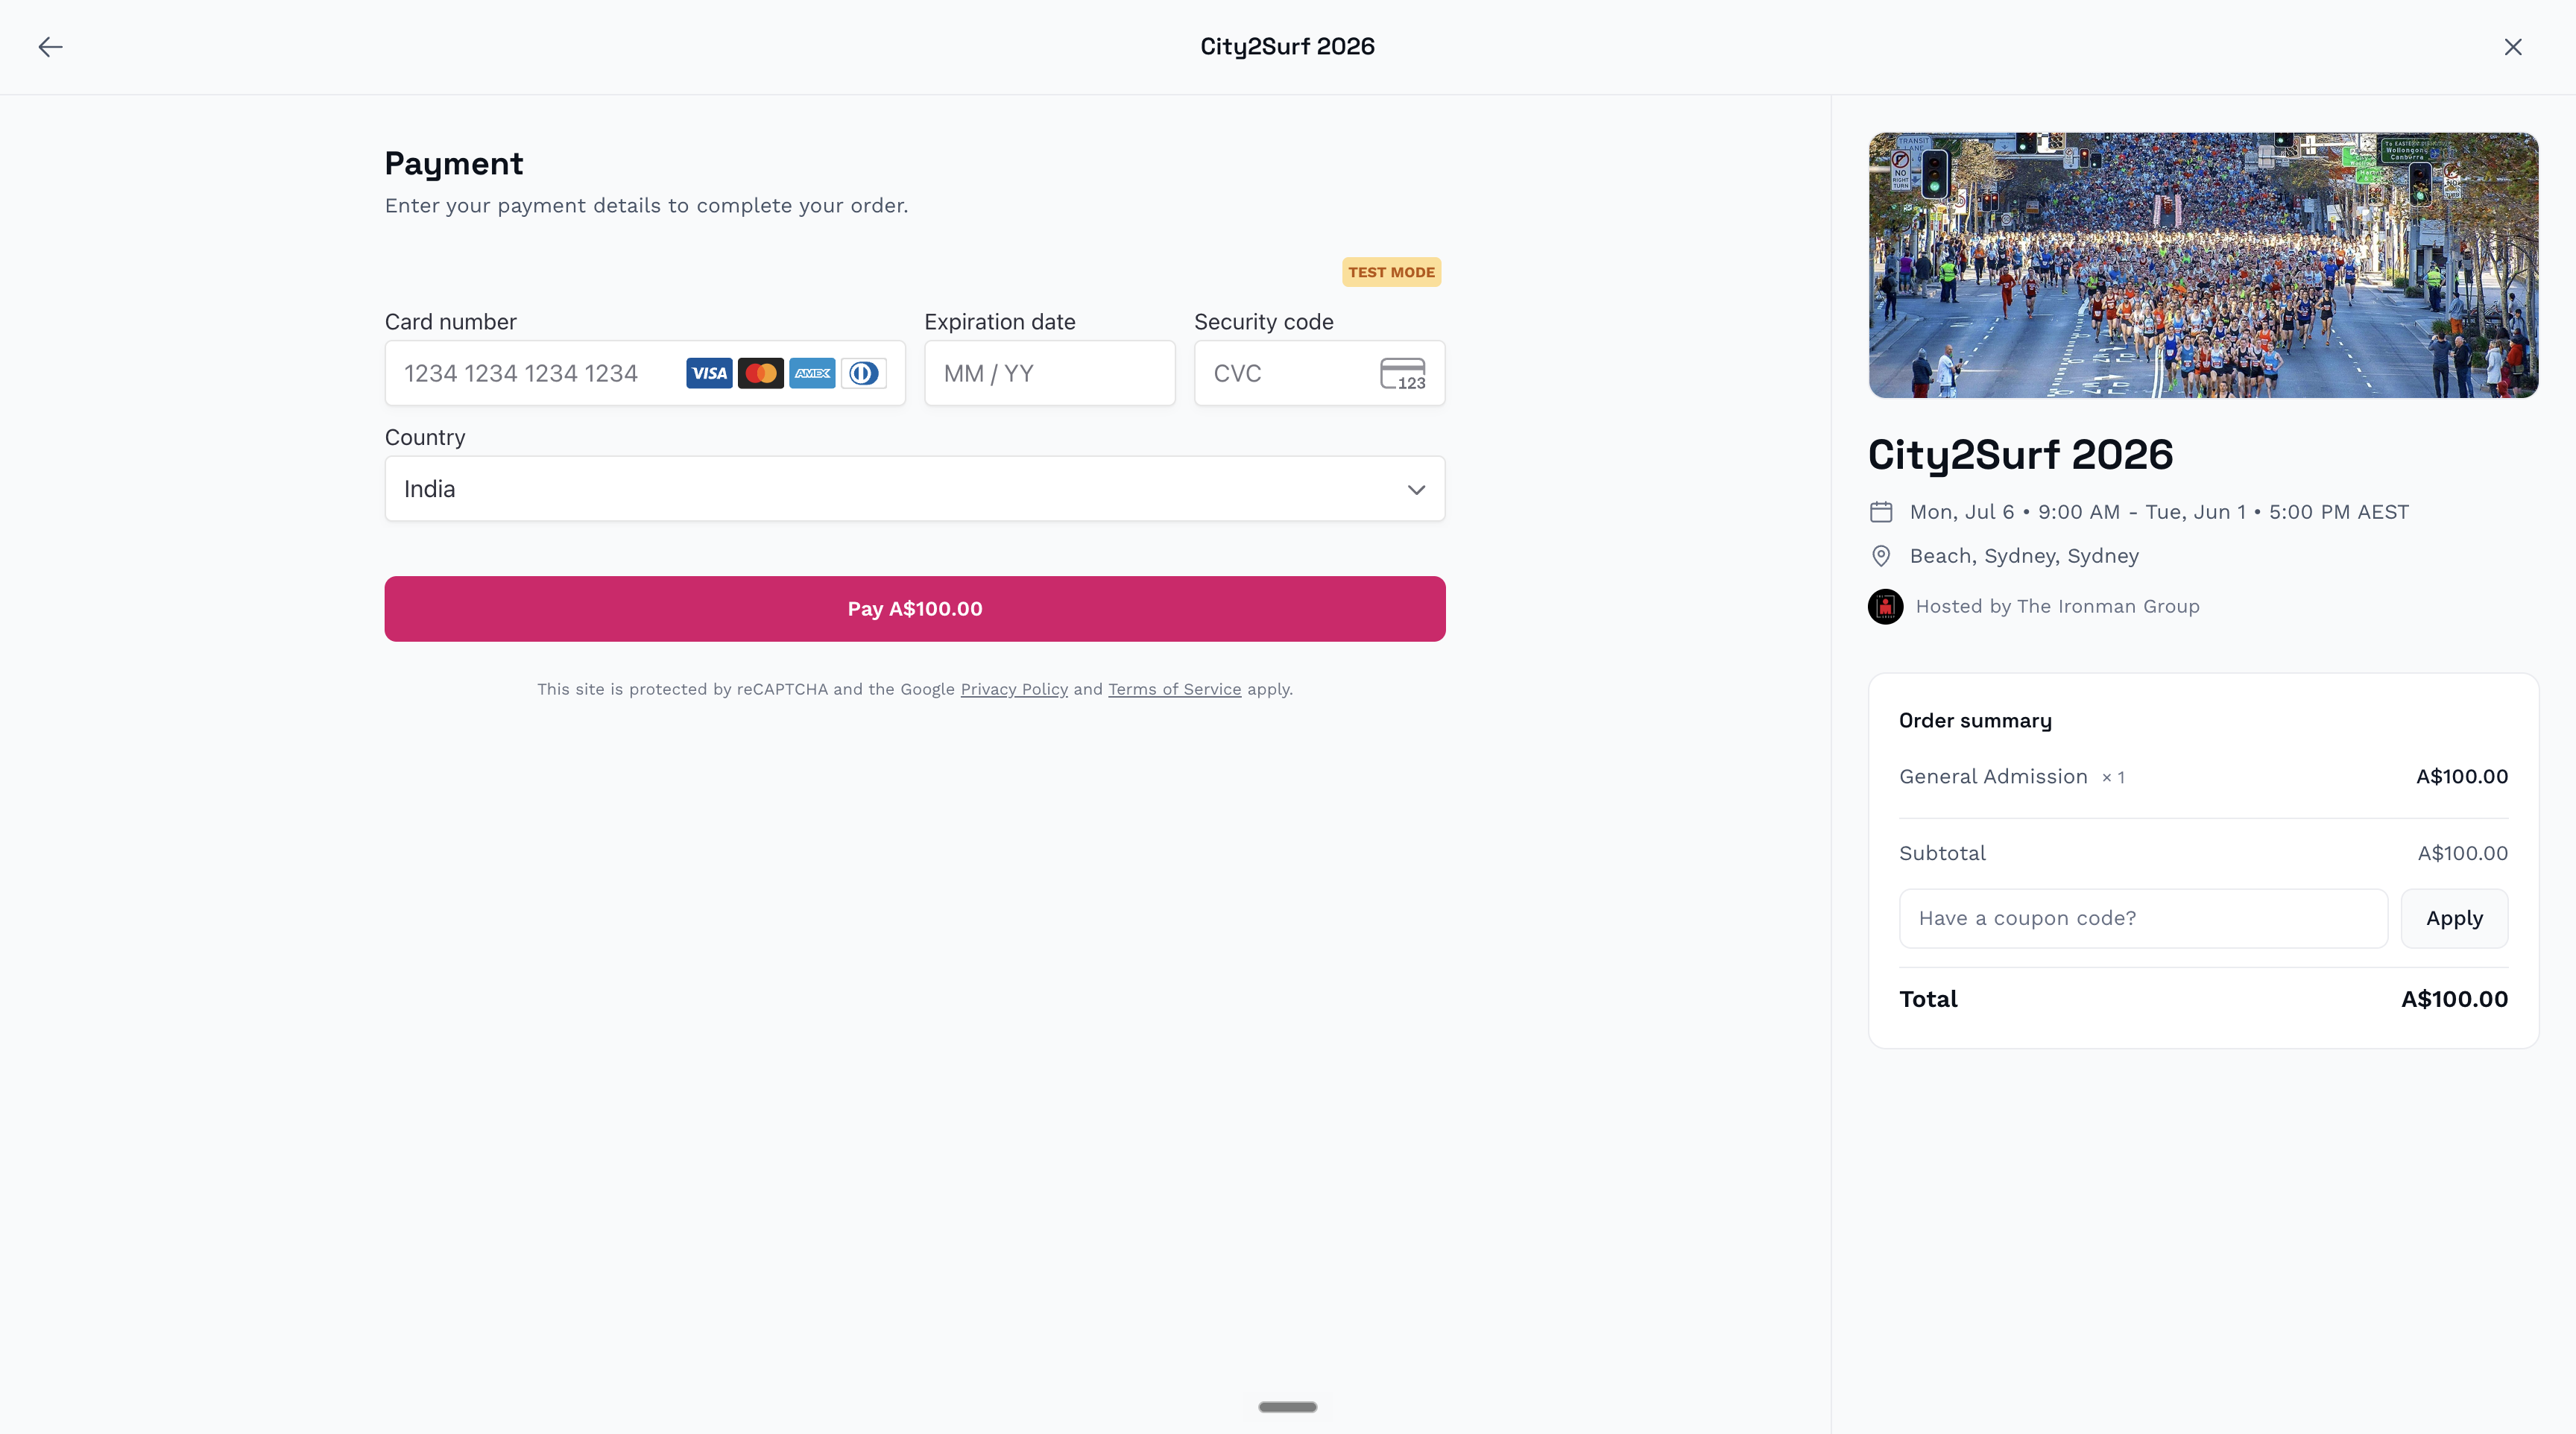
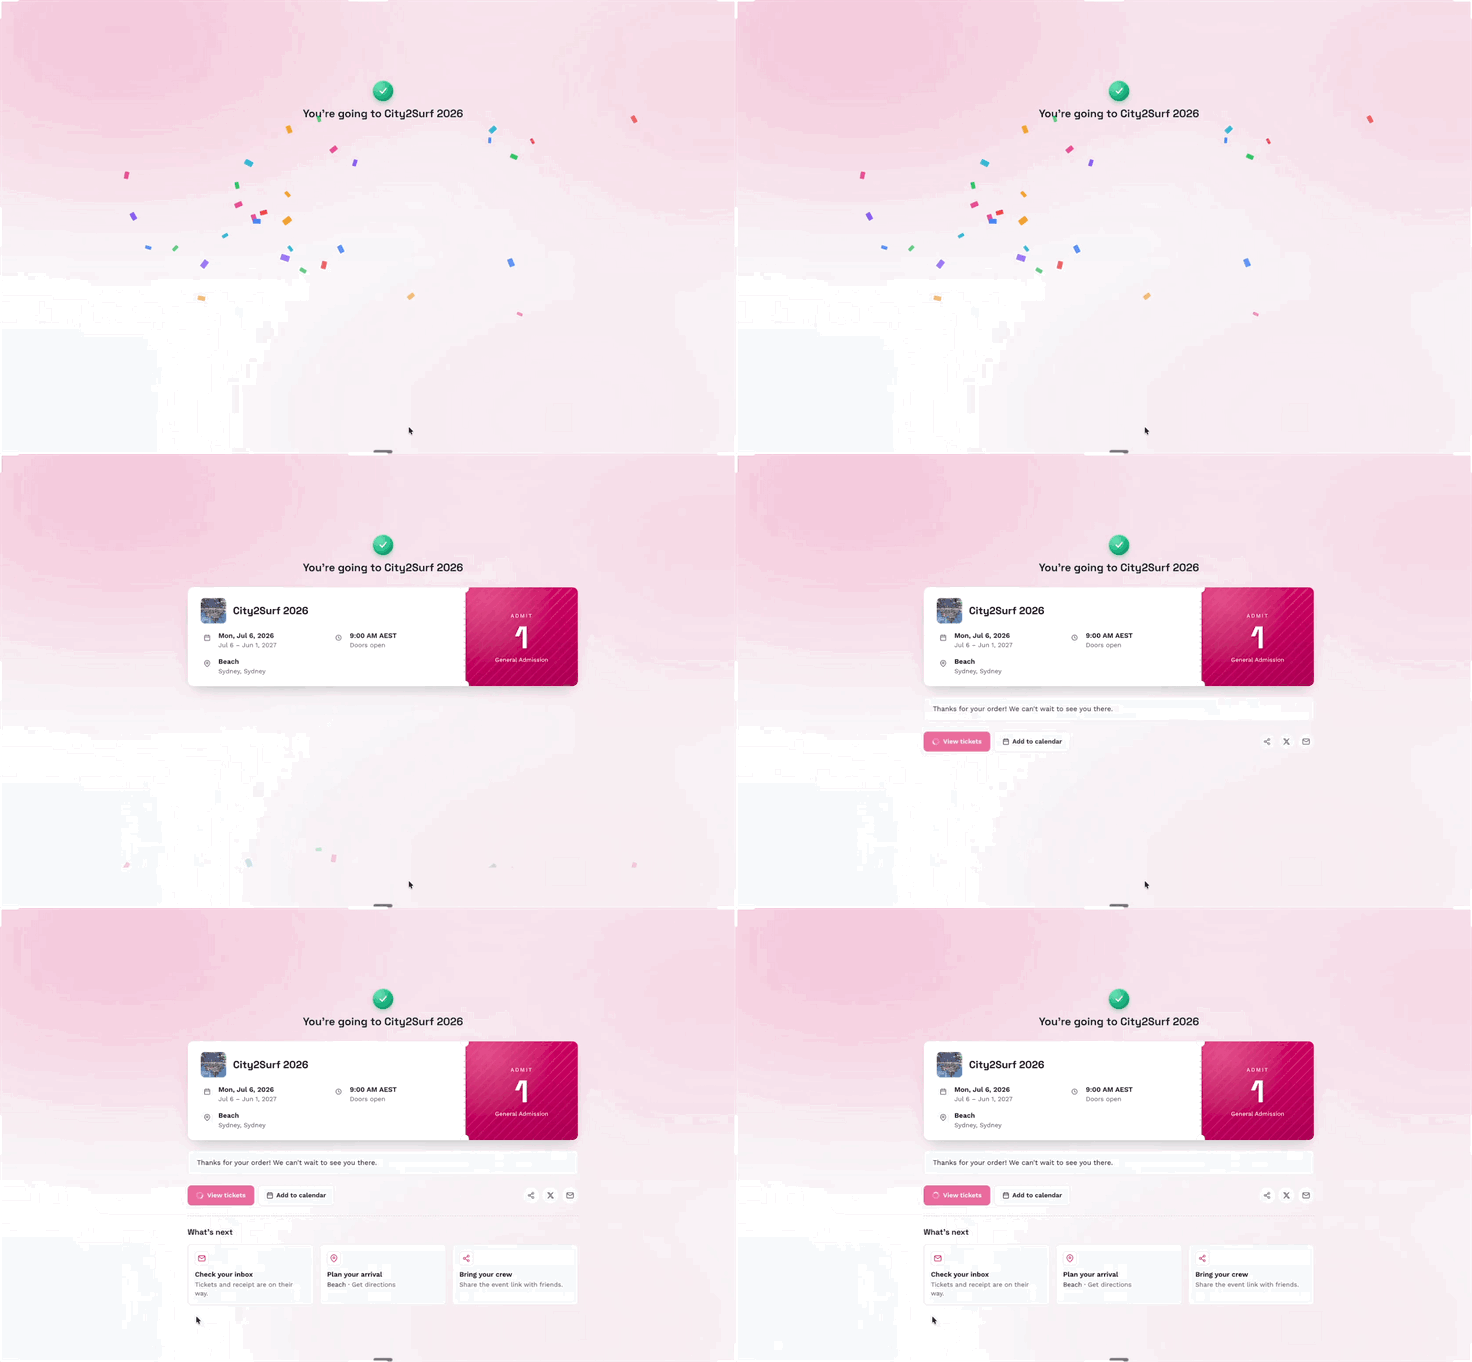
Checkout and Confirmation
Depending on the event, attendees enter required contact, billing, and payment information before reaching confirmation.
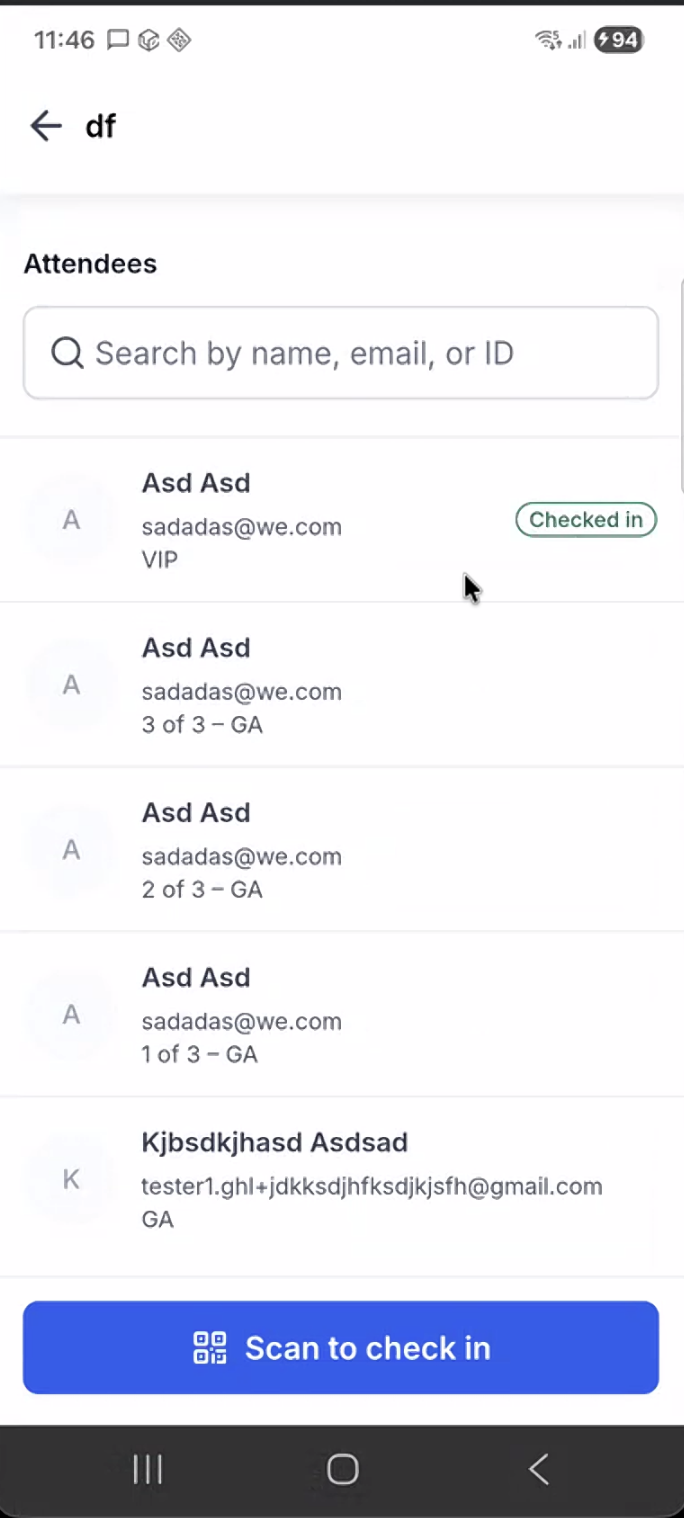
QR Code Check-in
Staff can scan an attendee's QR code using a mobile device to check them in.
Event Notifications
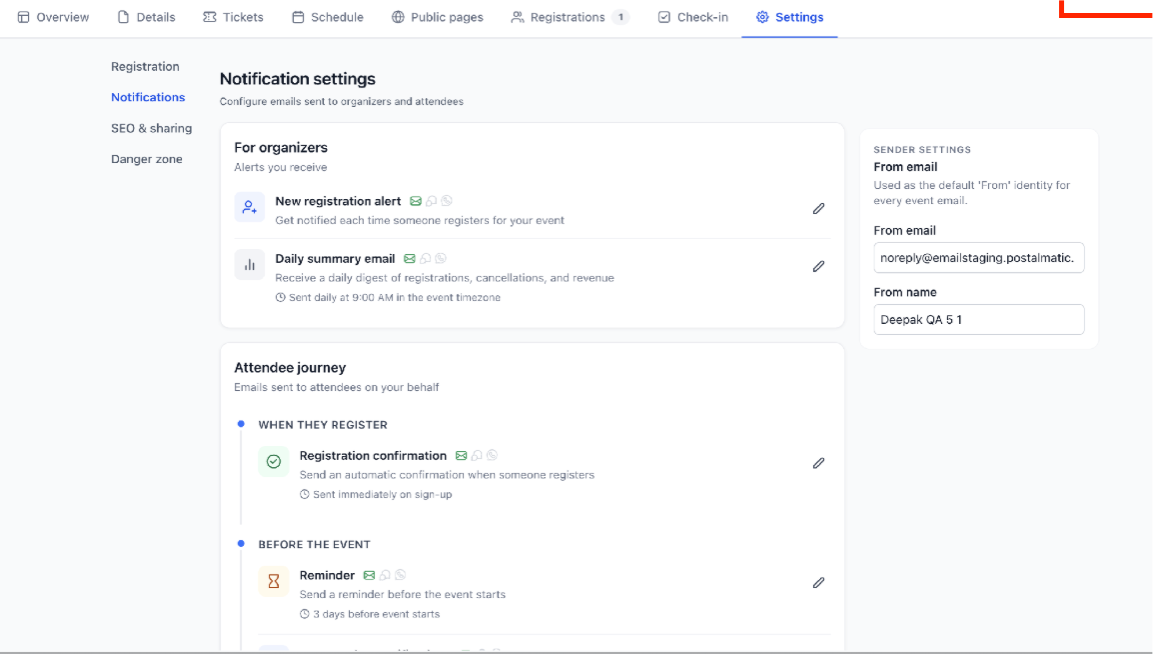
Notifications keep attendees informed and help organizers track registrations. Configure them under the event's Settings tab.
- Attendees: Registration confirmation and reminder emails.
- Organizers: New registration alerts and daily summary emails. The daily summary is sent at 9:00 AM in the event timezone.
- Sender: Configure the From email and From name.
Frequently Asked Questions
Q: How do I refund an event registration?
Organizers initiate refunds from the Registrations tab. Processing times follow the payment provider's standard timeline.
Q: Does unpublishing or canceling an event automatically refund tickets?
No. Organizers must process refunds manually.
Q: How do organizer payouts work?
Ticket payments are processed through the connected payment provider, such as Stripe. Payout timing follows that provider's schedule. HighLevel does not charge additional platform fees beyond standard card processing charges.
Q: Can attendees transfer their tickets?
There is no self-service ticket transfer. Organizers must update attendee details in Registrations, or cancel the original registration and manually add the replacement attendee.
Related Articles
Was this article helpful?
That’s Great!
Thank you for your feedback
Sorry! We couldn't be helpful
Thank you for your feedback
Feedback sent
We appreciate your effort and will try to fix the article