Calendar Payments are now possible when booking an appointment. It allows the location to receive payments when a client or customer books for a certain calendar appointment. This is very useful, especially for businesses that require a certain payment to book an appointment slot.
Covered in this article:
Choose How to Collect Payment Details
Charge upfront
- If the final amount is greater than $0, the customer provides payment details and pays the final amount.
- If the configured amount is $0, card collection and payment are skipped.
- If a coupon reduces the final amount to $0, card collection and payment are skipped.
- If a coupon reduces the amount but leaves a balance greater than $0, the customer pays the discounted amount.
Collect Card on File
- The customer provides their card details during booking.
- The card is securely saved for future use.
- The customer is not charged during the booking.
- No payment transaction is created during the booking.
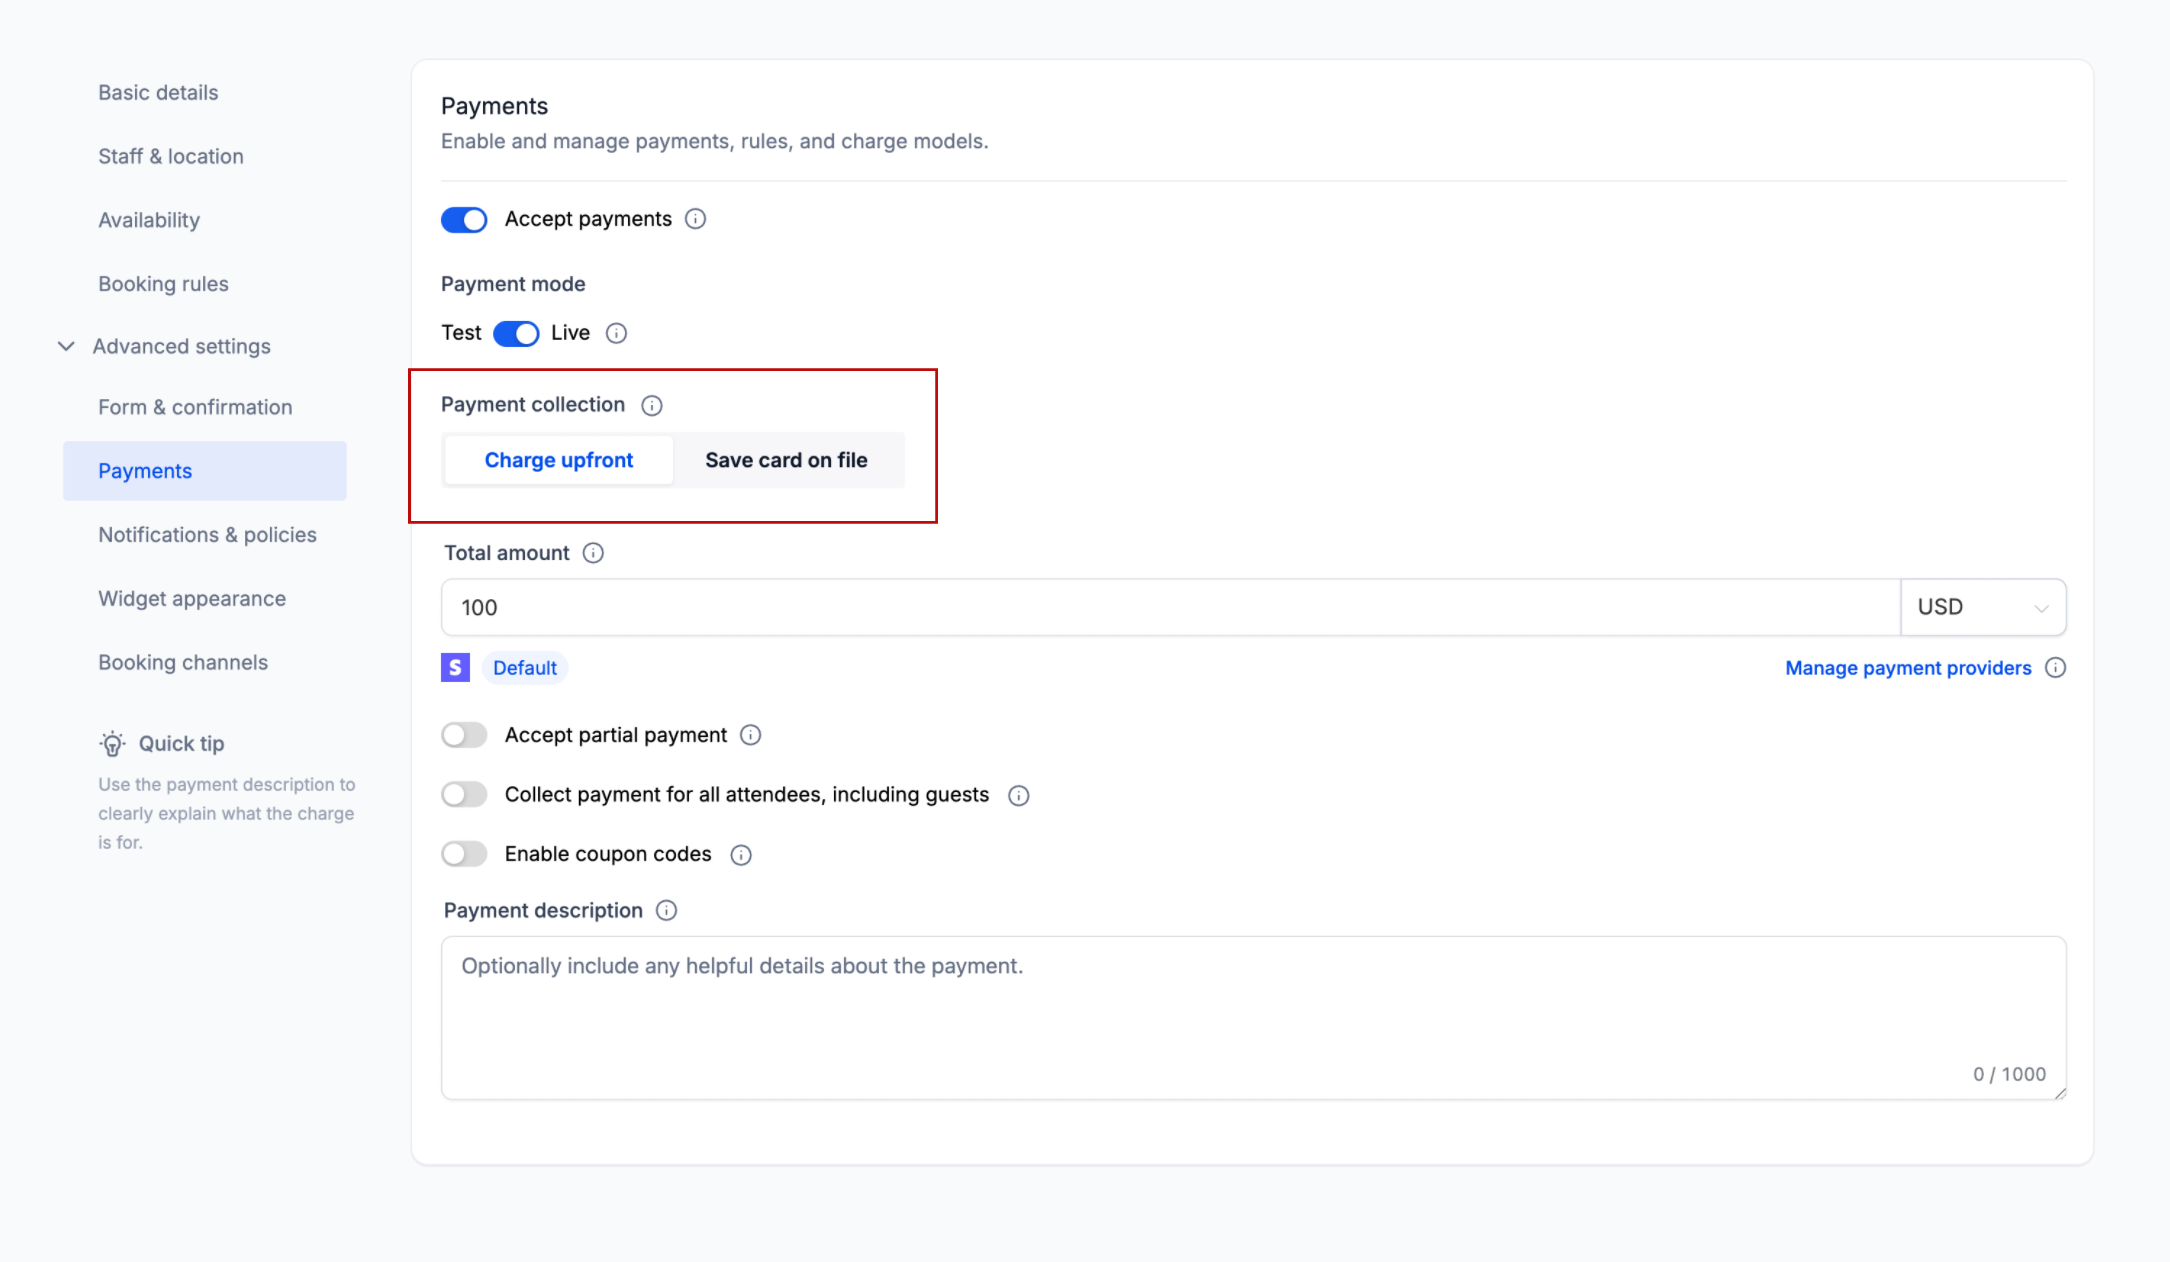
Available payment providers and how to add them
1. Payments in calendars are supported through six payment gateways, namely Stripe, NMI, Authorize.net, Razorpay, Square and PayPal.
Please Note: You can use these payment methods to collect payments for all calendar types. However, Razorpay, NMI and Square are currently not supported for the Classic Widget and Service menu.
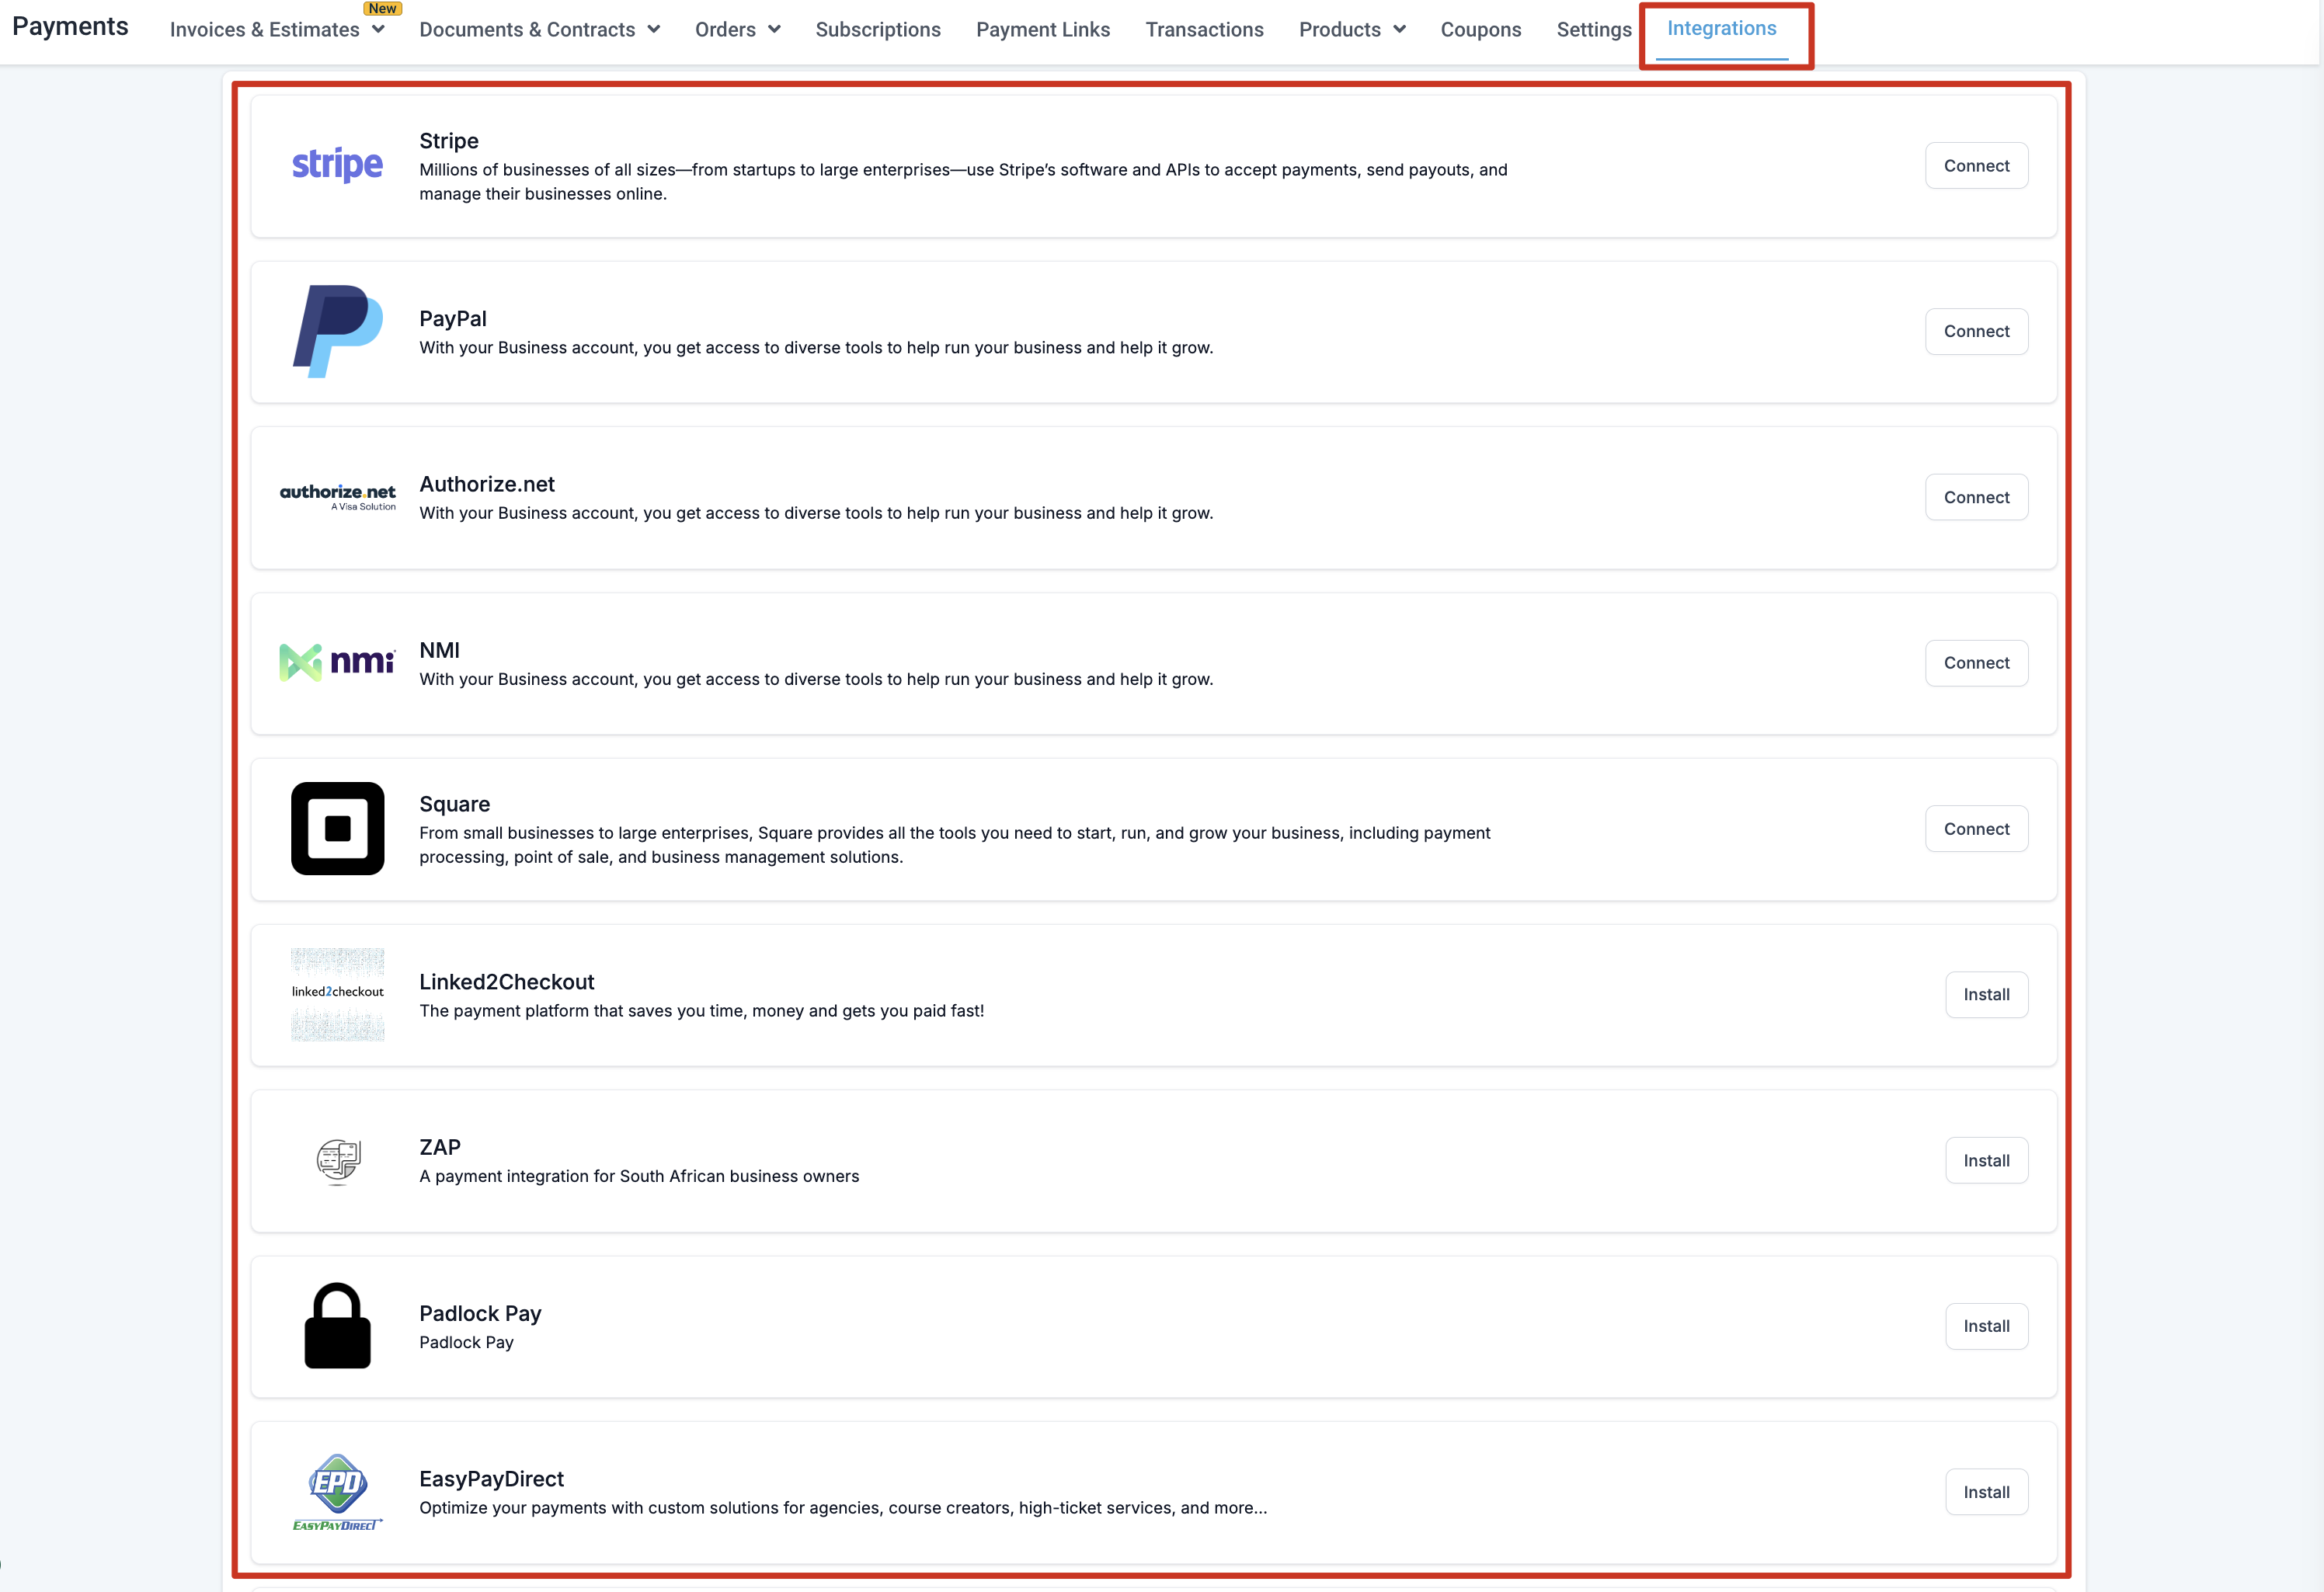
2. Add the payment gateways first from your sub-account by going to the Payments Tab > Integrations
Please Note:
If you connect multiple gateways, you would see a dropdown to select your default payment gateway. Only the DEFAULT PAYMENT GATEWAY will be used to collect payments. So if you chose Stripe then it will only collect payments through Stripe.
3. Now, go to Calendar Settings.
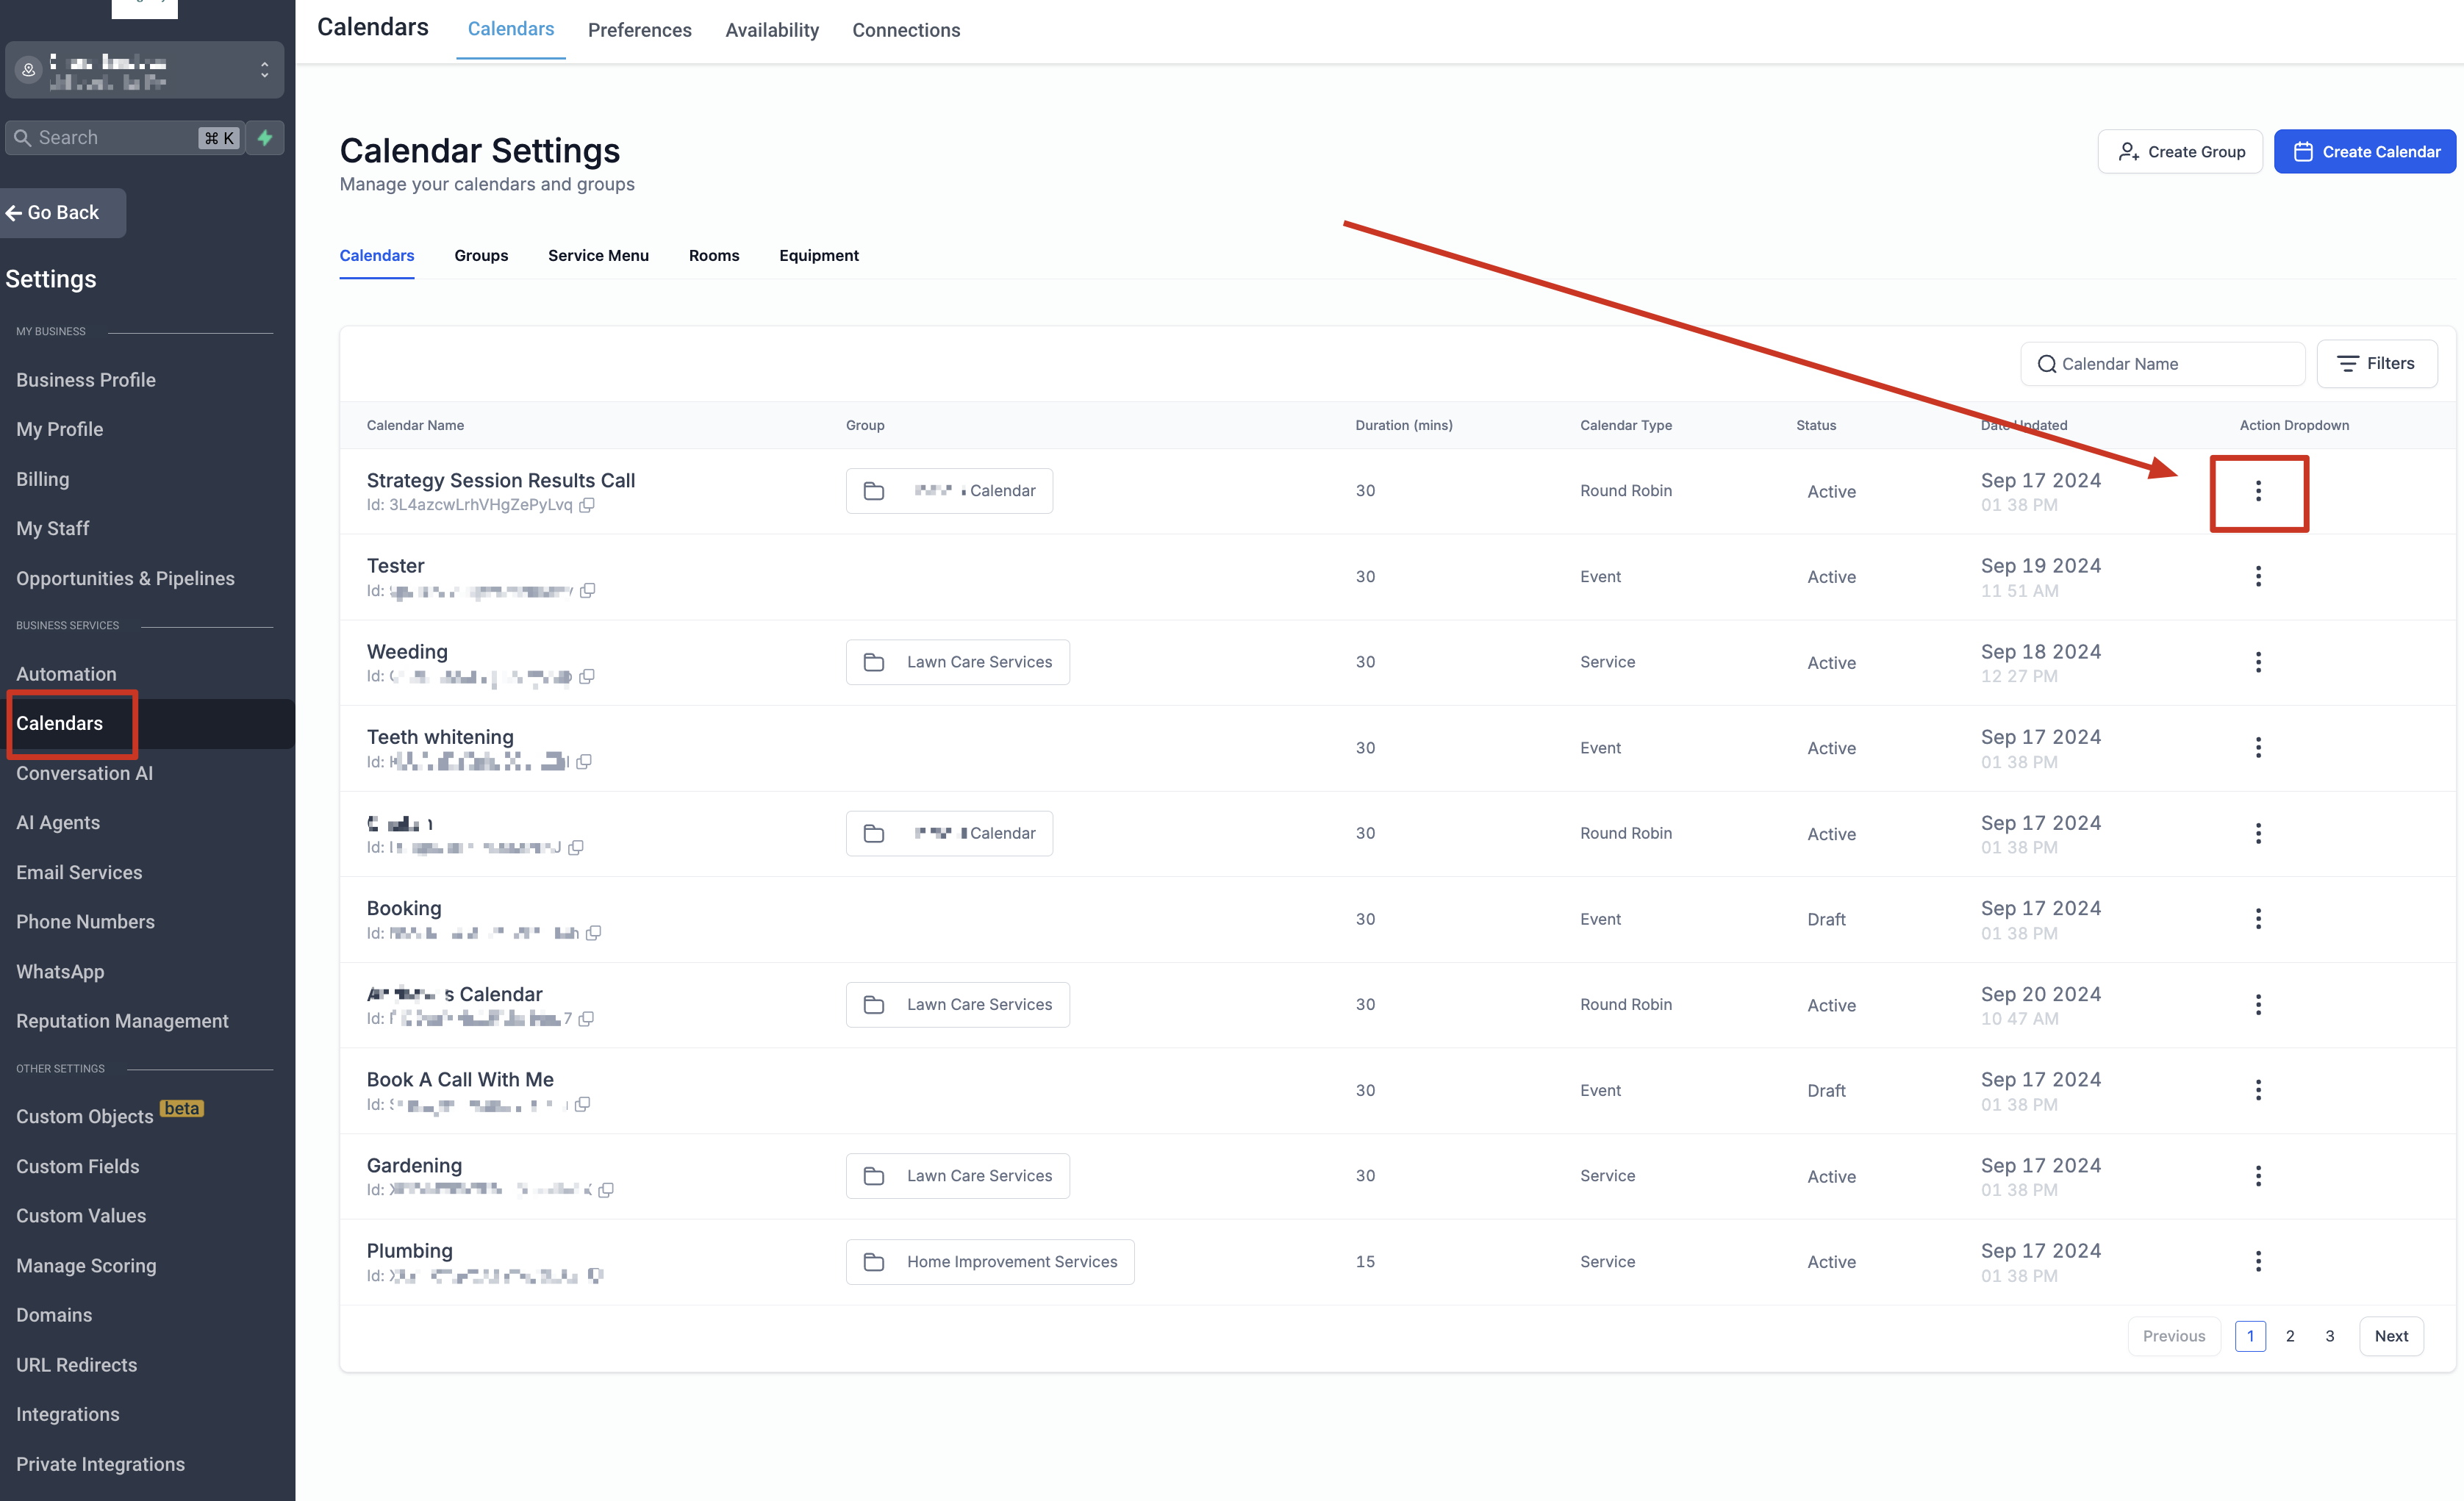
3. Edit (by clicking on the three dots) an existing calendar or Create a New Calendar (Advanced Settings). Under Forms & Payments you will see a toggle to "Accept Payments".
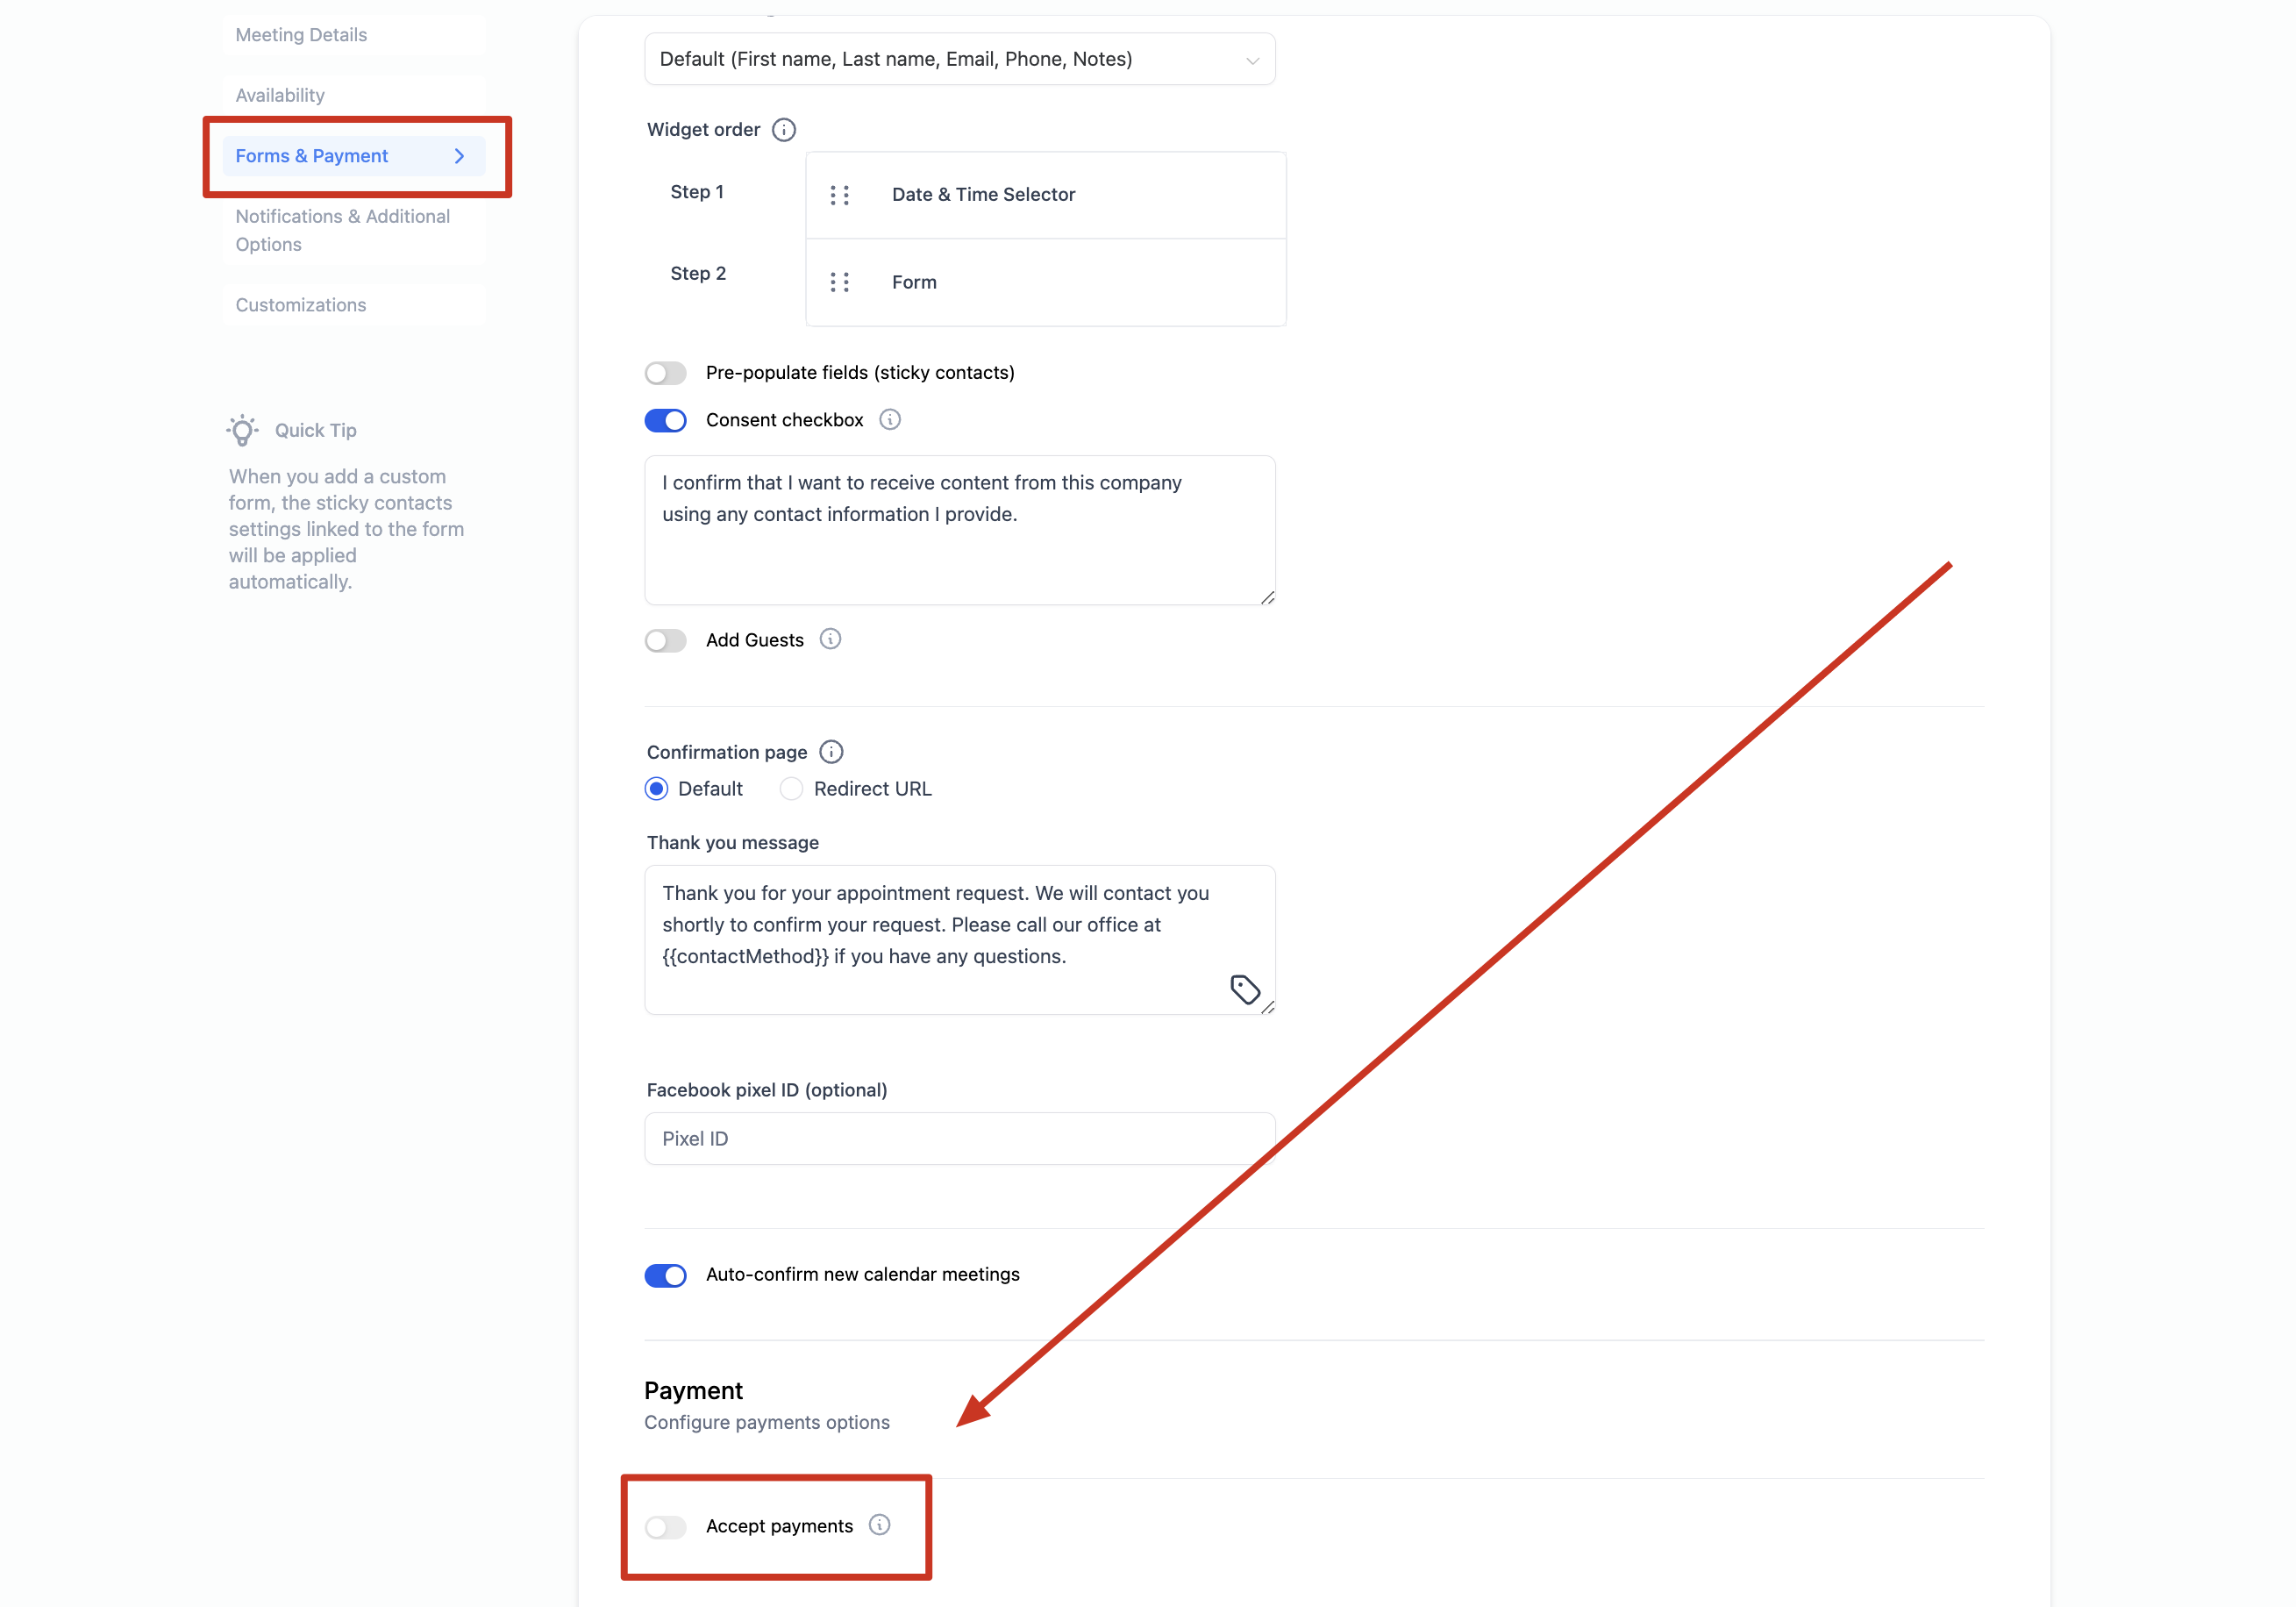
Once enabled, these new form fields would appear:
- Amount (with currency)
- Description
- Payment mode (Test or Live)
Note: When the “Test or Live” toggle is enabled (switched to the right), the calendar operates in Live Mode. If it is disabled (switched to the left), it remains in Test Mode.
Please Note: Partial payments do not work with recurring calendars.
REMEMBER! If you don't see the Payment Options like on the screenshot below, it's because you haven't integrated a payment gateway yet. Review the steps above to activate Payment Options for Calendars.

How to integrate Payment Providers?
Square:
To connect to Square, follow the below steps:
- Login to you square account - https://app.squareup.com/login and stay signed in as a square user.
- Then go to GHL, Payments Module > Integraand click on the Connect button for Square Live Mode. It will automatically pick the signed in account and connect it to GHL!
Razorpay - Help Doc
Was this article helpful?
That’s Great!
Thank you for your feedback
Sorry! We couldn't be helpful
Thank you for your feedback
Feedback sent
We appreciate your effort and will try to fix the article