Use Bulk Actions to enable SaaS Mode or pause multiple HighLevel sub-accounts without opening each account individually. Review payment-provider and subscription settings before applying changes. Use Bulk Action History to check results and investigate failed accounts.
TABLE OF CONTENTS
- How to Enable SaaS Mode in Bulk
- How to Pause Sub-Accounts in Bulk
- How to View Bulk Action History
- Related Articles
How to Enable SaaS Mode in Bulk
Apply a SaaS plan to multiple sub-accounts using the intended billing configuration. Have your payment provider and SaaS plan configured before starting.
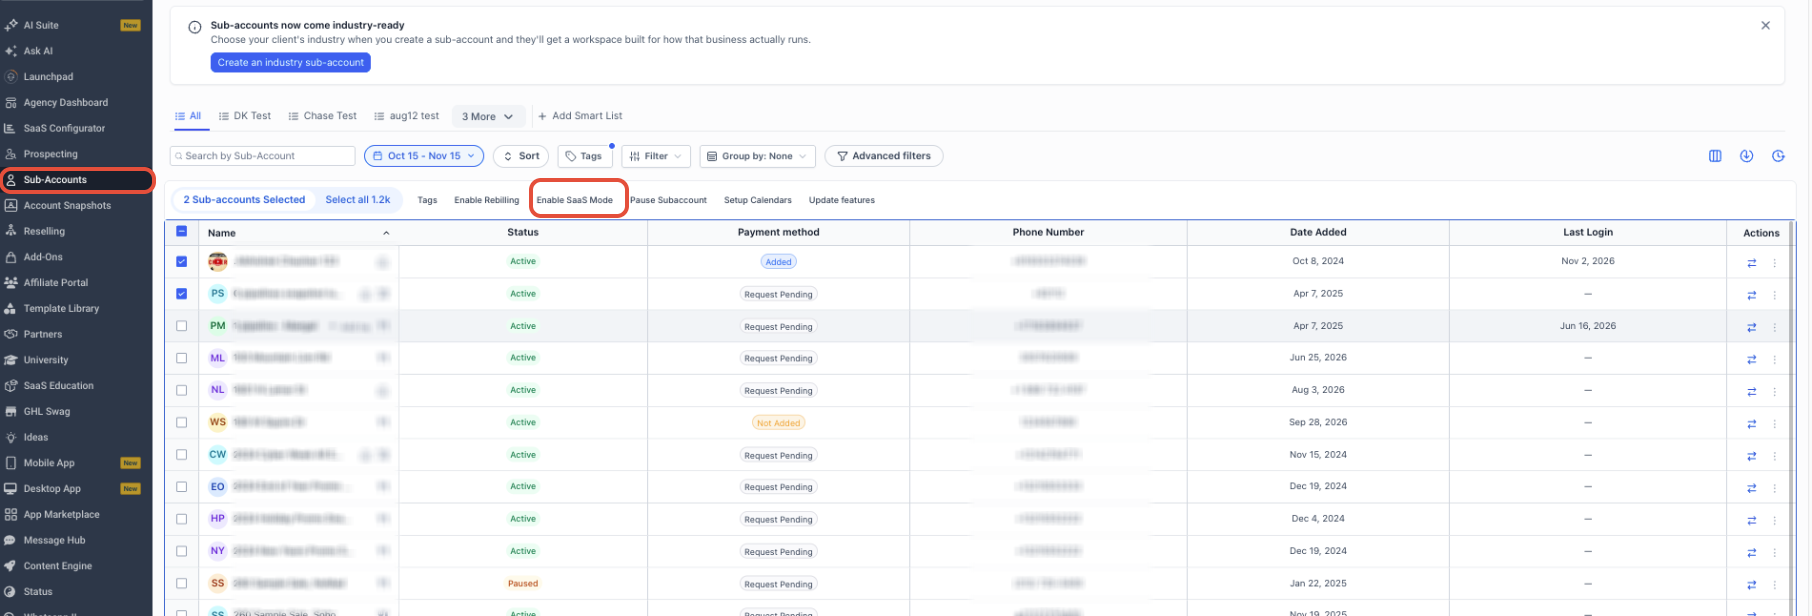
- From Agency View, click Sub-Accounts in the left navigation.
- Use search or filters to find the intended accounts. Select their checkboxes or use Select All, then review the selection.
- In the action bar above the selected accounts, click Enable SaaS Mode.
- Review the payment-provider cards. Each card shows the provider logo, version, and where customer and subscription data is managed.
- V1 (Agency): Uses the Stripe account connected in agency settings, with billing data managed in Stripe.
- V2 (Sub-account): Uses the selected agency sub-account's billing configuration, with data managed in HighLevel.
- Stripe can appear under either version. Check the version label and data-management description, not just the provider name. Cards marked Not supported remain visible but cannot be selected.
- Select the supported card for your intended configuration, then click Continue.
- V1 (Agency): Uses the Stripe account connected in agency settings, with billing data managed in Stripe.
- In Select Subscription Plan, click Show Full Details to review rebilling rates, included add-ons, Marketplace apps, and custom menu links. Click Select Plan for the intended plan.
- Review the selected-account count, plan, and price in the confirmation window. Click Proceed to submit the bulk action.
Payment requirement: Clients must add a payment method for the SaaS plan to take full effect. Account access can remain restricted until the required payment details are provided.
For billing-configuration details, see Choose a Payment Provider in the SaaS Configurator guide.
How to Pause Sub-Accounts in Bulk
Pause account access while choosing separately how SaaS subscriptions and phone resources should be handled. Review these choices before confirming because they affect billing and existing resources.
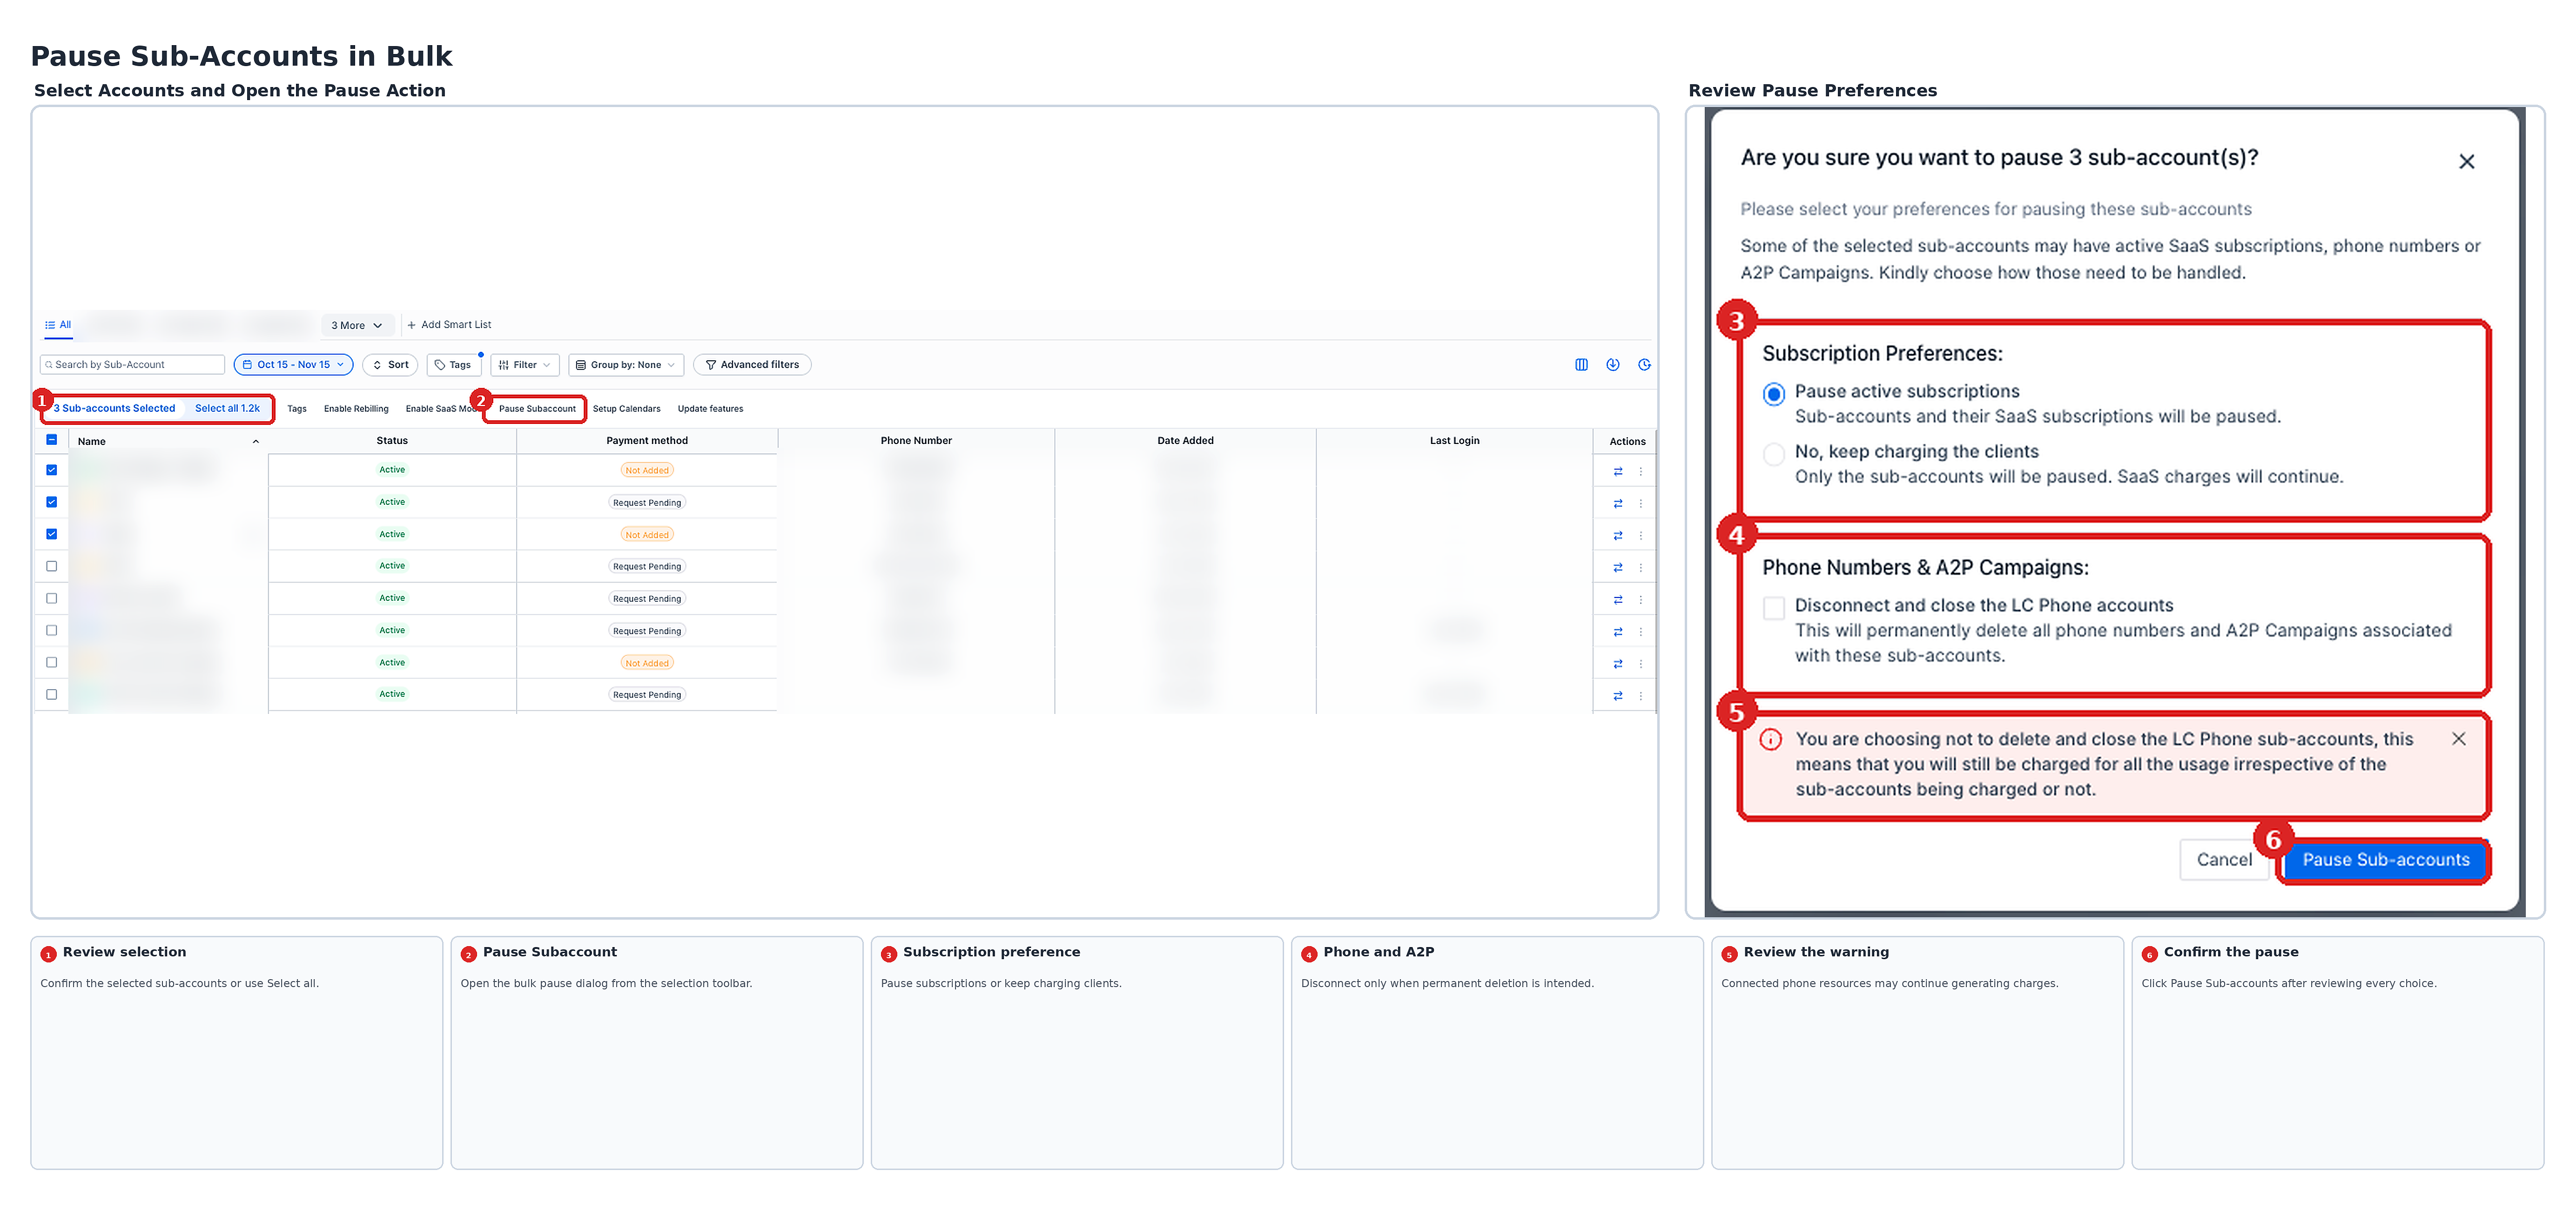
- From Agency View, click Sub-Accounts.
- Find the intended accounts using search or filters. Select their checkboxes or use Select All, then review the selection.
- In the action bar above the selected accounts, click Pause Subaccount.
- Under Subscription Preferences, choose:
- Pause active subscriptions: Pause the selected sub-accounts and their SaaS subscriptions.
- No, keep charging the clients: Pause account access while continuing SaaS subscription charges.
- Pause active subscriptions: Pause the selected sub-accounts and their SaaS subscriptions.
- Review Phone Numbers & A2P Campaigns. Select Disconnect and close the LC Phone accountsonly when you intend to permanently delete the associated phone numbers and A2P campaigns.
Important: Leaving LC Phone accounts connected can result in continued usage charges while the sub-accounts are paused.
- Review the selected preferences, then click Pause Sub-accounts.
How to View Bulk Action History
Check account-level results after submitting a bulk action. A job can contain both successful and failed accounts.
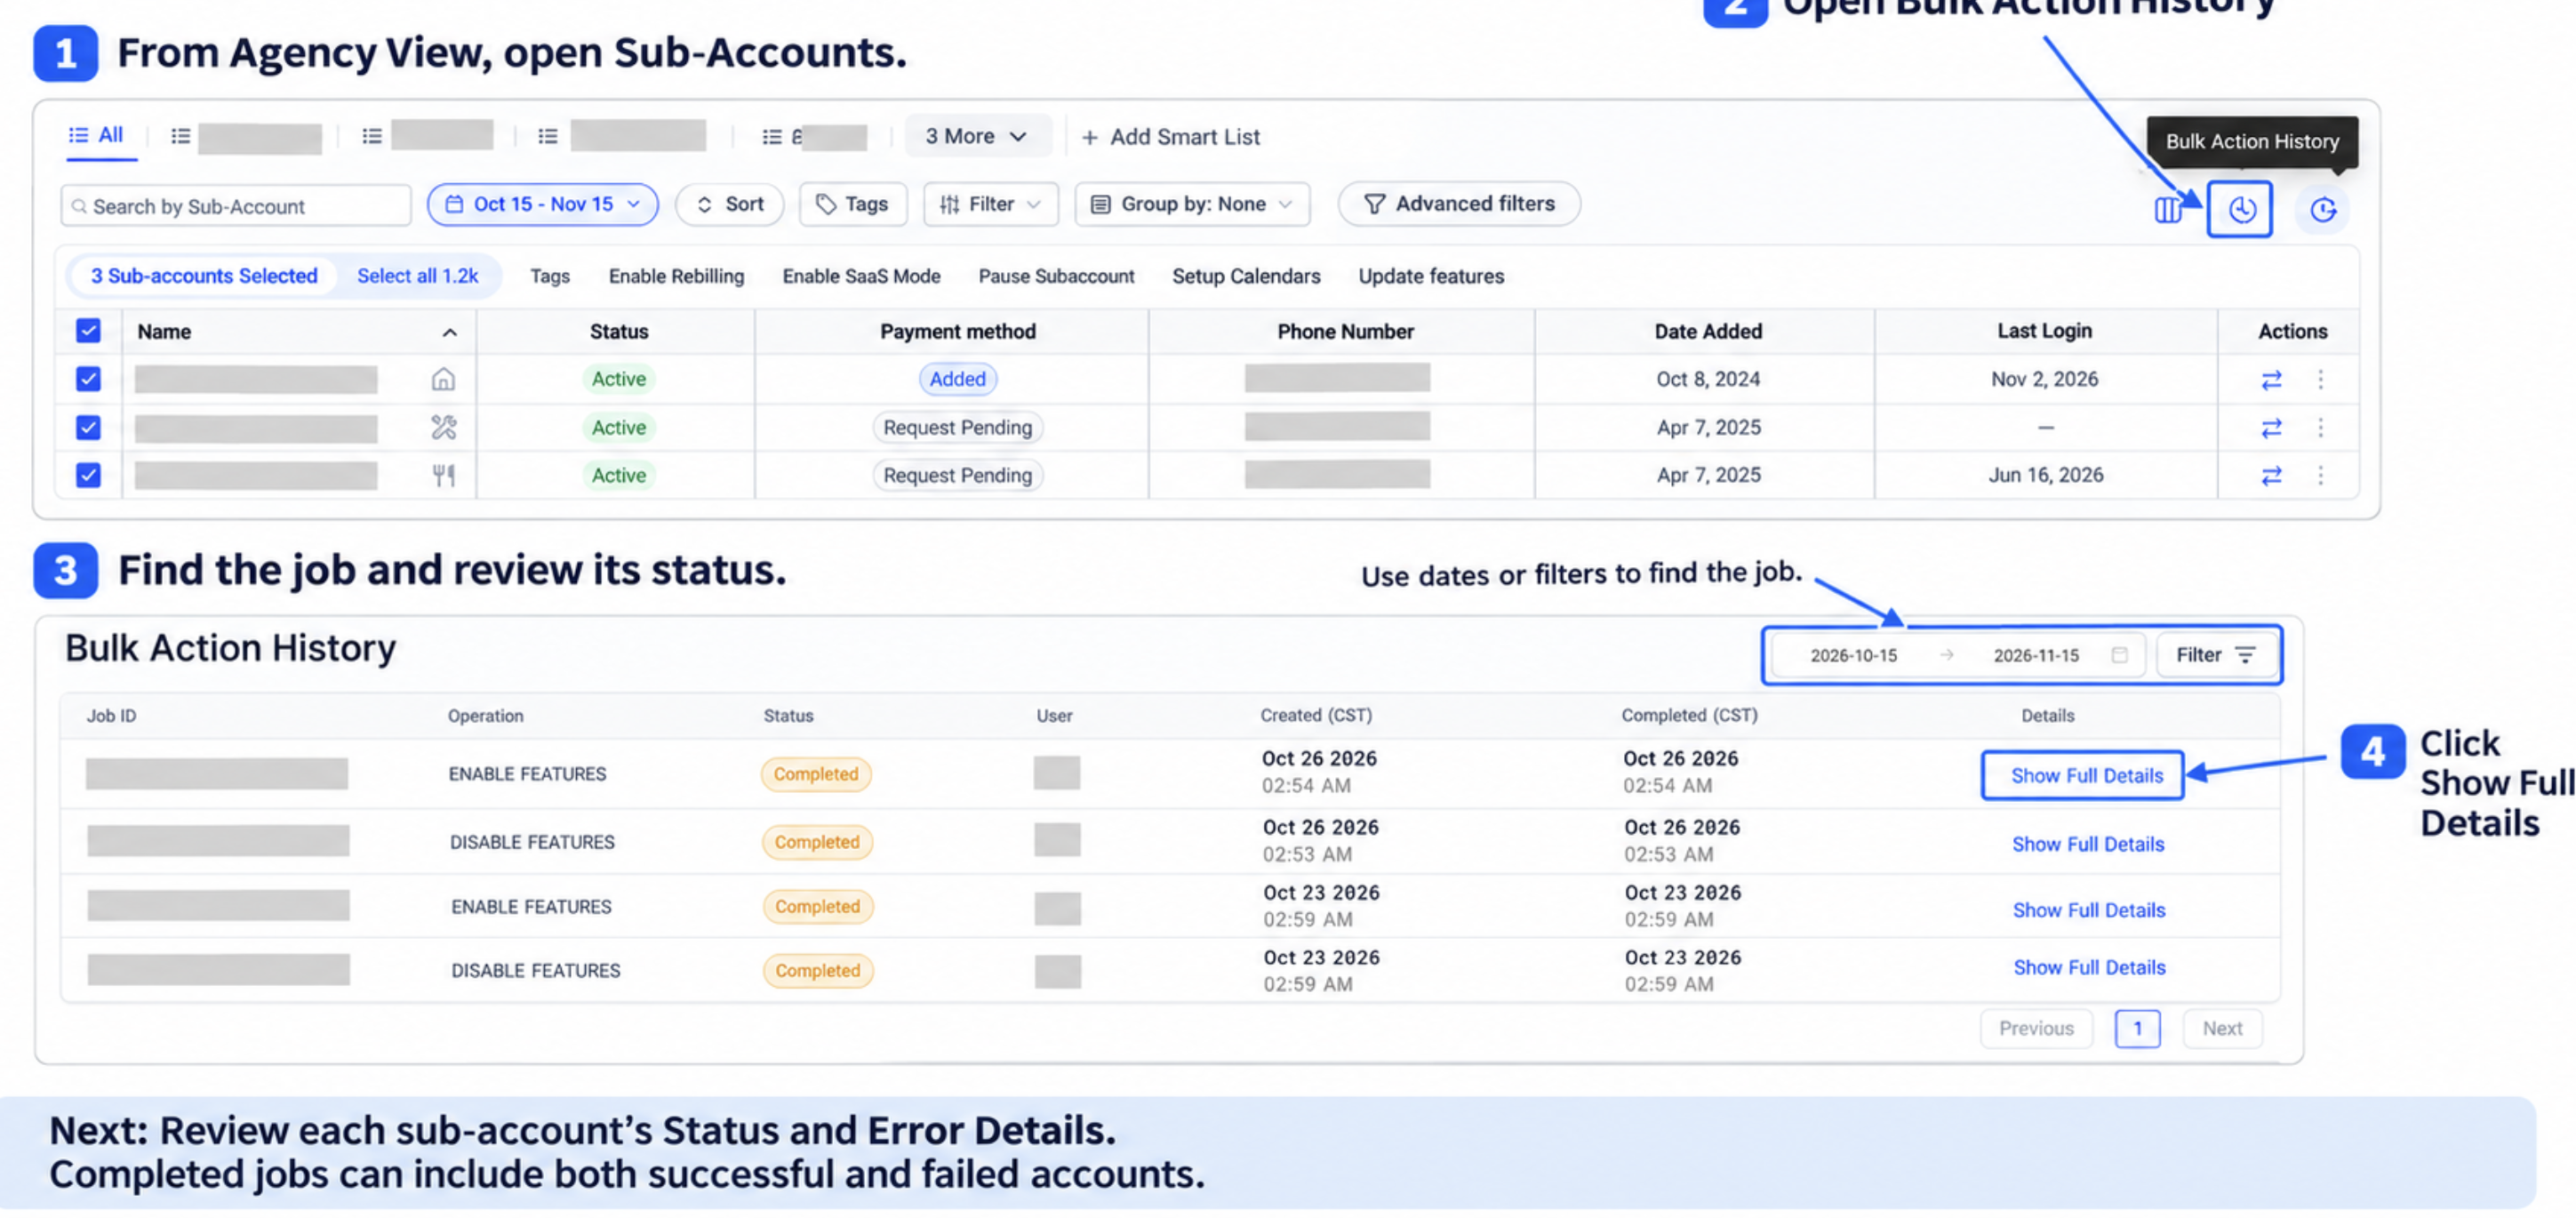
- From Agency View, click Sub-Accounts.
- Click the Bulk Action History clock icon.
- Find the job and review its operation, status, submitting user, and timestamps.
- Click Show Full Details for the job. Review each sub-account's status and Error Details to identify accounts needing attention.
Related Articles
Was this article helpful?
That’s Great!
Thank you for your feedback
Sorry! We couldn't be helpful
Thank you for your feedback
Feedback sent
We appreciate your effort and will try to fix the article