This article will guide you through HighLevel’s Notification Settings, which allows users to control how and where they receive notifications. Whether you want to be alerted via email, desktop, or mobile app, this tool helps reduce noise and ensures you never miss an important update.
TABLE OF CONTENTS
- What is Notification Settings?
- Key Benefits of Notification Settings
- How To Use the Notification Settings
- Adding Users to a Sub-Account
- Frequently Asked Questions
What is Notification Settings?
The Notification Settings helps users choose how they’d like to be alerted about important actions—such as new messages, tasks, appointments, or reviews—across different communication channels. The goal is to reduce unnecessary noise and allow users to focus on what’s relevant to them.
Key Benefits of Notification Settings
Easily stay on top of your workflows and communication by managing when, where, and how you get notified.
- Centralized control of notification preferences for multiple event types
- Choose from delivery options: Web App, Desktop, Email, Mobile App, and SMS
- Task reminders to reduce missed deadlines
- Supports timezone-specific scheduling for daily alerts
- Minimizes alert fatigue by customizing preferences
- Direct click-to-redirect saves time navigating the CRM
How To Use the Notification Settings
Personalize notification settings to align with your role, preferences, and devices.
To manage your notification preferences:
Access Settings Panel
Navigate to your workspace settings by clicking Settings from the left-hand sidebar. This is where you’ll manage user preferences, notification settings, and more.

Open My Profile
Click on My Profile under the Settings menu. This section allows you to access and personalize your notification preferences for conversations, tasks, and more.

Select Notifications Tab
Click on the Notifications tab at the top of the profile settings. This tab houses all your notification preferences, organized by category and channel.
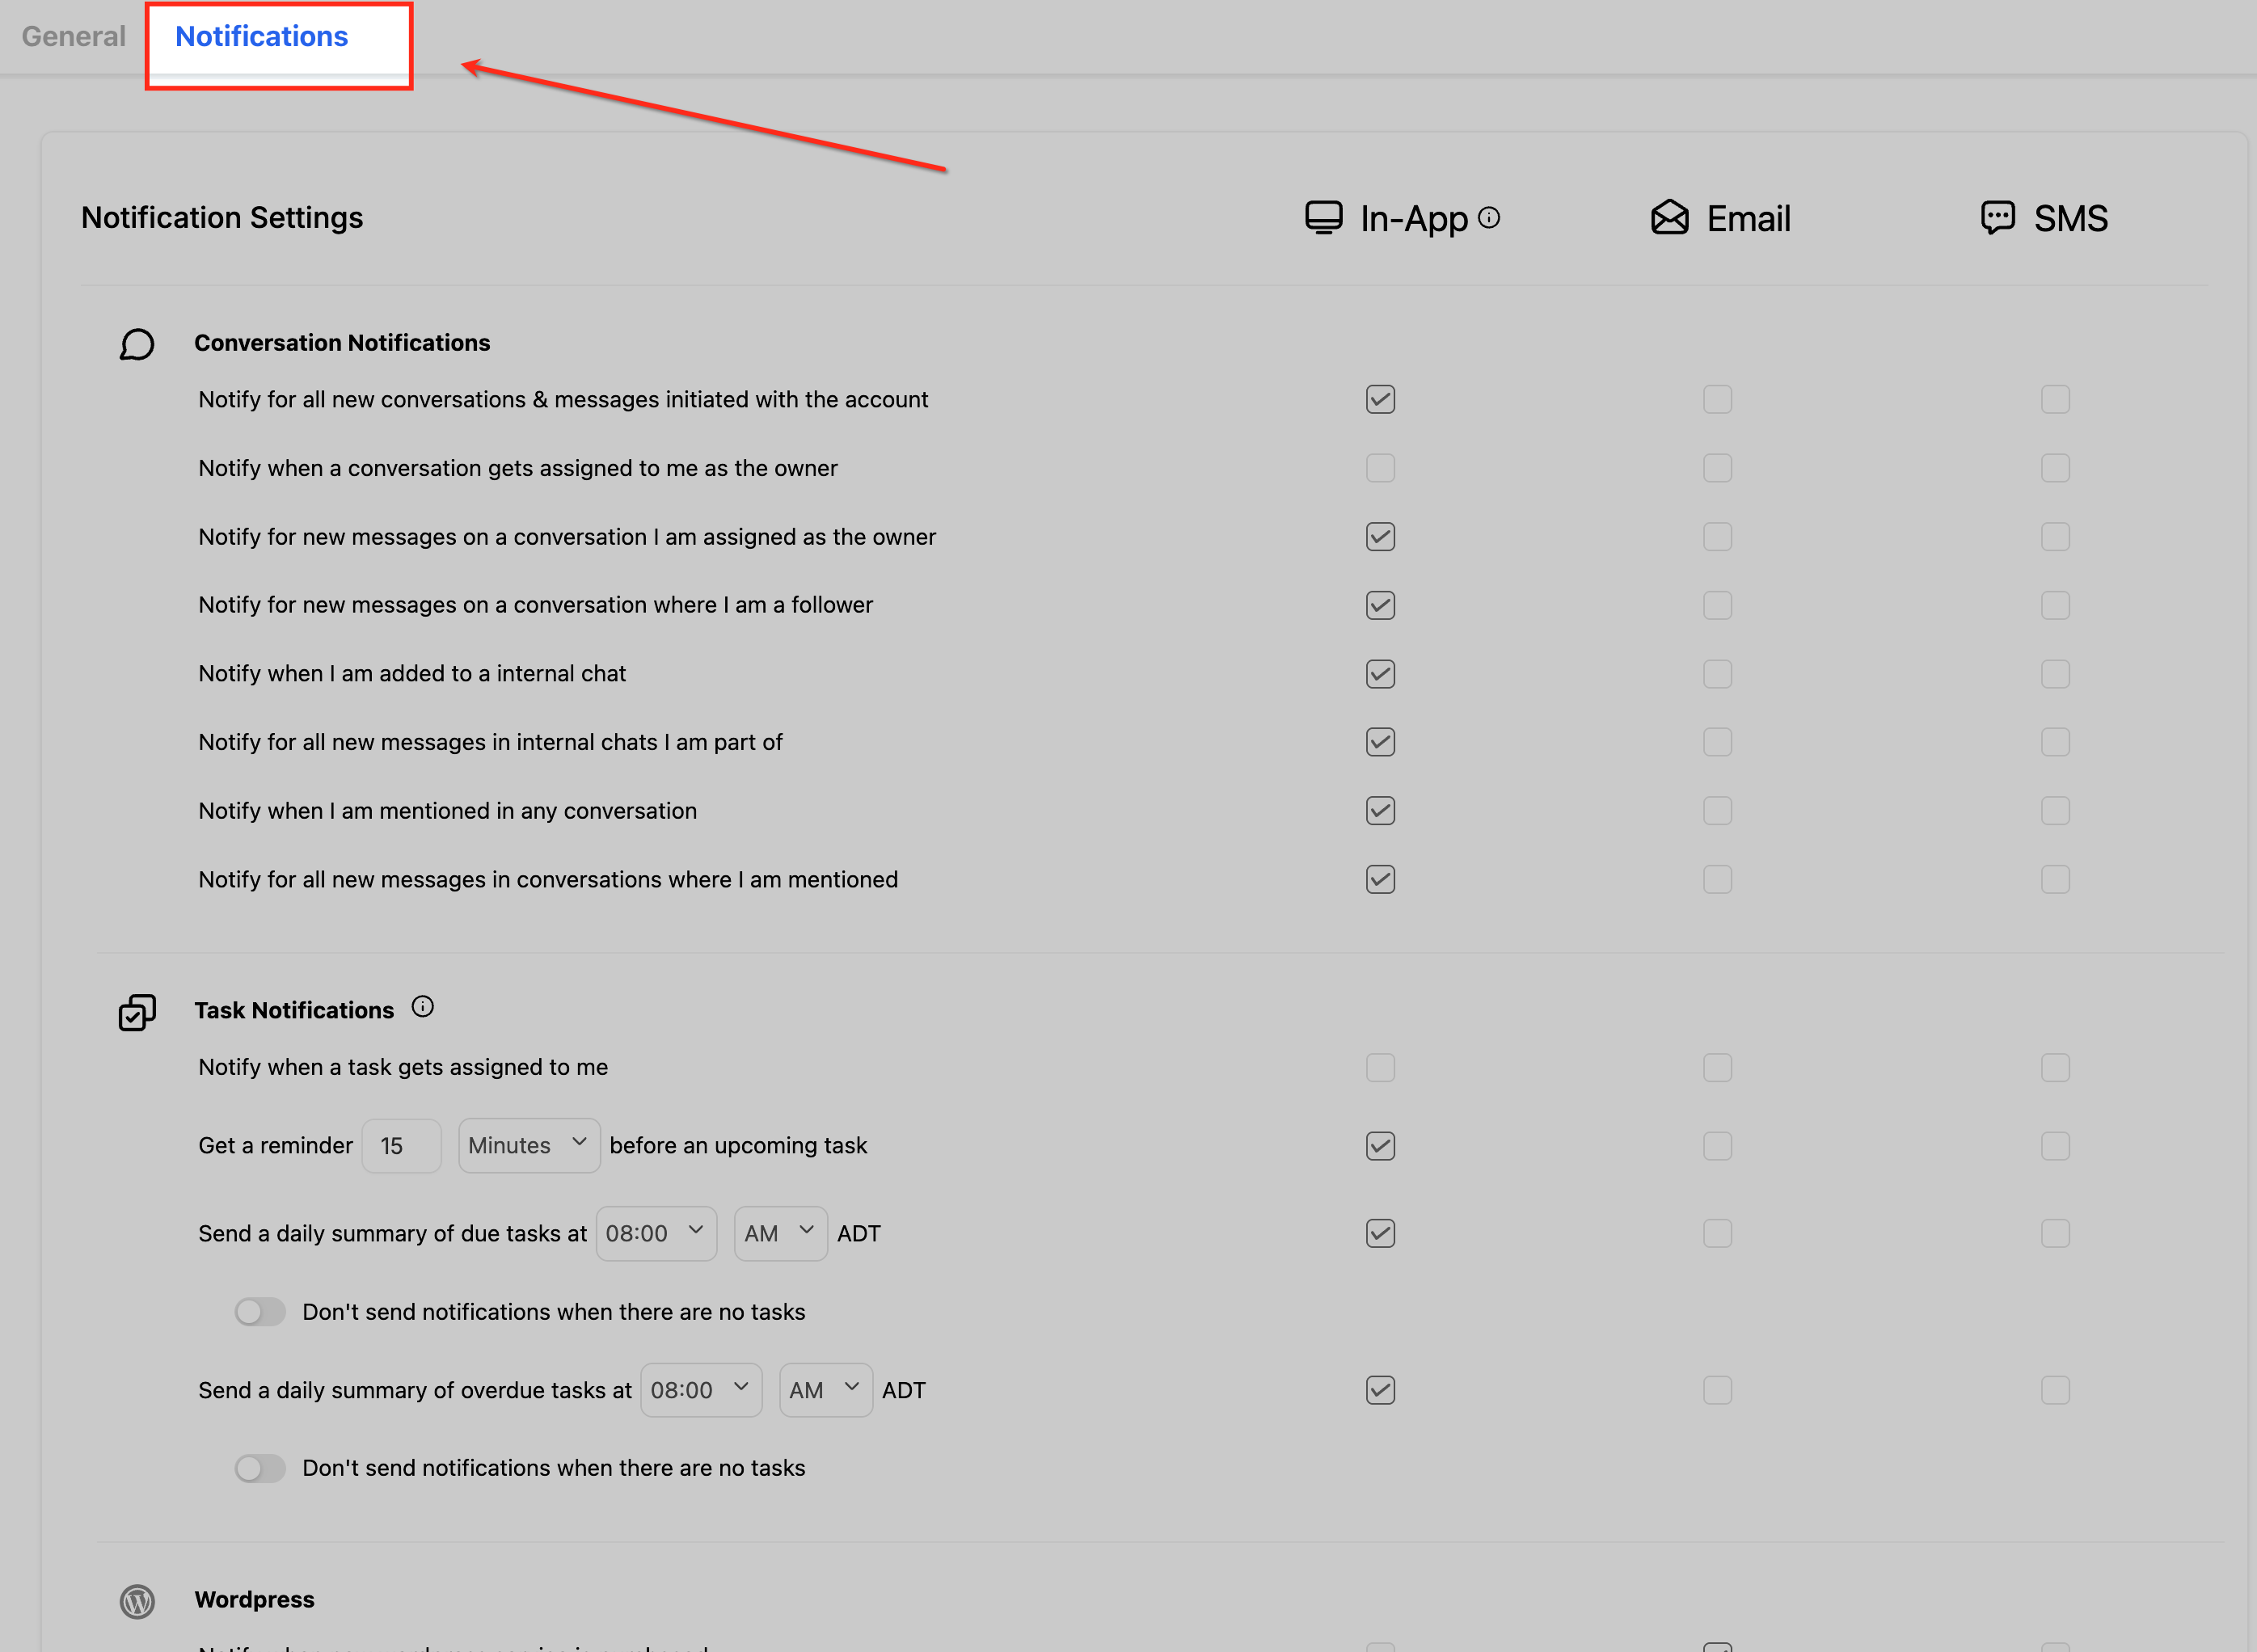
Choose Notification Channels
Select your preferred delivery method—In-App, Email, or SMS—for each notification type. You can mix and match channels depending on how and where you want to be alerted.

Language note:

Notification titles and bodies are delivered in the recipient’s Platform Language (when available). If a translation is missing, content falls back to English (en_US).
Save Your Preferences
After selecting your notification settings, click the Save button at the bottom right. This ensures all your changes are applied and your preferences are updated successfully.

Note: You must be added to a sub-account to receive its notifications. Users with only “Assigned Data” permissions will not receive alerts about unassigned leads.Note: Admins can review notification preference changes in Sub-Account → Settings → Audit Logs by filtering the Module to Notification Preferences.Notification Click-to-Redirect
When a notification pops up on the web app you are able to click it to get redirected to the origin of that notification.
This table explains how the redirect feature is meant to work:
Follower message notifications:

The setting “Notify for new messages on a conversation where I am a follower” is enabled by default for In-App notifications for both existing and new users.
This notification triggers for inbound messages only.
Email and SMS are optional.
| Notify when meeting link/location is missing | Admin & Users |
Adding Users to a Sub-Account
Users must be added to a sub-account to receive its notifications.
Switch to Agency View
Click the account switcher dropdown (1), then select Switch to Agency View (2). This allows you to manage users and permissions at the agency level, including assigning sub-accounts for notifications.

Open Agency Settings
Once you’re in Agency View, click on Settings from the left-hand navigation. This section is where you’ll manage users, permissions, and sub-account access at the agency level.

Navigate to Team Settings
Under the Agency Settings menu, click on Team. This is where you’ll find the list of all users and manage their roles, permissions, and sub-account access.

Edit User Permissions
Locate the user you want to update and click the pencil icon in the Action column. This opens their profile, where you can assign sub-accounts and configure notification access.

Select Roles & Permissions
In the user profile panel, click on Roles & Permissions from the left sidebar. This section allows you to assign sub-account access, user roles, and manage permission settings necessary for receiving notifications.

Add Sub-Accounts
Use the Add sub-accounts field to select which sub-accounts the user should have access to. Once added, the user will be able to receive notifications related to those sub-accounts.

Restrict Access (Optional)
Toggle Restrict Access to selected sub-accounts if you want the user to be limited to only the accounts listed. This ensures they receive notifications solely for the specified sub-accounts.

After saving, the user can go to the sub-account > Settings > My Profile > Notifications to manage their preferences.
Frequently Asked Questions
Q: How does the “Mark all as read” button work?
It changes all current notifications from unread to read status for the logged-in user.
Q: Why do I receive duplicate notifications for the same message?
This happens when multiple triggers apply (e.g., “assigned to me” + “new message”). Review your notification settings and disable overlapping options for a cleaner inbox.
Q: What does the “Clear All” button do?
It removes all current notifications from view. New notifications will still populate after clicking the button. Cleared notifications cannot be restored.
Was this article helpful?
That’s Great!
Thank you for your feedback
Sorry! We couldn't be helpful
Thank you for your feedback
Feedback sent
We appreciate your effort and will try to fix the article