Learn how to add and configure a Two‑Step Order Form in a HighLevel funnel. This article goes through attaching products and prices, customizing the form and enabling options like Cart Mode, Order Bump, and Coupon Codes.
TABLE OF CONTENTS
- What is a Two‑Step Order Form?
- Key Benefits of Two‑Step Order Forms
- Products Setup (Prerequisite)
- Adding the Two‑Step Order Form to a Funnel
- Frequently Asked Questions
- Related Articles
What is a Two‑Step Order Form?
Two‑Step Order Forms split checkout into two lightweight screens. Step 1 typically captures contact and shipping details while Step 2 collects payment and finalizes the order. Separating these steps can reduce friction, improve conversions. This form can be easily added to any funnel step making it simple to begin selling your products!
Key Benefits of Two‑Step Order Forms
- Conversion Optimization: Breaking checkout into two short steps can increase completion rates by reducing form fatigue.
- Flexible Fields: Customize the fields that are shown/hidden and required/optional to match your needs.
- Cart Mode: Cart mode and quantity limits let buyers select exactly what they need while keeping totals clear.
- Revenue Boosters: Order bump support makes it easy to offer complementary items on checkout.
- Clear Configuration: Step‑specific labels, headers, and buttons keep messaging on‑brand and easy to follow.
Products Setup (Prerequisite)
Products must be attached to the funnel step before the Two‑Step Order Form can display and charge for them. Follow these steps to ensure your products and prices are available in the form.
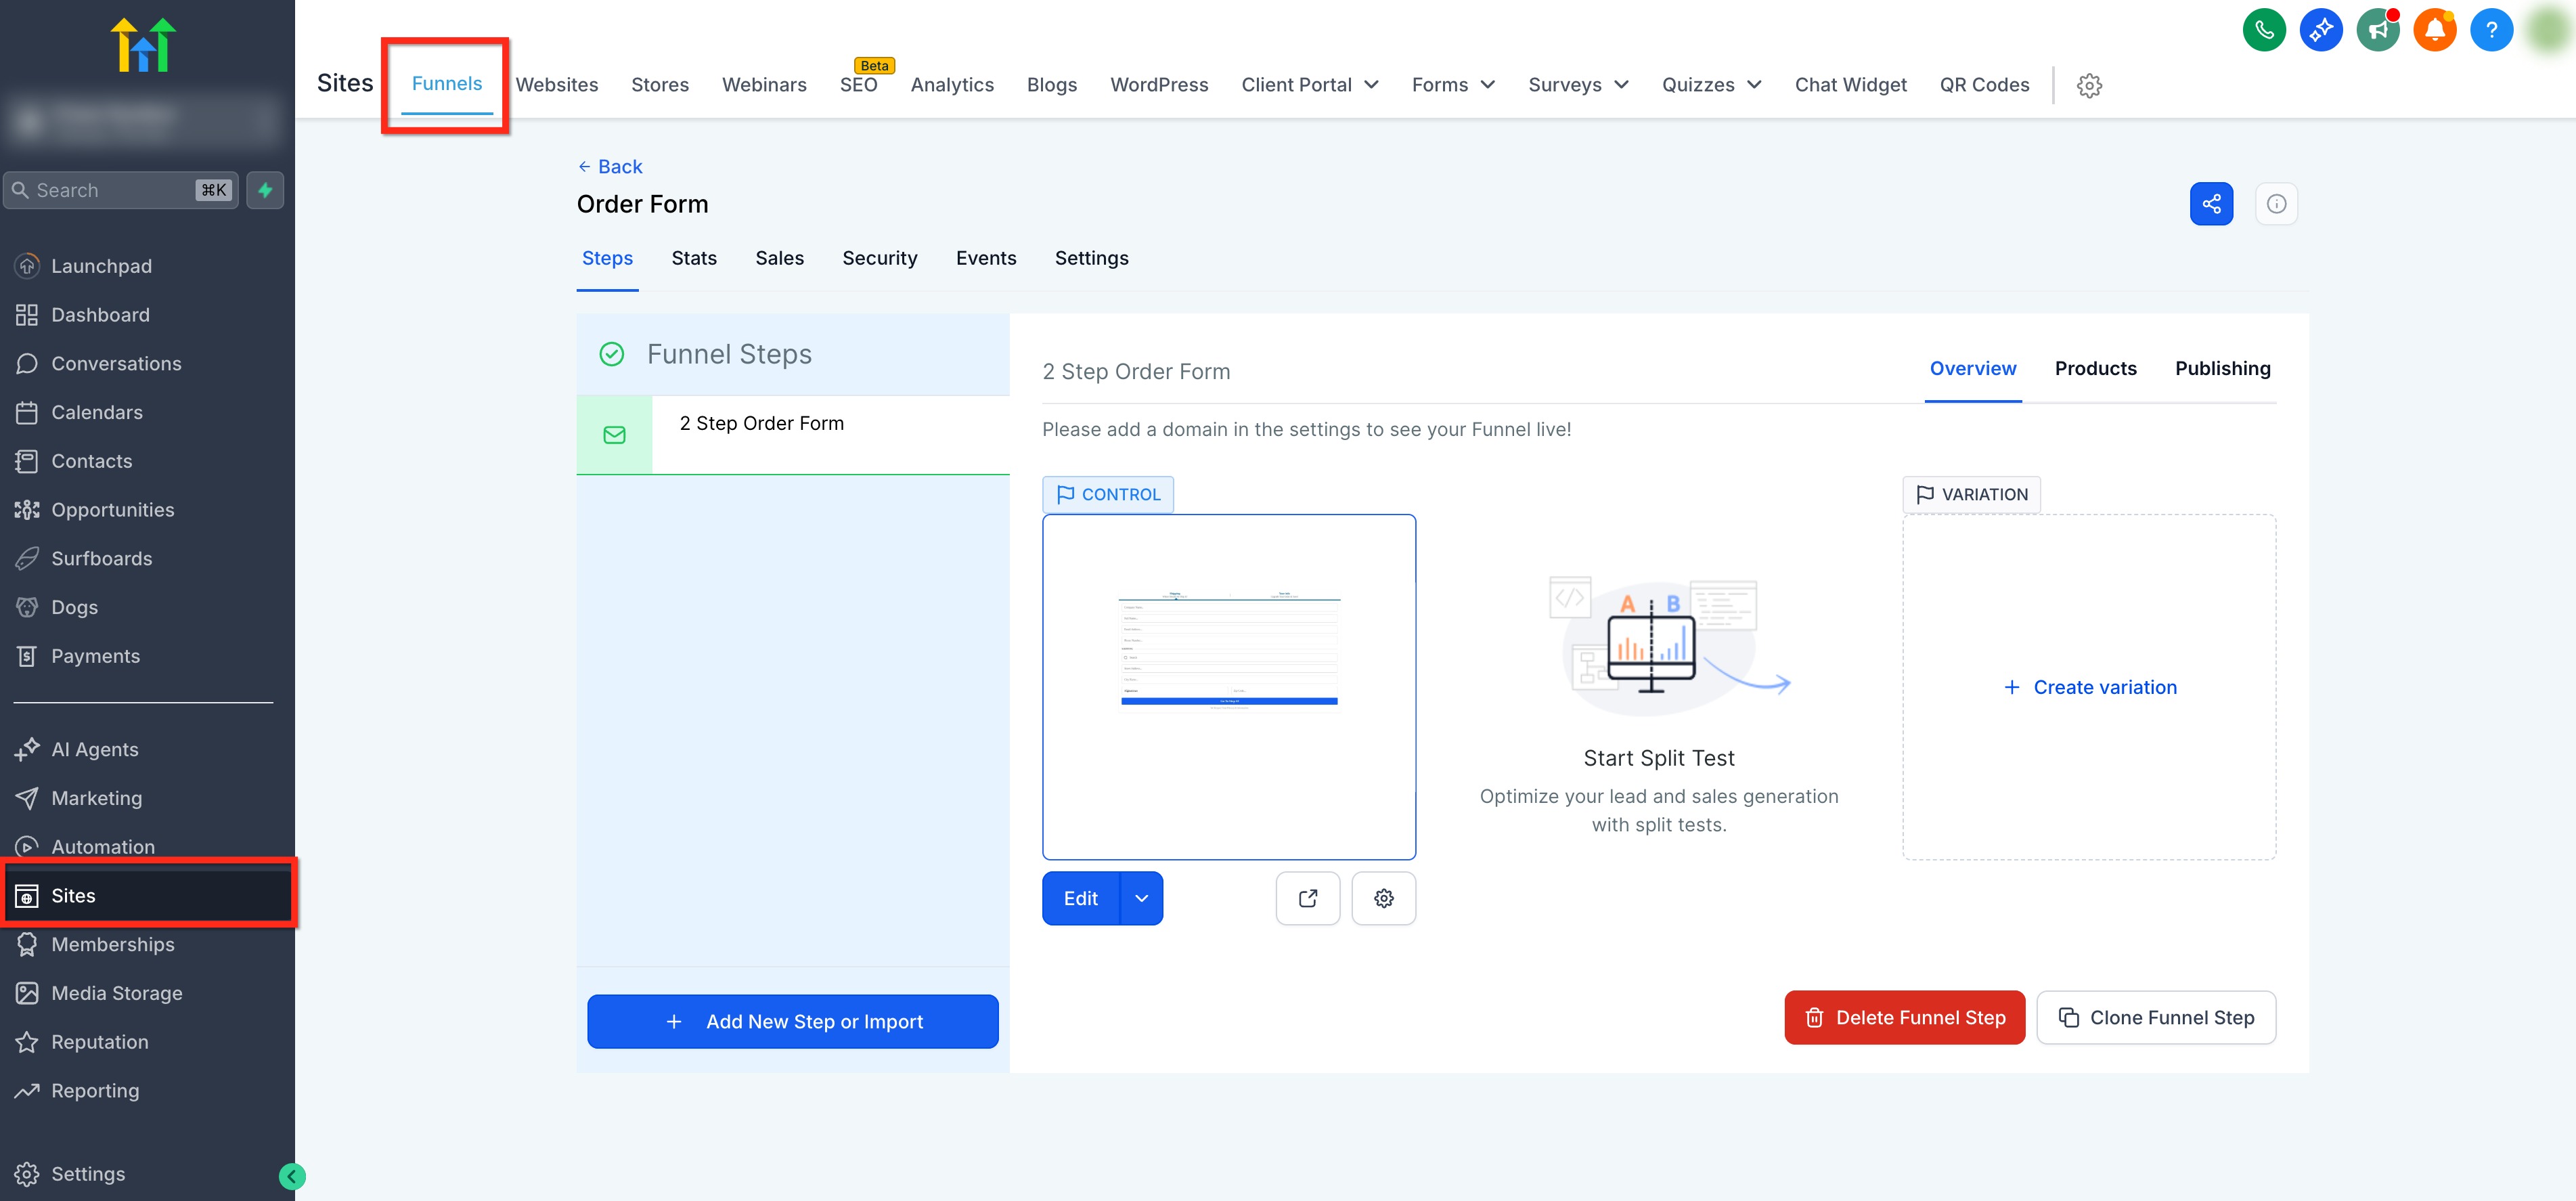
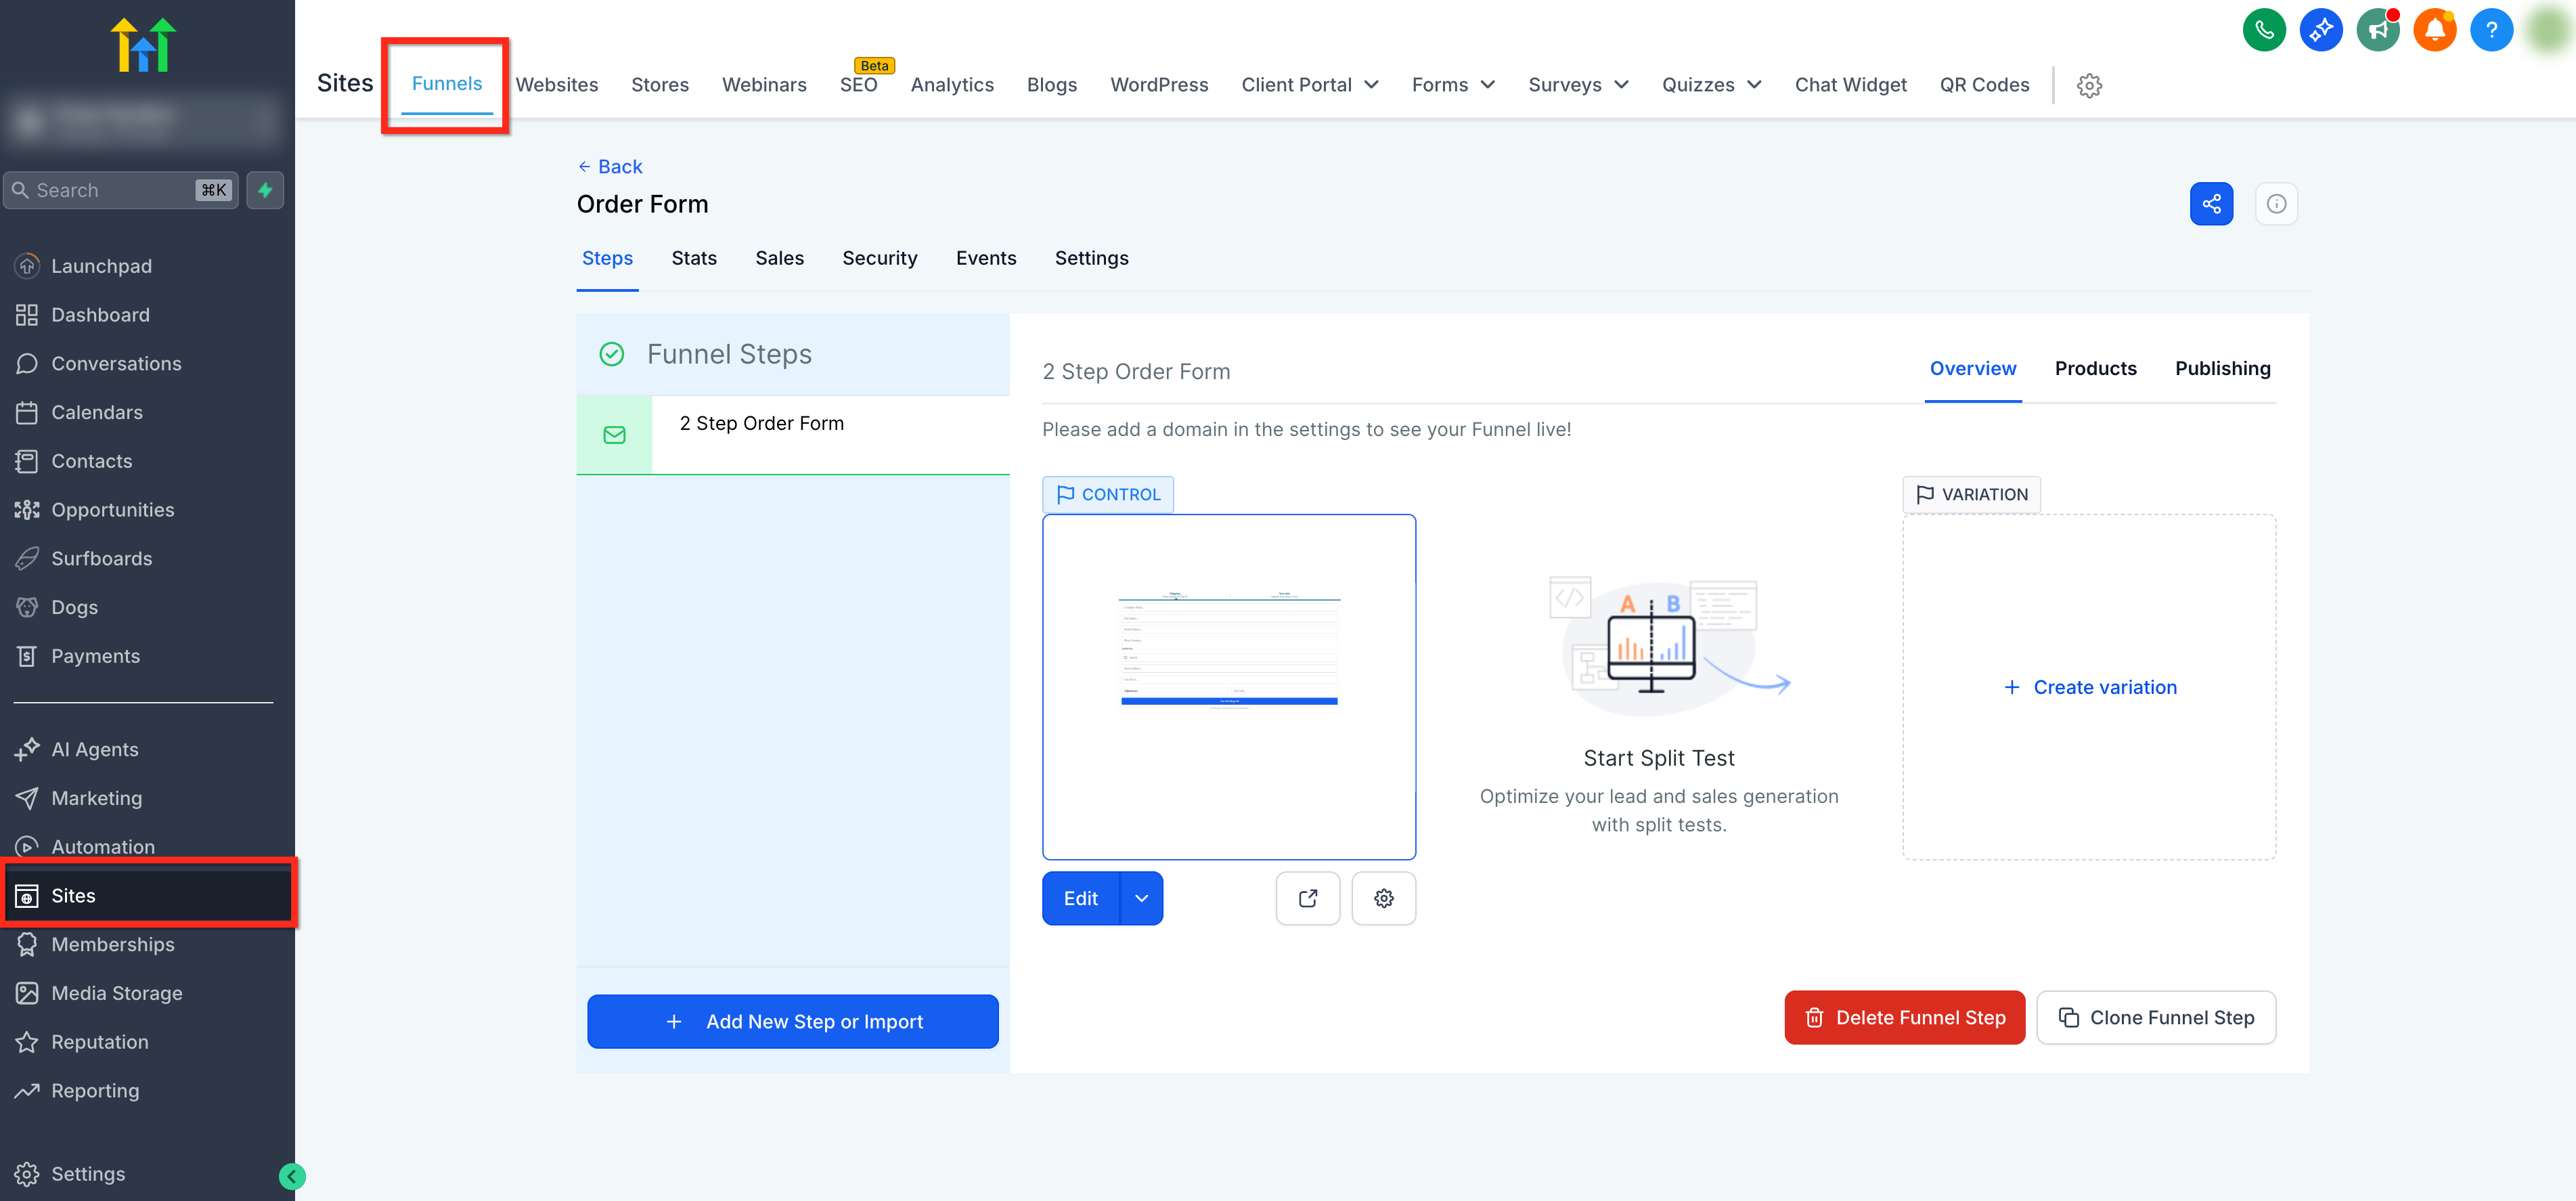
Tip: Be sure to create your products before starting this process. To learn more about creating products, click here.Go to Sites in the left navigation, open your Funnel, and select the funnel step you want to use.
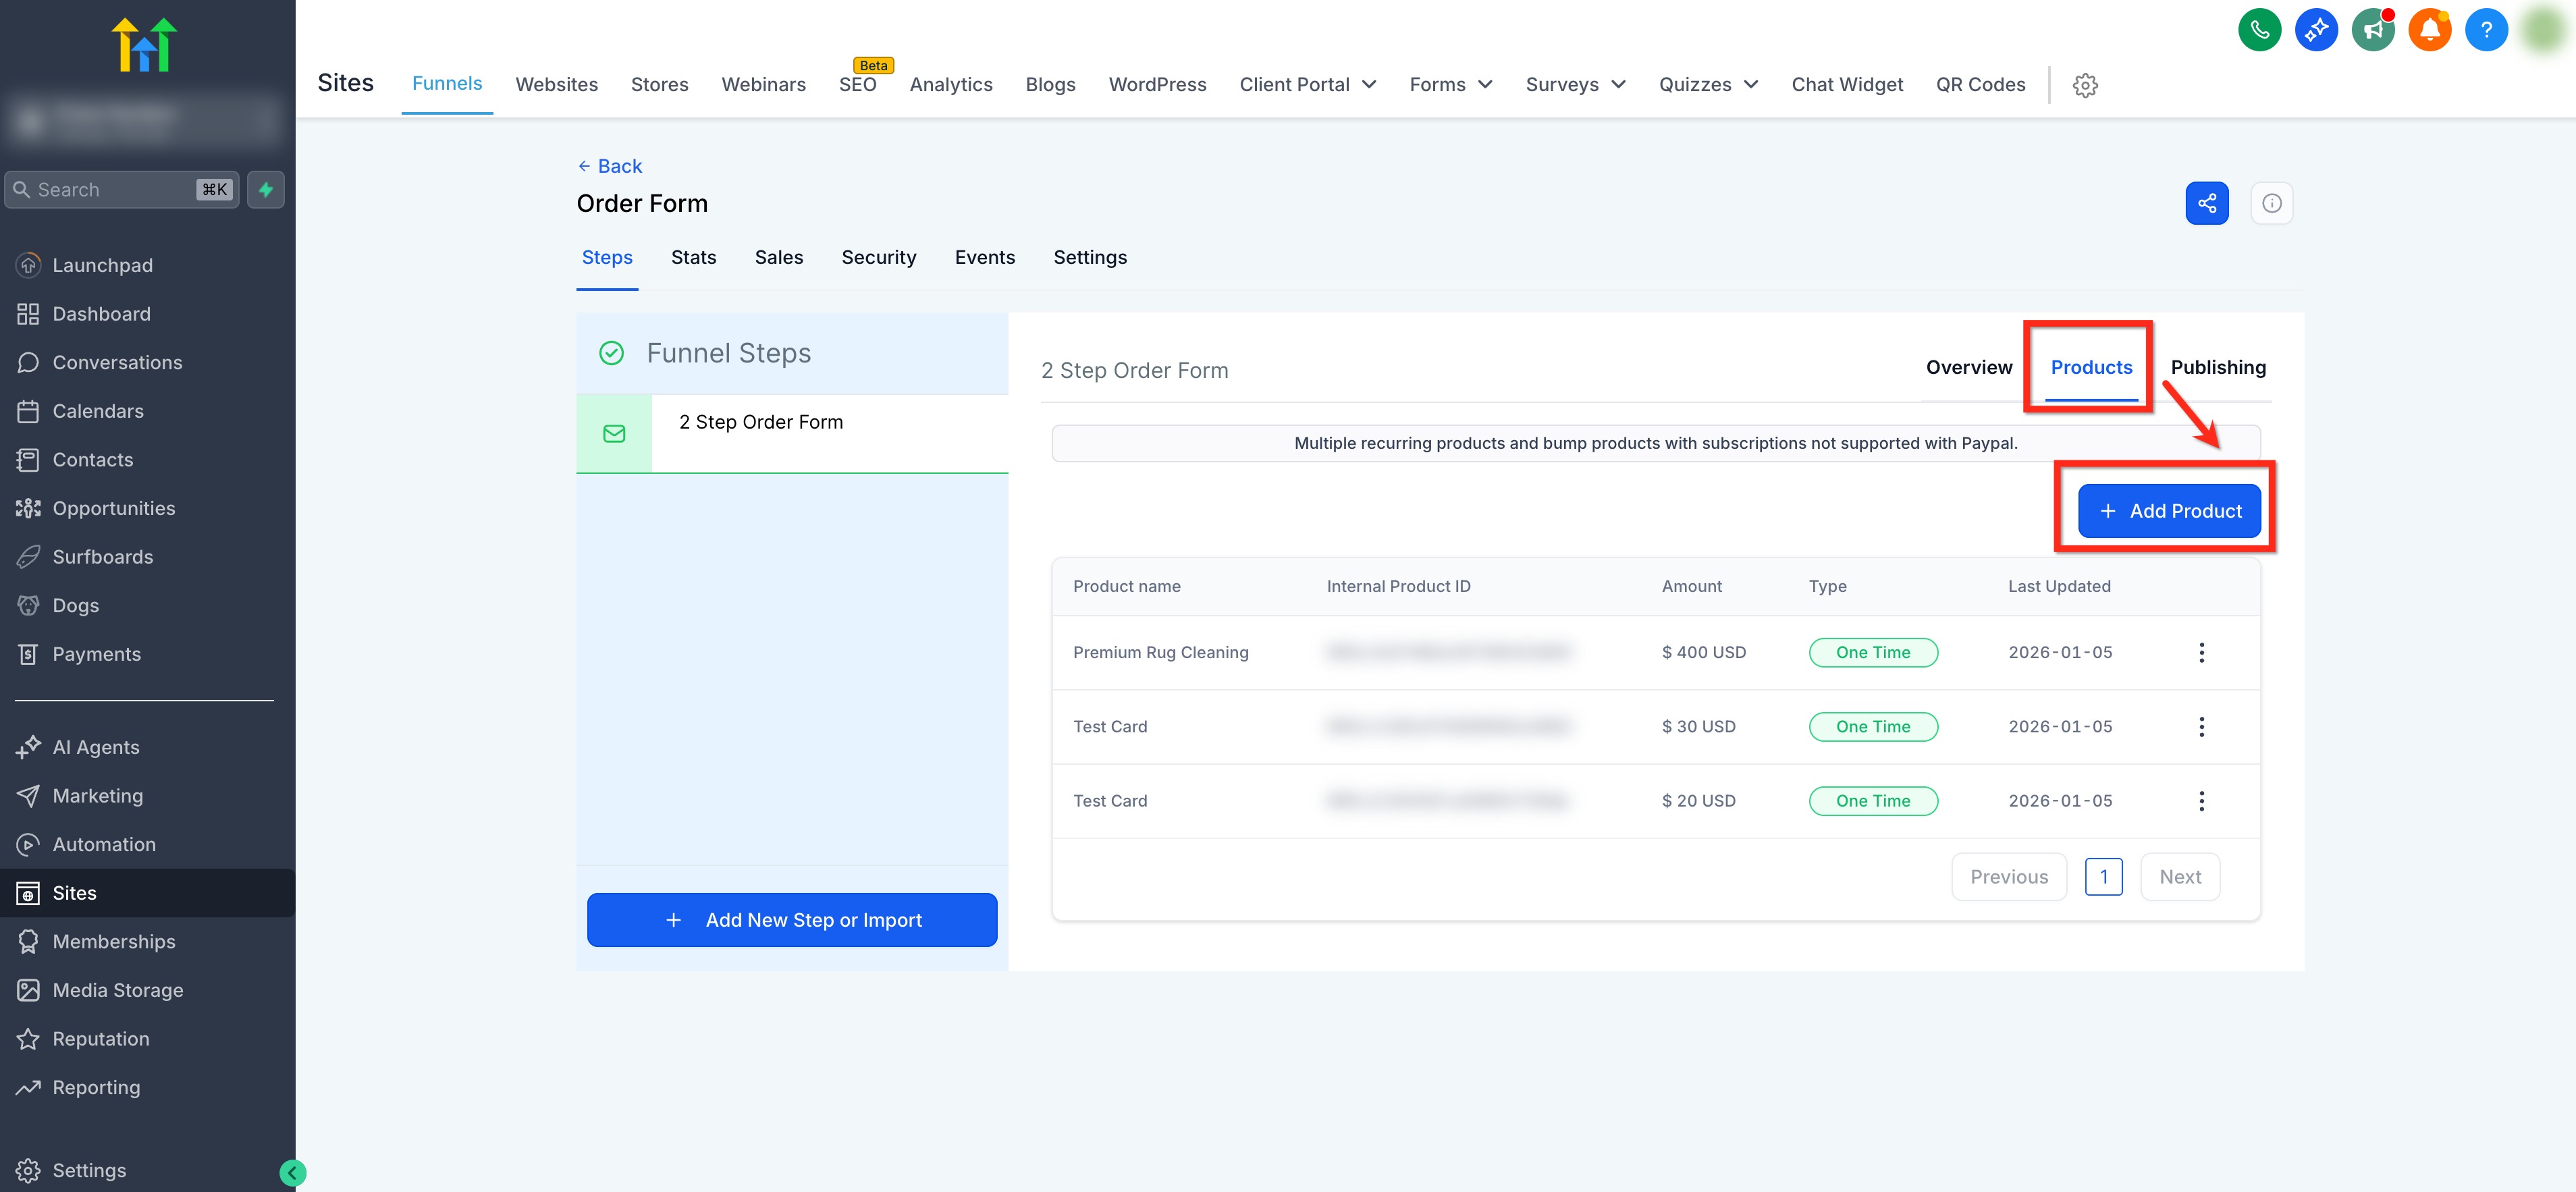
Open the Products tab on the right. Click + Add Product.
Use the Product dropdown to select the item you want to sell or click the inline text link to create a new product.
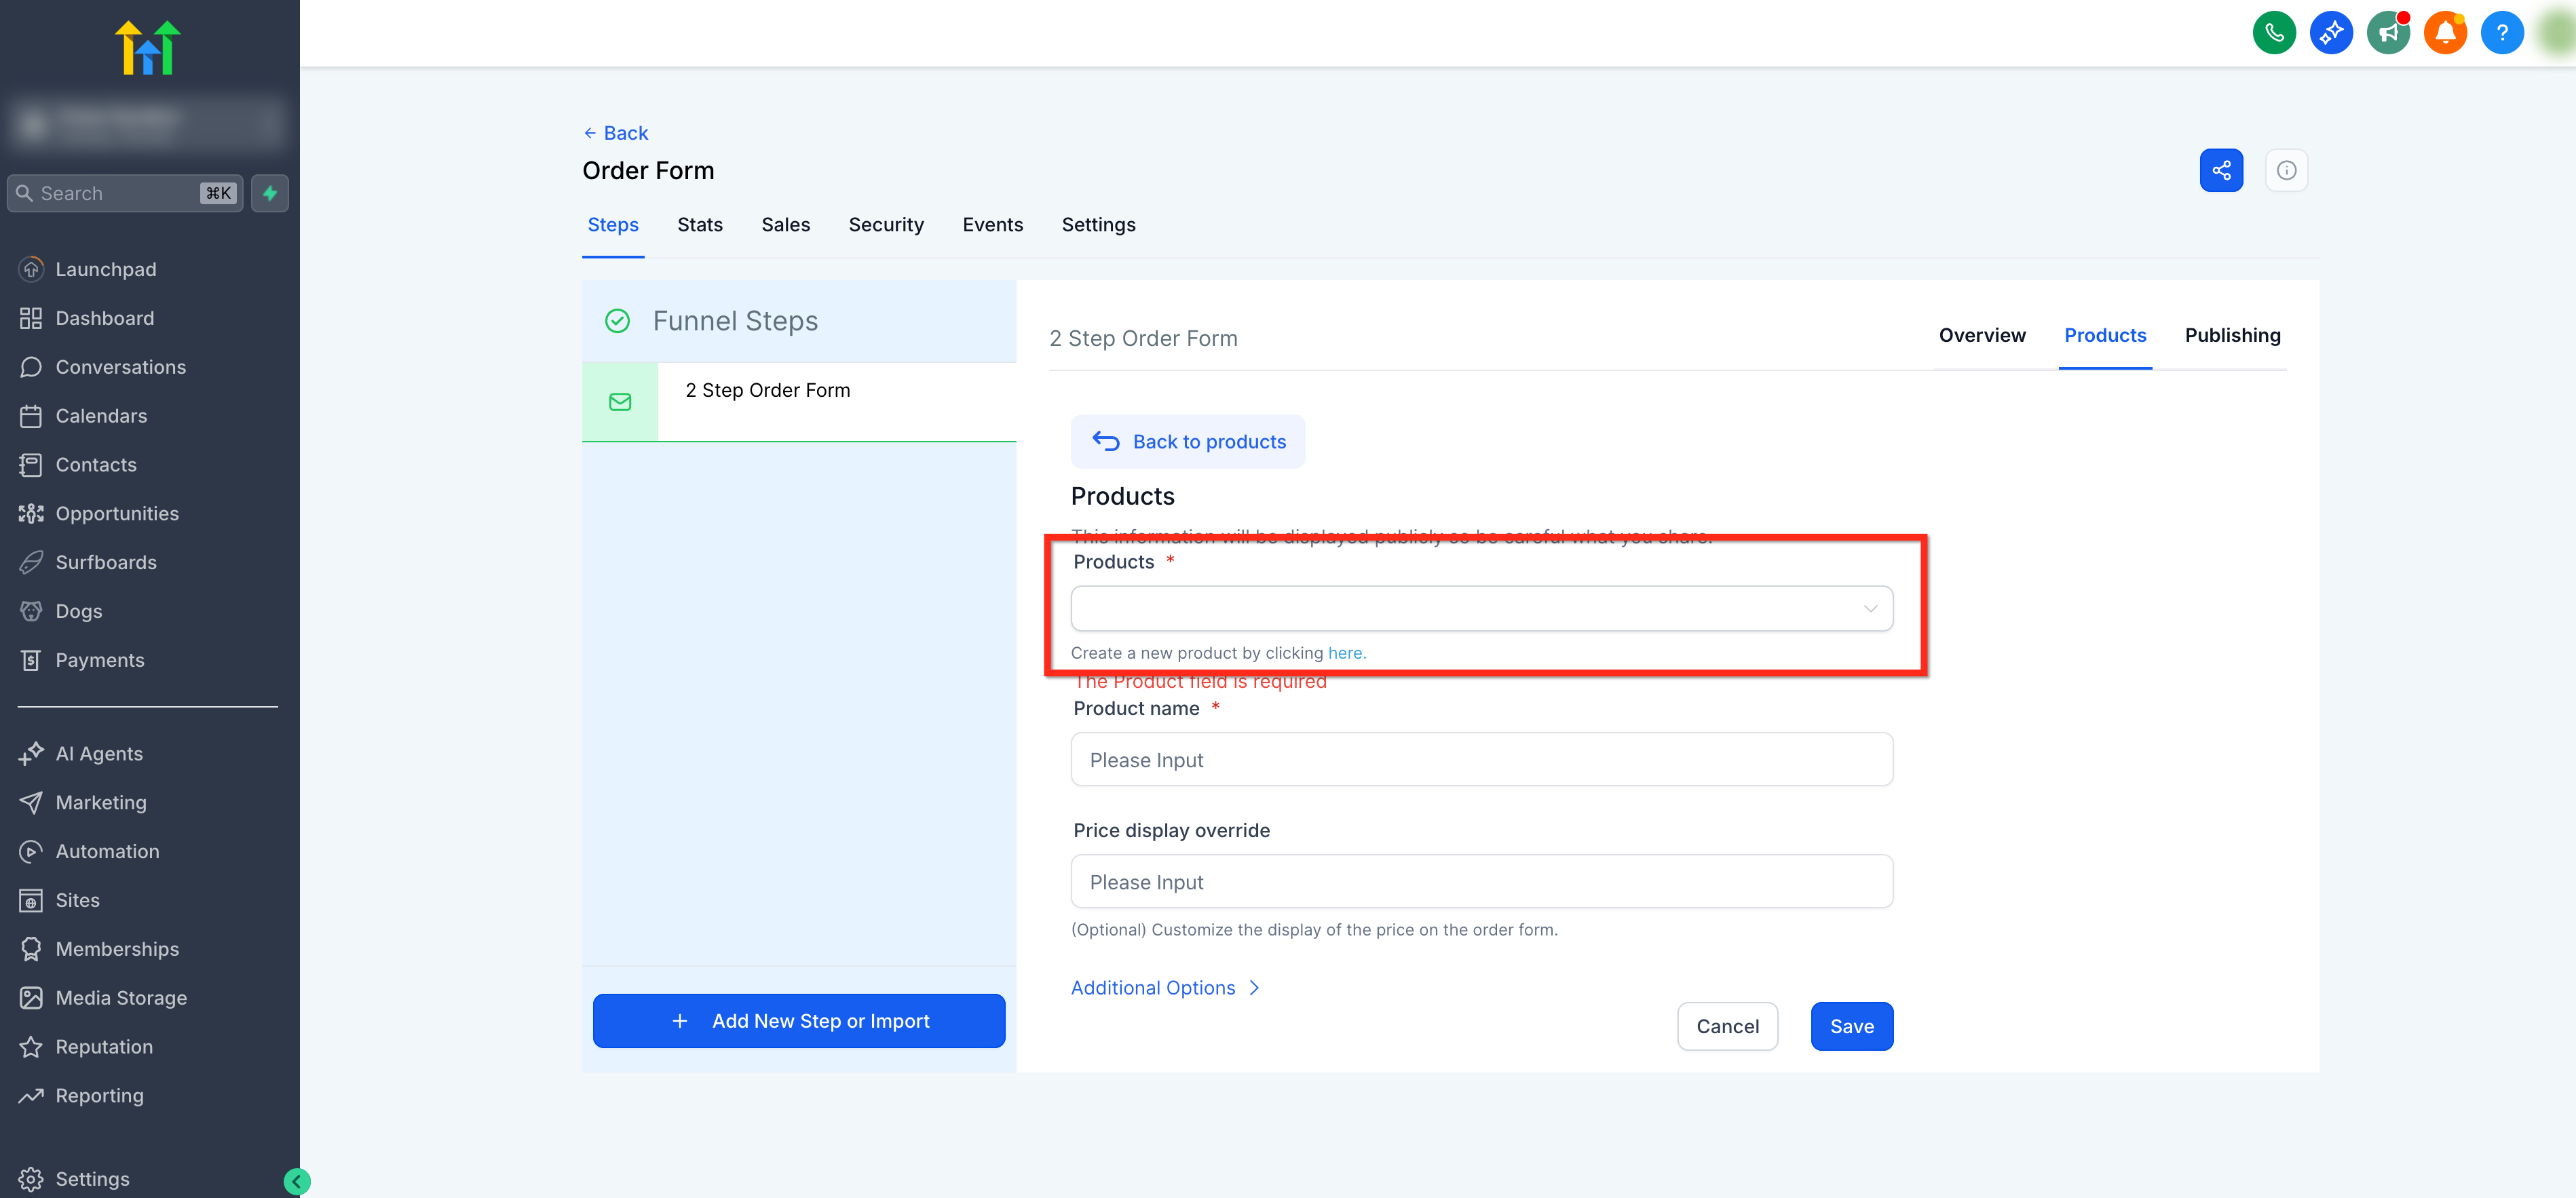
Under Price, choose an existing price or click the inline text link to create a new price.
You can optionally use Product Name Override to edit the name to control how it appears on the order form or Price Display Override to customize how the price is shown on the order form.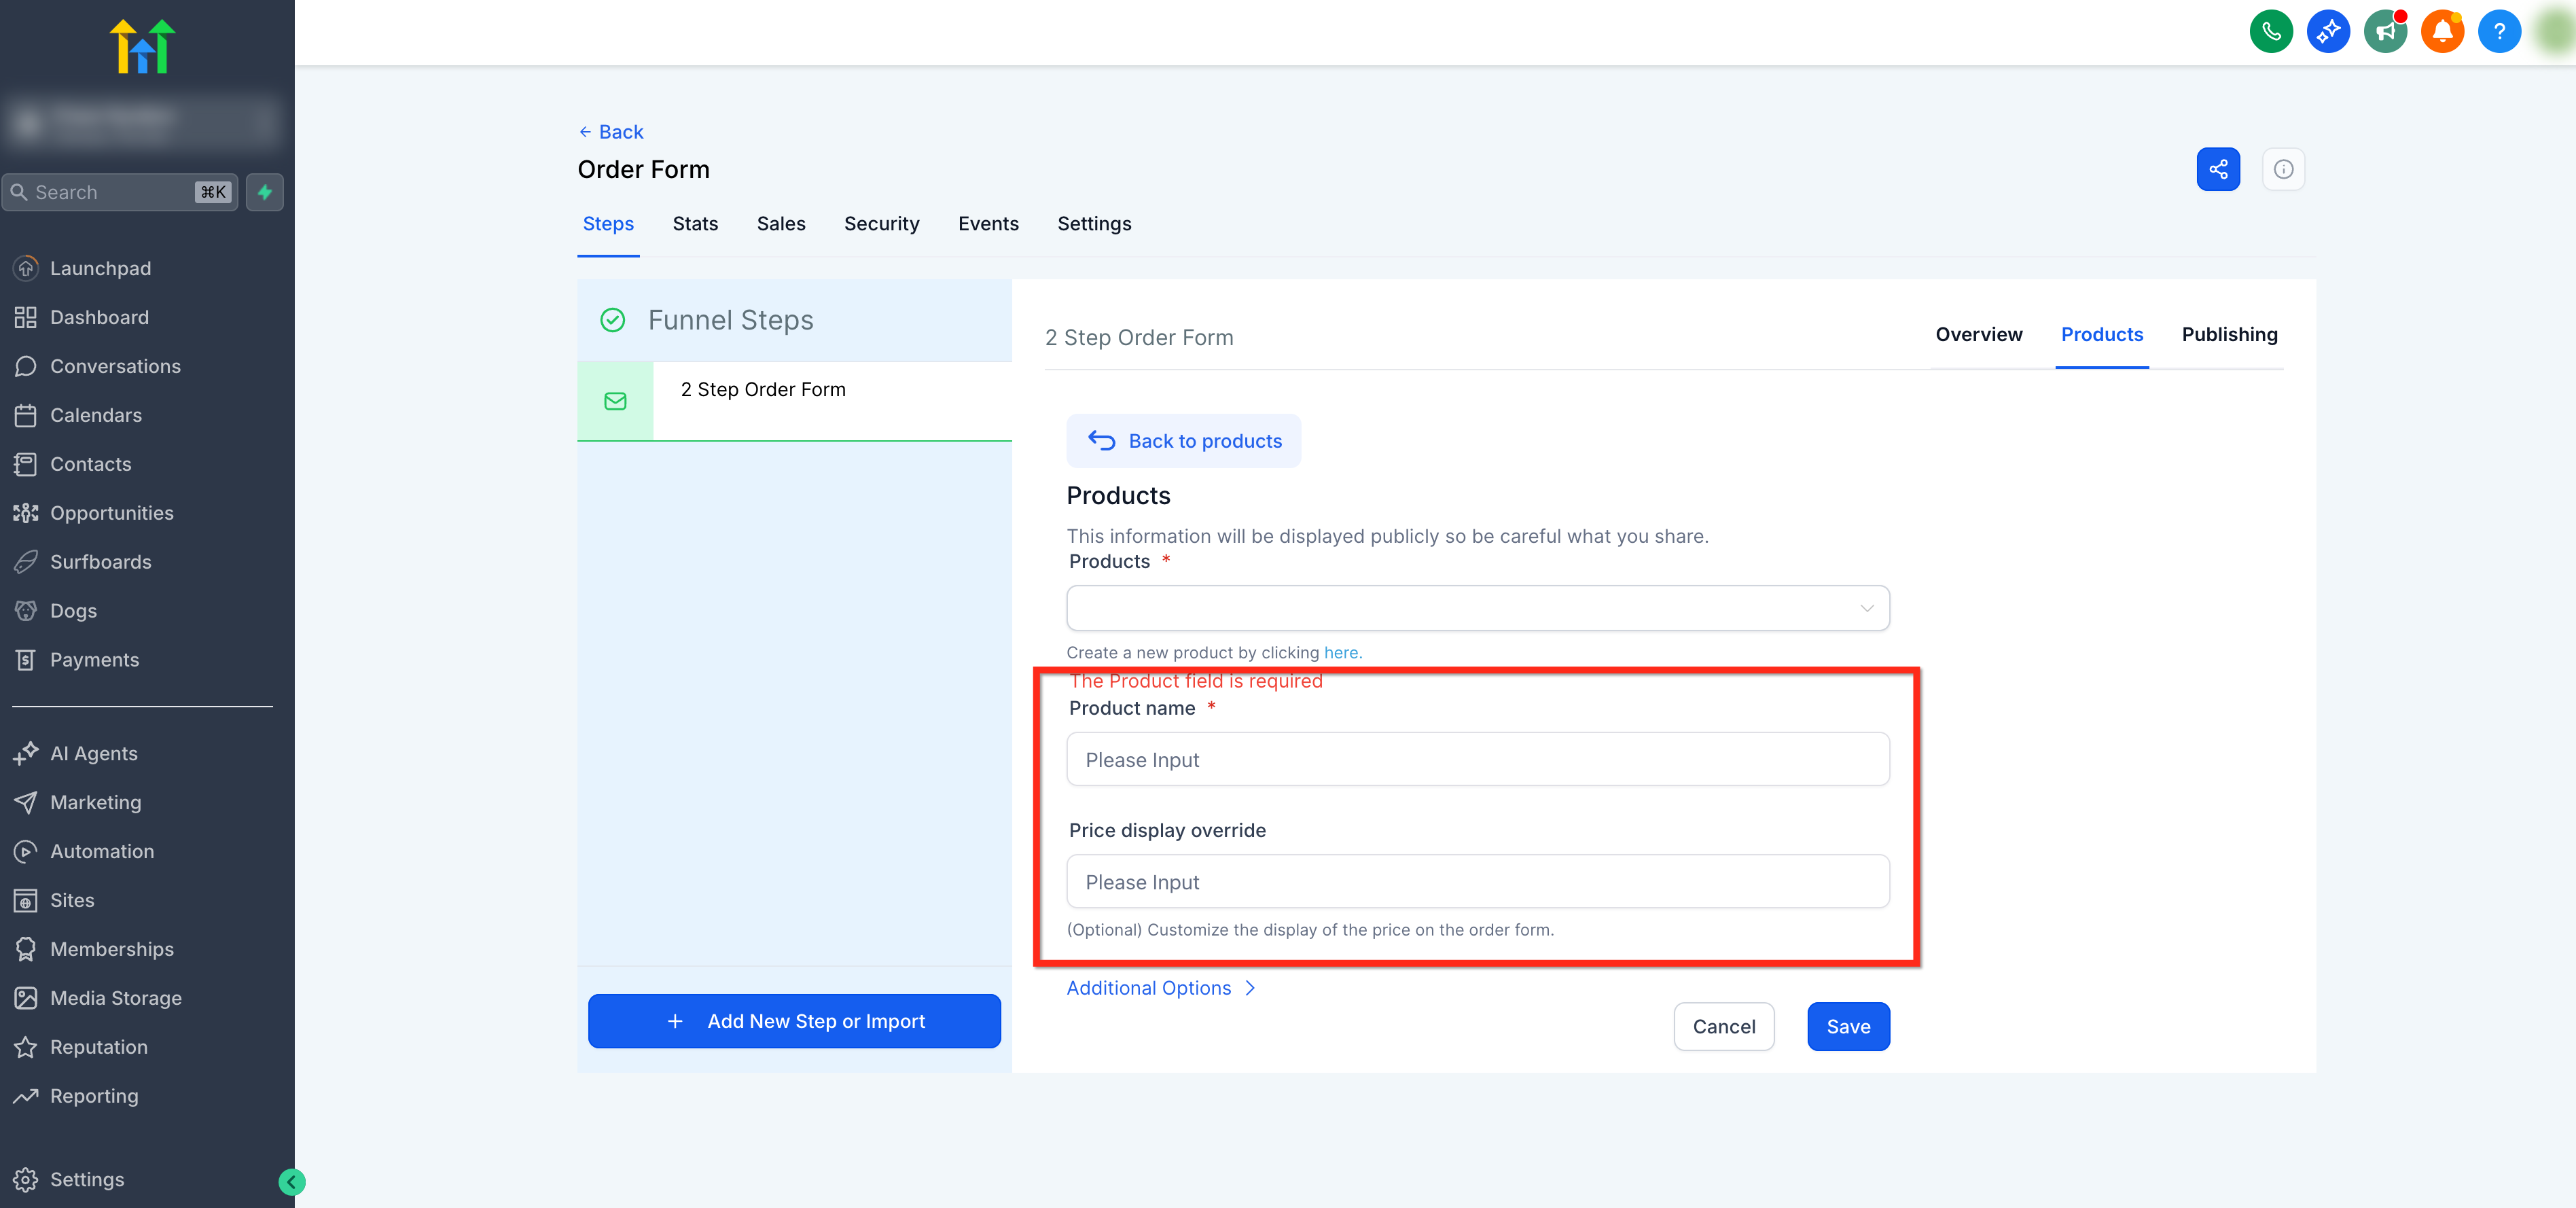
Click Additional options to configure how the product can be purchased:
- Enable Allow multiple quantity to let customers purchase more than one unit of the product.
- Use Max per order to set the maximum quantity a customer can purchase in one order. You can set the limit from 1–999 units.
- Choose whether the item is a Main product or Bump product.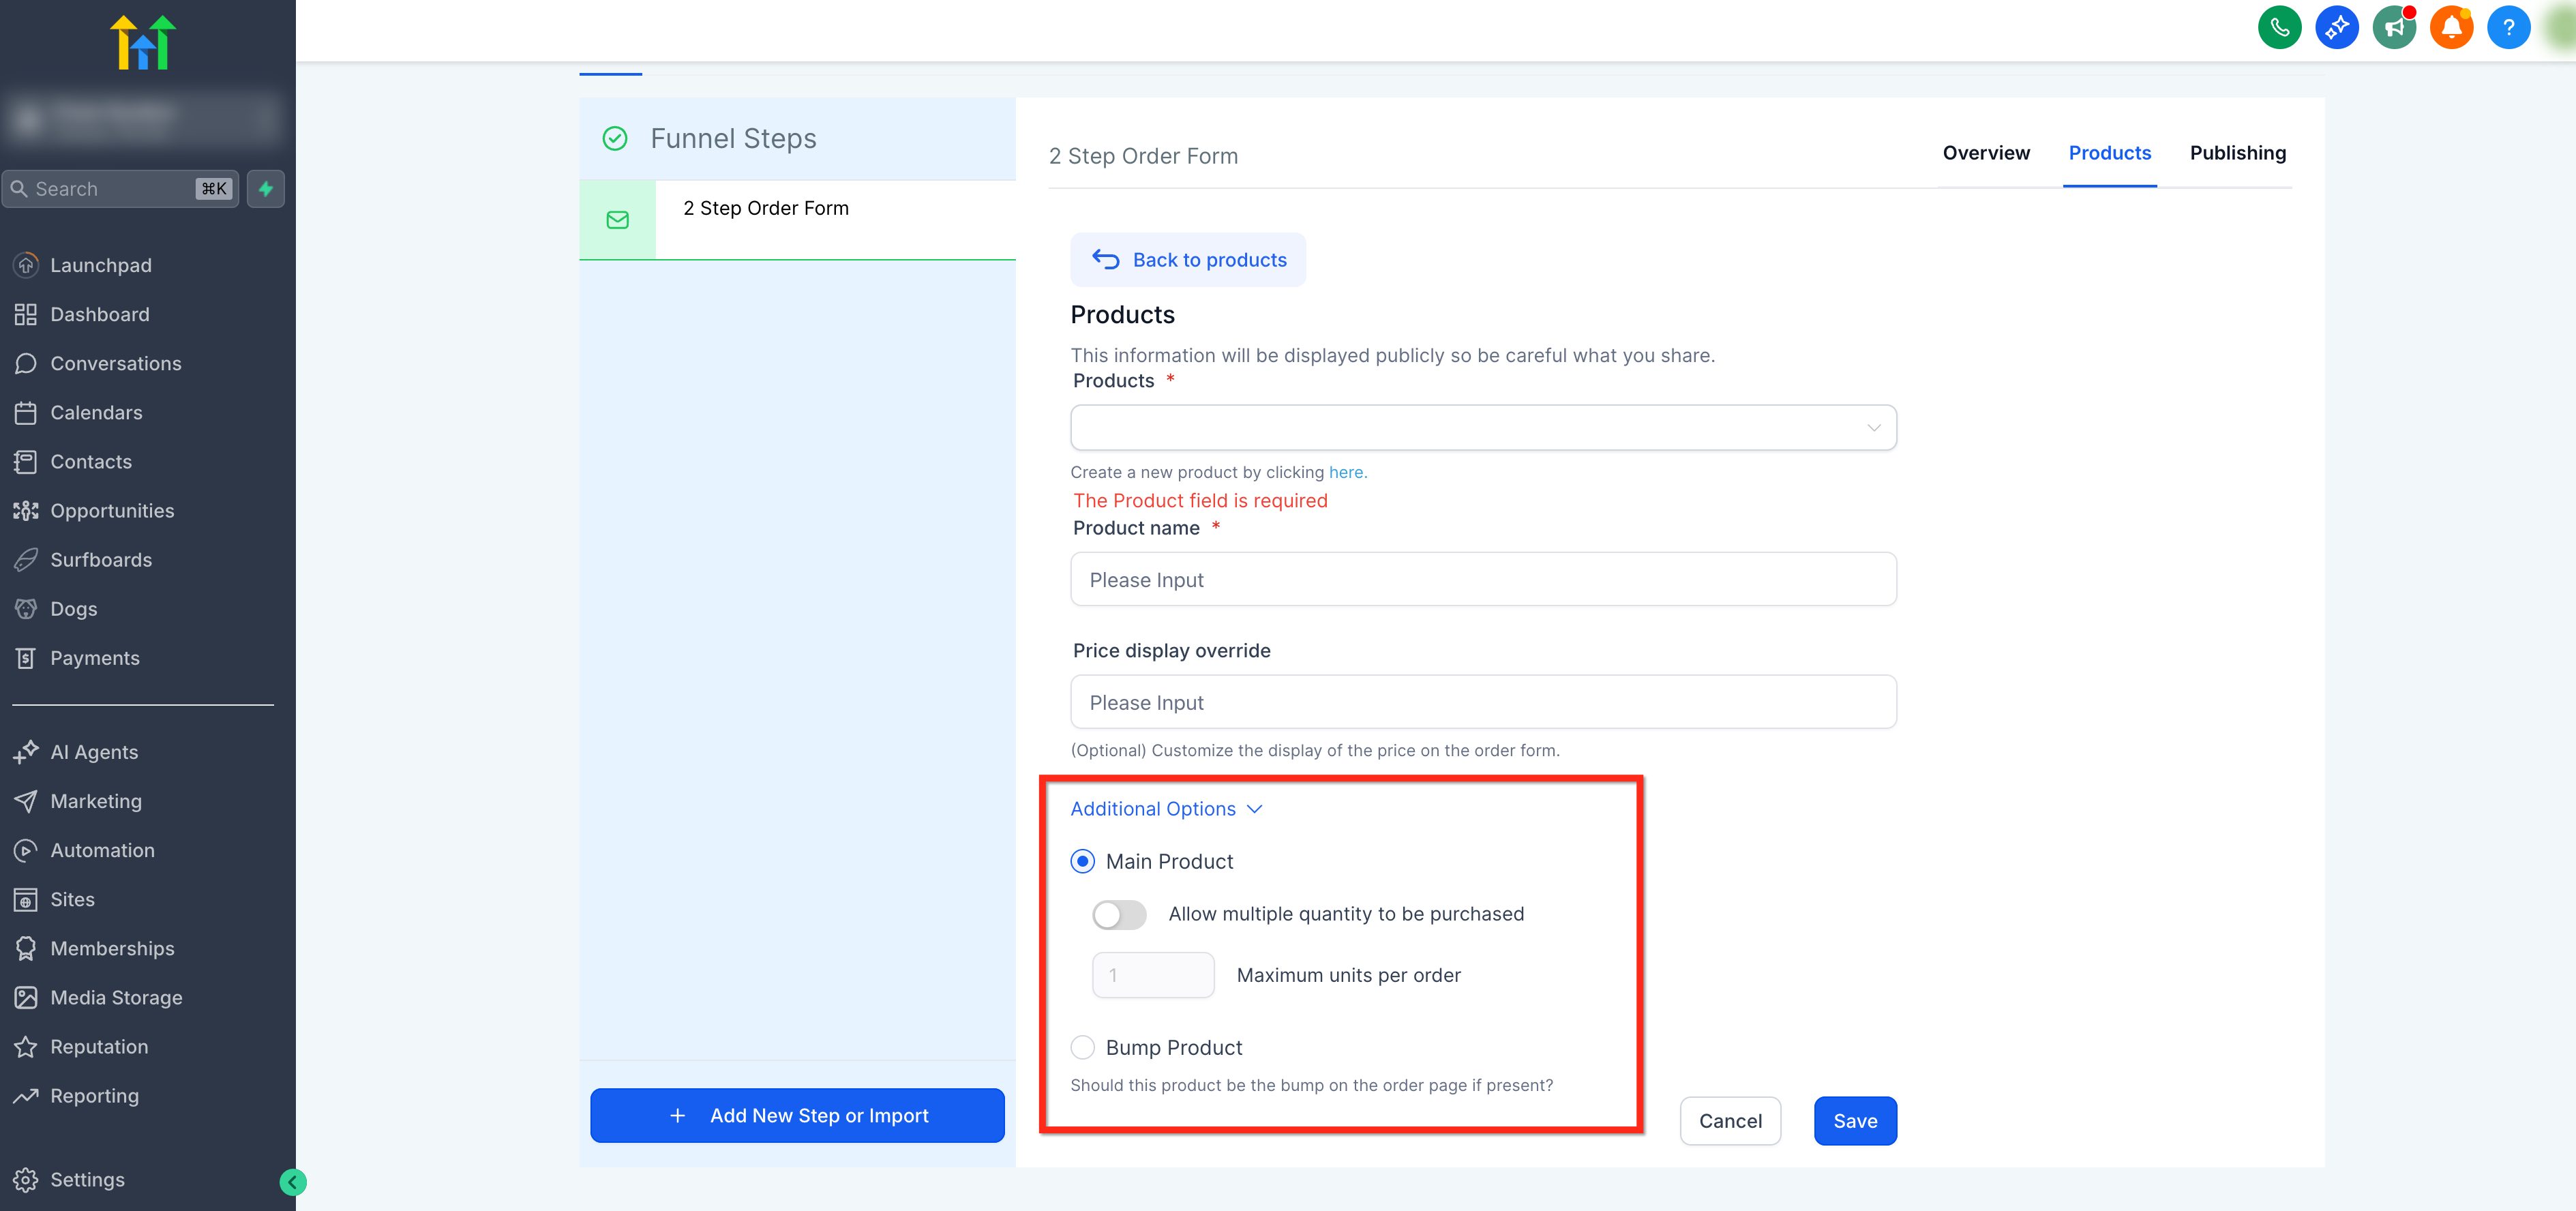
Repeat to add one or many products as needed!
Adding the Two‑Step Order Form to a Funnel
After products are attached to the step, follow these steps to add and configure the Two‑Step Order Form element in your funnel.
Step 1: Navigate to your Funnel Step
Go to Sites → Funnels, open your funnel, and select the specific step where you’ll place the checkout.
Step 2: Add the Two‑Step Order Form Element
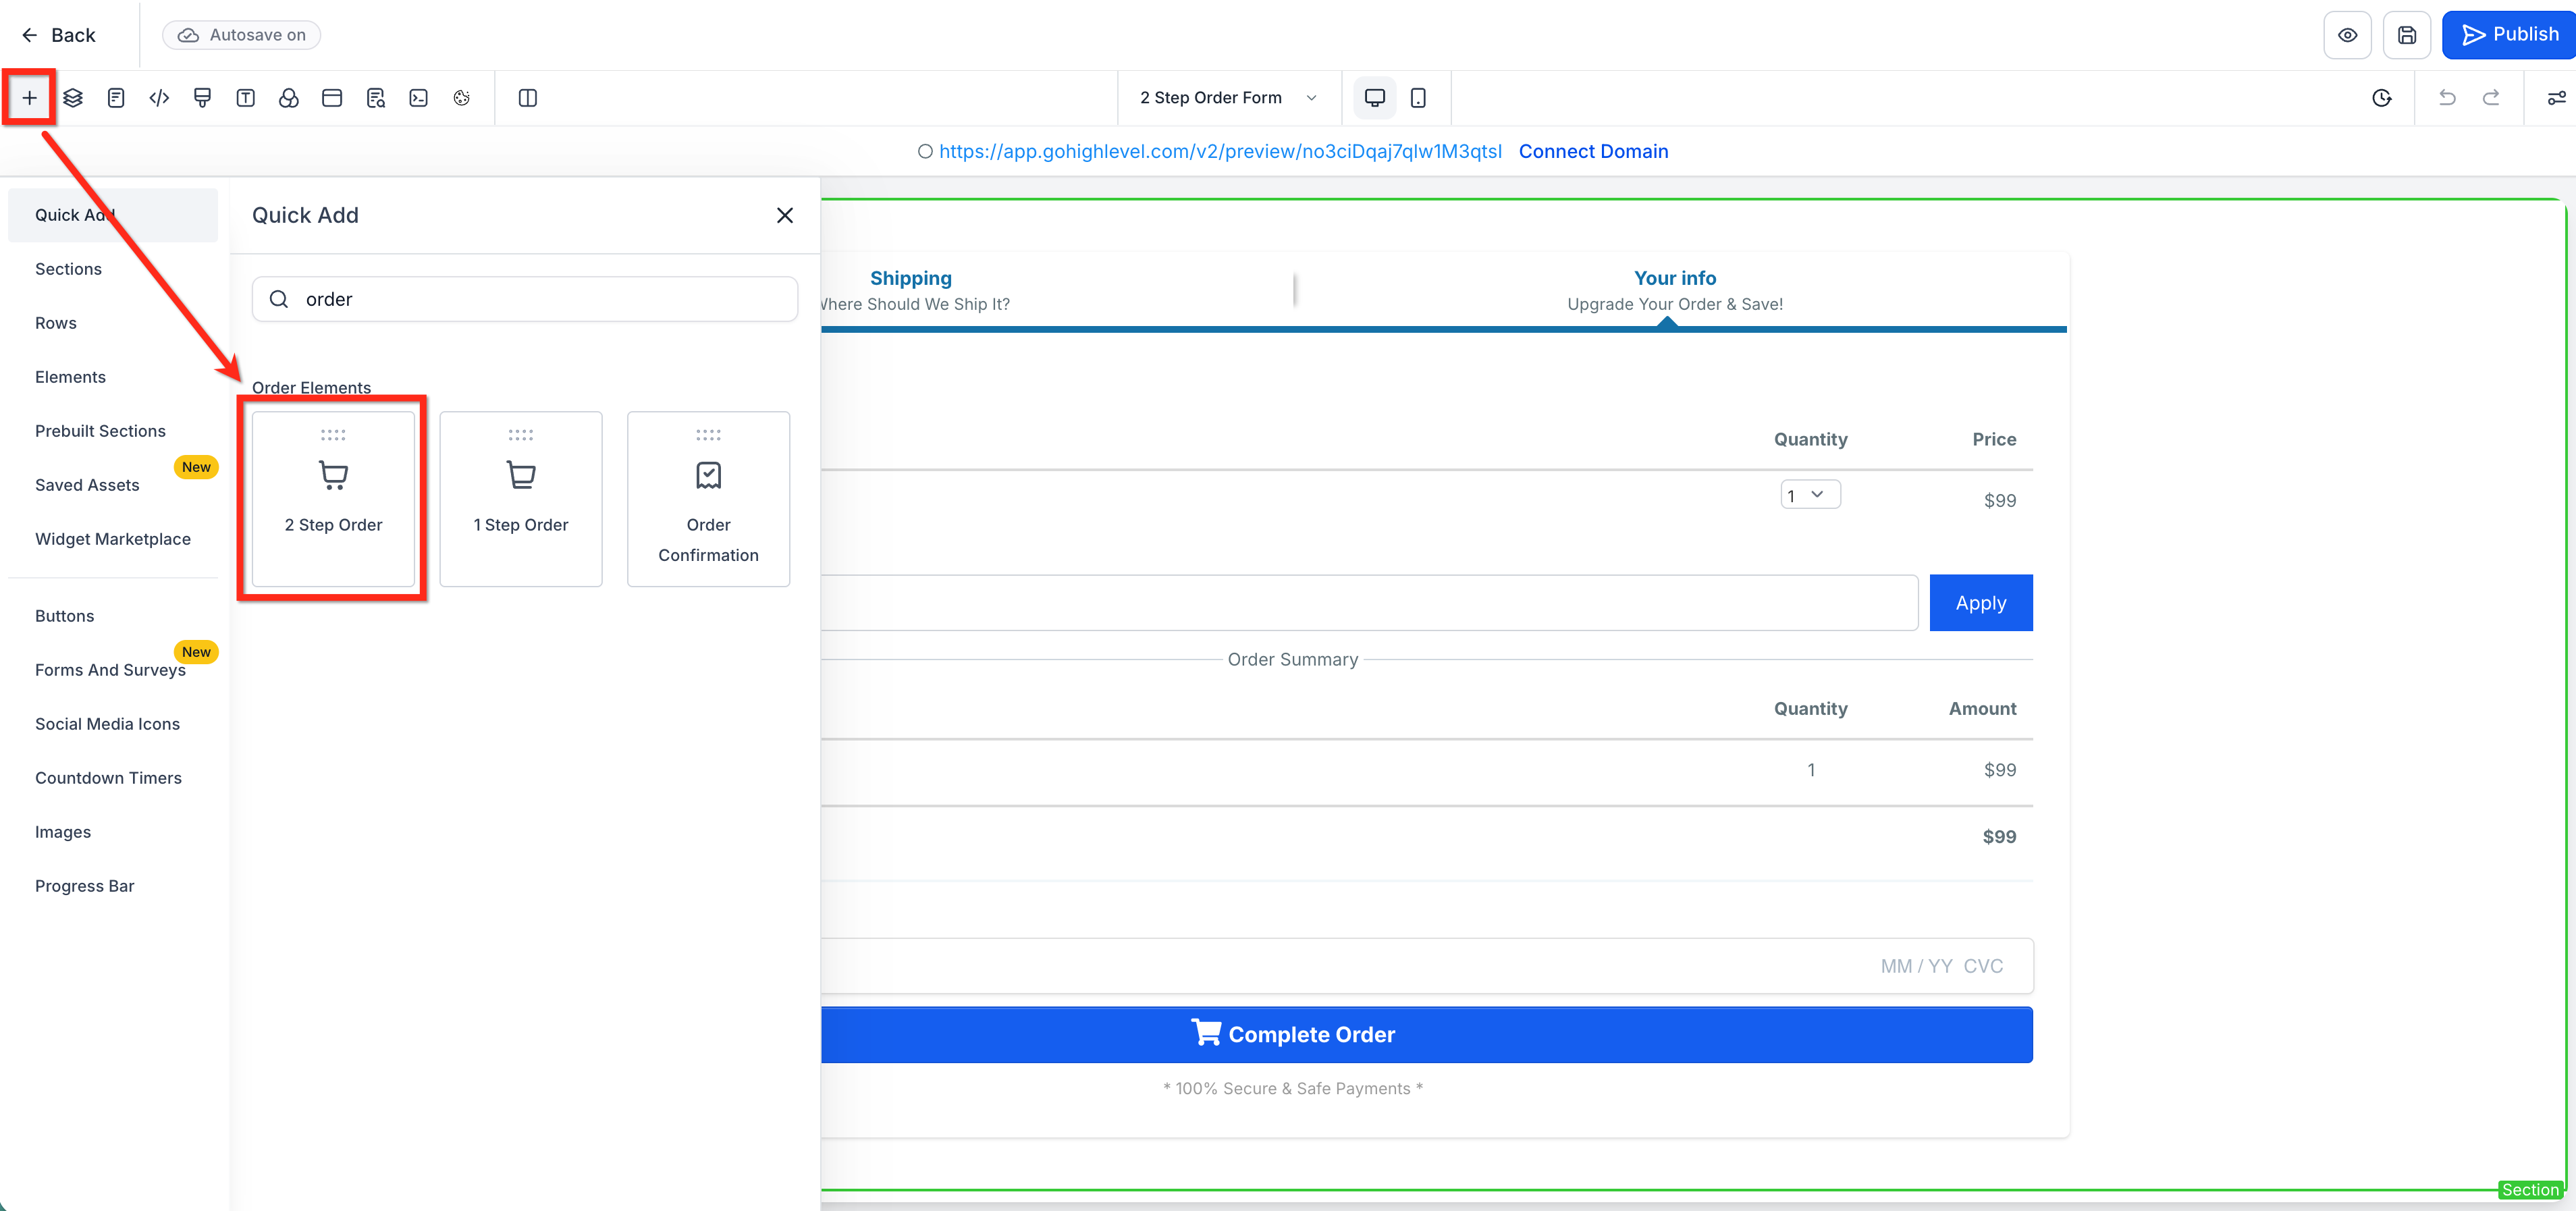
Click Add Elements (+) in the top‑left and under Order elements, select the Two‑Step Order element. Drag this element into your design.
Step 3: Configure Step 1
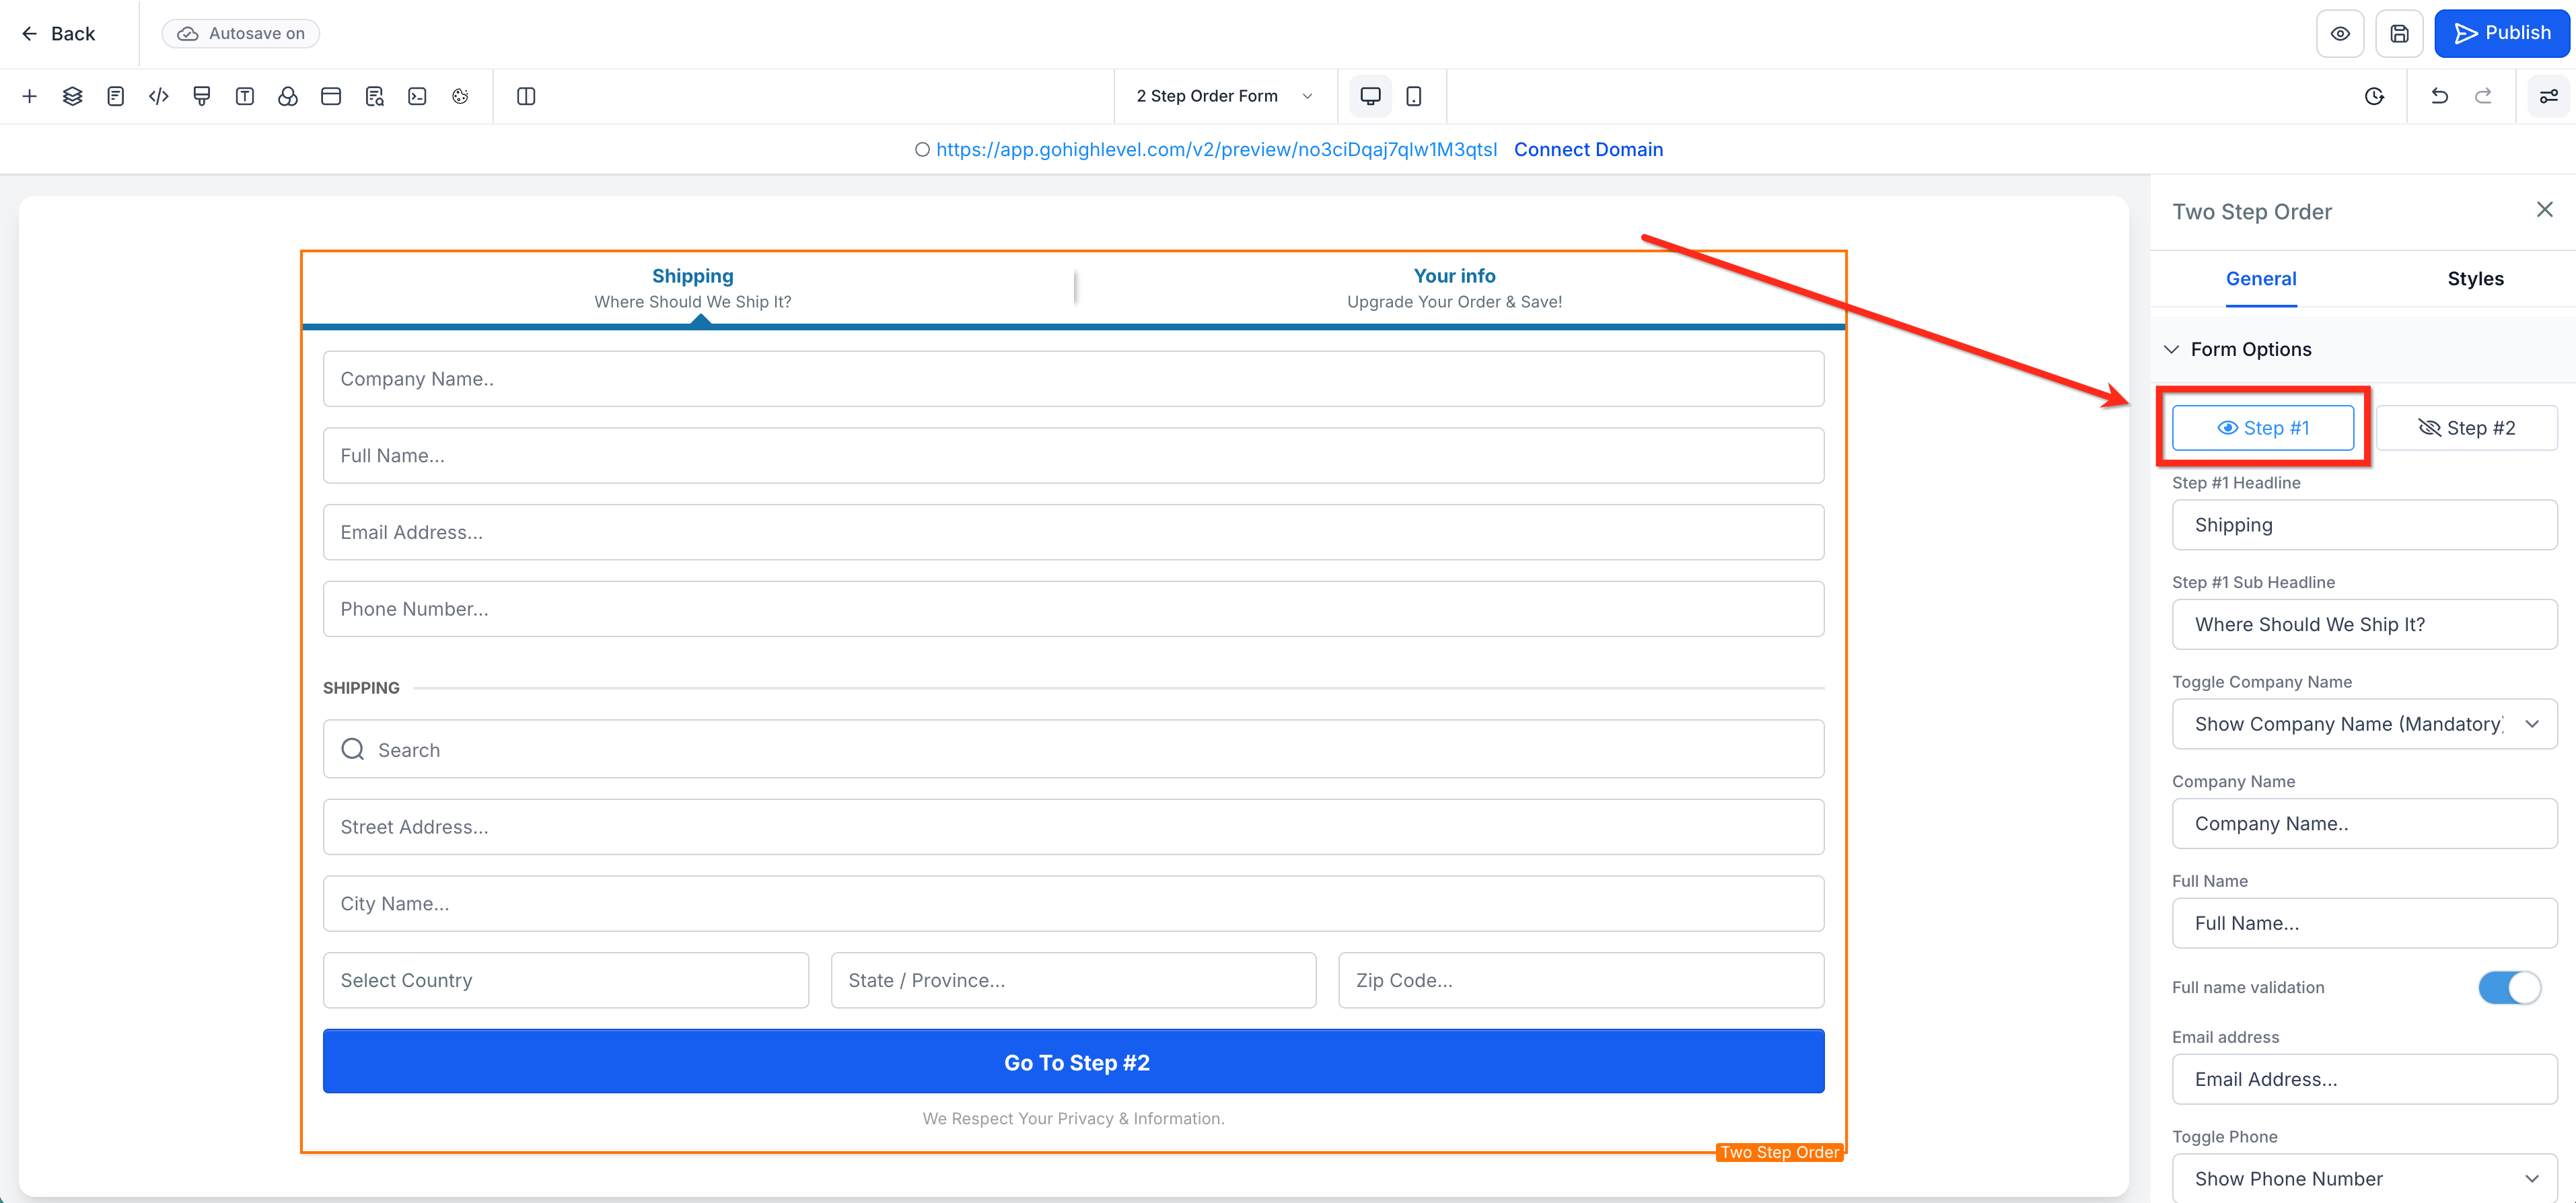
Step 1 captures contact information and shipping details. In the element settings, open Form options and select Step 1. Here you can configure:
Headline and Sub‑headline
Company name: Hidden, Optional, or Required.
Placeholders/Display names for visible fields.
Phone: required/optional/hidden.
Shipping: toggle On/Off.
Button text for progressing to Step 2.
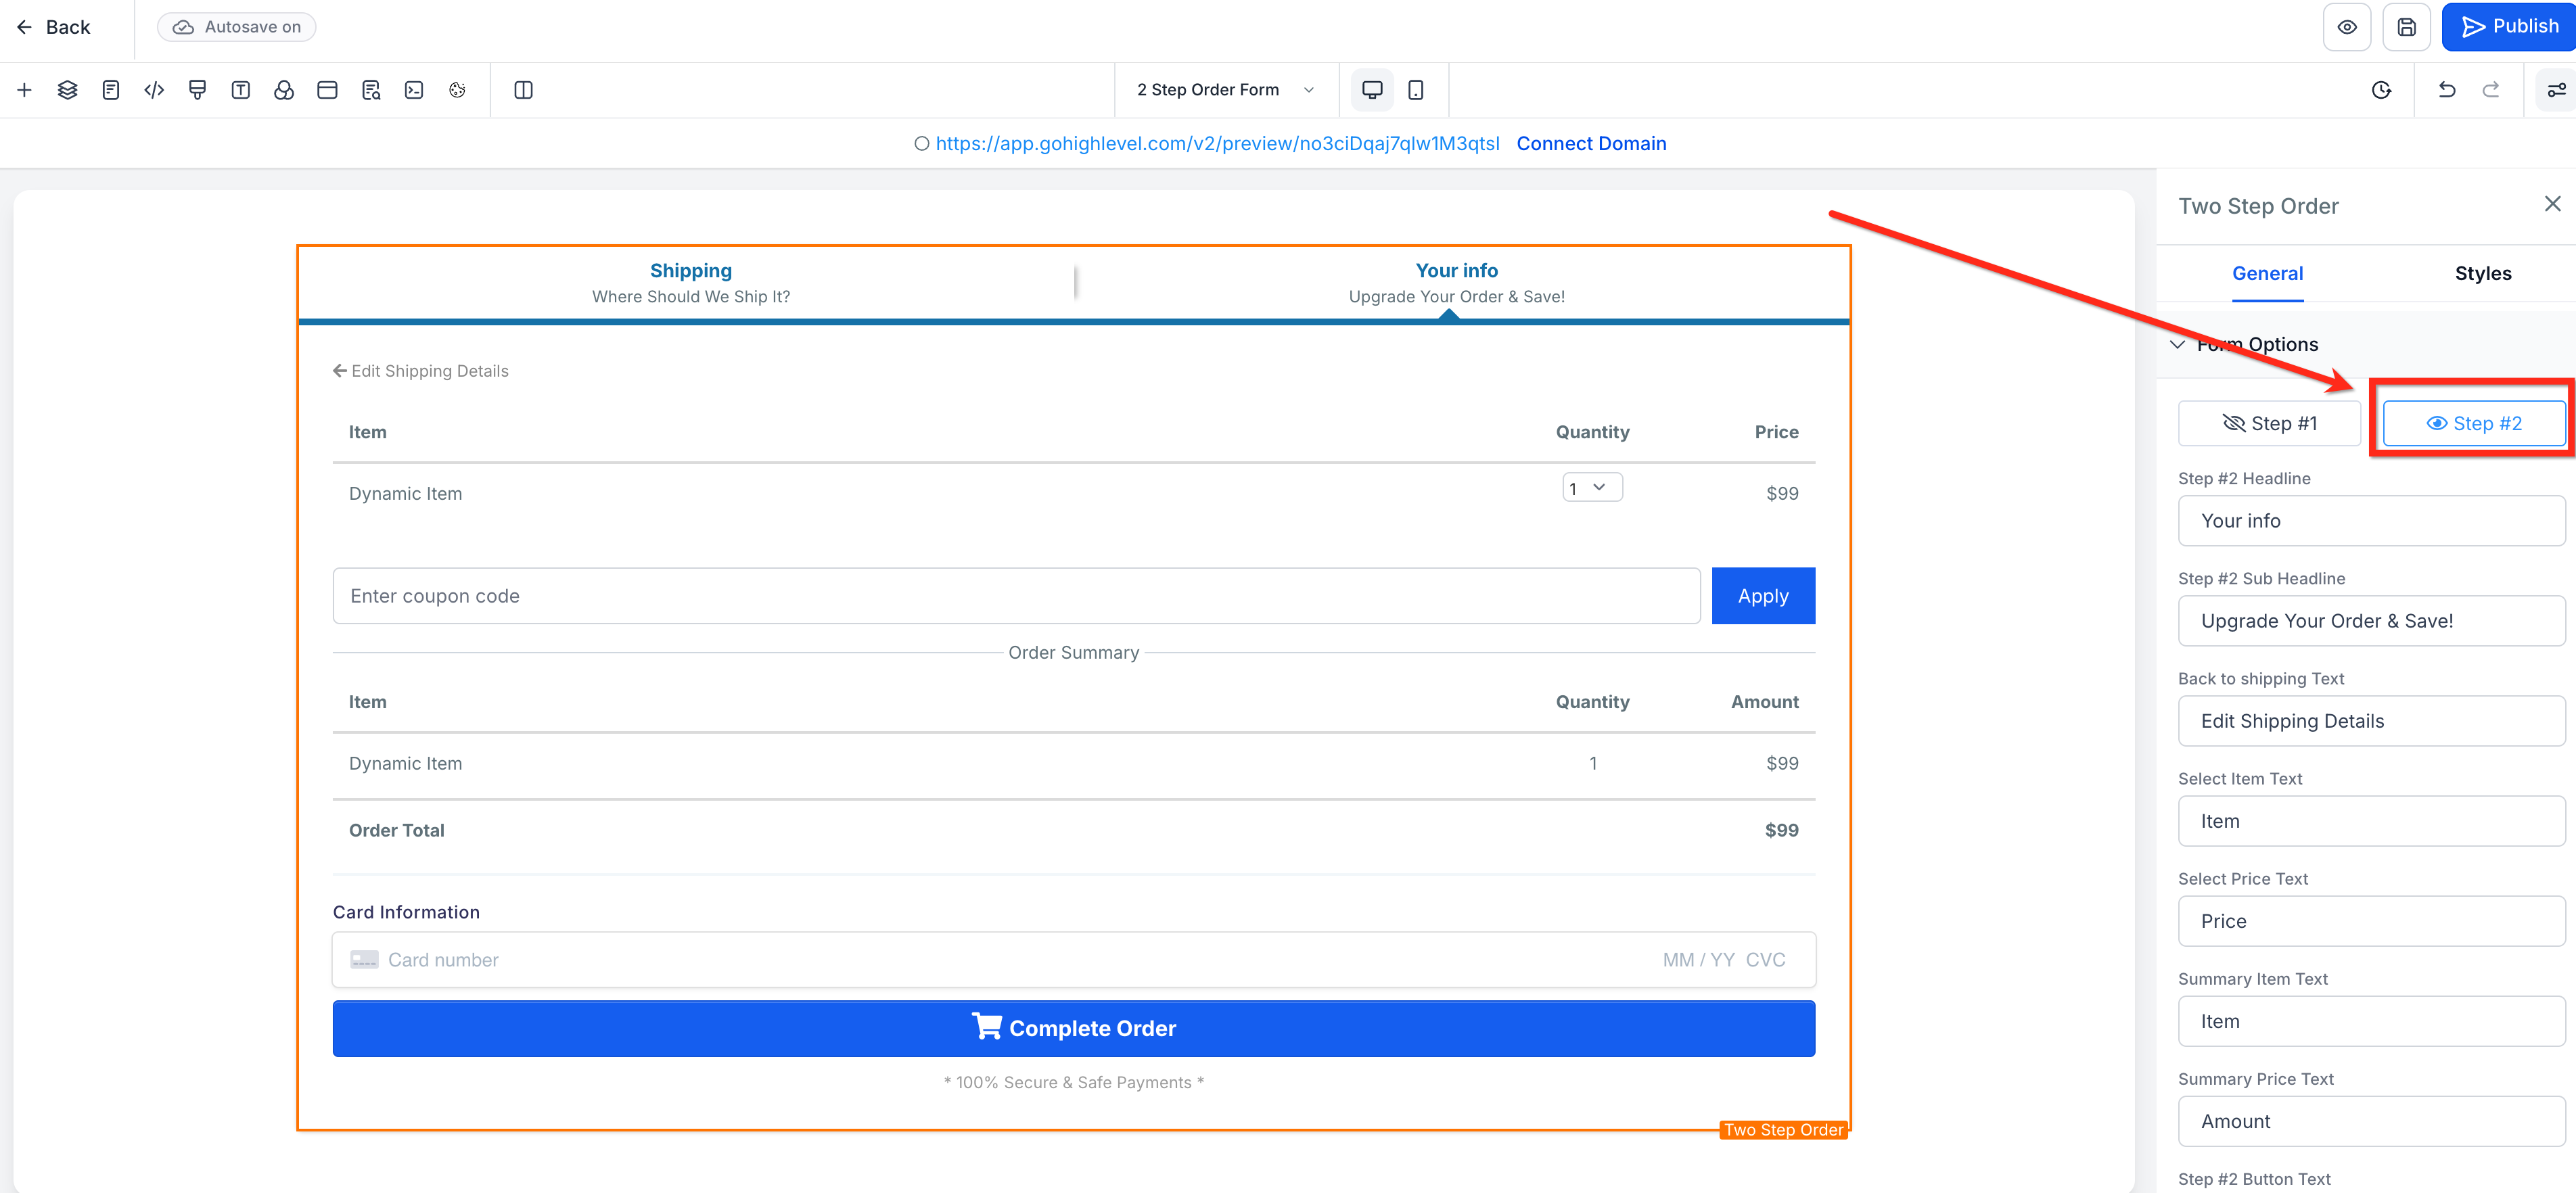
Step 4: Configure Step 2
Step 2 takes payment information and finalizes the purchase. In the element settings, open Form options and select Step 2.
Here you can edit the labels, headers, and button text for payment and confirmation.
Step 5: Other Settings (Optional)
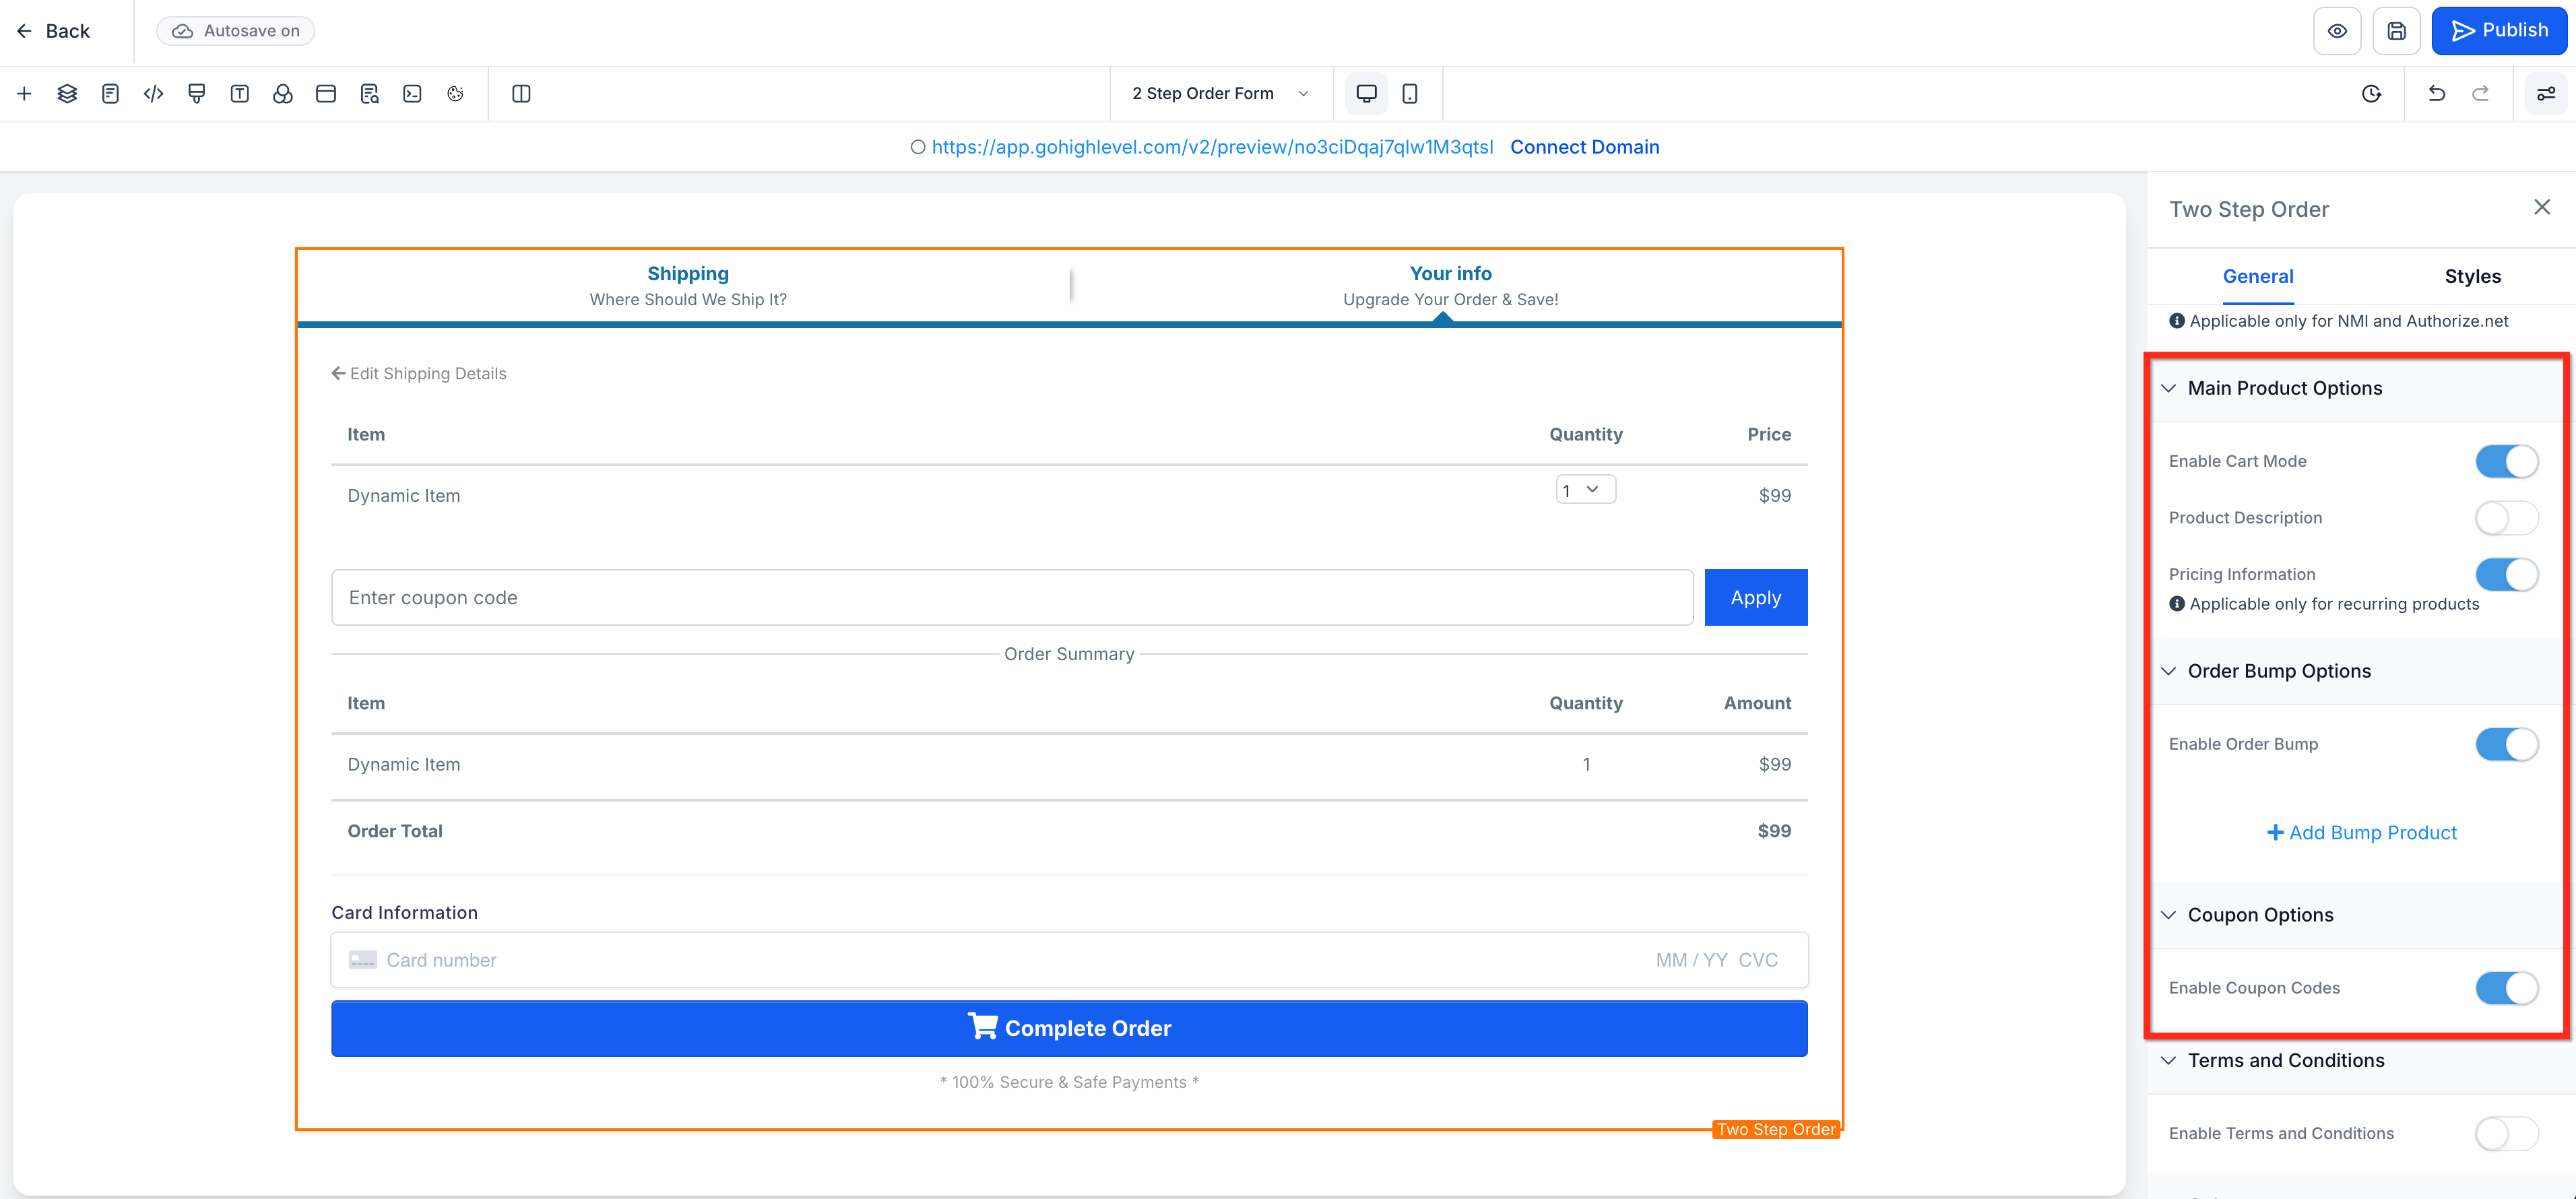
Use the additional settings to control how products are presented, whether you offer add‑ons, and if buyers can apply discounts:
- Toggle Enable cart mode (when available for your funnel version).
Enable Cart Mode: Turn on Cart Mode to allow customers to purchase multiple products from the same order form. Customers can select the products they want and adjust quantities for products that have Allow multiple quantityenabled.Without Cart Mode, the order form can be used for single-product selection. Cart Mode is available for supported V2 funnel order forms.
- Product Description and Pricing: Choose whether product descriptions and pricing information appear on the order form. For recurring products, the product description can display the price breakdown, including details such as the setup fee, trial period, number of trial days, and recurring payment information. Disable Product Description if you do not want these details displayed.
- Enable and configure an Order Bump. To learn more about Order Bumps in Forms, click here!
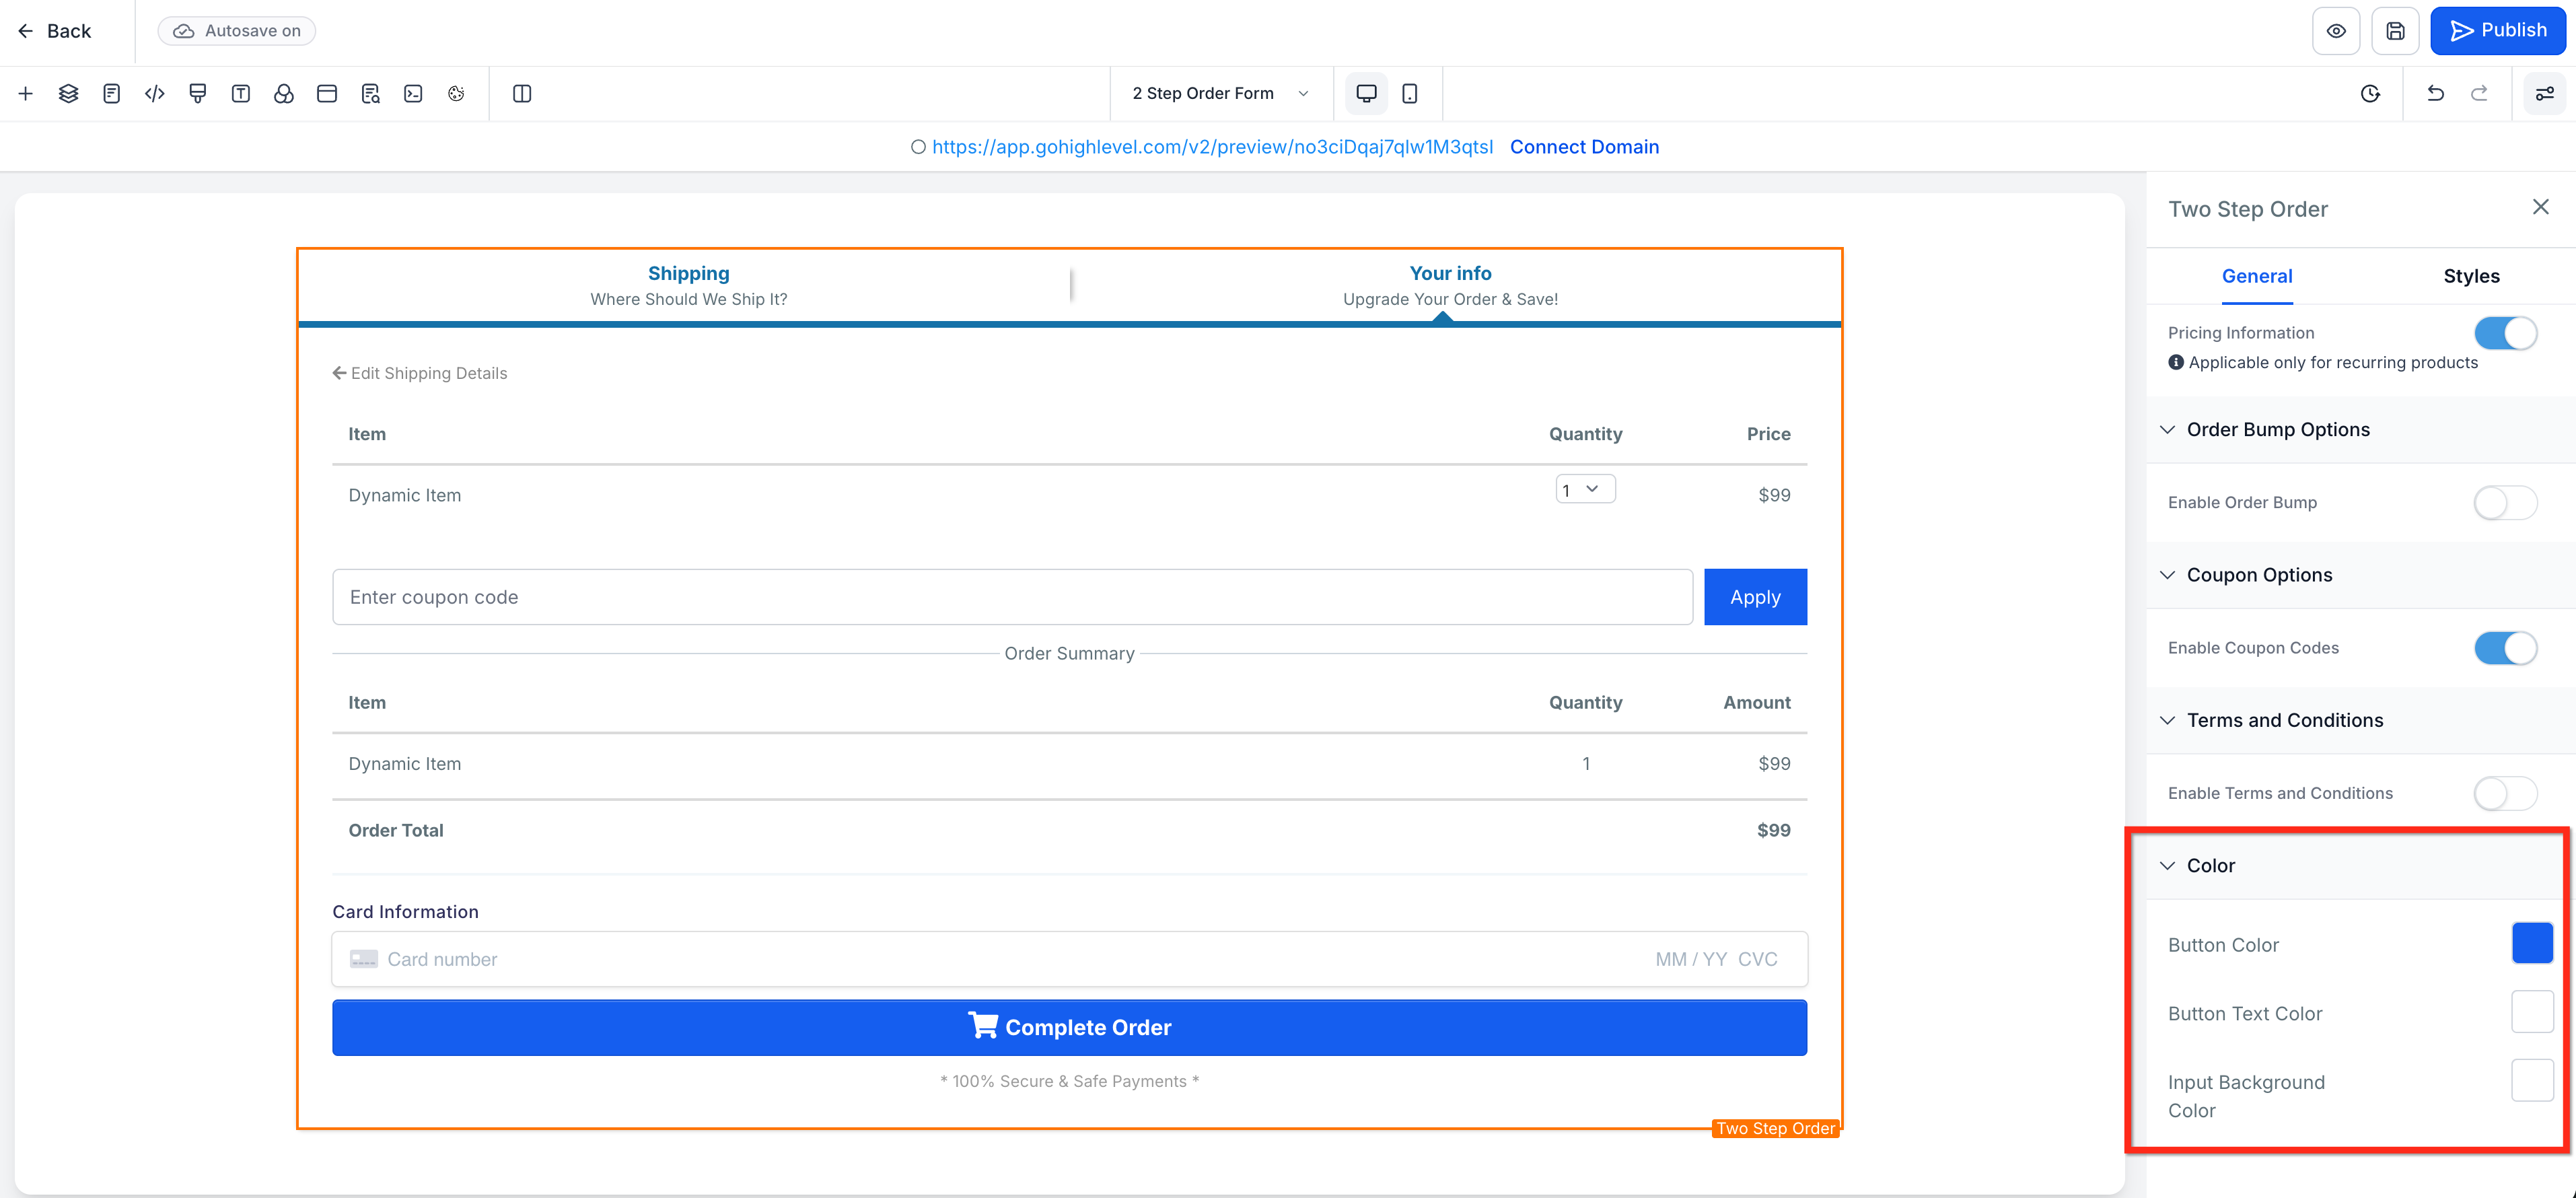
Step 6: Style the Form
In the element settings, adjust Button, Text and Background Colors to match your brand.
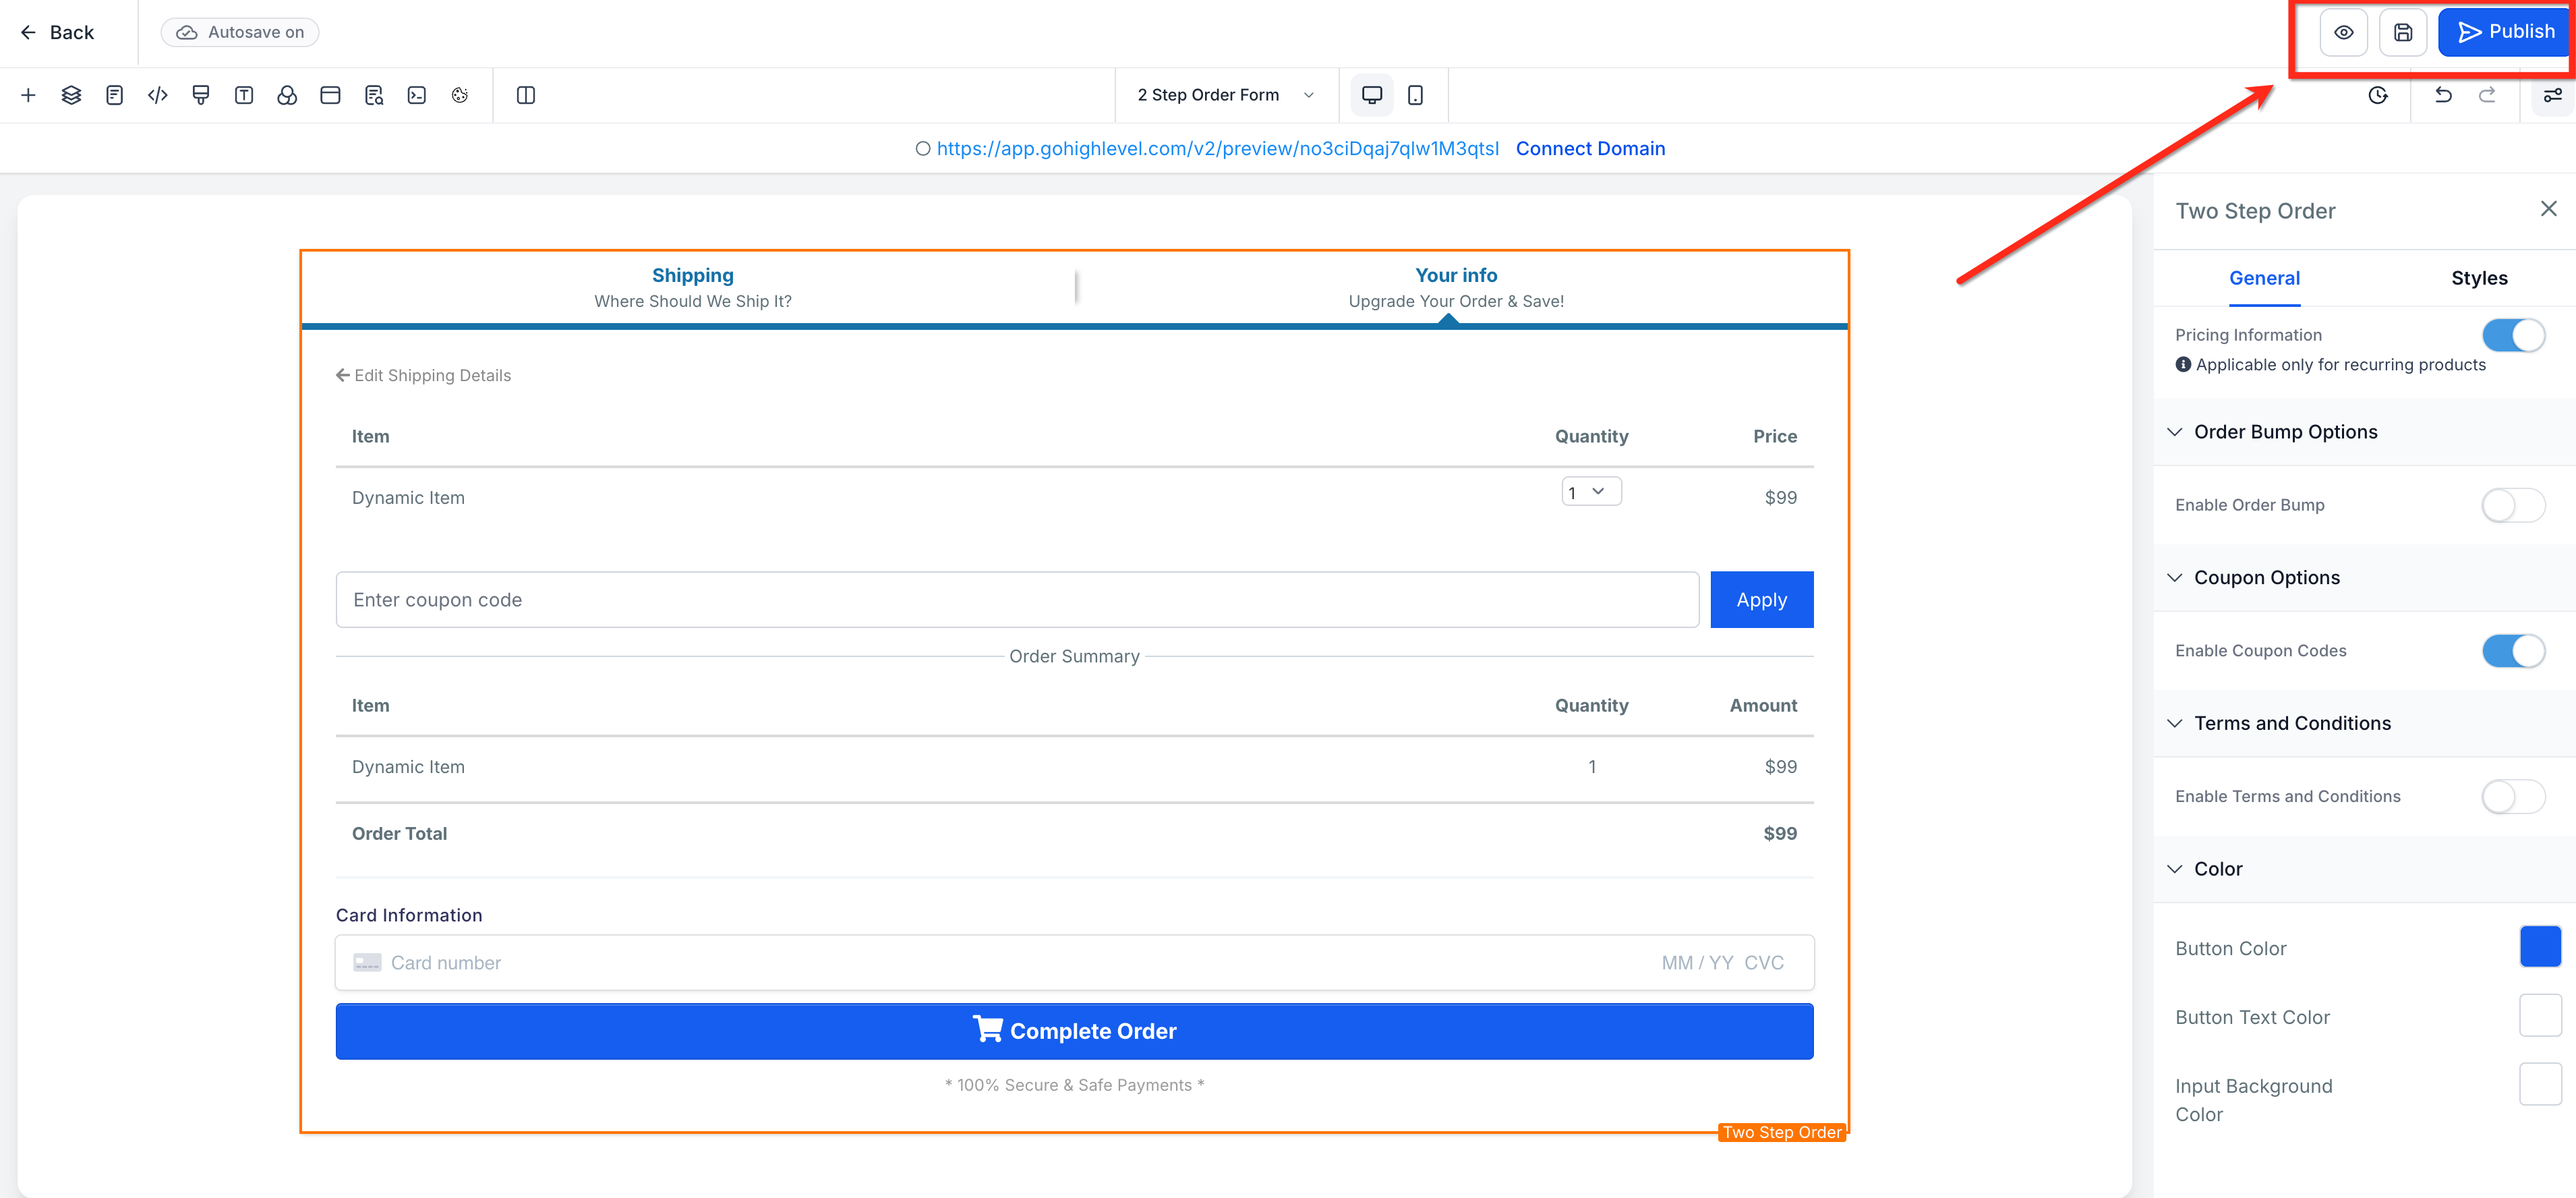
Step 7: Preview and Publish
Before publishing your funnel, click the Preview button in the upper-right corner to test your order form. Once verified, click the blue Publish button.
Frequently Asked Questions
Q: Why don’t my products appear in the Two‑Step Order Form?
Make sure products and at least one price are added in the Products tab for the same funnel step.
Q: How do I let customers buy multiple quantities?
In Products → Additional options, enable Allow multiple quantity and set Max per order.
Q: Can I use a two‑step order form in V1 funnels?
Two‑step order forms can be added in funnels. Consider migrating the step to V2 to access the latest settings such as cart mode.
Q: Does the order form support subscriptions and one‑time products?
Yes. The order form reflects the Pricing you attach to the product (one‑time or recurring).
Q: Can I add a platform/processing fee to all orders?
Yes! Processing or platform fees can be added under payments settings. Click here to learn more!
Related Articles
Was this article helpful?
That’s Great!
Thank you for your feedback
Sorry! We couldn't be helpful
Thank you for your feedback
Feedback sent
We appreciate your effort and will try to fix the article