Universal Content Customization makes it easier to update AI-generated WordPress pages without opening Elementor for routine content changes. This gives you a faster way to refine page content while keeping Elementor available for deeper design changes.
TABLE OF CONTENTS
- What is Universal Content Customization for AI Pages?
- Requirements
- Supported Content Elements
- Editing Text Directly from the Page Preview
- Using AI-Assisted Text Editing
- Changing the Tone of Page Content
- How To Customize an AI-Generated WordPress Page
- Frequently Asked Questions
- Related Articles
What is Universal Content Customization for AI Pages?
Universal Content Customization lets you edit supported content on AI-generated WordPress pages directly from the HighLevel preview. Instead of switching to Elementor whenever you need to change copy or replace an image, you can make many common updates from the Customizations panel.
Supported editable elements include:
Headings
Paragraphs
Buttons
Icon Box titles
Icon Box descriptions
Images
You can select a supported element, change the content manually, use AI-assisted editing options, and save the result. Saved updates are reflected on the WordPress page.
Important: Universal Content Customization requires LeadConnector WordPress Plugin v4.0.4 or later.Requirements
The correct WordPress integration version is required for Universal Content Customization to work as expected. Checking the plugin version first can help prevent missing editing controls or unsupported behavior.
You need:
An AI-generated WordPress page in HighLevel.
LeadConnector WordPress Plugin v4.0.4 or later.
For newly provisioned WordPress sites hosted through HighLevel, the LeadConnector plugin is installed automatically. You can also review the plugin connection status from the WordPress area in HighLevel.
If you need to download or update the plugin manually, the latest versions are available through the LeadConnector WordPress Plugin Hub.
Supported Content Elements
Universal Content Customization expands editing beyond a small number of predefined page sections. Selecting supported content directly from the preview makes it easier to update copy wherever it appears on the AI-generated page.
Supported elements include:
Headings: Change titles and section headings.
Paragraphs: Update longer descriptions and body copy.
Buttons: Change supported button content.
Icon Box titles: Edit the heading associated with an Icon Box.
Icon Box descriptions: Update the descriptive text below an Icon Box.
Images: Regenerate supported AI-generated images or replace them with uploaded images.
Not every Elementor element should be assumed to support direct customization. If an element cannot be selected from the HighLevel preview, use Elementor for additional editing.
Editing Text Directly from the Page Preview
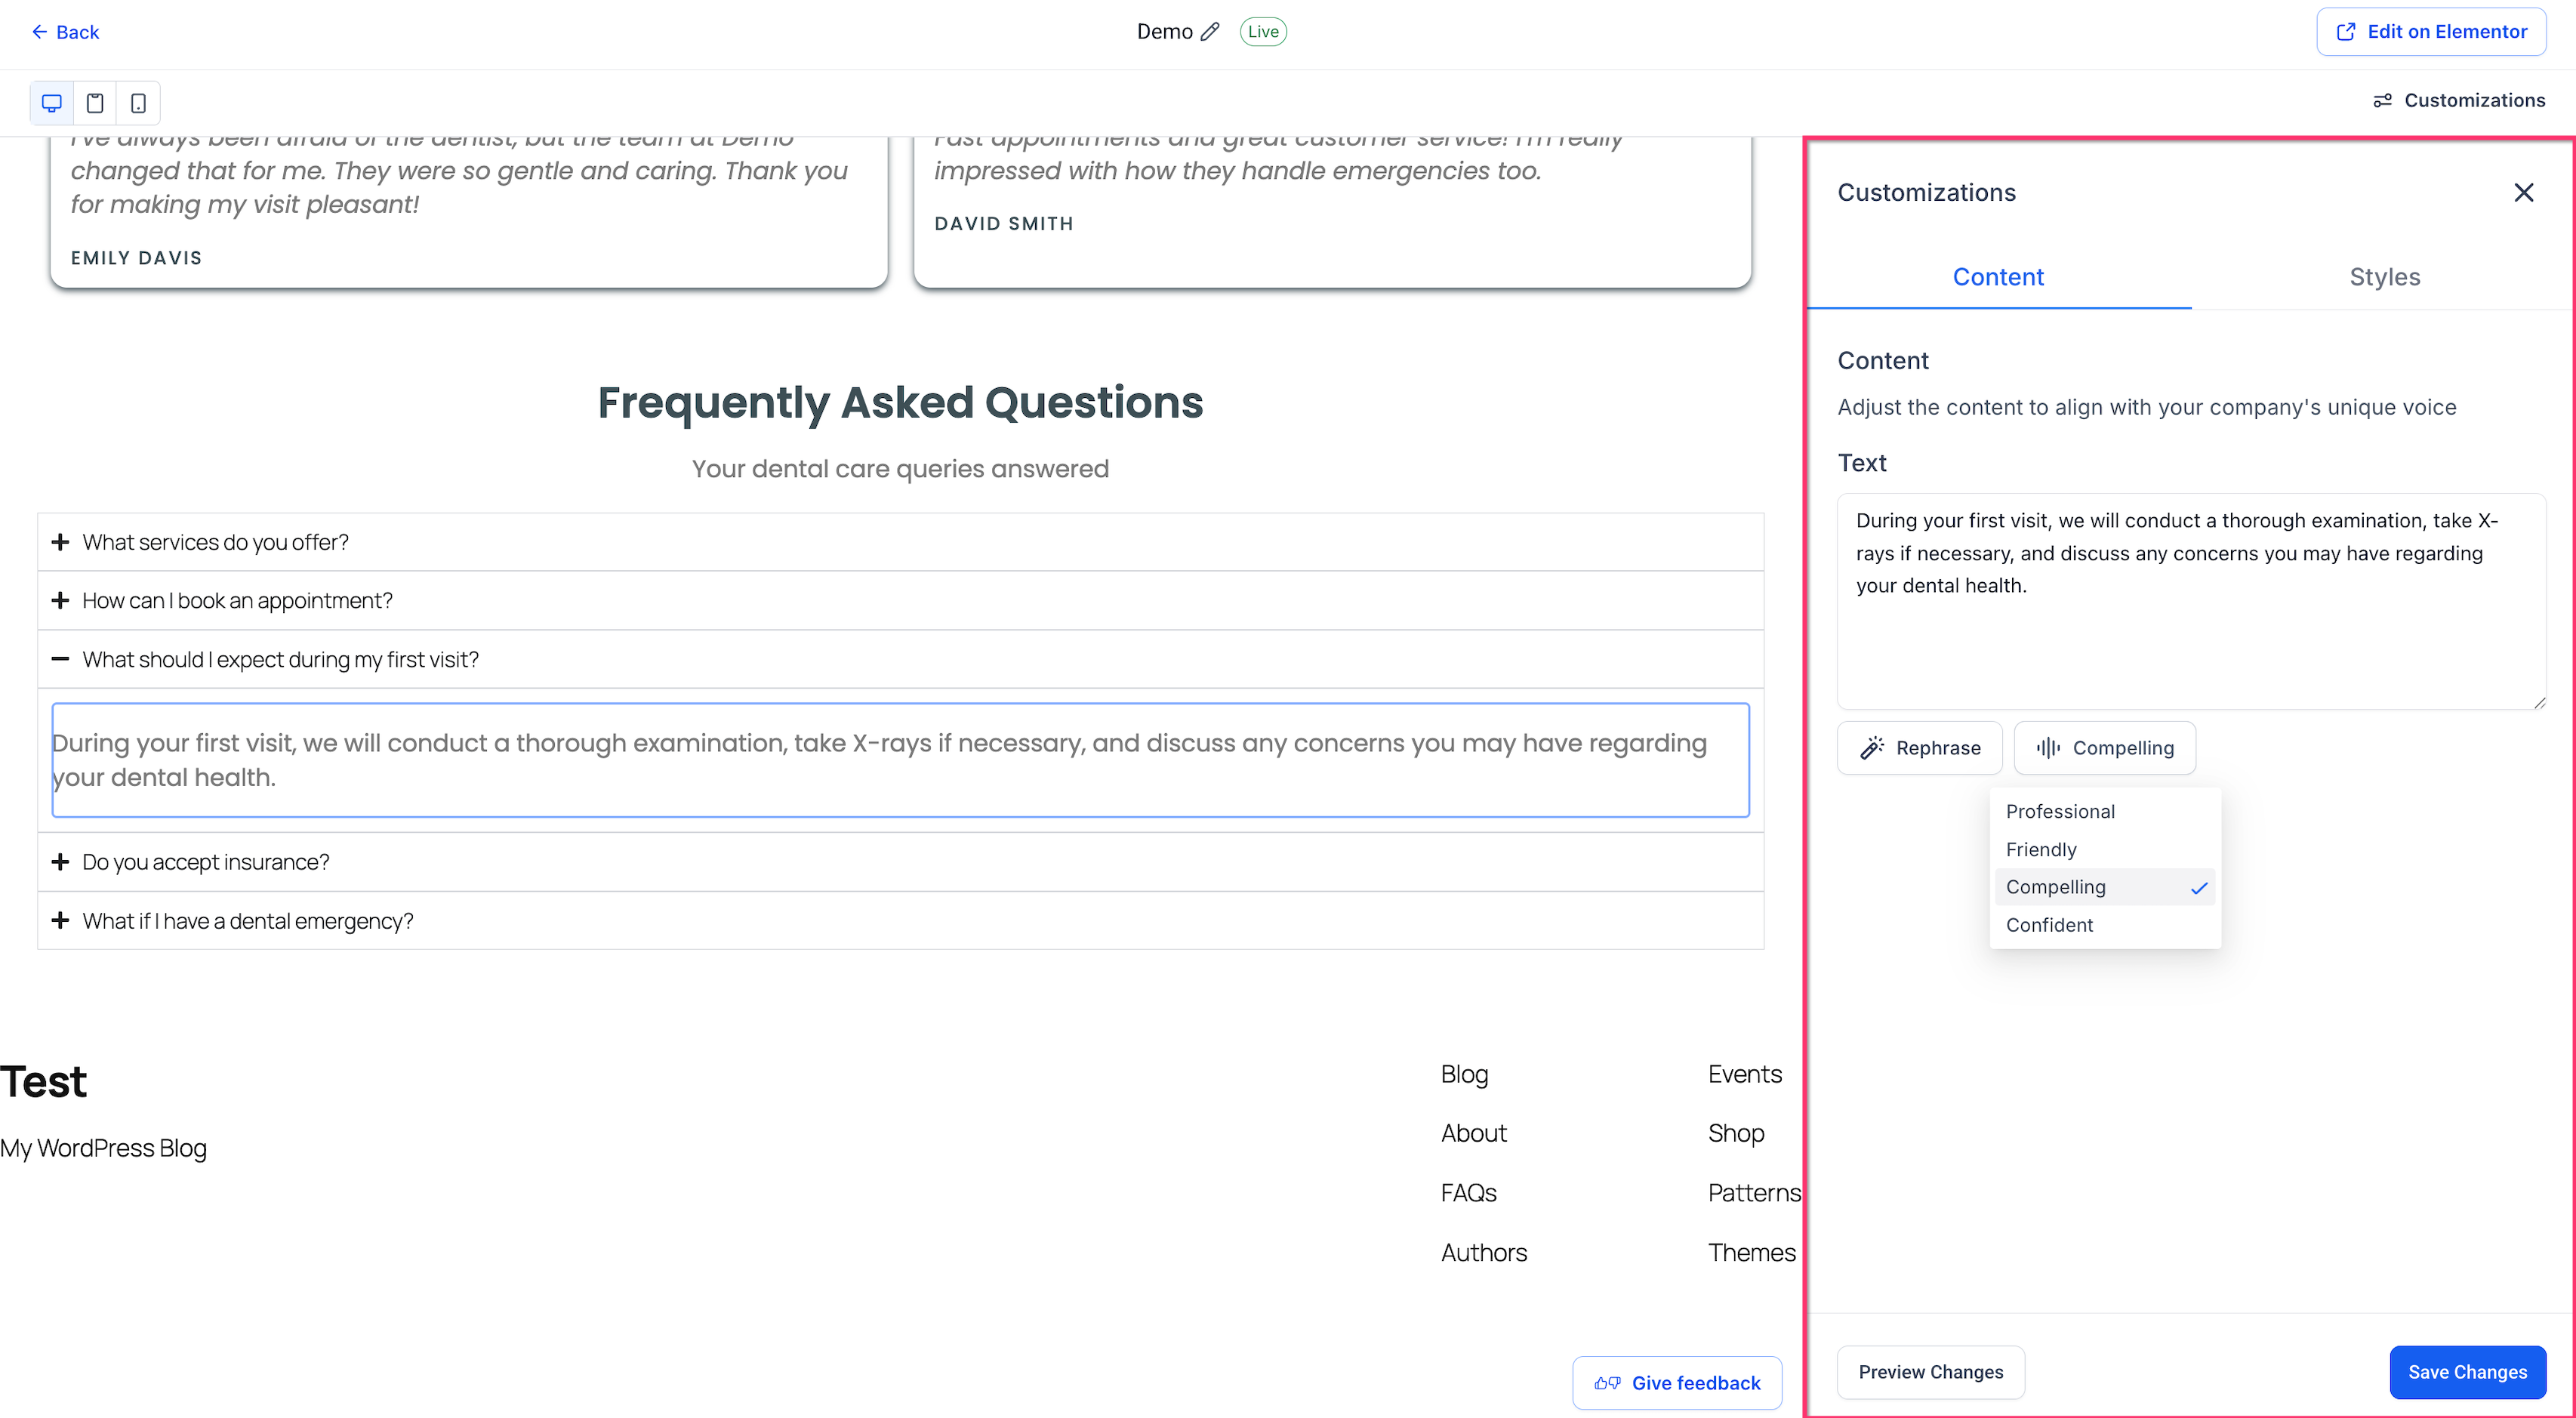
Direct text editing lets you correct wording, update business information, or refine generated copy without leaving the page preview. Selecting the text opens its current content in the Customizations panel so you can make the change in context.
To edit supported text:
Open the AI-generated WordPress page preview.
Hover over the text you want to change.
Click the supported element.
Review the selected text in the Customizations panel.
Replace or edit the text.
Preview the change if needed.
Click Save Changes when you are satisfied.
Using AI-Assisted Text Editing
AI-assisted editing can help you improve existing copy without writing a replacement from scratch. The available tools let you adjust the length, wording, or style of selected content while keeping the original page structure.
Available options include:
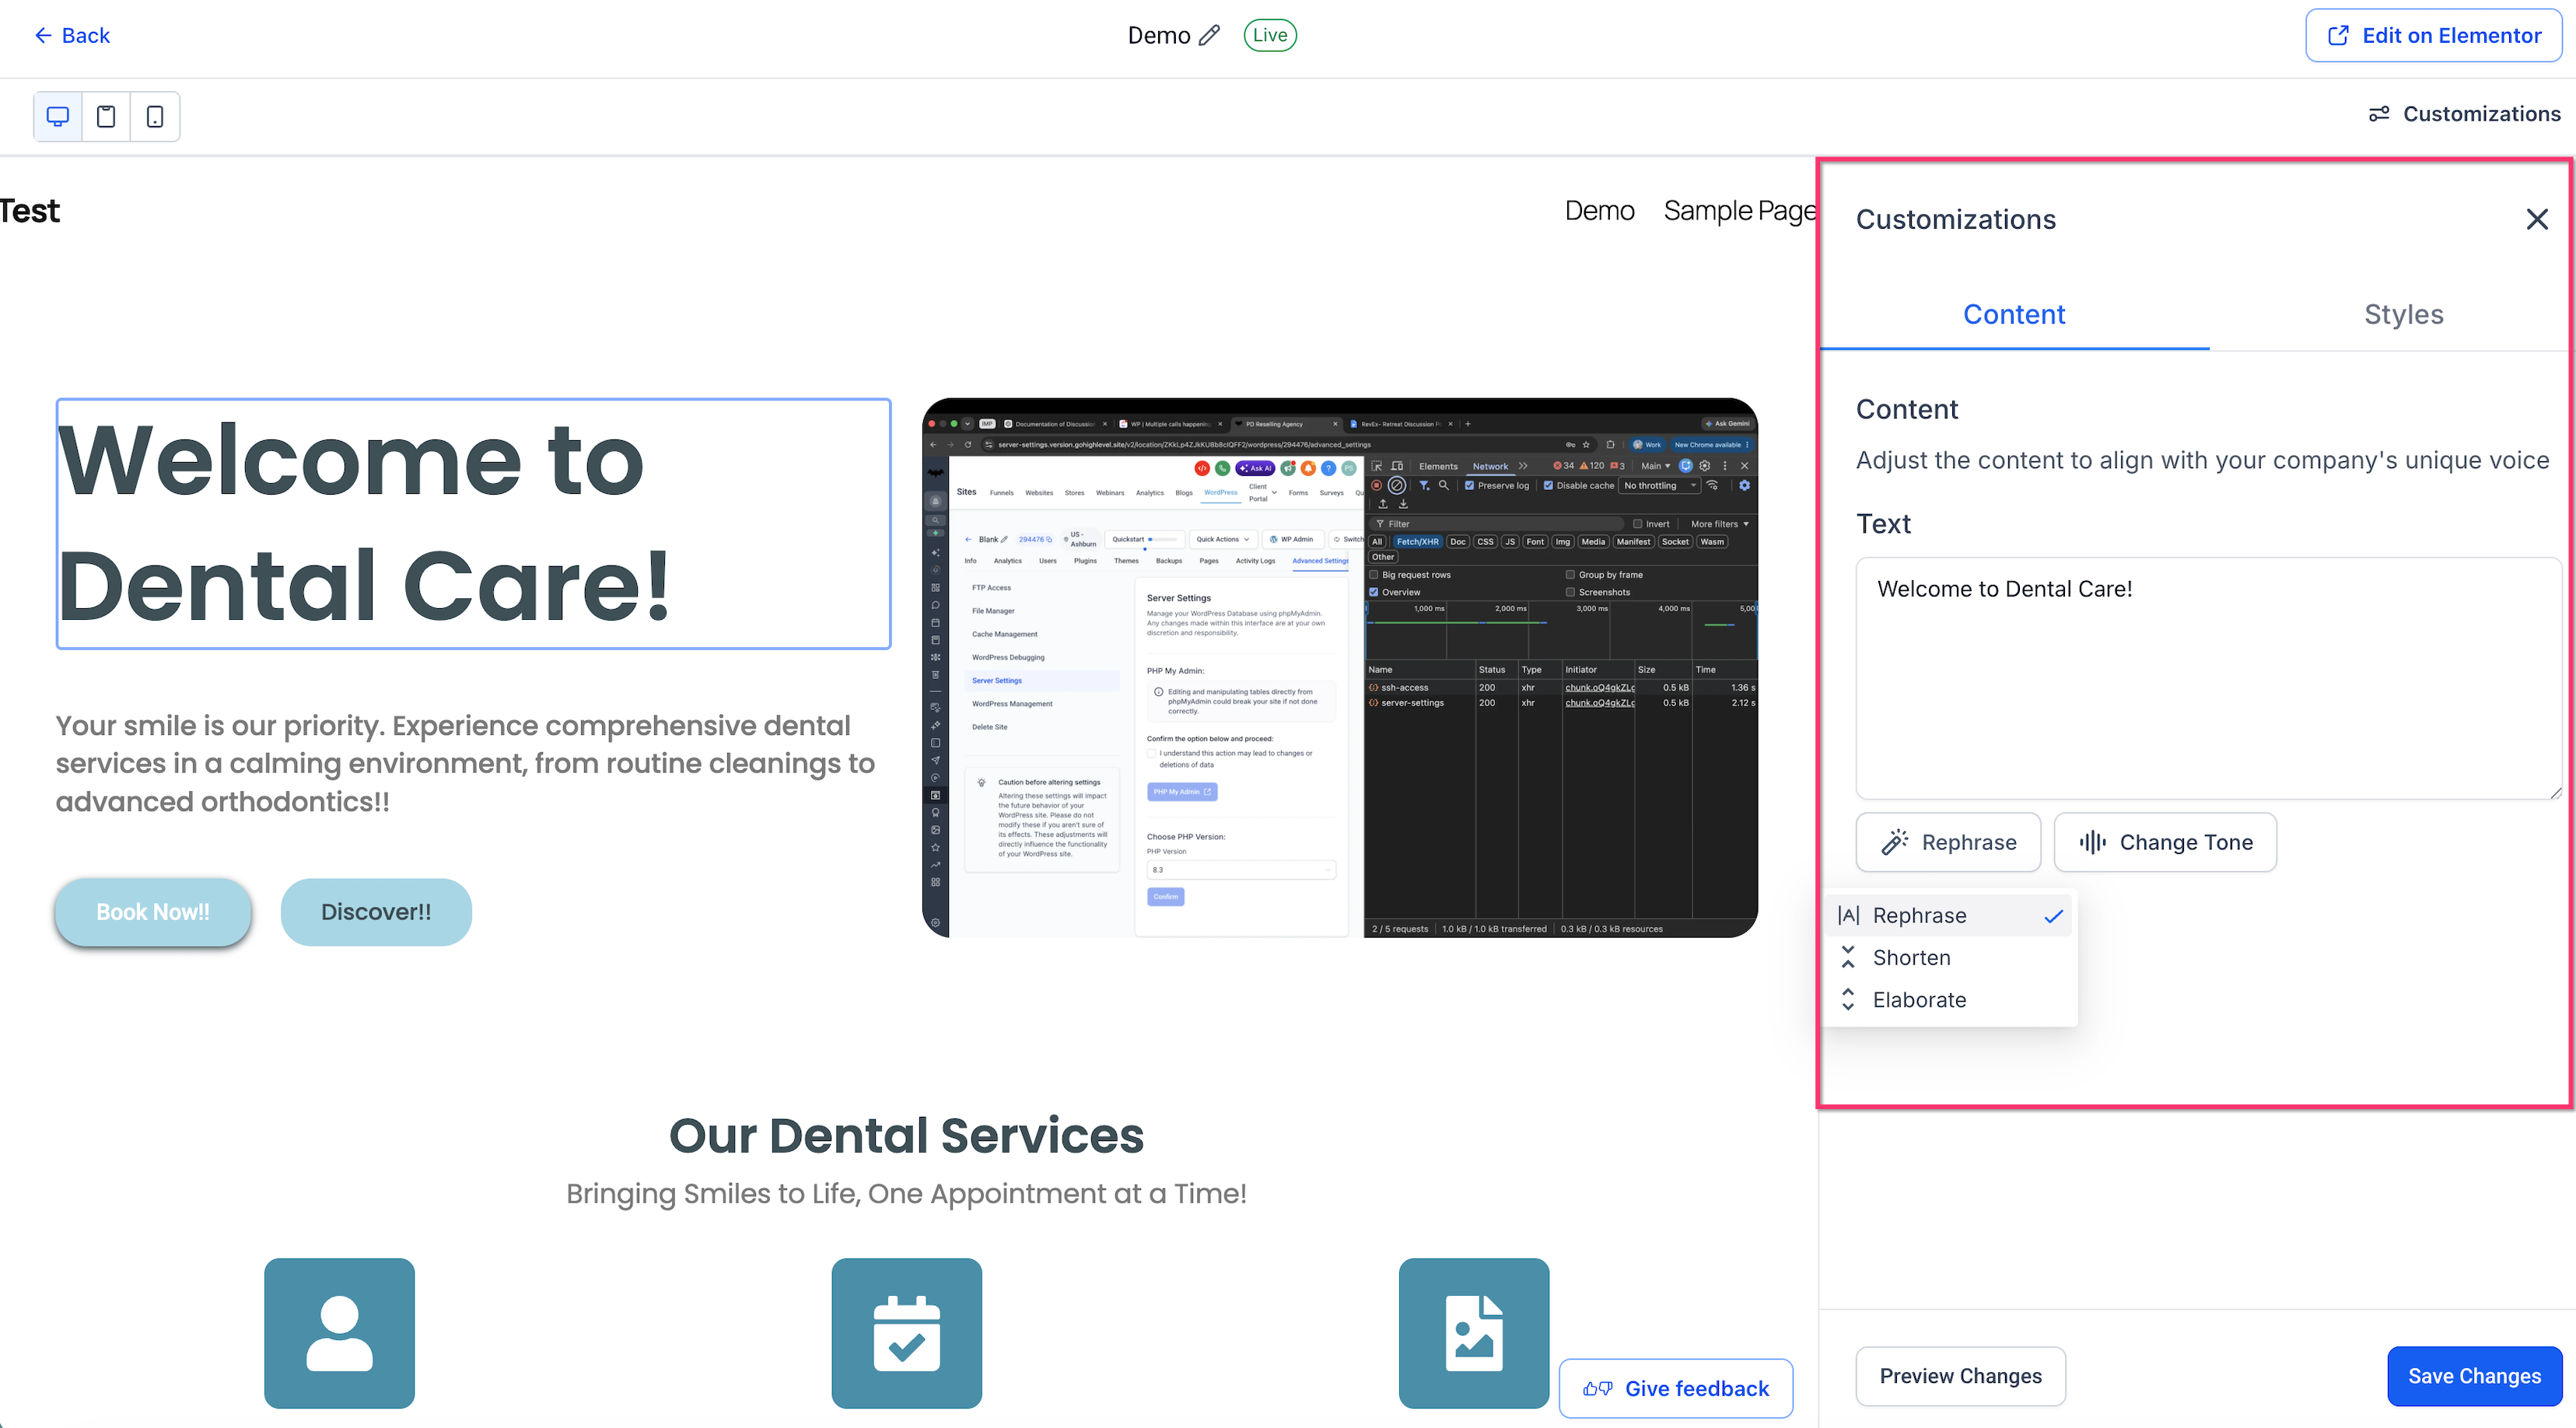
Rephrase: Rewrite the selected content using different wording.
Shorten: Create a more concise version.
Elaborate: Add more detail to the existing text.
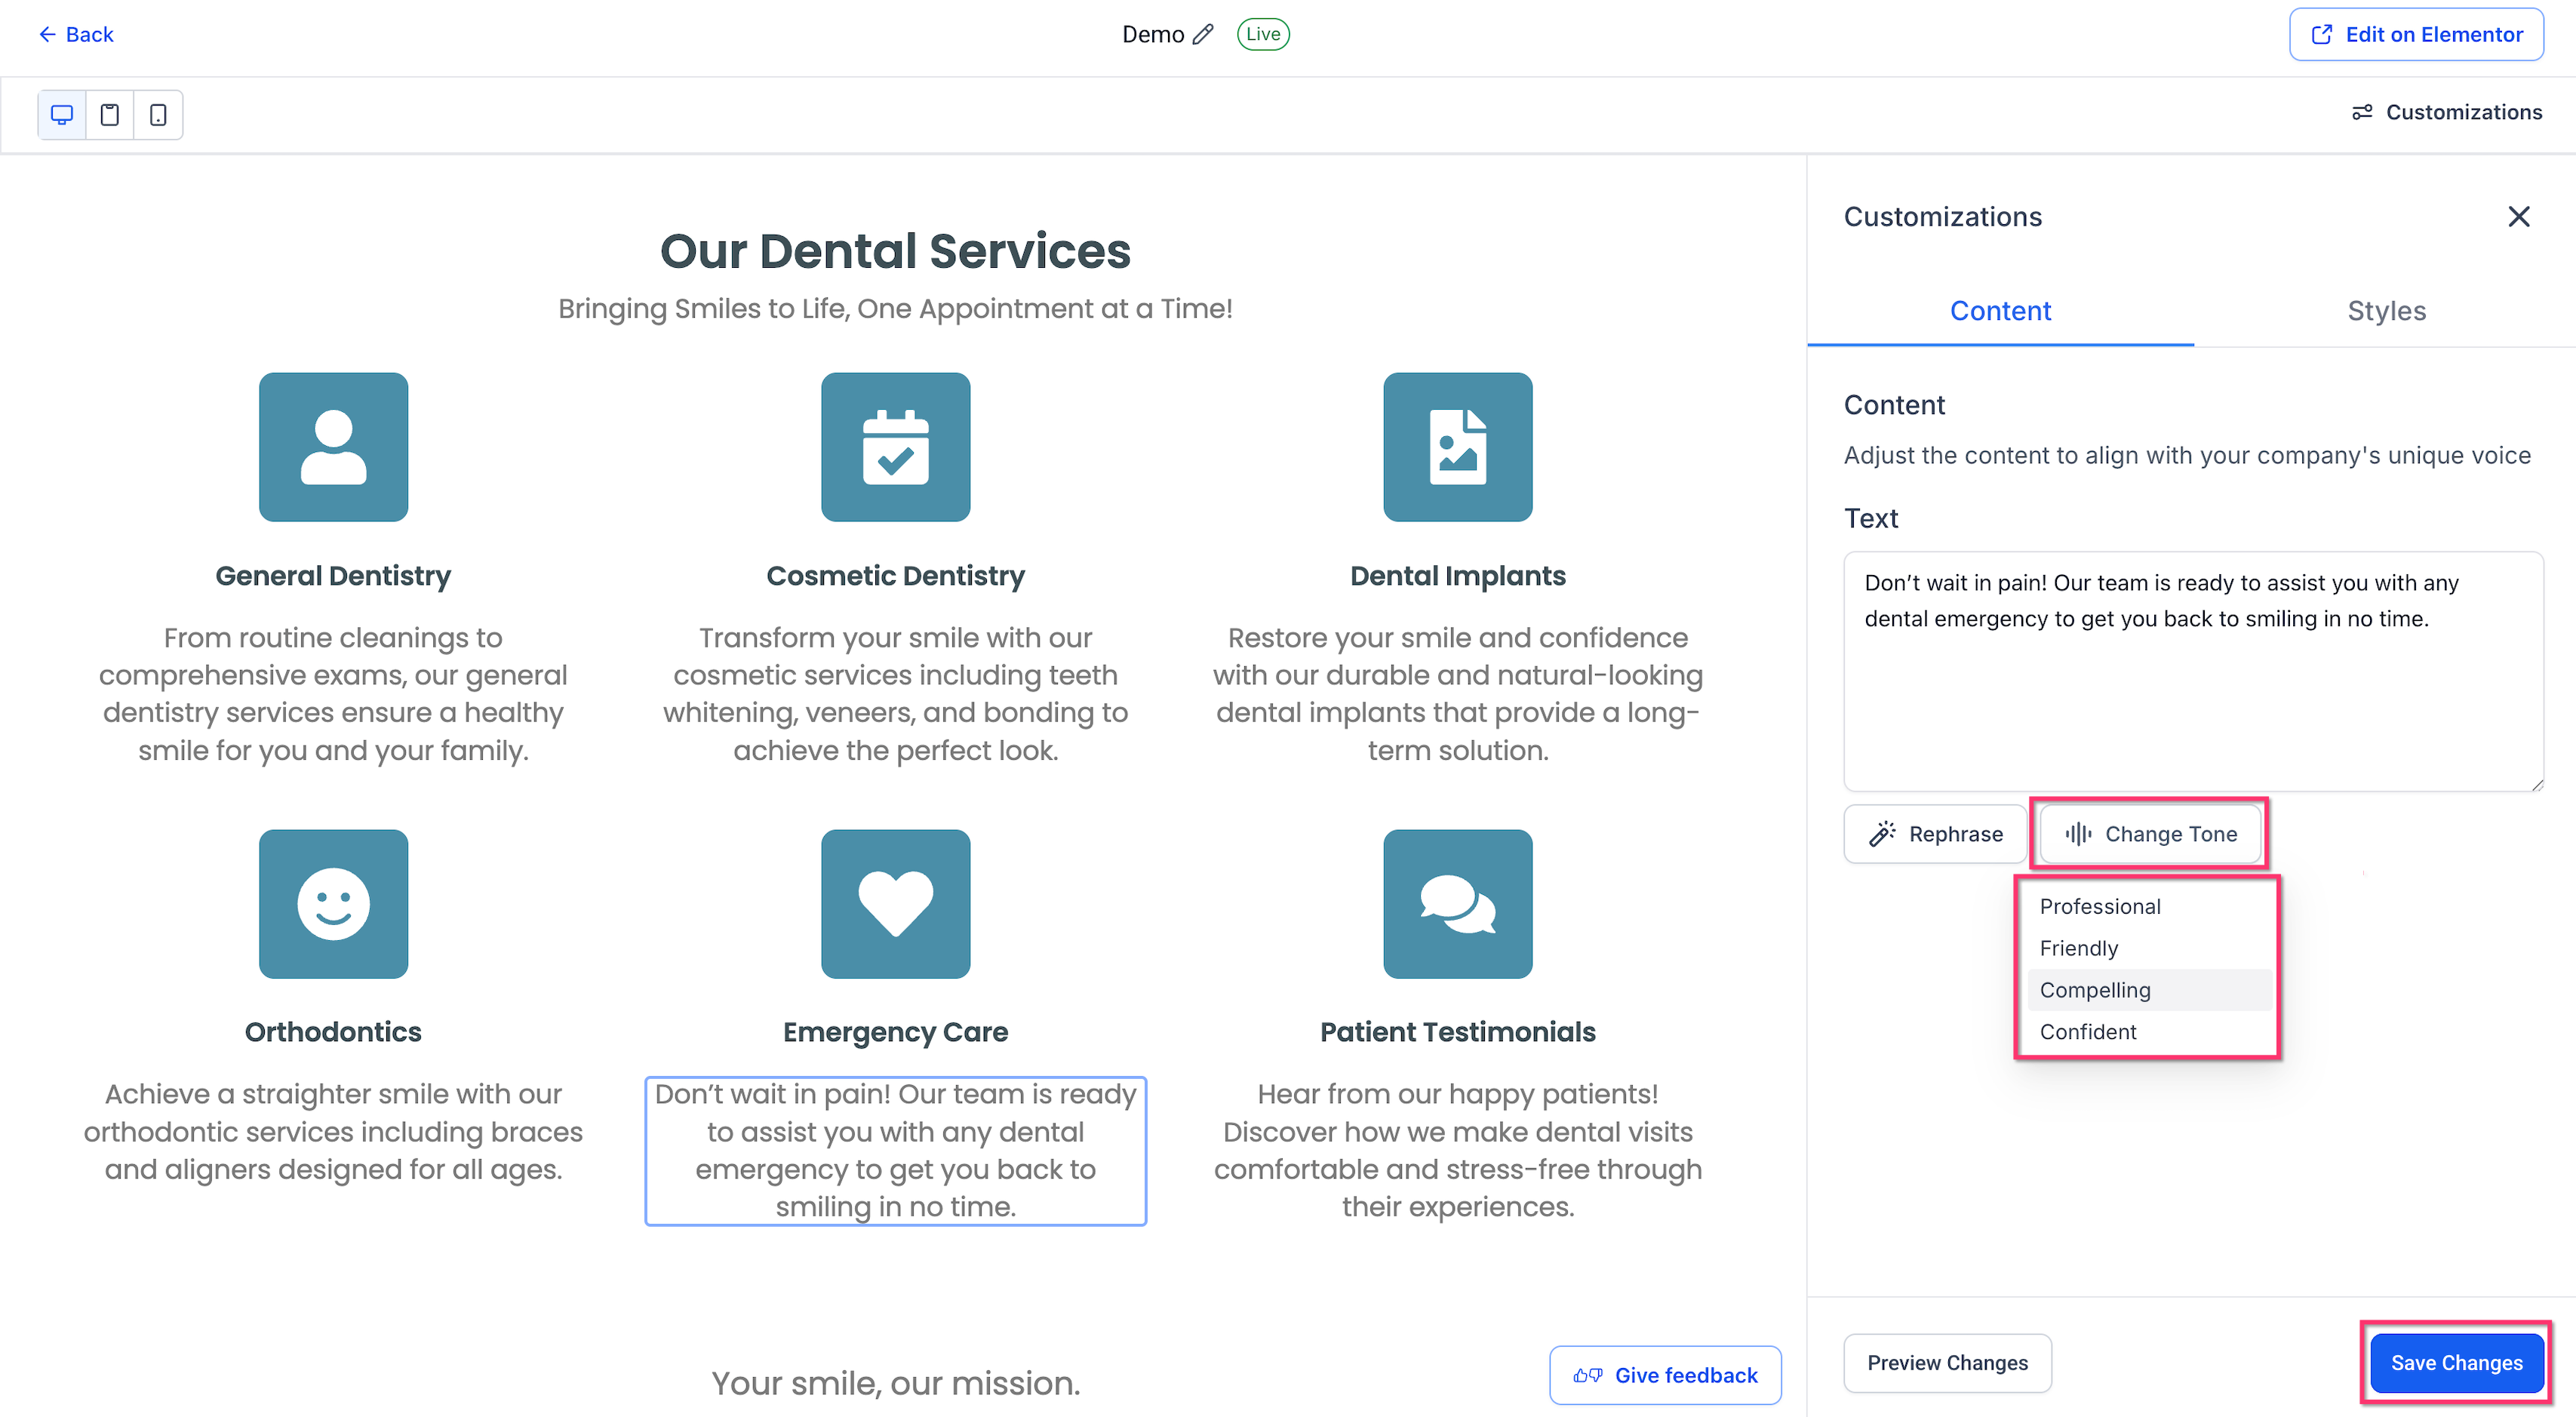
Change Tone: Rewrite the content with a different communication style.
You can review the generated result before saving it to the page.
Changing the Tone of Page Content
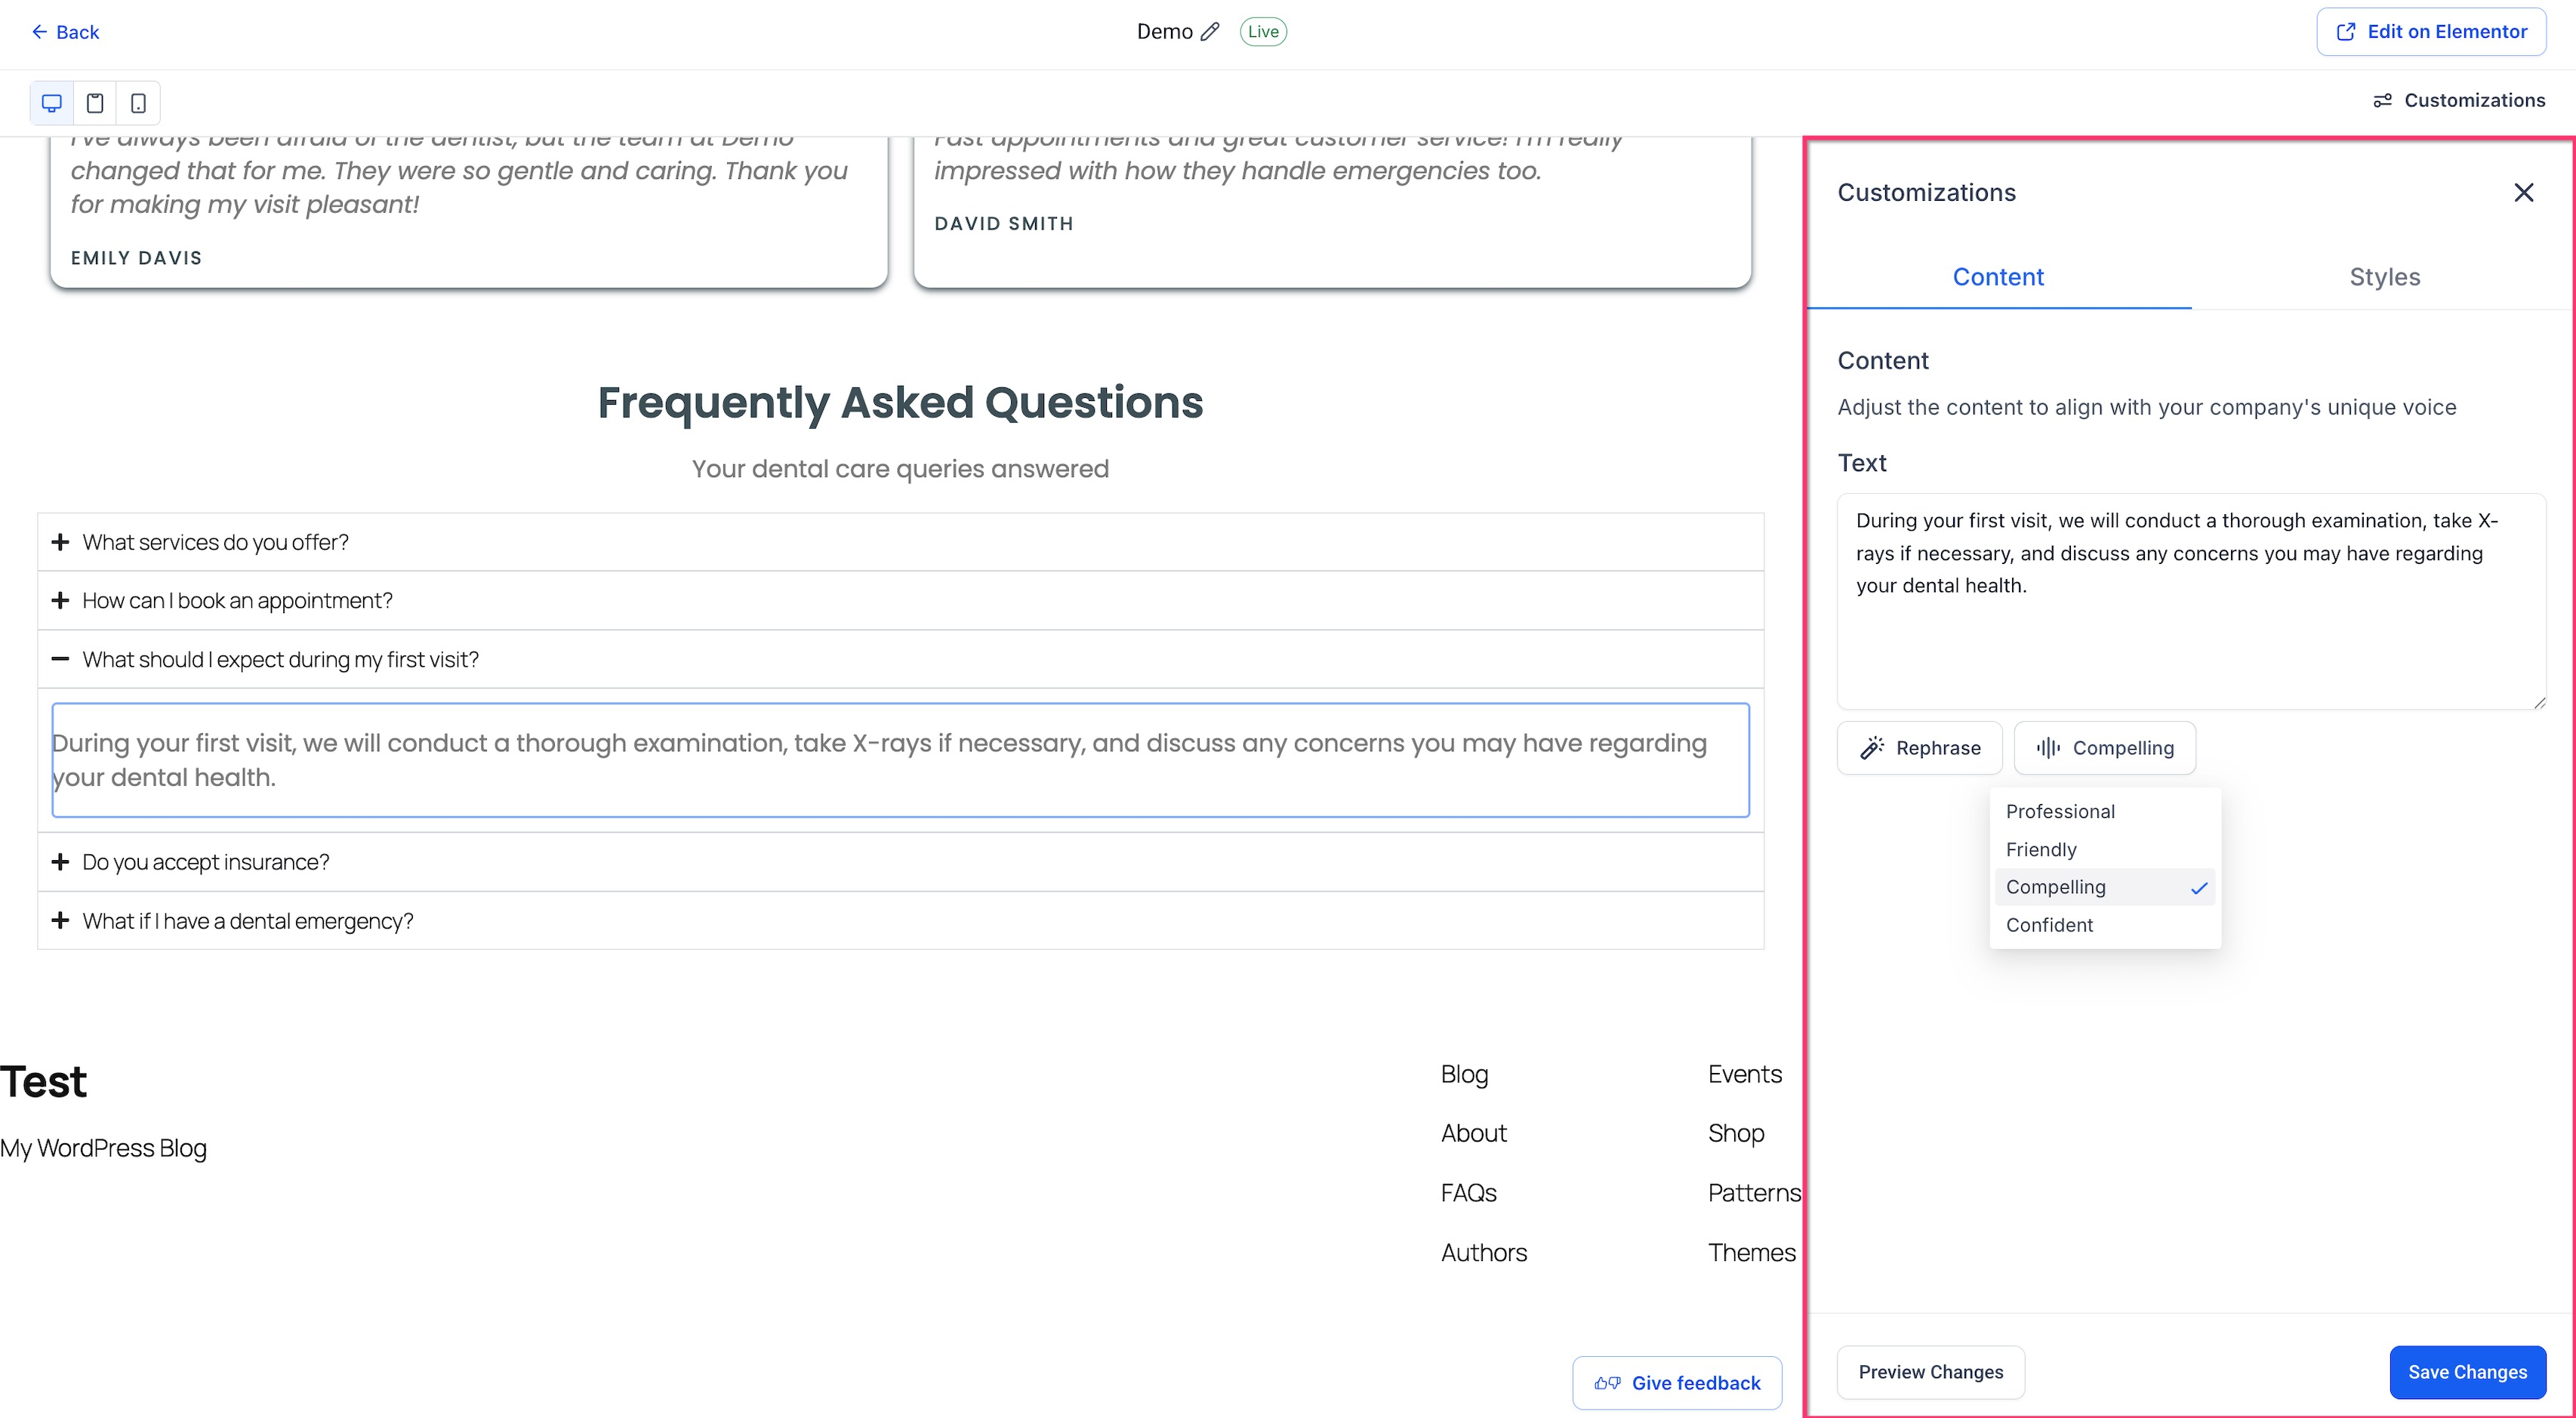
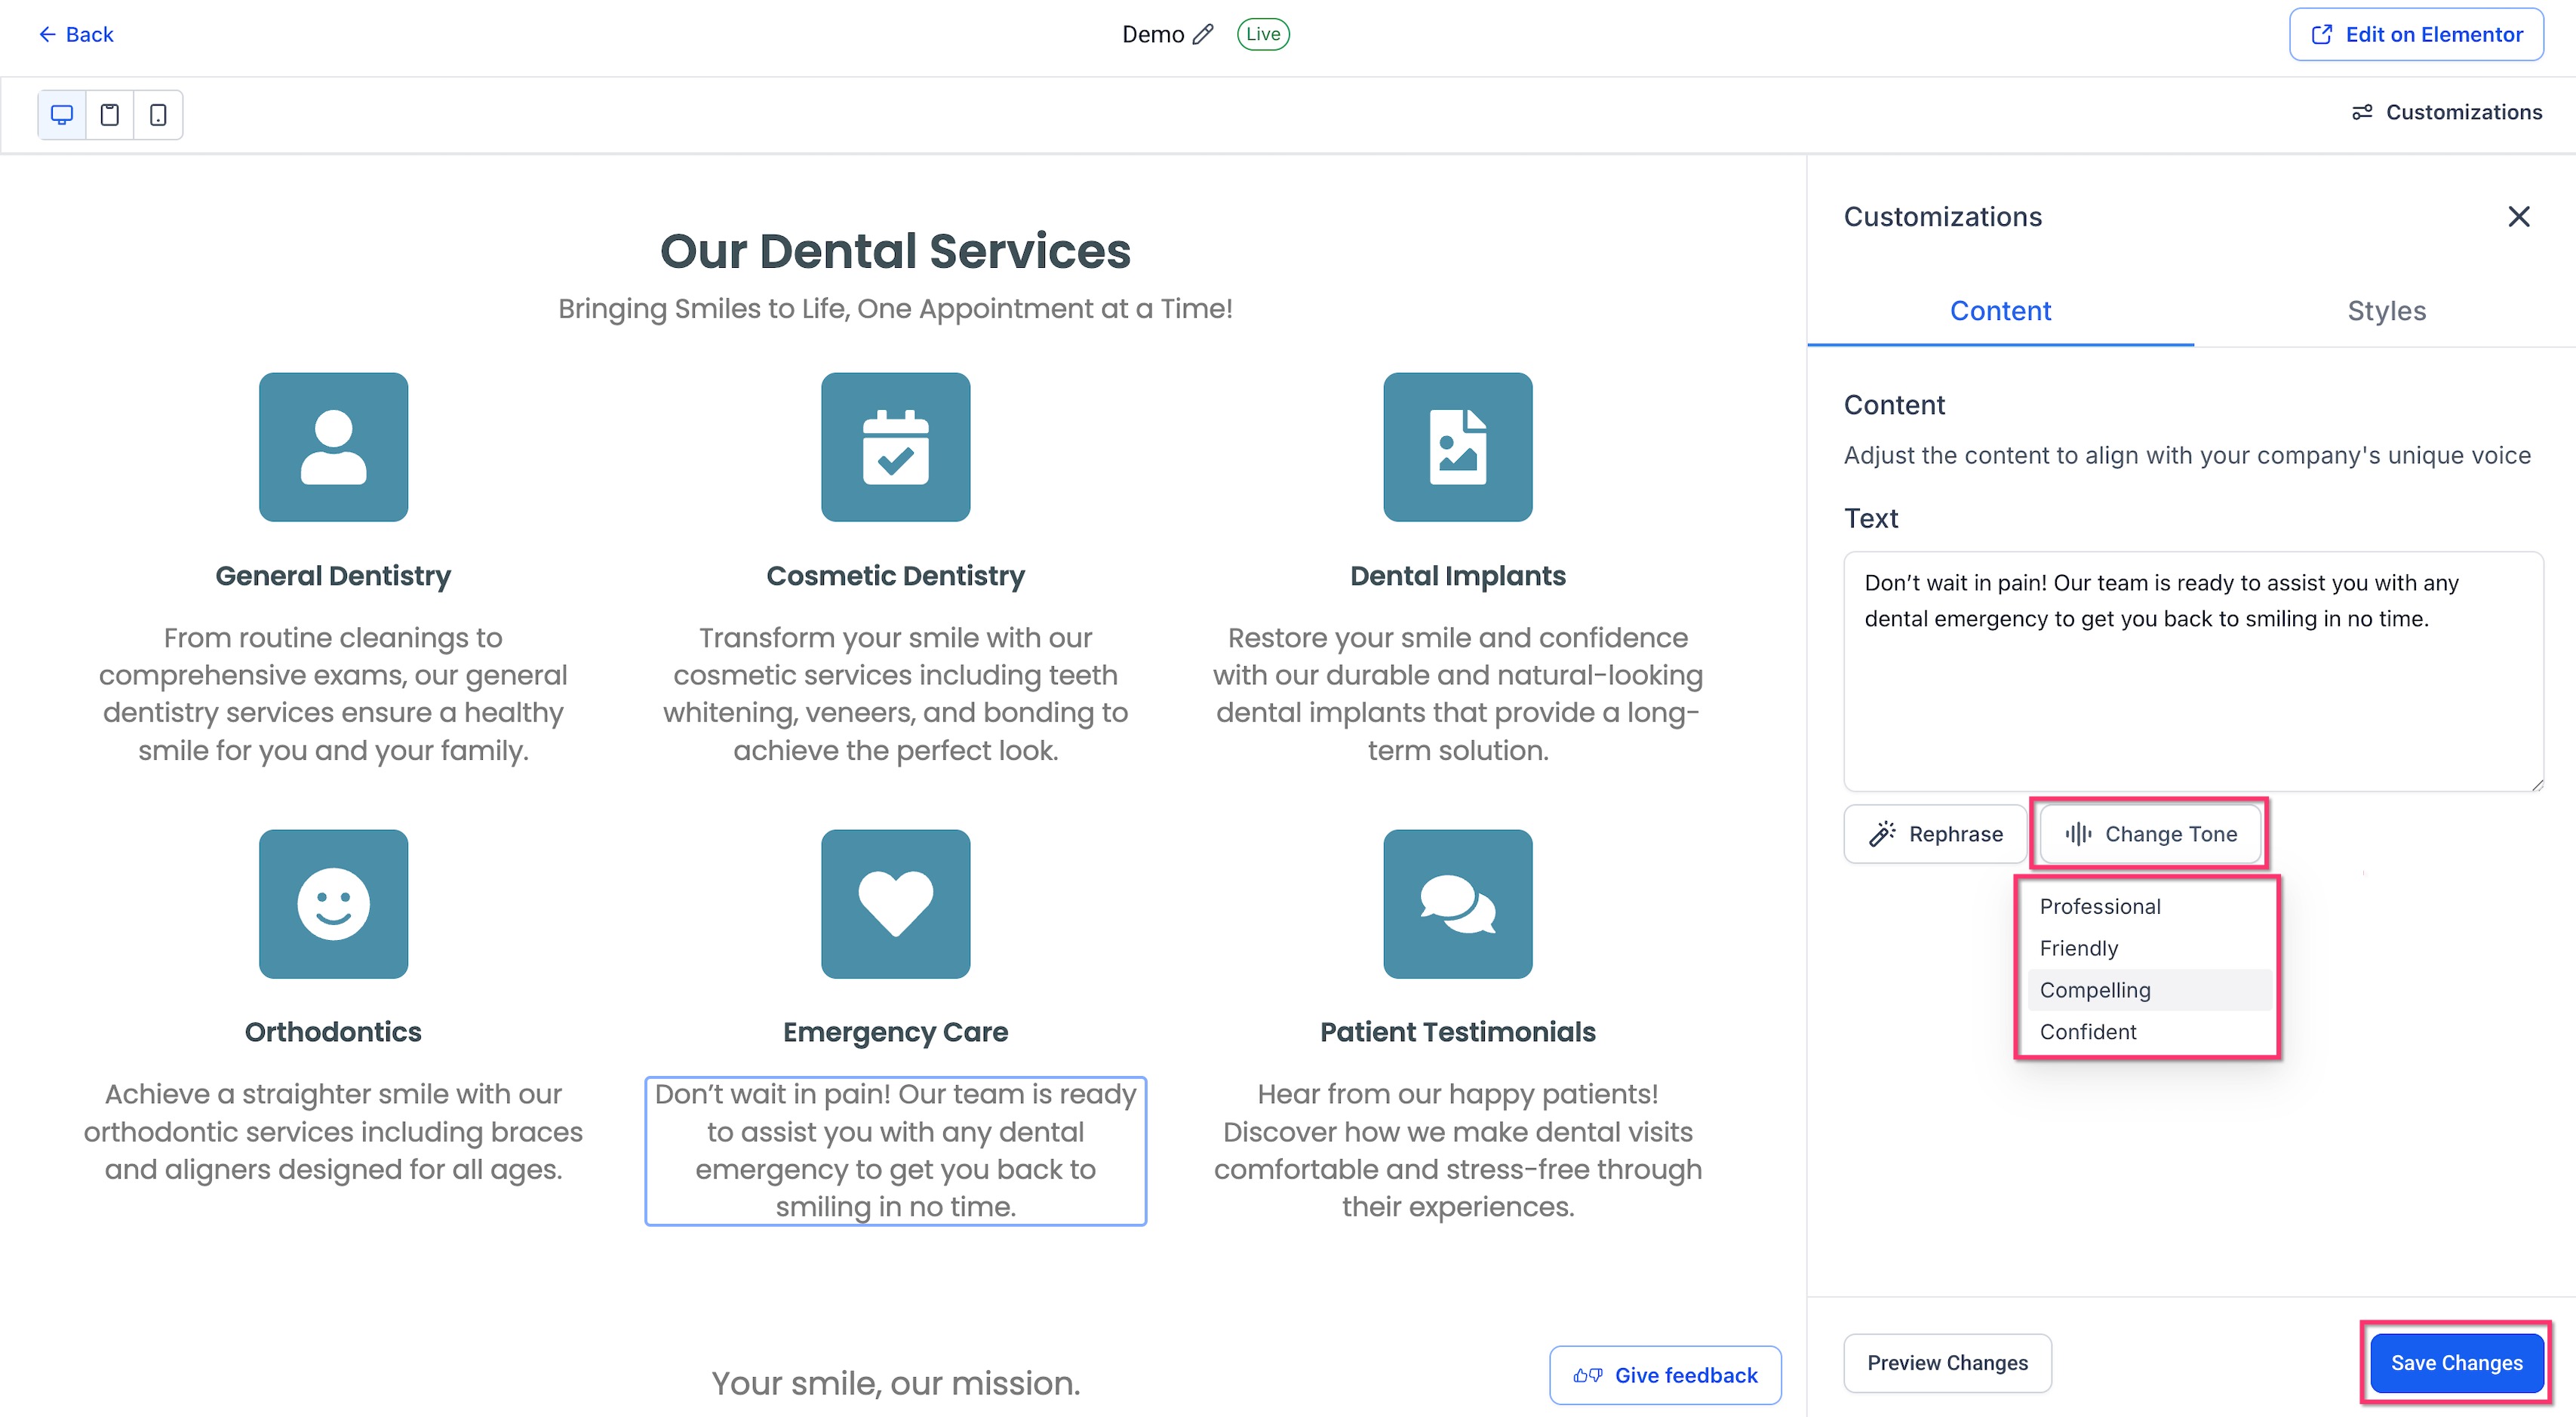
Changing the tone helps you keep page copy aligned with how your business communicates. Instead of manually rewriting the selected text, you can choose a predefined tone and generate a version that better matches the style you want.
Available tone options include:
Professional
Friendly
Compelling
Confident
Choose the tone that best matches the page and review the generated copy before saving it.
How To Customize an AI-Generated WordPress Page
Following the customization workflow helps ensure that you select a supported element, review the result, and save the change correctly. You can repeat the process for different text and image elements across the page.
Step 1: Open the AI-Generated Page
Go to Sites > WordPress > All Sites.
Open the appropriate WordPress site.

Go to Pages.
Open the AI-generated page you want to customize.

Step 2: Select a Supported Element
Move your cursor over the page preview.
Hover over the text or image you want to change.
Click the supported element.
The Customizations panel opens on the right.
Step 3: Edit the Content
For text:
Update the content manually, or select an AI-assisted option.
Use Rephrase, Shorten, or Elaborate if you want HighLevel to generate a revised version.
Use Change Tone when you want to adjust how the content sounds.
Review the result.
Step 4: Customize Images if Needed
To replace a supported image:
Hover over the image in the page preview.
Click Regenerate Image.
Select Generate with AI to create a new image or Upload image to use an existing file.
Generate or upload the replacement image.
Review the result in Live preview.
Click Insert image.

Step 5: Save the Changes
Click Save Changes when the page looks correct.
Your saved updates are applied to the WordPress page.
Step 6: Use Elementor for Additional Changes
If you need editing options that are not available in the HighLevel preview, click Edit on Elementor and continue customizing the page there.

Frequently Asked Questions
Q: Can I edit every element on an AI-generated WordPress page?
No. Universal Content Customization applies to supported elements. If an element cannot be selected or customized from the HighLevel preview, use Elementor for additional editing.
Q: Do I still need Elementor?
Not for many routine content changes. You can update supported text and images directly in HighLevel, but Elementor remains available for advanced layout, styling, and unsupported elements.
Q: What plugin version do I need?
Universal Content Customization requires LeadConnector WordPress Plugin v4.0.4 or later.
Q: Why do I not see the customization controls?
Confirm that you are working with a supported AI-generated WordPress page and that the LeadConnector WordPress Plugin is on the required version or later.
Q: Can I change the tone of generated content?
Yes. Supported text can use tone options such as Professional, Friendly, Compelling, and Confident.
Q: Can I regenerate only one image?
Yes. Supported AI-generated images can be regenerated individually without rebuilding the entire page.
Q: What is the difference between Preview Changes and Save Changes?
Preview lets you review the updated page before finalizing your edits, while Save Changes applies your customization.
Q: Can I continue editing the page in Elementor afterward?
Yes. The generated WordPress page can still be opened and edited in Elementor.
Q: Can I upload my own images instead of using AI-generated images?
Yes. Select a supported image, click Regenerate Image, and choose Upload image. You can upload JPEG, PNG, WebP, or GIF files up to 10 MB. Review the uploaded image before inserting it into the page.
Related Articles
Was this article helpful?
That’s Great!
Thank you for your feedback
Sorry! We couldn't be helpful
Thank you for your feedback
Feedback sent
We appreciate your effort and will try to fix the article