Bulk Import Companies
This article explains how to use the Bulk Import feature to create and update Company records in your HighLevel CRM using CSV files. You'll learn how to navigate the import wizard, map fields correctly, handle duplicates, and track import results.
By the end of this guide, you'll be able to migrate large datasets into your CRM efficiently while maintaining data integrity and avoiding common import errors.
This feature is currently available in Labs. To access it, navigate to your Subaccount settings, select Labs, and enable "Company and Custom Object Import" before proceeding with the steps in this article.
What is Bulk Import for Companies?
Bulk Import for Companies is a CSV-based import tool that allows you to create and update multiple Company records in HighLevel CRM simultaneously. The feature uses a guided 4-step wizard (Start → Upload → Map → Verify) that helps you upload data files, map fields to the correct Company properties, detect duplicates, and review your import before execution.
The wizard includes smart field mapping with preview data, duplicate detection based on Company ID, and the option to prevent overwriting existing field values with empty data. After submitting your import, you can track progress and view detailed statistics through the dedicated Bulk Actions page.
This feature is designed to simplify large-scale CRM migrations and eliminate manual data entry for agencies and businesses managing multiple company records.
Key Benefits
The Bulk Import feature provides several advantages for managing Company data at scale:
Enabling Company and Custom Object Import in Labs
Before you can import Company records, you must enable the feature through the Labs section of your Subaccount settings. This feature is currently in Labs, meaning it is available for early access testing and may receive updates based on user feedback.
Go to your Sub account settings and select the Labs tab from the left sidebar.
Locate the toggle labeled Company and Custom Object Import and turn it on.
Once enabled, navigate to the Companies section in your CRM to confirm the Import button is visible.
How to Import Companies
Follow these steps to initiate a bulk import of Company records using a CSV file:
Navigate to Companies in your HighLevel dashboard and click the Import button.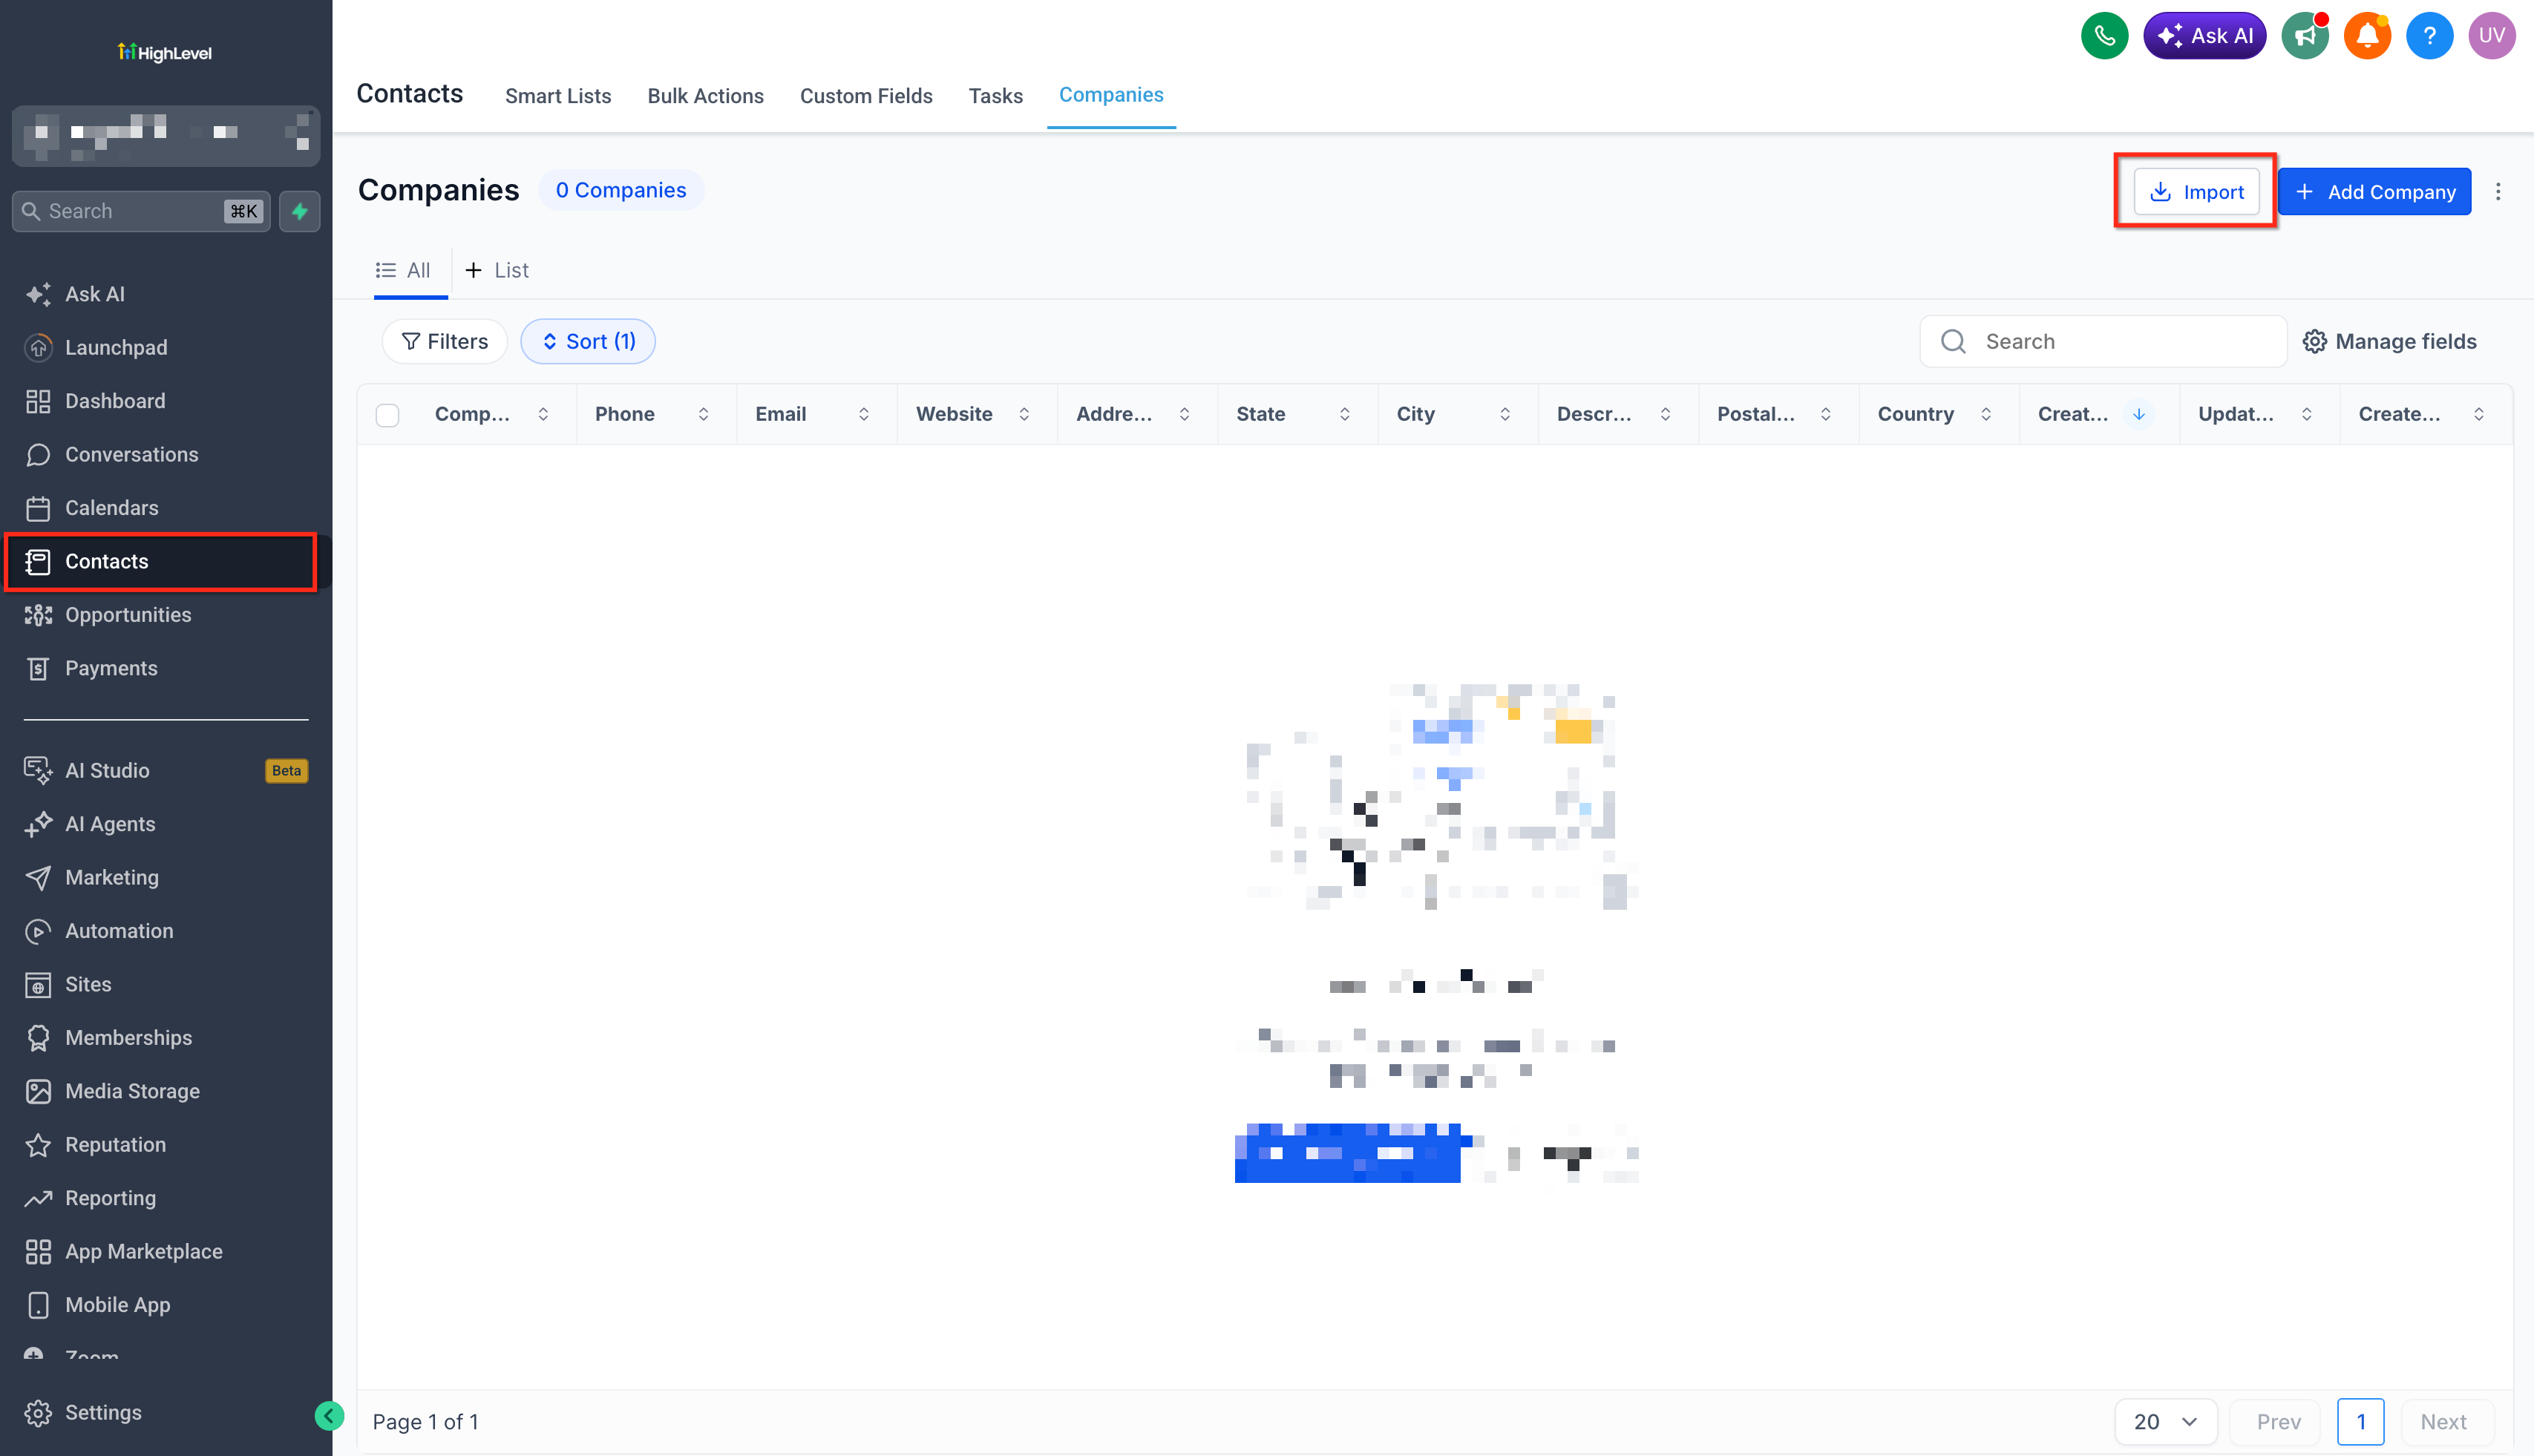
In the object selection screen, choose Companies as the object type you want to import.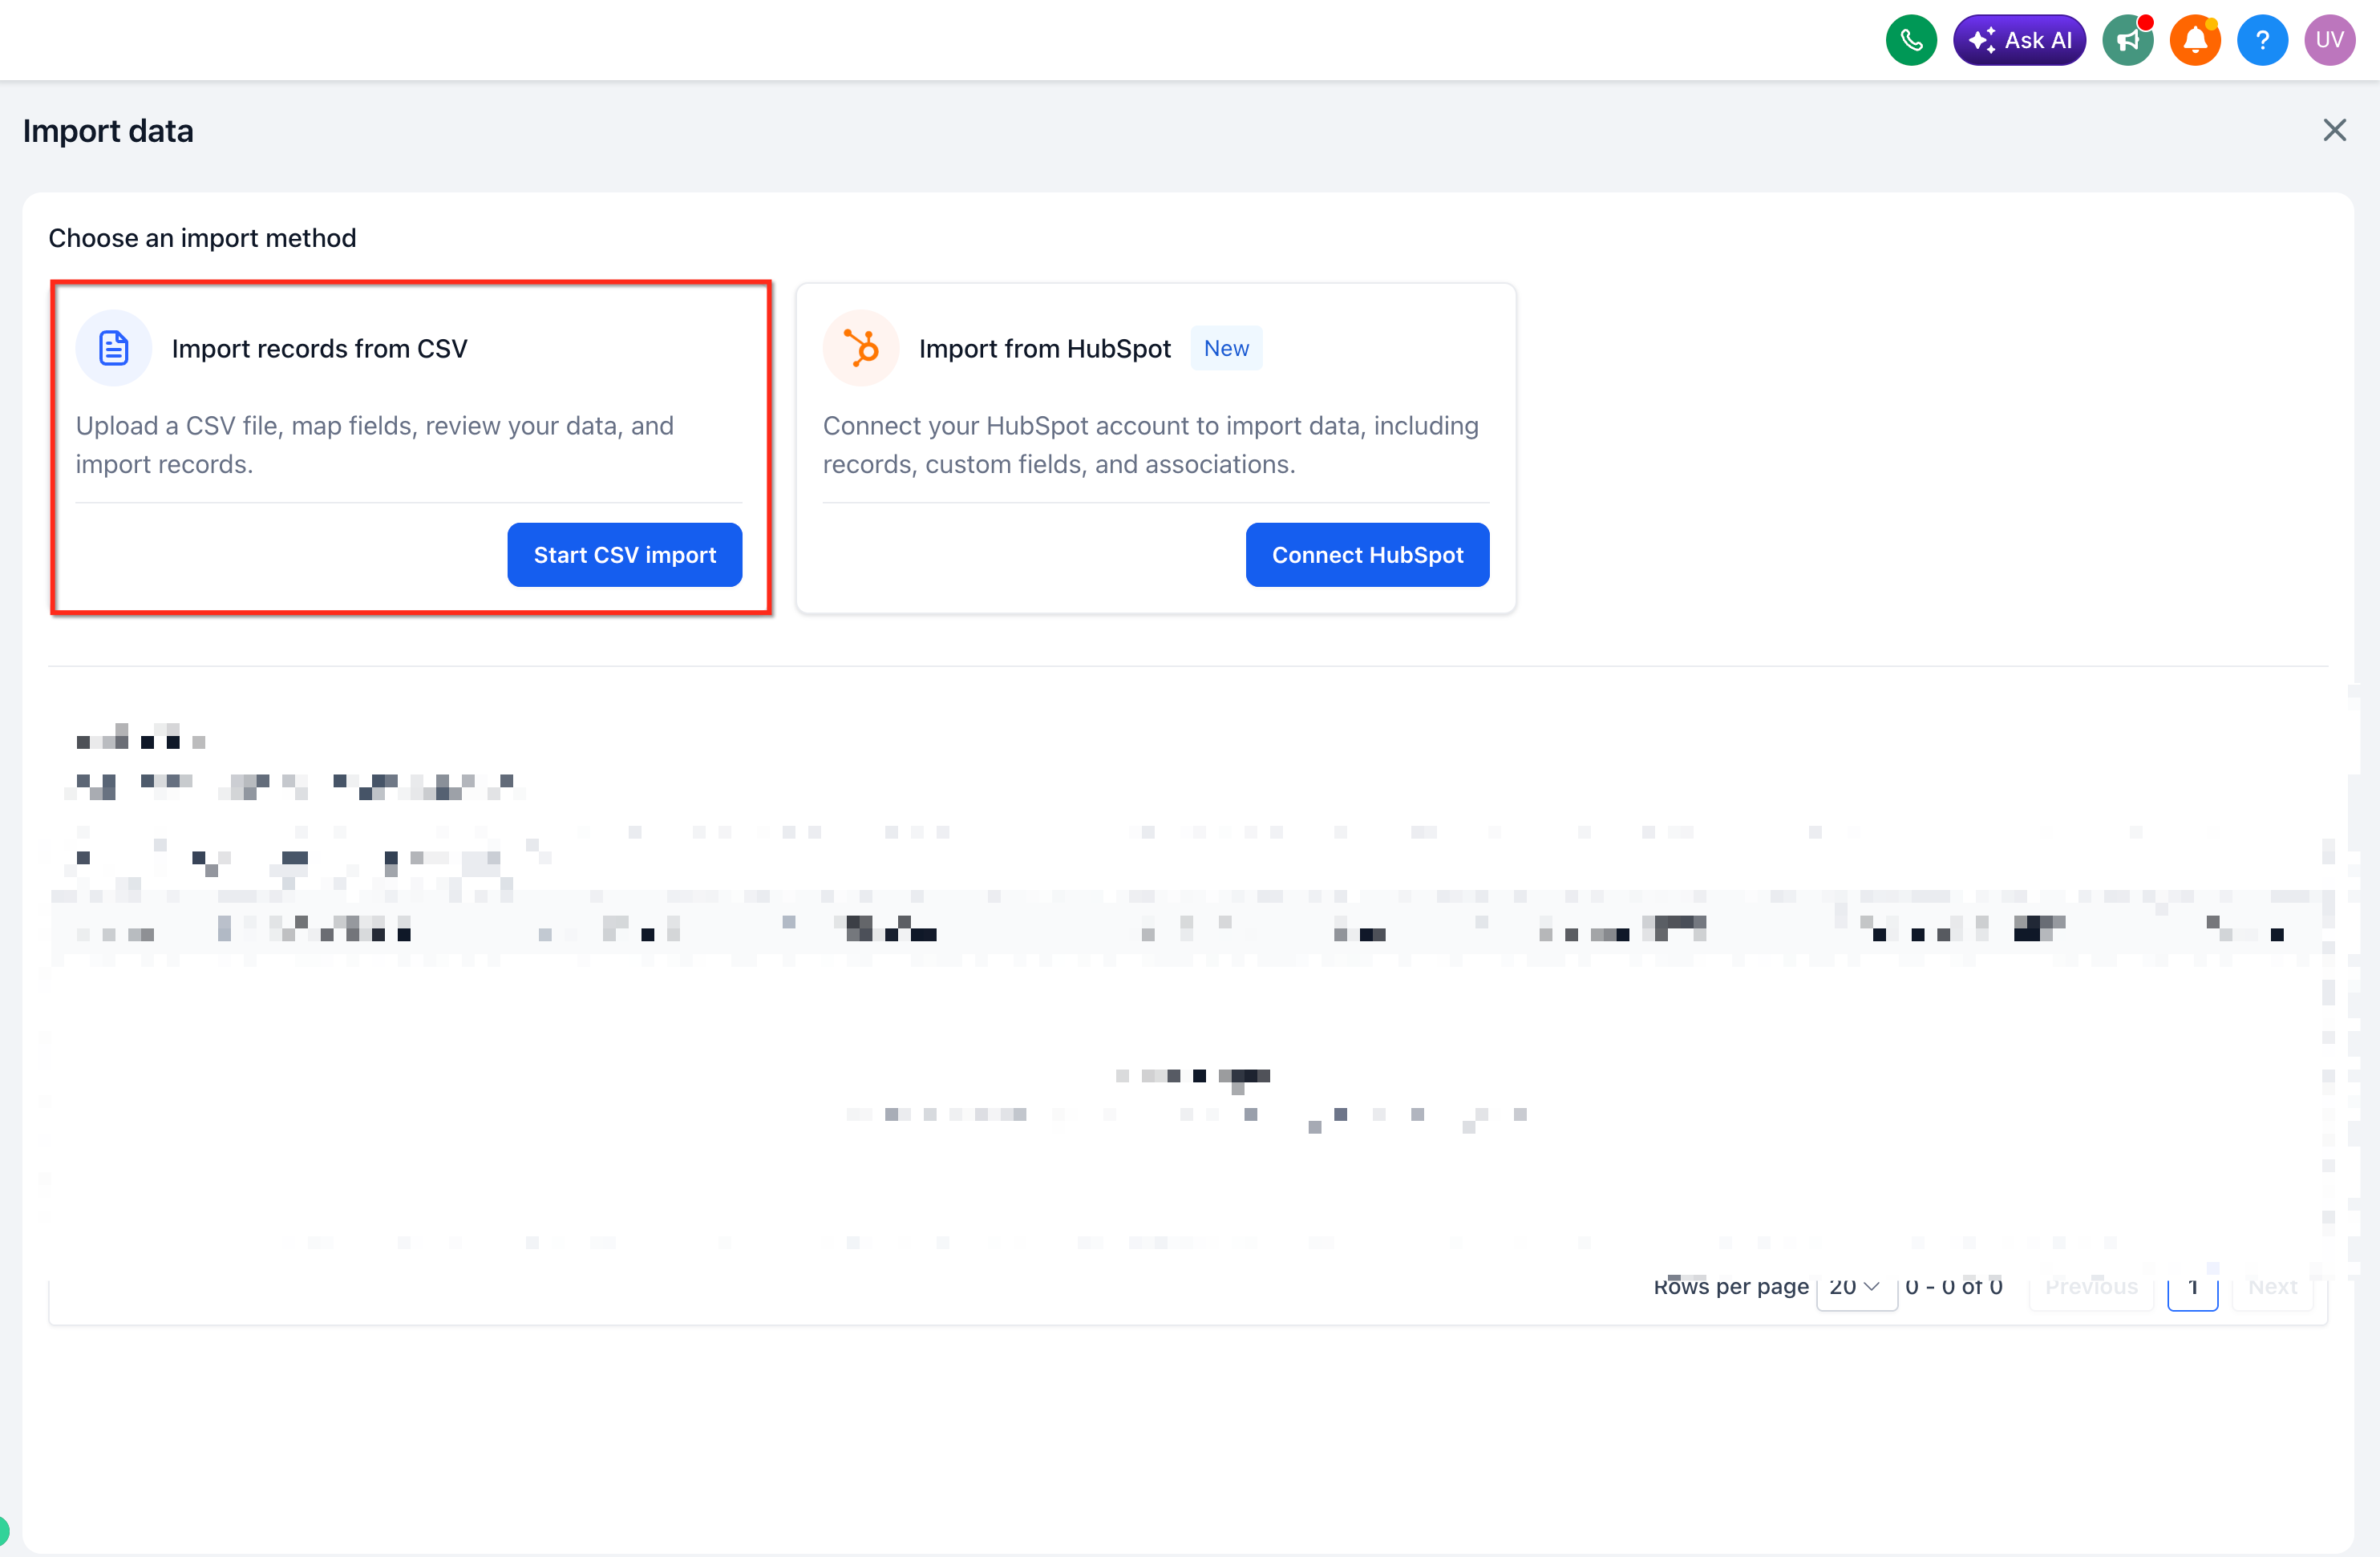
Click the upload area and select your prepared CSV file containing the Company data you want to import.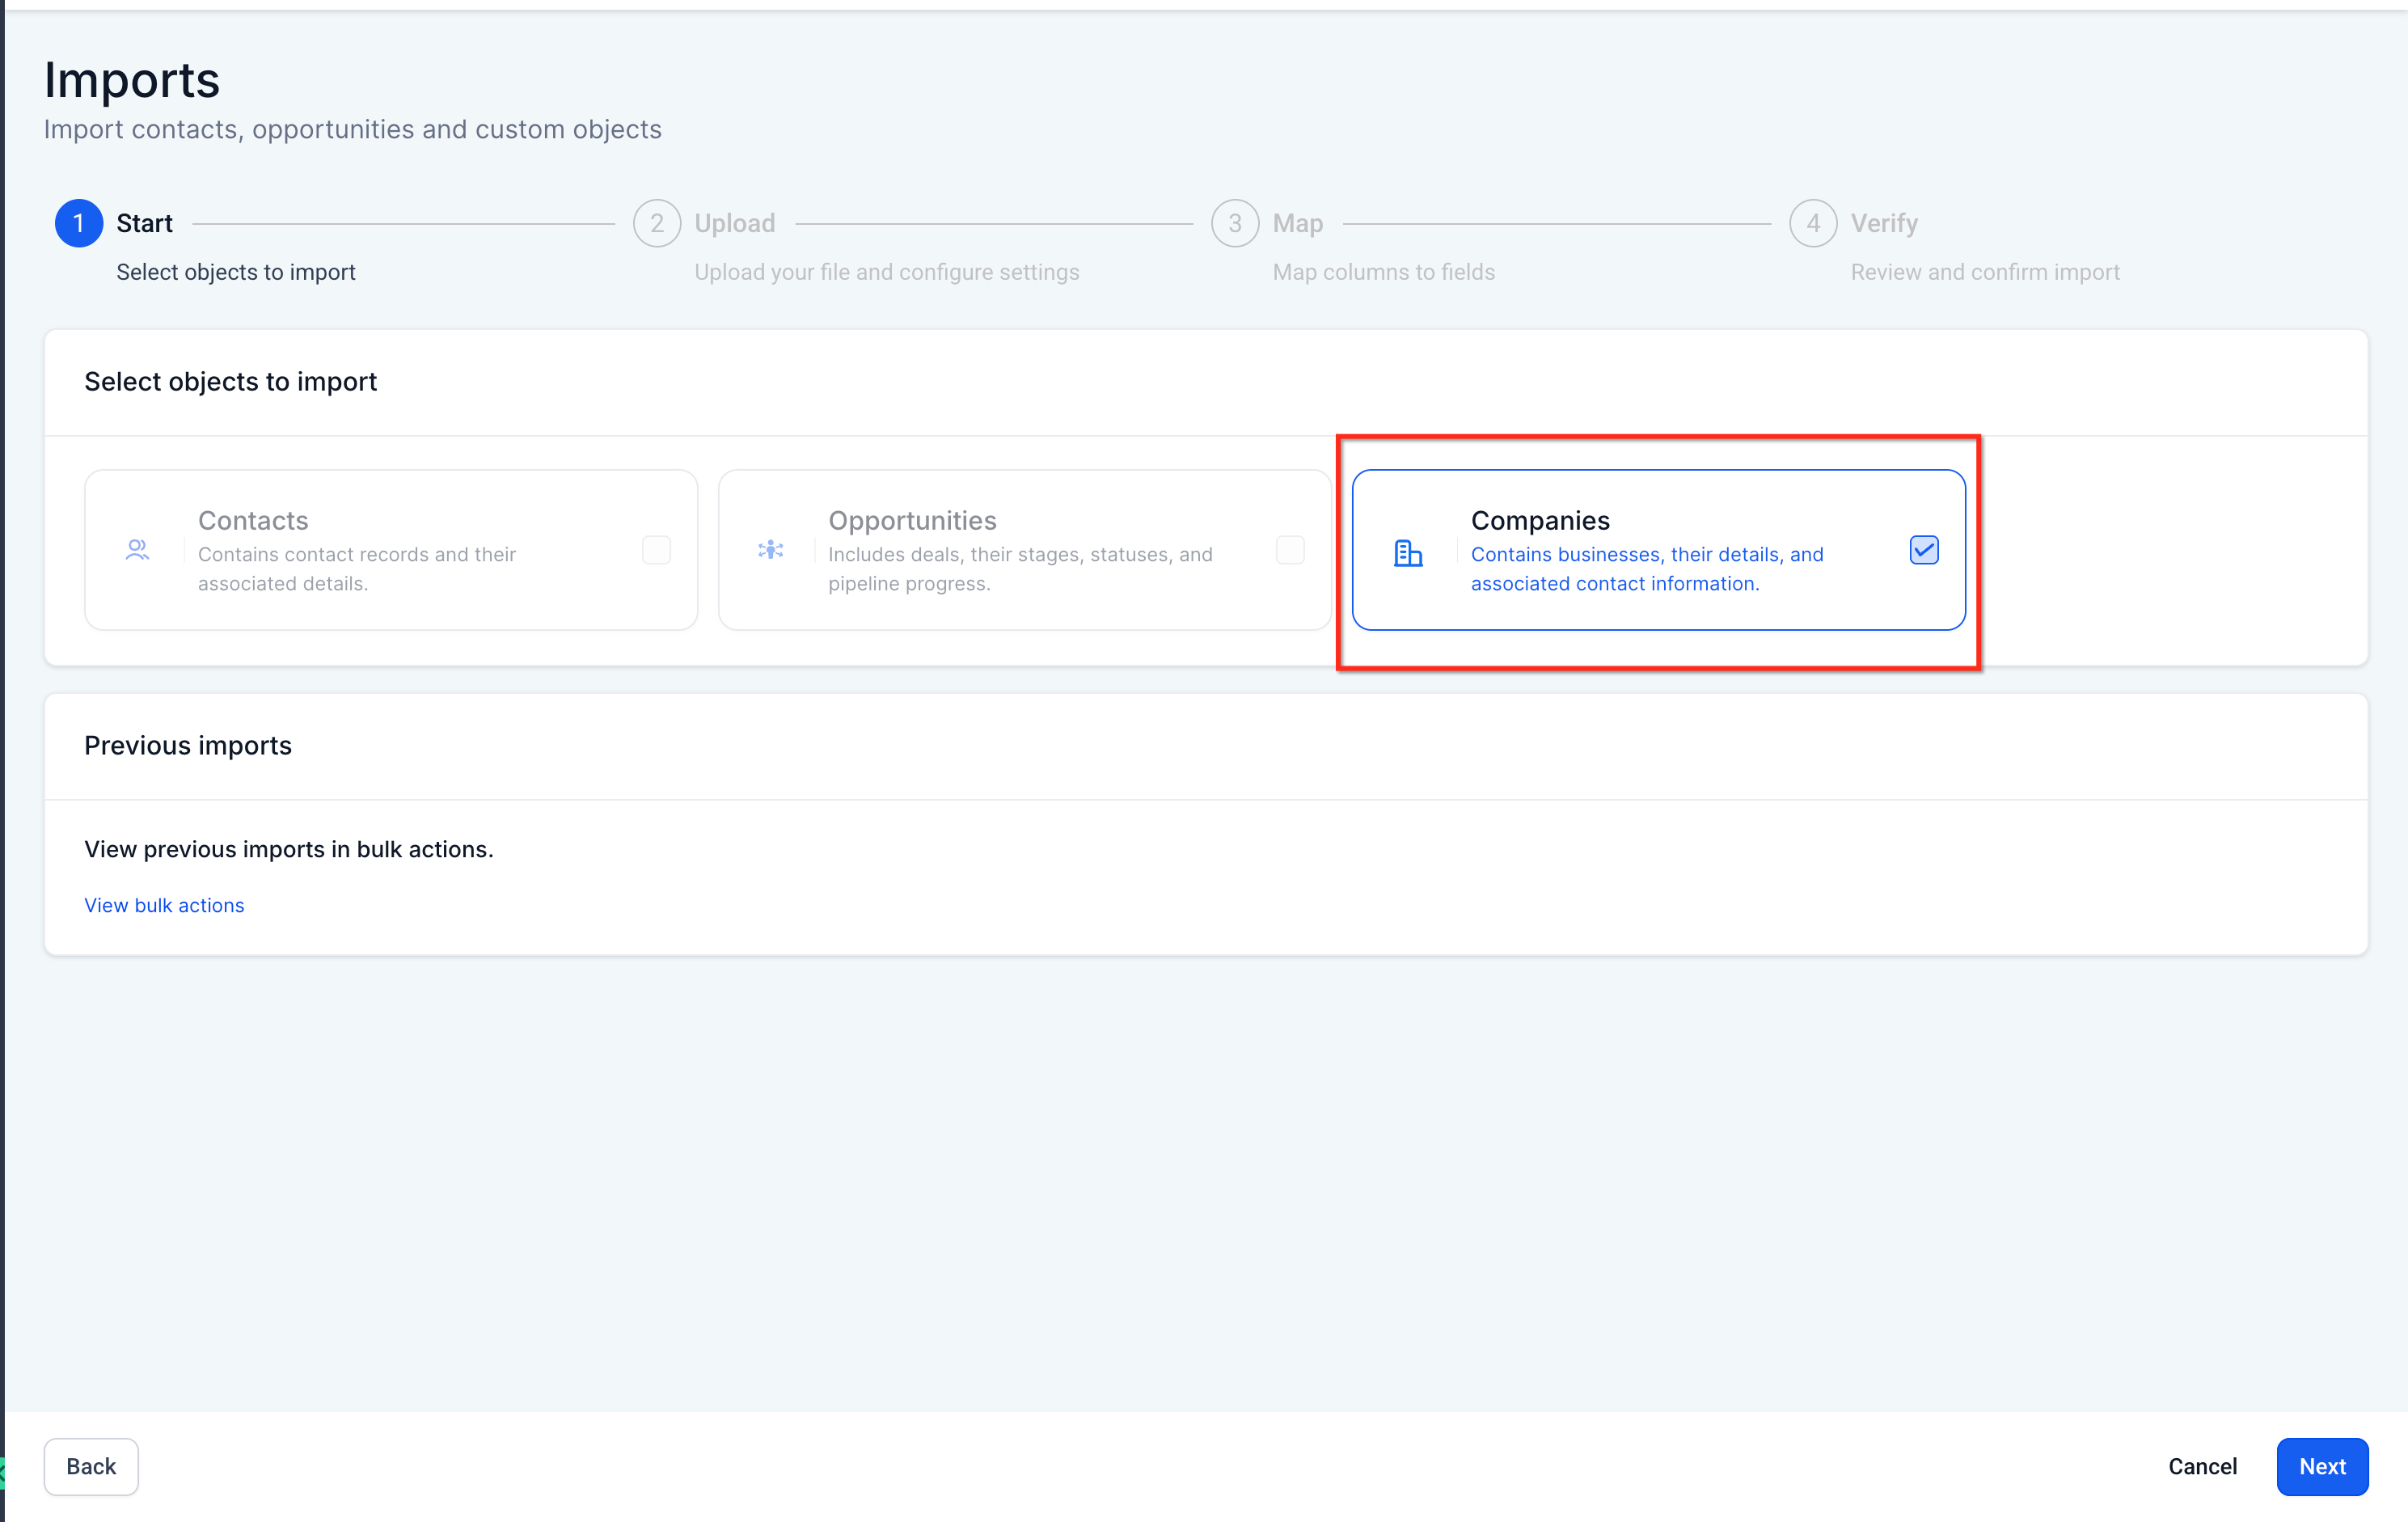
Select one of three options: Create companies (new records only), Update companies (existing records only), or Create & update companies (both).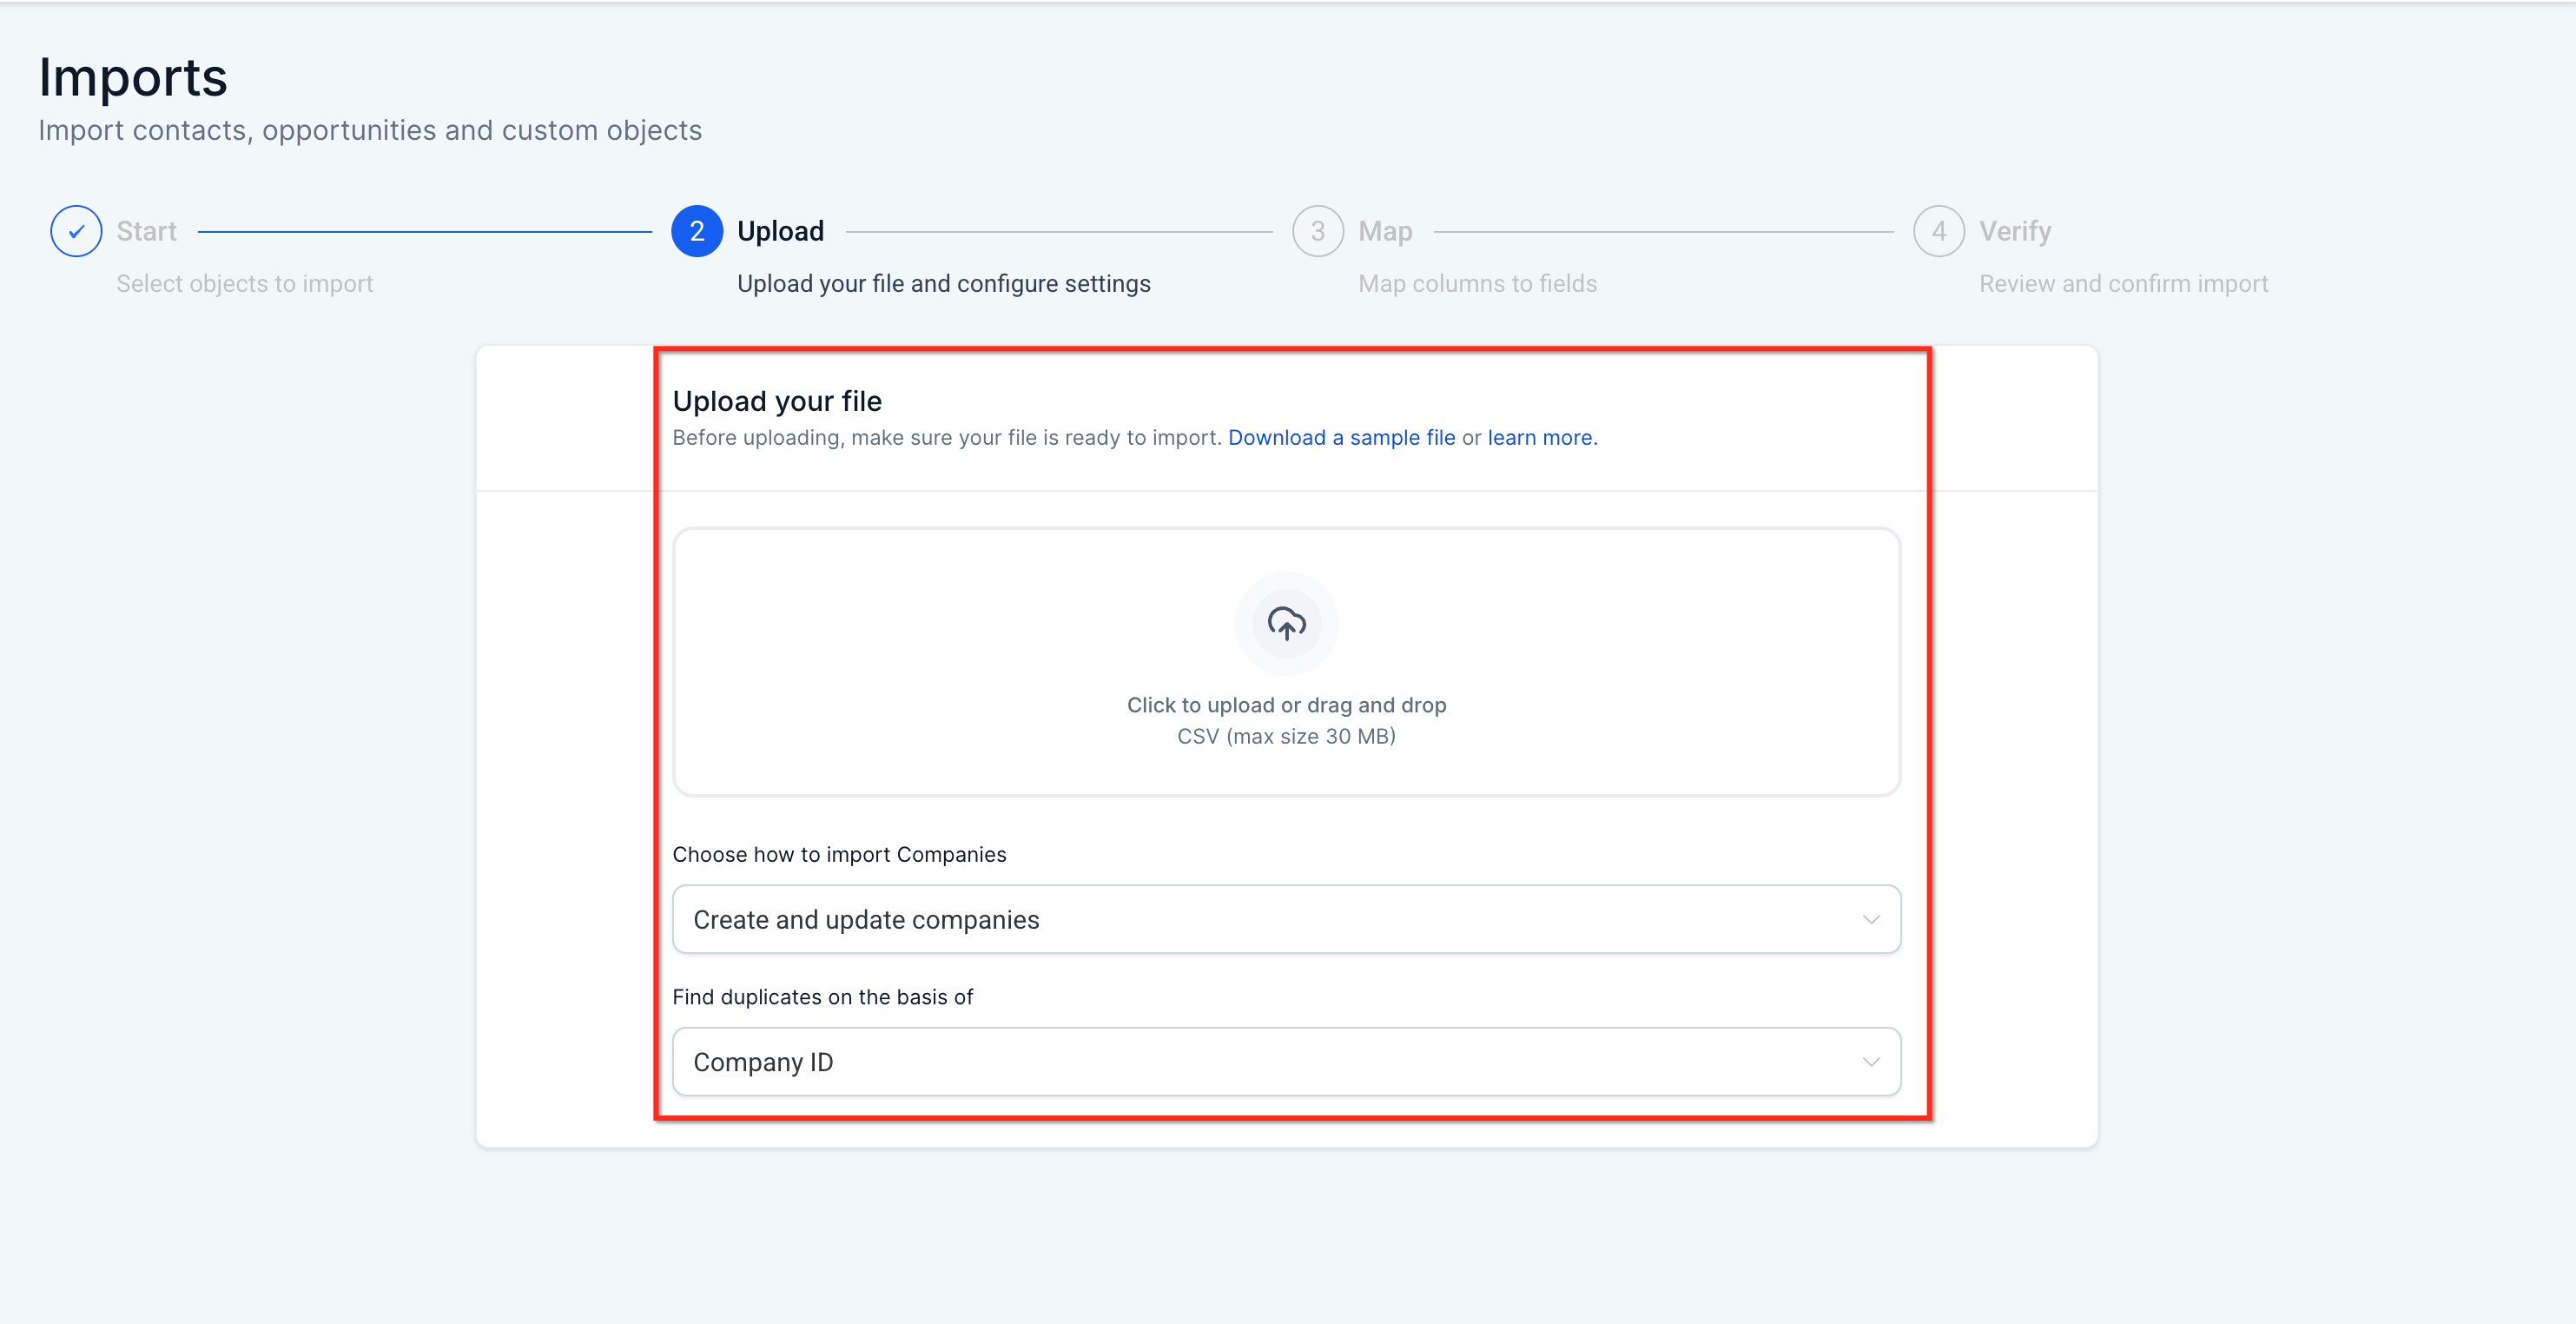
Select Company ID as the field to use for identifying duplicate records during import.
In the field mapping screen, match each column in your CSV file to the corresponding Company field in HighLevel. Preview data from your CSV helps confirm correct mappings.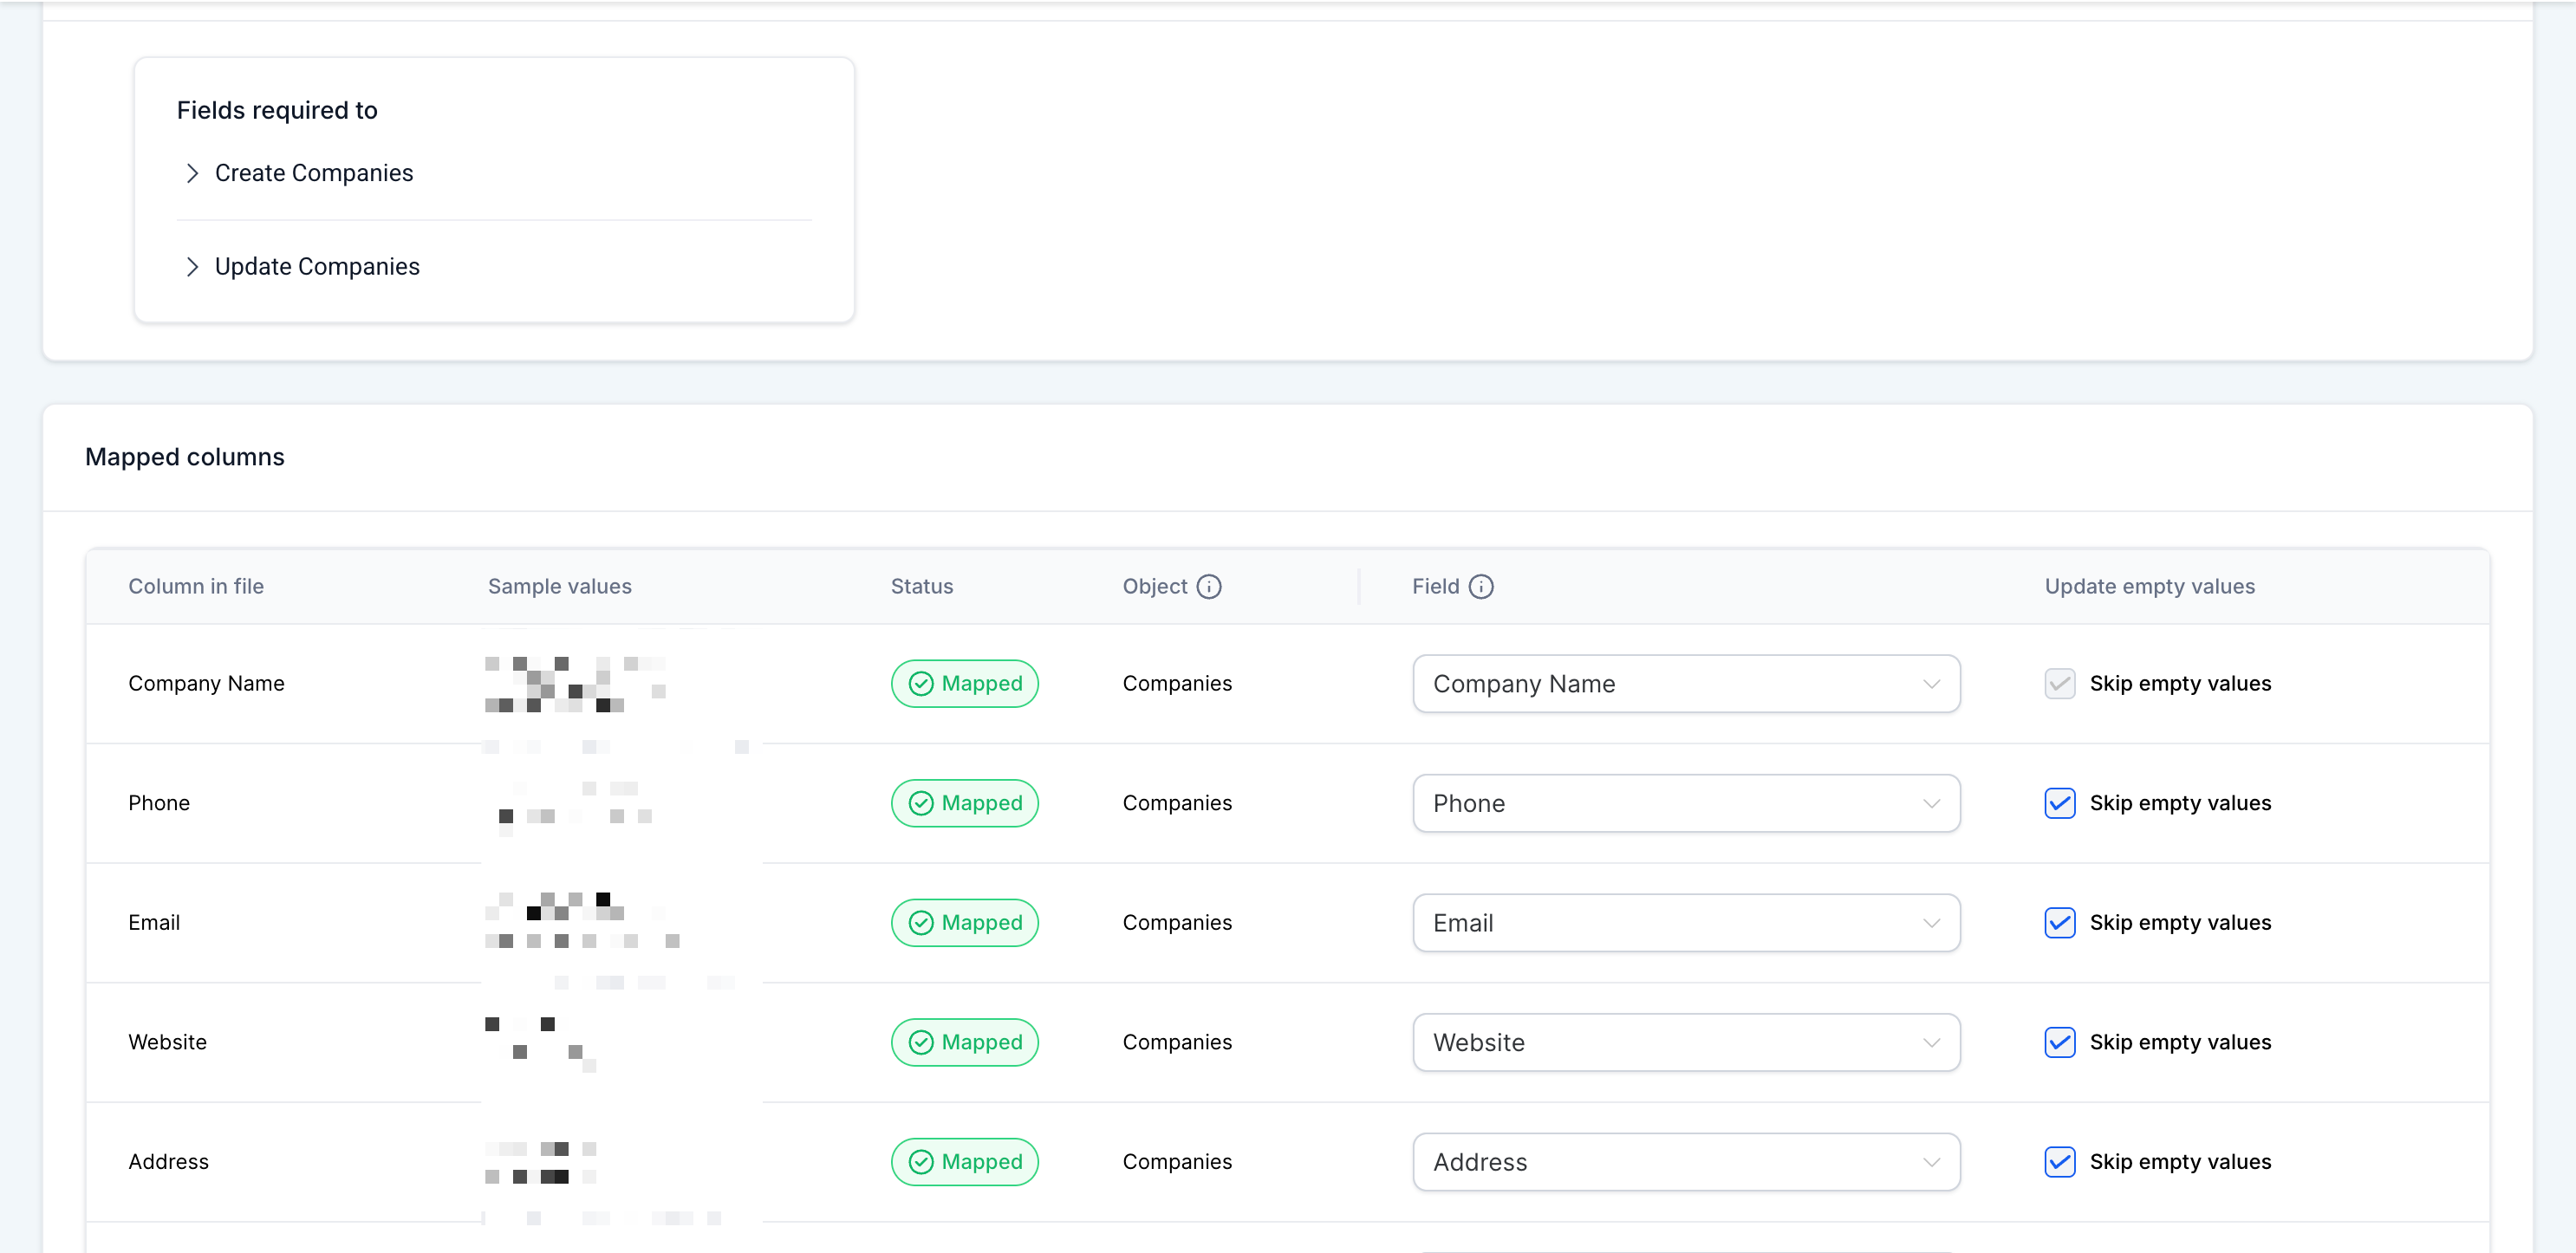
On the verification screen, review all your import settings, including field mappings and duplicate handling rules. Optionally enable Don't update to empty value to prevent overwriting existing data with blank fields.
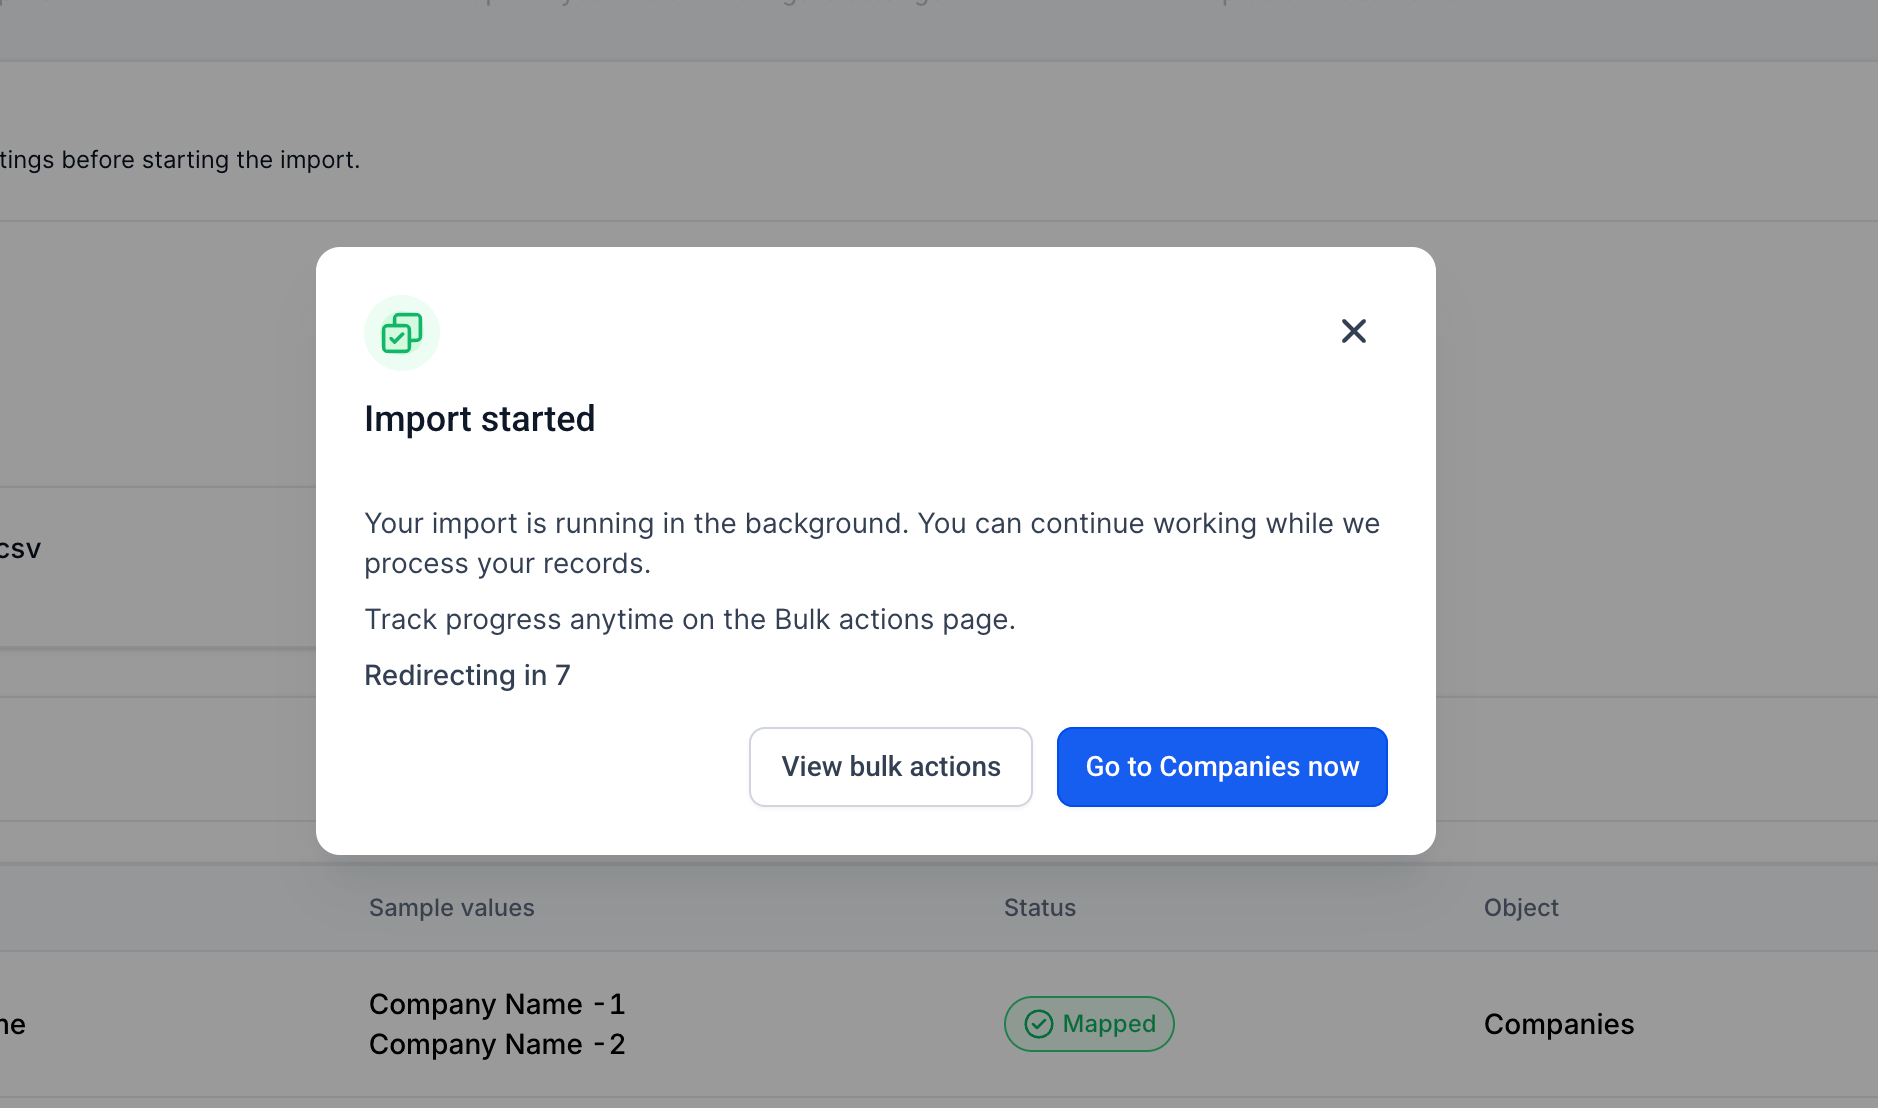
Click Start Import to begin processing your file.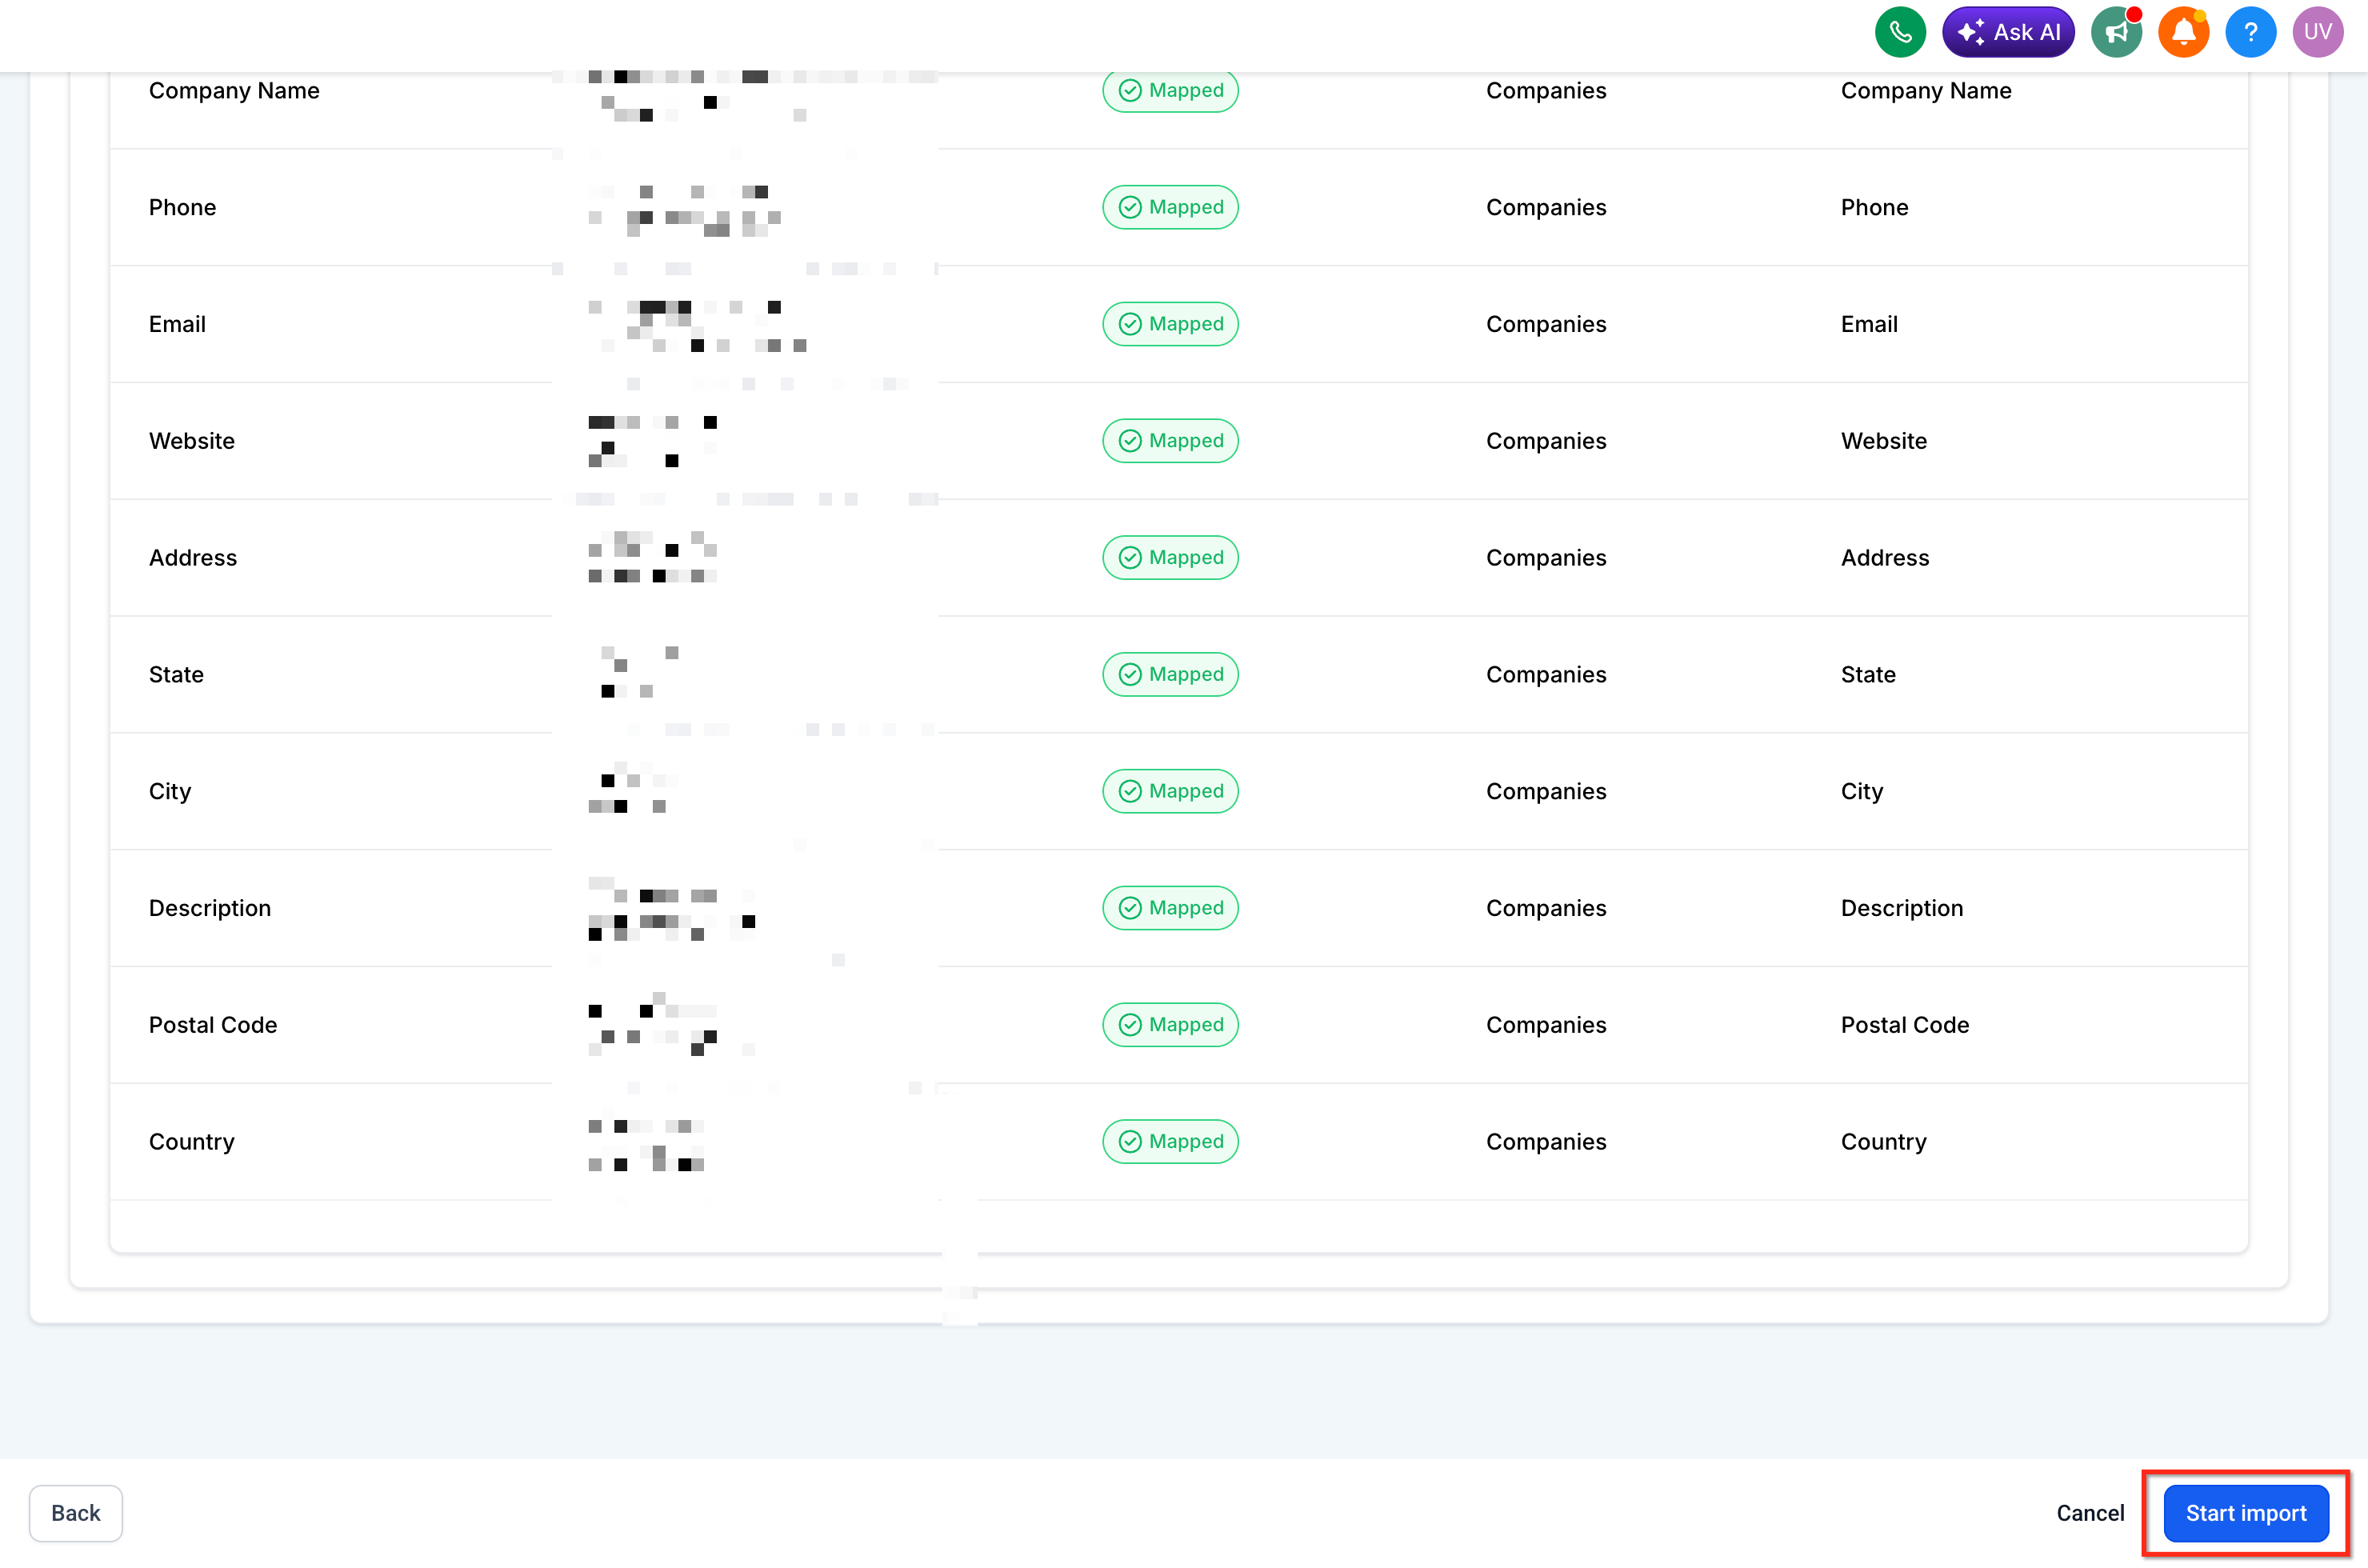
Track the import status under Bulk Actions – Companies in your dashboard.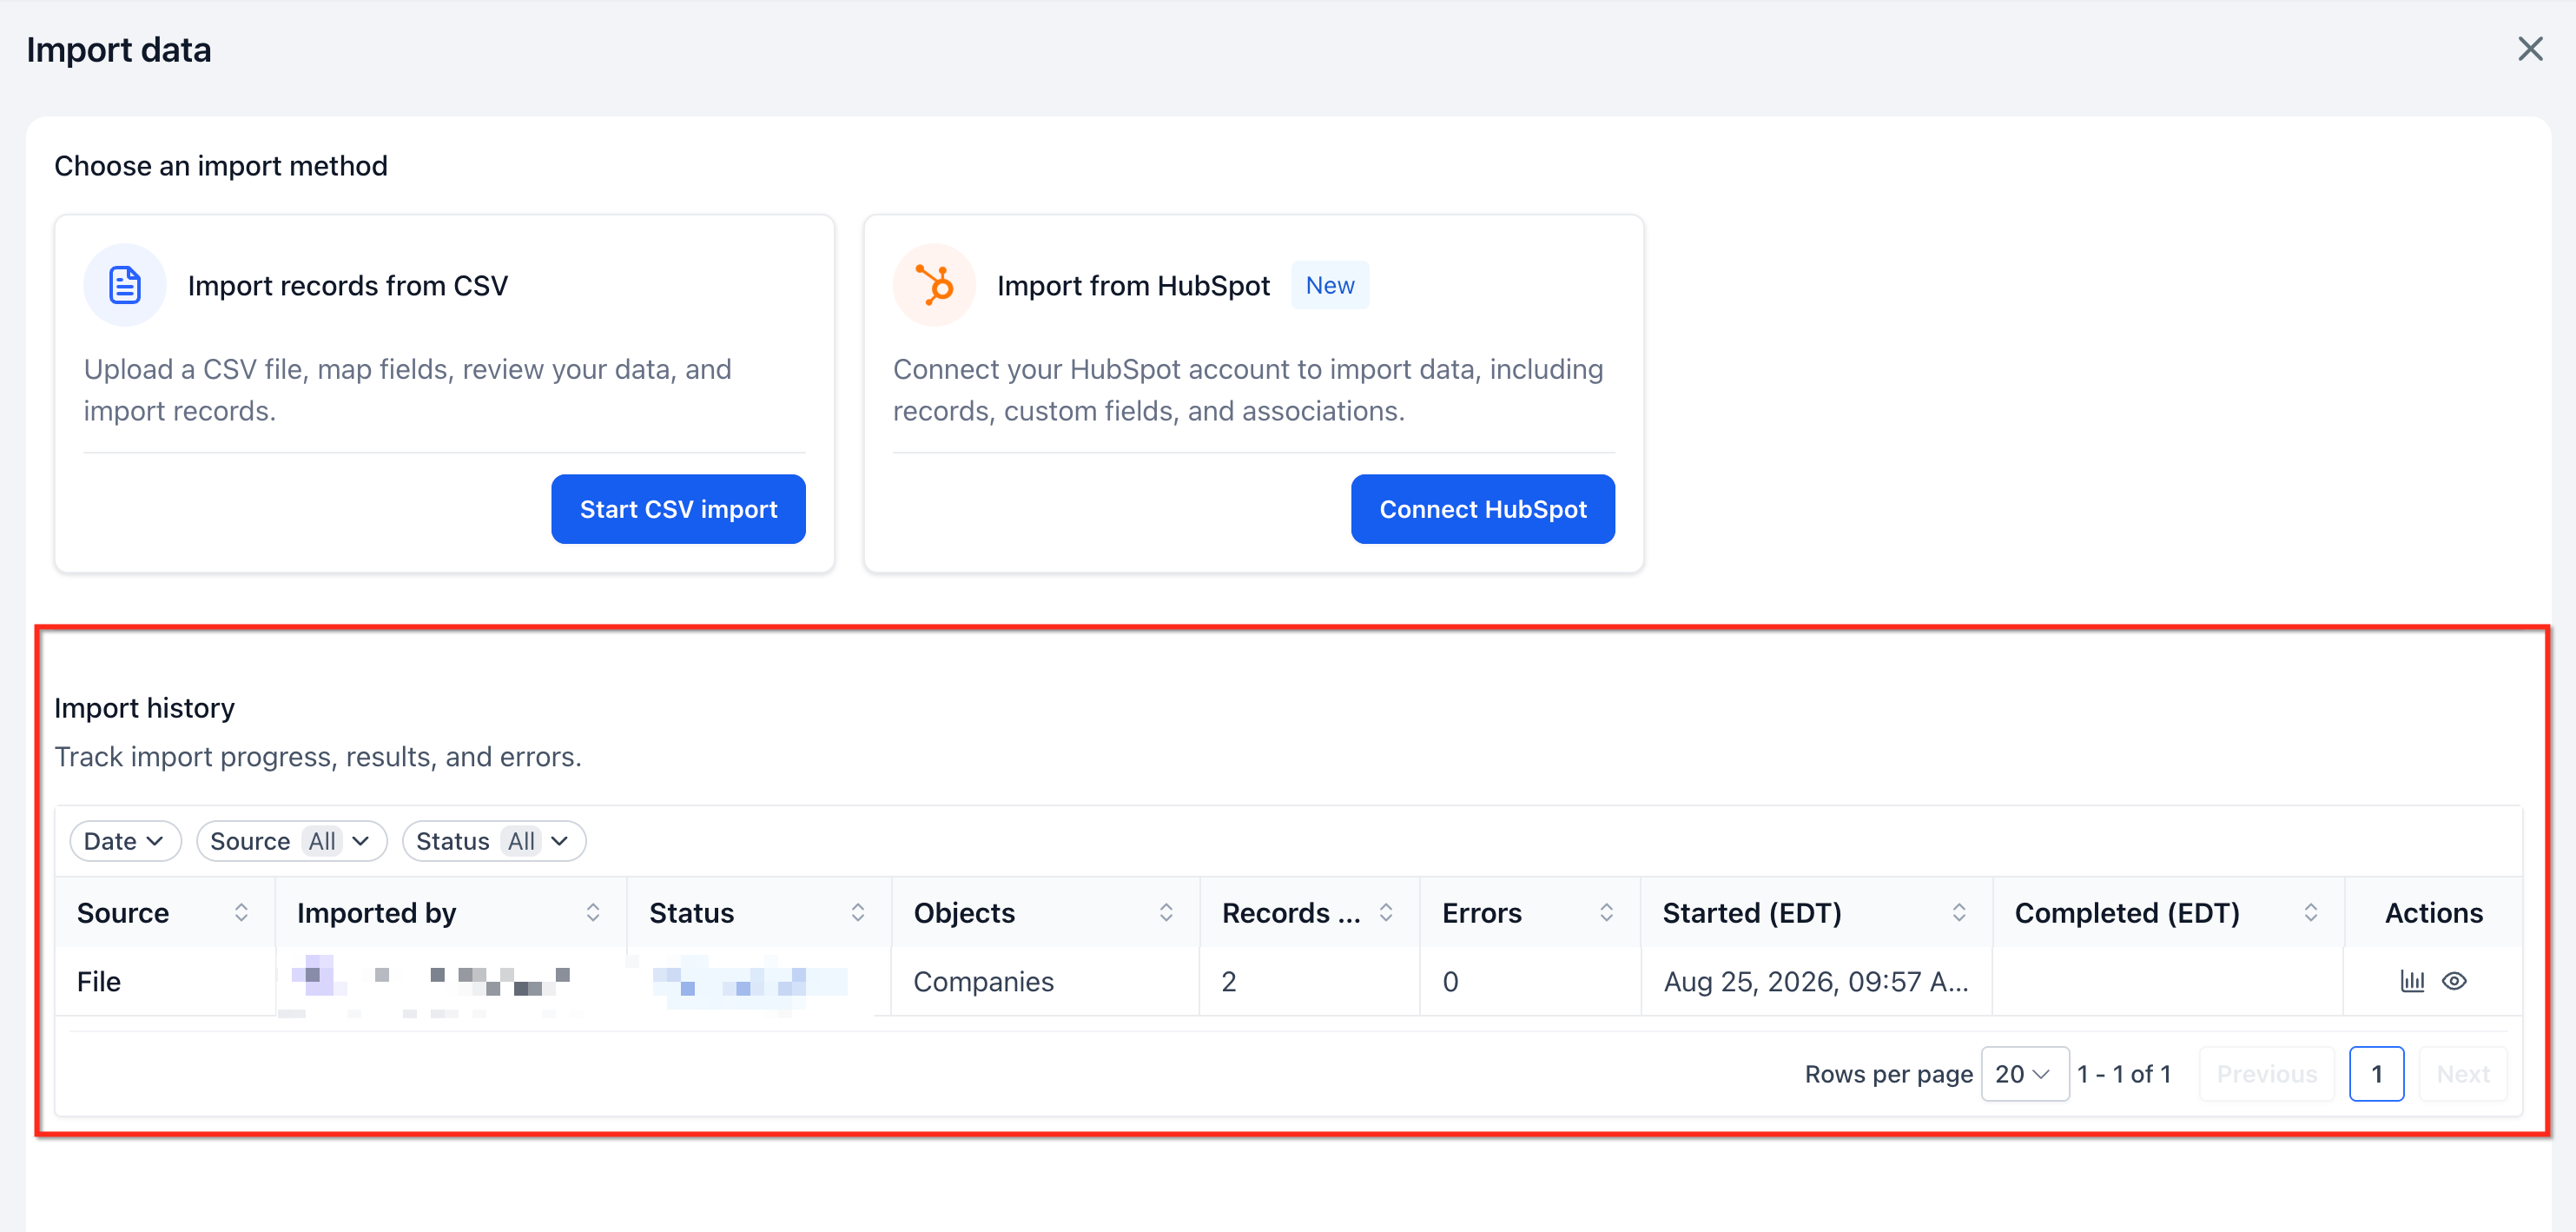
Understanding the 4-Step Import Wizard
The Bulk Import wizard guides you through four distinct phases to ensure accurate data transfer:
Select the object type (Companies) and define your import behavior—whether you want to create new records, update existing ones, or do both.
Upload your CSV file and choose the criteria for duplicate detection (typically Company ID).
Match each CSV column to a corresponding Company field. The wizard displays sample data from your file to help you confirm correct mappings.
Review all your settings before submitting. This screen includes the option to enable "Skip empty values" to protect existing data from being overwritten by blank CSV cells.
Always verify your field mappings carefully in the Map phase. Incorrect mappings can result in data being placed in the wrong fields, which may require manual cleanup or re-importing.
Tracking Imports with Bulk Actions
After you submit an import, HighLevel processes the file in the background. You can monitor the progress and review detailed results using the Bulk Actions – Companies dashboard.
The Bulk Actions page displays key statistics for each import:
You can also download a detailed import report that includes line-by-line results, error descriptions, and warnings. This report is useful for auditing, troubleshooting failed records, and ensuring data integrity after large imports.
Download the import report immediately after completion to preserve a record of the import operation. This is especially helpful for compliance, auditing, or debugging issues that may arise later.
Best Practices for Company Imports
Follow these recommendations to ensure smooth and accurate Company imports:
Ensure your CSV file is properly formatted with clear column headers, consistent data types, and no unnecessary special characters. Remove any duplicate rows before uploading.
Always double-check the field mappings in the Map phase. Verify that data from each CSV column matches the correct Company field in HighLevel to avoid placing information in the wrong properties.
When updating existing records, enable this option to prevent empty CSV cells from overwriting populated fields in HighLevel. This protects your existing data from accidental deletion.
Before importing thousands of records, test the process with a small CSV file containing 10–20 rows. Verify the results in Bulk Actions to confirm mappings and settings are correct.
After each import, download the detailed import report from the Bulk Actions page. Keep these reports for record-keeping, troubleshooting, and compliance purposes.
If your import includes a large number of records (500+), break it into smaller batches of 200–300 rows. This makes it easier to identify and fix errors without needing to re-upload massive files.
Frequently Asked Questions
Was this article helpful?
That’s Great!
Thank you for your feedback
Sorry! We couldn't be helpful
Thank you for your feedback
Feedback sent
We appreciate your effort and will try to fix the article