Pre-Built A2P Campaign (Widget-First) Registration
HighLevel's Pre-Built A2P Campaign (Widget-First) flow uses a guided questionnaire and an auto-generated Chat Widget to help you complete Campaign registration with built-in compliance safeguards.
This guide covers the widget-first approach, Marketing, Informational, and Mixed messaging use cases, the generated consent experience, and step-by-step instructions for registering your Campaign.
What is the Pre-Built A2P Campaign (Widget-First) Flow?
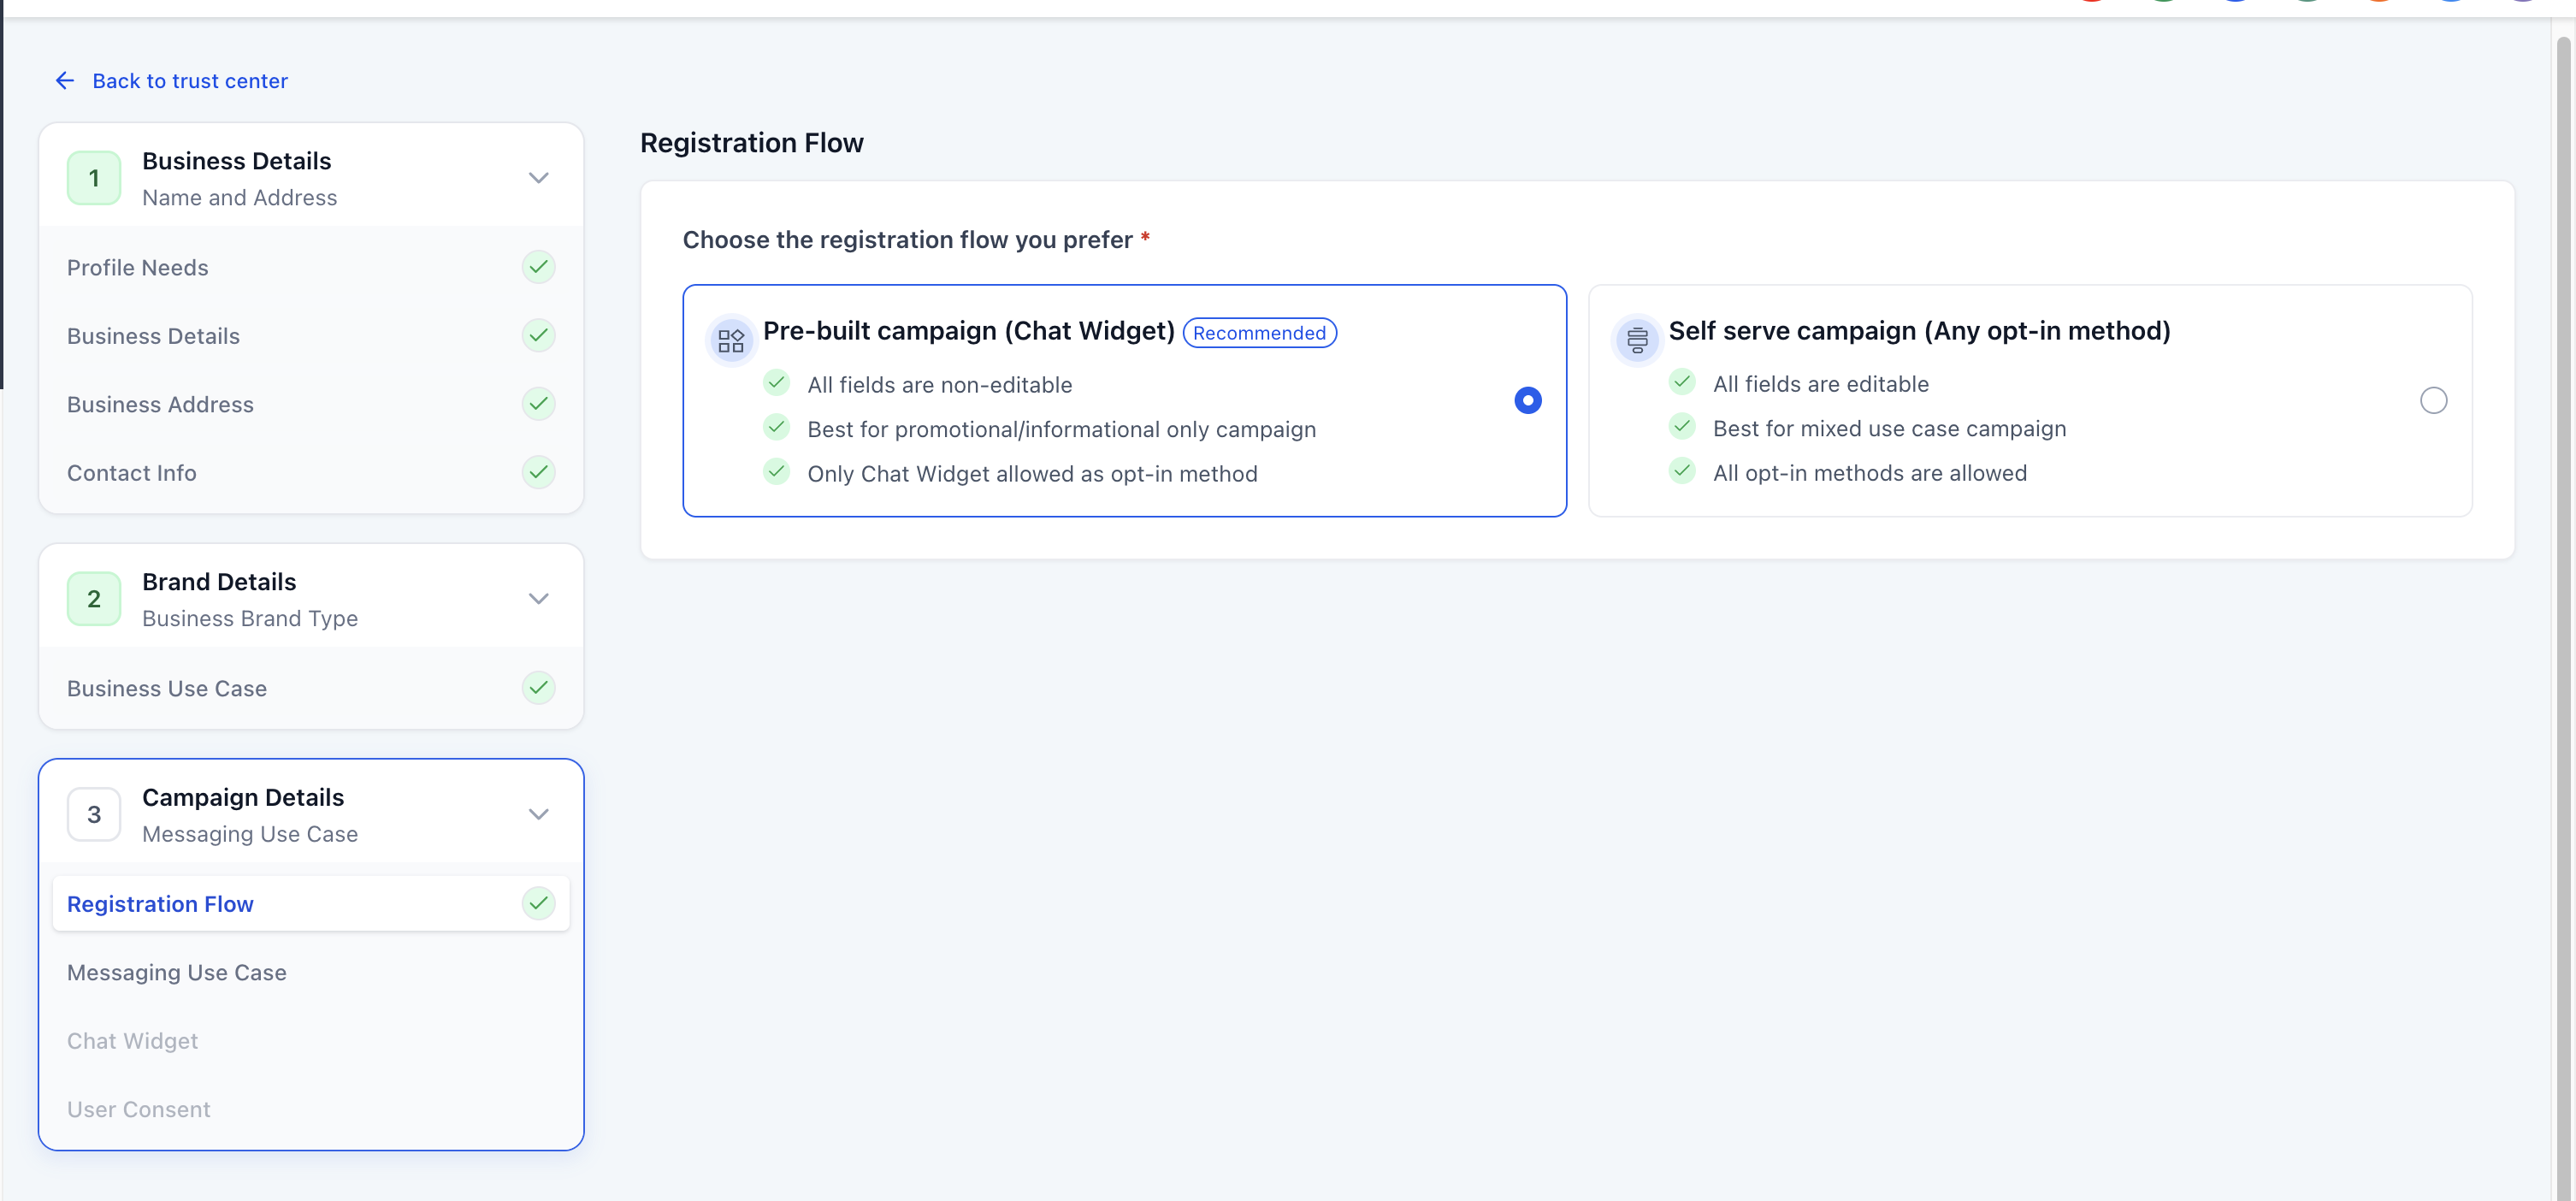
The Pre-Built A2P Campaign (Widget-First) flow uses a HighLevel-generated Chat Widget and guided Campaign setup to simplify SMS consent configuration. Campaign registration opens in Chat Widget Setup by default. If your business already collects SMS consent using another approved method, you can switch to Manual Setup.
Chat Widget Setup supports Marketing / Promotional, Informational / Non-Marketing, and Mixed messaging programs. Mixed is designed for one messaging program that includes both promotional and informational communication.
Key Benefits
The widget-first registration flow includes built-in safeguards that help simplify consent configuration, align Campaign details with the live opt-in experience, and reduce avoidable compliance issues compared with a fully manual submission.
Understanding the Pre-Built Campaign Flow
The widget-first flow includes automated guardrails and pre-configured components that help keep your Campaign details, consent experience, and messaging purpose aligned with carrier requirements.
At the start of registration, select the messaging category that matches your program:
- Marketing / Promotional for promotional messaging.
- Informational / Non-Marketing for transactional or informational messaging.
- Mixed when the same messaging program includes both categories.
For Marketing and Informational selections, the Campaign Use Case options are filtered to match the selected messaging category. When Mixed is selected, the Campaign Use Case is automatically set to Low Volume Mixed.
If you select Marketing / Promotional and also indicate that your Campaign involves financial services or loan-related content, the flow prompts you to switch to Informational before continuing. This helps prevent a high-risk combination that carriers commonly reject.
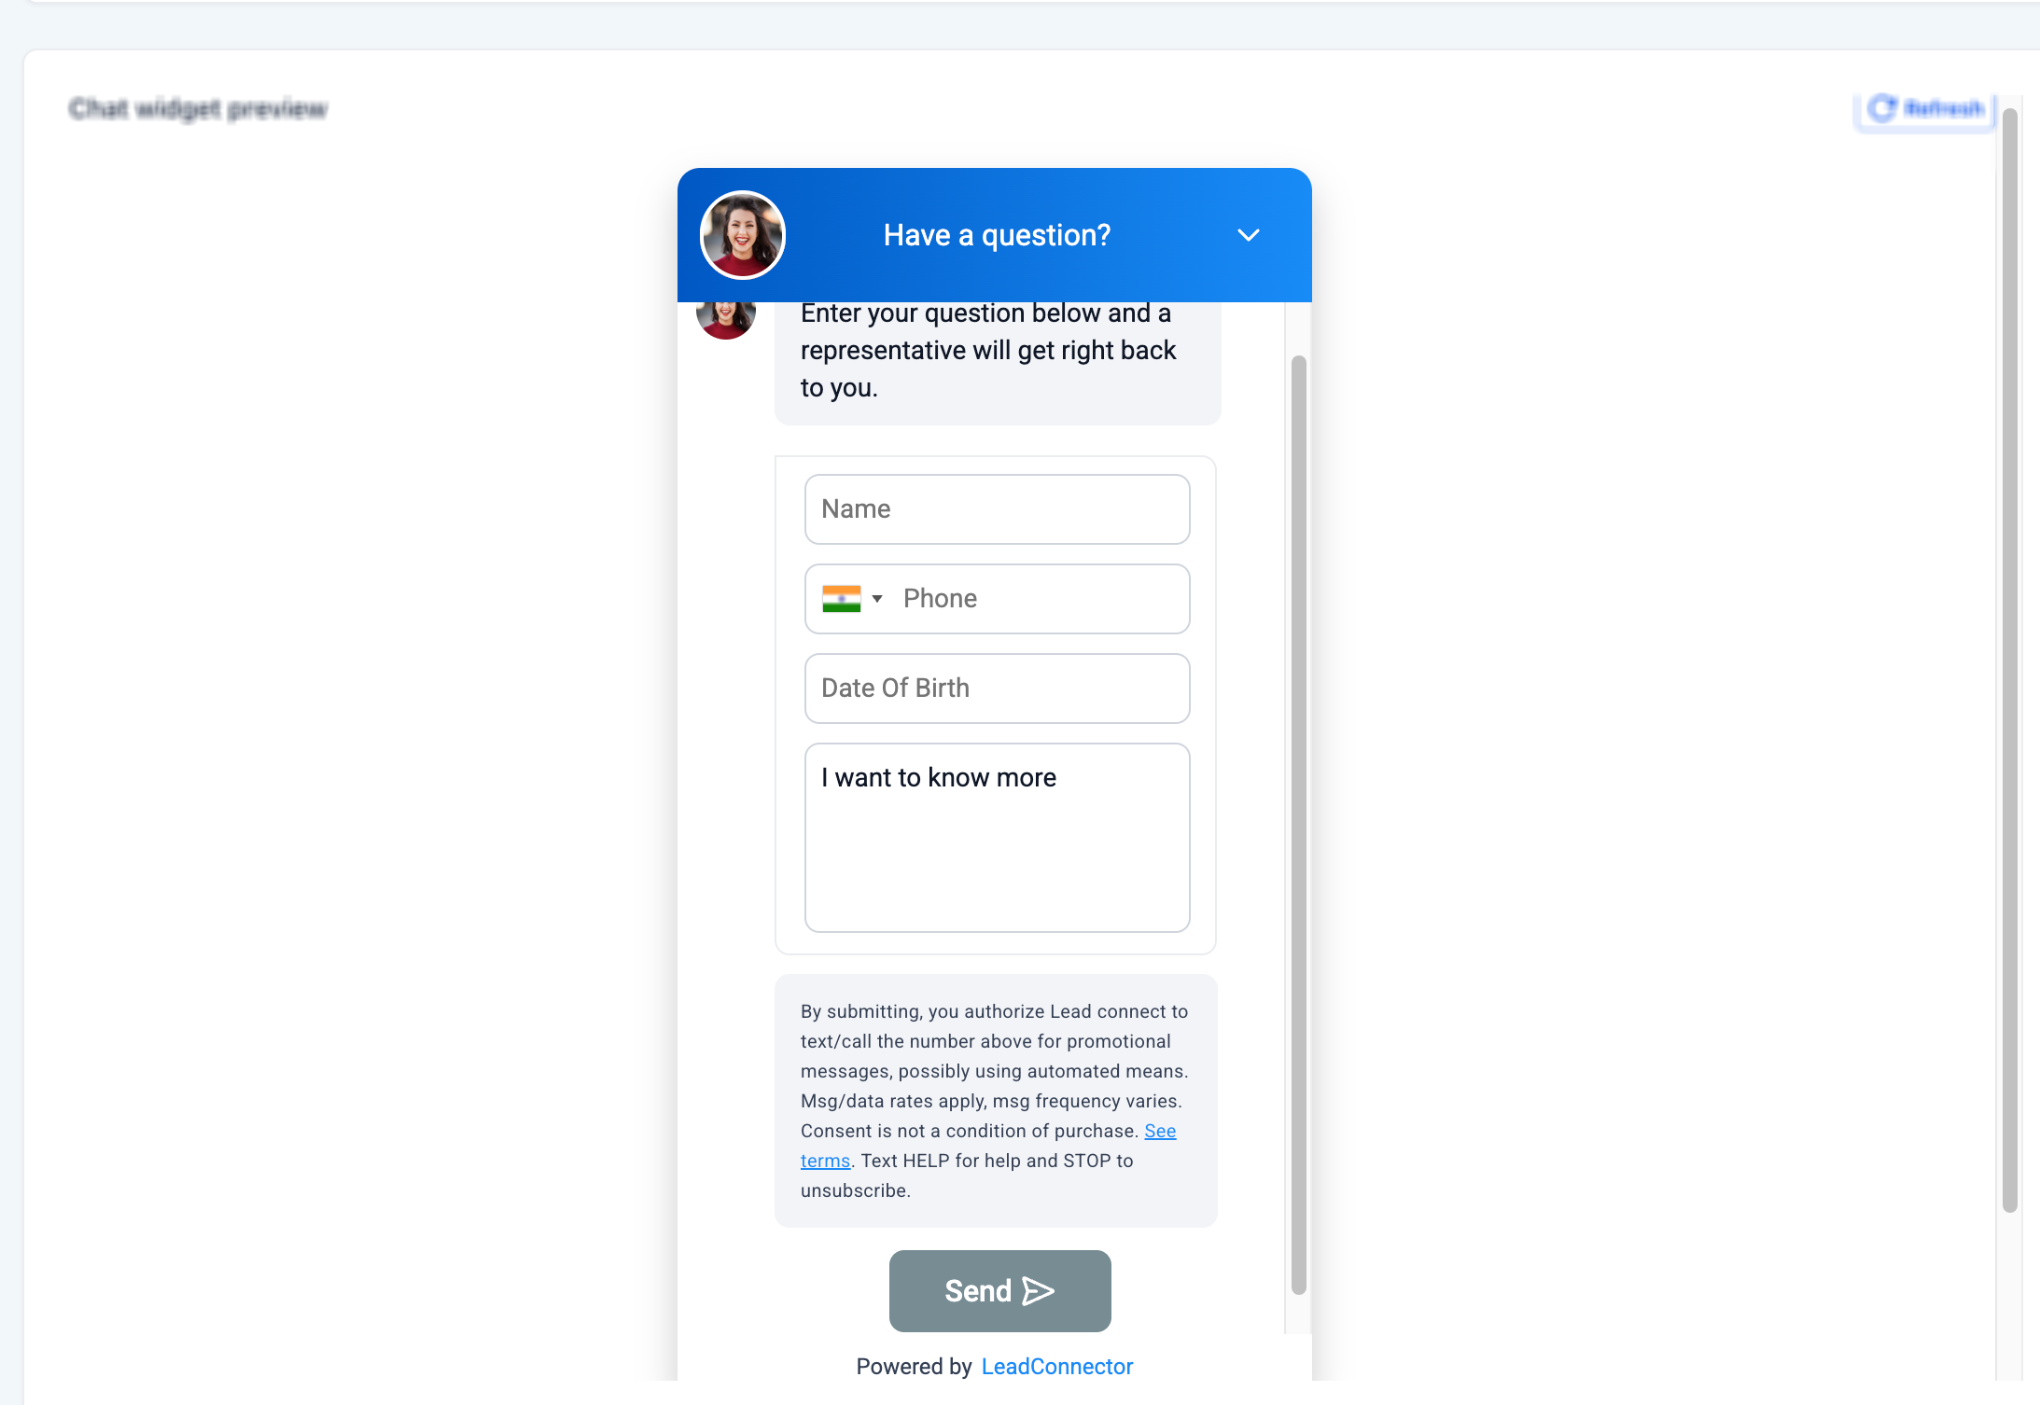
When you indicate that your Campaign involves age-gated content and/or financial services or loan-related content, the widget automatically adds a mandatory Date of Birth field. Contacts cannot submit the form without confirming they meet the minimum age requirement, which supports CTIA rules for restricted categories.
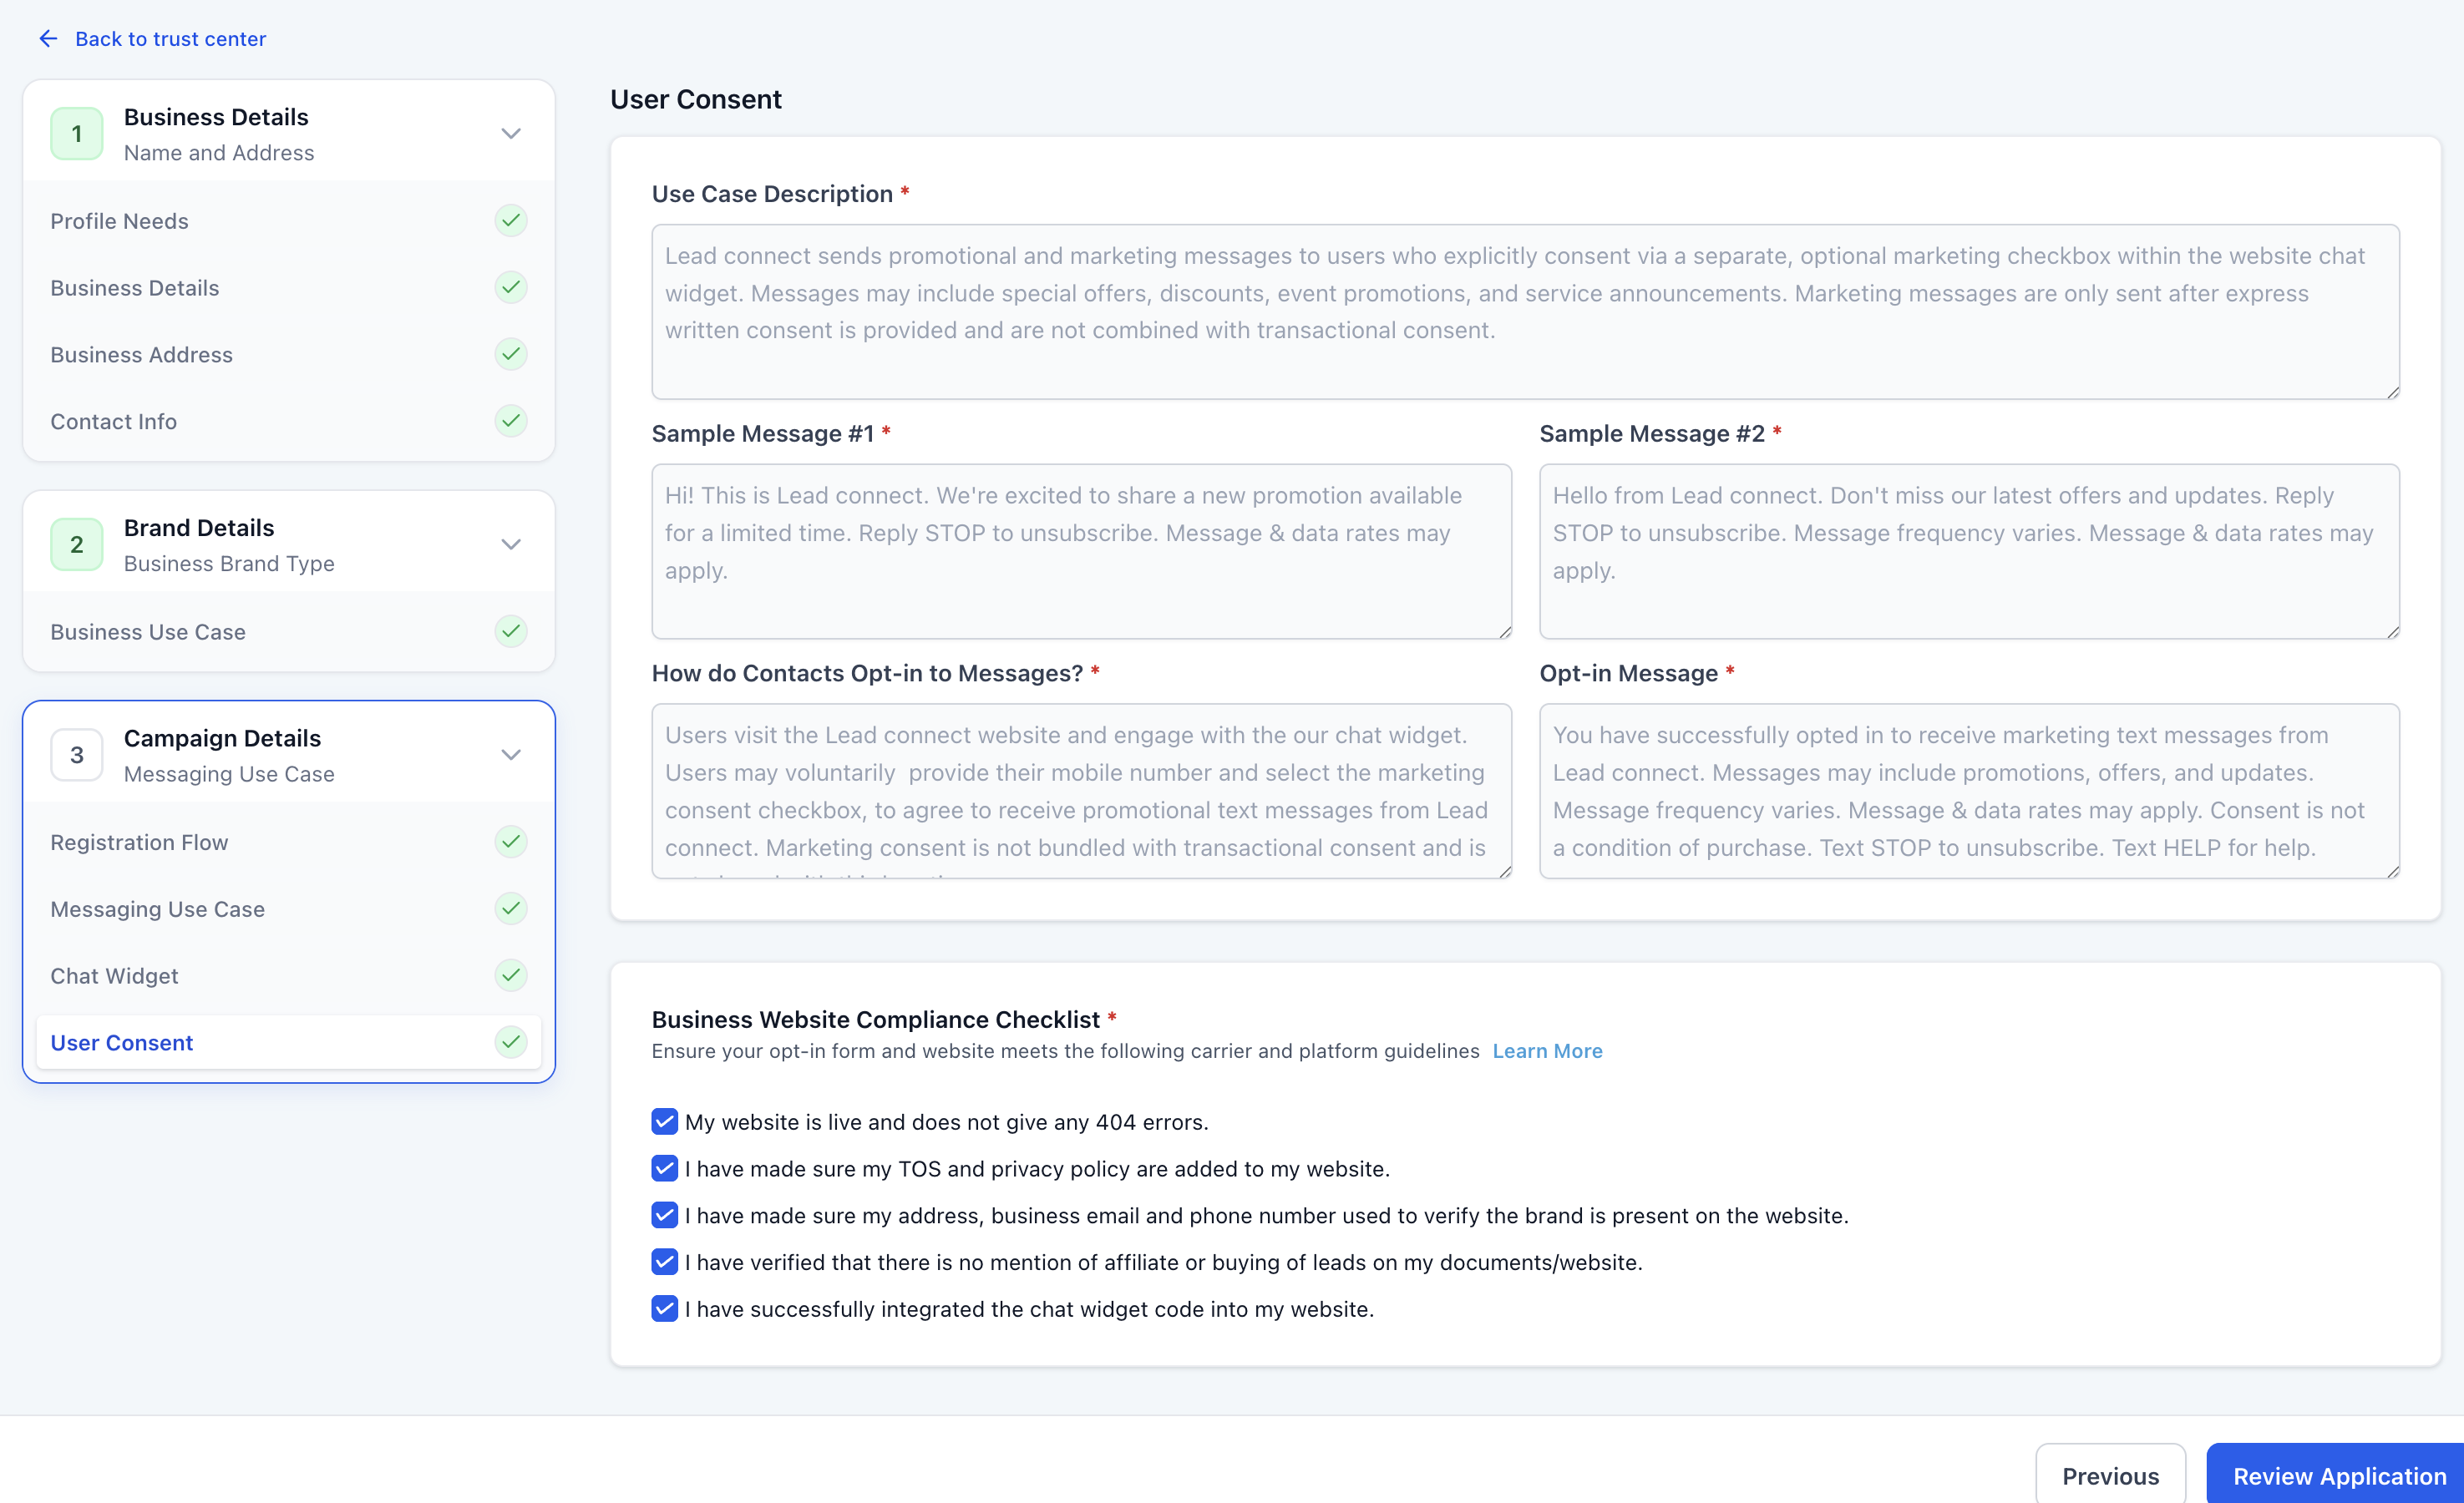
HighLevel automatically creates a brand-specific widget that includes your business name, frequency disclosure, "Msg & data rates may apply" notice, and STOP/HELP instructions. HighLevel also generates the JavaScript embed code for your website.
If Mixed is selected, the generated widget includes two independent consent checkboxes: one for informational/transactional messaging and one for marketing/promotional messaging. Neither checkbox is pre-selected, and each consent choice includes its own system-controlled disclosure content.
You can adjust colors and header text only. Disclosure language, required fields, and consent checkboxes cannot be edited or removed, so the live widget matches what was submitted for review.
Before submission, you review a read-only summary that includes your consent fields, system-generated sample messages, and your opt-in method. These fields are non-editable, which helps keep your registration details consistent with the live widget.
How to Set Up a Pre-Built A2P Campaign
Before you begin, make sure the following are in place:
- Your A2P Brand registration is approved, or eligible to continue.
- Your business has a live, publicly accessible website.
- The website represents the same business submitted during Brand registration.
- The website includes a Privacy Policy and Terms & Conditions.
- You know whether your messaging program is Marketing / Promotional, Informational / Non-Marketing, or Mixed.
Follow these steps to register your Campaign using the widget-first flow. Selecting the correct messaging category is important because it determines the available Campaign use case and the consent structure generated for the widget.
In your sub-account, go to Settings → Phone System → Trust Center. Under A2P Messaging (SMS), continue to Campaign registration. If you are creating an additional Campaign, go to Brand & Campaigns → Campaigns → Create Campaign.
After Brand registration is complete, Campaign registration opens in Chat Widget Setup by default. Complete the Chat Widget Setup fields to configure the consent experience for your Campaign.
Use Manual Setup if you already collect SMS consent through another approved method, such as an existing website form, paper form, lead form, QR code, kiosk, or verbal consent. Select Switch to Manual Setup below the first Chat Widget Setup screen.
Note: If you switch to Manual Setup and decide to use the Chat Widget instead, select Chat Widget Setup — recommended from the Campaign details step panel.
Select the option that accurately represents the messaging program:
- Marketing / Promotional: Select this when your Campaign sends promotional offers, advertising, discounts, newsletters, or similar marketing content.
- Informational / Non-Marketing: Select this when your Campaign sends transactional or informational communication such as reminders, confirmations, and service updates.
- Mixed: Select this when the same messaging program genuinely includes both promotional and informational messaging.
When Mixed is selected, HighLevel automatically sets the Campaign Use Case to Low Volume Mixed.

Respond to questions about your Campaign content, including whether it involves financial services, loan-related content, or age-gated materials. If you select a disallowed combination, such as Marketing plus Financial, the flow prompts you to adjust your selections before continuing.
Preview the auto-generated Chat Widget. You can adjust colors and header text, but disclosure language, required fields including any mandatory Date of Birth field, and consent notices are locked and cannot be modified.
If Mixed is selected, verify that the widget displays a separate informational/transactional consent checkbox and a separate marketing/promotional consent checkbox. Neither option should be pre-selected, and each consent choice should display its associated disclosure content.

Copy the provided JavaScript embed code and install it on the web page you confirmed during setup. The widget needs to be live and publicly viewable before you complete the compliance check in the next step.
Important: The Chat Widget should be the only form on the submitted page collecting SMS consent. Do not place another SMS opt-in form, such as a Contact Form, Lead Capture Form, or Appointment Form, on the same page.
Confirm that your website meets carrier and platform requirements. Your submitted website should:
- Be live and publicly accessible.
- Clearly represent the registered business.
- Match the business information used during Brand registration.
- Display appropriate business/contact information.
- Include a Privacy Policy and Terms & Conditions.
- Have the required SMS opt-in experience available on the submitted page.
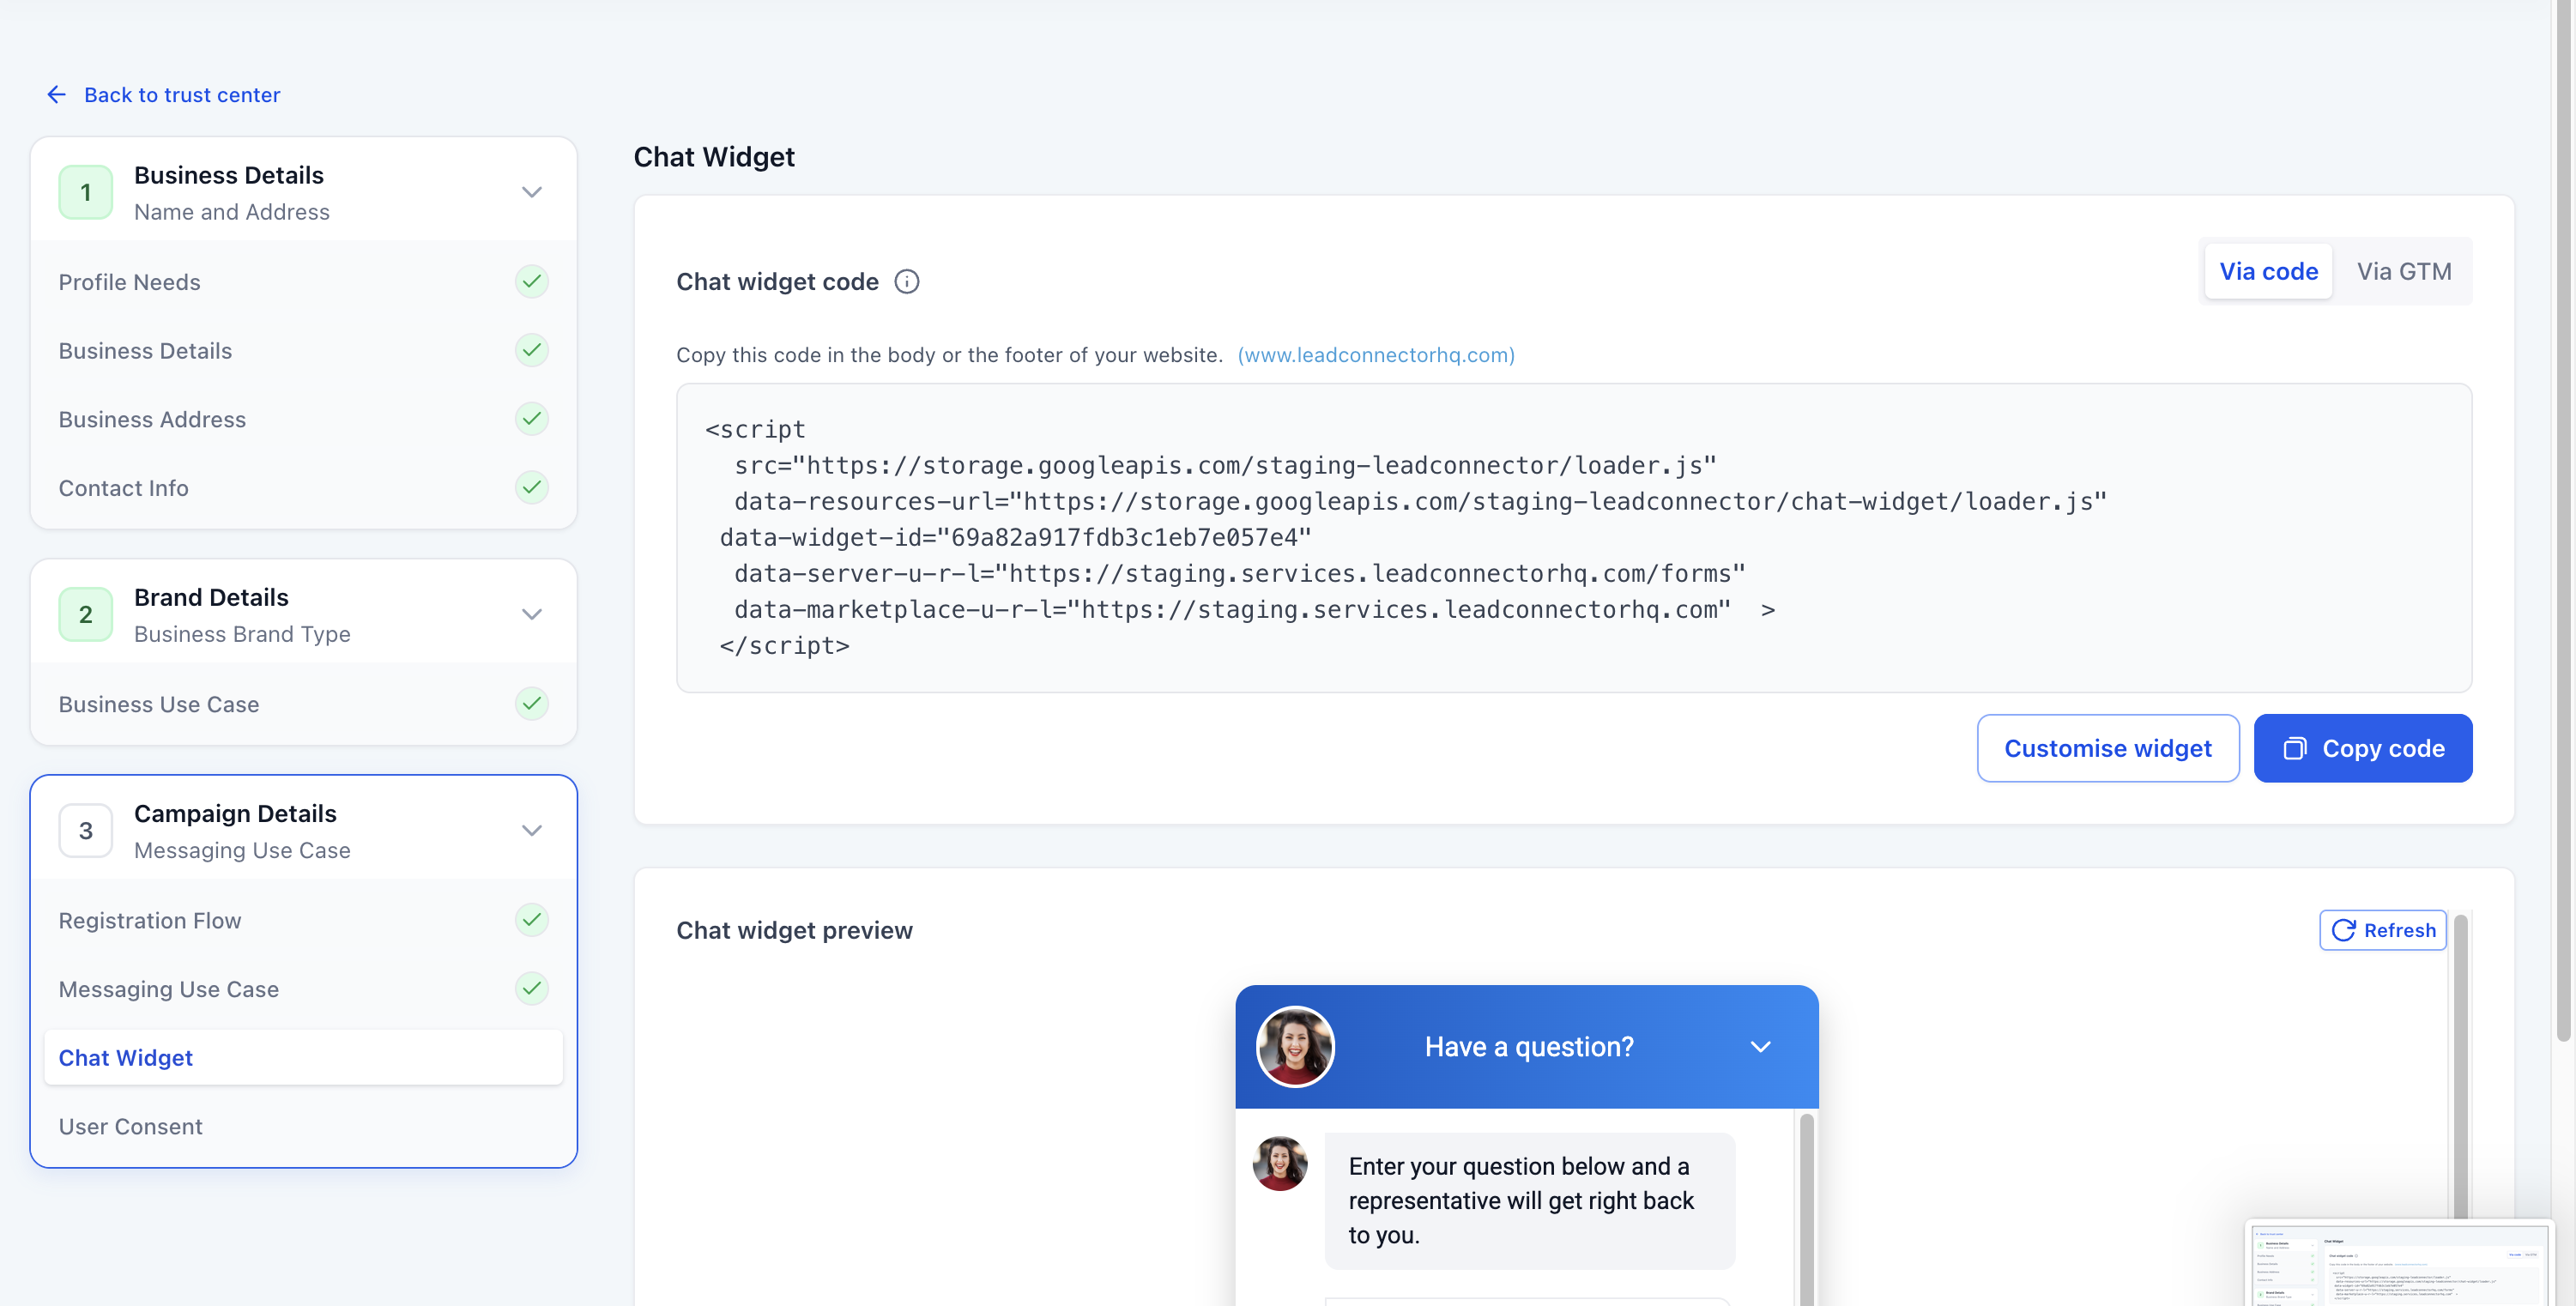
Click Review Application to run the compliance review. If HighLevel identifies an issue, review the recommendation, correct the applicable Campaign or website information, and run the review again. Once the required checks pass, submit the Campaign for carrier review. Passing the HighLevel review does not guarantee carrier approval — the final decision is made by carriers and registration partners.
Go to Campaigns → Status to track your submission. Review times can vary, so check the status in Trust Center rather than creating a duplicate Campaign.
Your Campaign has been submitted for carrier review. You can begin sending SMS once approval is confirmed.
Frequently Asked Questions
Was this article helpful?
That’s Great!
Thank you for your feedback
Sorry! We couldn't be helpful
Thank you for your feedback
Feedback sent
We appreciate your effort and will try to fix the article