This guide walks you through two configuration steps required to track email engagement from Mailgun inside your CRM: adding a webhook that forwards all email events to the platform, and enabling click & open tracking on your Mailgun domain.
Once both steps are complete, your CRM dashboards will display accurate click rates, open rates, unsubscribes, bounces, and spam complaints for all emails sent through Mailgun.
Prerequisites
Before you begin, make sure you have the following in place:
- An active Mailgun account with at least one verified sending domain.
- Admin access to your Mailgun account (required to manage webhooks and domain settings).
- Your sending domain already connected and sending through the platform.
Add the Webhook in Mailgun
Mailgun webhooks push real-time email event data to the platform. You need to add a domain-level webhook for all event types on each sending domain you use.
Log in to your Mailgun account. In the left sidebar, go to Send → Webhooks. Then click the Domain-level tab and select your sending domain from the dropdown.
Click Add webhook (top-right). In the dialog that appears, fill in the following:
- Description — enter a recognizable name, e.g. CRM Event Tracking.
- HTTP post URL — paste the URL below exactly as shown.
- Domain — select your sending domain from the dropdown.
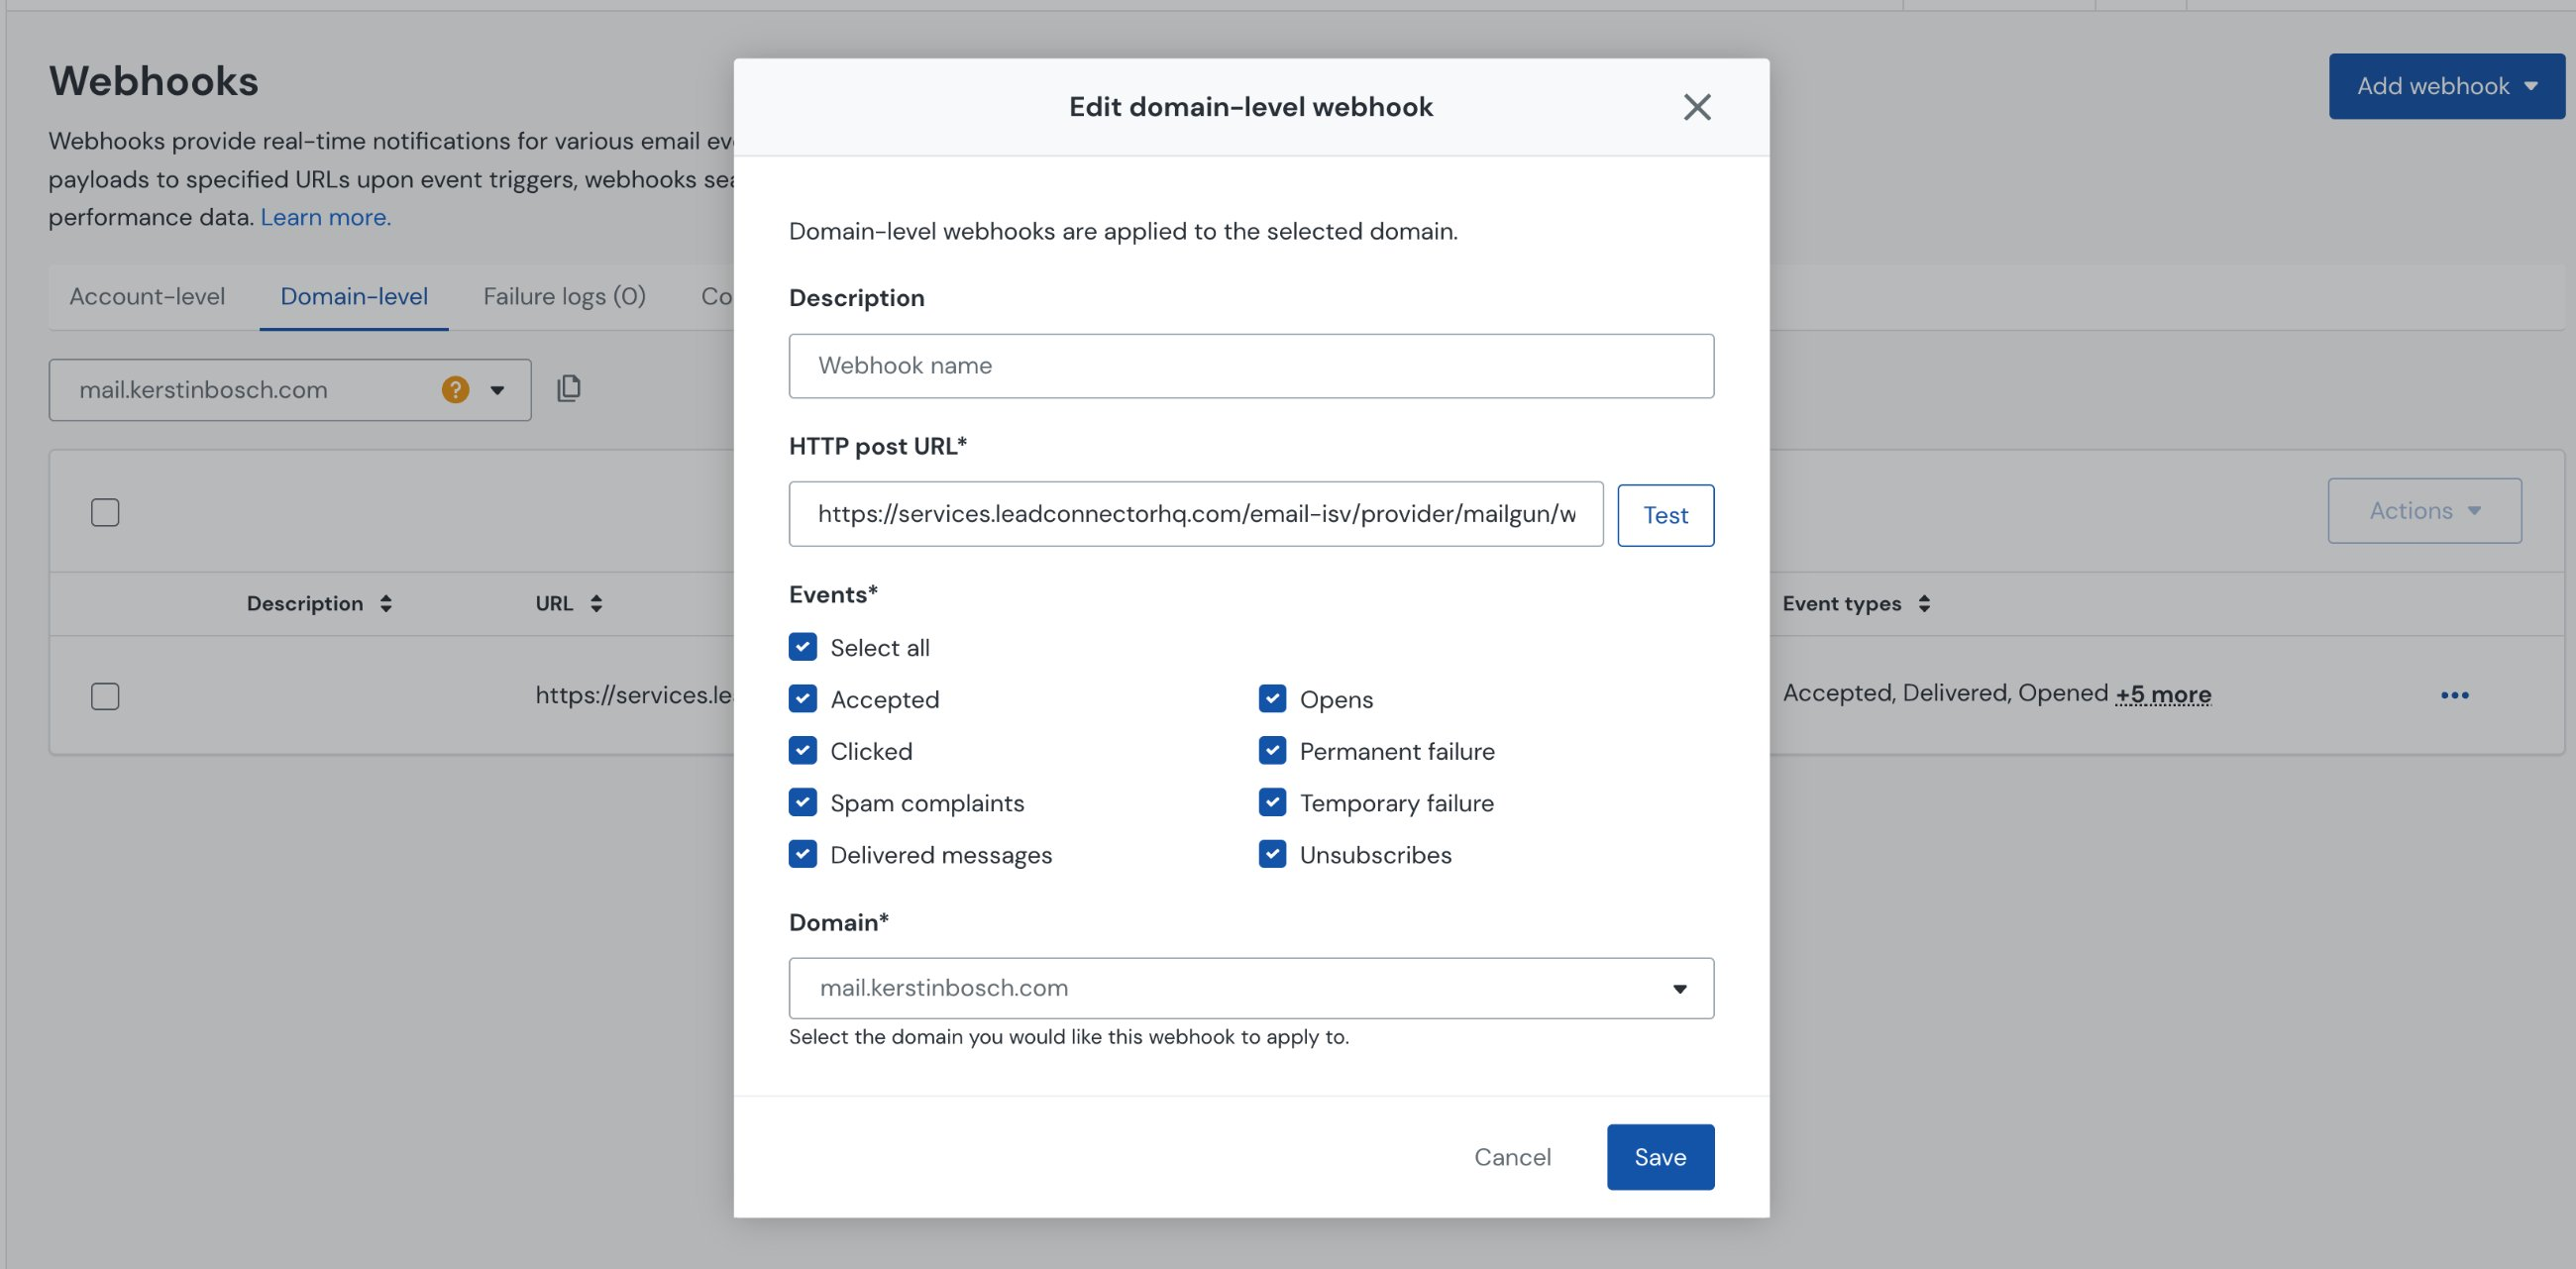
https://services.leadconnectorhq.com/email-isv/provider/mailgun/webhook/event
Under Events, check Select all to enable every event type. This ensures the platform receives data for all of the following:
Optionally click Test next to the URL field to confirm the endpoint is reachable. Once confirmed, click Save. The webhook will appear in the domain-level webhook list.
Repeat this process for each sending domain you have in Mailgun. Webhooks are domain-scoped, so a webhook added to one domain does not automatically apply to others.
Enable Click & Open Tracking on the Domain
In addition to the webhook, Mailgun must be configured to instrument your emails with tracking links and open-tracking pixels. This is done in Domain Settings.
In Mailgun, go to Send → Domains. Click on your sending domain, then select the Settings tab.
Scroll to the Tracking section. Next to Click tracking, click Edit and toggle the setting to On. Save the change.
Still in the Tracking section, click Edit next to Open tracking and toggle it to On. Save the change.
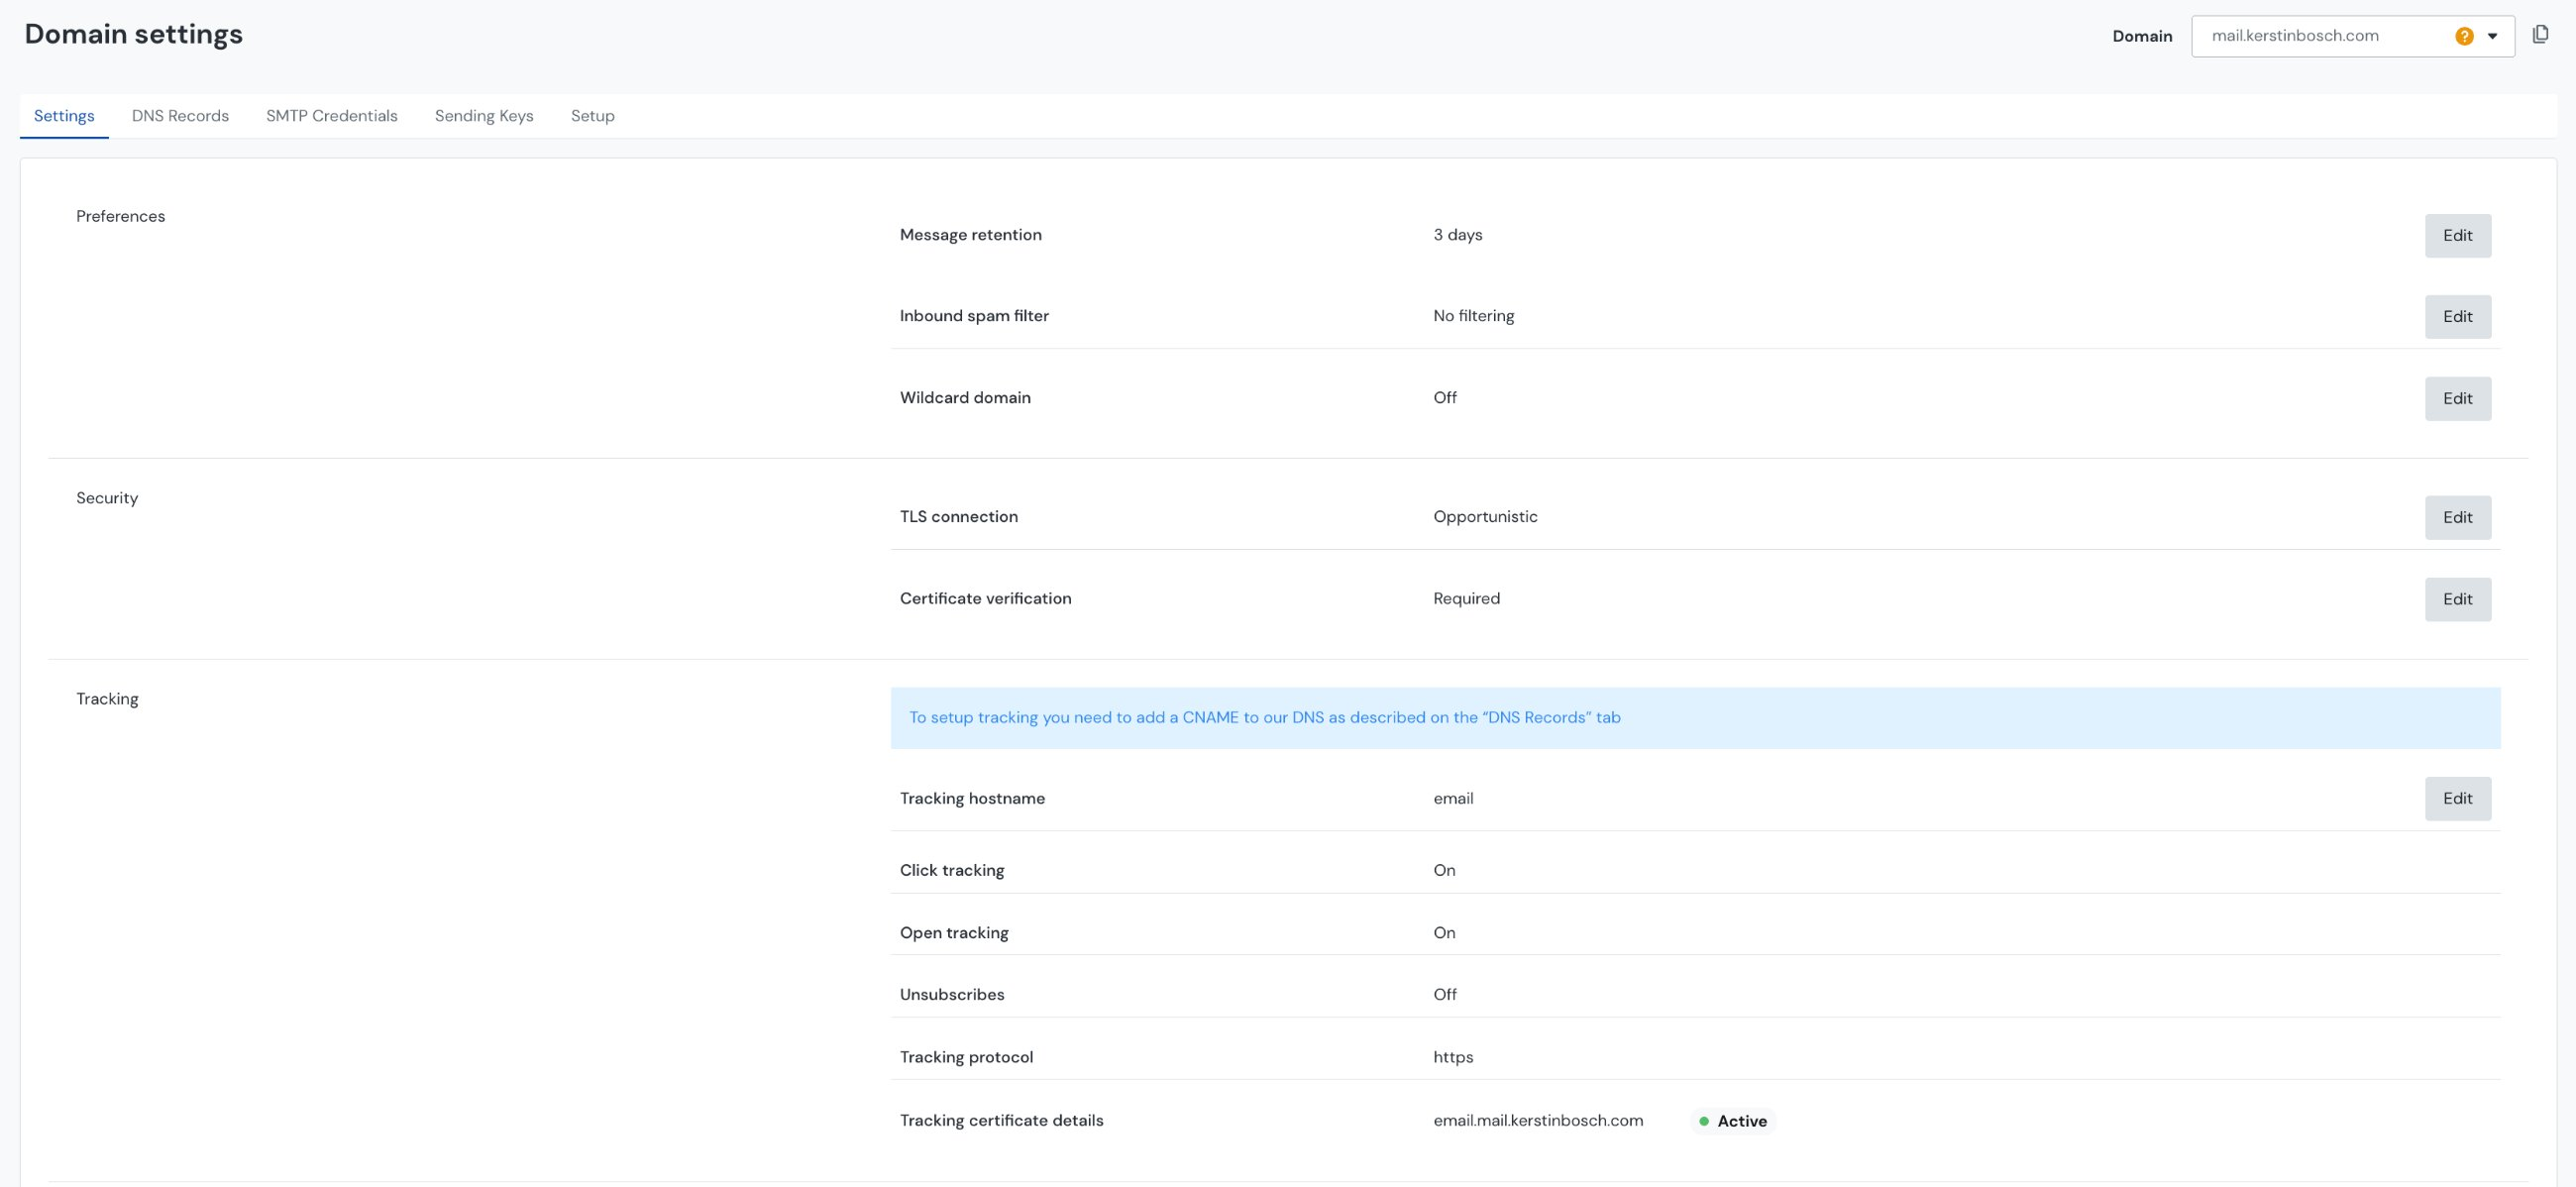
After enabling both settings, your domain tracking configuration should look like this:
| Setting | Required Value |
|---|---|
| Click tracking | On |
| Open tracking | On |
| Tracking protocol | https |
| Tracking certificate | Active |
For click tracking to work correctly, a tracking CNAME record must be added to your domain's DNS. Mailgun will show the required CNAME under Domain Settings → DNS Records. If the tracking certificate shows as inactive, the CNAME is either missing or hasn't propagated yet.
Once the webhook is saved and tracking is enabled, your CRM will start receiving click events, open events, bounces, unsubscribes, and spam complaints in real time. Email analytics dashboards will reflect accurate engagement data for all emails sent through this Mailgun domain.
Frequently Asked Questions
Was this article helpful?
That’s Great!
Thank you for your feedback
Sorry! We couldn't be helpful
Thank you for your feedback
Feedback sent
We appreciate your effort and will try to fix the article