New users of Workflows can now enjoy a simplified, tailored onboarding experience on the Workflow Automations landing page. The page has been redesigned with AI-powered workflow creation, visual guidance and curated content based on the business niche you select during onboarding. This means from day one, you'll see examples and suggestions relevant to your industry, making it easier to understand how automations work and to set up your first workflow quickly.
The landing page now provides multiple paths to get started: use the AI Builder to describe your automation in plain language, browse pre-built templates for inspiration, or click "Create Workflow" to start from scratch.
IMPORTANT: Workflow AI Builder is enabled by default for all agencies via Labs. If you don’t see AI Builder, it may be turned off at the agency or location level.
TABLE OF CONTENTS
- Workflow AI Builder
- Tailored Onboarding by Business Niche
- New Layout with On-Page Videos
- Drag and Drop Triggers and Actions onto the Canvas
- Dropdown options under create workflow
- Frequently Asked Questions
Workflow AI Builder
The Workflow AI Builder is now prominently featured on the workflows landing page, making it easier than ever for new users to create their first workflow. Simply describe what you want to automate in plain English, and let AI generate your workflow.
Look for the "What do you want to automate?" prompt at the top of the page. You can type a description like "When form is submitted, send SMS to lead, wait 5 minutes for response - if no response create call task, if they respond add tag" and the AI will build the workflow for you.
Quick-start suggestions like "Lead Nurturing," "Form Automation," and "Email Campaigns" are available below the AI input to help you get started even faster.

Tailored Onboarding by Business Niche
When you first start with Workflows, you'll be asked to choose your business niche (industry). The platform then customizes your experience based on that choice. Everything from the examples to the suggested templates will align with your niche.

- We’ve added ready-made workflow templates for popular niches like Education, Health, Finance, and Real Estate. These templates cover common automation scenarios in each industry. For example, a Real Estate agent might see a pre-built template for following up with new property inquiries, while a Health clinic might get a template for appointment reminders. You can use these niche-specific templates as a starting point and customize them to fit your needs, instead of building from scratch.
- A new "View All Templates" link lets you browse all available templates directly from the landing page—perfect for those who want inspiration or a quick-start foundation

New Layout with On-Page Videos

A Learn About Workflows section with tutorial videos. You can scroll the landing page to find a template and launch it, or watch a quick intro video without navigating away. In short, everything you need – templates to start with and learning resources – is available at a glance on the landing page, making it much easier to get started.
Videos on
- Introduction to Workflows: Here
- Workflow Templates: Here
- Building a Workflow from Scratch: Here
- Workflow Settings, Enrollment History, and Execution Logs: Here
Quick access from messages
You can open the exact workflow execution directly from a conversation message when troubleshooting.
Mini navigation:
From Conversations: message details → Workflow → Execution Details (context loaded).
From workflow: Workflows → open workflow → Logs.
Drag and Drop Triggers and Actions onto the Canvas
You can now add workflow steps faster by dragging triggers and actions directly from the sidebar onto the workflow canvas.
How it works
Open the Triggers or Actions sidebar in your workflow.
Click and hold a trigger or action, then drag it onto the canvas.
Hover over a valid drop target (a + marker or between existing steps). A highlighted placeholder shows where the step will be inserted.
Drop the item, configure it, and save to add it to your workflow.

IMPORTANT: If you exit the workflow without saving, the dragged trigger/action is not added to the canvas.AI Builder availability and controls
Workflow AI Builder is enabled by default for all agencies.
Disable AI Builder for an agency (and all sub-accounts)
Go to Settings → Labs and disable Workflow AI Builder.
Disable AI Builder for a specific location
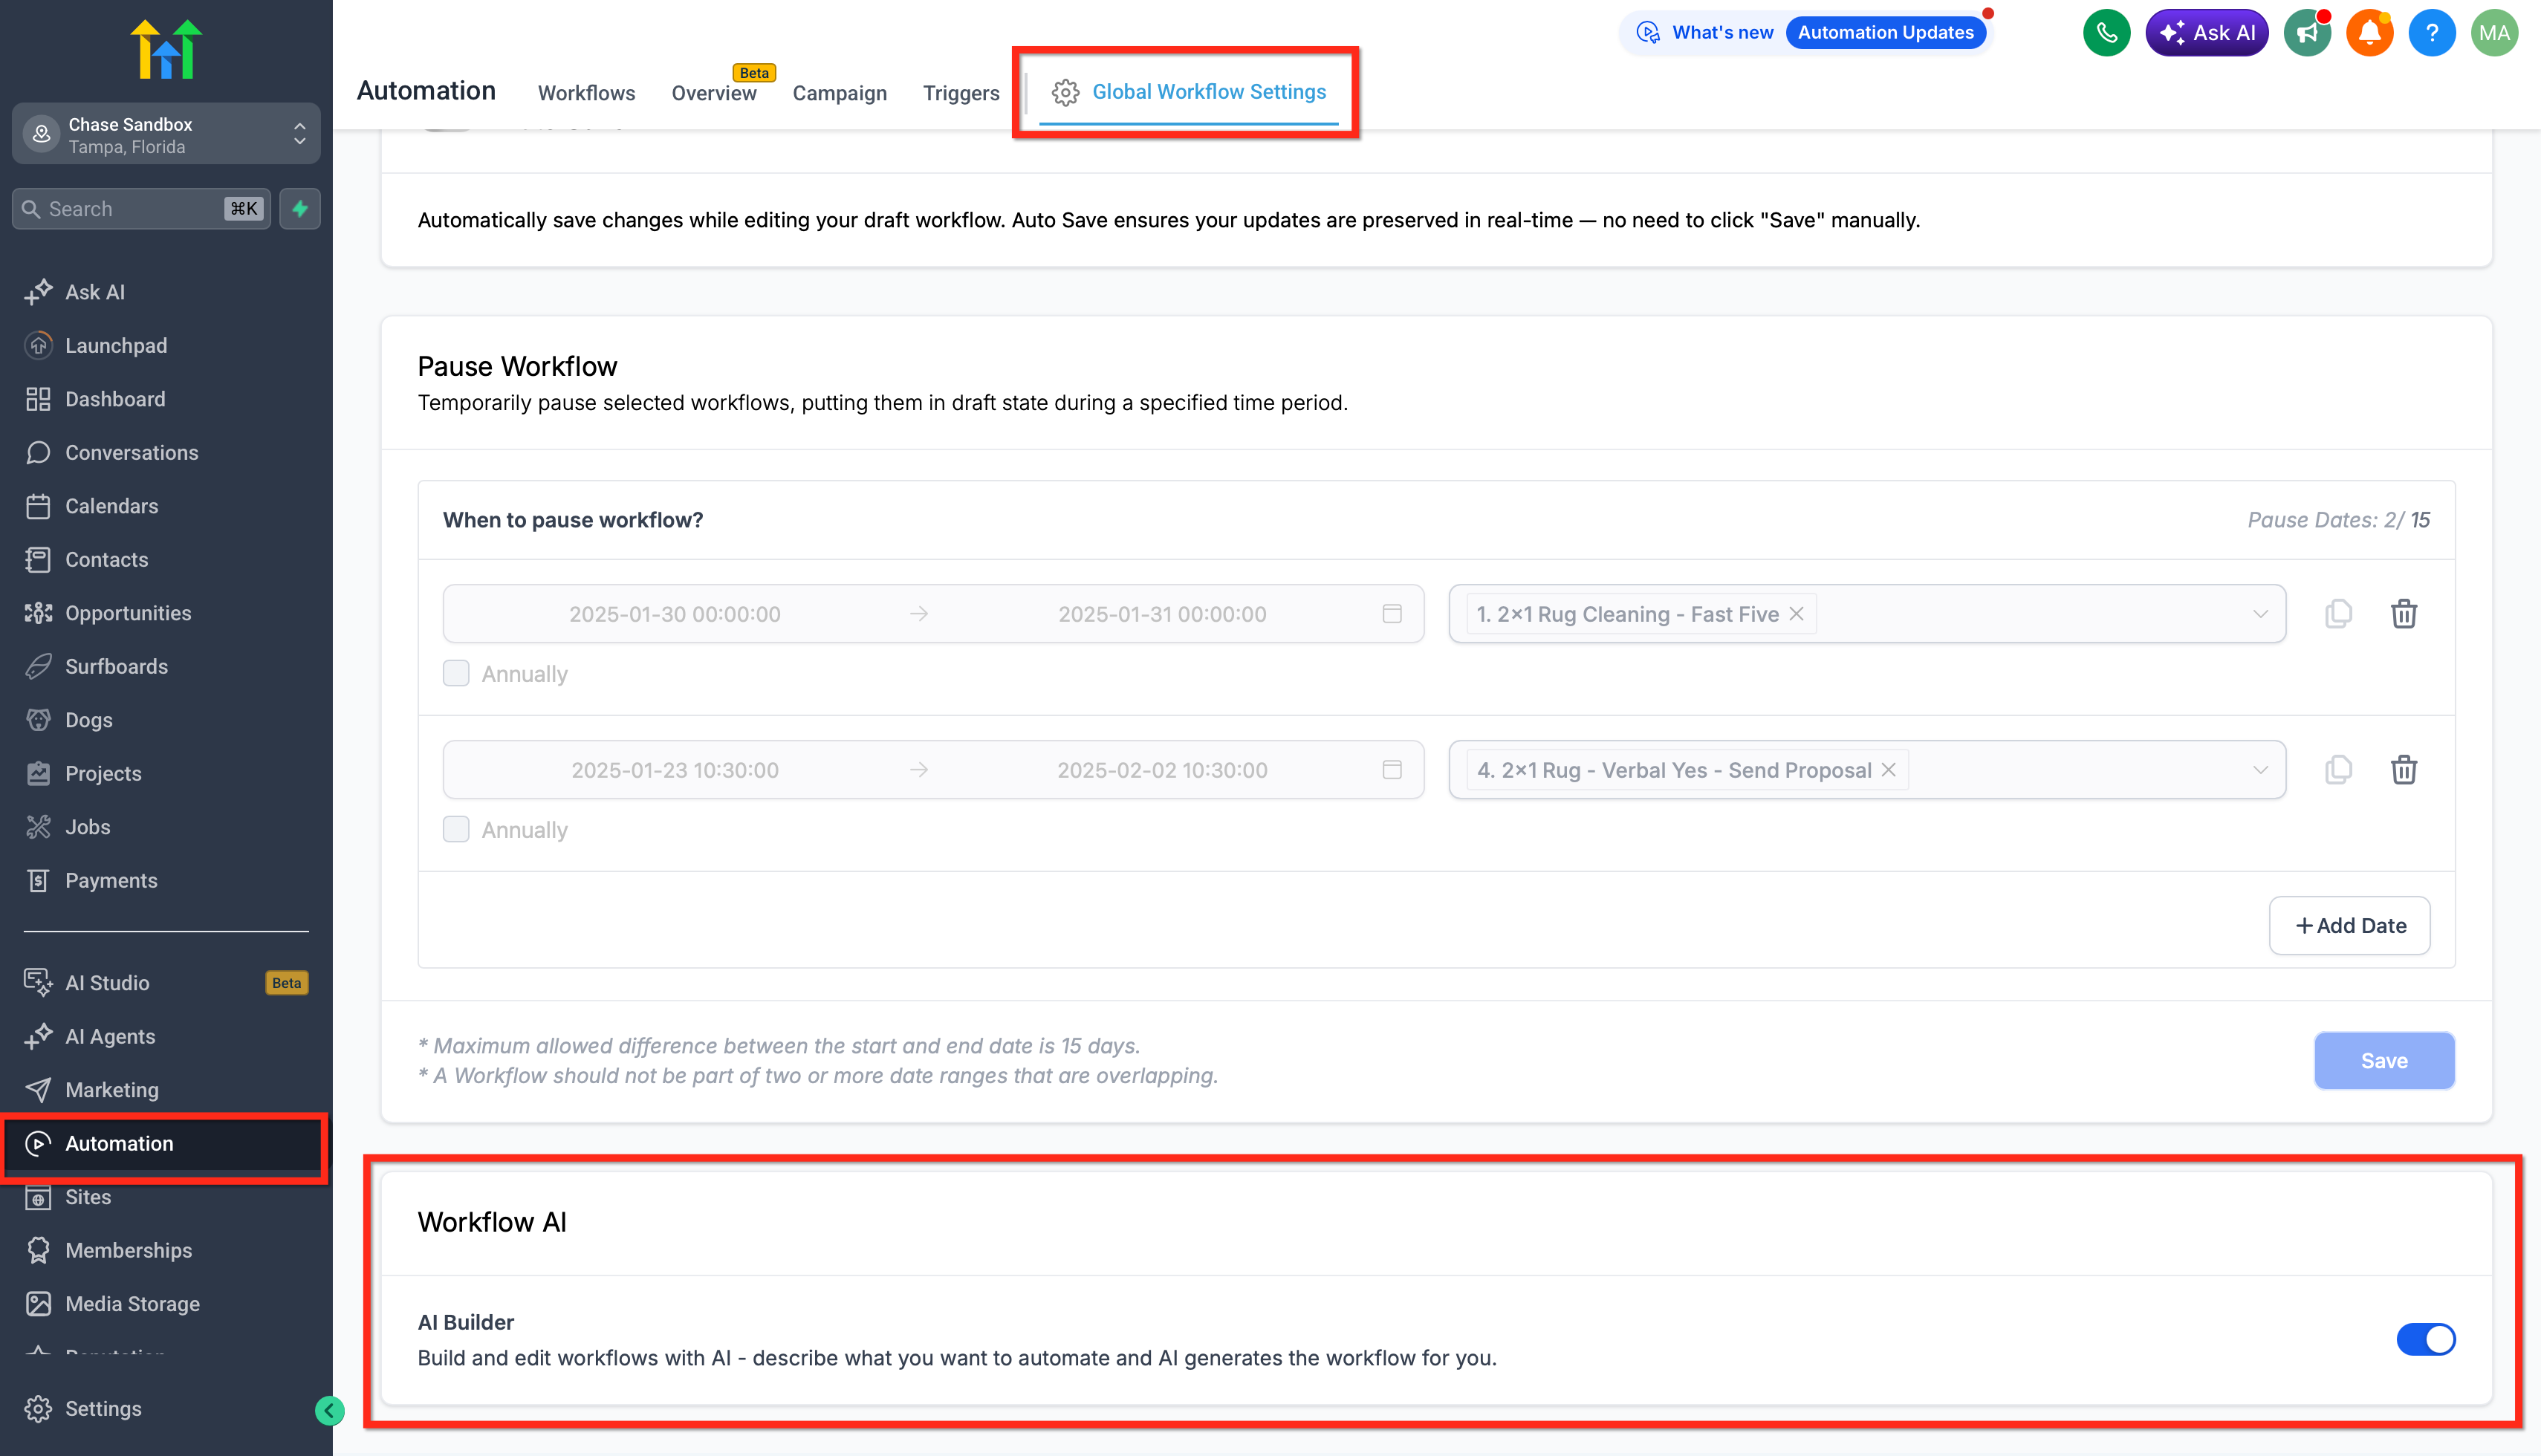
Go to Automations → Global Workflow Settings → Workflow AI and toggle off AI Builder.
Owner Pop-Up in Sub-Accounts
Agency owners will see a confirmation pop-up when visiting a sub-account that now has AI Builder, including a quick Disable option for that location.
Dropdown options under create workflow
Options to start from scratch are still preserved and visible under the create workflow dropdown.

Frequently Asked Questions
Q. I'm not seeing the new experience in my sub-account. Why?
The AI Builder needs to be enabled in Labs first in order for this experience to be available. Go to Settings > Labs and enable the AI Builder feature to access the new workflows landing page experience.
Q. I don't want to show this new experience with AI to my users. How do I remove it?
You can disable AI Builder at either level:
Agency: Go to Settings → Labs and disable Workflow AI Builder.
Location: Go to Automations → Global Workflow Settings → Workflow AI and toggle off AI Builder.
Was this article helpful?
That’s Great!
Thank you for your feedback
Sorry! We couldn't be helpful
Thank you for your feedback
Feedback sent
We appreciate your effort and will try to fix the article