Border customization in HighLevel’s Email Builder lets you control the appearance of supported email sections. You can adjust border color, corner radius, and border thickness from the section settings. These controls help define section boundaries without custom code. This guide explains how to access and configure the available Border settings.
TABLE OF CONTENTS
- What is Border Customization in Email Builder?
- Key Benefits of Border Customization
- How To Setup Border Customization
- Customize Border Color
- Adjust Border Radius
- Adjust Border Thickness
- Preview and Test Border Changes
- Frequently Asked Questions
What is Border Customization in Email Builder?
Border customization lets you change the border appearance of supported email sections from the Email Builder.
The available settings include border color, corner radius, and border thickness. These settings are accessed from the selected section’s Border settings panel.
Key Benefits of Border Customization
Border settings give you direct control over how supported email sections are outlined.
- Border Color: Choose the color used for the section border.
- Border Radius: Control how rounded or square the section corners appear.
- Border Thickness: Adjust the visible width of the section border.
- In-Builder Editing: Review border changes while editing the email.
- Section-Level Control: Apply border styling directly to the selected email section.
How To Setup Border Customization
Select the email section you want to style, then use its Border settings to configure the available border properties.
Step 1: Open the Email Builder
Start from the Sub-Account containing the email campaign or template you want to edit.
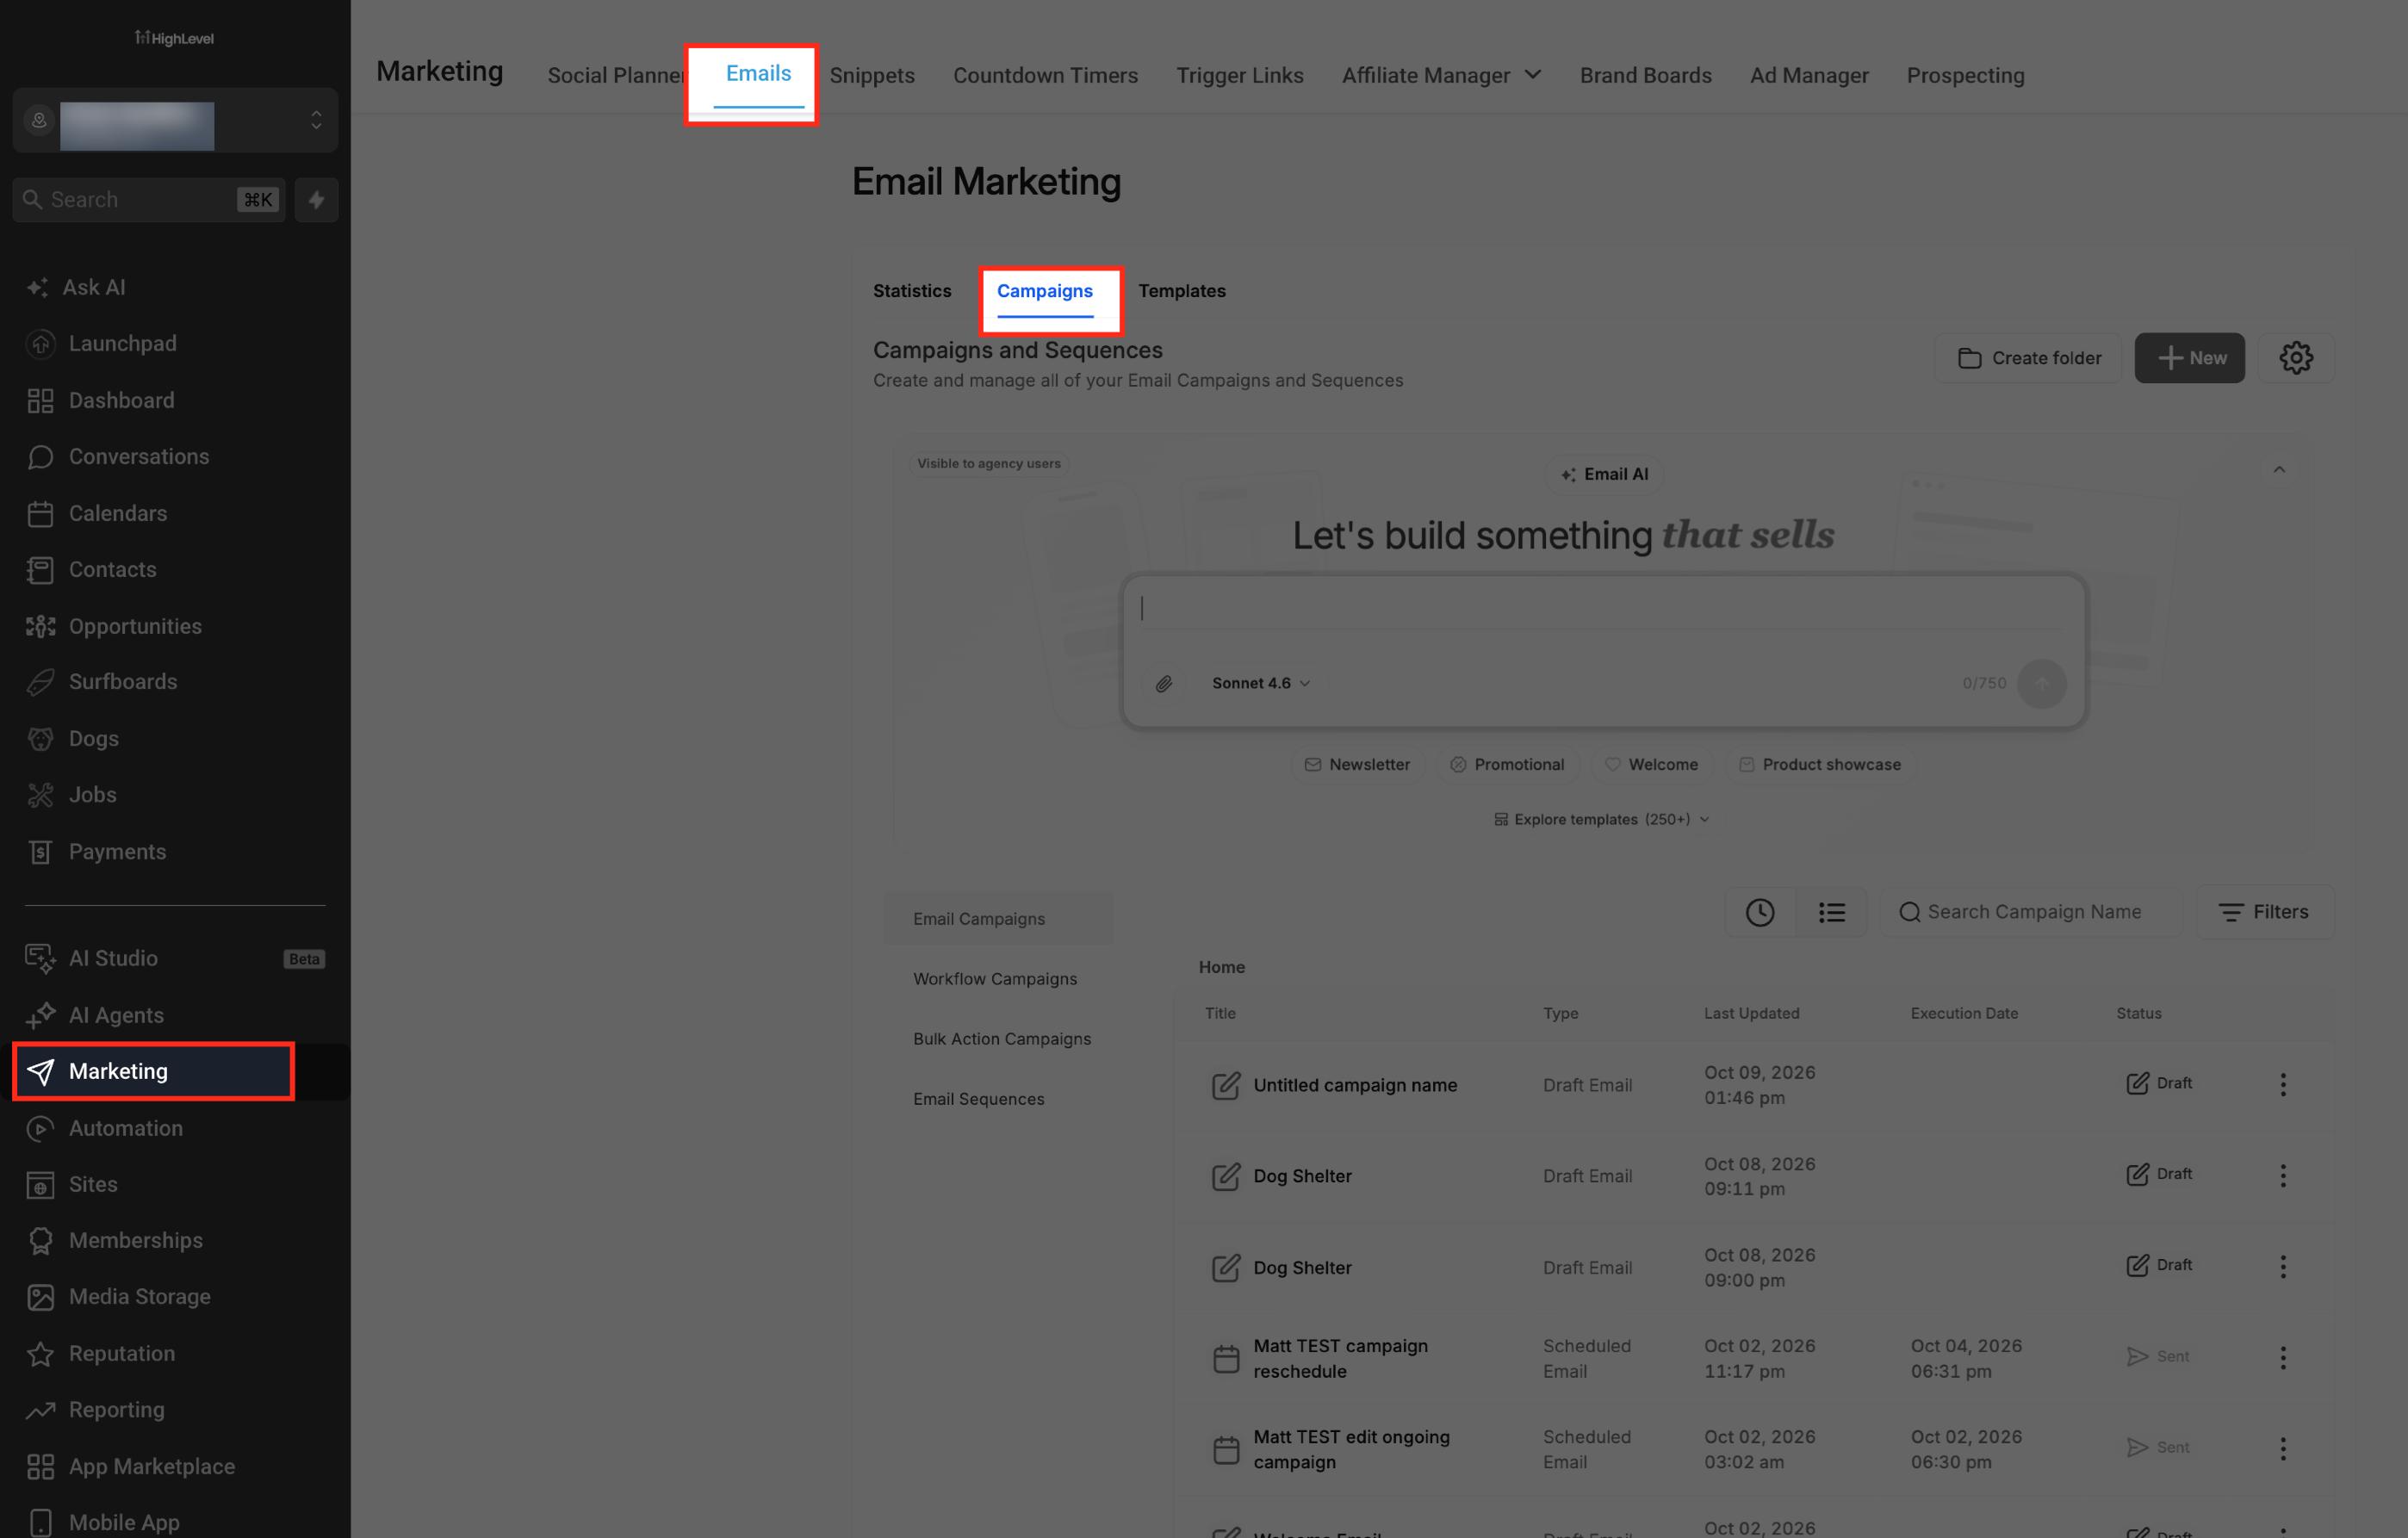
- From the HighLevel Sub-Account, go to Marketing.
- Select Emails.
- Open Campaigns or Templates.
- Create a new email or open an existing email.
- Open the email in the Design Editor.
Step 2: Select the Email Section
Selecting the section opens the current section-level styling controls.
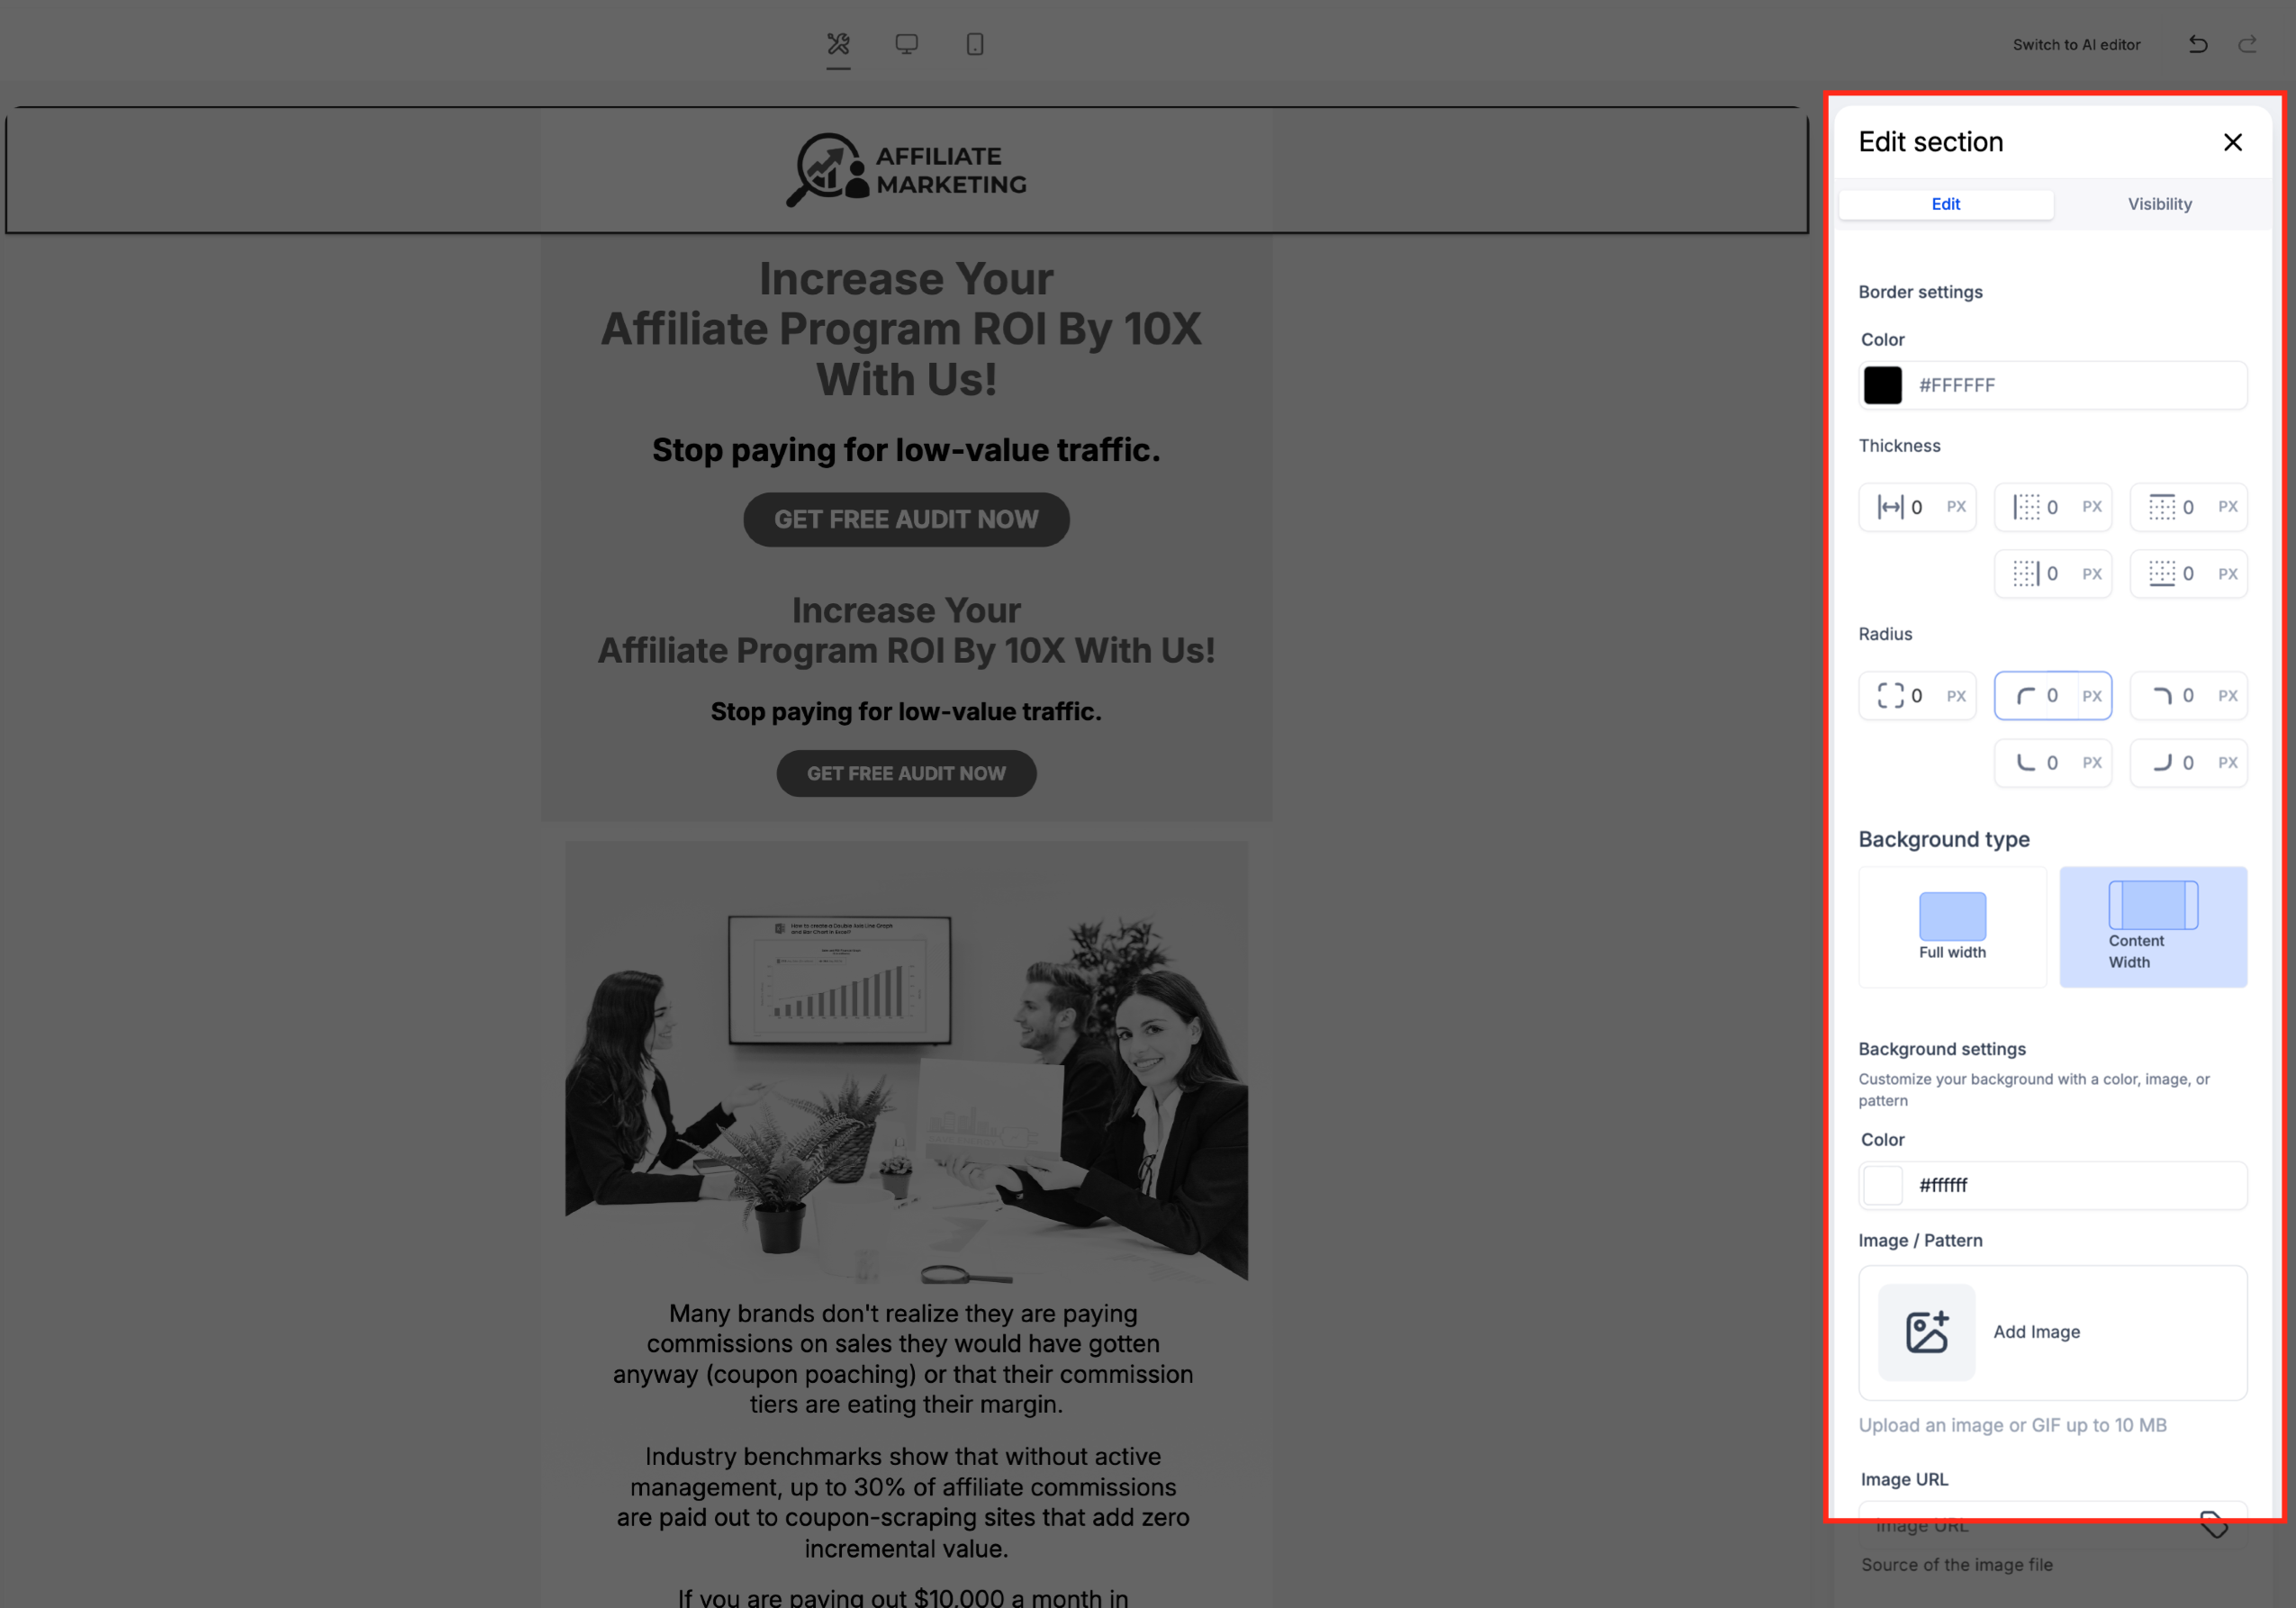
- Select the section you want to customize.
- Locate the Edit section panel.
- Expand Border settings.
Customize Border Color
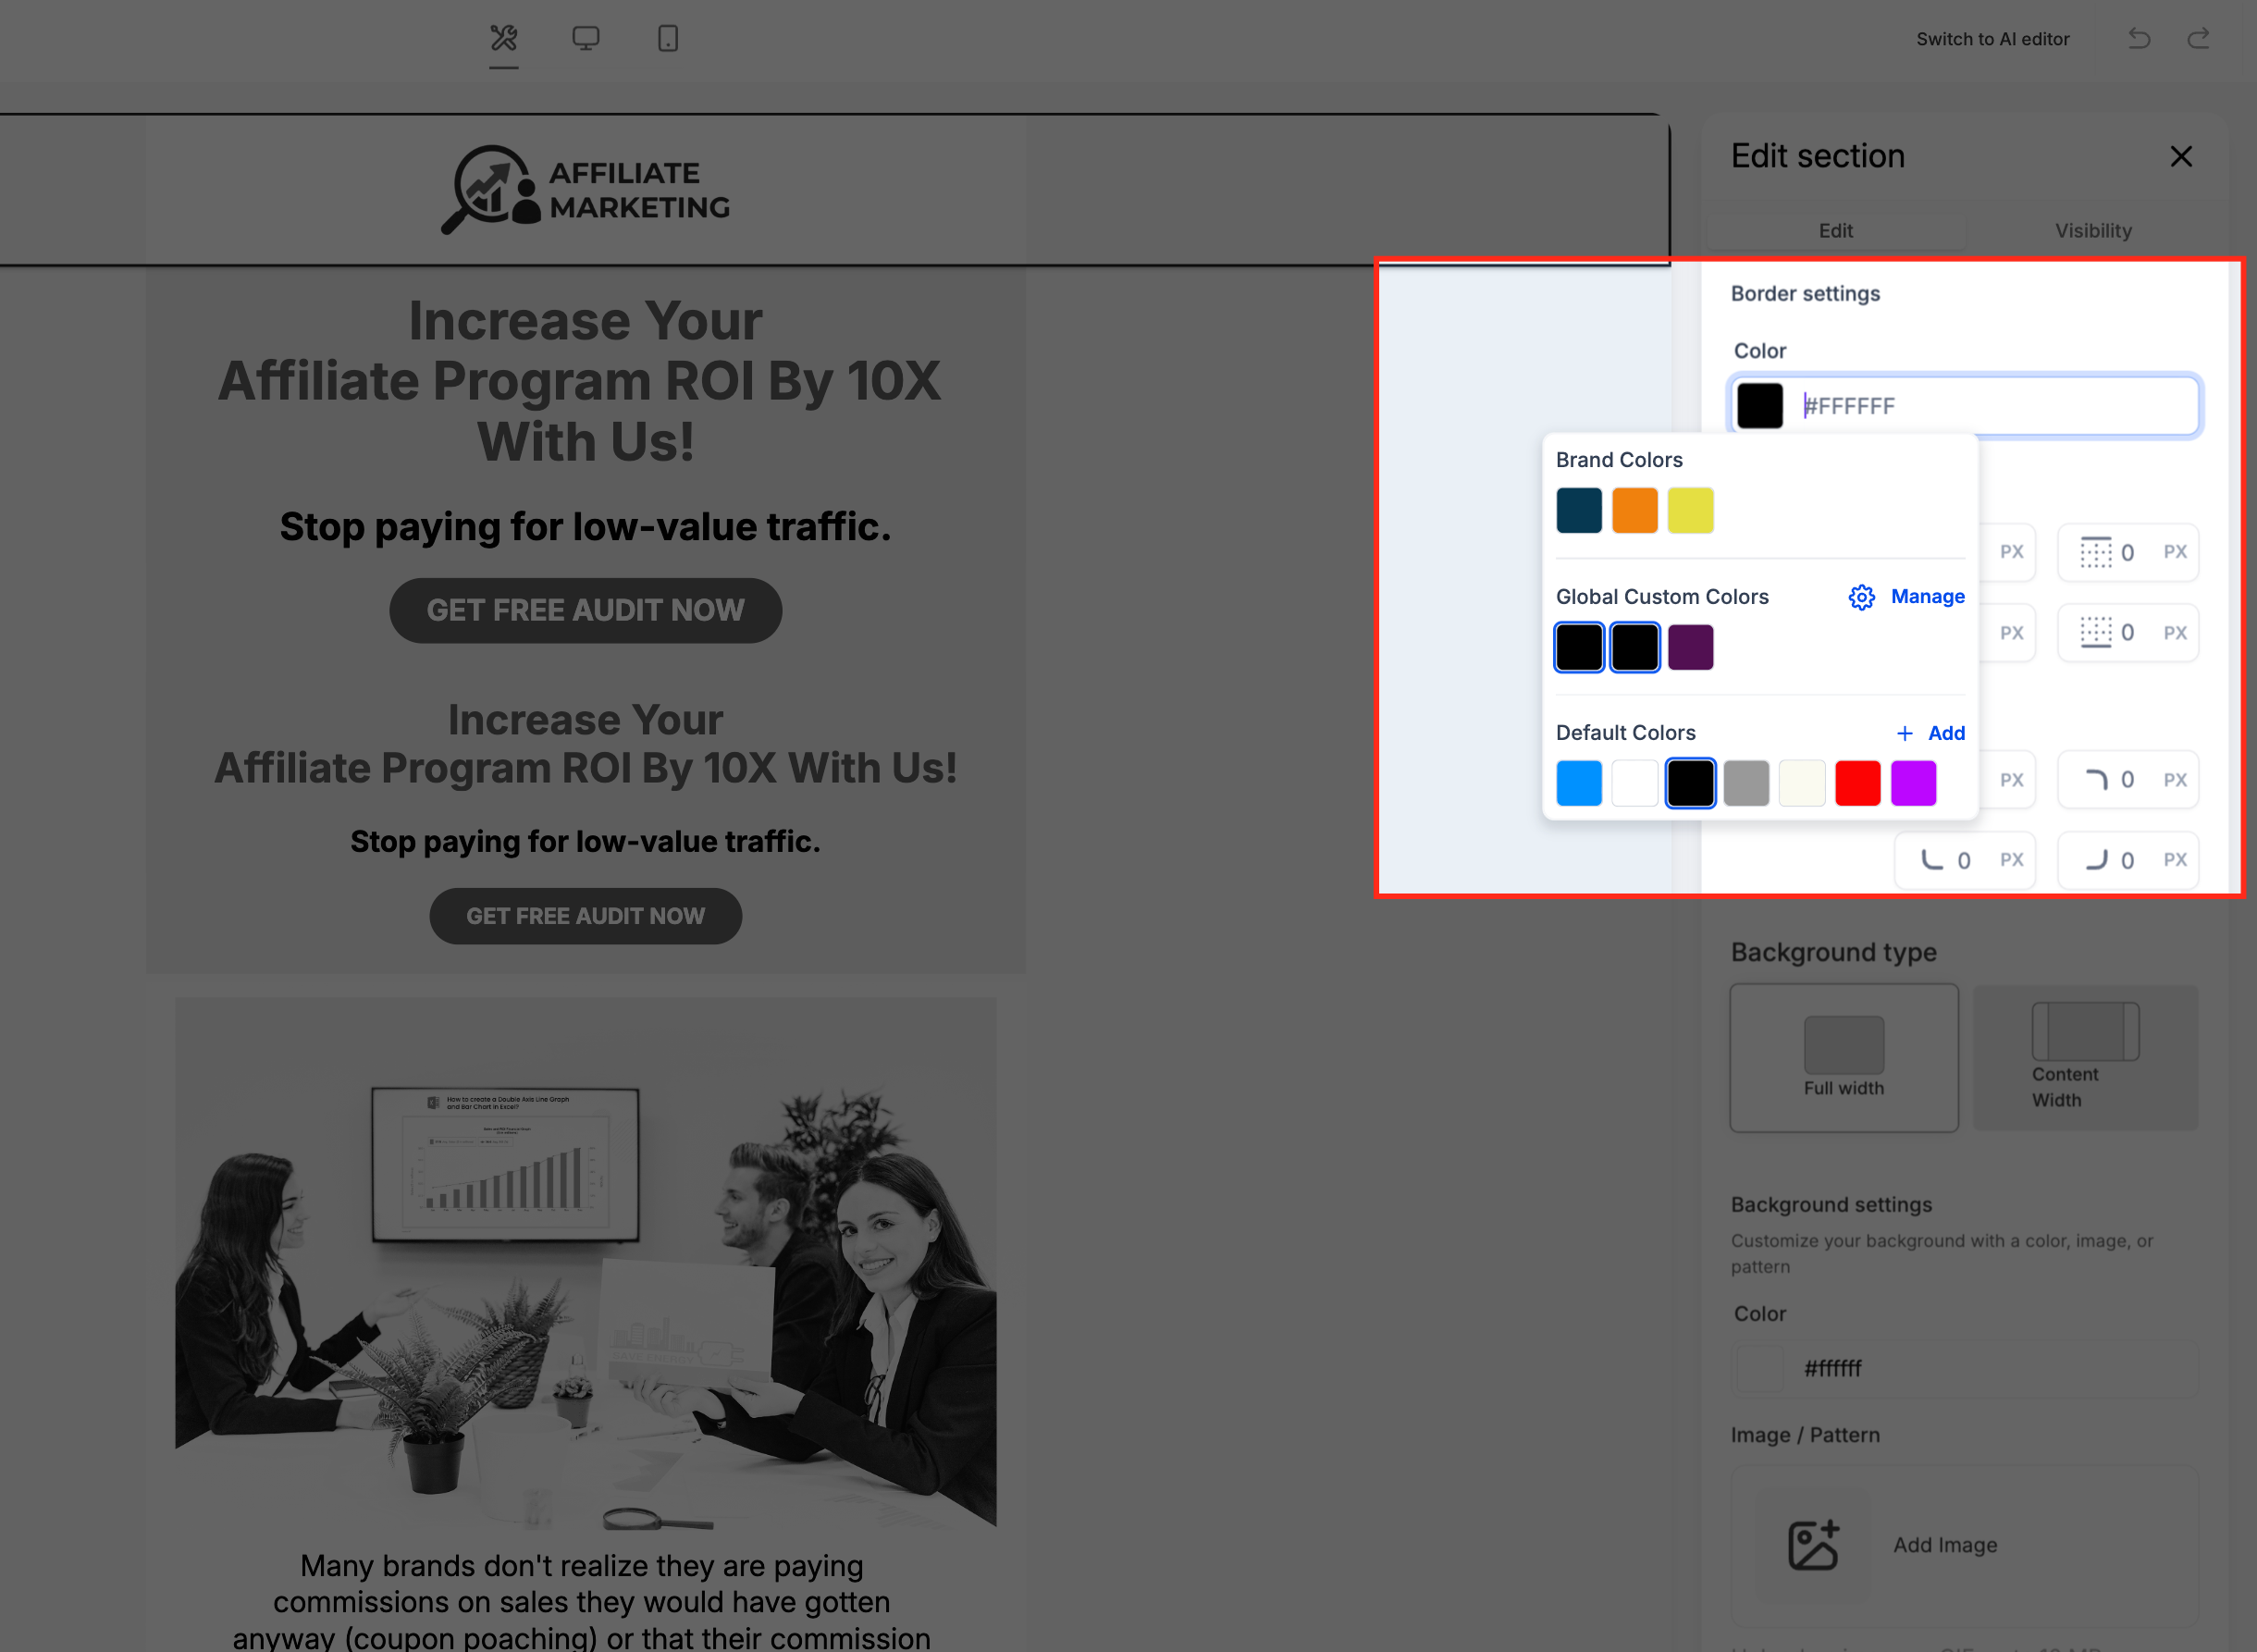
Border Color controls the color used for the selected section border.
- Expand Border settings.
- Locate the border color control.
- Select the color you want to use.
- Review the result directly in the Email Builder.
Adjust Border Radius
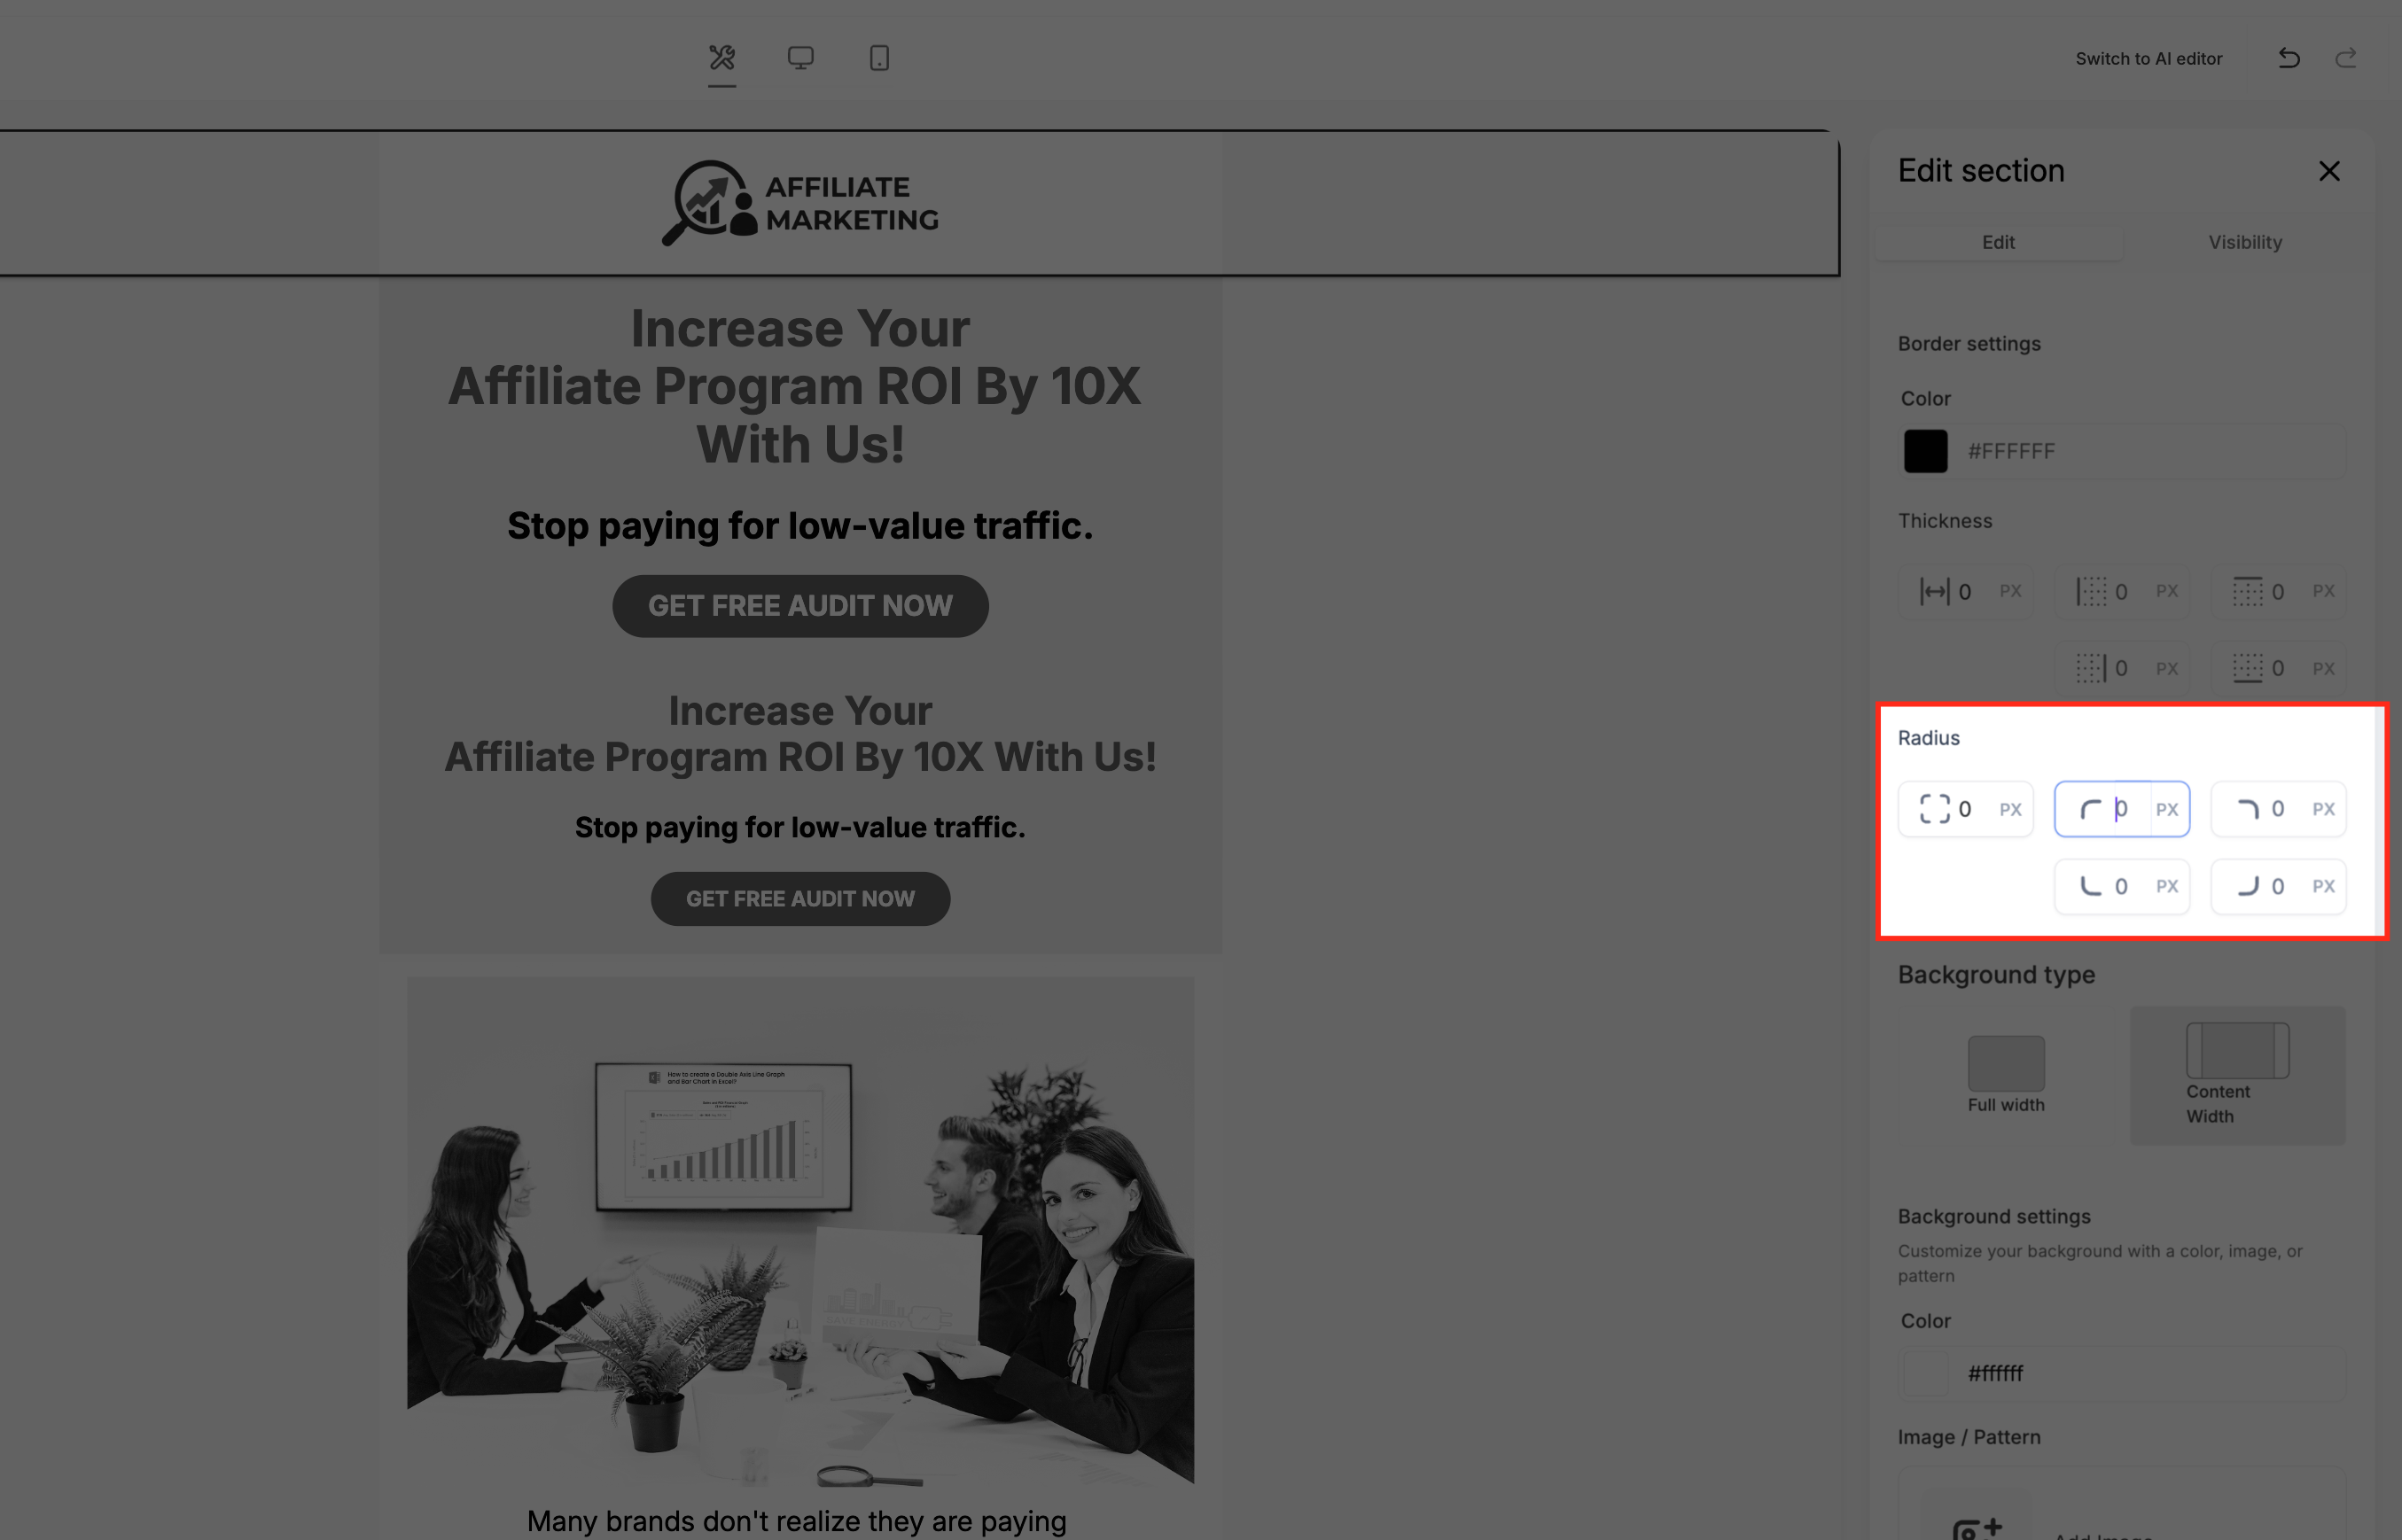
Border Radius controls how rounded or square the section corners appear.
- Open Border settings.
- Locate the Border Radius control.
- Adjust the radius using the available control.
- Review the updated corners in the Email Builder.
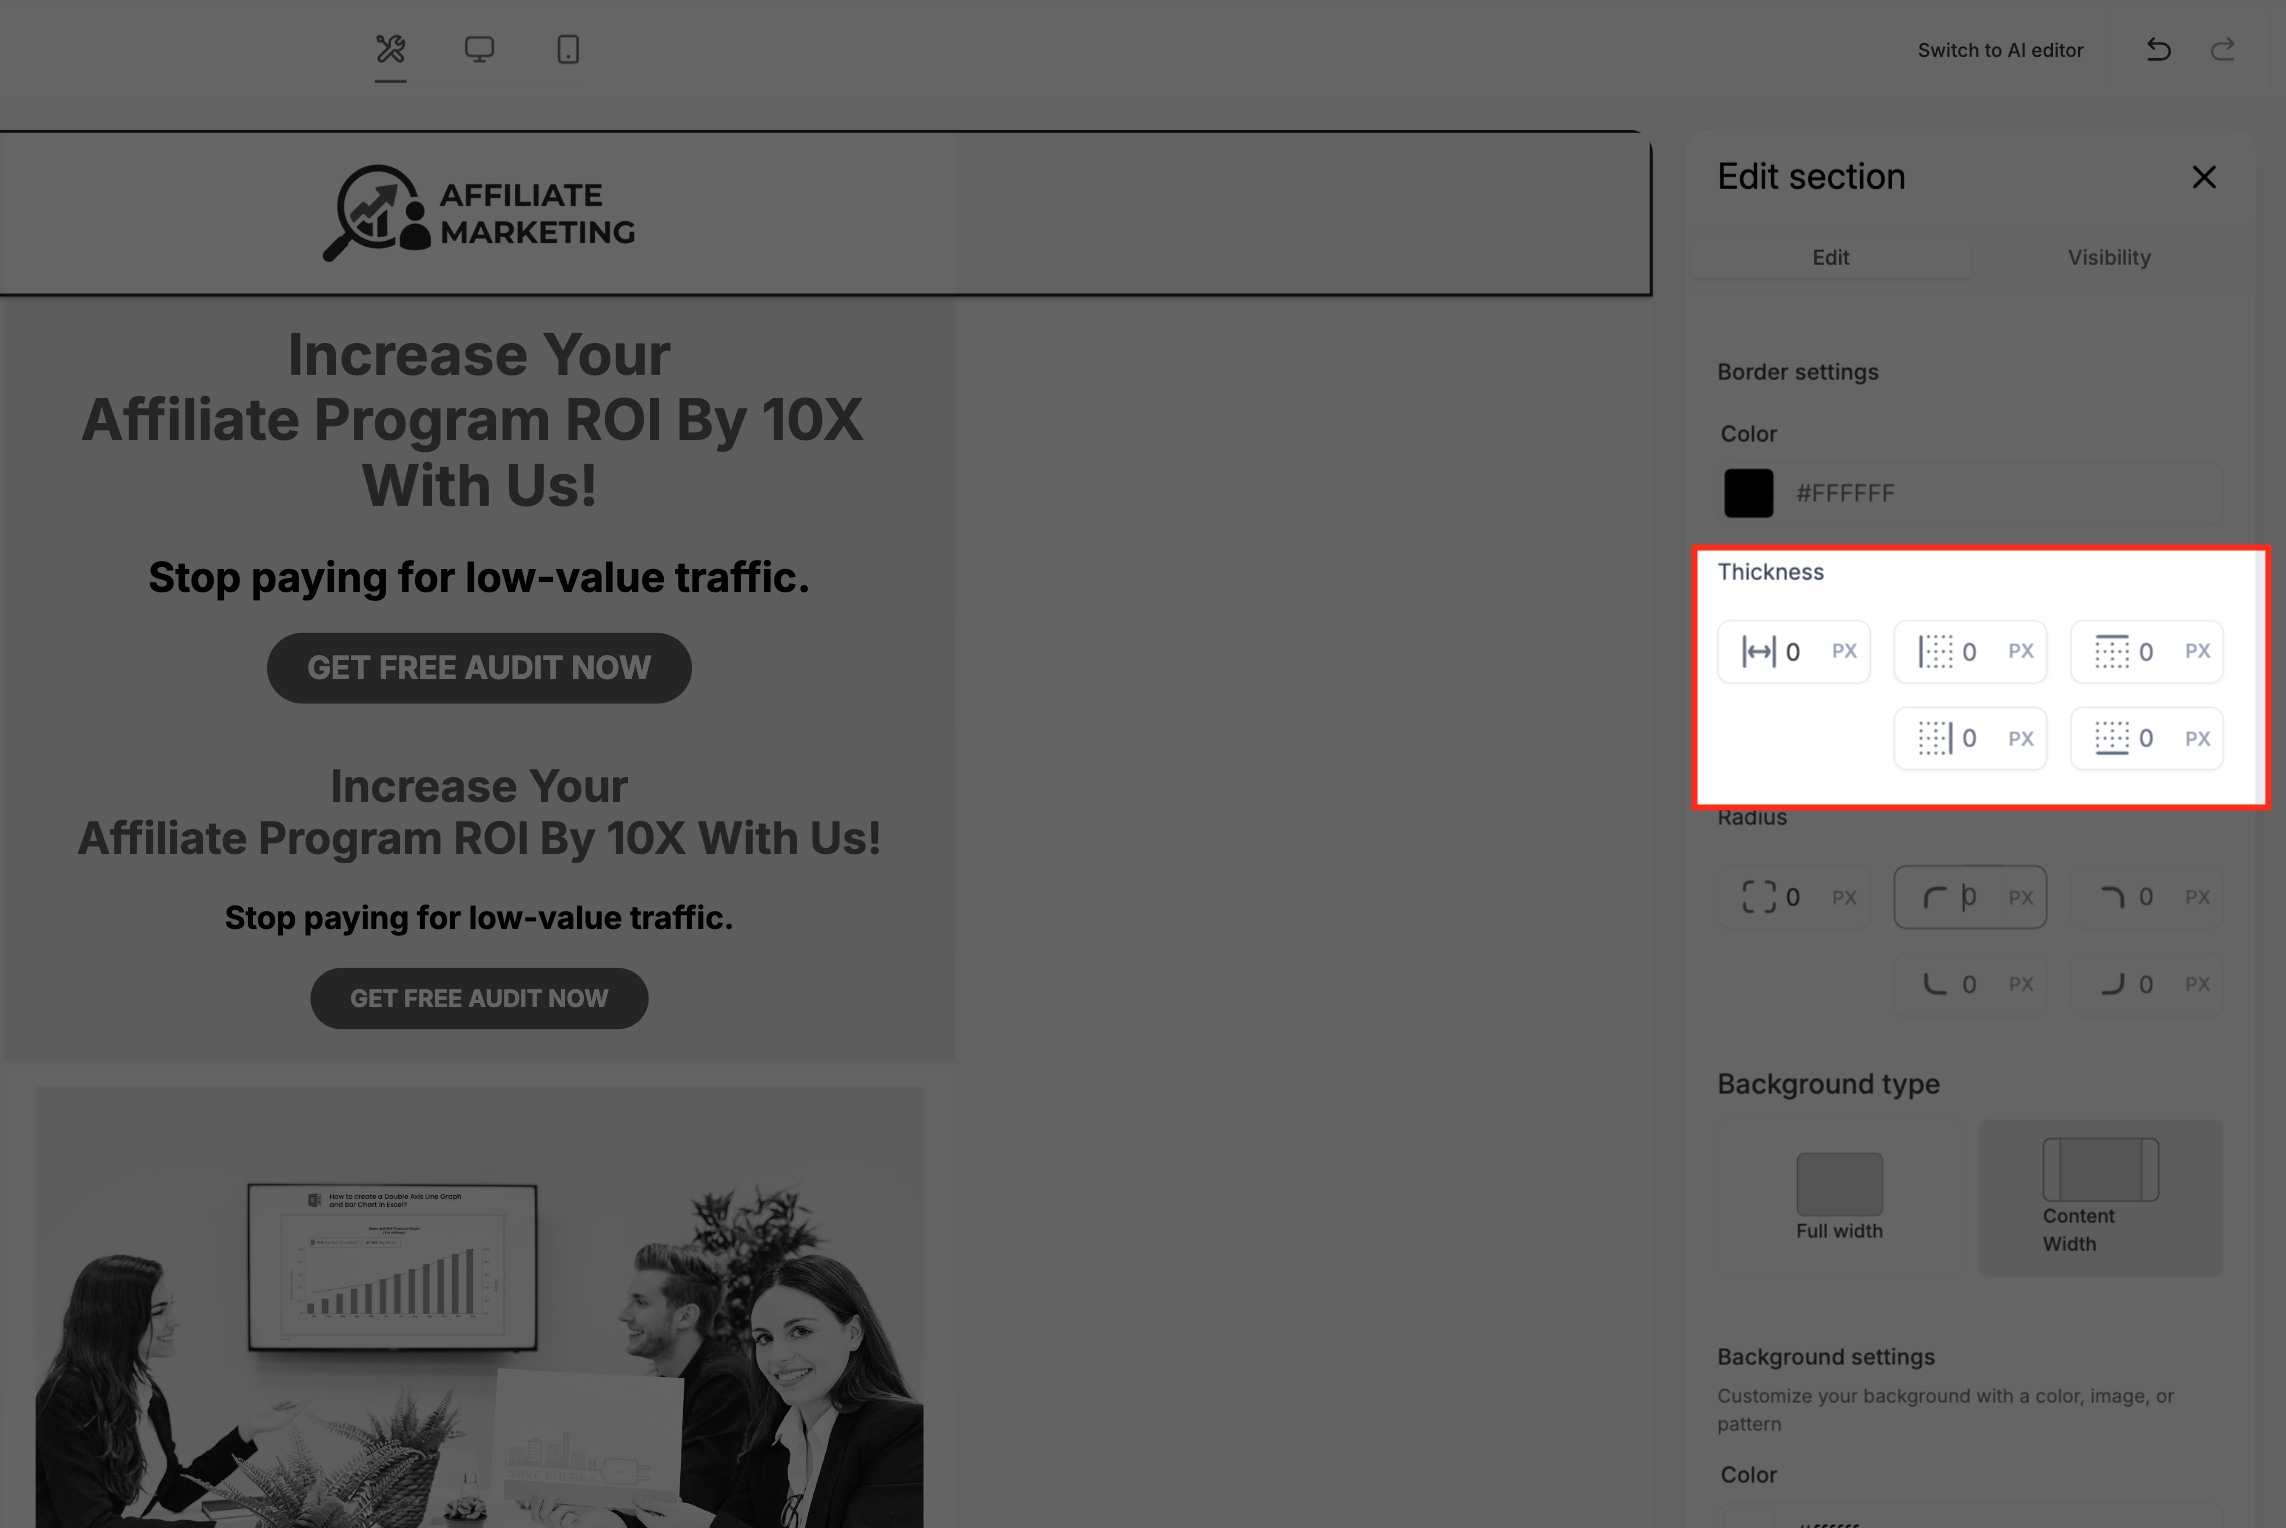
Adjust Border Thickness
Border Thickness controls the visible width of the section border.
- Open Border settings.
- Locate the Border Thickness control.
- Adjust the border width using the available control.
- Review the updated section border.
Preview and Test Border Changes
Review border styling before using the campaign or template to confirm that the final layout appears as expected.
- Review the border changes directly in the Email Builder.
- Use the available desktop and mobile views to review the layout.
- Save the email before final testing or sending.
- Send a test email when you need to verify rendering in an actual inbox.
Email layouts are designed to be responsive, but rendering can vary between email clients. Preview and test the email when validating the final design.
Frequently Asked Questions
Q: Where do I find Border settings in the Email Builder?
Select a supported email section, then expand Border settings in the Edit section panel.
Q: What can I customize in Border settings?
The feature provides controls for border color, corner radius, and border thickness.
Q: Are Border settings available on every Email Builder element?
This article covers the Border settings available for supported email sections. Other Email Builder elements can provide their own styling controls.
Q: Can I preview border changes before sending the email?
Yes. Review the changes in the Email Builder and use the available desktop and mobile views before sending.
Q: Should I send a test email after changing a border?
A test email is useful when you need to confirm how the design renders in an actual inbox or email client.
Related Articles
- How to Use HighLevel Email Builder & In-line Editor
- Layout Margins and Text Spacing in Email Builder
- How to Customize Mobile Formatting in the Email Builder
- Button Element in Email Builder
- Different Elements in Email Builder
Was this article helpful?
That’s Great!
Thank you for your feedback
Sorry! We couldn't be helpful
Thank you for your feedback
Feedback sent
We appreciate your effort and will try to fix the article