This guide will help you set up workflow triggers for new prospects generated through the Prospecting Tool, whether they are created directly in-app or via embedded widgets. This allows you to automate actions based on prospect details, helping you organise and engage with leads more effectively.
TABLE OF CONTENTS
Overview
The "Prospect Generated" workflow trigger enables automated actions for new prospects created either directly within the Prospecting Tool or through embedded widgets on your website. This helps you organize leads, improve follow-up strategies, and optimize your sales funnel.
With this trigger, you can:
- Automatically save and categorize new prospects.
- Filter prospects based on their source (in-app or widget) and conversion rate.
- Trigger automated actions like sending welcome emails, assigning prospects to sales pipelines, and notifying team members.
Trigger Name
Prospect Generated
Where to Find It:
- The "Prospect Generated" trigger is located in the Workflow Builder.

Trigger Description
The "Prospect Generated" trigger activates automated workflows when a new prospect is created in the Prospecting Tool. This can happen in three ways:
- In-App: When a prospect is manually generated within the tool.
- Widget: When a prospect is generated through an embedded widget on your website.
- Prospect AI: When a prospect is generated automatically via Prospect AI
This trigger allows you to filter and organise prospects based on:
- Source: Identify whether the prospect originated in-app or via a widget or via the AI
- Conversion Rate: Segment prospects by their likelihood to convert, enabling targeted engagement.
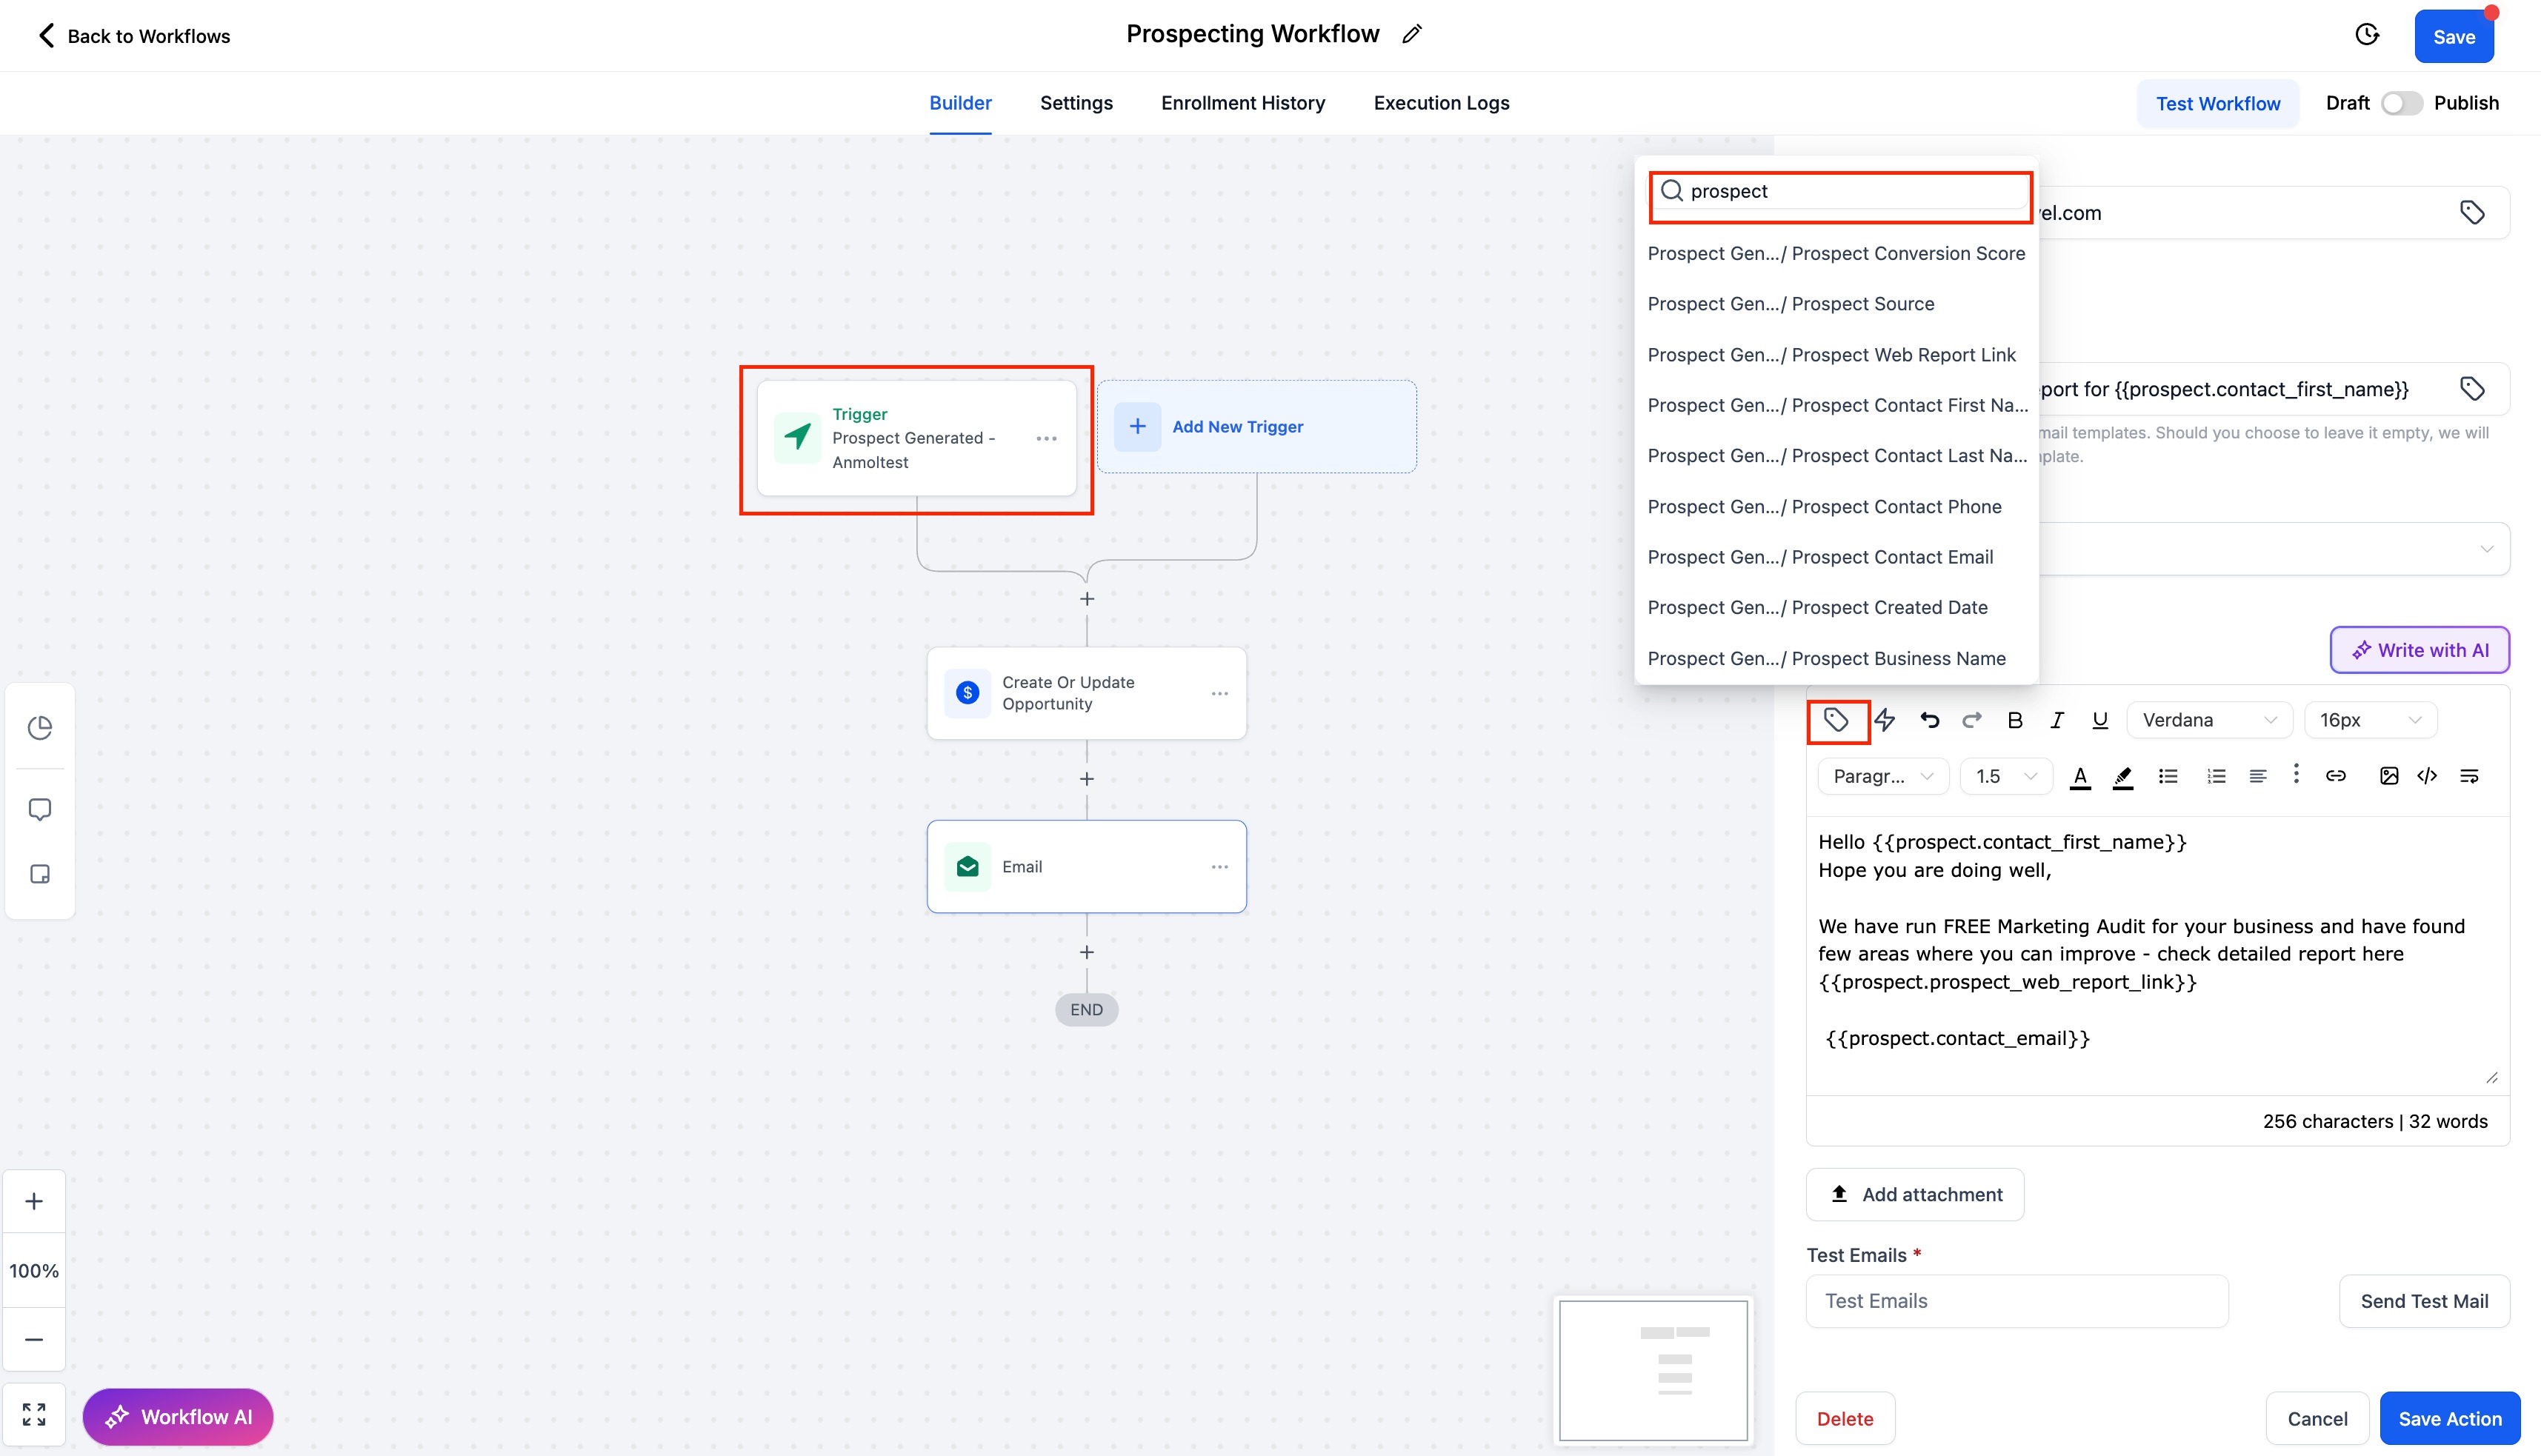
You can also use merge fields to include custom values in your email
This customisation makes it easier to prioritise high-potential leads and streamline your sales process.
Step 1: Setting Up the Workflow Trigger
Create or Edit a Workflow:
- Click on "Create Workflow" or select an existing one to edit.
Select the Trigger:
- In the trigger section, choose "Prospect Generated" as your workflow trigger.
- This trigger enables automated actions for new prospects, allowing you to filter and organize them for more effective sales targeting.
Step 2: Adding Filters for Prospects
To make your workflow more effective and tailored, apply filters to trigger specific actions based on prospect details.
Prospect Source:
- In-App: Trigger actions for prospects generated directly within the Prospecting Tool.
- Widget: Trigger actions for prospects generated via embedded widgets on your website.
- Prospect AI: When a prospect is generated automatically via Prospect AI
- These filter helps you distinguish between different lead sources, allowing for customized follow-up strategies.
Conversion Rate:
- Filter prospects by their conversion rate.
- Create separate workflows for:
- High-Conversion Prospects: Trigger personalised outreach or direct sales follow-up.
- Low-Conversion Prospects: Set up nurturing campaigns to increase engagement.
- This segmentation enables strategic engagement, maximising your sales potential.

Step 3: Mapping Prospect Details to Automated Actions
After configuring the trigger and applying filters, the next step is to map prospect details to automated actions. This ensures you can leverage advanced workflow automation within the Prospecting Tool.
Automated Actions Include:
- Assigning Prospects to Sales Pipelines: Automatically organize prospects into relevant stages of your sales pipeline.
- Sending Welcome Emails or SMS: Initiate personalized communication with newly generated prospects.
- Notifying Team Members: Alert your sales team about high-conversion prospects in real-time.
- Tagging and Categorising Prospects: Automatically organize prospects by tags, categories, or niches for better segmentation.
Step 4: Saving and Testing Your Workflow
Once all configurations and mappings are completed:
- Click Save: Finalise your workflow.
- Test the Workflow: Simulate a new prospect generation (both in-app and via widgets) to verify if the automation is triggered as expected.
- Adjust as Needed: If the workflow isn't functioning as intended, fine-tune the conditions or actions.
Example
Scenario: You want to send a personalised welcome email to every new prospect generated via an embedded widget and alert your sales team for high-conversion prospects.
Trigger Configuration:
- Set the trigger as "Prospect Generated".
- Filter by Source = Widget and Conversion Rate > 70%.
Automated Actions:
- Send Welcome Email: Personalised email is automatically sent to the new prospect.
- Notify Team: Sales team is notified about the high-conversion lead for immediate follow-up.
Outcome:
- New prospects from the widget receive an instant welcome email.
- High-conversion prospects are flagged, ensuring prioritized engagement by your sales team.
Conclusion
By setting up workflow triggers for new prospects generated through the Prospecting Tool, you can automate lead management, enhance sales targeting, and improve overall conversion rates. Using filters like prospect source and conversion rate, you can tailor workflows to engage prospects strategically, streamlining your sales funnel and optimizing team productivity.
For any questions or support, feel free to reach out to our team.