Loading a Snapshot into an existing sub-account lets agencies add prebuilt HighLevel assets without recreating them manually. You can choose which Snapshot assets to import, review conflicts before replacing existing items, and confirm the load before changes are applied. When dashboards are included, you can also choose which selected dashboard becomes the destination sub-account's default.
Learn how to load a Snapshot into an active sub-account, select specific assets, set a default dashboard when dashboards are included, resolve asset conflicts, and confirm the final import.
What Is Loading a Snapshot Into an Existing Sub-Account?
Loading a Snapshot into an existing sub-account imports prebuilt HighLevel assets such as workflows, funnels, emails, and other supported content into an account that is already active. This lets agencies deploy standardized systems without recreating them manually while preserving existing client data unless a conflicting asset is intentionally overridden during the load.
Key Benefits of Loading a Snapshot Into an Existing Sub-Account
Loading a Snapshot helps agencies reuse proven assets while keeping control over what is imported and what happens when the destination sub-account already contains similar content.
- Efficiency: Reuse workflows, forms, funnels, and other assets instead of rebuilding them.
- Consistency: Apply the same structure and processes across multiple client sub-accounts.
- Flexibility: Choose which assets to import and which existing assets to override.
- Conflict warnings: Review potential conflicts before deciding whether to replace existing content.
Loading a Snapshot vs. Pushing a Snapshot Update
Loading and pushing a Snapshot serve different purposes. Choosing the correct workflow helps prevent confusion between an initial asset import and an update to accounts that previously received the Snapshot.
| Action | When to Use It |
|---|---|
| Load Snapshot | Add selected assets from a Snapshot into an existing sub-account. This is commonly used when initially deploying a template or adding Snapshot content to an account. |
| Push Update | Send selected changes from a refreshed Snapshot to sub-accounts that previously received that Snapshot. |
If you need to update accounts that are already using a Snapshot, see Refresh or Update Snapshots.
How To Load a Snapshot Into an Existing Sub-Account
Following the load process in order helps ensure you select the correct destination account, choose only the assets you need, review conflicts carefully, and confirm the import before HighLevel applies the Snapshot.
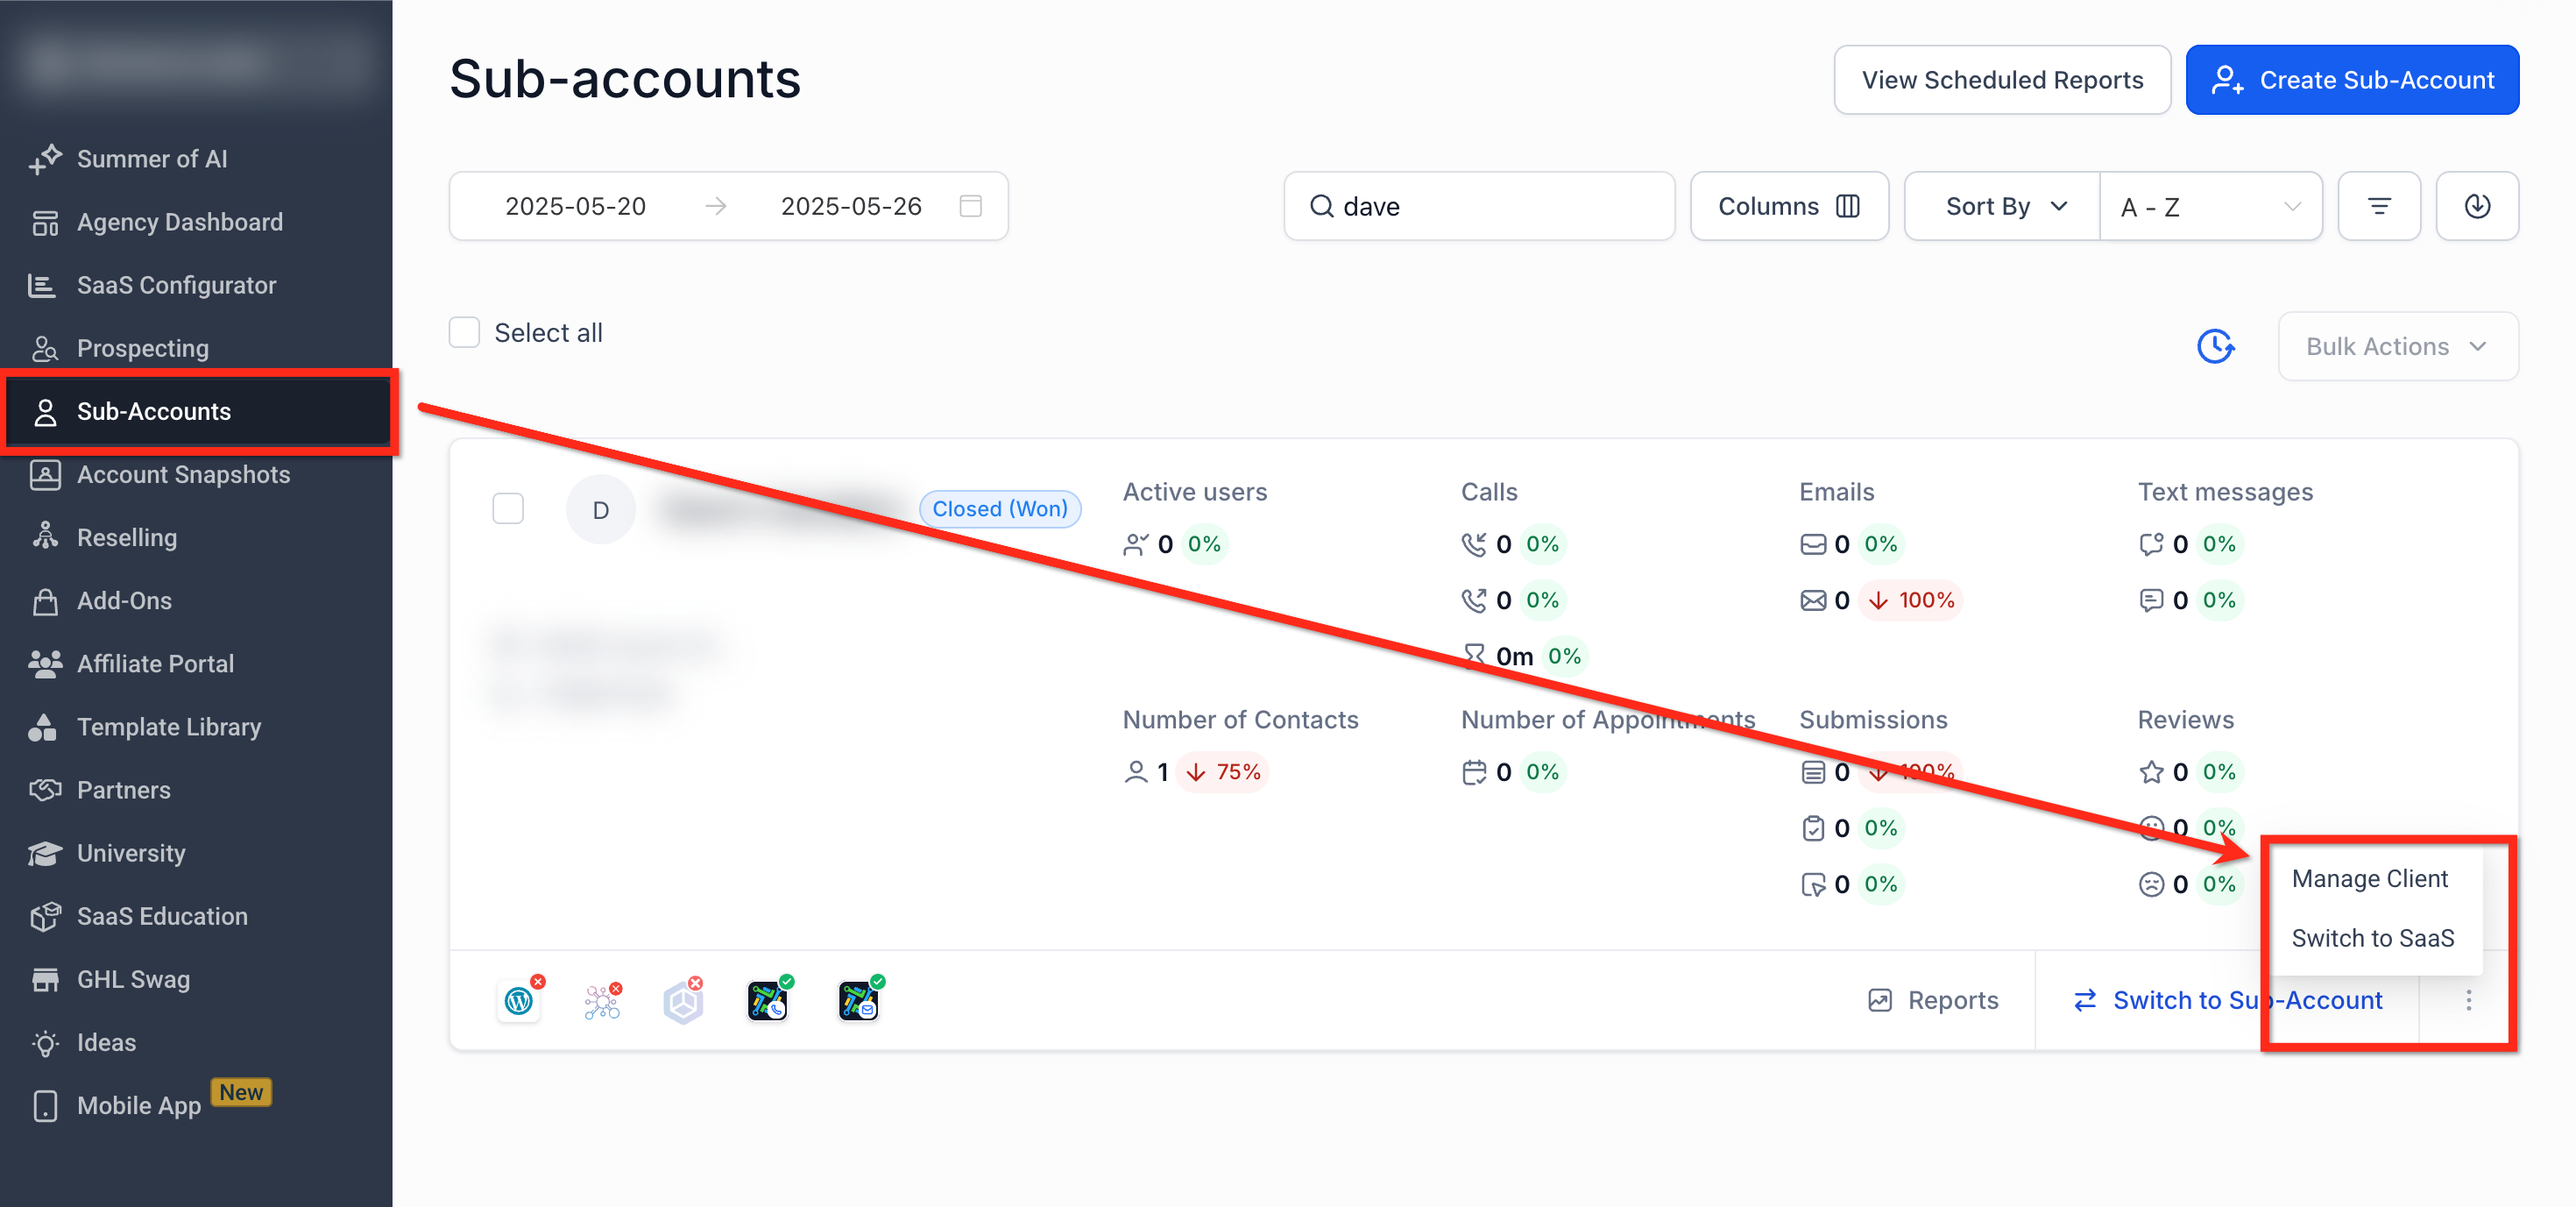
Navigate to Manage Client
Start from the destination sub-account so the Snapshot is loaded into the intended client account.
- From the Agency Dashboard, select Sub-Accounts in the left-hand menu.
- Locate the sub-account using the list or search bar.
- Click the three-dot menu next to the sub-account and select Manage Client.
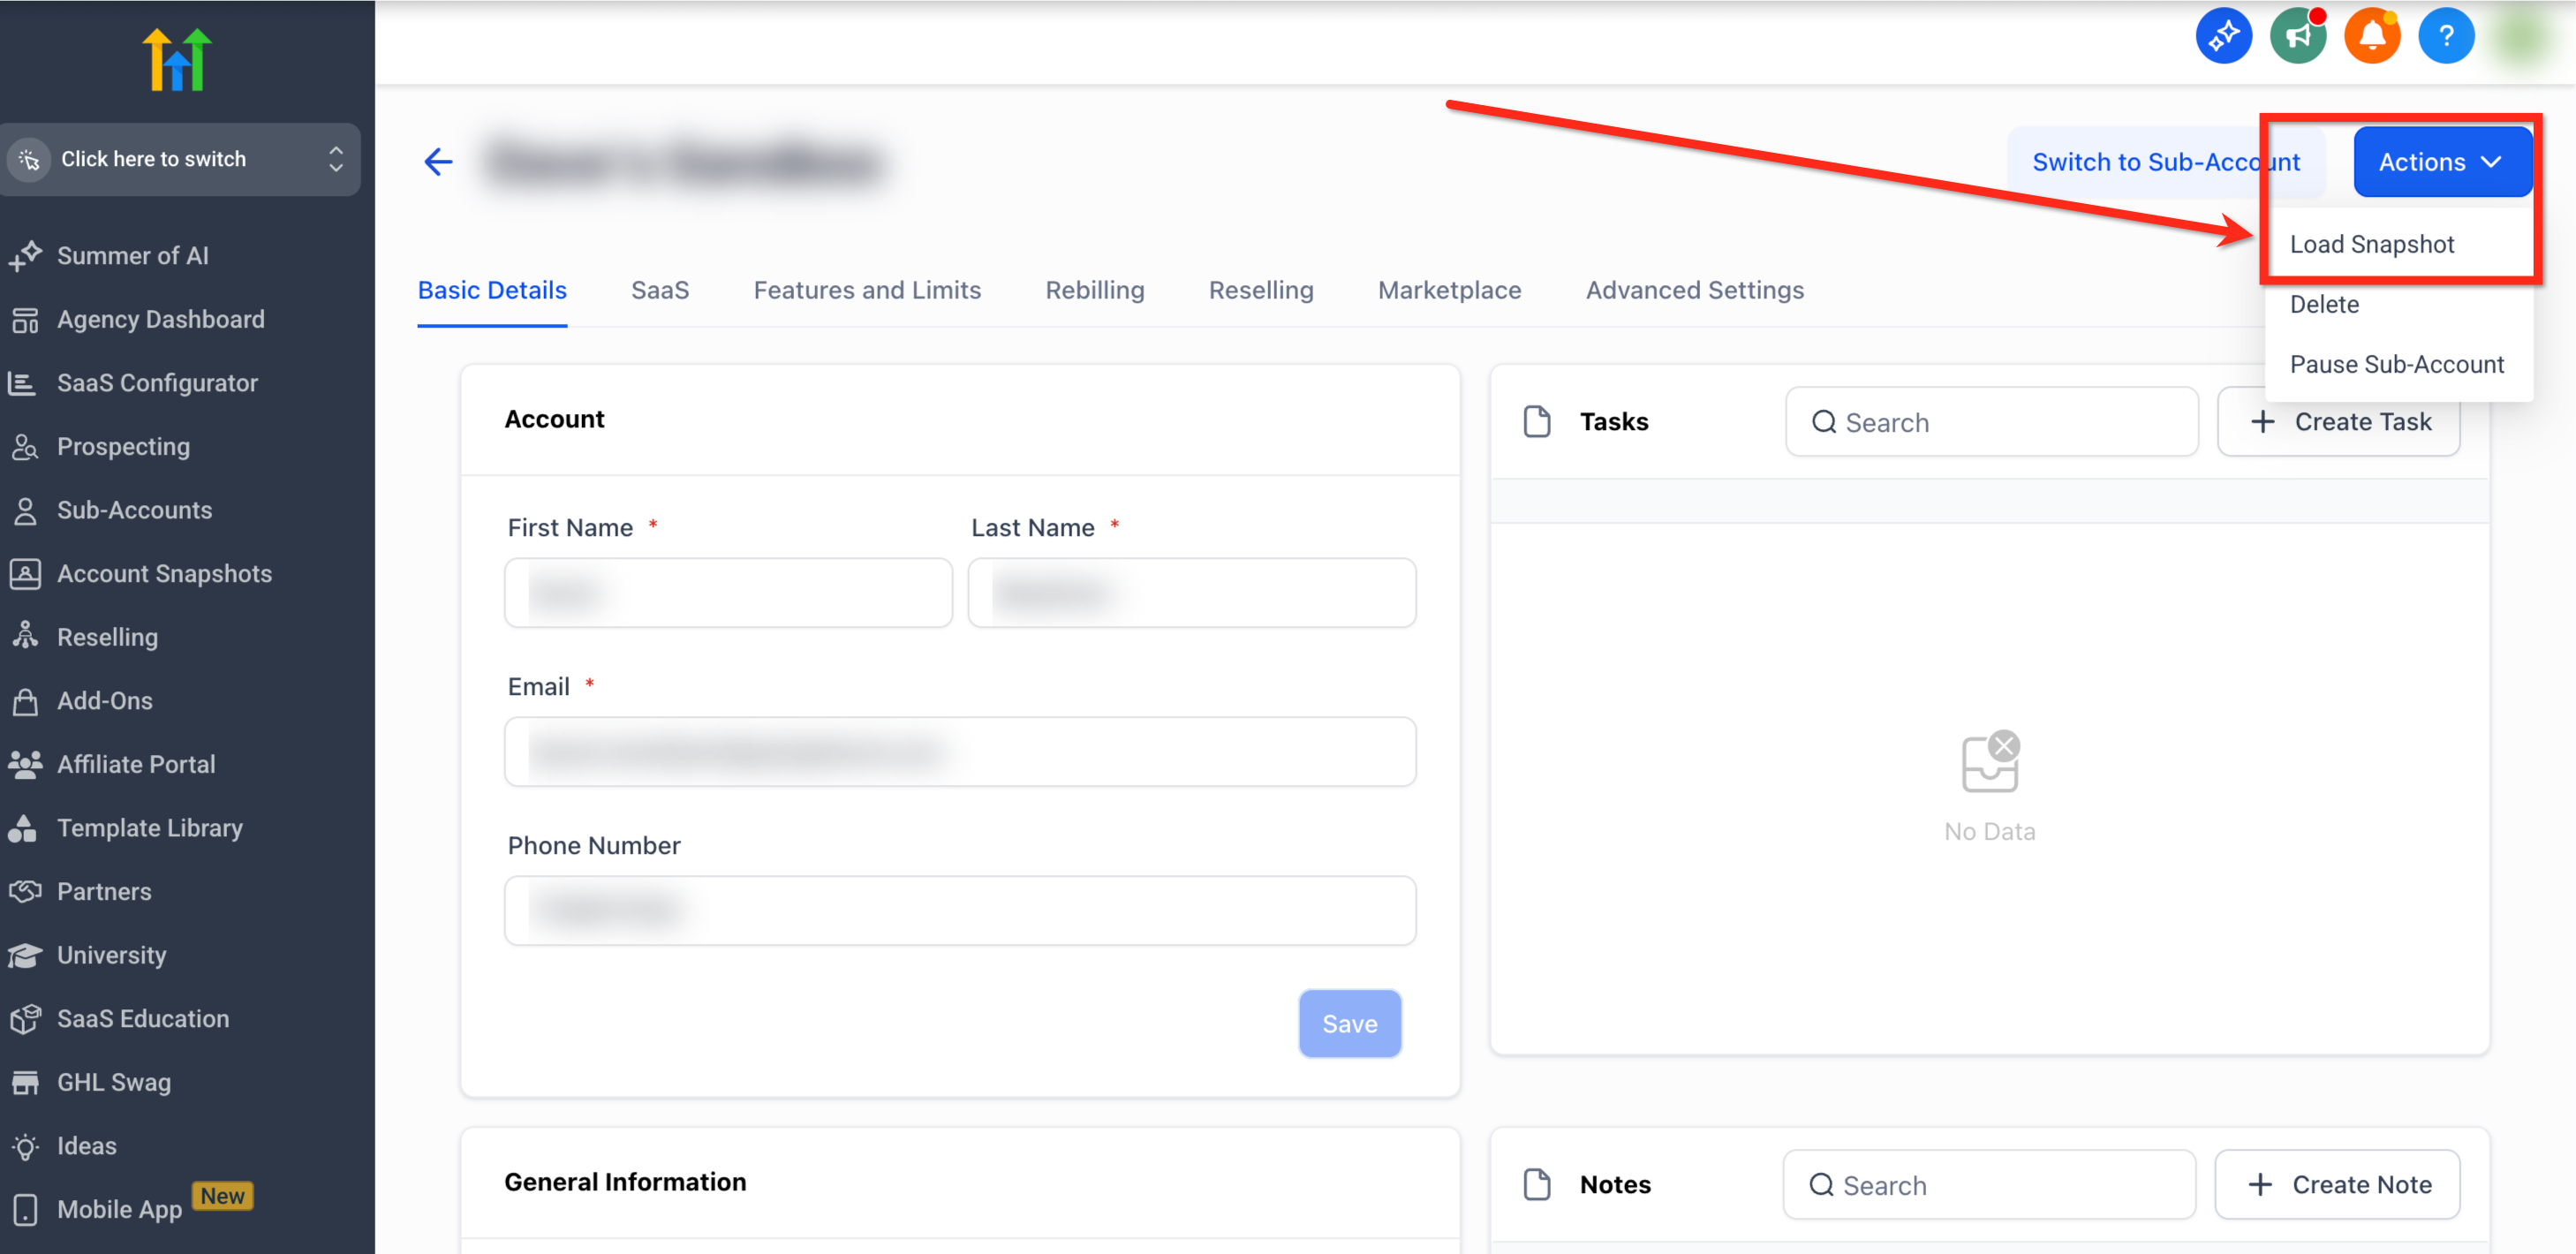
Select Load Snapshot
The Actions menu opens the Snapshot-loading workflow for the selected sub-account.
- Click Actions in the upper-right corner.
- Select Load Snapshot.
Note: If Load Snapshot is not available, confirm that Snapshot access is enabled under User > Roles and Permissions from the Agency Dashboard.
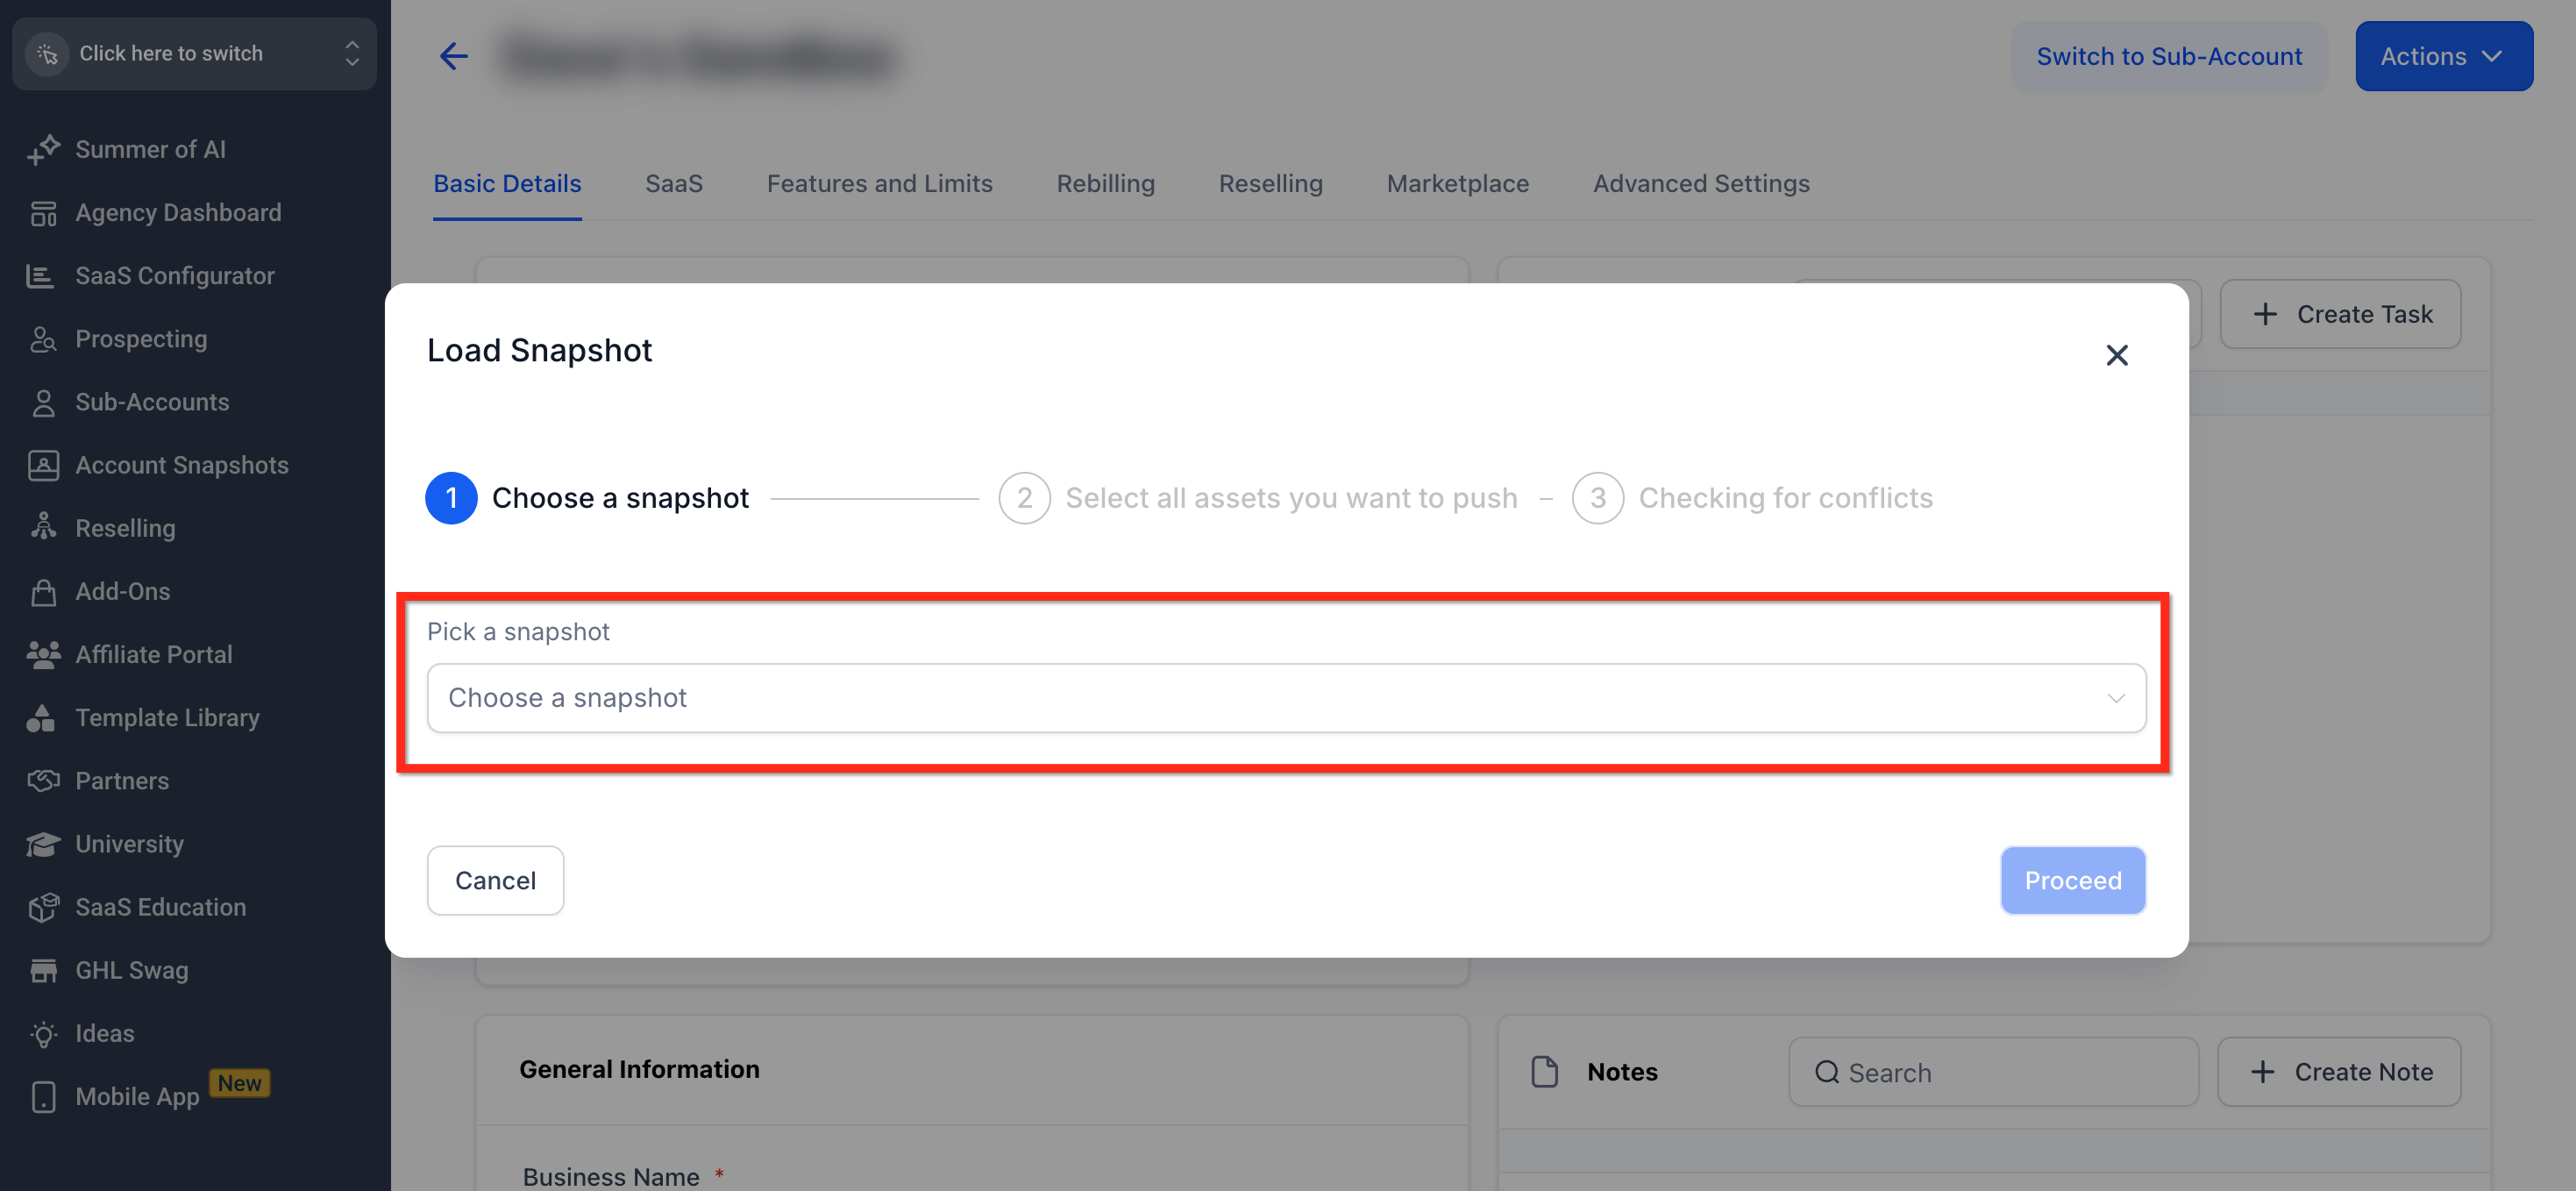
Choose the Snapshot
Selecting the correct Snapshot determines which reusable assets are available for the destination sub-account.
- In the Load Snapshot popup, open Pick a Snapshot.
- Select the Snapshot you want to load.
- Click Proceed.
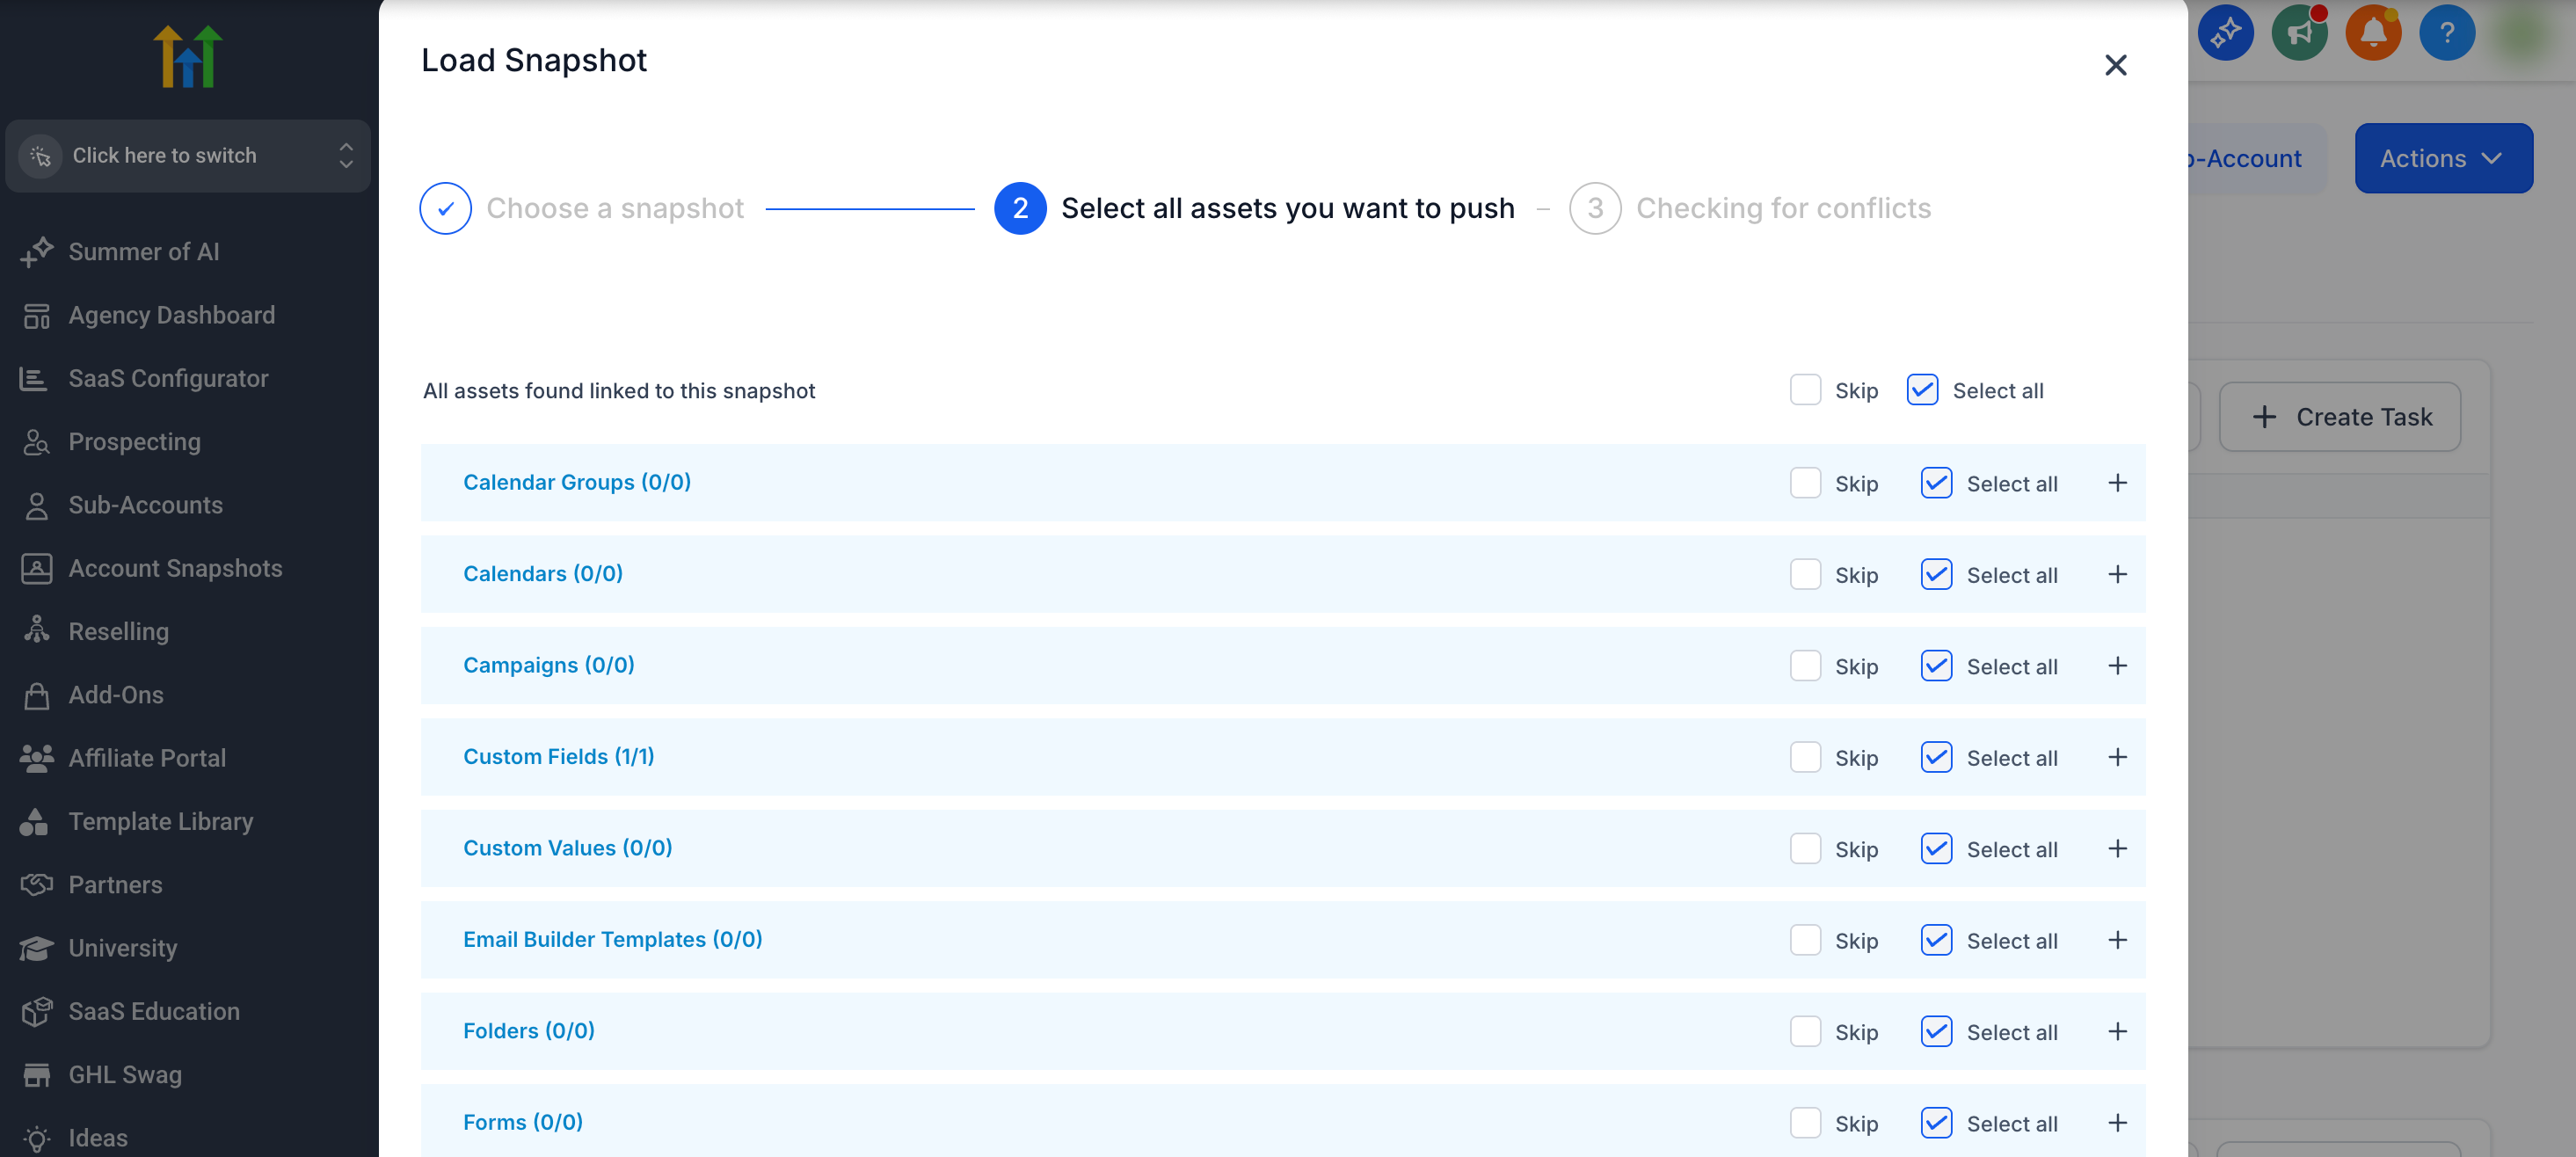
Select Assets
Asset selection lets you control exactly which parts of the Snapshot are imported and gives you access to dashboard-specific default settings when dashboards are included.
- Use the checkboxes to select the assets you want to import.
- Click Select All to import all available assets.
- Select only the categories you need to import by category.
- Click the + icon to expand a category and choose individual assets.
- Click Proceed when you are finished selecting assets.
Dashboards: When dashboards are selected, click Set as default on the selected dashboard you want to use as the destination sub-account's default. Only one dashboard can be marked at a time. To change the default, click Set as default on another selected dashboard. To remove the selection, click the currently marked dashboard again. If no dashboard is marked, HighLevel uses the Snapshot's existing default dashboard.
For dashboard-specific requirements and limitations, see How to Load Snapshots with Dashboards.
Webinars: If your Snapshot includes Webinars, importing them clones the webinar pages and automatically creates the corresponding webinar sessions. Related webinar data is restored during the import.
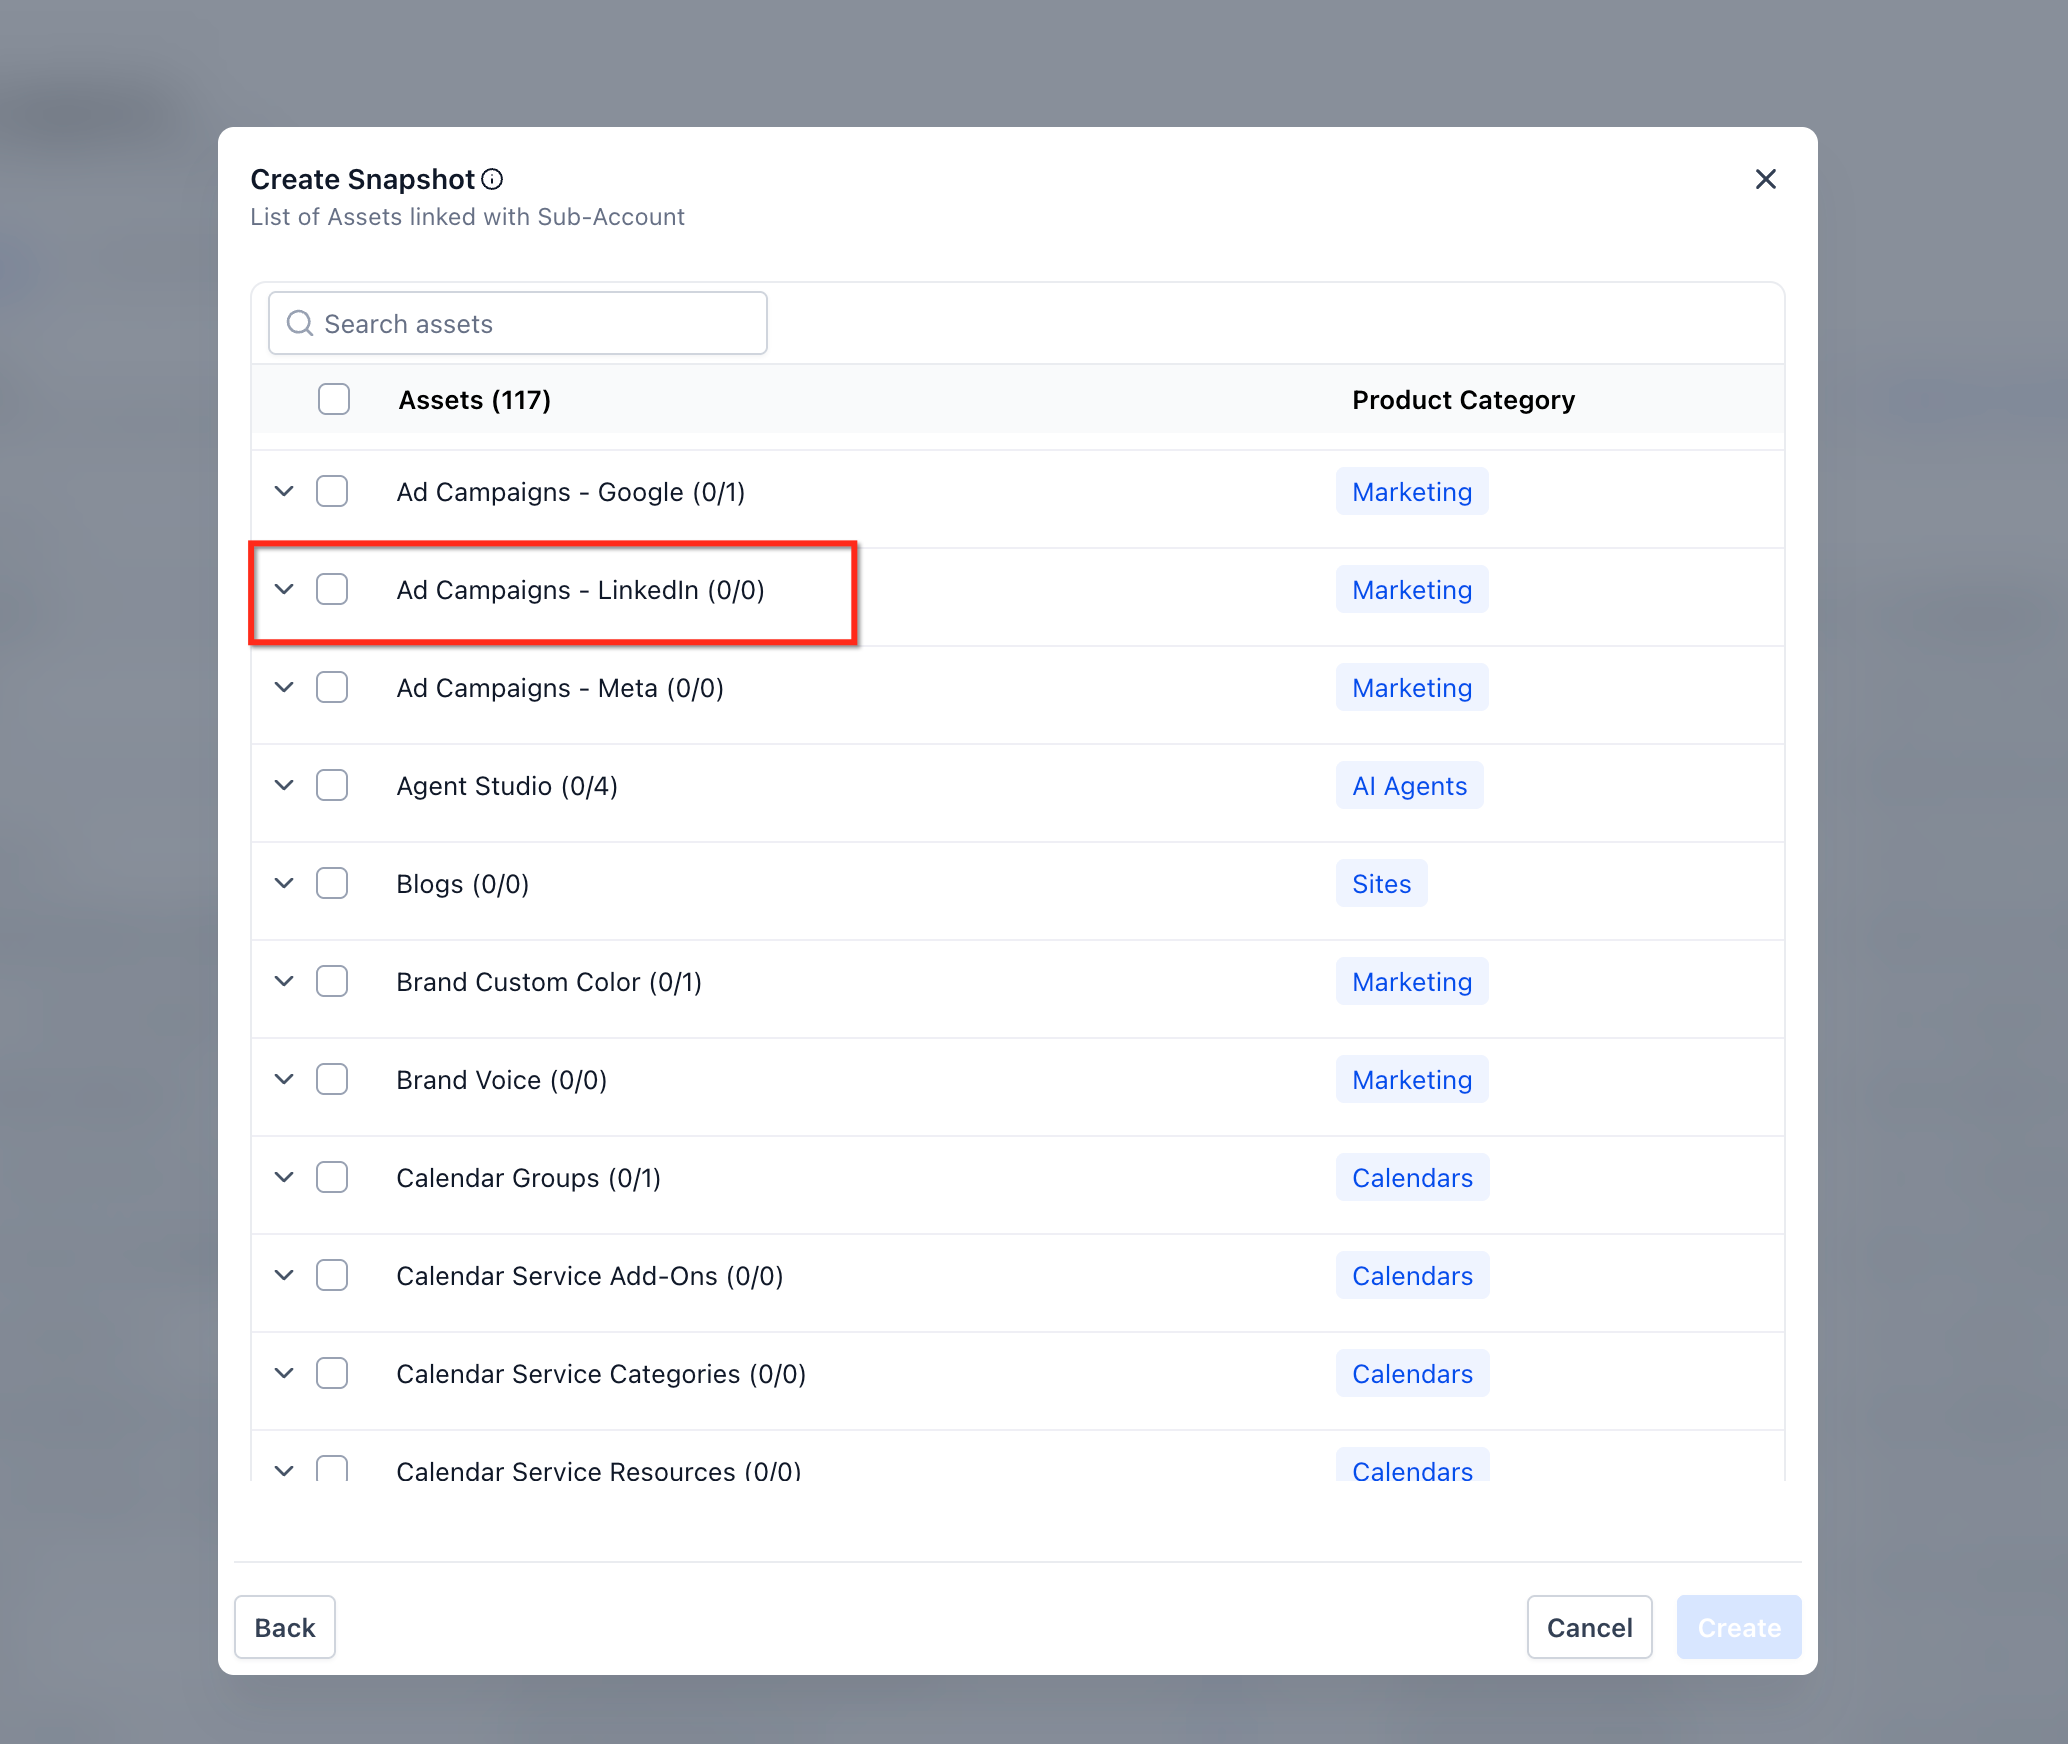
LinkedIn Ad Campaigns (Marketing Assets)
LinkedIn campaign assets can be selected during the Snapshot load, but they follow specific import behavior in the destination sub-account.
- In the asset list, select Ad Campaigns – LinkedIn.
- Continue to the conflict check step to review standard conflicts before importing.
- Imported LinkedIn campaigns are always created in Draft status.
- If LinkedIn is not connected in the destination sub-account, the import still completes and the campaigns are created as Draft.
- Lead Gen Forms are not imported.
Resolve Conflicts
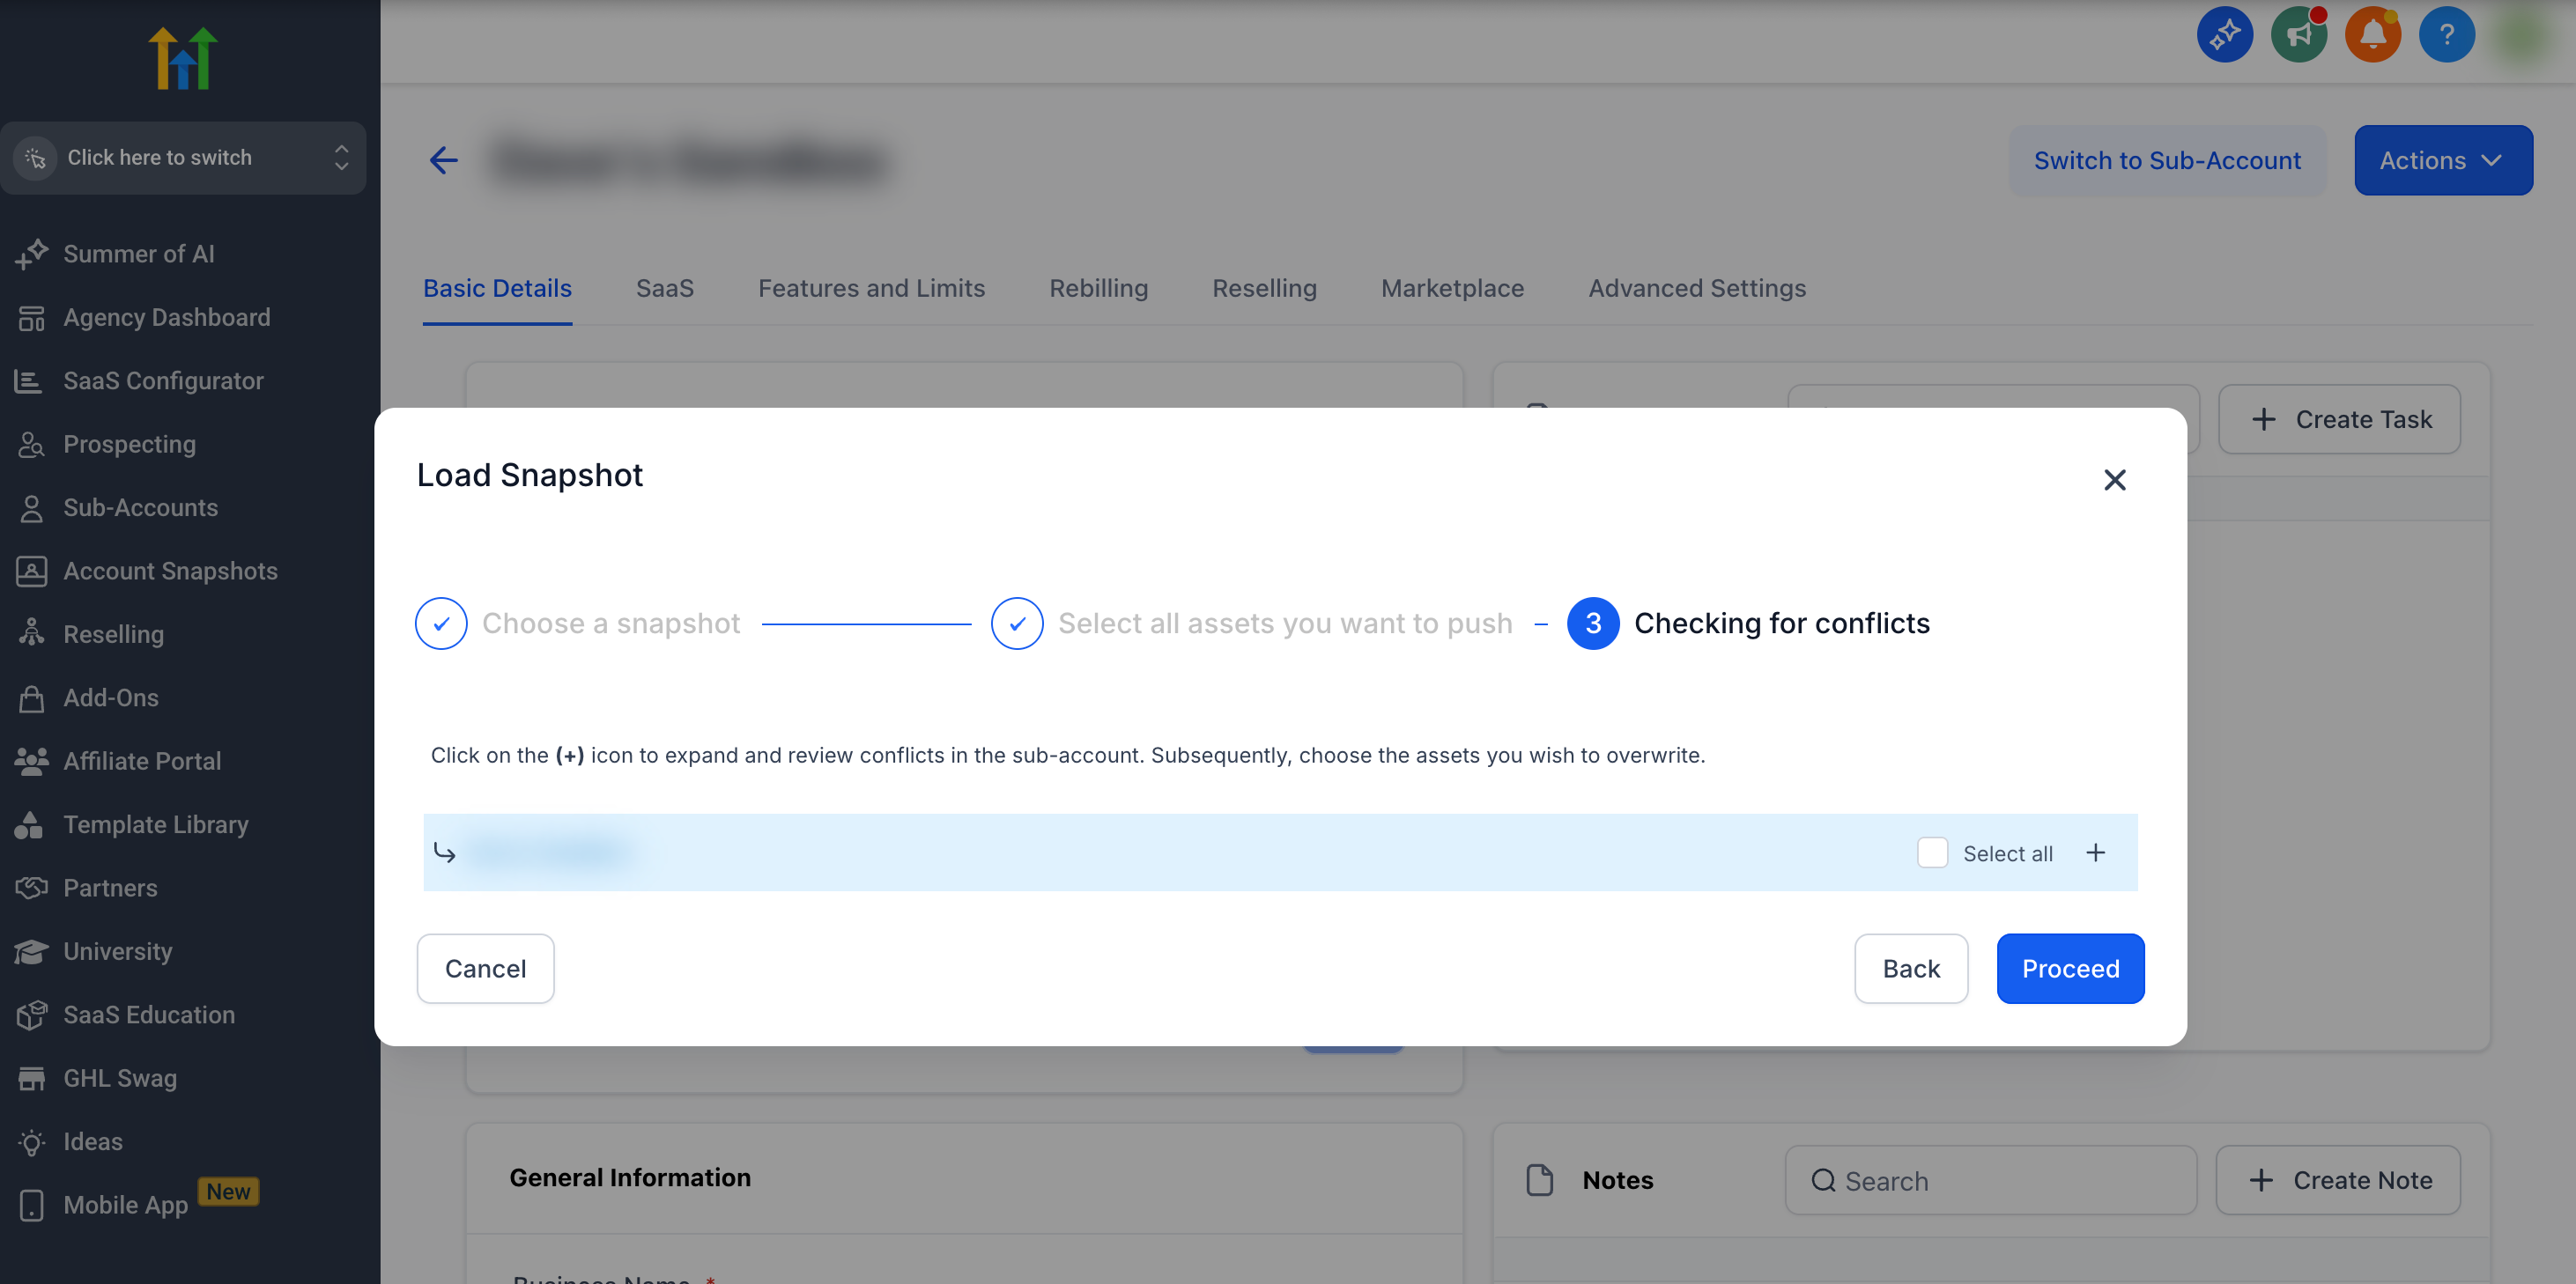
Conflict review gives you control over whether existing sub-account assets should be replaced or preserved before the Snapshot load continues.
- Override: Replaces the existing sub-account item with the Snapshot version.
- Skip: Keeps the current version and excludes the conflicting Snapshot item.
- After reviewing the conflicts, click Proceed.
Note: Conflict resolution applies to Webinars the same way it applies to other asset types. Choose Override to replace the existing webinar asset or Skip to keep the current version.
Confirm the Import
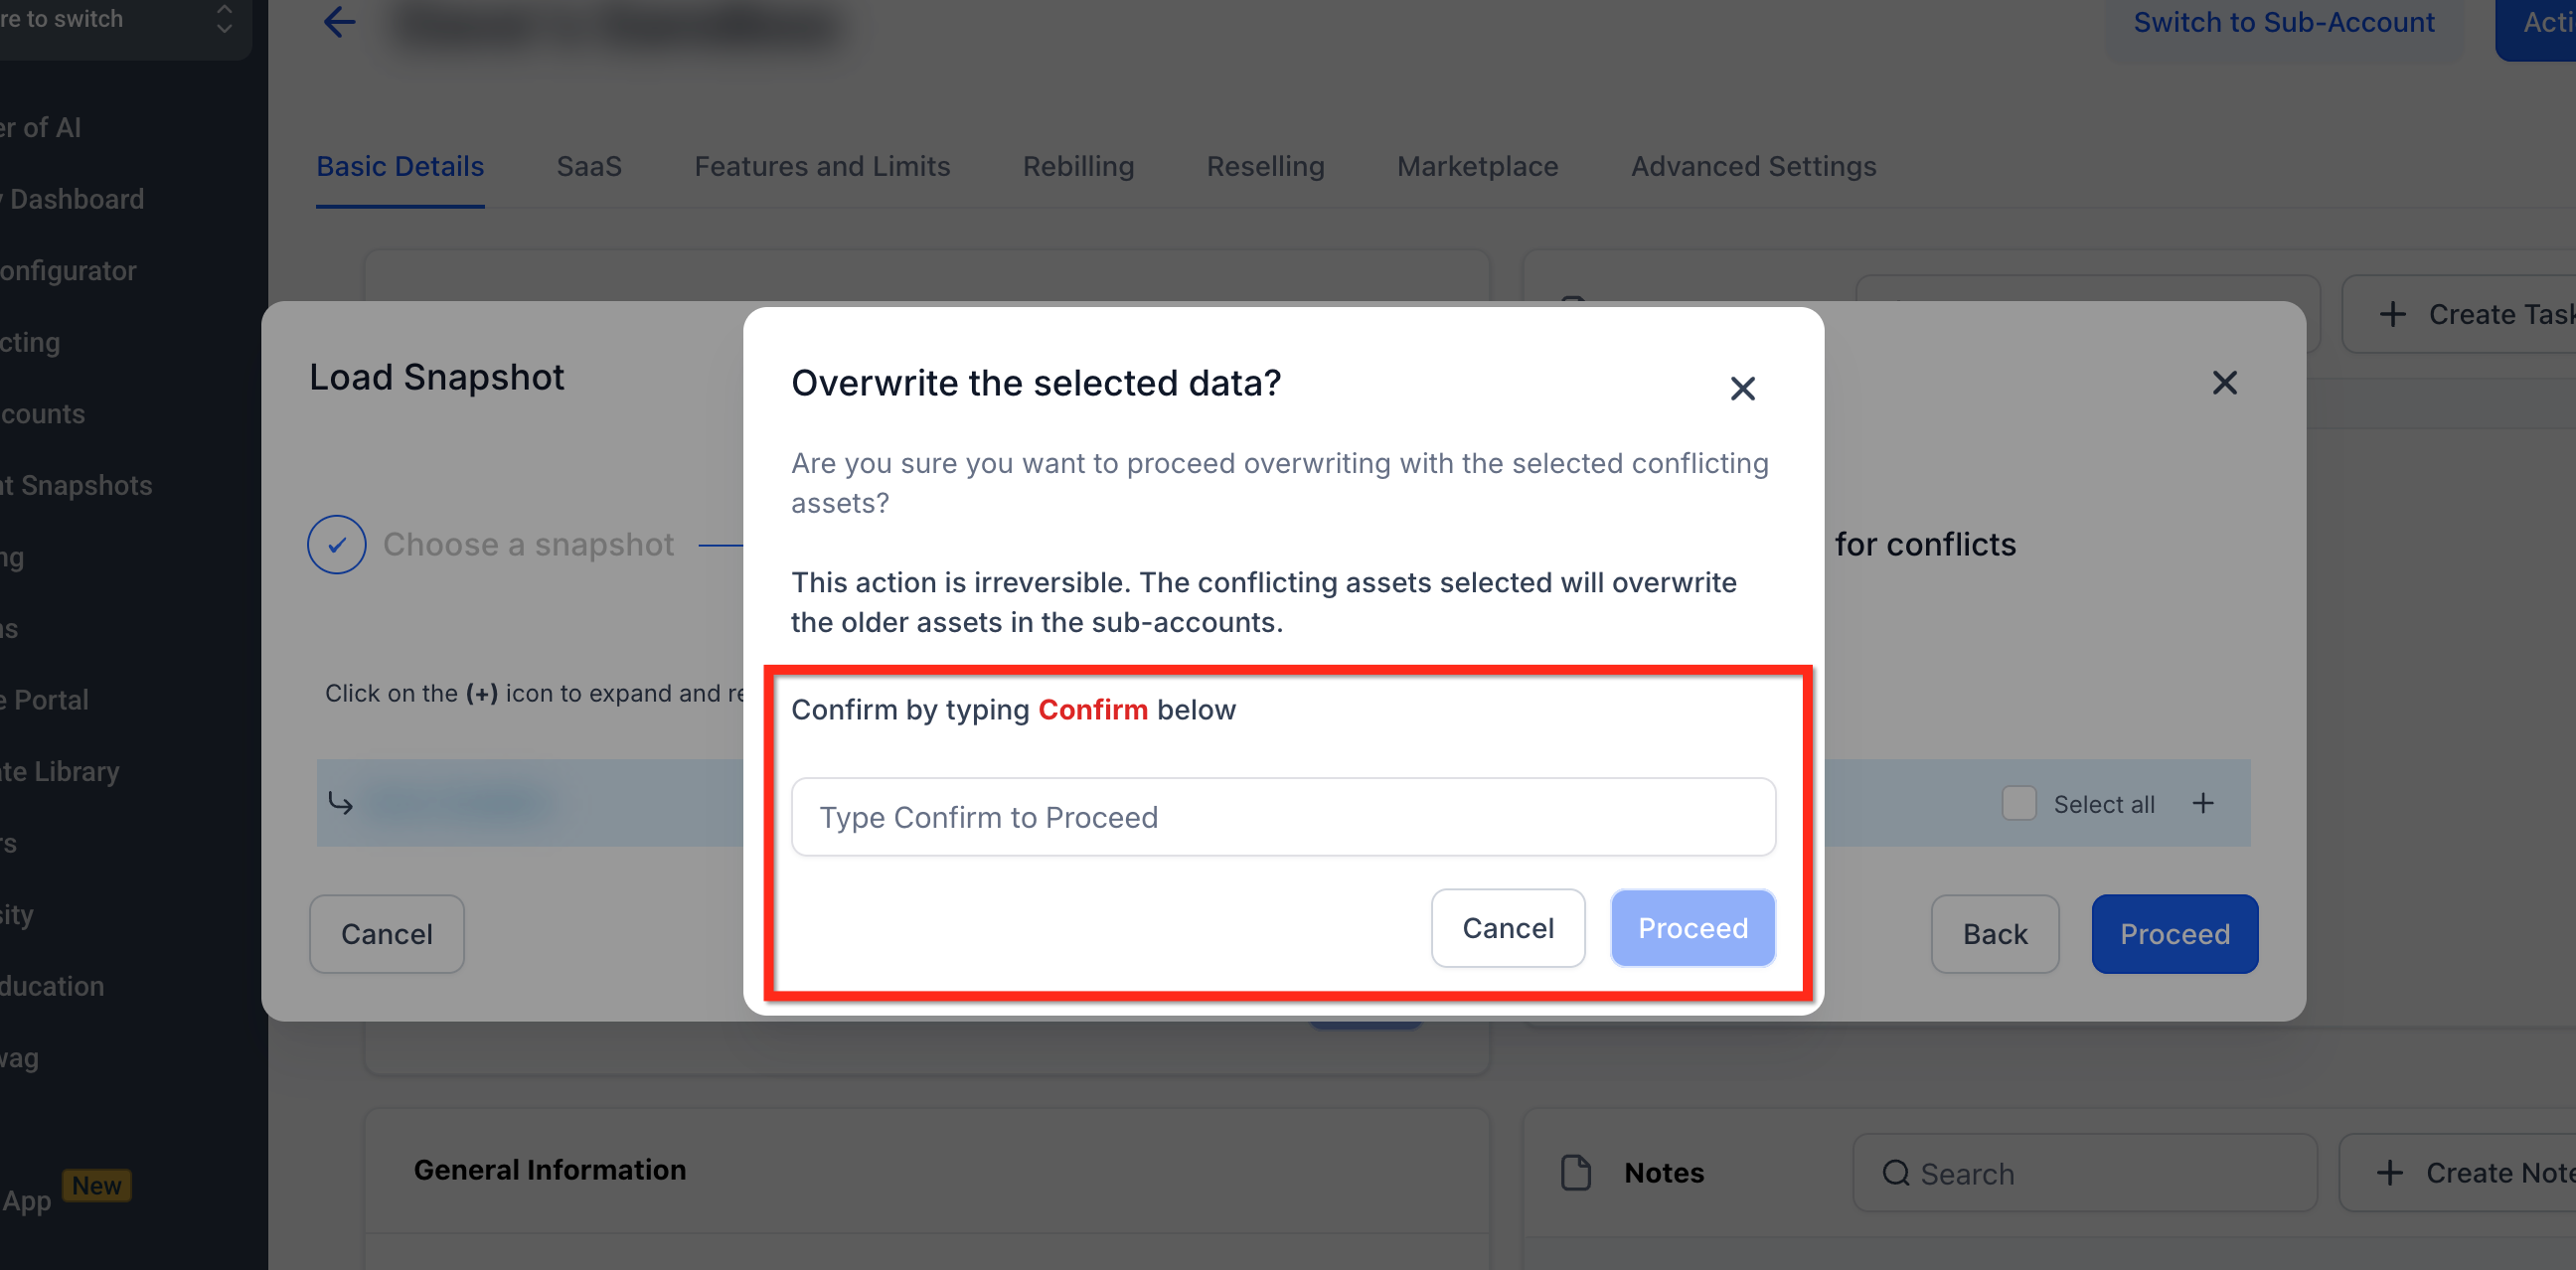
The final confirmation prevents the Snapshot from being loaded until you explicitly approve the selected changes.
- Enter confirm when prompted.
- Click Proceed.
- A success notification confirms that the Snapshot is being loaded. An email notification is sent once the information has been transferred.
Frequently Asked Questions
Was this article helpful?
That’s Great!
Thank you for your feedback
Sorry! We couldn't be helpful
Thank you for your feedback
Feedback sent
We appreciate your effort and will try to fix the article