Multi-Role Signing for Documents and Contracts Templates
Multi-role signing lets you define multiple signer roles (buyer, seller, witness, or custom roles) directly on your Documents and Contracts templates. When you send a document through a Workflow, HighLevel automatically populates and routes each role for signature.
This guide shows you how to configure signer roles on templates, assign fillable elements to each role, and send multi-party agreements through Workflows without manual re-entry.
What is Multi-Role Signing?
Multi-role signing allows you to define multiple signer roles on a single Documents and Contracts template. Each role represents a party to the agreement — buyer, seller, witness, or any custom role you define — and can be assigned specific fillable elements like signature boxes, date fields, and text inputs.
You can configure up to 6 signer roles per template. When you send a document through a Workflow, HighLevel automatically populates each role's details (name, email, phone number) and routes the document for signature in the order you define.
Before multi-role signing, templates supported only a single signer, requiring manual entry of additional parties for every multi-party agreement. Multi-role signing eliminates this repetitive work by letting you define roles once on the template and reuse them across all documents generated from that template.
Key Benefits of Multi Role Signing
Multi-role signing streamlines multi-party agreement workflows and reduces manual data entry errors.
How Multi-Role Signing Works
Multi-role signing separates role definition (on the template) from role assignment (in the Workflow). This separation lets you reuse templates across different agreements while maintaining flexibility per send.
You create signer roles (buyer, seller, witness, or custom names) on your template and assign fillable elements (signature boxes, date fields, text inputs) to each role. Each role can have static values or custom field placeholders that resolve when the document is sent.
Add the "Send Document" action in a Workflow and choose your multi-role template. HighLevel automatically detects all roles defined on the template and displays them in the Workflow action configuration.
Role values from the template auto-populate in the Workflow action. You can override any role's name, email, or phone number at the workflow level if the specific agreement requires different details. Workflow-level values always take precedence over template defaults.
When the Workflow sends the document, HighLevel routes it to each signer in the order you define. Each signer receives a unique signing link and completes their assigned fillable elements. The contact enrolled in the workflow becomes the primary recipient, and all other roles are populated based on the values set in the template or overridden in the Workflow action.
How to Set Up Multi-Role Signing
Follow these steps to configure multi-role signing on your Documents and Contracts template and send the document through a Workflow.
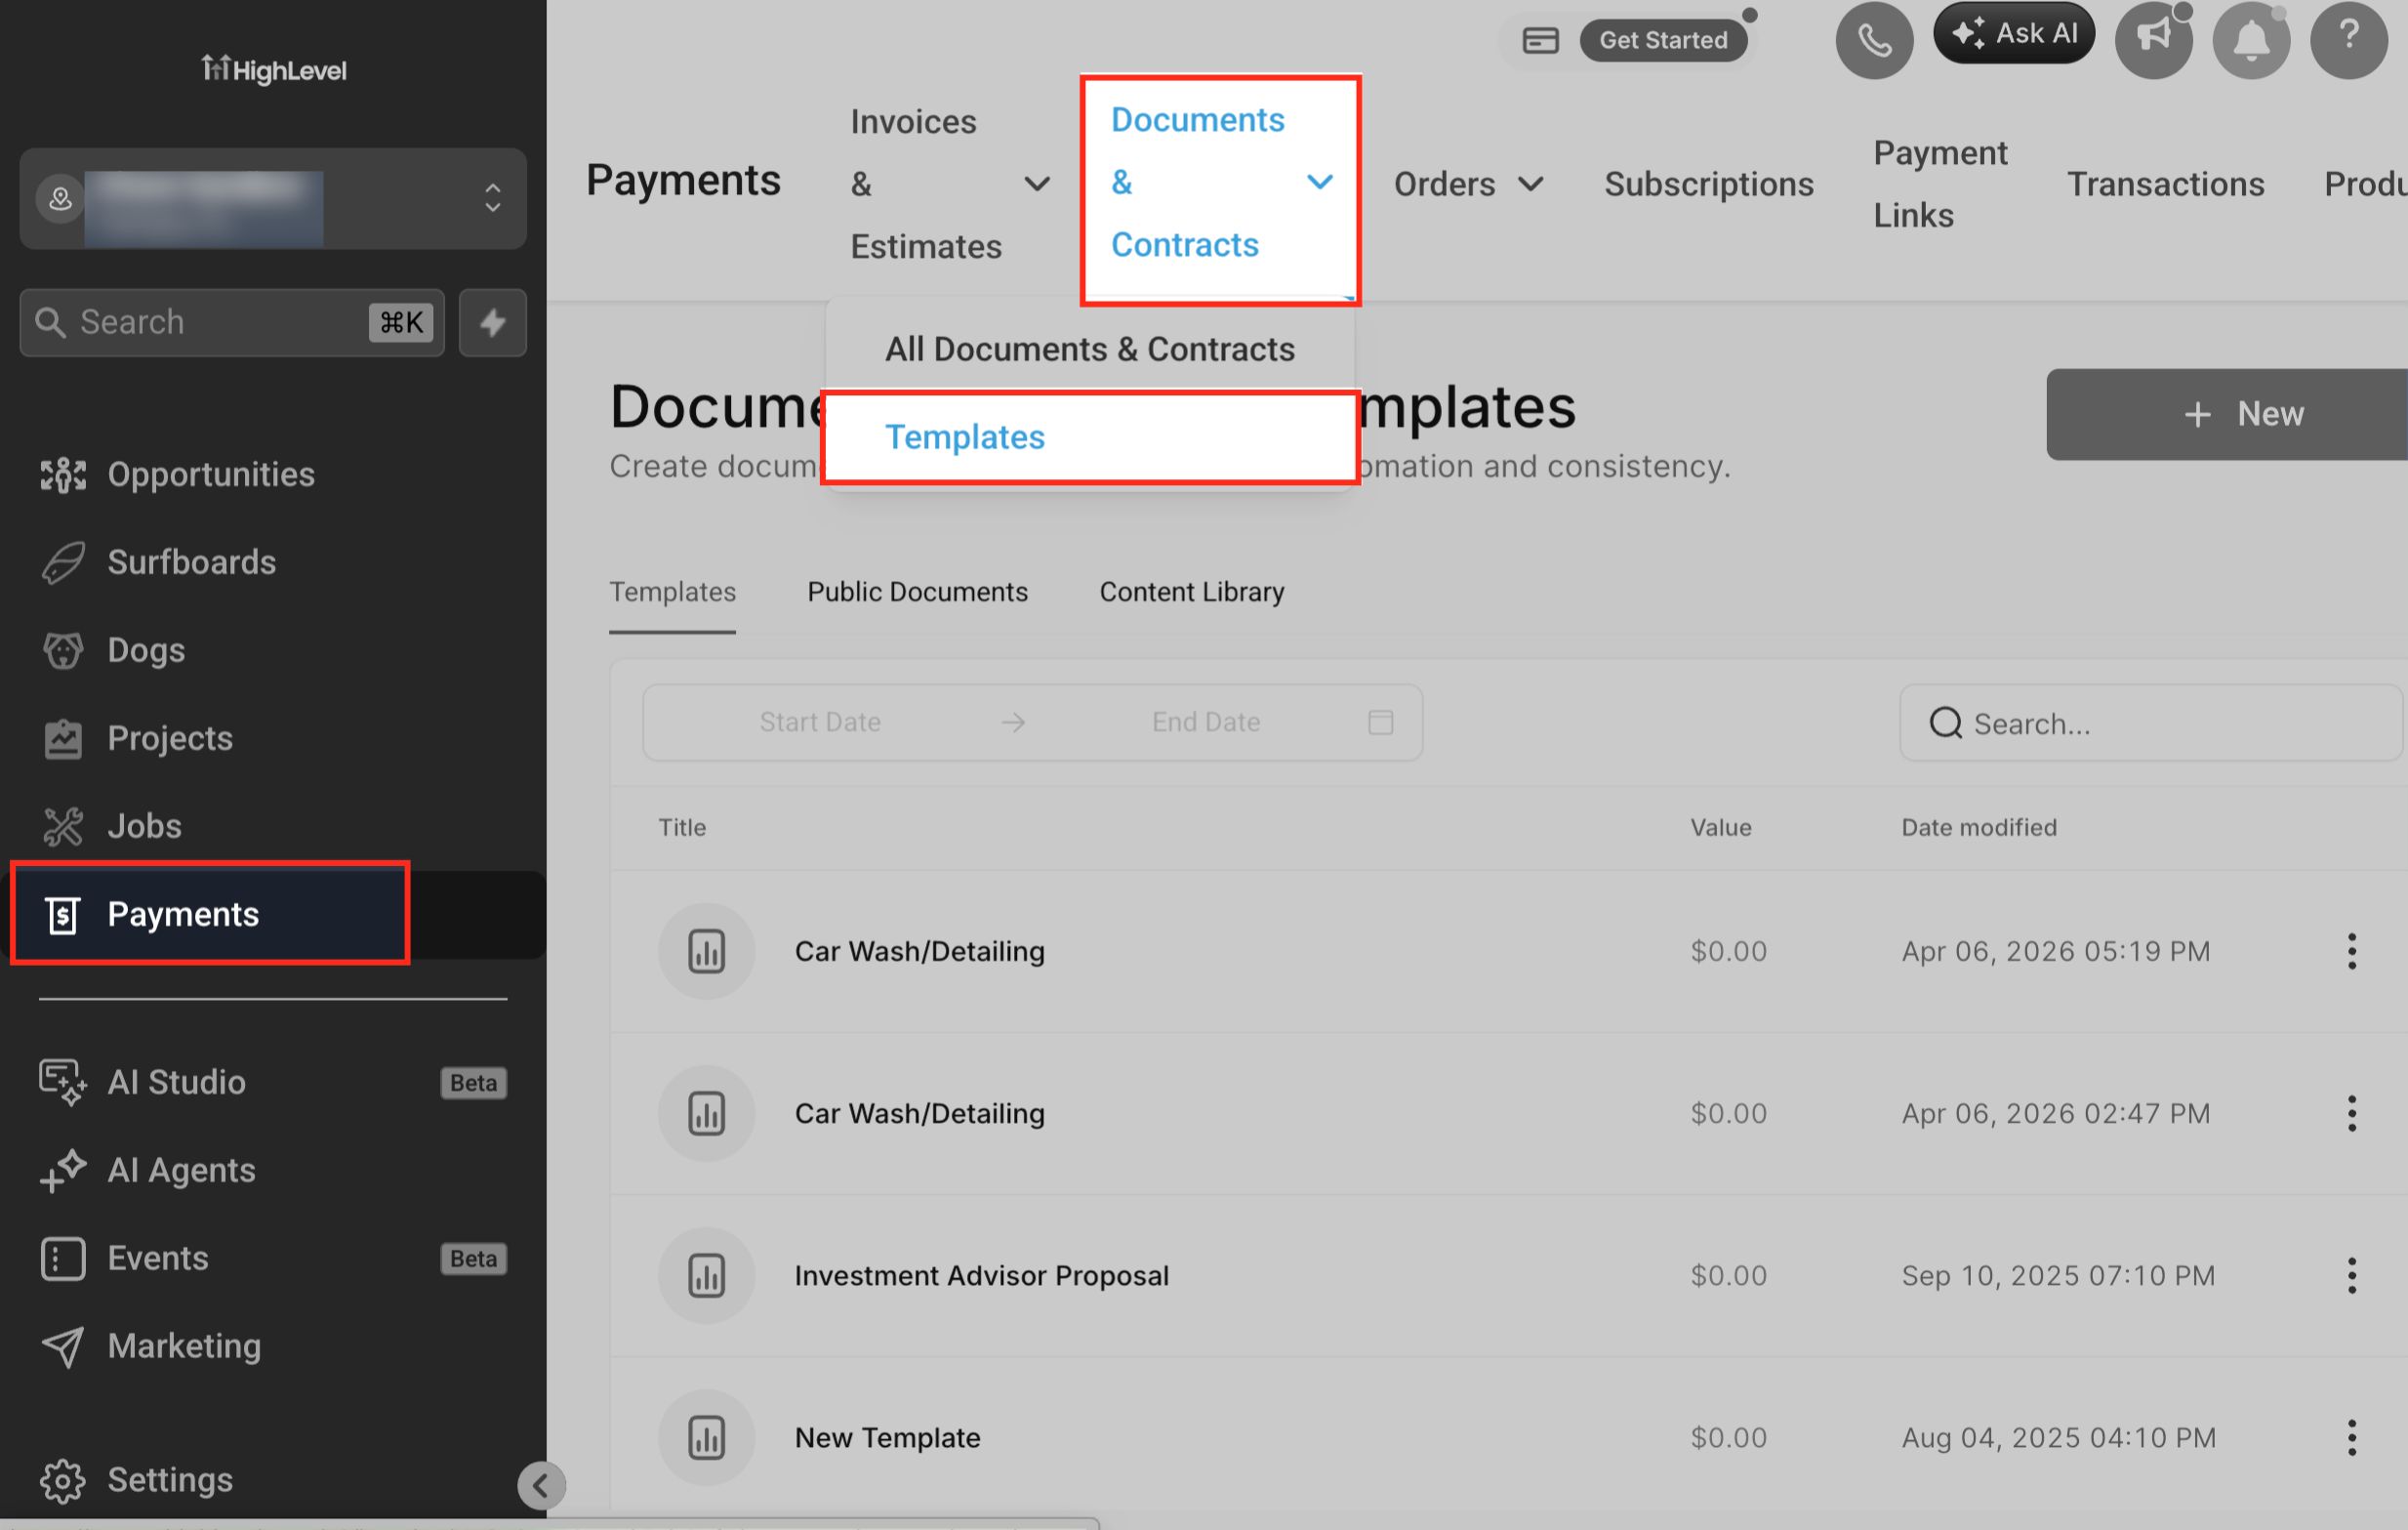
Go to Payments > Documents & Contracts > Templates. Open an existing template or create a new one.
The template is where you define which roles exist and what information each role needs to provide. This setup determines how your document will be routed when sent through Workflows.
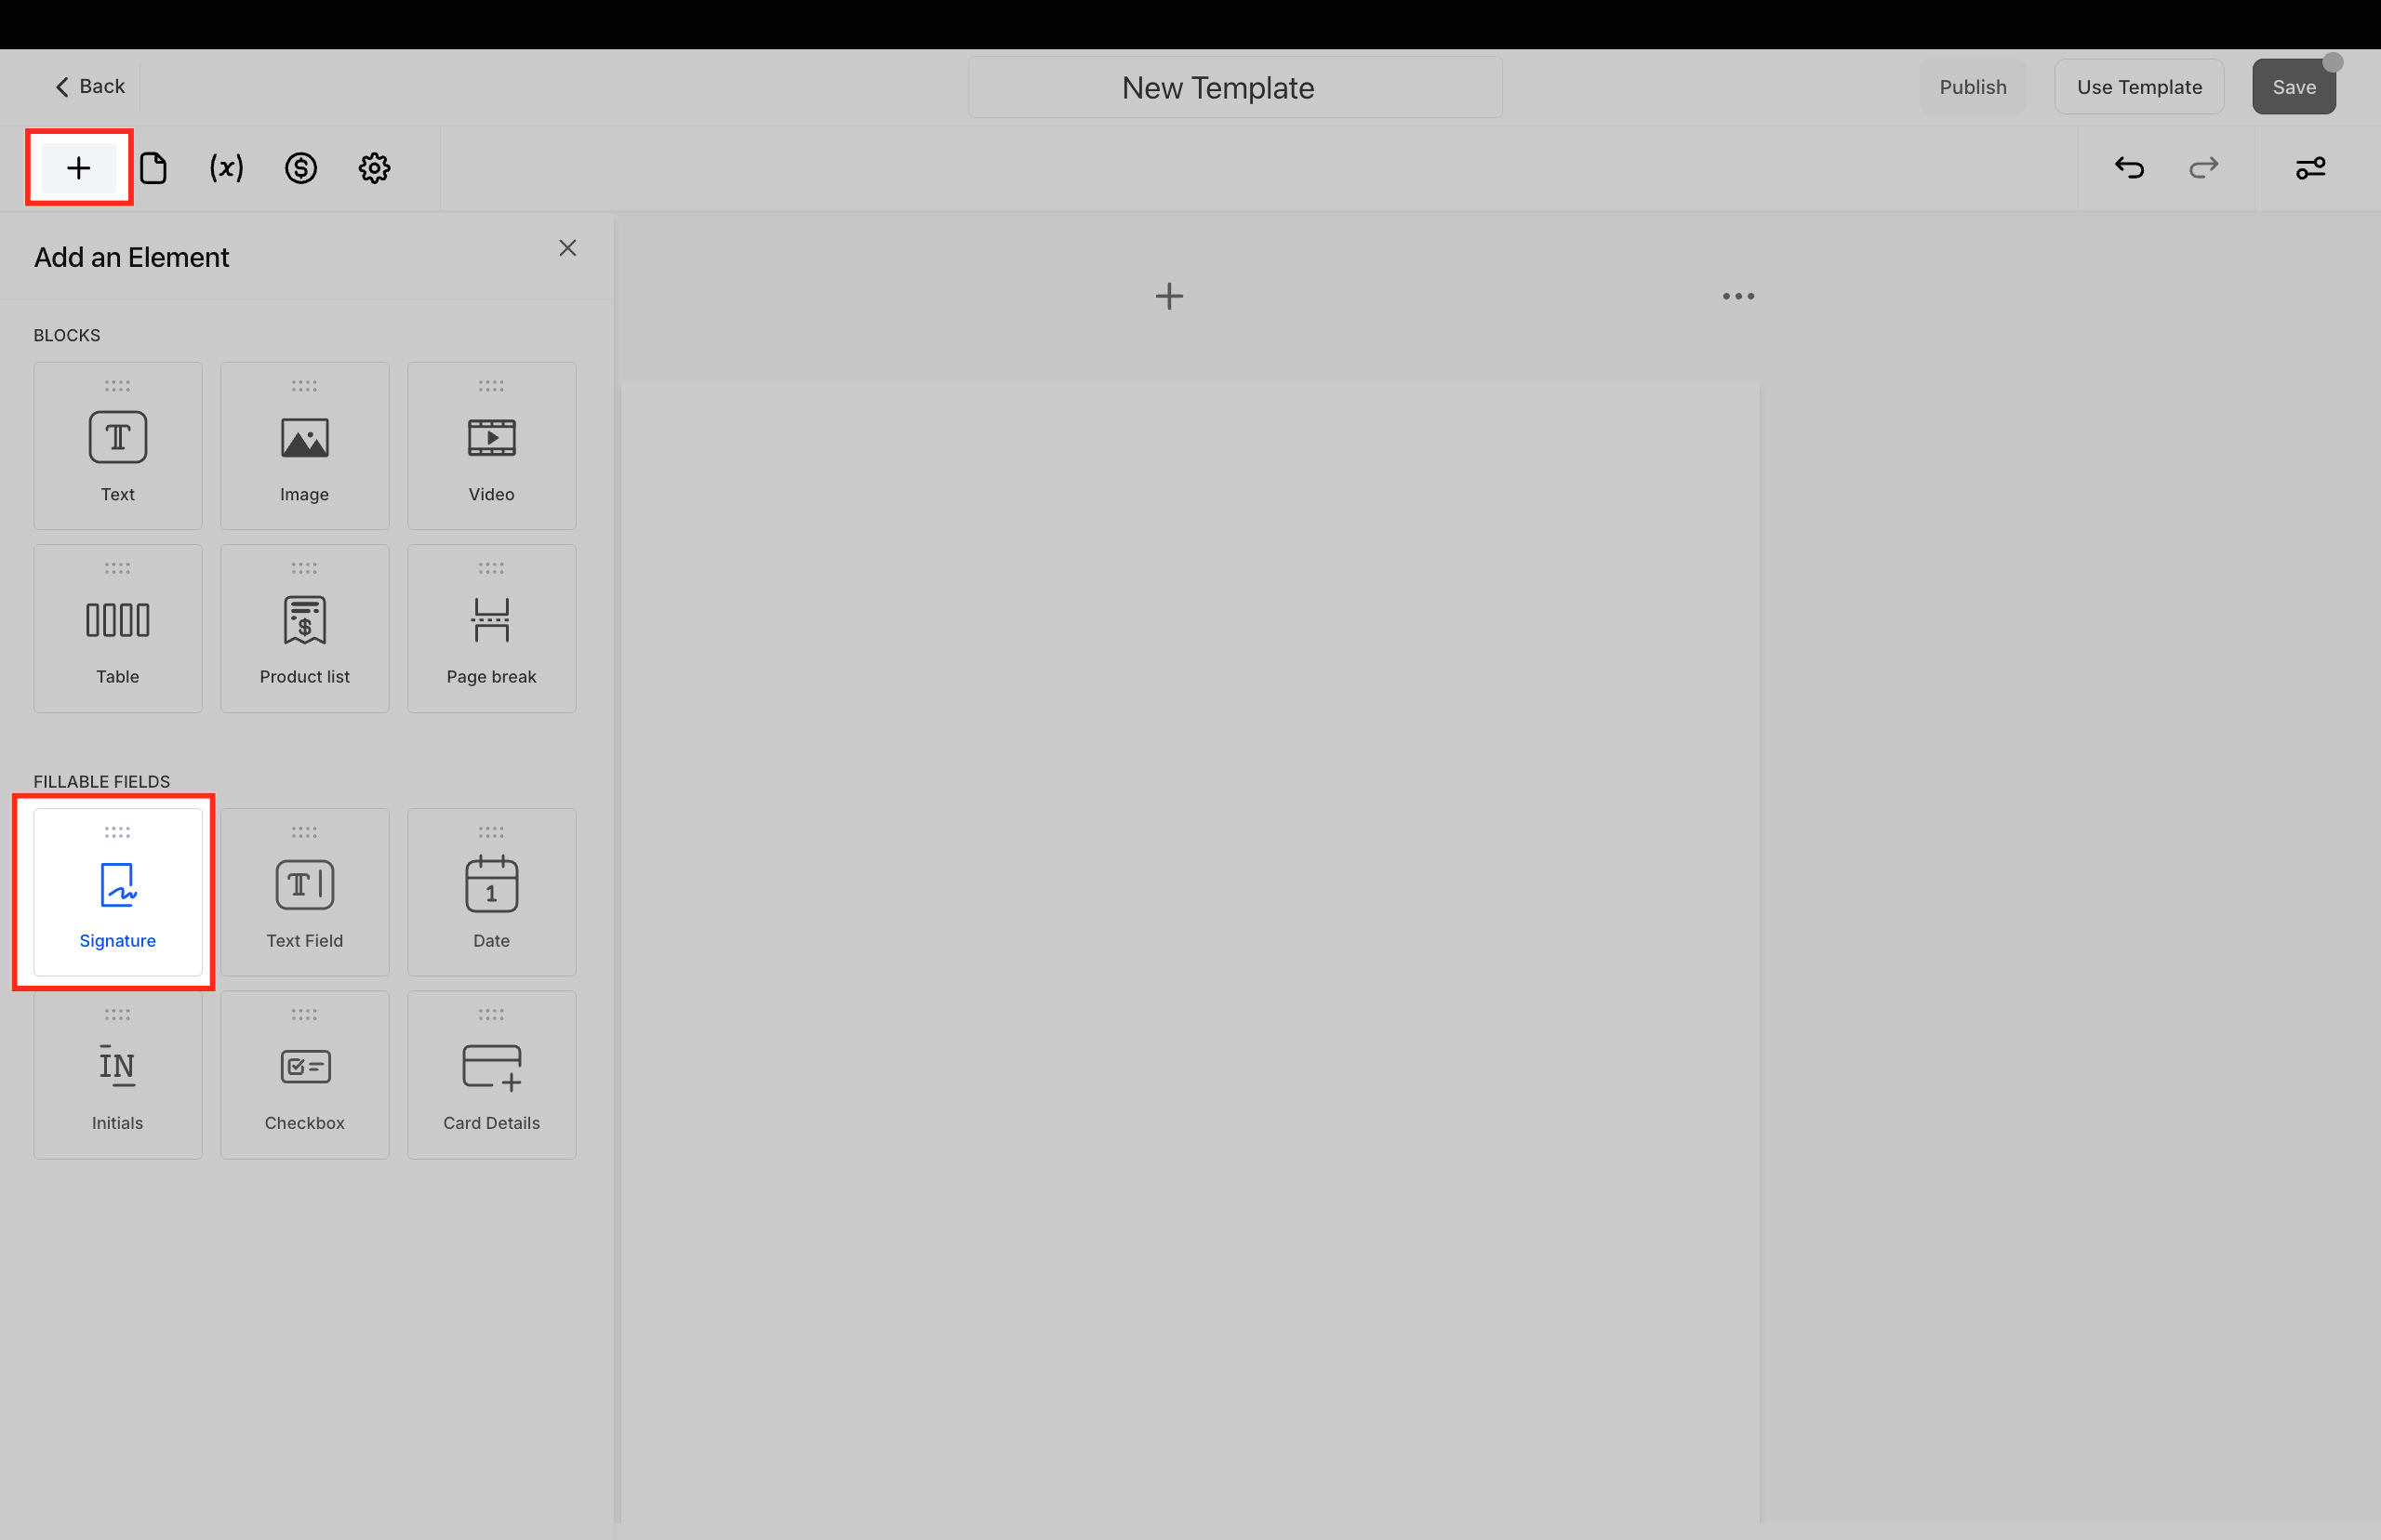
In the template editor, add a fillable element — signature box, date field, text input, or any other supported field type. Click on the fillable element you just added.
Every role must have at least one fillable element assigned to it. Fillable elements define what each signer will complete when they receive the document.
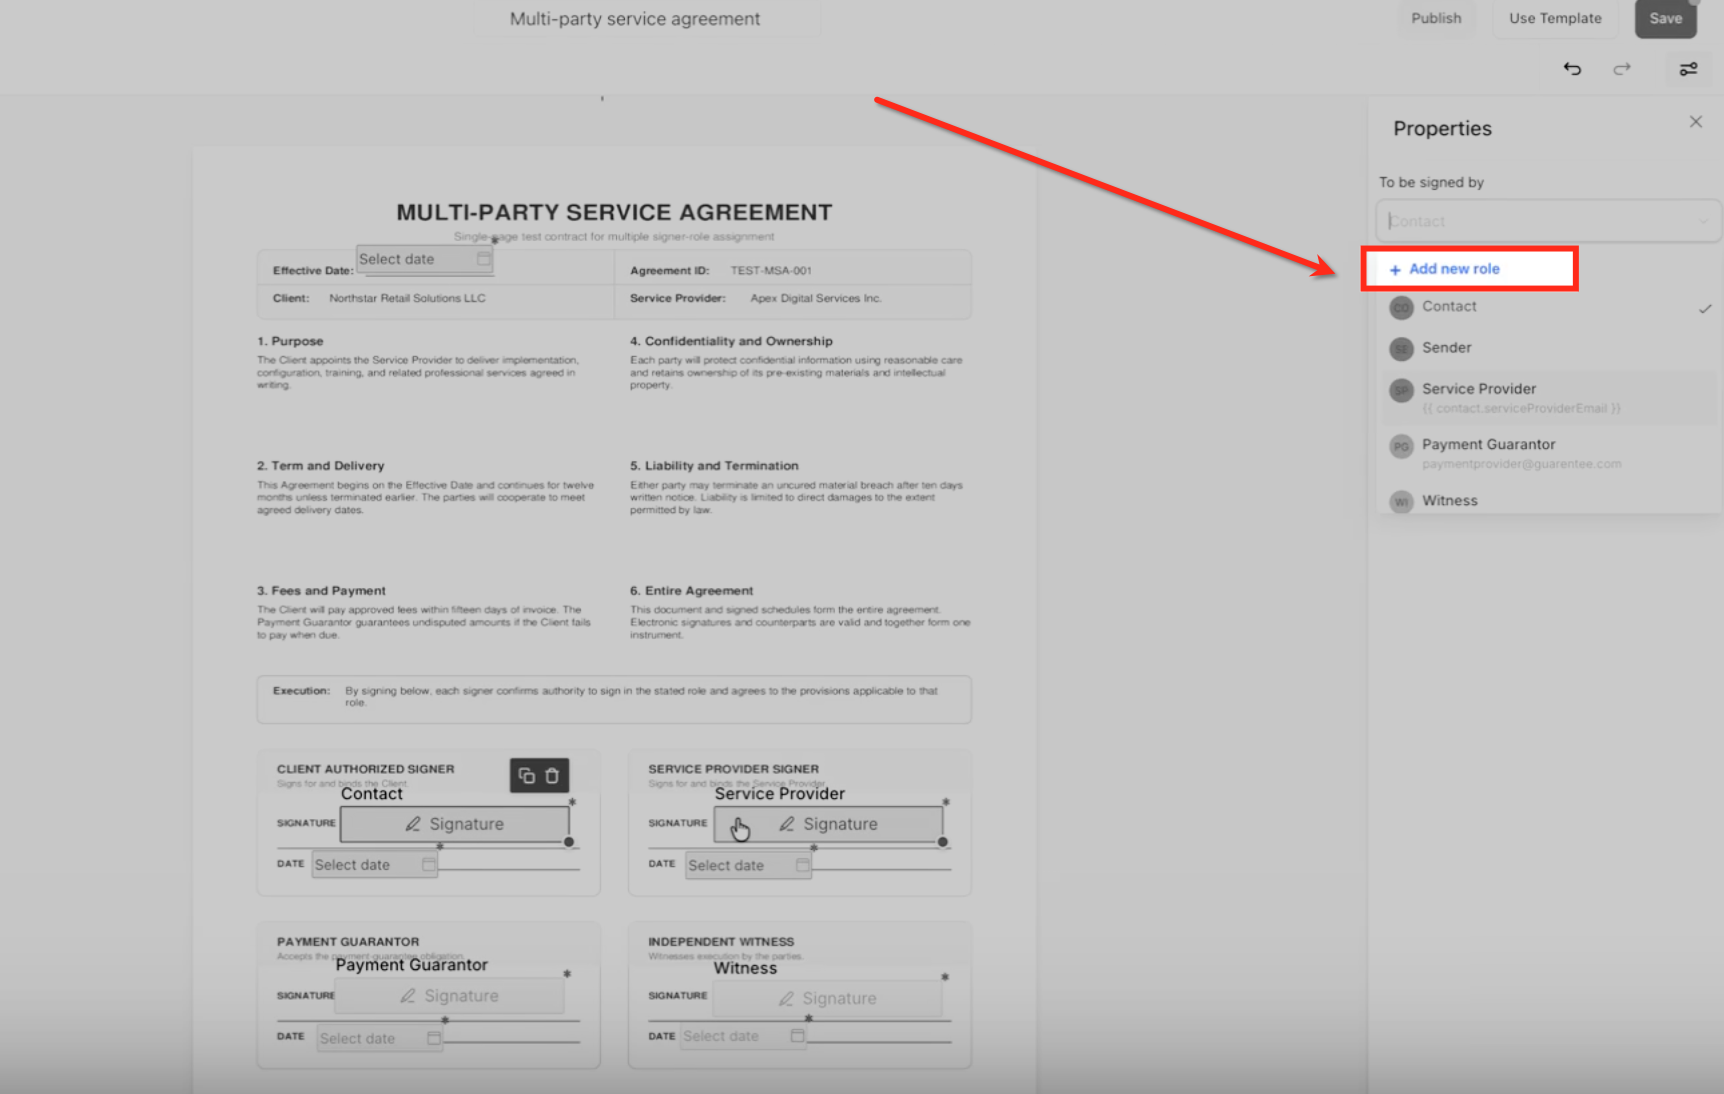
With a signature element selected, click the Add Role option. This opens the role creation form.
The Add Role form is where you define who this signer is (buyer, seller, witness, or a custom role name) and how HighLevel should populate their contact information.
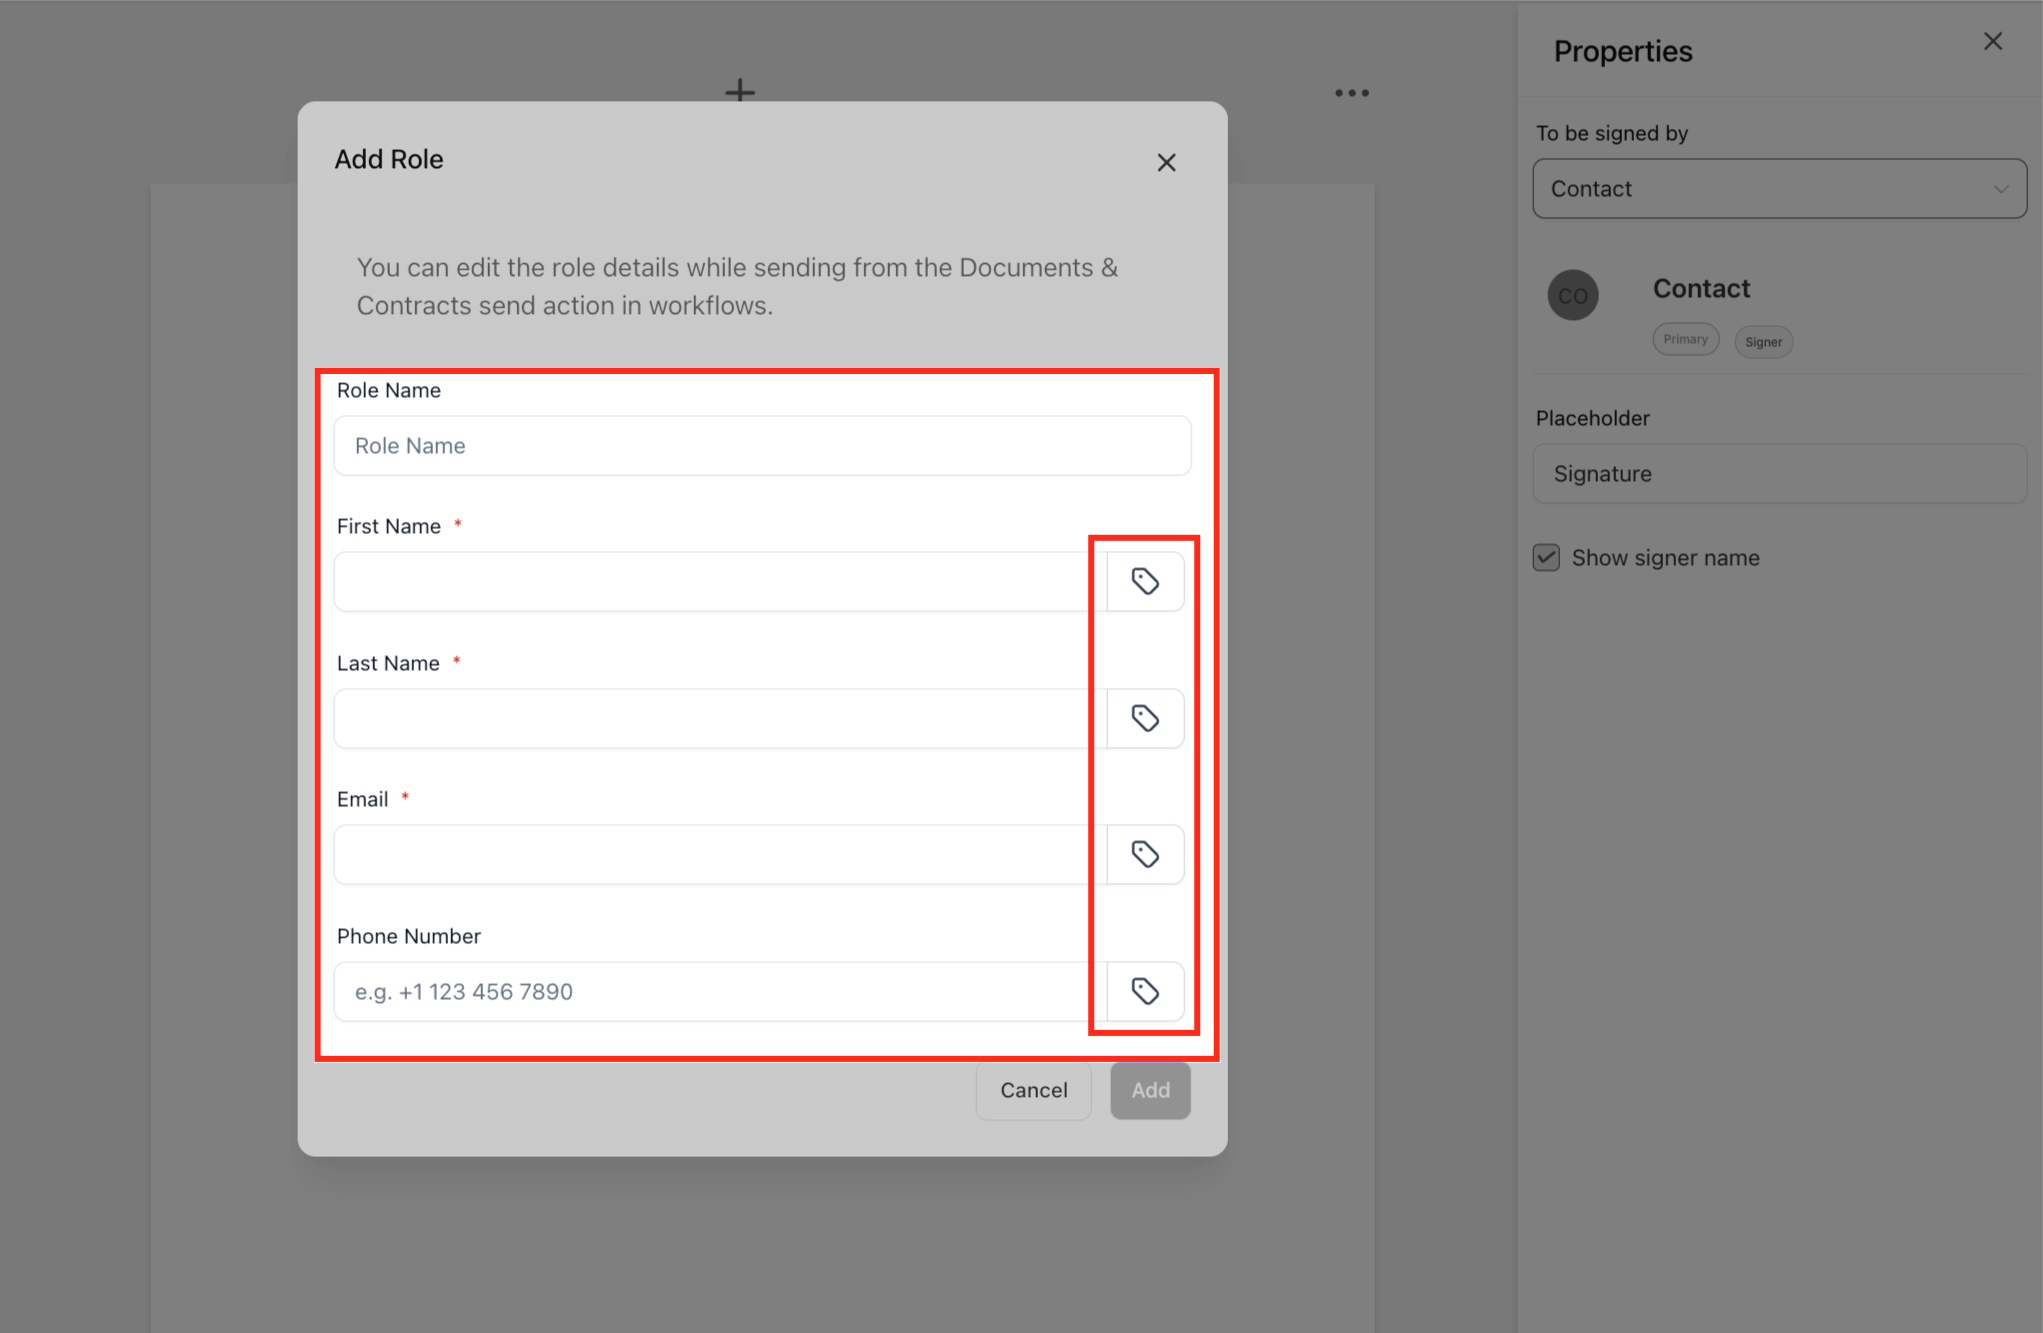
In the role creation form, enter a descriptive Role Name (e.g., "Witness," "Buyer," "Co-Signer"). This name will appear above the signature field when the signer receives the document.
For each role, you can set the Name, Email, and Phone Number fields in two ways:
- Static Value: Enter a fixed value directly (e.g., "John Smith" or "john@example.com"). Use this when the role's information is always the same.
- Custom Field Placeholder: Select a custom field from your contact records (e.g., {{contact.witness_name}} or {{contact.buyer_email}}). Use this when the role's information varies per contact and you want HighLevel to auto-populate it when the document is sent.
Custom field placeholders let one template serve many different agreements. When a Workflow sends the document, HighLevel resolves the placeholders from the enrolled contact's record, automatically filling in the correct signer details without manual entry.
At least one fillable element must be assigned to the "Contact" role. The Contact role represents the primary recipient — the contact who enrolls in the Workflow and triggers the document send. Without a Contact role assignment, the "Send Document" Workflow action will not function properly.
After creating a role, the signature you clicked is automatically assigned to that role. To assign more signatures to the same role (or to different roles), click add signature element in the template and select the role from the dropdown.
Each role can have multiple signature elements. For example, a "Buyer" role might need to sign, initial, and enter a date. Assigning all relevant fields to the correct role ensures each signer sees only the fields they need to complete.
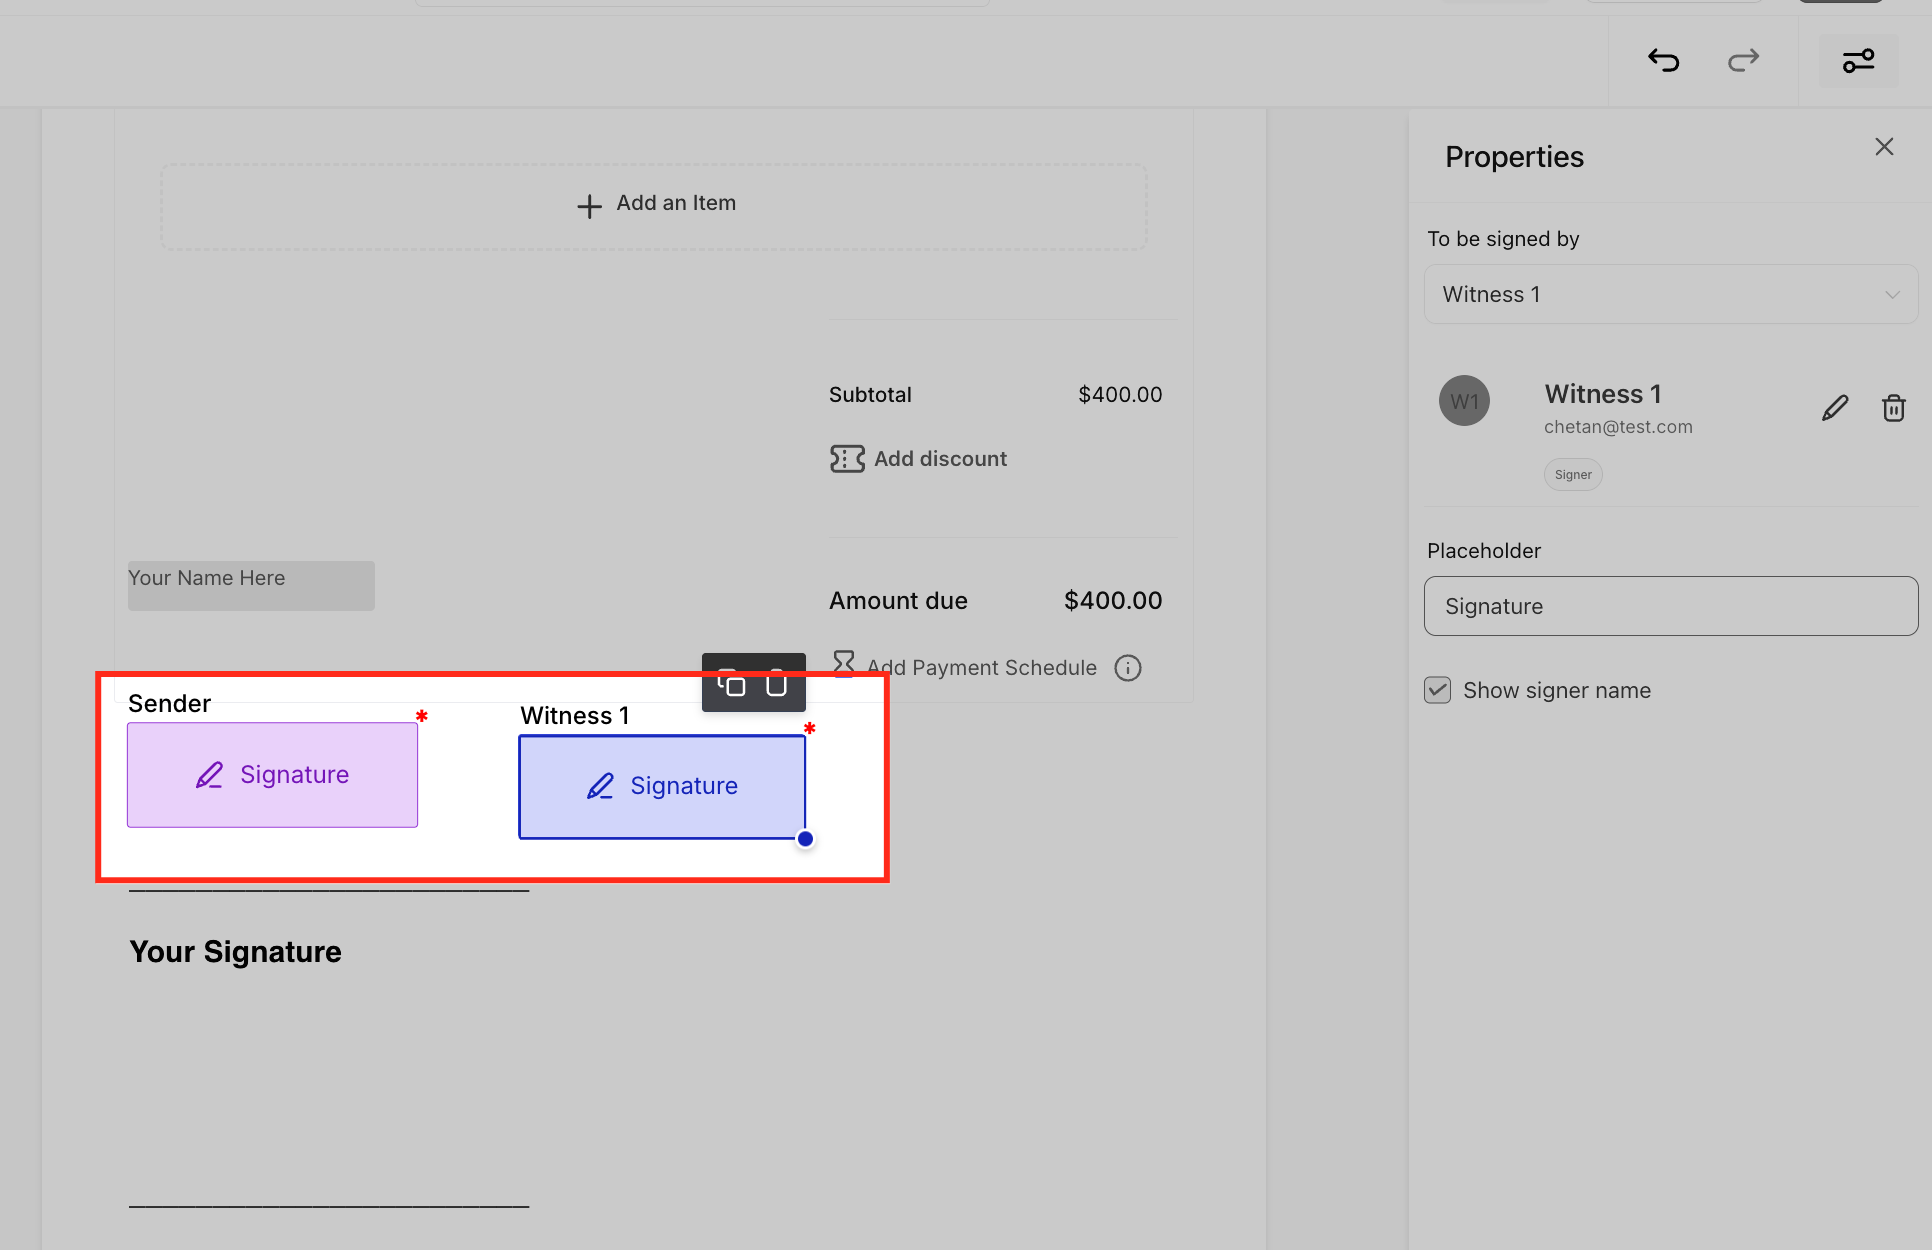
Once you've added all roles and assigned fillable elements, click Save. Your template is now configured for multi-role signing and ready to use in Workflows.
Saving locks in your role configuration. Any Workflow that uses this template will automatically detect and display all roles you've defined.
Navigate to Automation > Workflows. Create a new Workflow or edit an existing one. Add the Send Document action and select your multi-role template from the template dropdown.
The Workflow is where your template comes to life. When a contact enrolls in this Workflow, HighLevel generates the document with all roles populated and routes it for signature.
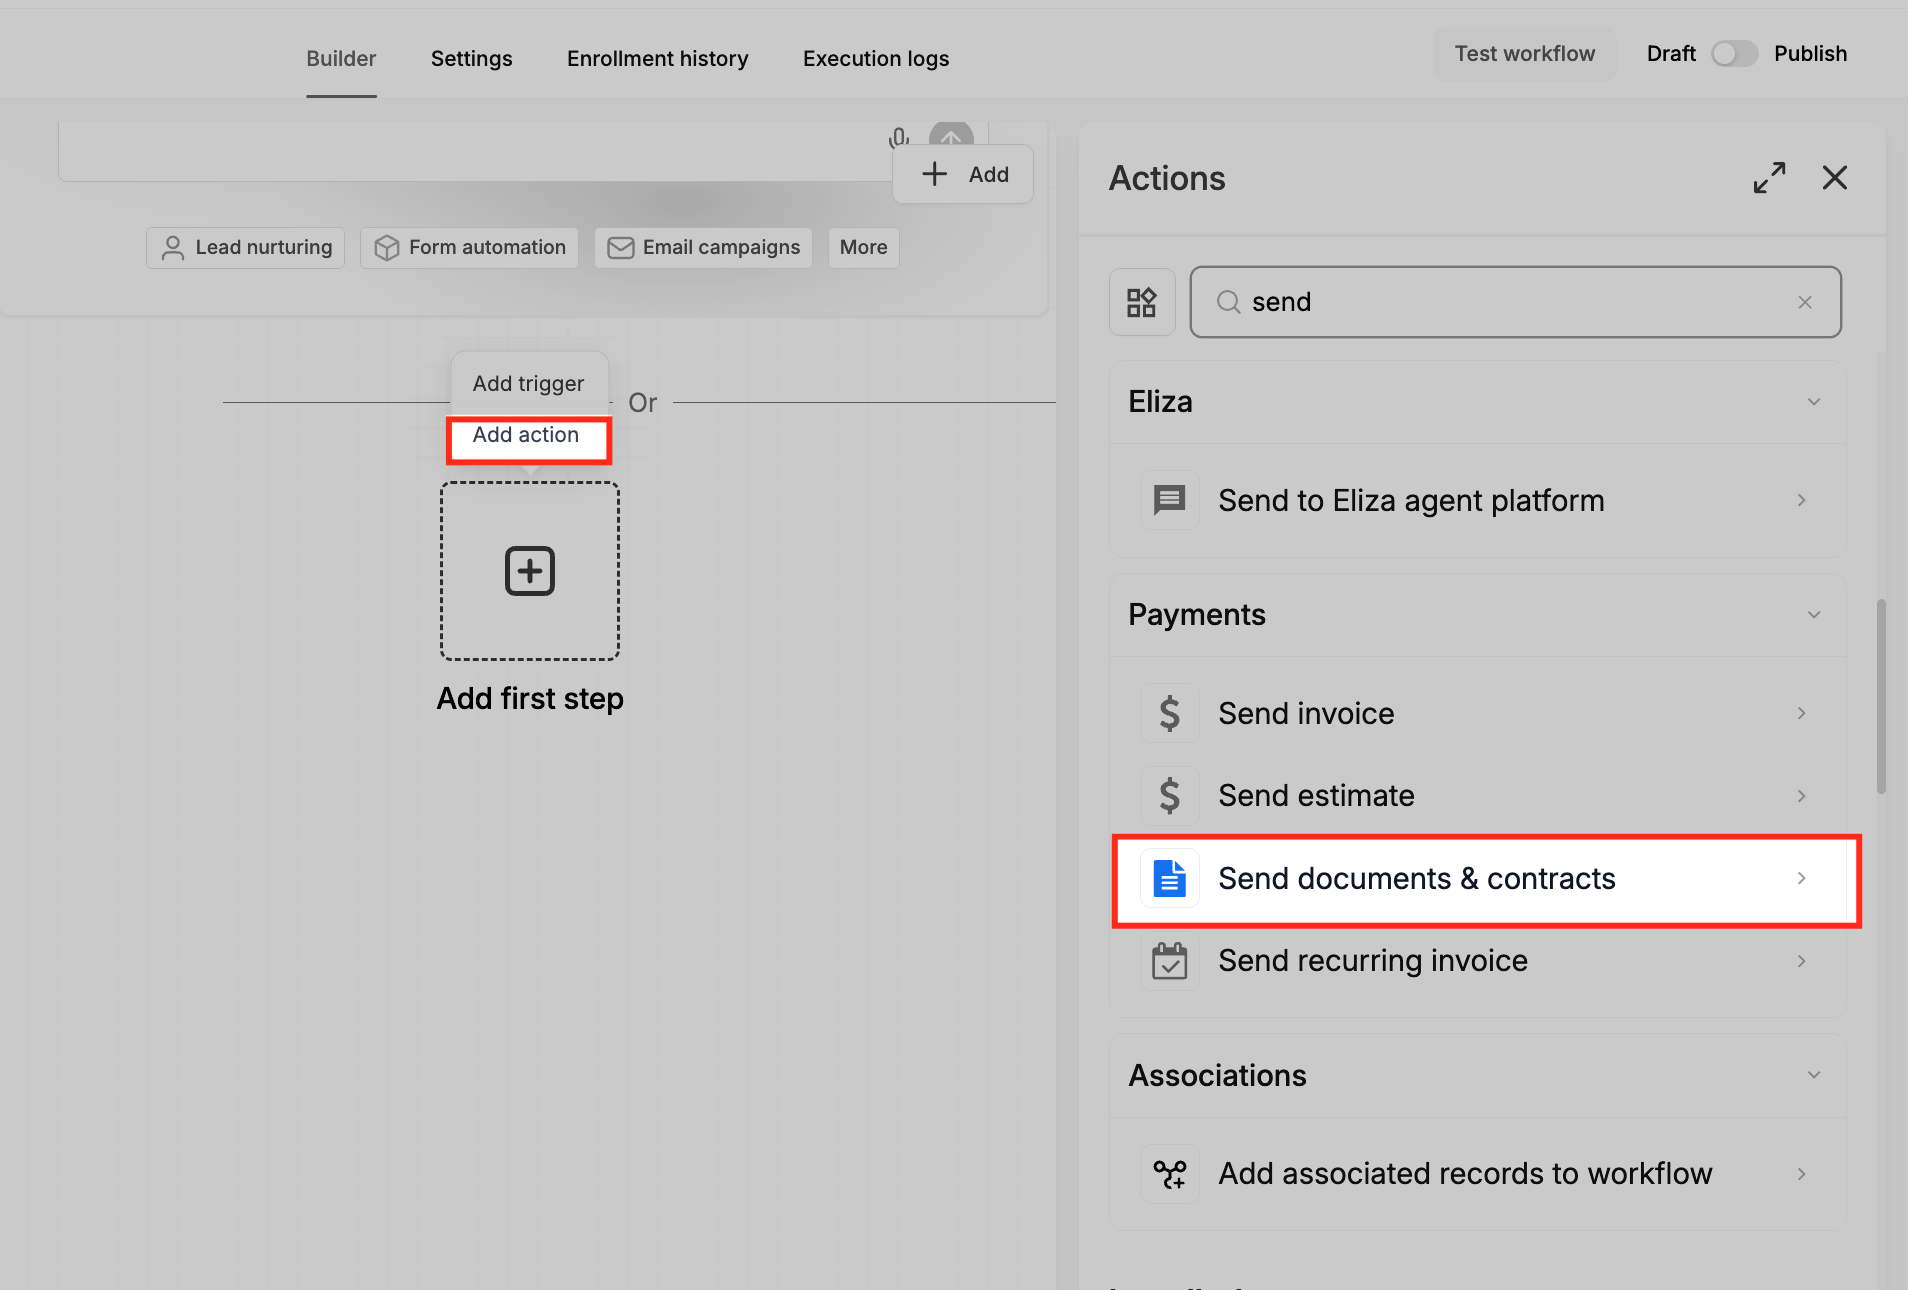
Once you select a multi-role template, HighLevel displays the Assign Roles section in the Workflow action configuration. This section shows all roles that have at least one fillable element assigned in the template.
Review the auto-populated role details. If you used custom field placeholders on the template, those placeholders will be visible here and will resolve when the Workflow runs. If you used static values, those values will be shown.
The Assign Roles section gives you one last chance to verify that each role is correctly configured before the document is sent. You can also override any role's details at this step (see Step 9).
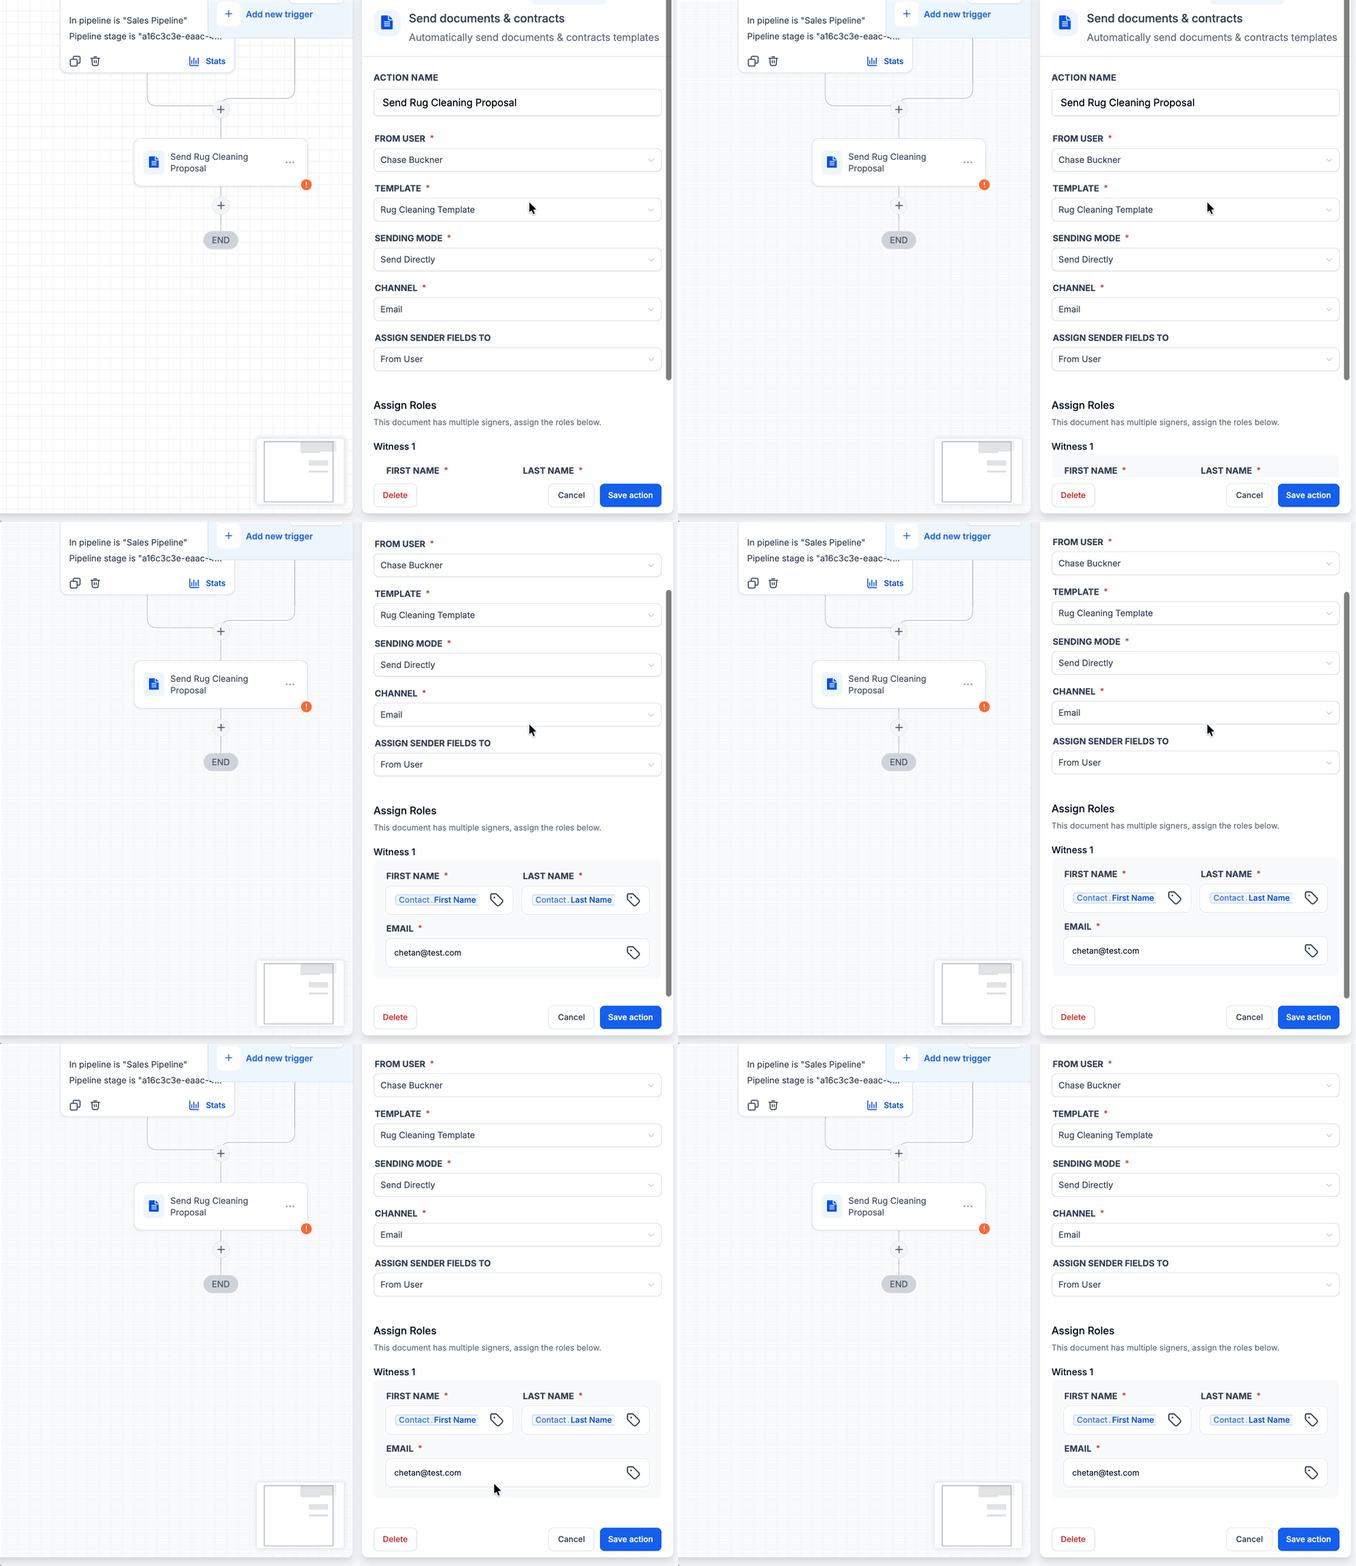
If a specific agreement requires different details for any role, click Edit next to that role in the Assign Roles section. You can manually enter a new name, email, or phone number. Workflow-level values always take precedence over template defaults.
Overrides let you customize per-send without duplicating templates. For example, if your template uses a custom field placeholder for a "Witness" role, but one specific deal requires a different witness, you can enter that witness's details here and HighLevel will use them for this send only.
Click Save on the Send Document action, then click Publish on the Workflow. When a contact enrolls in this Workflow, HighLevel generates the document, populates all role values (from the template or your Workflow overrides), and sends the document to each signer.
The contact who enrolled in the Workflow becomes the primary recipient (assigned to the "Contact" role). All other roles are populated based on the values you set in the template or overridden in the Workflow. Each signer receives a unique signing link via email (if email notifications are enabled in the Workflow action) and can complete their assigned fillable elements.
Publishing activates the Workflow. From this point forward, every contact who triggers this Workflow will receive a fully populated, multi-role document without any manual intervention.
Overriding Role Details in Workflows
Workflow-level overrides let you customize signer details for individual document sends without editing the template. This flexibility means one template can serve many different agreements.
When you select a multi-role template in the "Send Document" Workflow action, HighLevel displays all role details from the template in the Assign Roles section. You can click Edit next to any role and change that role's name, email, or phone number directly in the Workflow action configuration. Values you enter at the workflow level always take precedence over the template defaults.
For example, you might have a template with a "Buyer" role set to a custom field placeholder like {{contact.buyer_name}}. For most sends, the Workflow resolves the placeholder from the contact record. But if you need to send to a different buyer for a specific deal, you can manually enter that buyer's details in the Workflow action, and HighLevel will use those values instead of the template default for that send only.
Use template-level custom field placeholders for roles that rarely change (e.g., your agency's name as a "Seller" role), and override at the workflow level for roles that vary per deal (e.g., different buyers, co-signers, or witnesses). This approach minimizes template duplication while maximizing flexibility.
Frequently Asked Questions
Was this article helpful?
That’s Great!
Thank you for your feedback
Sorry! We couldn't be helpful
Thank you for your feedback
Feedback sent
We appreciate your effort and will try to fix the article