Send Email Action in Company & Custom Object Workflows
This article explains how to use the Send Email action in Company and Custom Object workflows, allowing you to automate email communications to associated contacts based on company or custom object events.
You'll learn how to configure the Send Email action, select recipients using association labels, and manage email delivery for your automated communications.
Send Email Action in Company & Custom Object Workflows is a Labs feature. Enable it in Settings > Labs before use. Labs features are in active development and may receive updates based on user feedback.
What Is the Send Email Action?
The Send Email action enables you to send automated emails directly from Company and Custom Object workflows in HighLevel. Previously, email actions were only available in Contact workflows, requiring you to create separate workflows or complex conversion steps to email contacts associated with companies or custom objects.
With this enhancement, you can automate email communication based on Company or Custom Object events without creating additional Contact workflows. When you add the Send Email action to a Company or Custom Object workflow, you select which associated contacts should receive the email using association labels and recipient selection options.
The system uses the relationships defined between your companies or custom objects and their associated contacts to deliver messages automatically when workflow triggers activate, streamlining your automation processes for non-contact record types.
Popular Use Cases
Use the Send Email action to automate communications for various business scenarios:
How to Set Up the Send Email Action
Follow these steps to configure the Send Email action in your Company or Custom Object workflows:
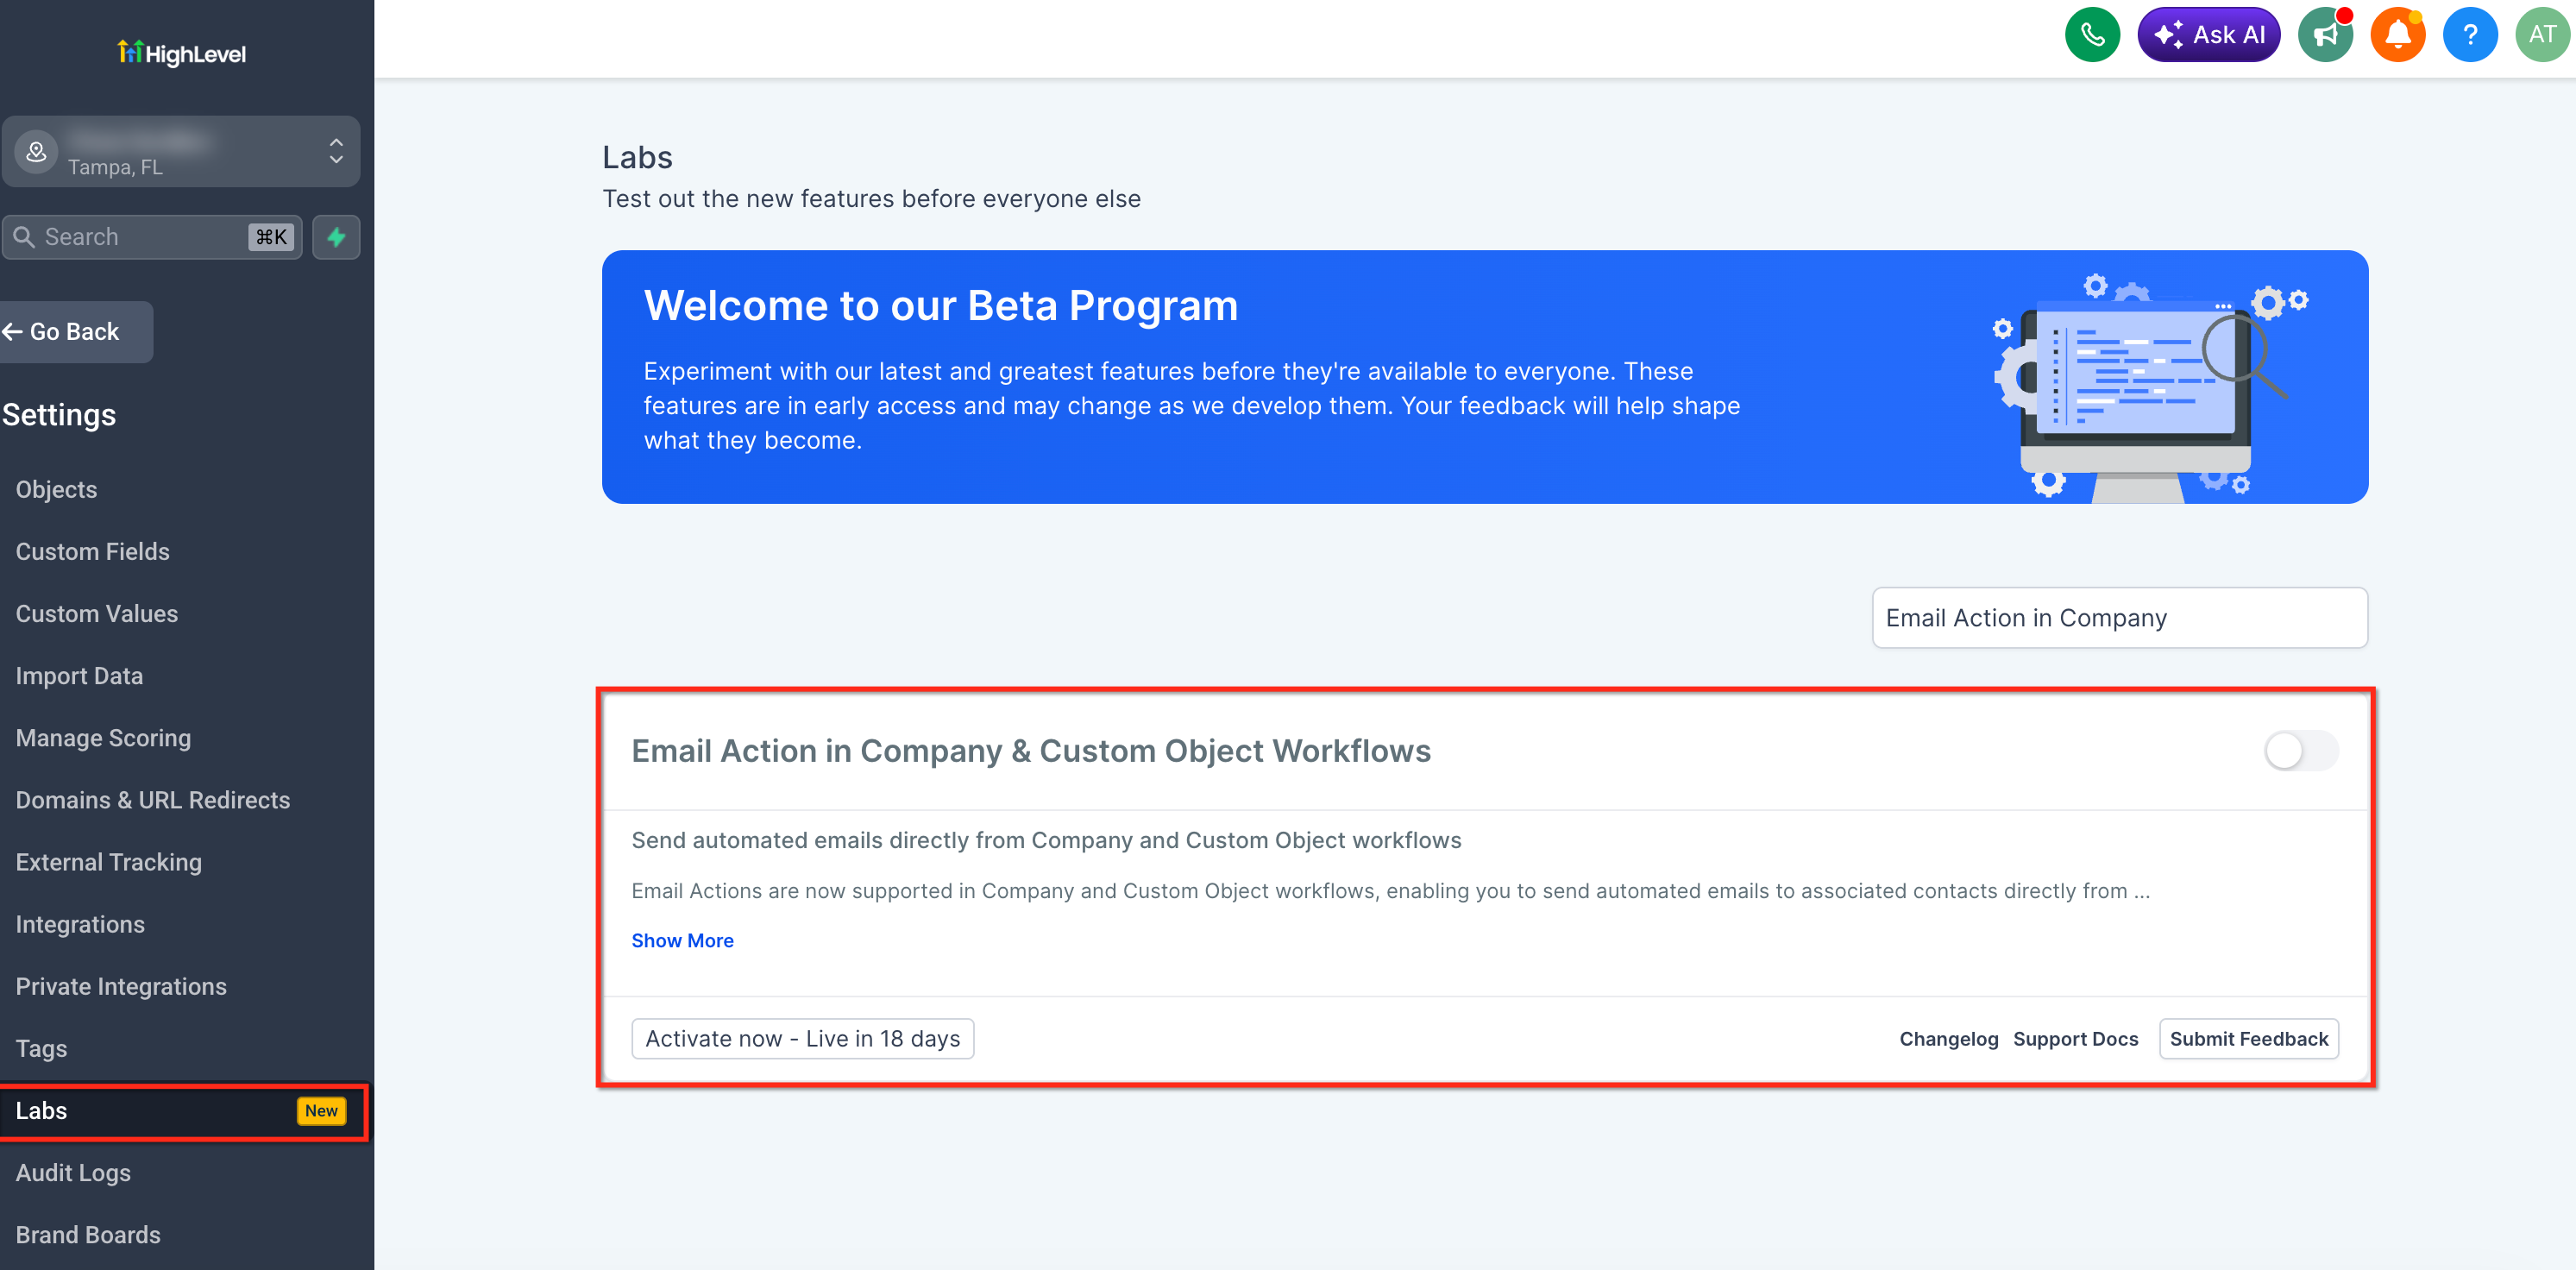
Navigate to Settings > Labs in your HighLevel account. Locate "Email Action in Company & Custom Object Workflows" and enable the feature.
Create or open an existing Company or Custom Object workflow in the Automation section of your account.
Click the + Add button in your workflow. In the Actions panel, locate the Communication section and select "Send email" from the available actions. You can also use the search bar to find it quickly by typing "Send email".
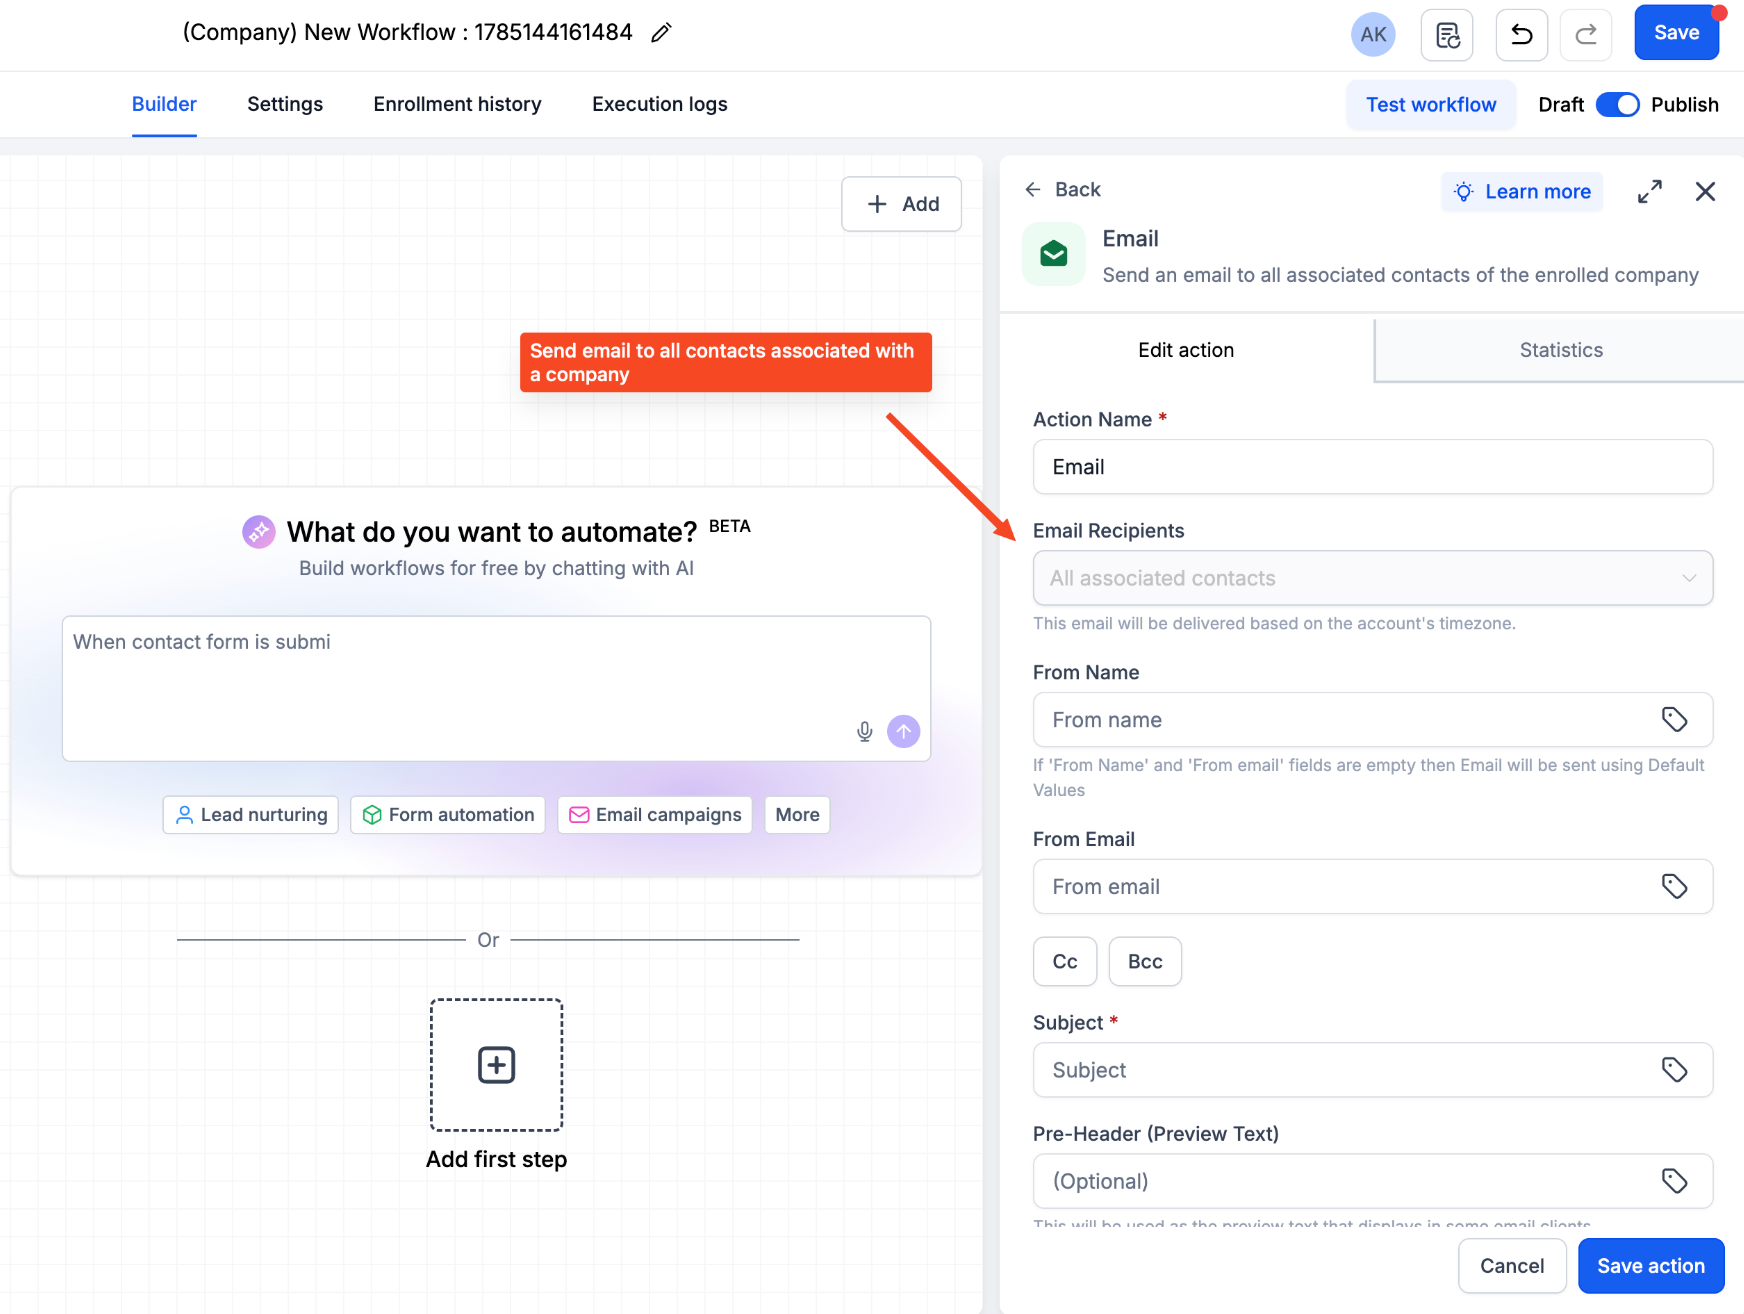
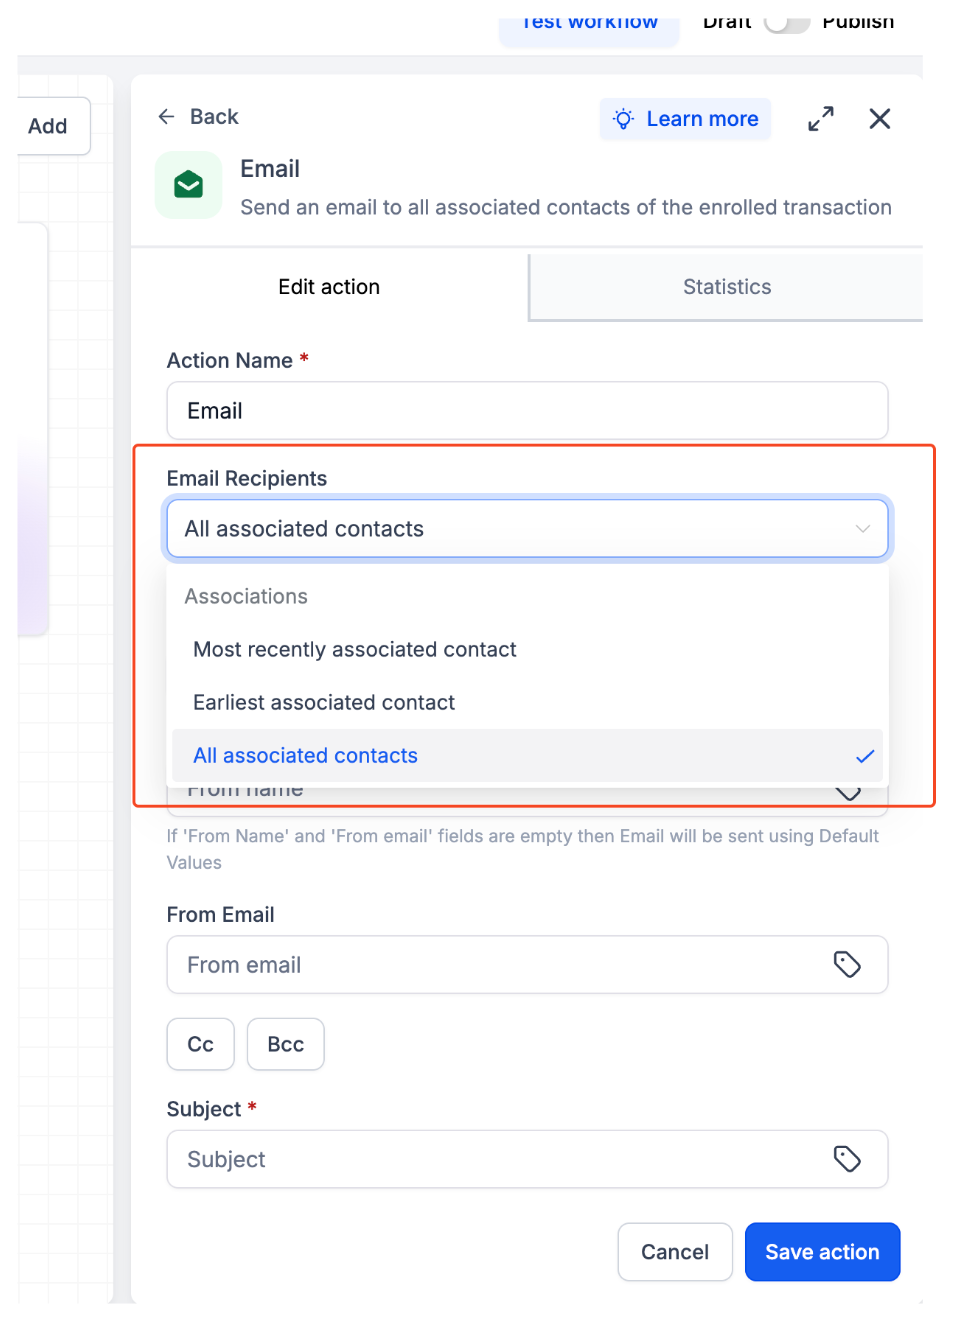
In the Email Recipients dropdown, select one of the following options under the Associations section:
- All associated contacts — Sends to all contacts associated with the company or custom object
- Most recently associated contact — Sends only to the most recently associated contact (Custom Object workflows only)
- Earliest associated contact — Sends only to the earliest associated contact (Custom Object workflows only)
If you want to target specific types of associated contacts, use the Association Label field to select one or more association labels. This filters which contacts receive the email based on their relationship type. If you leave this field empty, the email sends based on your Email Recipients selection without filtering by association type.
Note: The Association Label option is currently supported only for Custom Object workflows. It is not available for Company workflows at this time. If you're using a Company workflow, this field will not be displayed.
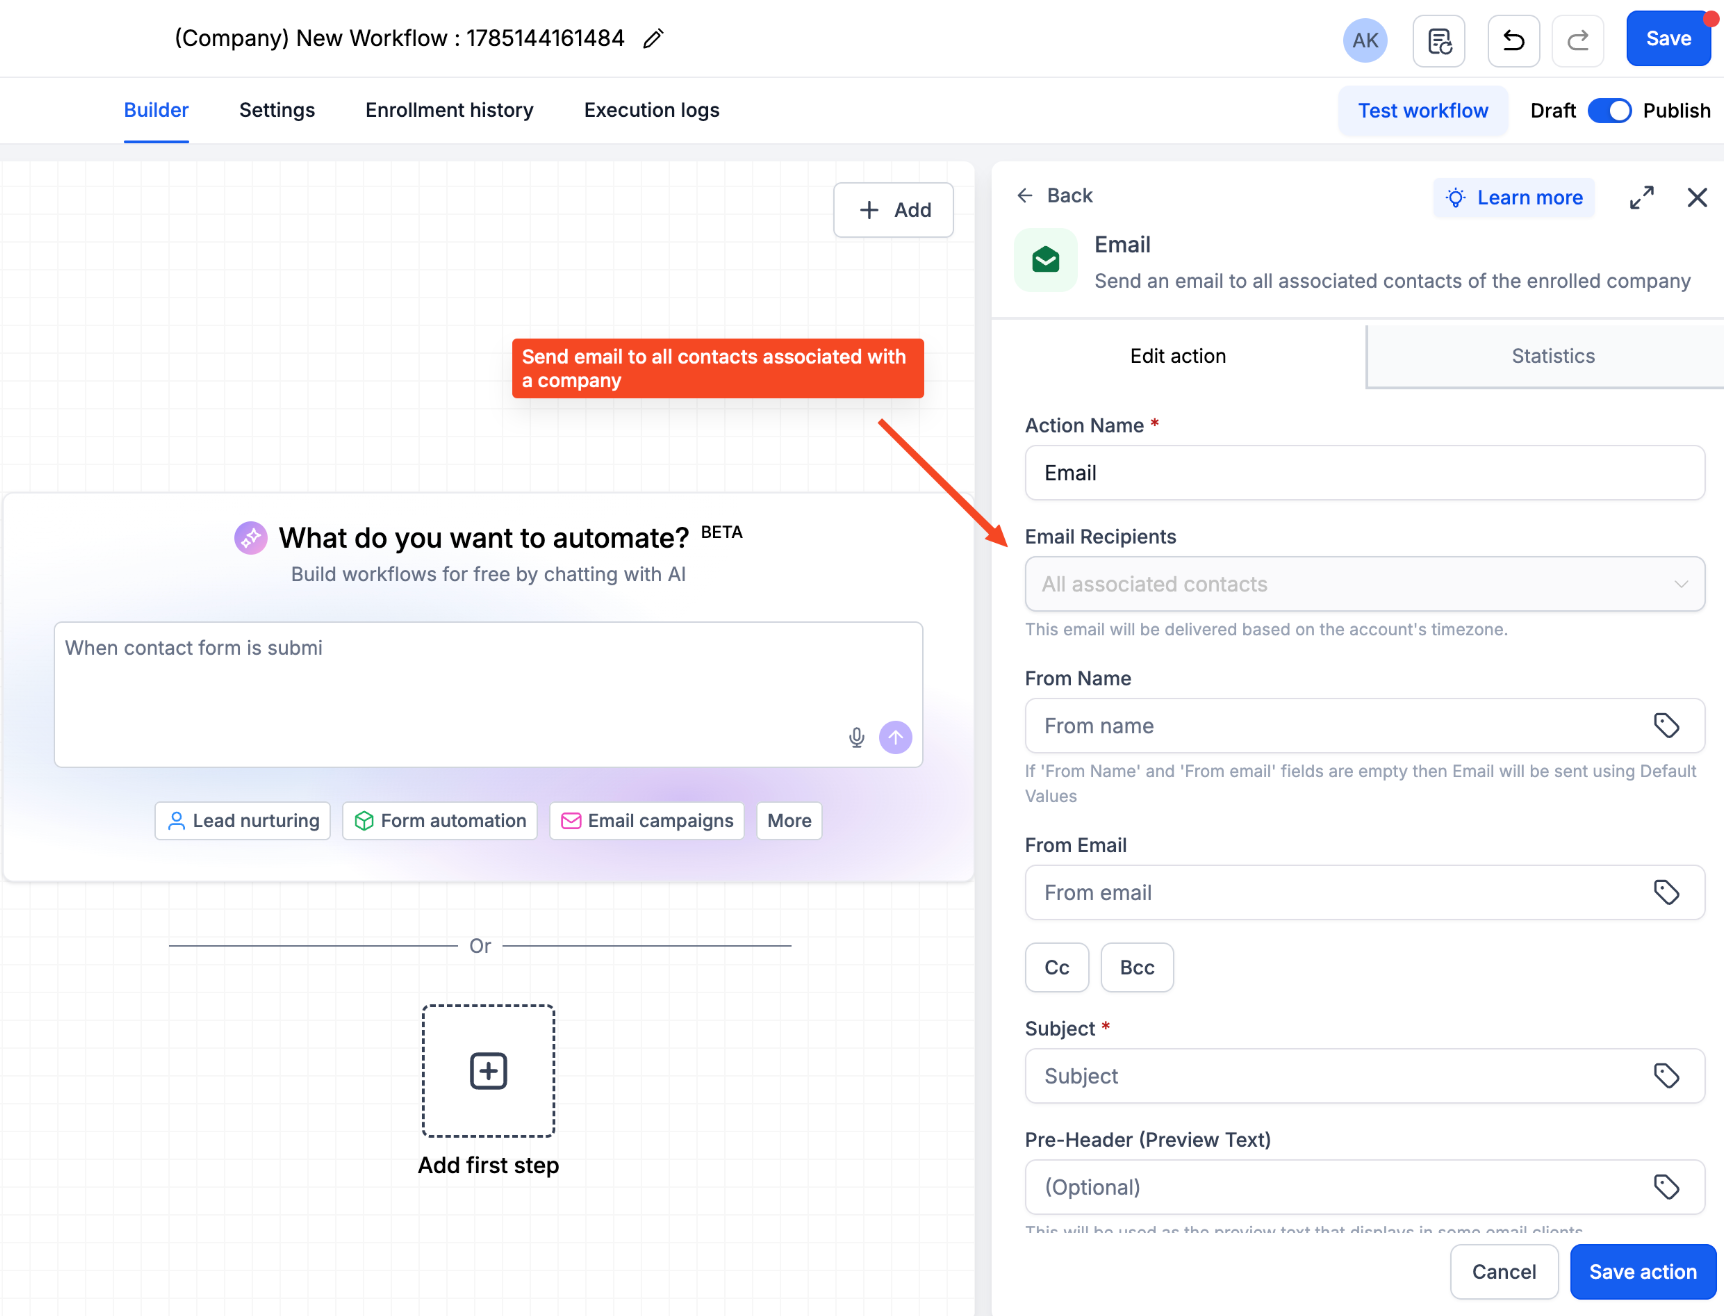
Complete the email configuration fields:
- From Name — Enter the sender name for the email
- From Email — Enter the sender email address
- Subject — Add your email subject line
- Cc/Bcc — Add any Cc or Bcc recipients if needed
Compose your email content using the email editor. You can include custom fields, personalization tokens, and formatting as needed.
You can use personalization tokens from the associated Contact as well as the Company or Custom Object records, allowing you to dynamically personalize your email content.
The editor supports the same features available in other workflow email actions.
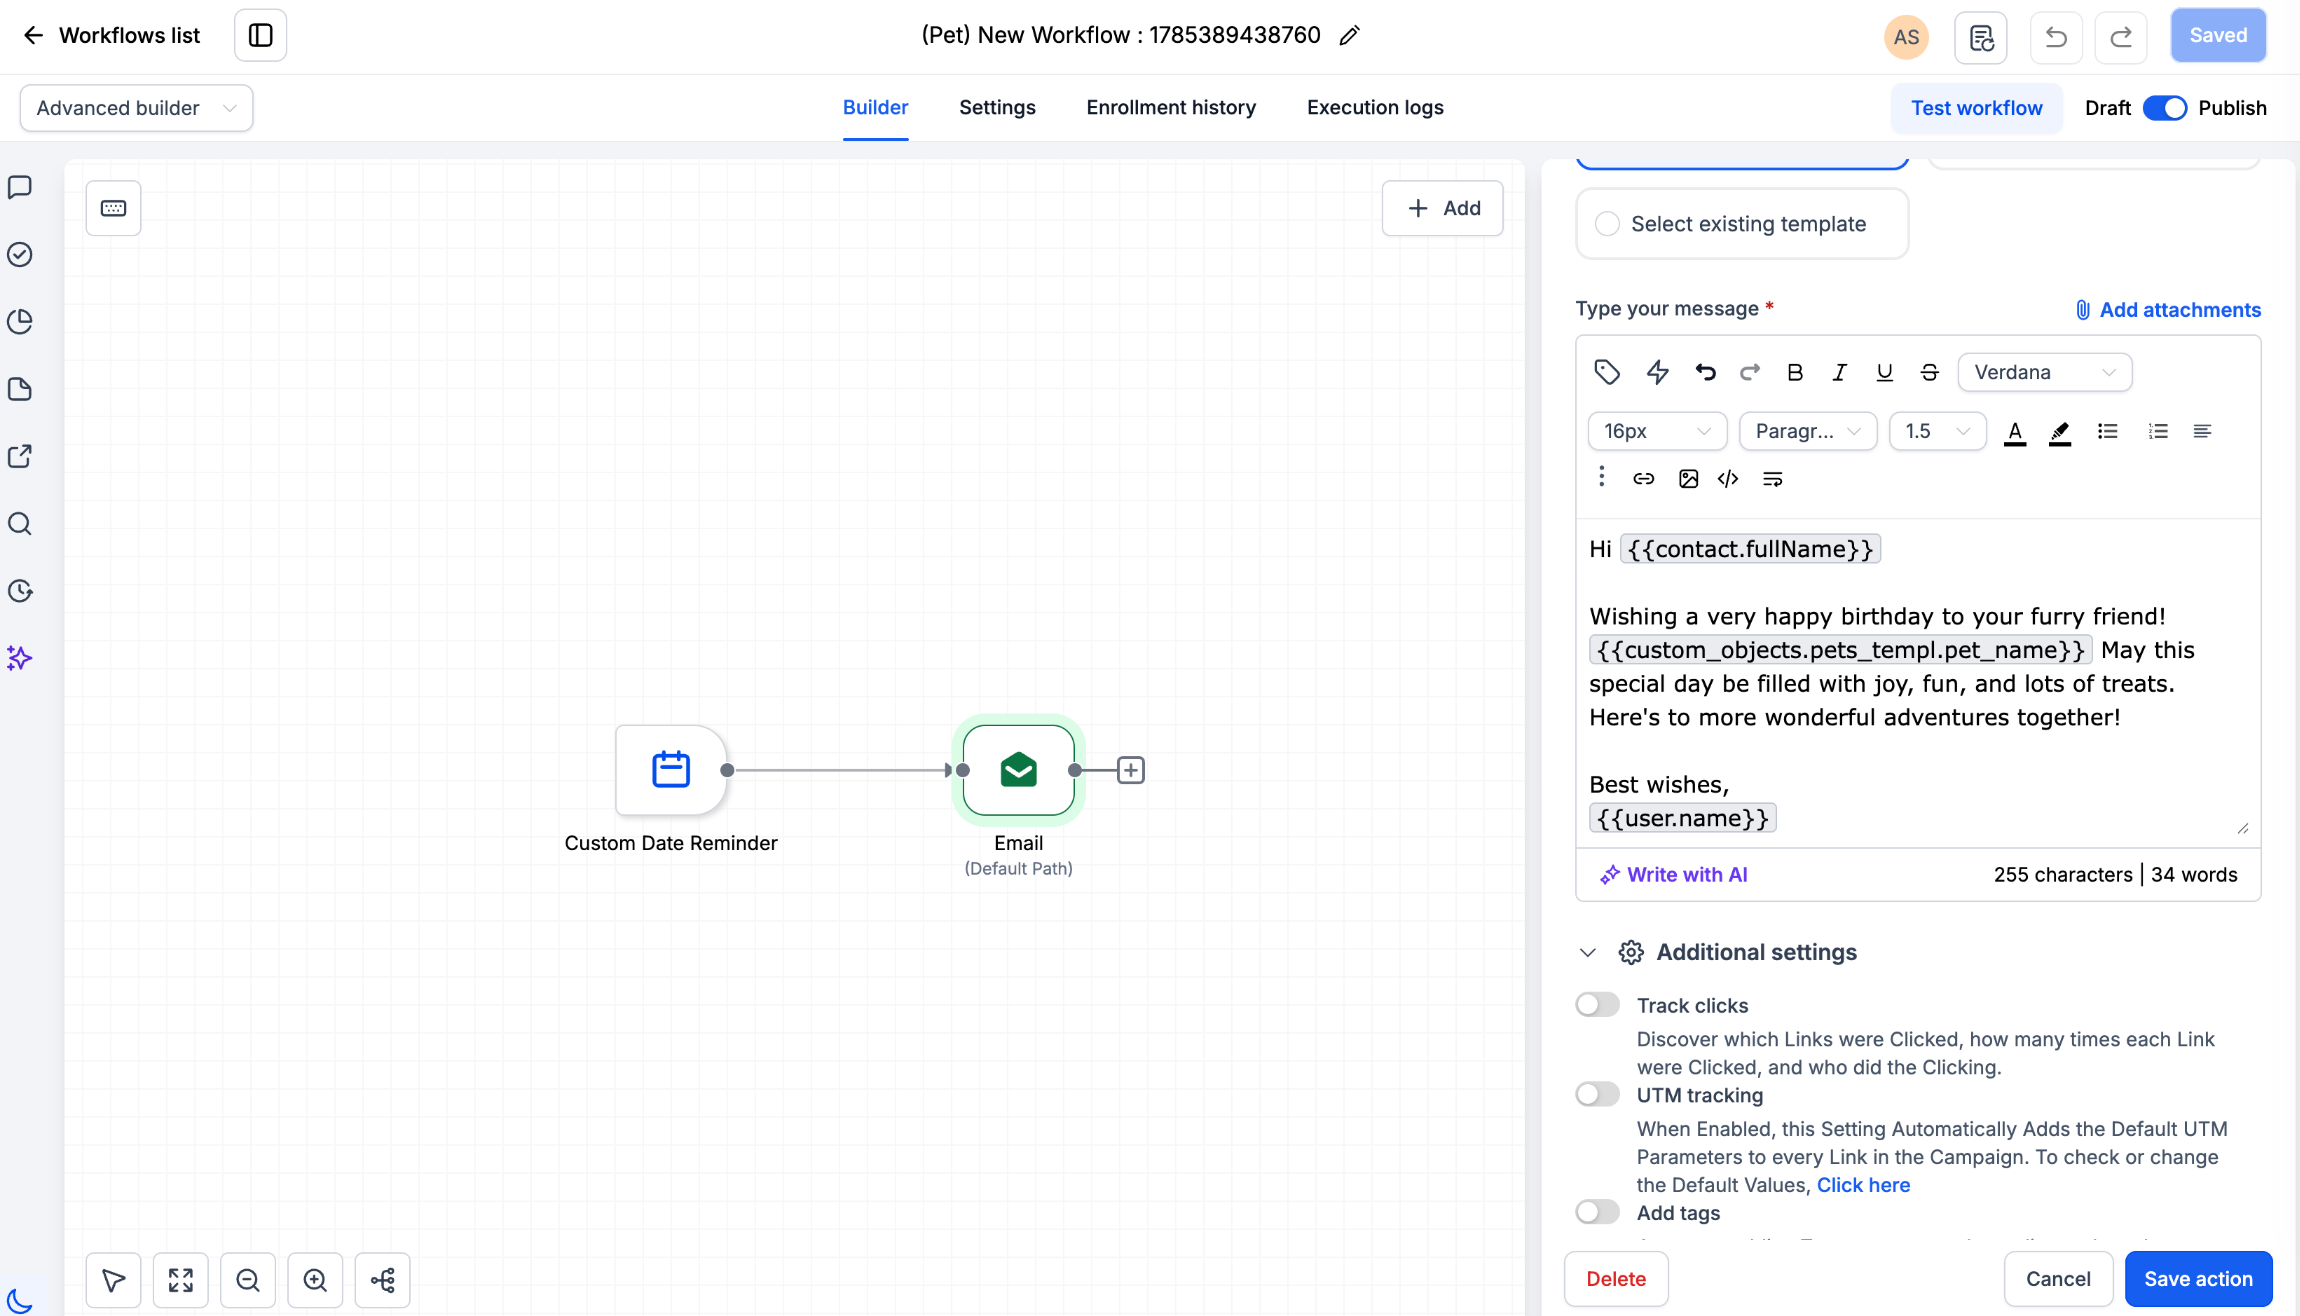
Click "Save action" to save your email configuration, then publish your workflow to activate the automation. When the workflow is triggered, emails will automatically be sent to the selected associated contacts.
Emails are sent using the Bulk Email sending domain configured for your account.
This email will be delivered based on the account's timezone setting.
If the From Name and From Email fields are empty, the email will be sent using the default values configured in your account settings.
If a contact matches multiple selected association labels, they receive only one email. Recipient deduplication is handled automatically to prevent duplicate email sends.
Frequently Asked Questions
Was this article helpful?
That’s Great!
Thank you for your feedback
Sorry! We couldn't be helpful
Thank you for your feedback
Feedback sent
We appreciate your effort and will try to fix the article