Capture every Google lead the instant it’s generated. HighLevel’s Google Ads Integration funnels form-fill data straight into your CRM, where workflows can respond automatically and move prospects forward—no manual uploads or zaps required. (Keywords: Google Ads integration, lead sync, HighLevel CRM, workflow automation).
TABLE OF CONTENTS
- What is Google Ads Integration
- Key Features of Google Ads Integration
- How to Connect to Google Ads
- Form Field Mapping
- How to Test if the Connection is Successful
- Frequently Asked Questions
What is Google Ads Integration
Google Ads Integration links your Google Ads account with your HighLevel sub-account so leads submitted through Google Lead Forms become contacts in real time. The secure, OAuth-based connection also exposes form metadata to workflows, letting you trigger automations the moment a prospect hits “Submit.”
The Google Ads integration allows you to collect leads directly from Google Ads and have them automatically synced with your CRM. With this integration, you can easily capture contact information from potential customers interested in your products or services on Google and quickly follow up with them through your CRM. By automating the lead capture process, you can save time and improve the efficiency of your sales and marketing efforts.
Key Features of Google Ads Integration
1. Seamless Setup
- Easily connect your Google Ads account to HighLevel.
- Support for multiple Google Ads accounts under a single Google (Gmail) login.
- View all active campaigns and lead forms in one place.
2. Automatic Lead Sync
- A new contact is created in the CRM whenever a lead is submitted from an enabled and mapped Google Ads lead form.
- Once activated, leads flow automatically with no additional setup required.
3. Workflow Automation
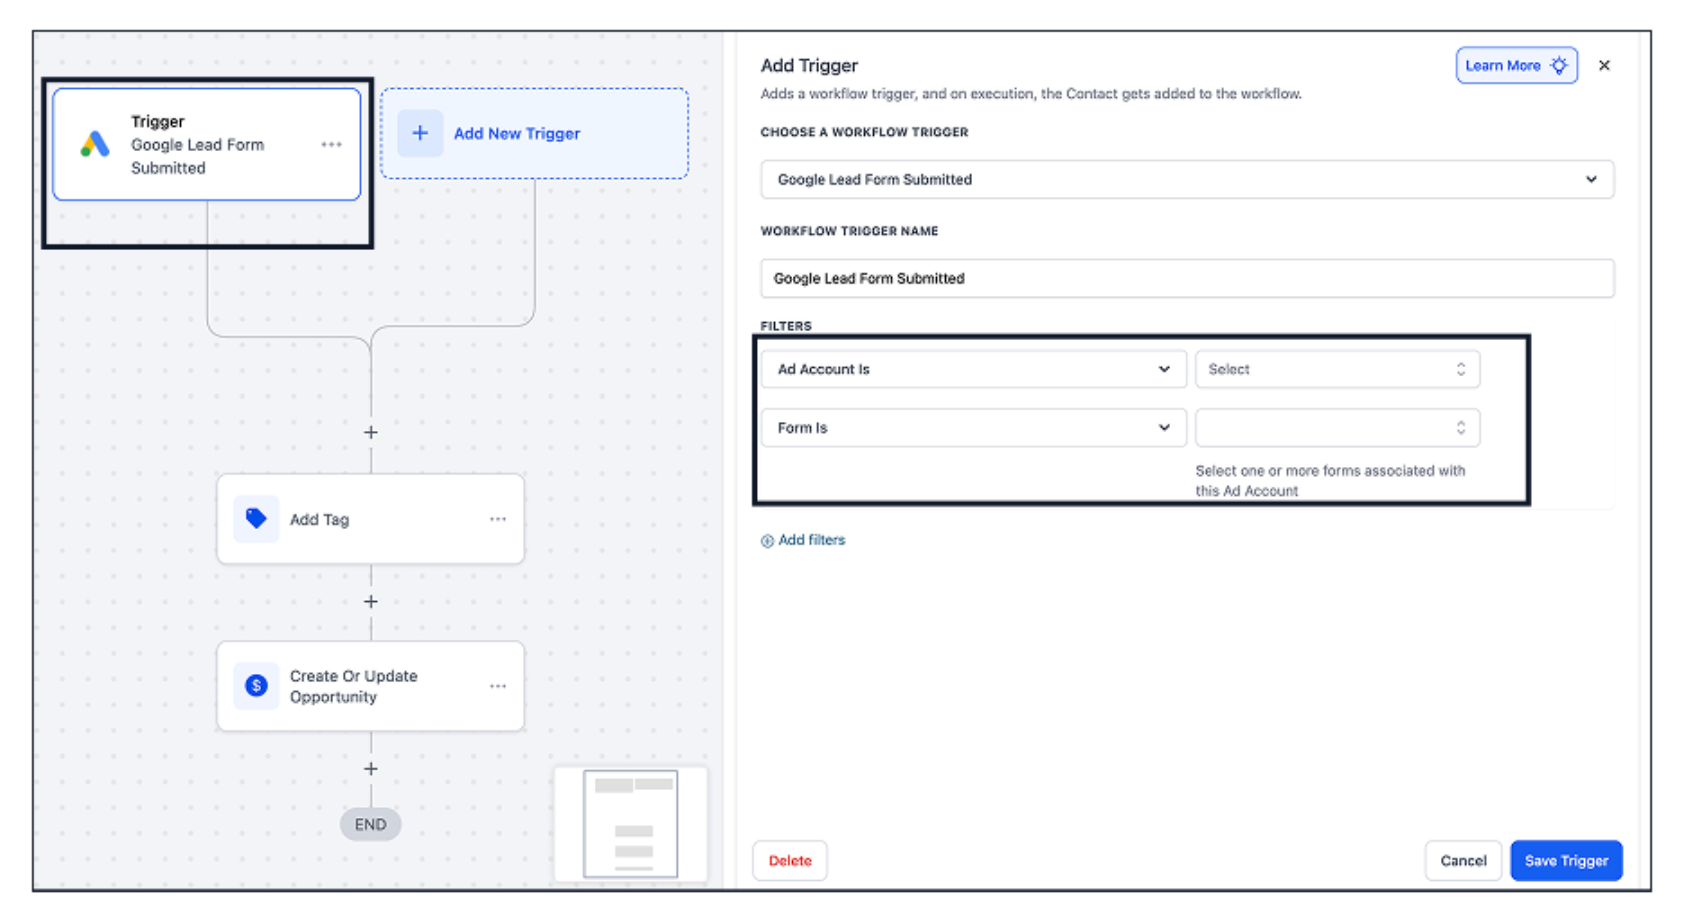
- Trigger workflows instantly using the Google Lead Form Submitted trigger.
- Apply filters such as Ad Account and Lead Form to create targeted automations.
- Automate SMS, email follow-ups, internal notifications, and more.
How to Connect to Google Ads
Step 1: Navigate to Sub-Account View → Settings → Integrations.
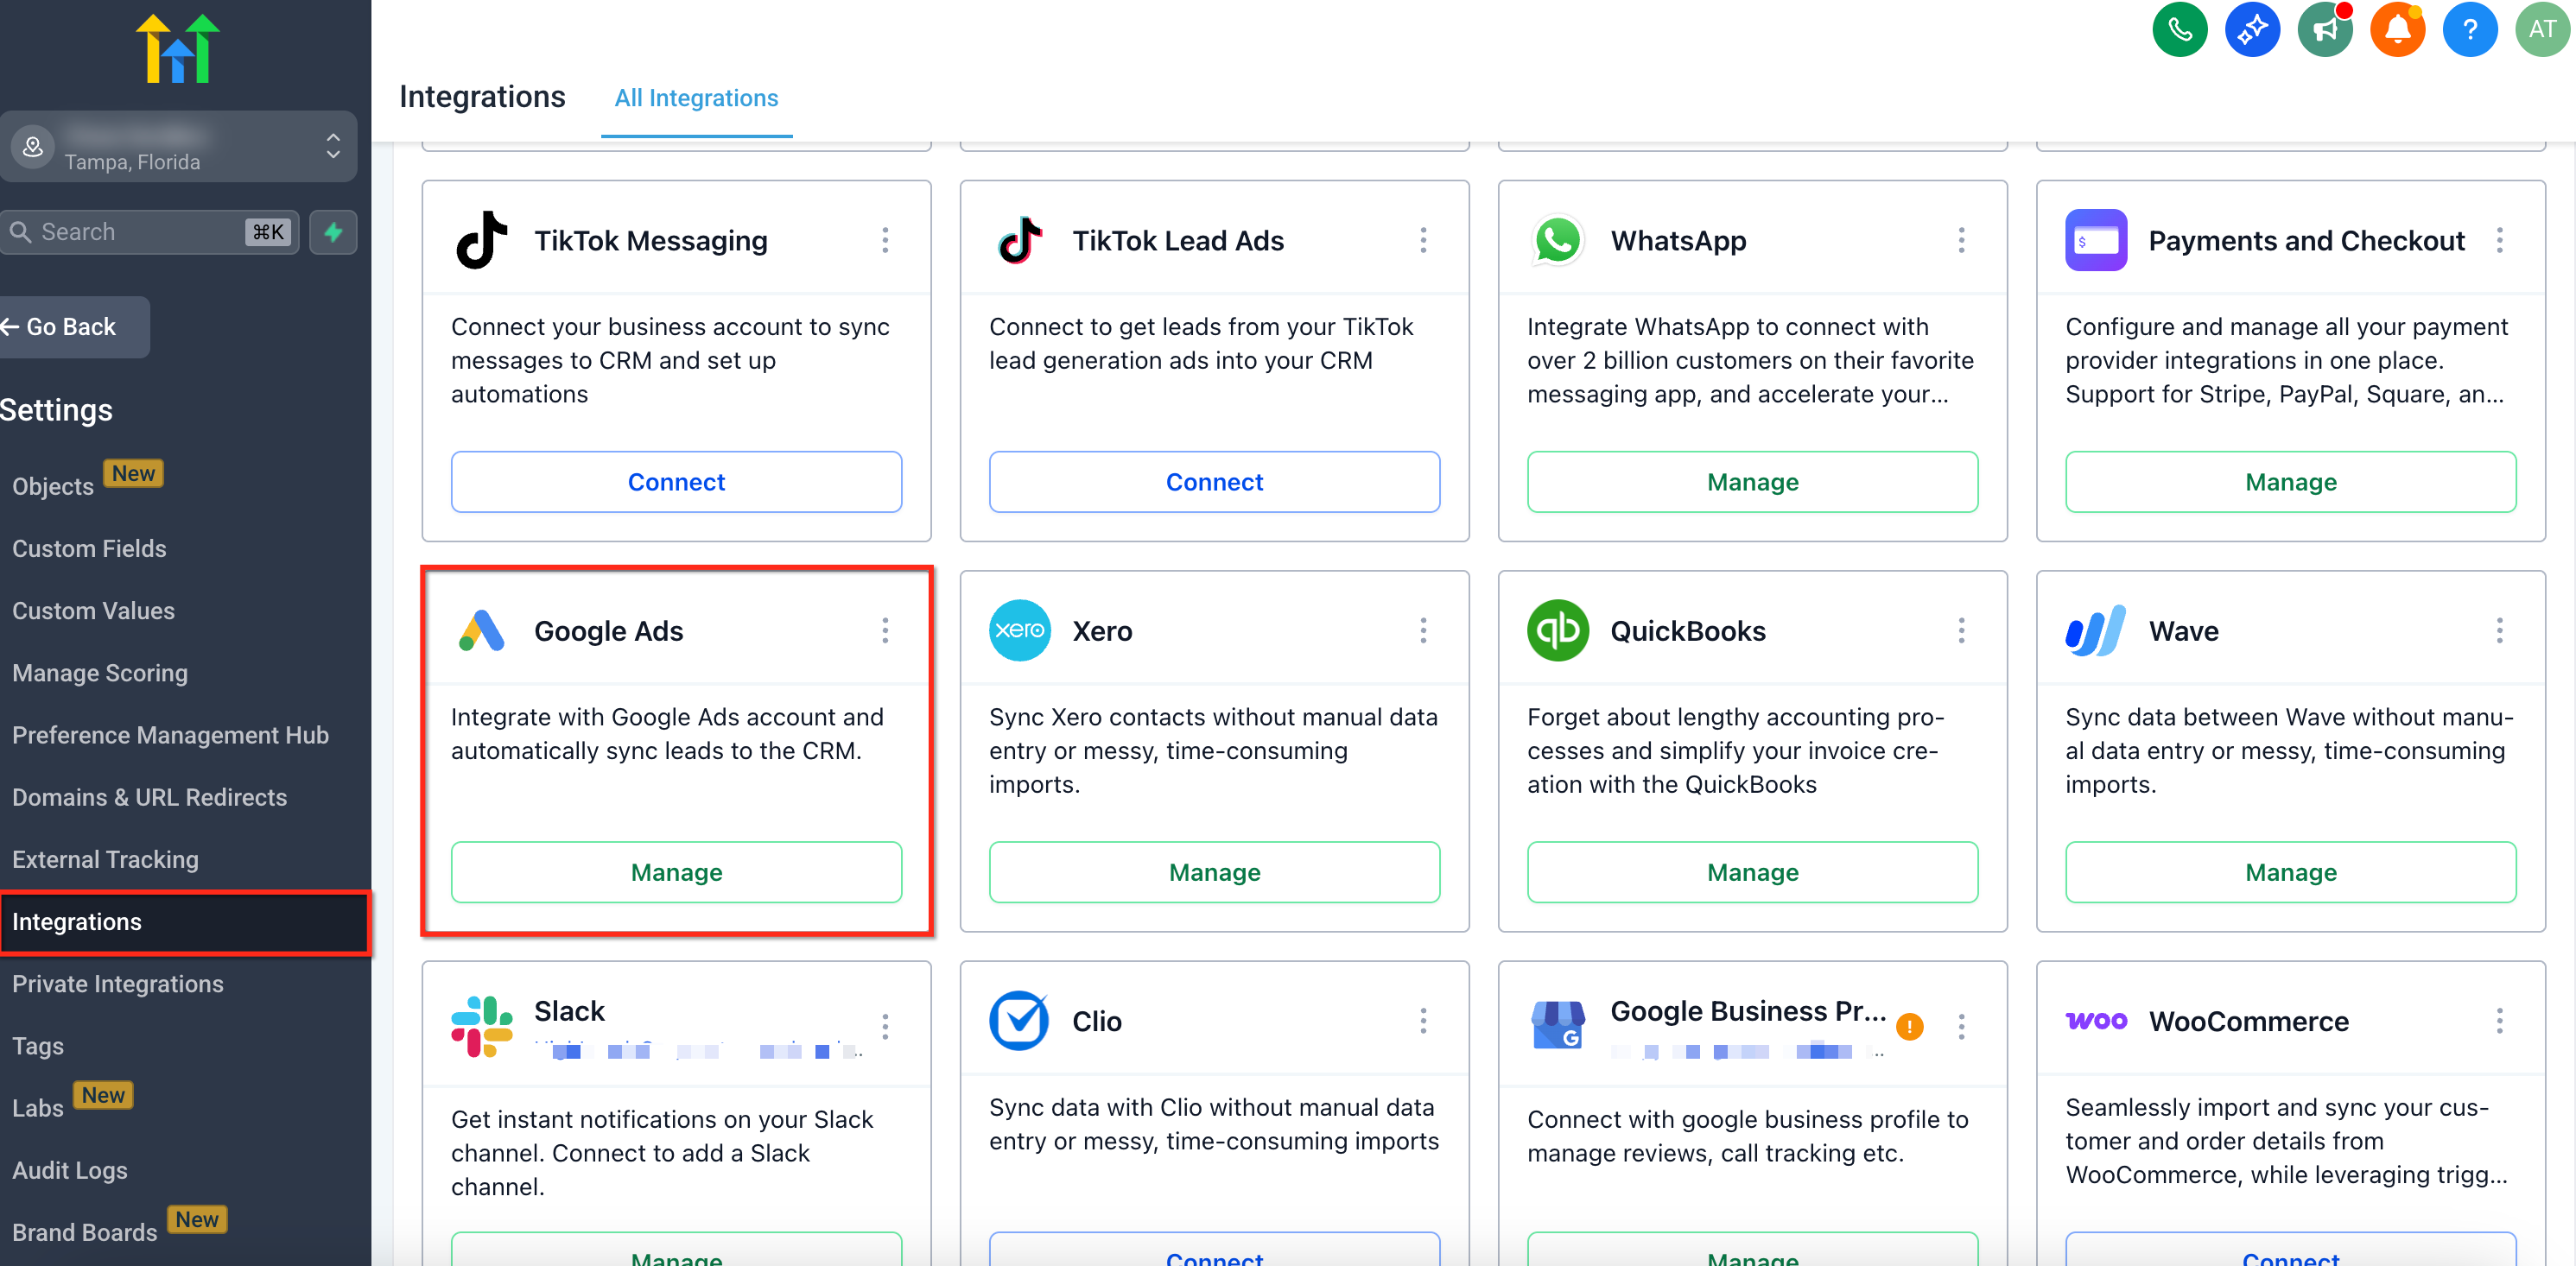
Step 2: Click Manage under the Google Ads integration.
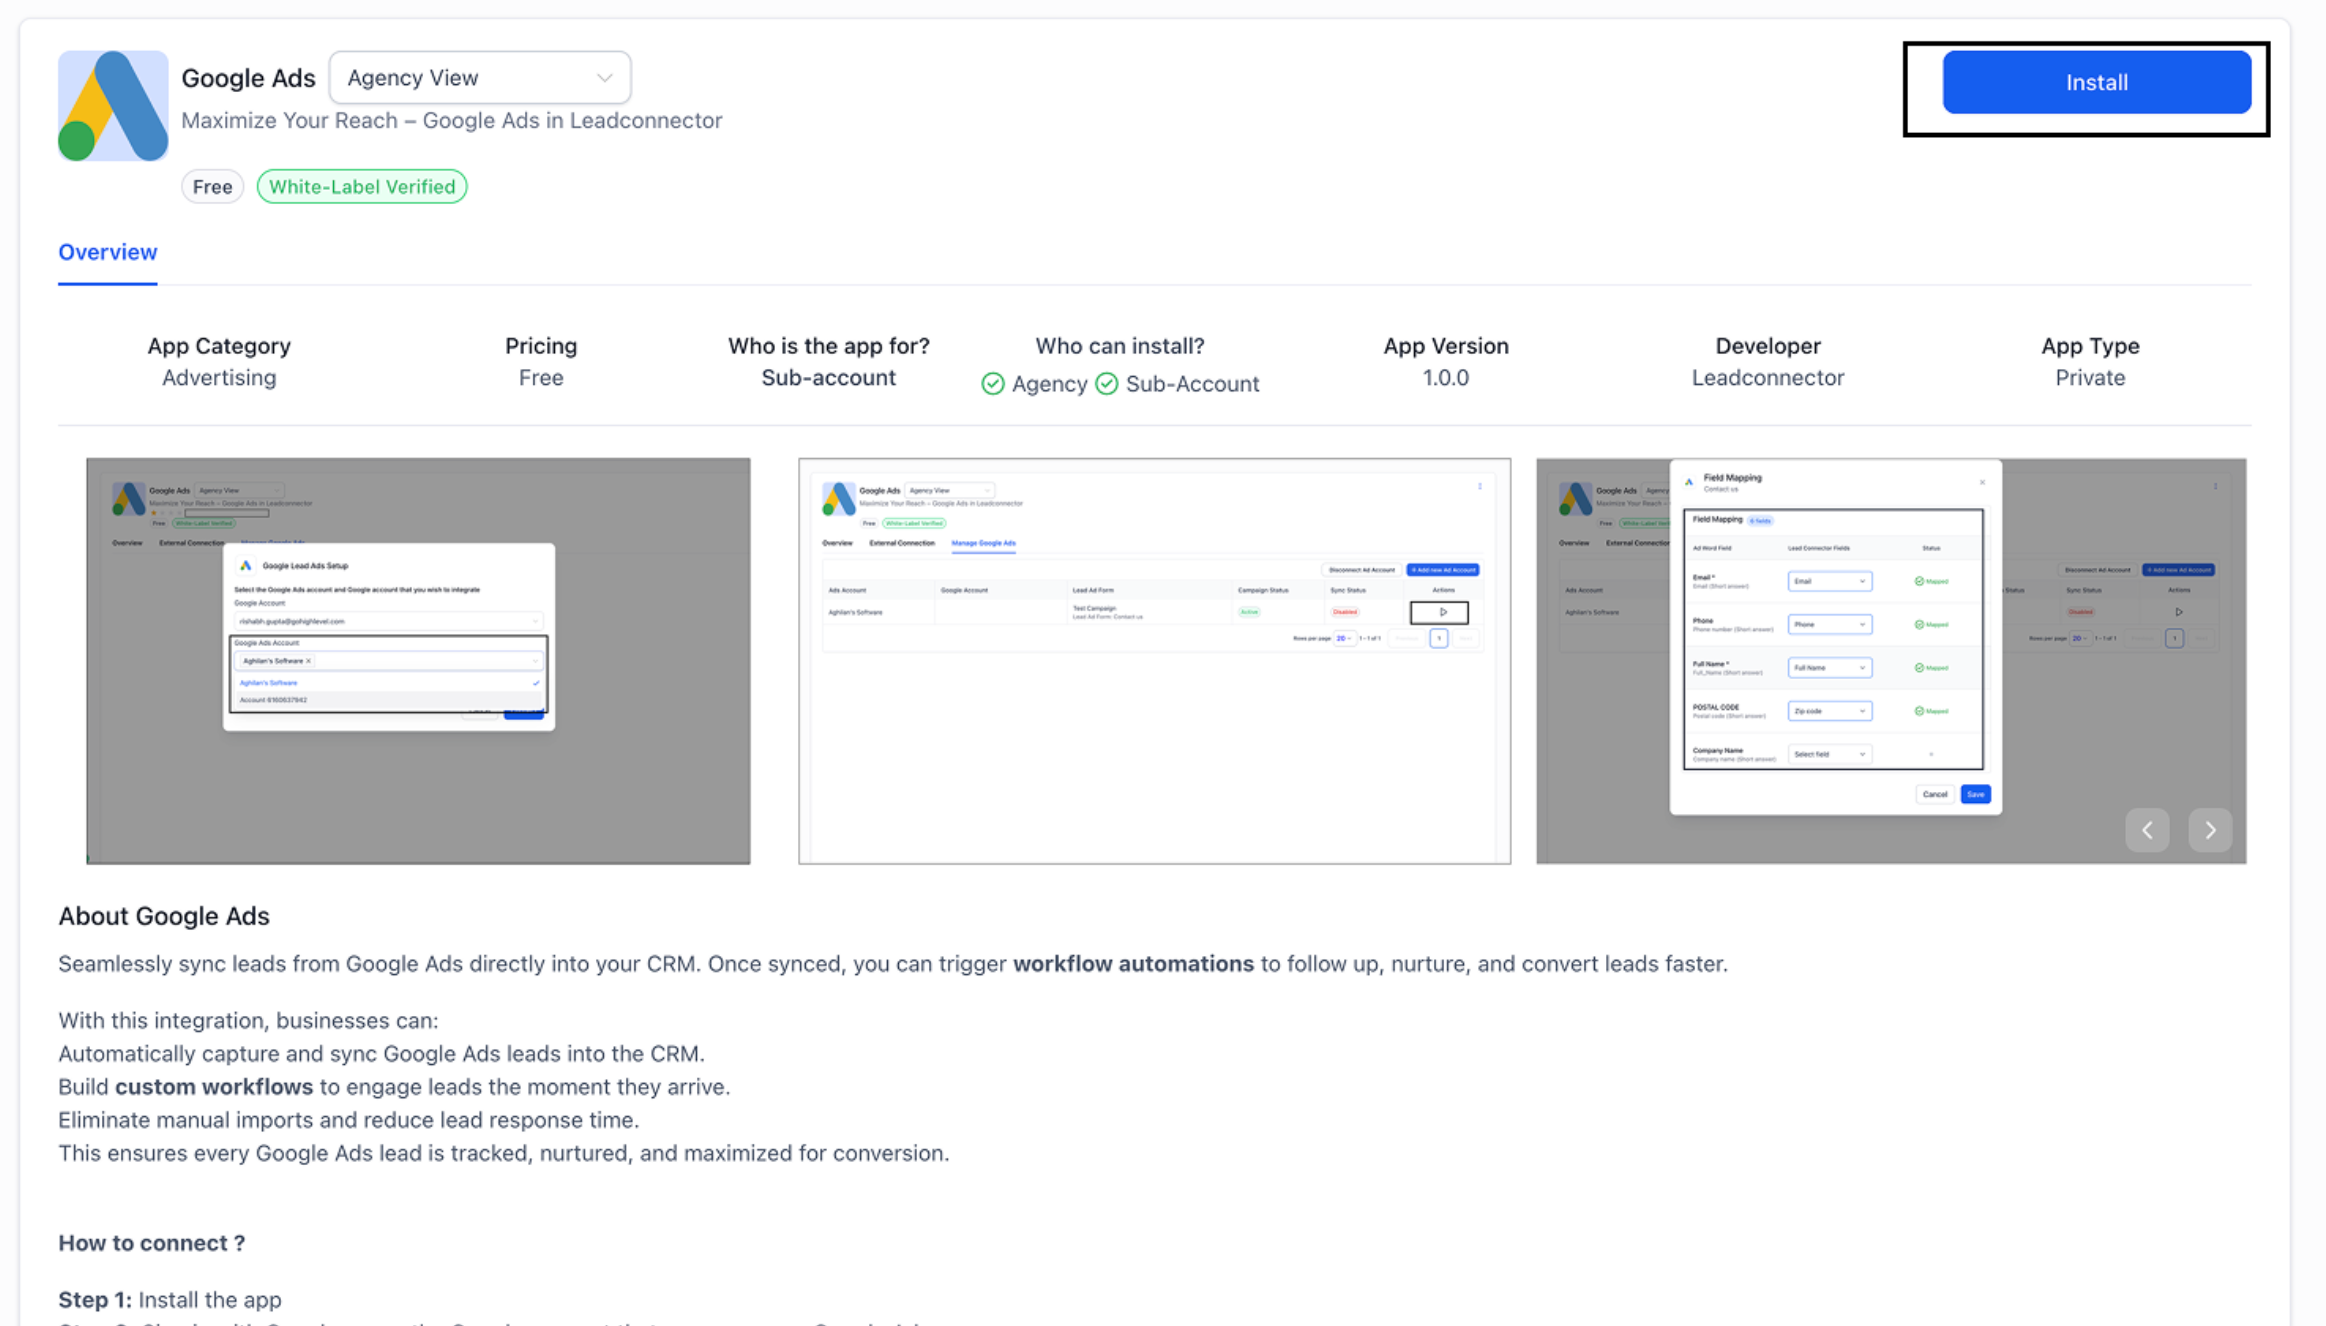
You’ll be redirected to the App Description page. Click Install to proceed.
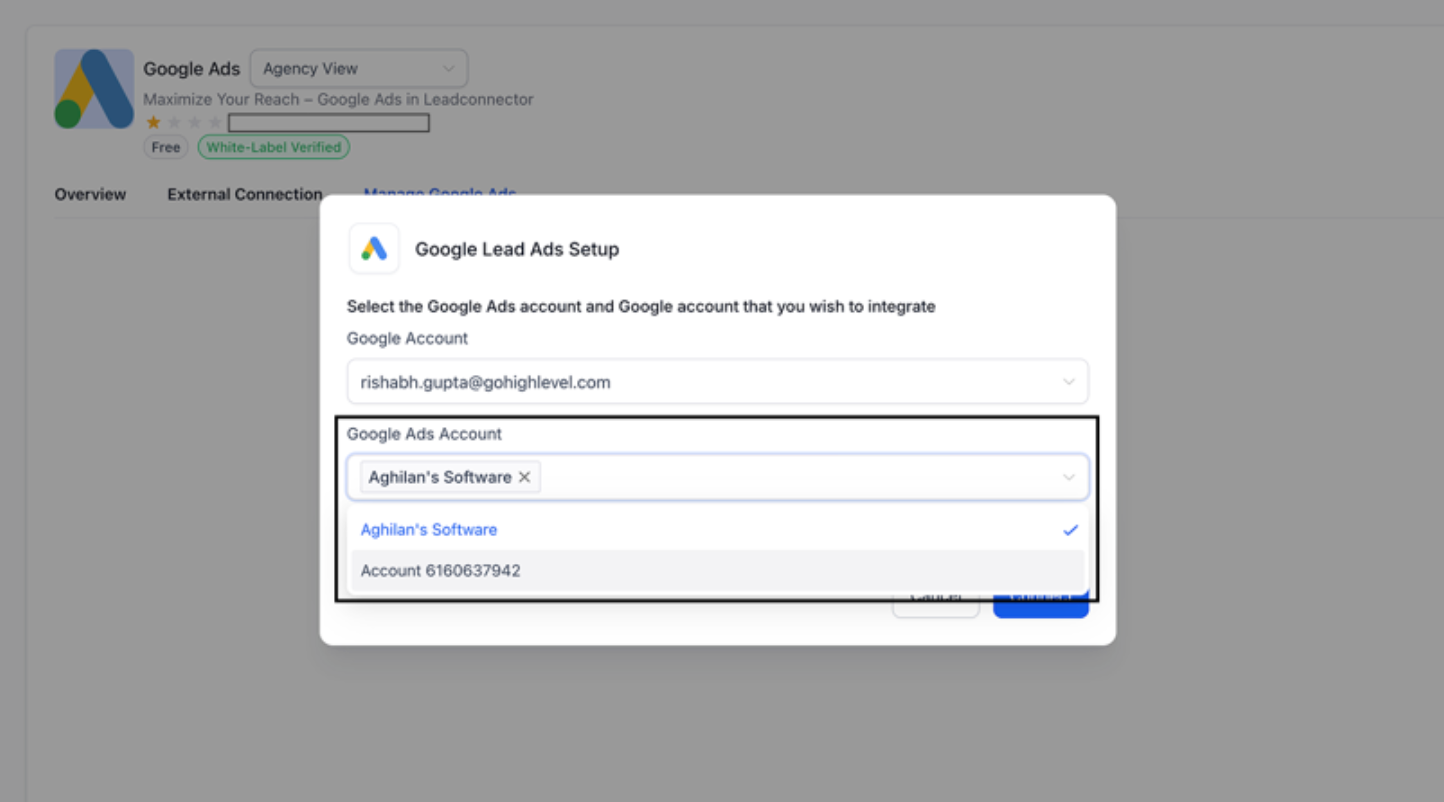
Step 3: You’ll be prompted to sign in with your Google account through OAuth authorization.
After authentication, select the Google Ads accounts you want to connect for lead syncing.
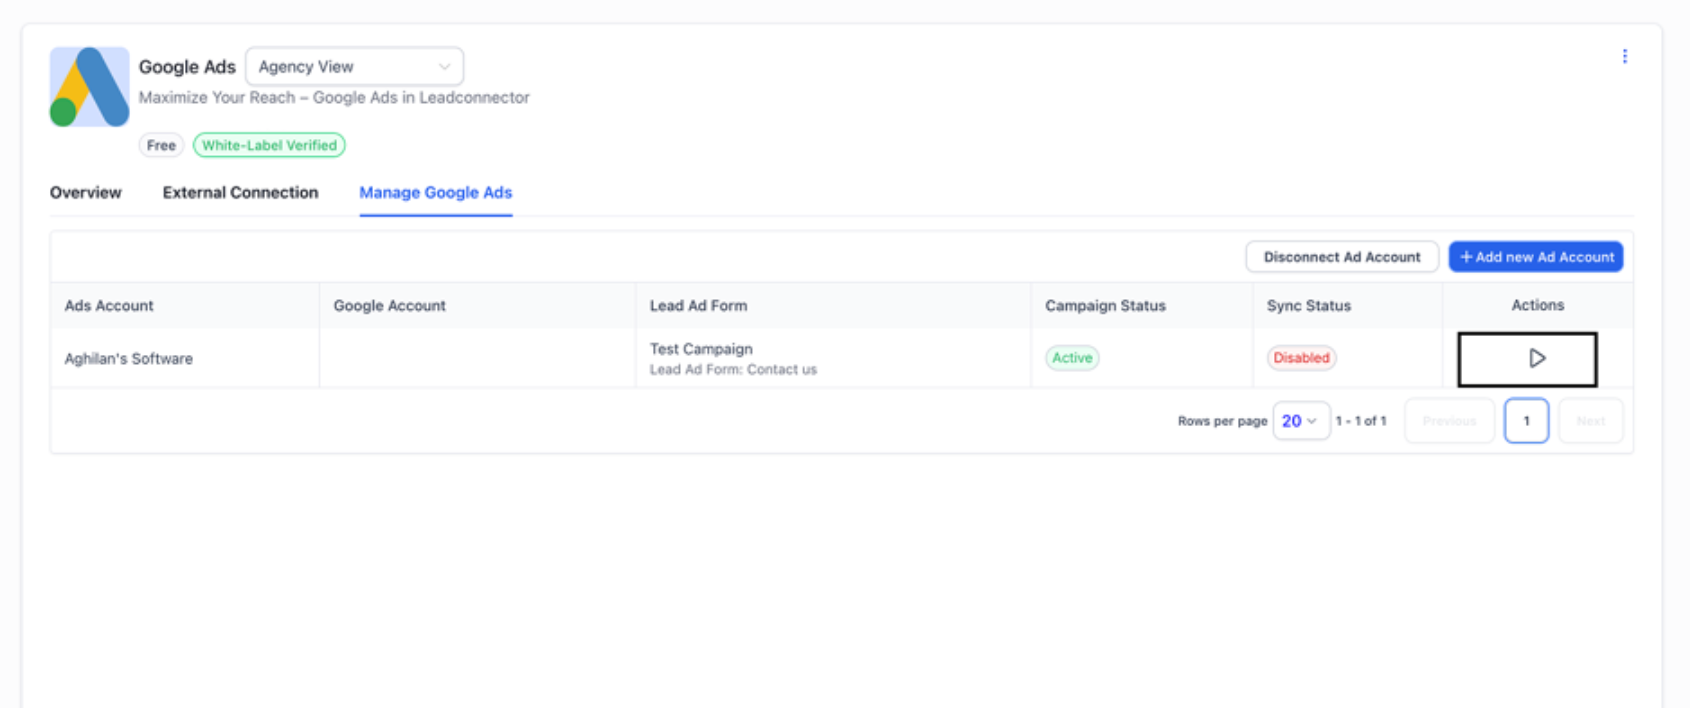
Step 4: Once connected, all lead forms linked to your selected ad accounts will appear — along with their associated campaign names and status.
Click the Play icon next to a form to map it and activate lead syncing.
Step 5: Set up workflows using the trigger “Google Lead Form Submitted” to automate your follow-up actions when a new lead comes in.
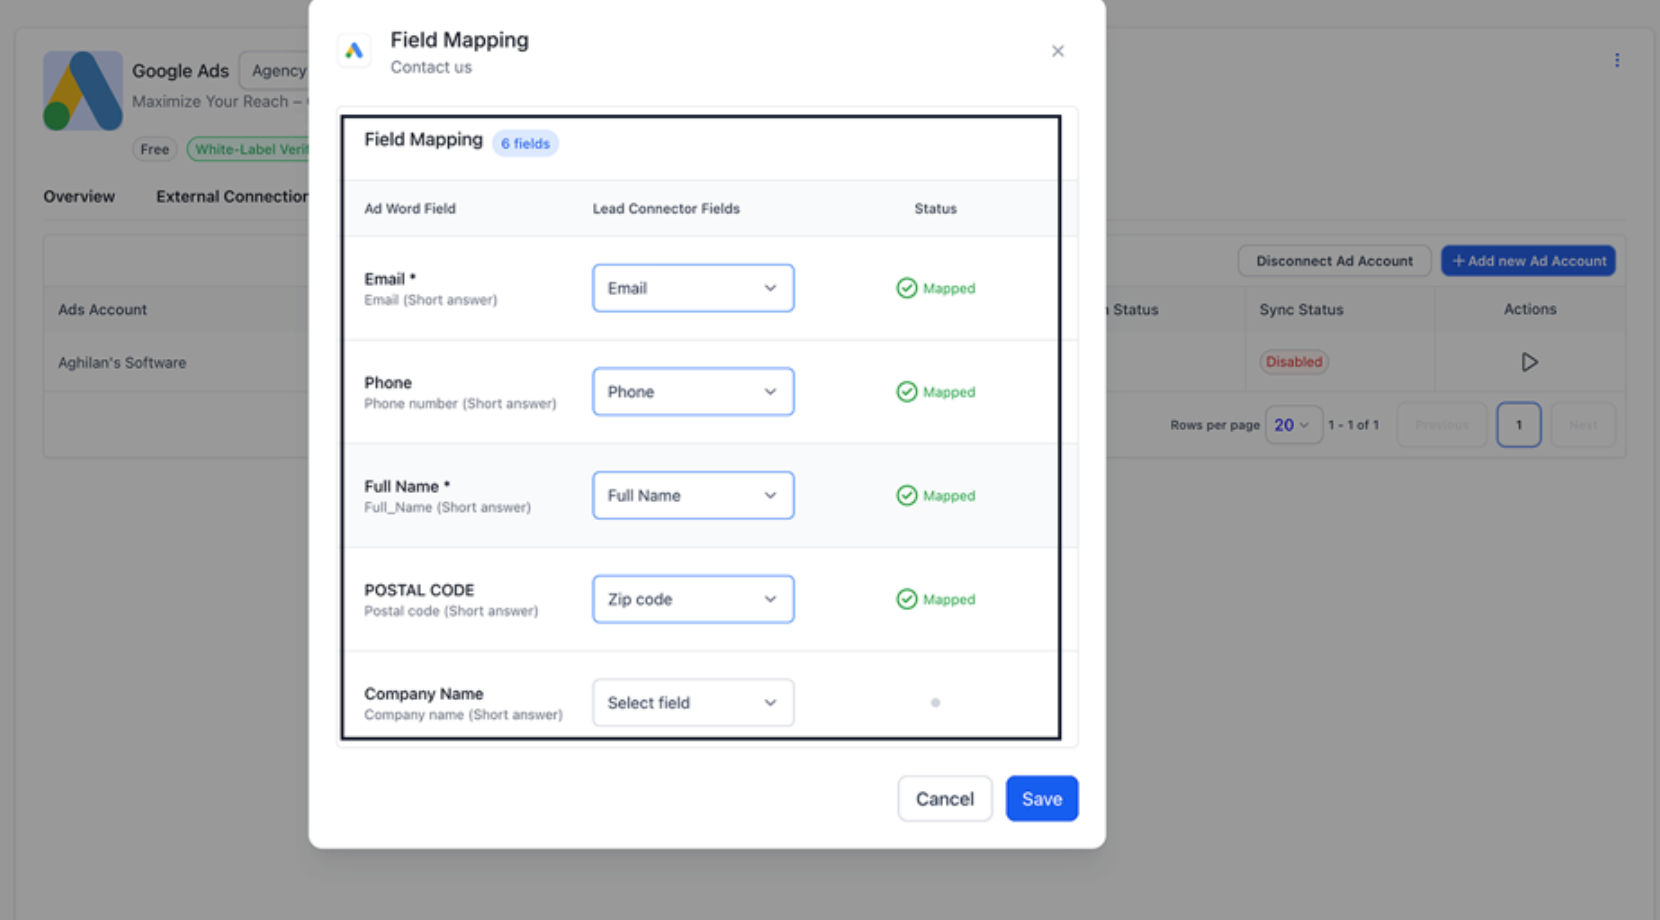
Form Field Mapping
- Click on the Play/Edit icon for the form you wish to map and sync leads from.
- Use the Map Fields button to align your Google Ad Form fields with CRM fields.
- If you want to disable inbound leads from any of the forms, click on Pause icon.
How to Test if the Connection is Successful
Step 1: Open Your Campaign
In your Google Ads Manager, navigate to the campaign you want to sync with your CRM.

Step 2: Select the Campaign
From the Campaign List View, click on the campaign name to open its details.

Step 3: Access the Lead Form
Go to the Lead Form section within the campaign and click Edit.

Step 4: Open the Linked Form
You’ll be redirected to the form linked with your campaign.
Click on the form name to open it.

Step 5: Send Test Data
Click Send Data to test the integration.
Note: You may see a warning message — you can safely ignore it for this test.

Frequently Asked Questions
Q. Do I need admin access to connect to Google Ads?
Yes. You must use a Google (Gmail) account that has access to the Google Ads account you want to connect. Without the required permissions, the ad account and lead forms will not appear.
Q. Can I connect more than one Google Ads account?
Yes. You can connect multiple Google Ads accounts using a single Google login and manage all associated campaigns and lead forms from one place.
Q. When is a contact created in the CRM?
A contact is created each time a lead is submitted through a Google Ads lead form that is enabled and properly mapped in the integration.
Q. Why aren’t my leads syncing?
Check the following:
The correct Google Ads account is connected.
Lead sync is enabled for the campaign or form.
All required lead form fields are mapped to CRM fields.
The sync status shows Active.
Was this article helpful?
That’s Great!
Thank you for your feedback
Sorry! We couldn't be helpful
Thank you for your feedback
Feedback sent
We appreciate your effort and will try to fix the article