When a client books a service (like a photography session or consultation), if sending a contract that includes the specific booking date where the client has to sign is a critical part of your process, this article explains how to automate this - whether you have a simple booking process or a more advanced opportunity pipeline.
Objective & Challenge
Your Goal: You want a workflow to automatically send a contract that includes the client's specific appointment date and time as soon as they book.
The Challenge: You can't add an {{appointment.start_time}} merge tag directly into a contract template. The "Send Contract" action is designed to pull data from Contact or Opportunity fields, not directly from the appointment trigger itself.
The Solution: The solution is to use your workflow to first, copy the appointment date into a custom field (on the Contact or Opportunity), and second, send the contract that pulls from this new field.
Prerequisites
Before building the workflow, you must have two things set up:
A Custom Field to Store the Date:
Navigate to Settings > Custom Fields.
Click Add Field and select Contact (for the simple method) OR Opportunity (for the advanced method).
Set the Field Type to Text.
Name it clearly (e.g., "Session Date," "Event Date," or "Booking Date").
Click Save.


An Updated Contract Template:
Navigate to Payments > Contracts.
Find and Clone your existing template (e.g., "Service Agreement - with Date") or Create a New Template.
Edit the template and add your new custom field variable:
For the Contact method:
{{contact.session_date}}For the Opportunity method:
{{opportunity.session_date}}
Save the template.

- Use contact custom field in the document template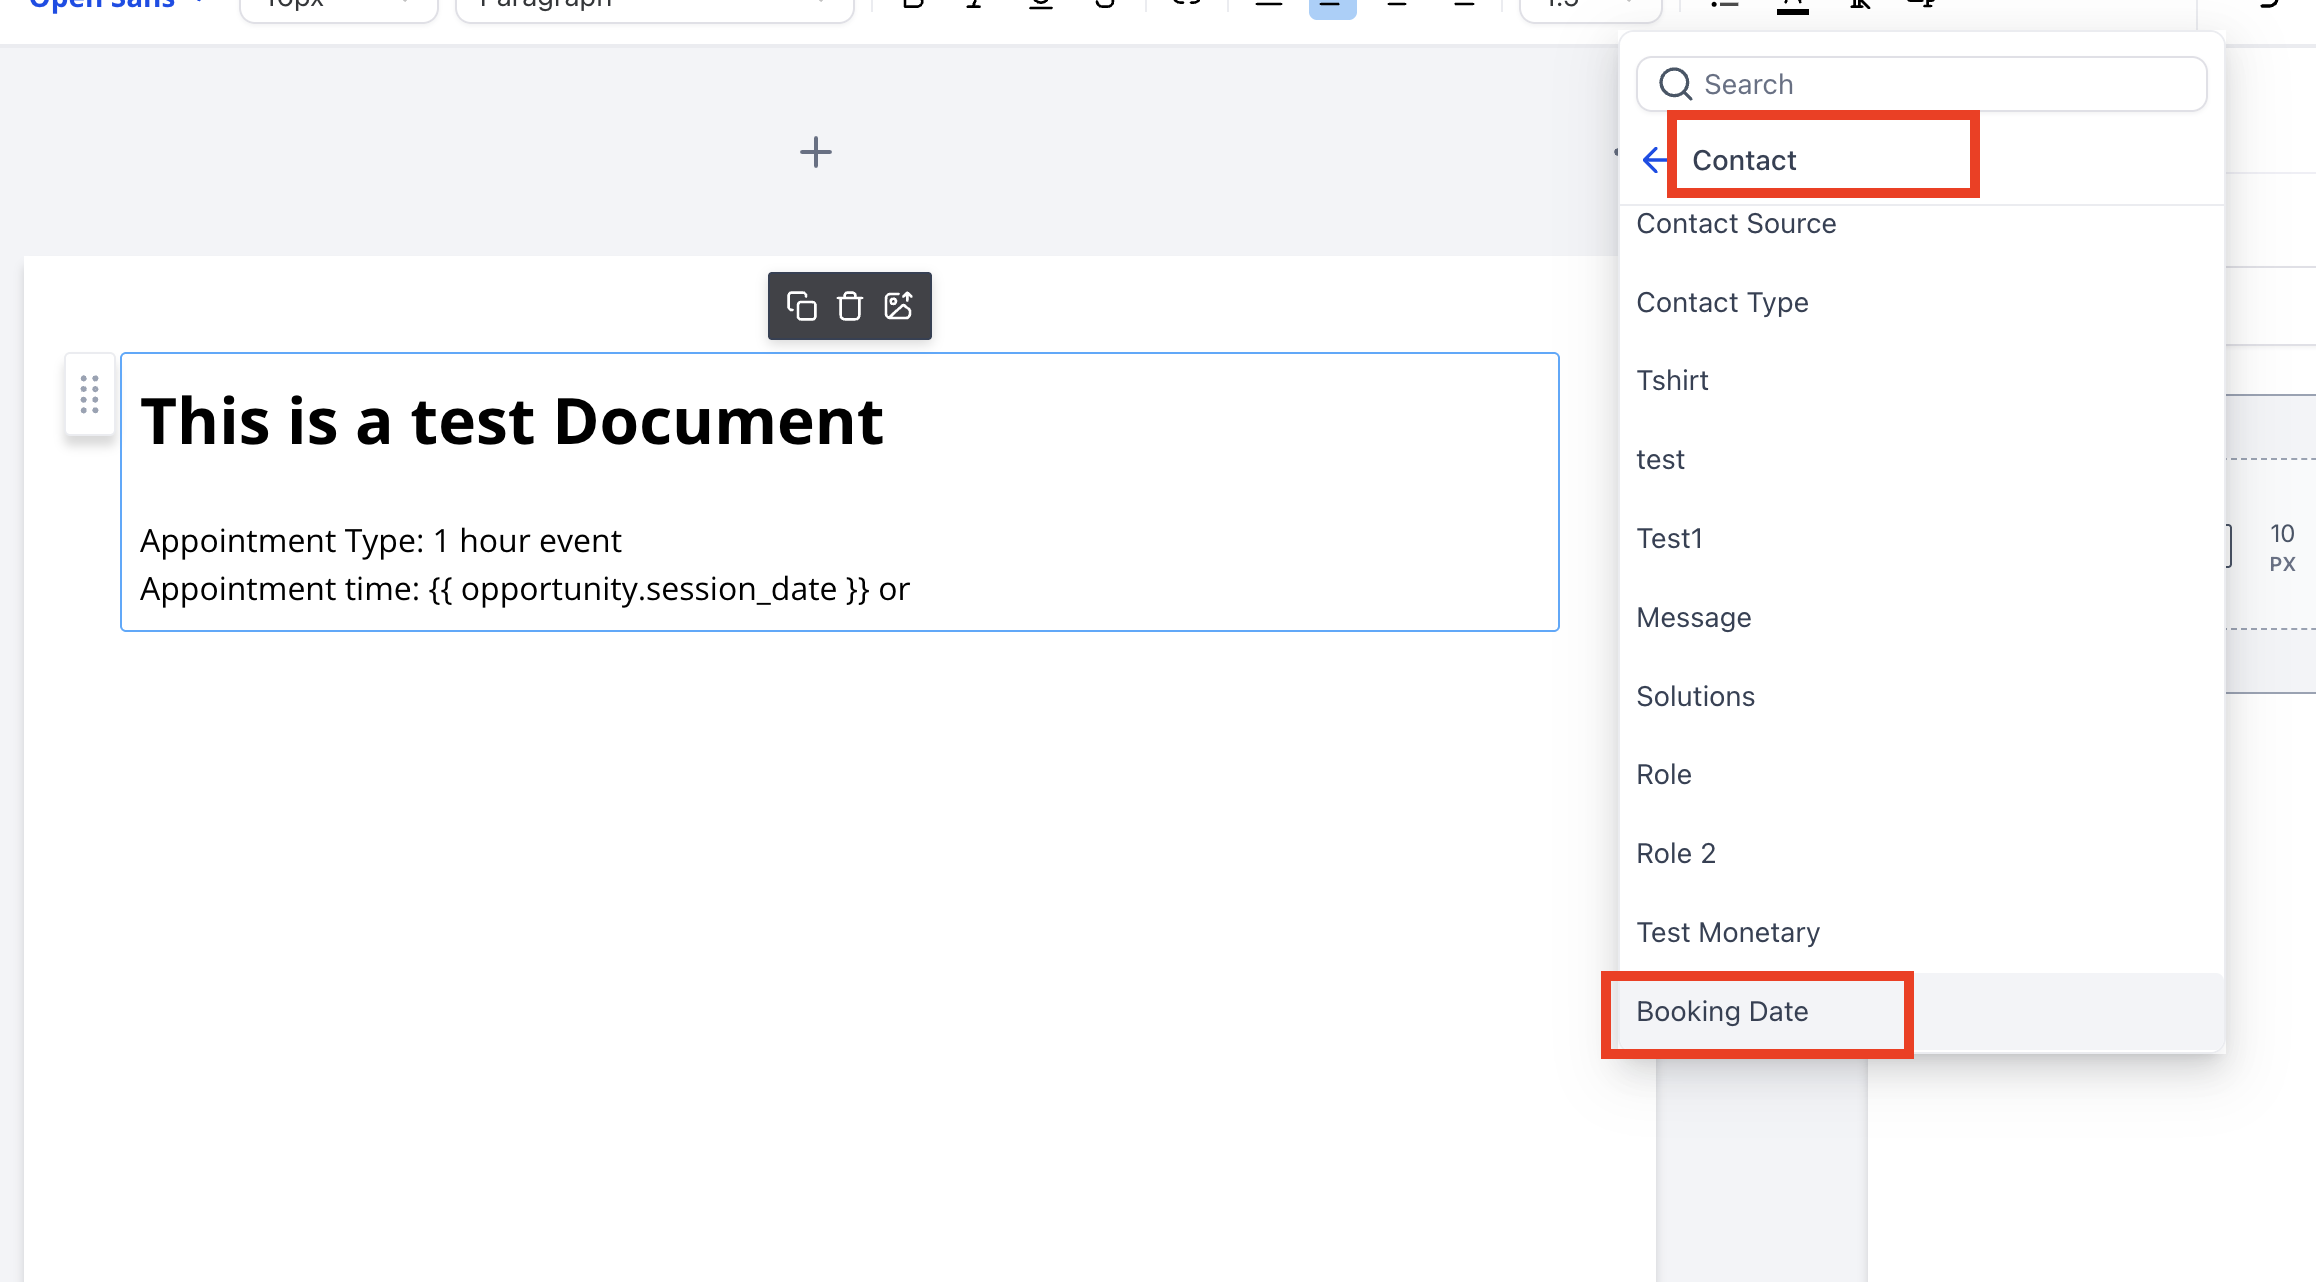
-OR Use Opportunity custom fields [Learn more] if one contact can have multiple bookings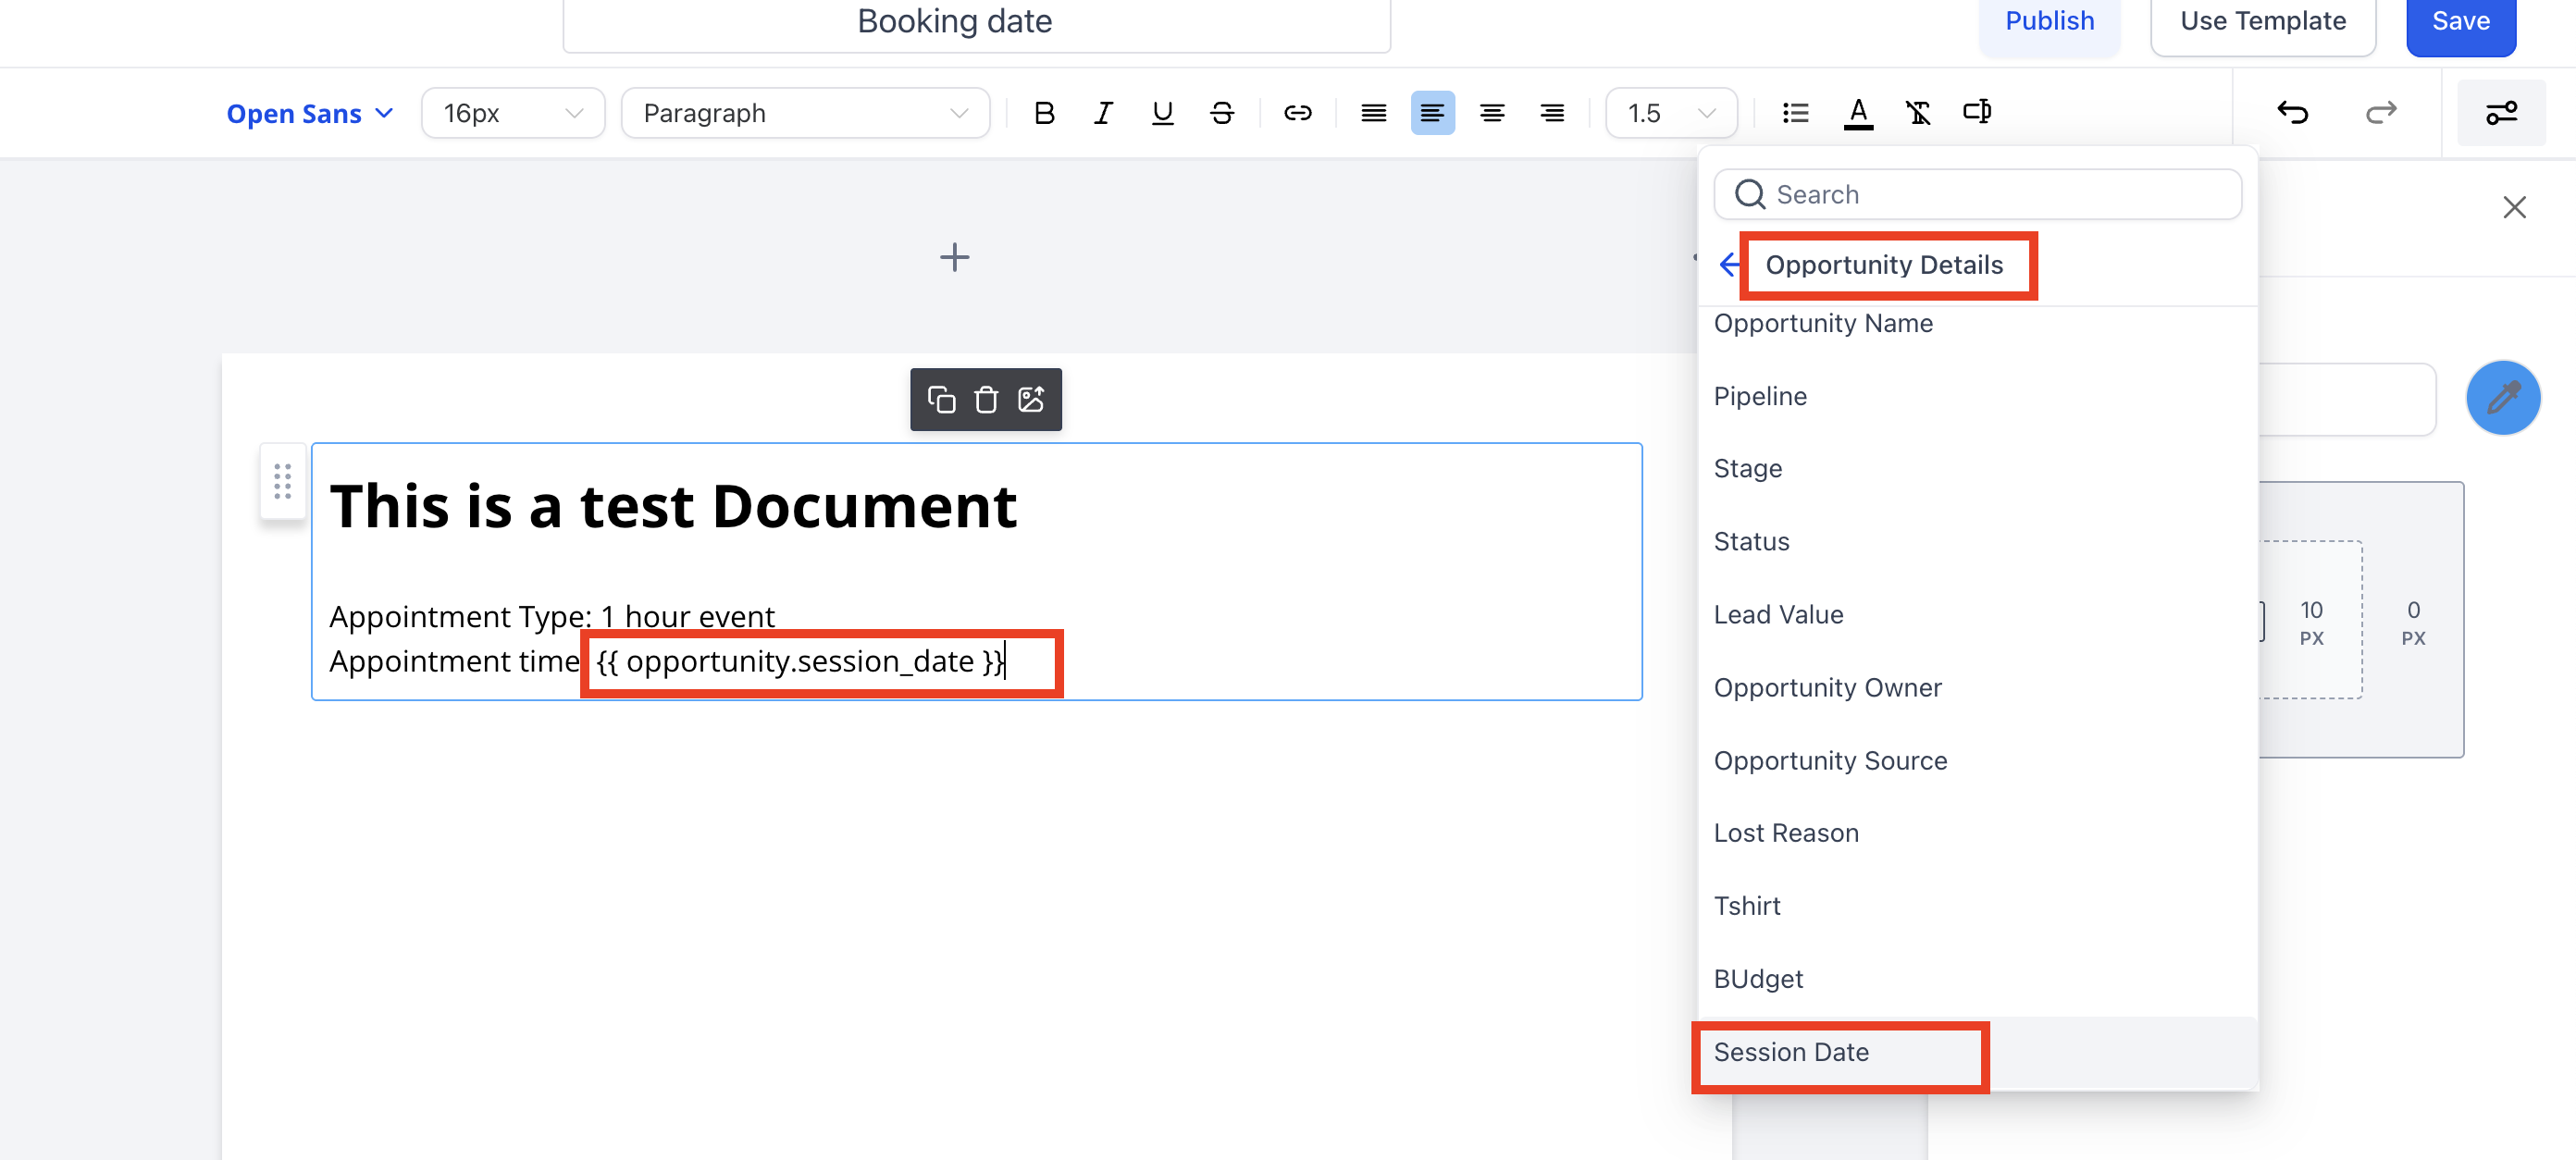
Workflow Configuration: Choose Your Method
Choose the method that best fits your business process.
Method 1: The Simple "Contact" Workflow
This is the most direct method. It's perfect if you don't use an opportunity pipeline for your bookings and simply want to send a contract right after someone books.
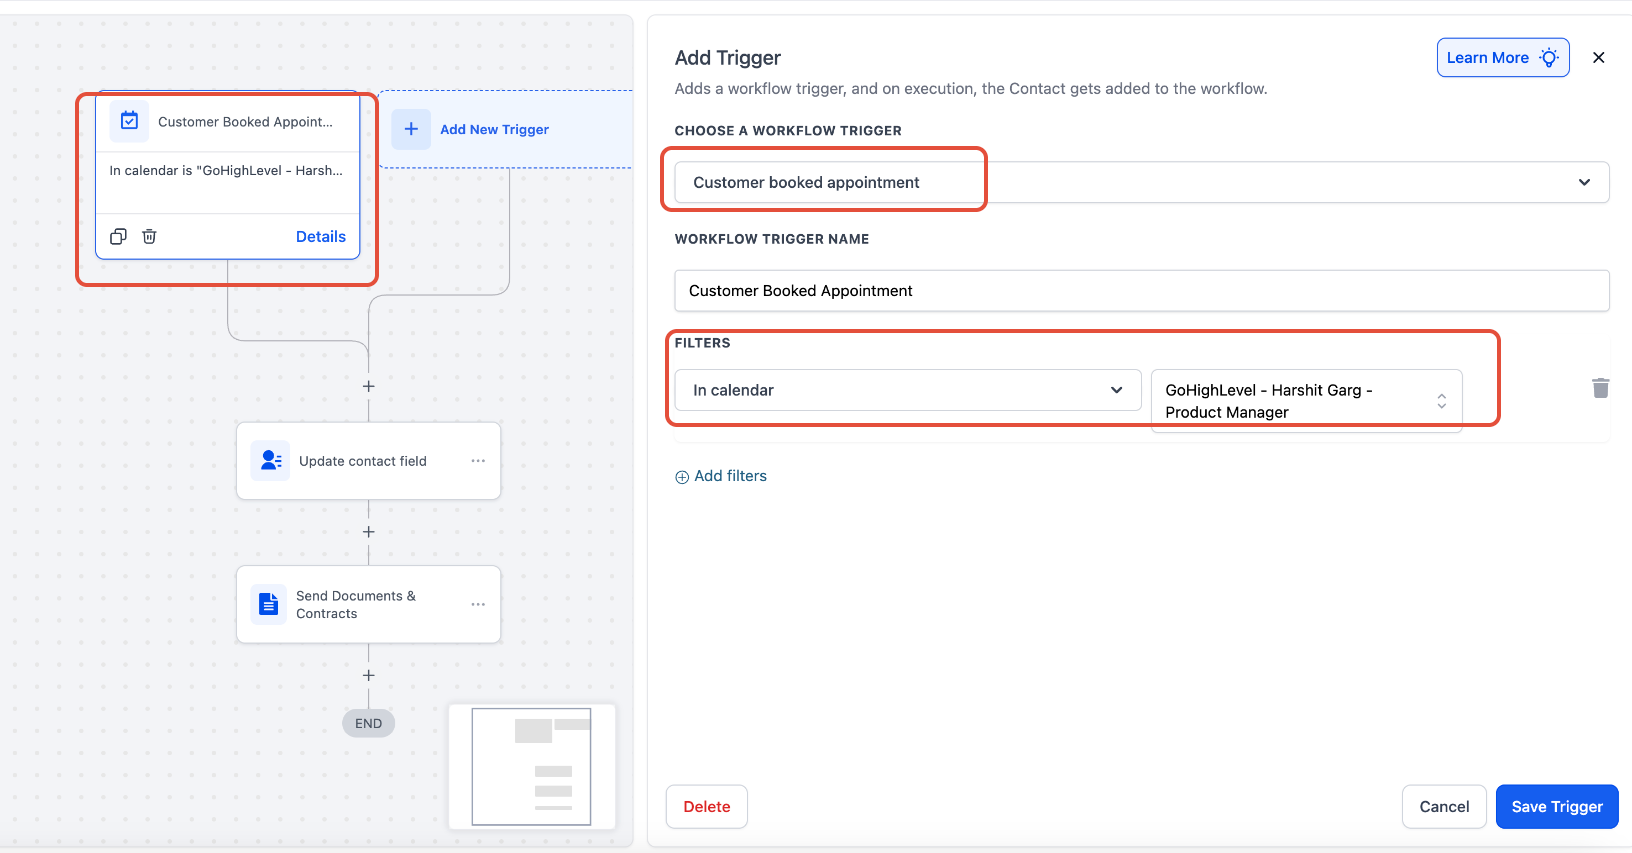
Set Your Trigger:
Add a new workflow and select the Customer Booked Appointment trigger.
(Optional) Use the Filters to select the specific In calendar that should run this automation.
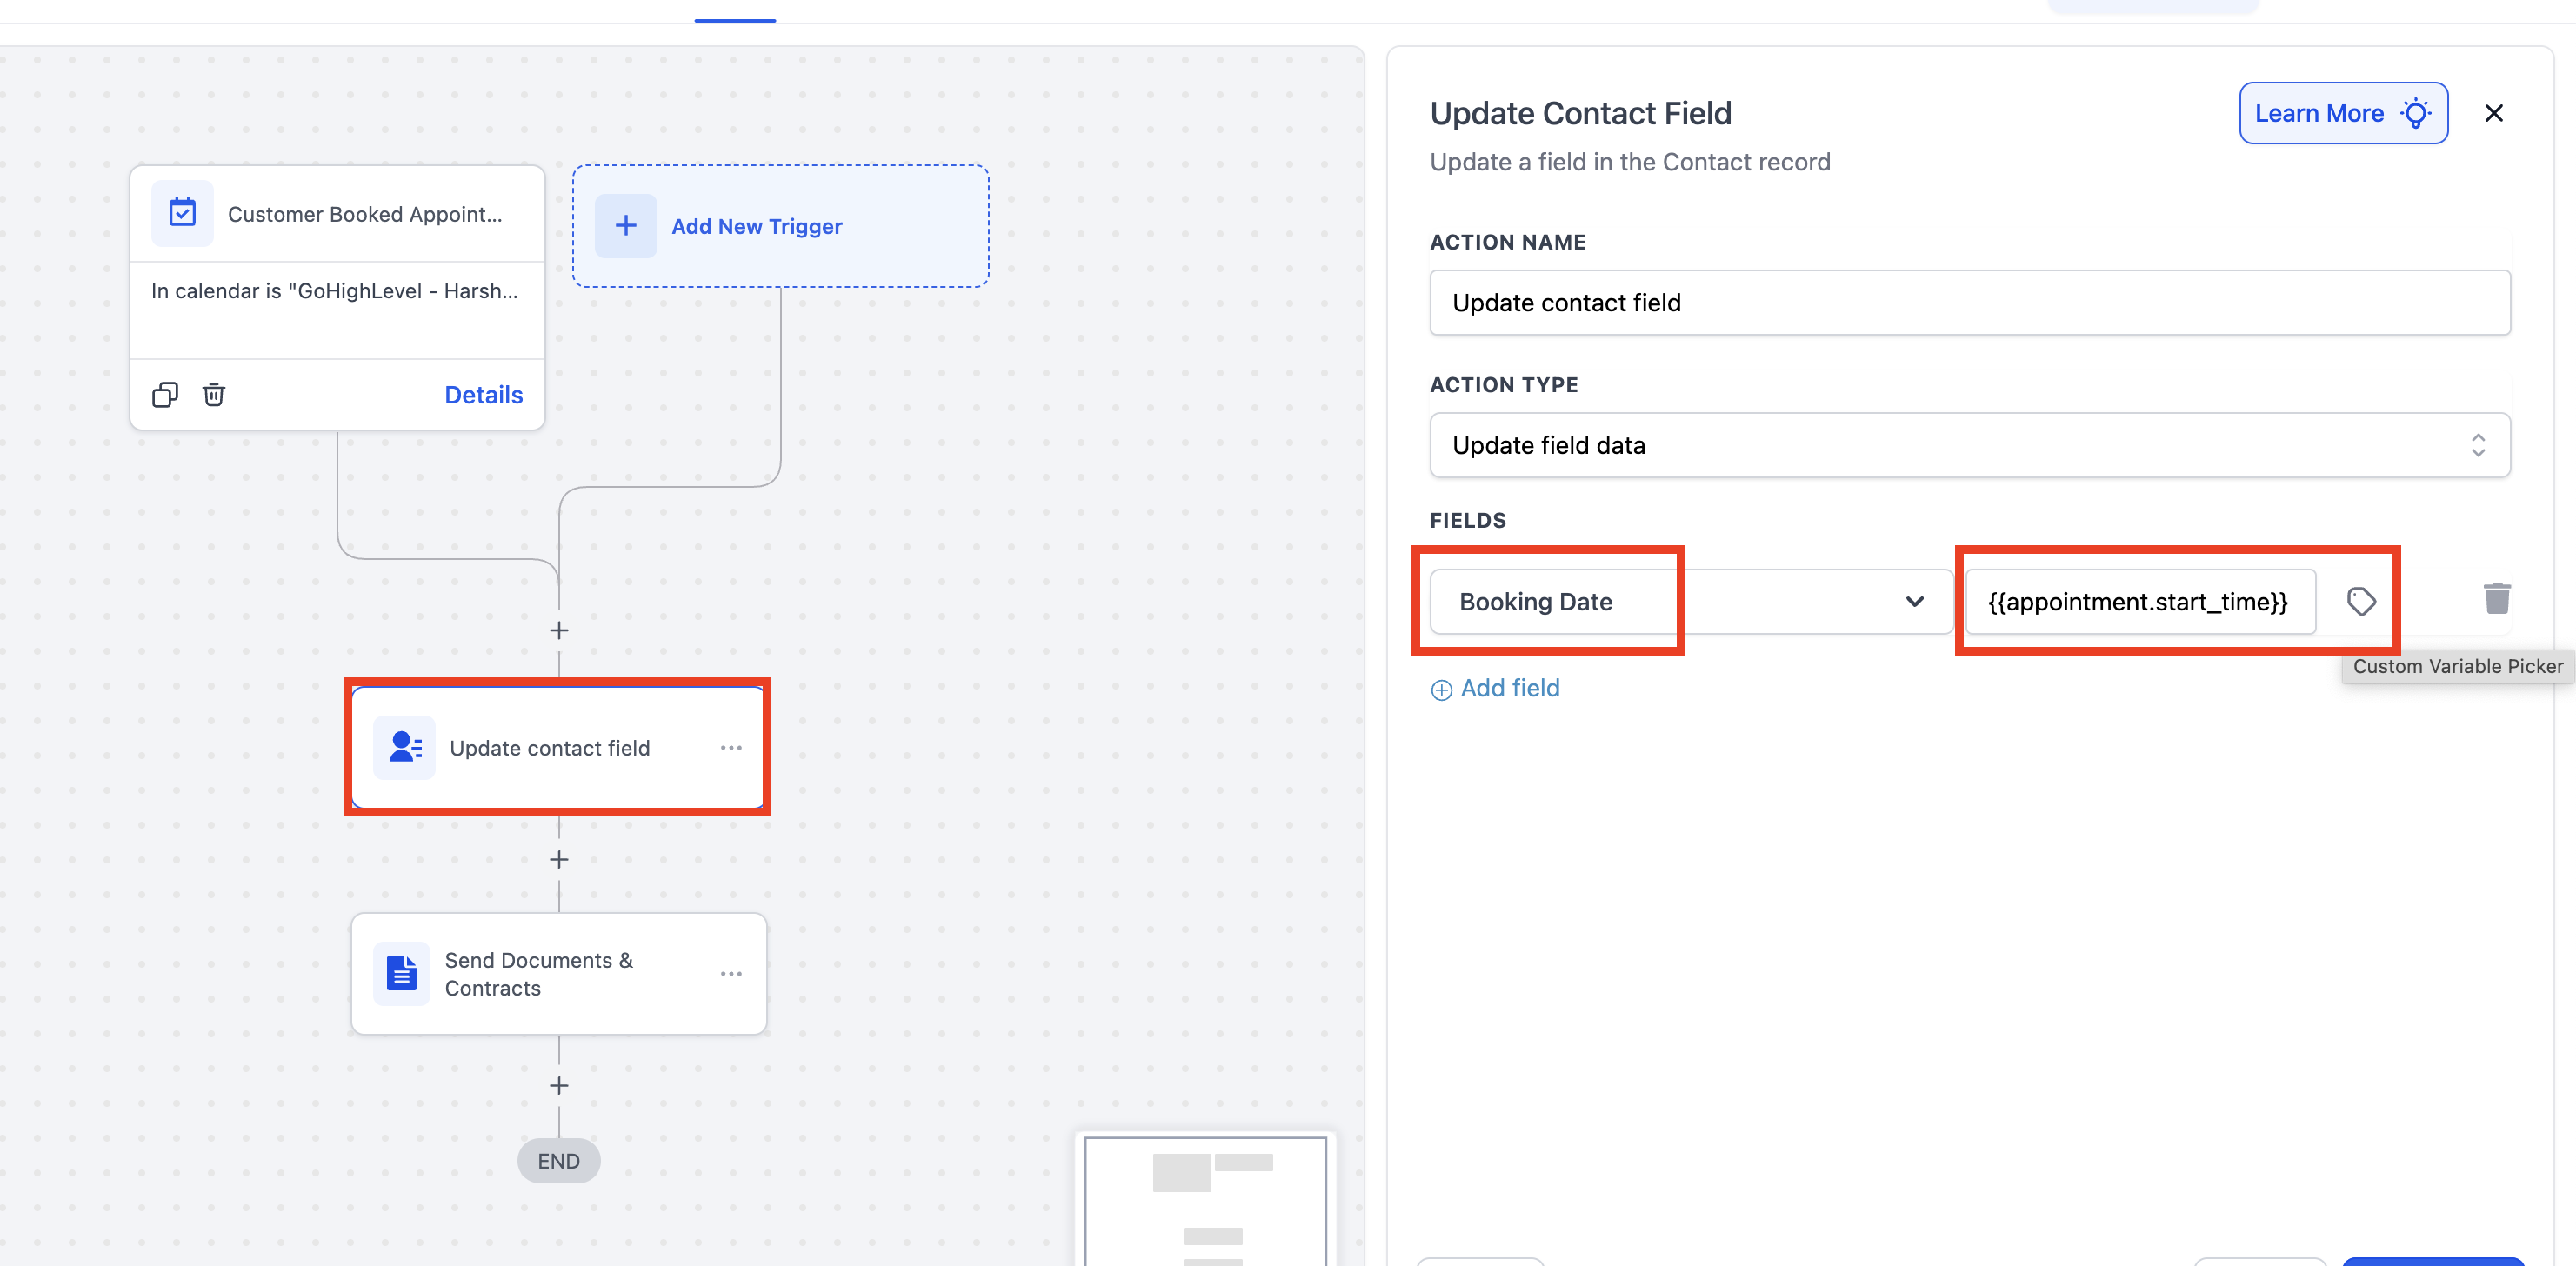
Add the "Update Contact Field" Action:
Click the (+) icon to add a new action.
Select Update Contact Field.
Select Field: Choose the Contact custom field you created (e.g., "Session Date").
Select Value: Click the tag icon and select Appointment > Start Time. This copies the booking date into your contact's custom field.
Add the "Send Contract" Action:
Click the (+) icon directly under the "Update Contact Field" step.
Select the Send Documents & Contracts action.
In the Template dropdown, select the new, updated contract template you created in the "Prerequisites" step.
Save and Publish your workflow.

4. The sent contract will have the booking date prefilled

This method is for businesses that already have an opportunity-based pipeline. It finds an existing opportunity for the contact and updates it with the booking date. You can also set up workflows where post booking, a new opportunity is created and within that information is filled.
Set Your Trigger:
Add the Customer Booked Appointment trigger, and filter for your specific calendar.

Add the "Find Opportunity" Action:
Click the (+) icon and select Find Opportunity.
Set
OPPORTUNITY TO BE FOUNDto Most recently created opportunity.Add a Field filter: Select your custom field (e.g., "Session Date") and set the condition to "Is Empty". This ensures you only update opportunities that need a date.

Add the "Update Opportunity" Action:
On the "Opportunity Found" branch, click the (+) icon.
Select the Update Opportunity action.
Add field and select your Opportunity custom field (e.g., "Session Date").
For the value, click the tag icon and select Appointment > Start Time.
Add the "Send Contract" Action:
Click the (+) icon directly under the "Update Opportunity" step.
Select the Send Documents & Contracts action.
In the Template dropdown, select your updated Opportunity-based contract template.

The sent contract will now have the booking date prefilled.

Final Logic
Your workflow, whether using Method 1 or 2, must follow this logic:
Trigger (Appointment Booked)
Update Field (Contact or Opportunity)
Send Contract (Using the updated template)
Troubleshooting Q&A:
- The contract was sent, but the date field is blank: This could mean a few things-
1. Your workflow order is wrong. The Update Field action (Contact or Opportunity) must be placed before the Send Contract action.
2. If you are updating an opportunity then an opportunity should exist for the user who has made the booking. Else, create opportunity action should be used.
- The old contract was sent, without the new date field: Go back into your Send Contract action and make sure you have selected your new, cloned template from the dropdown menu, not your old one.
Was this article helpful?
That’s Great!
Thank you for your feedback
Sorry! We couldn't be helpful
Thank you for your feedback
Feedback sent
We appreciate your effort and will try to fix the article