Capture key context once and have it follow you wherever you work. In HighLevel, appointment notes automatically appear on the related Contact, Opportunity, and Conversation records so everyone sees the same information. This guide covers how to create, manage, and filter notes—and clarifies what syncs with Google/Outlook and what stays internal. Use it to streamline handoffs, reduce retyping, and keep every interaction actionable.
TABLE OF CONTENTS
- What are Notes for Appointments in HighLevel?
- Key Benefits of Notes for Appointments
- How Notes Flow Across Different Modules
- How to Add, View, and Manage Appointment Notes
- Managing Appointment Notes
- Frequently Asked Questions
What are Notes for Appointments in HighLevel?
Notes for appointments capture internal context tied to a single calendar event in HighLevel. When you add one, it automatically becomes available on the associated Contact, Opportunity, and Conversation records.
Edits and deletions to the appointment note are reflected everywhere the note appears, so you never retype or reconcile versions. Each note records who added it and when, supporting accountability and handoffs. Notes are internal to HighLevel; external calendar descriptions remain separate and do not replace these notes.
You’ll see three types of content in the appointment’s Notes area: user-added notes (these propagate to Contact/Opportunity/Conversation), the booker’s Additional Information from the booking form (visible only in the Appointment Modal), and Google/Outlook event descriptions if two-way sync is enabled (also Appointment Modal only). Internal notes never sync out to external calendars. With two-way sync, Google/Outlook descriptions can sync into the appointment for reference.
Key Benefits of Notes for Appointments
Understanding these benefits helps your team rely on Notes as the shared source of truth for appointment context.
- Consistency: One note tied to the appointment appears on Contact, Opportunity, and Conversation.
- Real-time updates: Edit once and changes are reflected everywhere the note is shown.
- Findability: Filter by source—User, Workflow, or API—to focus on the entries that matter.
- Accountability: Each note records the author and timestamp for clear ownership.
How Notes Flow Across Different Modules
Appointment notes travel with the contact so you can see the same context without jumping back to the calendar. The note you create on an appointment is the same note you’ll see elsewhere; viewing or editing it from any module shows identical content, author, and timestamp.
- Contacts: Open Contacts → select the person → check the right-side Notes panel (and the Appointments card) to view or edit the appointment’s internal note.
- Conversations: Open Conversations → select a conversation → use the right-side Notes panel to view or edit the appointment note tied to that contact.
- Opportunities: Open Opportunities → click the relevant opportunity → choose Notes in the drawer to view or edit the appointment note linked to that opportunity’s contact.
Notes sync across supported records in real time, so teams always see the latest version without manually refreshing context across modules.
Use this quick matrix to confirm what appears where:
Input Type | Appointment Modal | Contact | Opportunity | Conversation |
|---|---|---|---|---|
Internal appointment note (User/Workflow/API) | ✔ | ✔ | ✔ | ✔ |
Contact note (added on Contact) | — | ✔ | — | — |
Booker’s Additional Information | ✔ | — | — | — |
Google/Outlook event description | ✔ | — | — | — |
How to Add, View, and Manage Appointment Notes
Covering the most common paths so your team can capture context no matter where they work.
From Calendar View (booked appointment)
- Go to Calendars → Calendar View.

- Click the appointment to open it, then choose the Notes tab. Click Add Internal Note, type your note, and Save.

From Appointment List View (booked appointment)
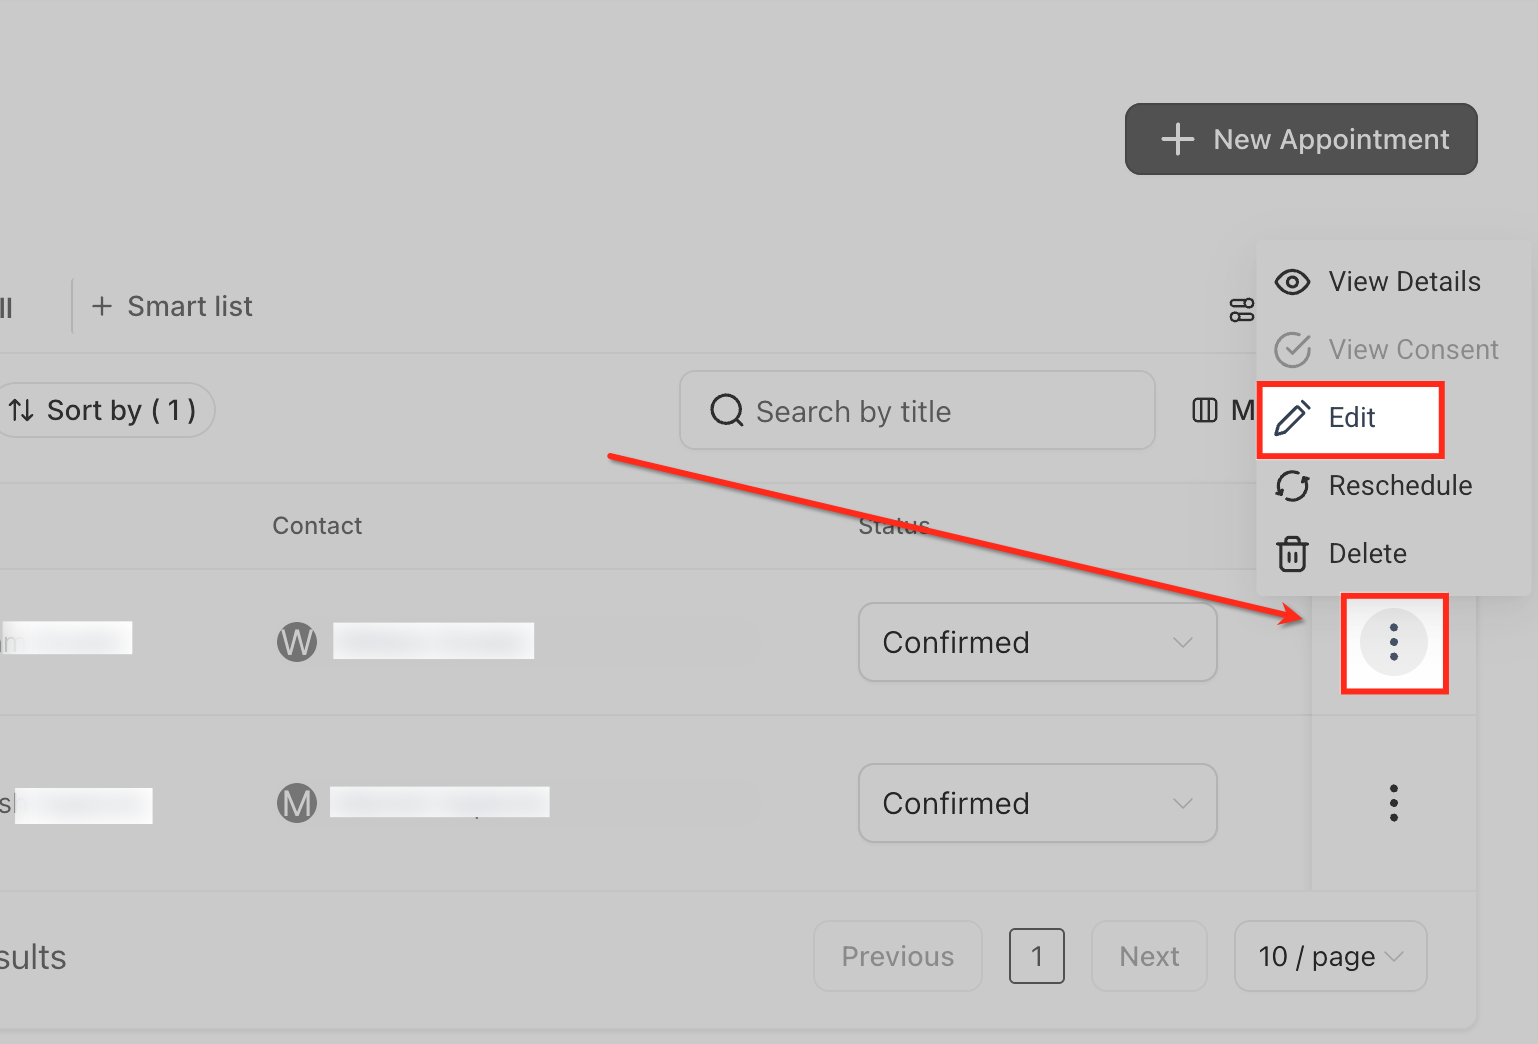
- Go to Calendars → Appointment List View.

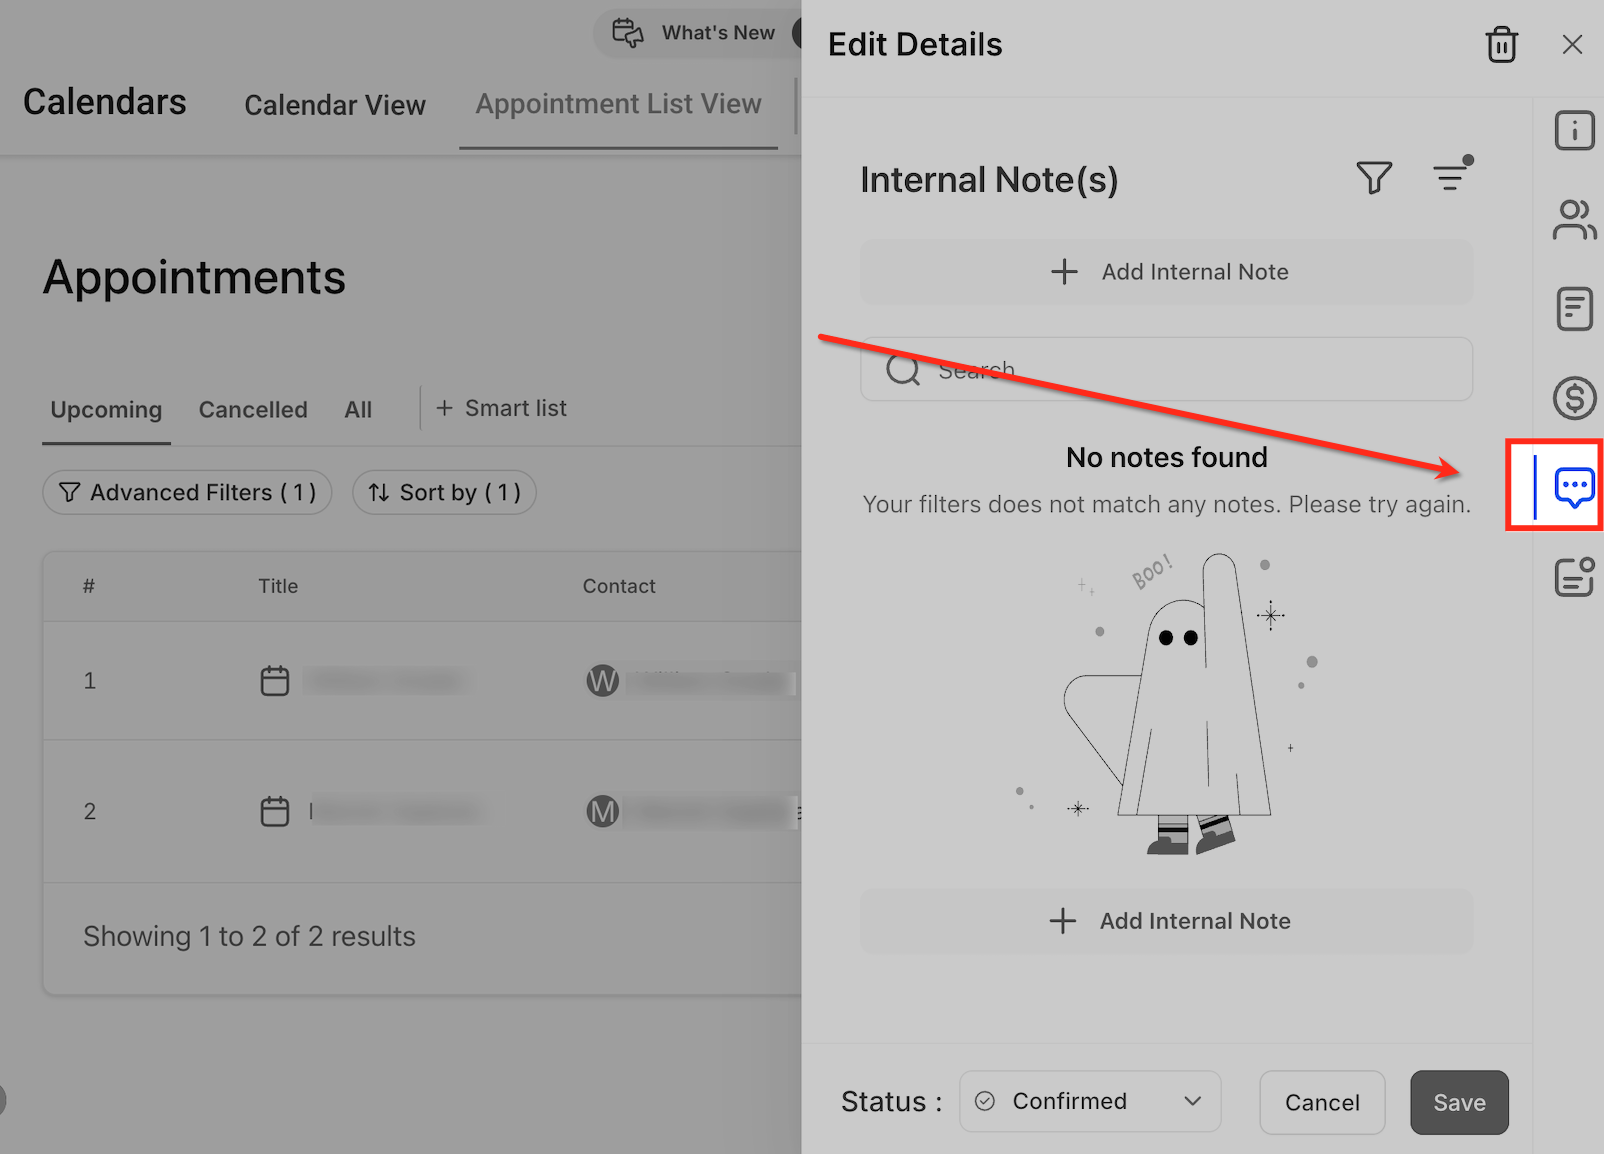
- Find the appointment, click the ⋮ menu, then select Edit. In Edit Details → Internal Note(s), click Add Internal Note, type, and Save.
When a customer books (Additional Information field)
- Your calendar form includes Additional Information, whatever the customer types appears with the appointment as booking context.

Add an Internal Note (Editor & Status)
Compose your note and, if needed, update the appointment status from the same panel—keeping context and meeting lifecycle in sync.
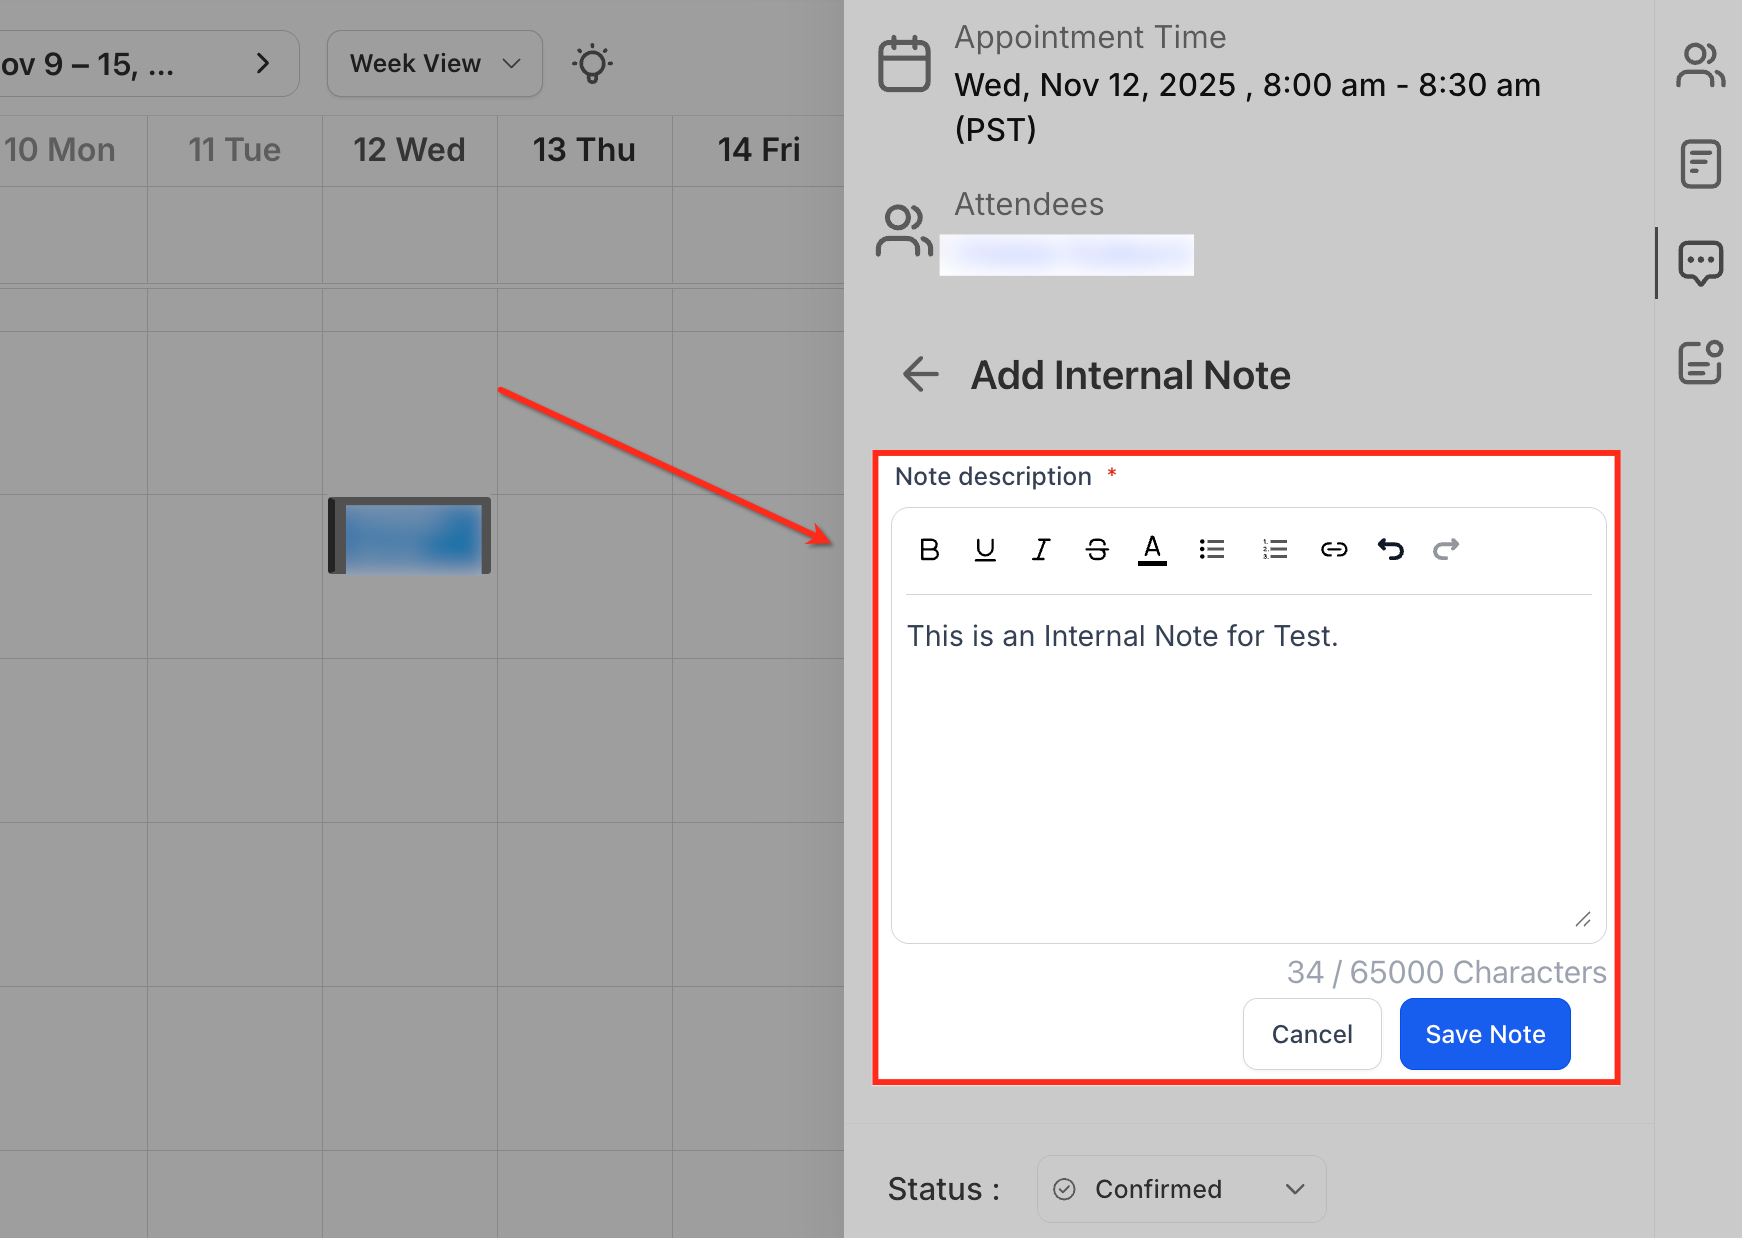
- Open the appointment from Calendar View or Appointment List View, then click Add Internal Note.

- Type your note. You can use formatting (bold, italics, underline, lists, links). The editor supports up to 65,000 characters.
Managing Appointment Notes
Make it easy to find and control notes on busy timelines.
Filter by source
Click the filter icon in Internal Note(s) and choose User, API, and/or Workflow. Multiple selections can be applied.

Sort notes
Click the sort icon to sort by Date created (ascending/descending).

Search notes
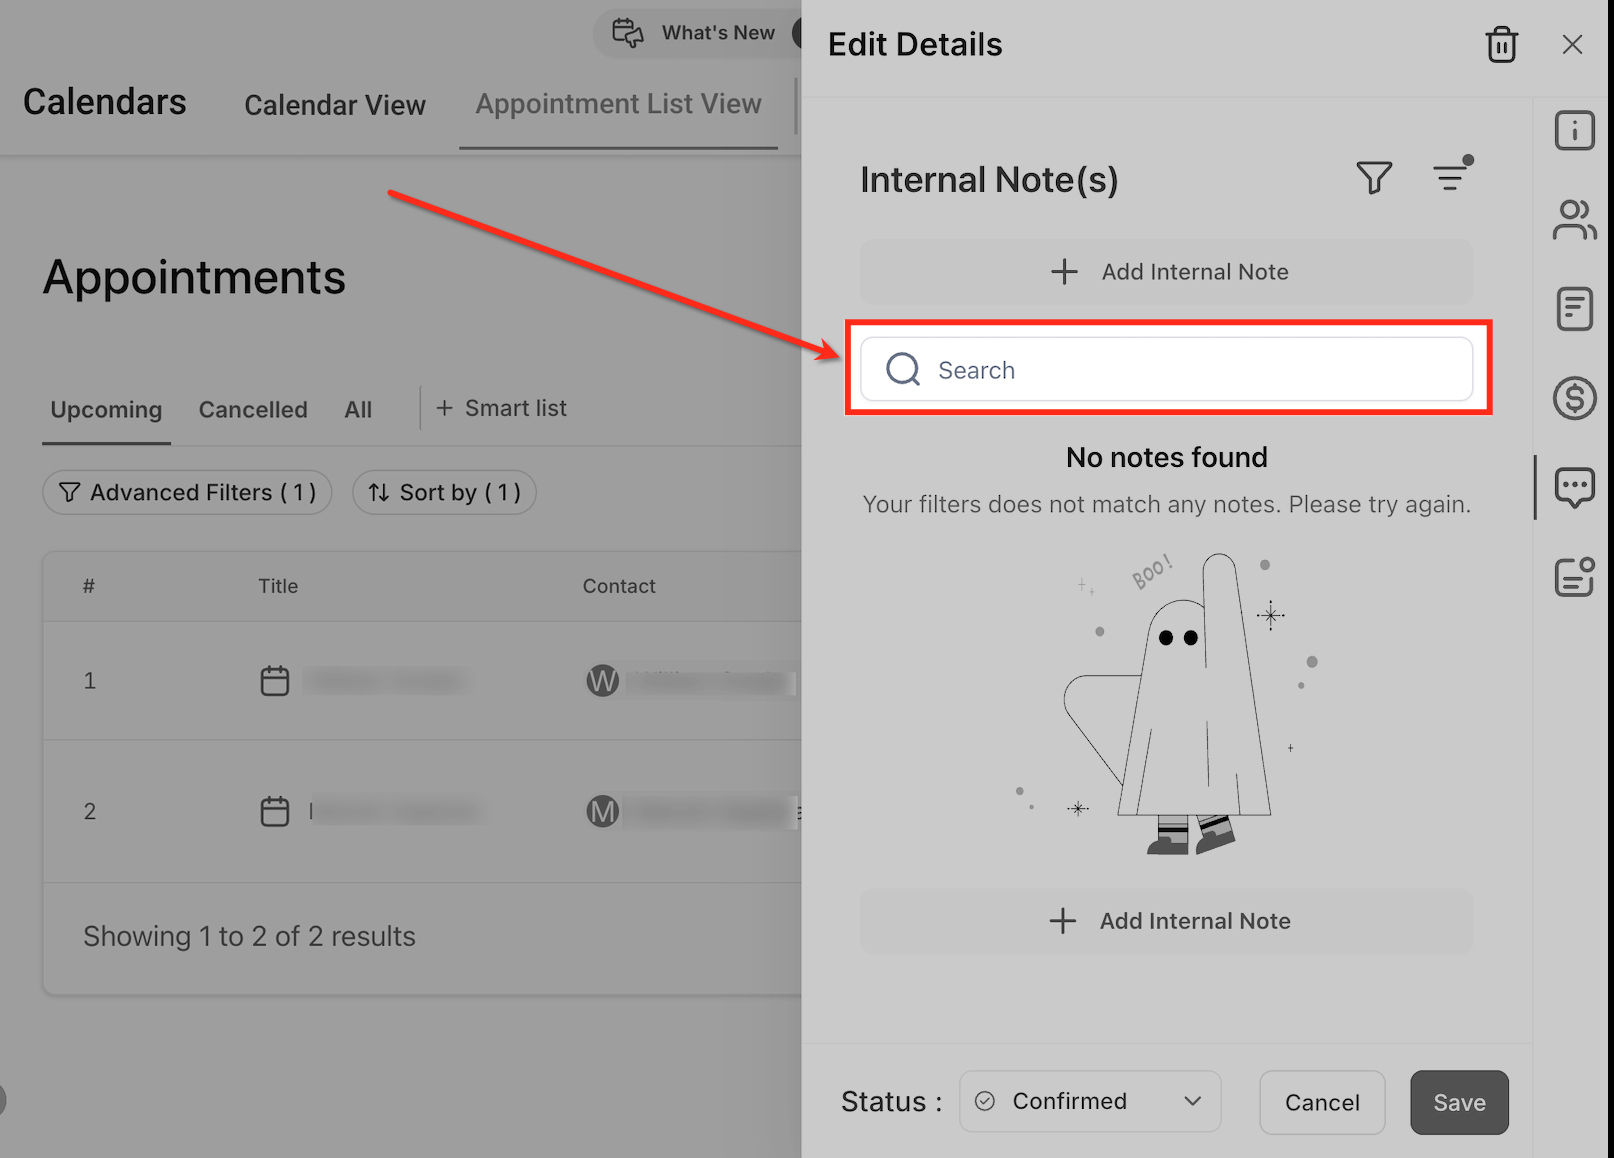
Use the Search field in Internal Note(s) to find keywords across notes for this appointment.
Status
Use the Appointment List View tabs (Upcoming, Cancelled, All) or the Status field in the Edit Details panel to navigate appointments. Notes remain accessible regardless of appointment status; changing status does not delete notes.

Delete or edit a note (⋮ menu)
Open the appointment → Internal Note(s). On the note card, click the ⋮ (three dots) menu to Edit or Delete the note. Deleting a note removes it from the Contact, Opportunity, and Conversation where it appears, and it can be restored within 30 days.

Frequently Asked Questions
Q: What’s the practical difference between an internal appointment note, the Booker’s Additional Information, and a Google/Outlook event description?
Internal appointment notes are created by users/Workflows/API in HighLevel and propagate to the associated Contact, Opportunity, and Conversation. Booker’s Additional Information is provided by the customer during booking and stays on that appointment only. Google/Outlook event descriptions (with two-way sync) appear on the appointment as external context and never push to other modules or replace internal notes.
Q: If I edit an appointment note from the Contact/Opportunity/Conversation view, does it update the appointment too?
Yes. It’s the same note referenced in multiple places. Editing or deleting from any surface updates the note everywhere it appears, including the appointment.
Q: What happens to notes if I reschedule or cancel the appointment?
Notes remain attached to the appointment record and stay visible according to the rules in this article. Changing Status (Confirmed, Cancelled, Showed, No Show, Invalid, Unconfirmed) does not remove notes.
Q: How do notes behave with recurring or duplicated appointments?
Notes are tied to a specific appointment instance. Create notes on each instance that needs its own context; notes aren’t copied automatically to new or duplicated events.
Was this article helpful?
That’s Great!
Thank you for your feedback
Sorry! We couldn't be helpful
Thank you for your feedback
Feedback sent
We appreciate your effort and will try to fix the article