This article explains the Calendar View in Rentals — your visual hub for managing all bookings, blocked slots, and listing availability in one place. It covers how to navigate the calendar, filter and organize views, and create new bookings directly from this screen.
TABLE OF CONTENTS
What is Calendar View for Rentals?
The Calendar View provides a visual timeline of all bookings and listing availability. It helps you easily identify occupied slots, open periods, and overlapping reservations across listings or variants. The redesigned layout offers more space, streamlined filters, and improved readability for managing high booking volumes.
With Calendar View, you can:
View all bookings across listings, days, or weeks at a glance.
Filter listings and bookings by category, status, or payment state.
Create new bookings directly from the calendar.
Quickly open and edit existing bookings.
Key Benefits of Calendar View
At‑a‑Glance Planning: See bookings by day/week/month to spot gaps and overlaps quickly.
Focused Context: Keep listings, variants, and rental statuses separate from Meetings/Services.
Smart Filtering: Narrow by listing, category, booking status, or payment status to triage operations.
Faster Booking Intake: Create new bookings directly from the calendar and open existing ones in a click.
Consistency across tools: Items you create here appear instantly in Appointments (List) View, keeping ops in sync.
Scheduling Types in Calendar View
The Calendar View in Rentals supports multiple scheduling types across the platform, allowing different calendar experiences to coexist without overlap. However, Rentals is designed as a dedicated scheduling type, separate from Meetings or Services.
Scheduling Types Overview
Meetings
Best for sales calendars, classes, and personal or collective scheduling.
Includes existing calendar types like personal, round robin, collective, and class calendars.
Designed for teams or individuals managing client meetings or internal sessions.
Services
Purpose-built for service-based businesses.
Supports advanced options such as variations, add-ons, multiple services and staff specific pricing.
Helps manage bookings that involve staff, different service types, or multiple locations.
Rentals
A distinct scheduling type purpose-built for rental-based businesses.
Focuses on multi-day booking, availability tracking, and resource-based scheduling.
Supports advanced features like listing variants, inventory, and pricing adjustments over time.
Separate from Services, Rentals introduces its own booking flow, invoicing logic, and global configuration.
Enabling or Disabling Scheduling Types
Scheduling types can be managed under Agency Settings.
If only one type (e.g., Rentals) is enabled, the Calendar View automatically defaults to that type, hiding the scheduling type selector.
If multiple scheduling types (e.g., Meetings and Rentals) are enabled, a dropdown appears at the top of the Calendar View, allowing users to switch between them.
How the View Changes
When switching between scheduling types using the dropdown:
The layout and filter options adjust to match the selected scheduling type.
Each type displays only its own relevant bookings, blocked slots, and filters to avoid cross-type confusion.
For example, Rentals will display listings, variants, and rental bookings, while Meetings will show appointments.
Note: The Calendar View Enhancements (Labs Flag) — is automatically enabled when Rentals is active.How to Access the Calendar View
Navigate to Calendars → Calendar View.

In the dropdown at the top, select Rentals.

Use the Day, Week, or Month toggle to switch between views.

Tip: Use Today to instantly jump back to the current date from any view.
Understanding the Calendar View
The Calendar View is divided into three key sections:
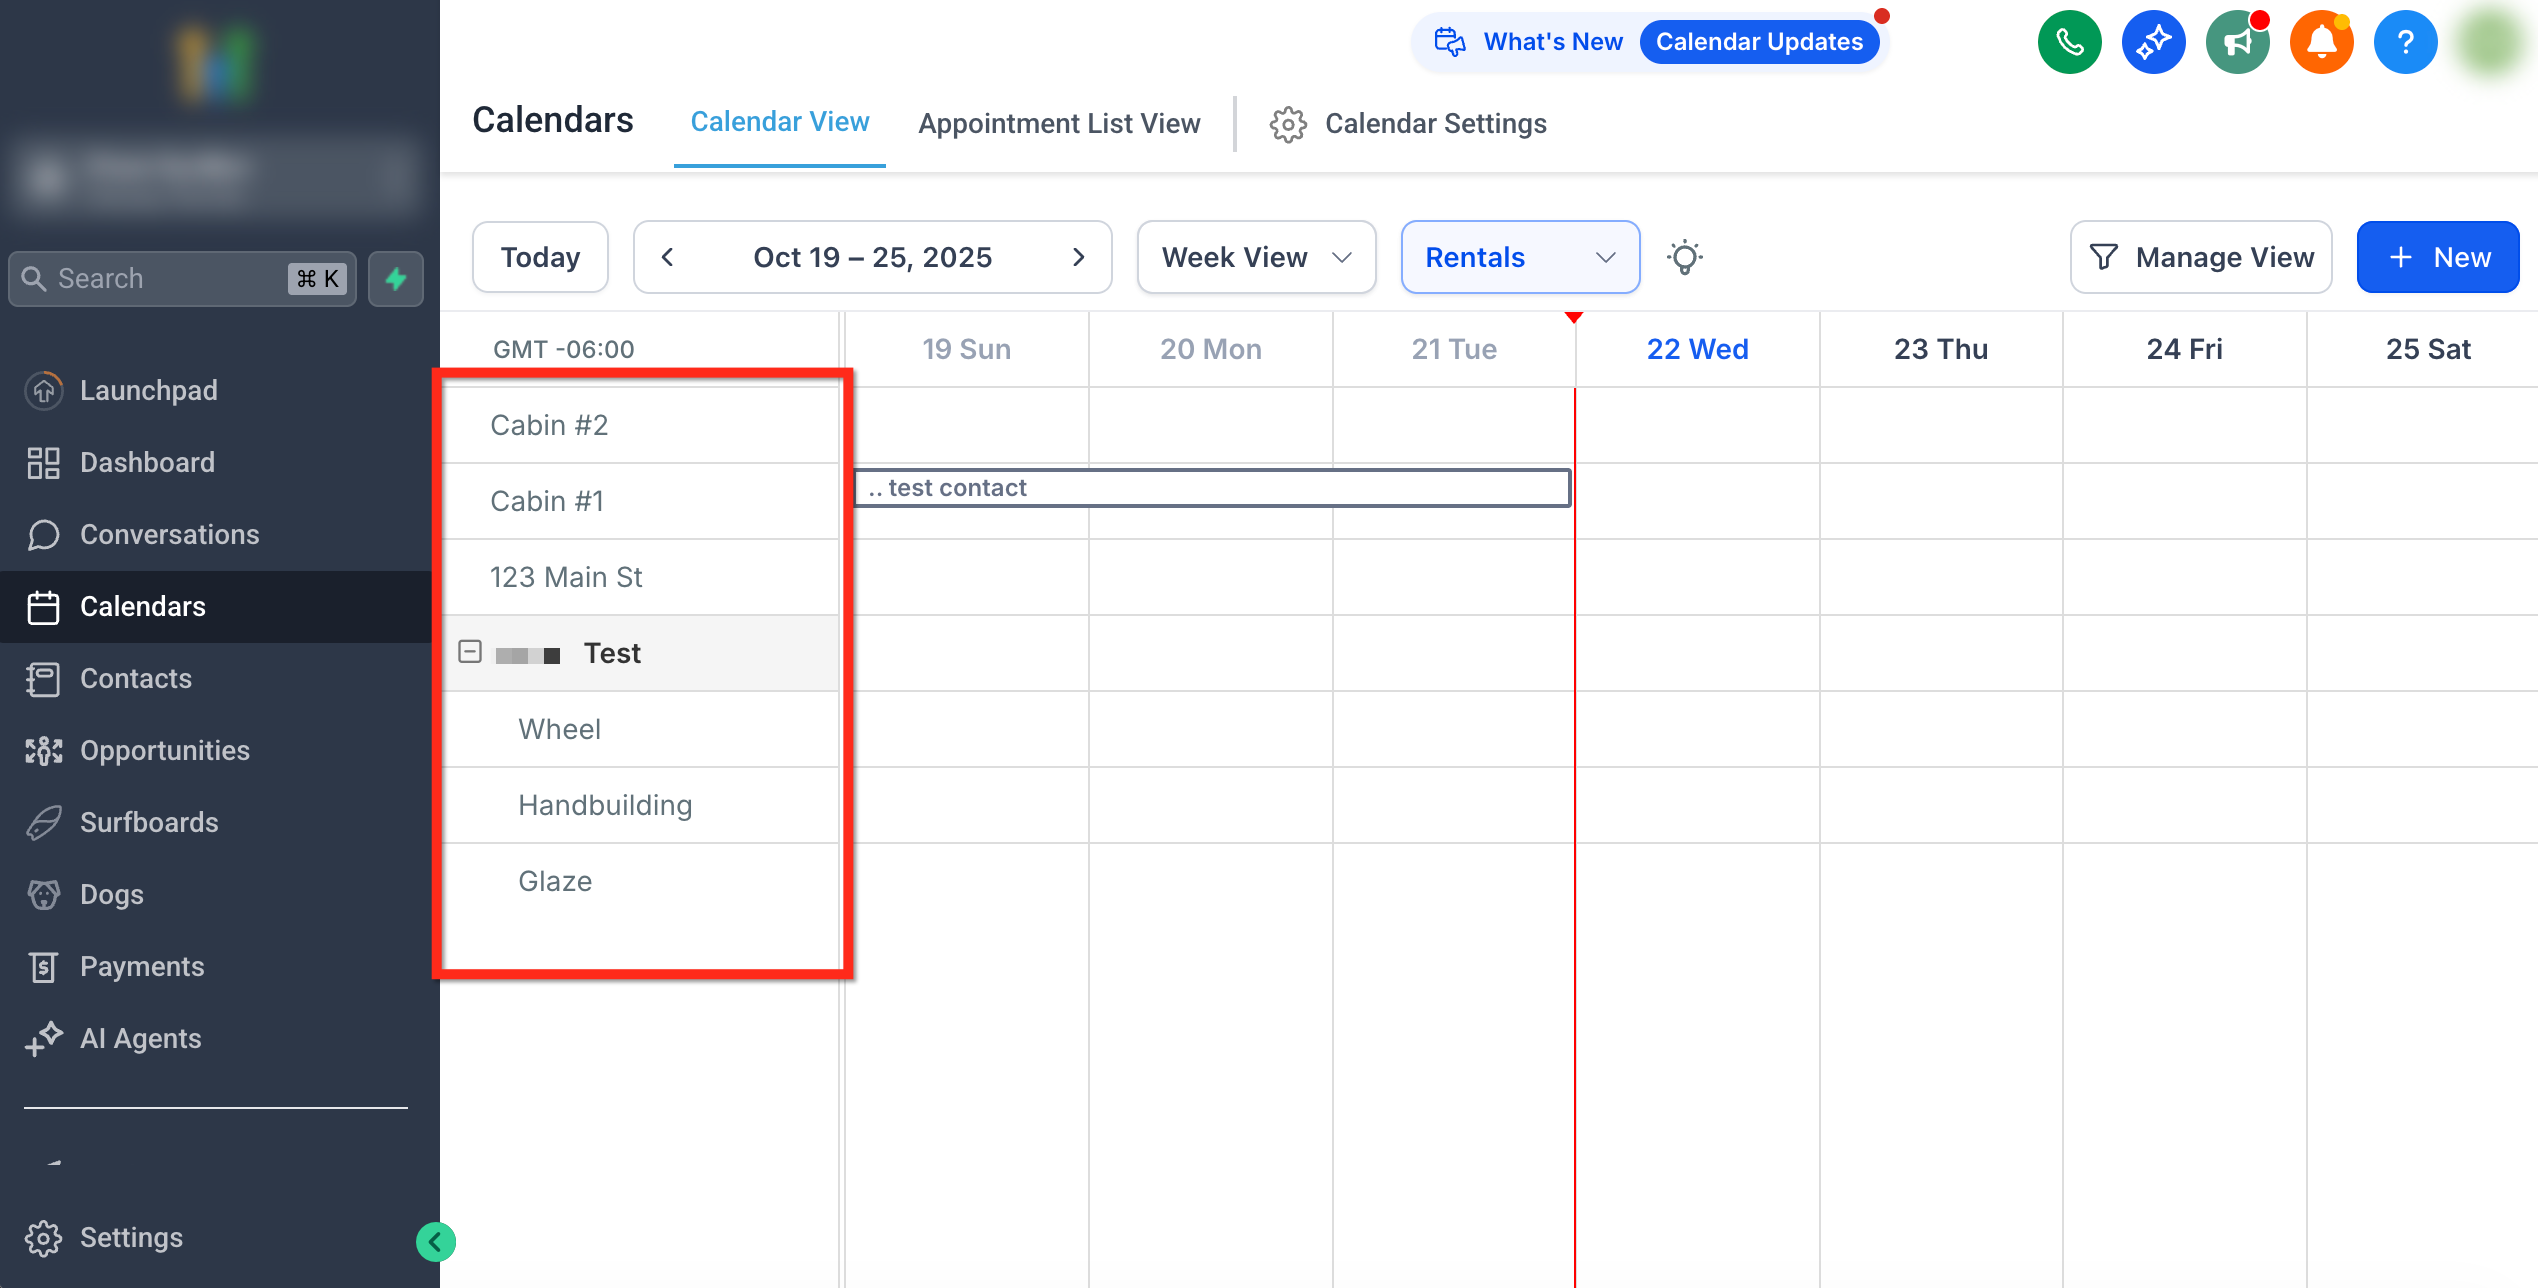
1. Listings (Left Side)
Displays all listings and their variants in a collapsible list.
Each listing name expands to show variants (if applicable).
The panel allows you to visually match listings with their active bookings.
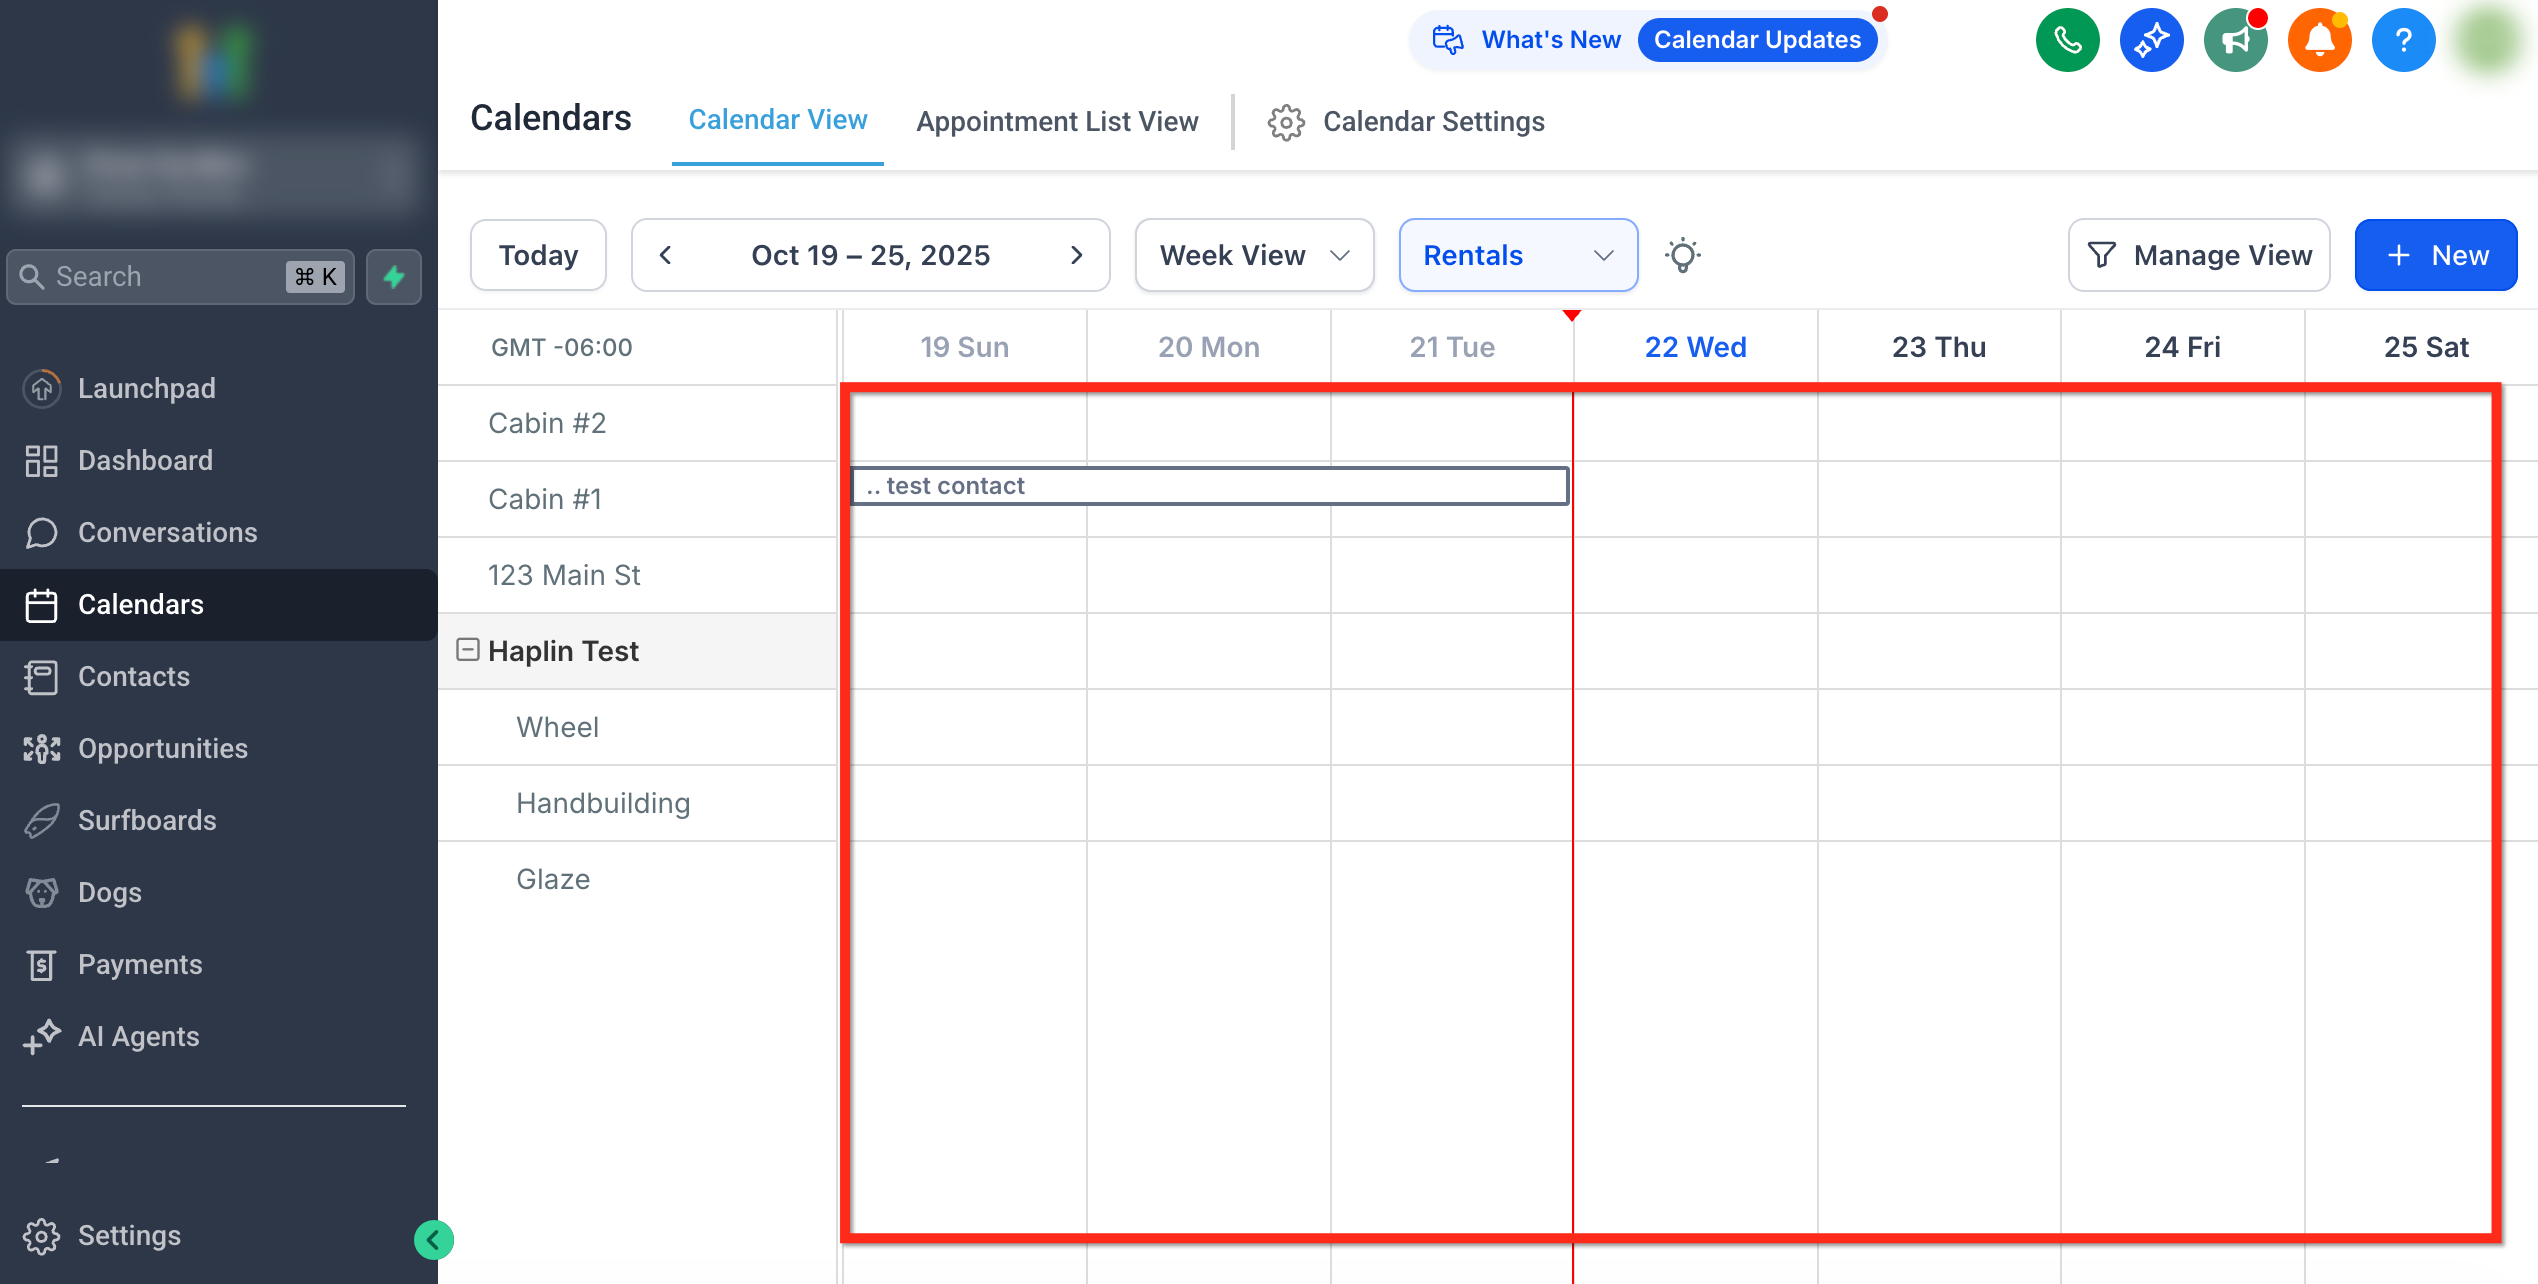
2. Calendar Grid (Center)
Displays bookings across the selected timeline.
Each booking block represents one booked interval.
Hovering over a booking shows a tooltip with booking details: customer name, listing, duration, and booking status.
Color-coded blocks indicate booking status:
Light Blue: Booked
Blue: Active
Green: Completed
Red: Canceled
Gray Unfilled: Unconfirmed
Click any booking block to open the Booking Details.
3. Manage View Panel (Collapsible)
Controls filters and display preferences.
Allows you to refine what appears on the calendar using multiple filter categories.

Navigation Controls
The top navigation bar provides quick control over how you view and manage bookings.
| Control | Description |
|---|---|
| Today | Jump to the current date instantly. |
| Date Picker / Arrows | Move forward or backward in time. |
| Day / Week / Month View | Switch between granular and broad timeline views. |
| Rentals Dropdown | Toggle between modules such as Services and Rentals. |
| Manage View | Open filters and customization options for the calendar. |
| + New | Create a new booking directly from the calendar. |
Tip: Day and Week views are ideal for operational planning, while Month View gives a high-level overview of availability and occupancy trends

Using Manage View
The Manage View panel allows you to filter bookings and listings to focus on the data that matters most.
View By Type
All: Displays both bookings and blocked slots.
Bookings: Displays rental bookings only.
Blocked Slots: Displays manually blocked availability slots and third party imported blocks.
Filters Available
Listings – Select specific listings or variants to display on the calendar.
Categories – Filter bookings by category (e.g., Apartments, Vehicles, Equipment).
Status – Filter by booking status: Unconfirmed, Booked, Active, Completed, or Canceled.
Payment Status – Filter bookings based on payment progress: Pending, Partially Paid, or Paid.
Use Search to find listings, categories, or statuses quickly, and Clear All to reset filters.
Booking Display and Interaction
Each booking is shown as a colored block in the grid.
Hover over a block to view a summary tooltip (customer name, booking ID, dates, and status).
Click a booking to open its detailed view.
The calendar view dynamically adapts by expanding in size if there are more than one booking for the same listing or variant.
Note: The timezone displayed here matches the user's timezone set for View Appointments In set under My Profile.
Creating a Booking from Calendar View
Admins can create new bookings directly from the calendar using either the + New button or by dragging across available dates in the calendar grid.
Method 1: Using the + New Button
Click the + New button in the top-right corner.
Fill out booking details (customer, listings, duration, etc.).
Save the booking.
The new booking will immediately appear on the calendar and sync with the Appointments View.
Tip: Creating bookings directly from Calendar View helps ensure alignment with listing availability.

Method 2: Drag to Create
Users can create bookings directly by selecting a date or time range inside the calendar grid.
Click and drag across future dates or time slots within a listing row
Release the mouse to open the booking creation panel. The selected start and end date/time will be automatically pre-filled.
Complete the booking details and Create Booking
Important: Drag-to-create is available only for future dates. It is not supported for past dates or the current date. To create bookings for today, use the + New button instead.

Blocked Slots
Blocked slots let you take a listing off the market without creating a customer booking or order. Once created, the listing becomes unavailable for the selected duration and availability updates across booking flows
To create a blocked slot, set Event Type to Blocked slot when creating a booking.
For more information, see: Blocked Slots for Rental Listings
Example: If a car is undergoing maintenance, a blocked slot ensures that no bookings can overlap with that time period.

Best Practices
Use Week View for operational clarity when managing multiple listings.
Hover over bookings to quickly preview details without leaving the calendar.
Use Manage View → Categories or Status filters to simplify the view during peak seasons.
Frequently Asked Questions
Q: Can I edit or drag bookings directly on the calendar?
Currently, bookings can be edited only by clicking the booking block and opening the Edit Booking page.
Q: What does each color represent?
Colors reflect booking status — Light Blue for Booked, Blue for Active, Green for Completed, Red for Canceled, and Gray (Unfilled) for Unconfirmed.
Q: Can I hide blocked slots?
Yes. Use Manage View → View by Type → Bookings to show only confirmed bookings.
Q: Do calendar updates appear in real time?
Yes, the calendar automatically refreshes for all users with active sessions.
Q: My listings aren’t visible. What should I do?
Check the Manage View filters — you may have certain listings, statuses, or payment filters applied.
Q. I got a new booking on a third party platform, but it's not showing on the calendar view.
Bookings are automatically synced from the external platforms every few hours. You can manually re-sync and import bookings by going to the specific listing > Edit > Calendar Sync Tab > Refresh icon next to the imported calendar
Related Articles
Was this article helpful?
That’s Great!
Thank you for your feedback
Sorry! We couldn't be helpful
Thank you for your feedback
Feedback sent
We appreciate your effort and will try to fix the article