This article walks you through how to create and edit listings in Rentals. It covers everything from adding basic information in the quick-create modal to configuring advanced details like inventory, variants, pricing, booking options, and calendar synchronization.
TABLE OF CONTENTS
Overview of Creating and Editing Listings
Listings are the foundation of your Rentals setup. Each listing represents a rentable item—like a car, property, or piece of equipment—and contains all associated details such as pricing, duration, and stock availability.
You can create listings quickly using the New Listing modal and later configure more advanced settings using the Edit Listing page, which includes multiple tabs for detailed customization.
How to Create a New Listing?
To create a new listing:
Step 1: Navigate to Listings
Go to Calendars → Calendar Settings → Rentals → Listings.

Step 2: Create New Listing
Click the + New Listing button in the top-right corner. The New Listing modal will appear.

Step 3: Fill Out Basic Listing Details
In the New Listing modal, enter the following fields:
Listing Image — Upload or drag & drop photos to showcase your listing. These images are shown on the booking page.
Listing Name (required) — Add a title for your listing (e.g., “Luxury Villa,” “Compact SUV,” “Professional Camera Set”).
Description — Provide a brief for the listing to communicate about its features, what all is included or is offered.
Base Price & Booking Unit— Set the cost per selected time unit. E.g., $50/hour
Category — Select a category to group listings
Status — Mark the listing as Active (visible) or Inactive (hidden) on the booking website.
Tip: Keep listings inactive until you finish setup to avoid early bookings.

Step 4: Advanced Settings
Once complete, click Advanced Settings at the bottom to open the detailed setup. Here you are able to make edits covering:
General Information
Inventory & Pricing
Booking Settings
Calendar Sync
More information on each area will be covered later in this article.

Editing a Listing
To edit a listing:
Step 1: Navigate to Listings
Go to Calendars → Calendar Settings → Rentals → Listings.
Step 2: Select a Listing
Click the edit icon(Pencil) next to the listing you would like to edit

Step 3: Make Edits
The Edit Listings Screen will open. The Edit Listing screen includes four main tabs:
General Information
Inventory & Pricing
Booking Settings
Calendar Sync
Each tab focuses on a specific part of your rental configuration. More information on each are can be found in the following sections.

General Information
This tab lets you modify listing basics and visuals.
Available Fields:
Listing Image — Add or replace multiple images to form a gallery.
Listing Name — Update the title for admin and customer display.
Description — Edit or expand rental details and highlights.
Category — Reassign to a different category if needed.
Status — Toggle between Active and Inactive.
- Enable Listing Specific Form — Toggle this ON incase you'd want to collect some separate information from the user when this listing is booked.
Note: Listing specific form is skipped incase multiple listings are added to the cart
Pro Tip: Use high-quality images and descriptive summaries to boost engagement and conversions.

Inventory & Pricing
This section controls your stock availability, listing variations and defines how much customers pay for rentals and supports advanced pricing logic.
Inventory
Inventory — Turn this on to manage available stock. If disabled, the whole listing is considered as one bookable unit.
Stock — The total number of units available for booking.
Variants
Variants allow you to offer different versions of the same listing (e.g., multiple car types or room categories).
When variants are enabled, you can set the Booking Unit as Hour, Day, Week, or Month which is used across all variants.
To Add a Variant:
Toggle on Variants

Click + New.

Fill in the following details:
Variant Name (e.g., Sedan, Deluxe Room)
Stock — Stock for that specific variant (if enabled).
Base Price — The price specific to that variant.
Security Deposit (optional) — Set refundable or card-on-file deposit values. (if enabled)
Click Confirm to save.
Note: Inventory and pricing are tracked individually for each variant if enabled.
Example:
A camera rental company might list:
Canon EOS R5 – Body Only ($70/day, Qty: 3)
Canon EOS R5 – With Lens ($90/day, Qty: 2)
Pricing
Base Price: The standard rental cost before any adjustments.
Advanced Pricing Options:
Seasonal Pricing — Adjust rates for specific date ranges (e.g., increase by 20% during holidays).
Day of Week Pricing — Configure unique rates for weekdays or weekends.
Hour of Day Pricing — Set different rates for certain hours (applies to hourly listings only).
Duration Discounts — Offer price reductions for longer bookings (e.g., 10% off after 7 days).
Quantity Discounts — Apply discounts for bulk bookings (e.g., 15% off for 5+ units).
Learn more about pricing logic in this article: Pricing & Discounts.

Booking Settings
Booking Period
The Booking Period setting determines how customers select dates and times for a listing and how rental duration and pricing are calculated.
You can choose from three modes:
1. Date & Time Selector
Customers select both start and end dates and times.
This mode is ideal for hourly rentals and bookings where precise time selection is required. Duration is calculated using the exact difference between the selected start and end date/time.
Time selection is always enabled in this mode.
2. Date Selector (Date-Only Bookings)
Customers select start and end dates only. They do not select time.
The system uses the configured Rental Start Time and Rental End Time to calculate duration and pricing.
Rental Start Time & Rental End Time
Rental Start Time = the booking start time applied to the selected start date (e.g., Check-in time)
Rental End Time = the booking end time applied to the selected end date (e.g., Check-out time)
These determine whether pricing behaves as day-based or night-based.
How Pricing Works
If Rental End Time is later than Rental Start Time, the booking is treated as day-based. Selecting the same start and end date is charged as 1 day. (e.g., Rental Start Time = 11 AM, Rental End Time = 5 PM)
If Rental End Time is earlier than Rental Start Time, the booking is treated as night-based. Selecting two consecutive dates is charged as 1 night. (e.g., Rental Start Time = 3 PM, Rental End Time = 11 AM)
Note : Hourly pricing is not supported with Date Selector.
3. Fixed Durations
Use this mode when customers should book predefined durations (for example, 2 hours, 1 day, 1 week, or 1 month).
All units (Hourly, Daily, Weekly, Monthly) include the setting:
“Customers can select start time while booking.”
If enabled:
Customers choose the start time. The end time is calculated automatically based on the selected duration.
If disabled:
Time behavior depends on the Booking Unit:
Hourly: Only Rental Start Time is configured.
End time is calculated as:End Time = Rental Start Time + DurationDaily, Weekly, Monthly: Both Rental Start Time and Rental End Time are configured.
These define the booking window for each duration.
Monthly Time Rules (All Modes)
For monthly rentals, the Rental End Time must not be later than the Rental Start Time. This ensures the booking represents a clean calendar-month period without spilling into an additional billing cycle.
For monthly durations:
End date = same calendar date in the next month
If that date does not exist (e.g., 31st), it adjusts to the last valid day of that month
Choosing the Right Mode
Use Date & Time Selector for time-specific or hourly bookings.
Use Date Selector for vacation rentals, overnight or multi-day bookings.
Use Fixed Durations for structured rental packages.
Additional Fields:
Minimum Duration — Shortest booking duration allowed.
Maximum Duration — Longest permitted rental duration.
Pre/Post Buffer Time — Add setup or cleaning time before and after bookings.
Minimum Scheduling Notice — Required notice time before a booking can start.
Maximum Advance Booking Window — The furthest date customers can book ahead.
Example:
For a property rental:
- Minimum Duration: 1 day
- Maximum Duration: 30 days
- Buffer: 2 hours before & after
- Advance Window: 3 months ahead
Note: While bookings must start and end within your business operating hours, rental durations can extend beyond them.

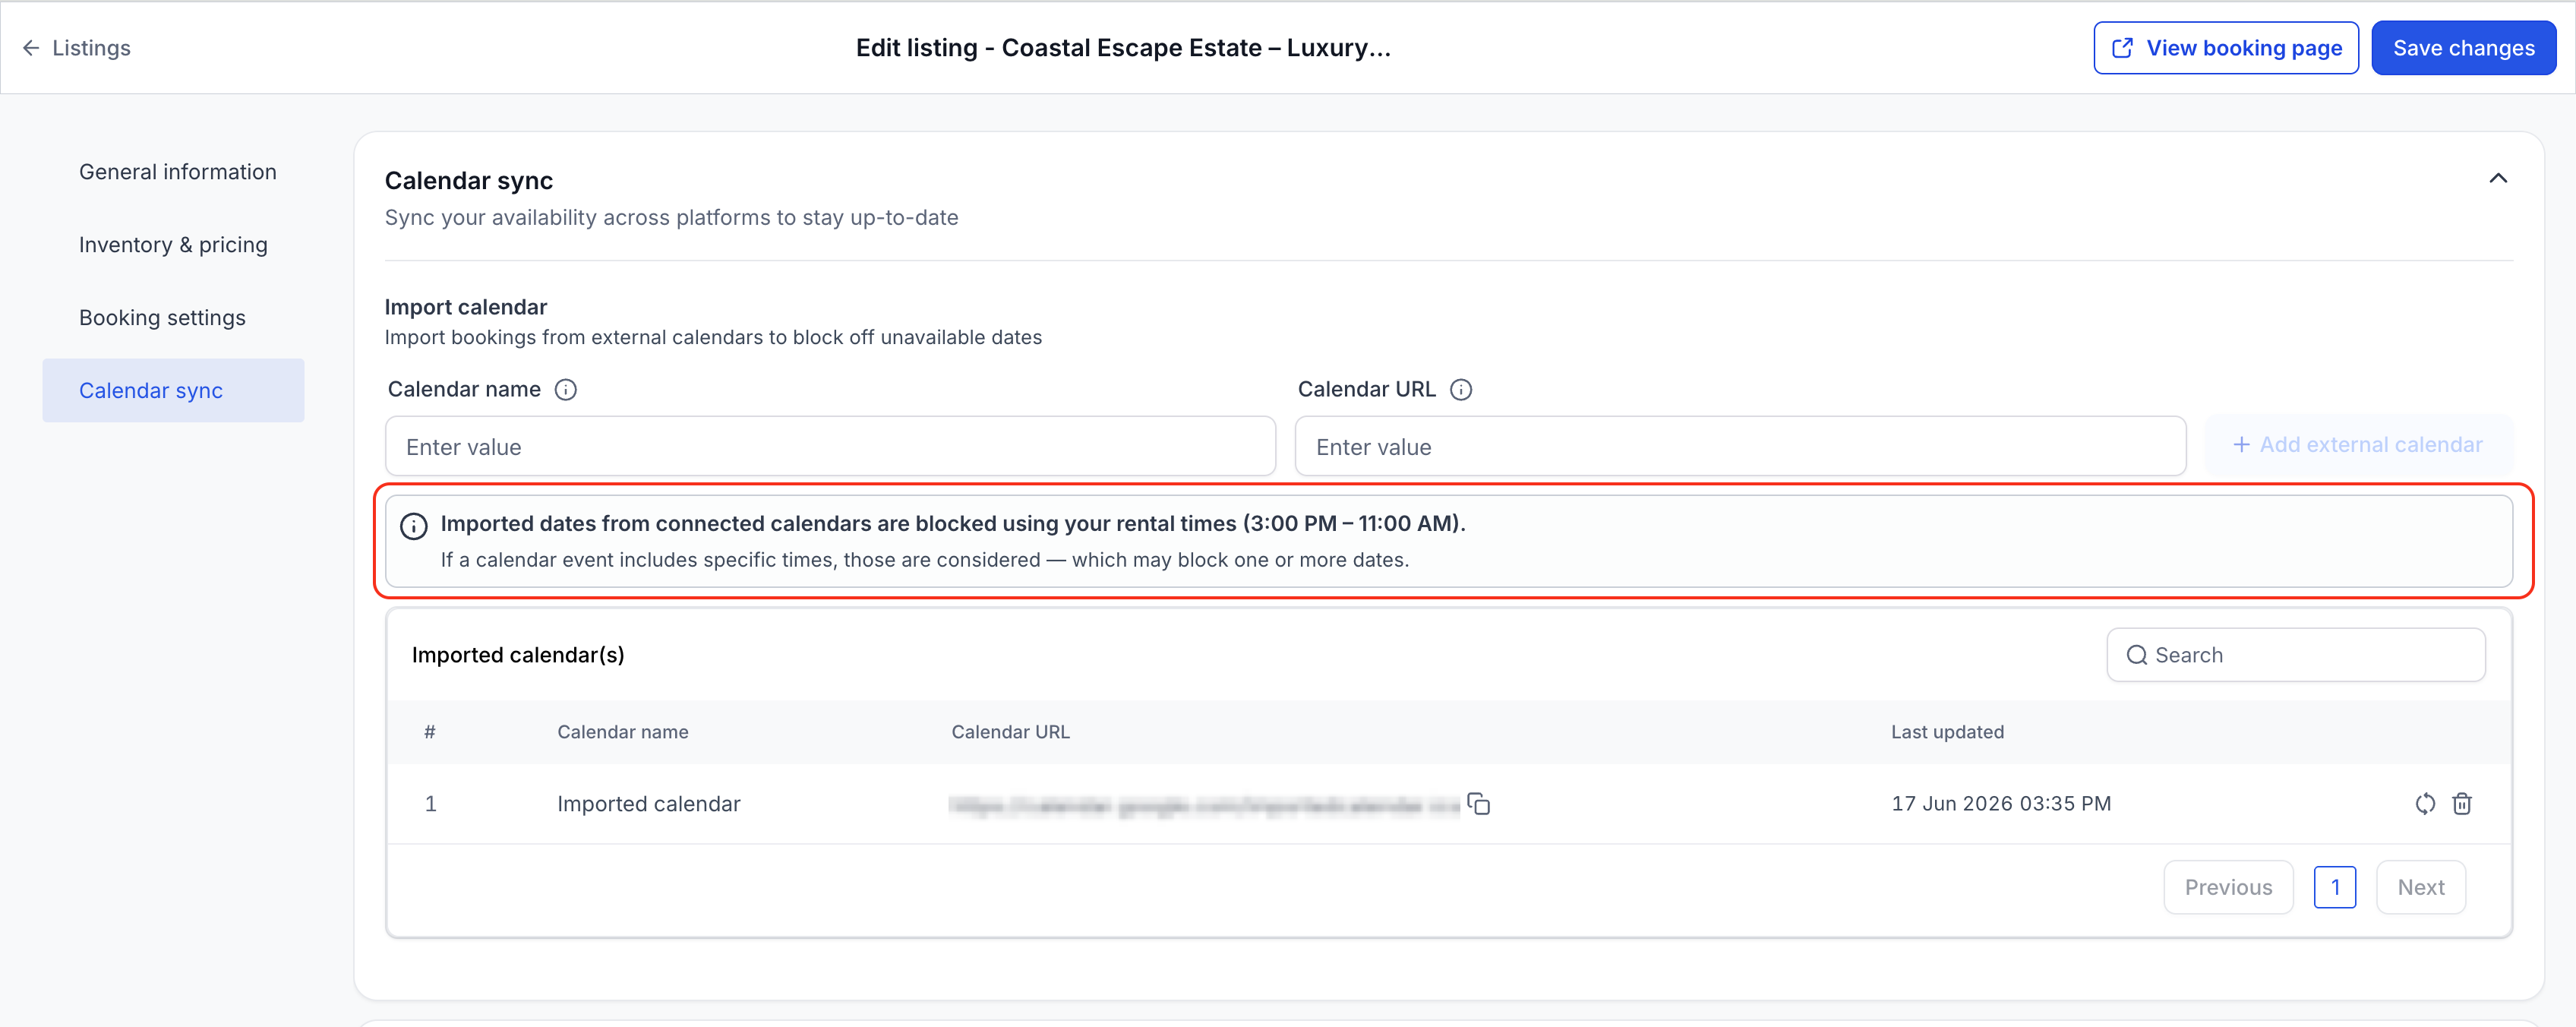
Calendar Sync
The Calendar Sync tab allows you to sync your rental listing bookings with external calendar platforms. This prevents double-booking by automatically syncing availability between systems.
Features:
Import Calendar (iCal URL): Add external iCal links (ending with .ics format to import bookings from third-party platforms. Imported bookings appear as blocked time slots within your Rentals calendar.
Export Calendar: Generate and copy your unique iCal link to sync your Rentals availability with external platforms. This ensures that changes made in Rentals are reflected externally.
Sync Frequency:
Bookings from external platforms are imported automatically every hour to keep availability accurate.
You can re-sync manually in between if needed using the "Refresh" action available against the imported calendar.
Pro Tip: Always verify iCal links before saving to ensure synchronization between Rentals and external platforms functions properly.
How Rentals Interprets Imported Calendar Bookings
The way imported calendar bookings affect availability depends on your listing's booking mode and the information provided by the connected calendar.
When Imported Events Include Start & End Times
If the connected calendar provides specific start and end times, Rentals blocks availability using those exact timestamps.
For example:
- Imported event: April 15, 2:00 PM → April 15, 5:00 PM
- Availability blocked: April 15, 2:00 PM → April 15, 5:00 PM
This applies to all booking modes.
When Imported Events Are Date-Only
Some calendar providers and OTA platforms may sync availability as dates only without specific start and end times.
For the below rental booking period configurations, Rentals interprets those dates using the listing's configured rental times or rental hours instead of generic midnight-to-midnight blocks.
Booking period configurations:
- Date Selector
- Fixed Durations · Daily/Weekly/Monthly
Example:
Listing rental times:
- Rental start time: 3:00 PM
- Rental end time: 11:00 AM
Imported calendar event:
- April 15 – April 17
Availability blocked:
- April 15, 3:00 PM → April 17, 11:00 AM
This ensures imported availability aligns with how the rental is actually booked.
Notes:
- If a listing has variants enabled, the imported calendar will block slots for all the first variant only.
- If inventory is enabled for a listing, the whole inventory is blocked for the time duration for which the booking is imported.
Save and Publish
Once you’ve completed setup:
Click Save Changes in the top-right corner.
Click View Booking Page to preview how the listing appears to customers.
Activate the listing when it’s ready to go live.
Tip: Test listings on your Booking Website to confirm correct pricing, durations, and synchronization behavior.
Frequently Asked Questions
Q: Can I add multiple images?
Yes. You can upload up to 30 images per listing.
Q: Can I disable inventory?
Yes. If you only have one unit available, you can leave inventory disabled—the entire listing will be booked as one unit.
Q: Can I skip variants?
Yes. Variants are optional and only needed for listings with multiple configurations.
Q: Can I edit the pricing unit later?
Yes, but changing the unit (e.g., from day to hour) will recalculate pricing and duration behavior.
Q: Do buffer times apply globally?
Yes. Buffers apply automatically before and after each booking.
Q: How often does Calendar Sync update?
External bookings are imported every hour to ensure up-to-date availability.
Q: Can I disconnect a synced calendar?
Yes. You can remove iCal links from the Calendar Sync tab at any time.
Related Articles
Was this article helpful?
That’s Great!
Thank you for your feedback
Sorry! We couldn't be helpful
Thank you for your feedback
Feedback sent
We appreciate your effort and will try to fix the article