This article explains what Listings and Categories are in Rentals, how to access the Rentals module, and how they work together to organize your rental listings.
TABLE OF CONTENTS
What are Listings and Categories?
Listings represent the individual rental items you offer—such as properties, vehicles, rooms, or equipment. Each listing contains its own images, description, pricing, inventory (optional), and status. Listings form the foundation of your Rentals setup.
Categories are used to group similar listings and simplify organization for both internal users and customers.
Examples:
- A property manager might use categories like Beach Houses, Urban Lofts, Mountain Cabins.
- An equipment rental company might use Cameras or Lighting Gear as categories to organize listings for specific equipment.
Key Benefits of Listings and Categories
Organization: Categories make it easier to navigate and manage large rental inventories.
Control of Public Layout: Reordering categories changes grouping and order on the booking page without touching any settings.
Easy Sharing: Share links for a listing or category direct customers to exactly what they need, speeding up decisions and reducing support questions.
- Customization: Set up configuration details for pricing, booking settings, and calendar sync.
How to Access the Rentals Module
To access your listings in the Rentals module:
Click the Calendars tab on the left navigation bar.
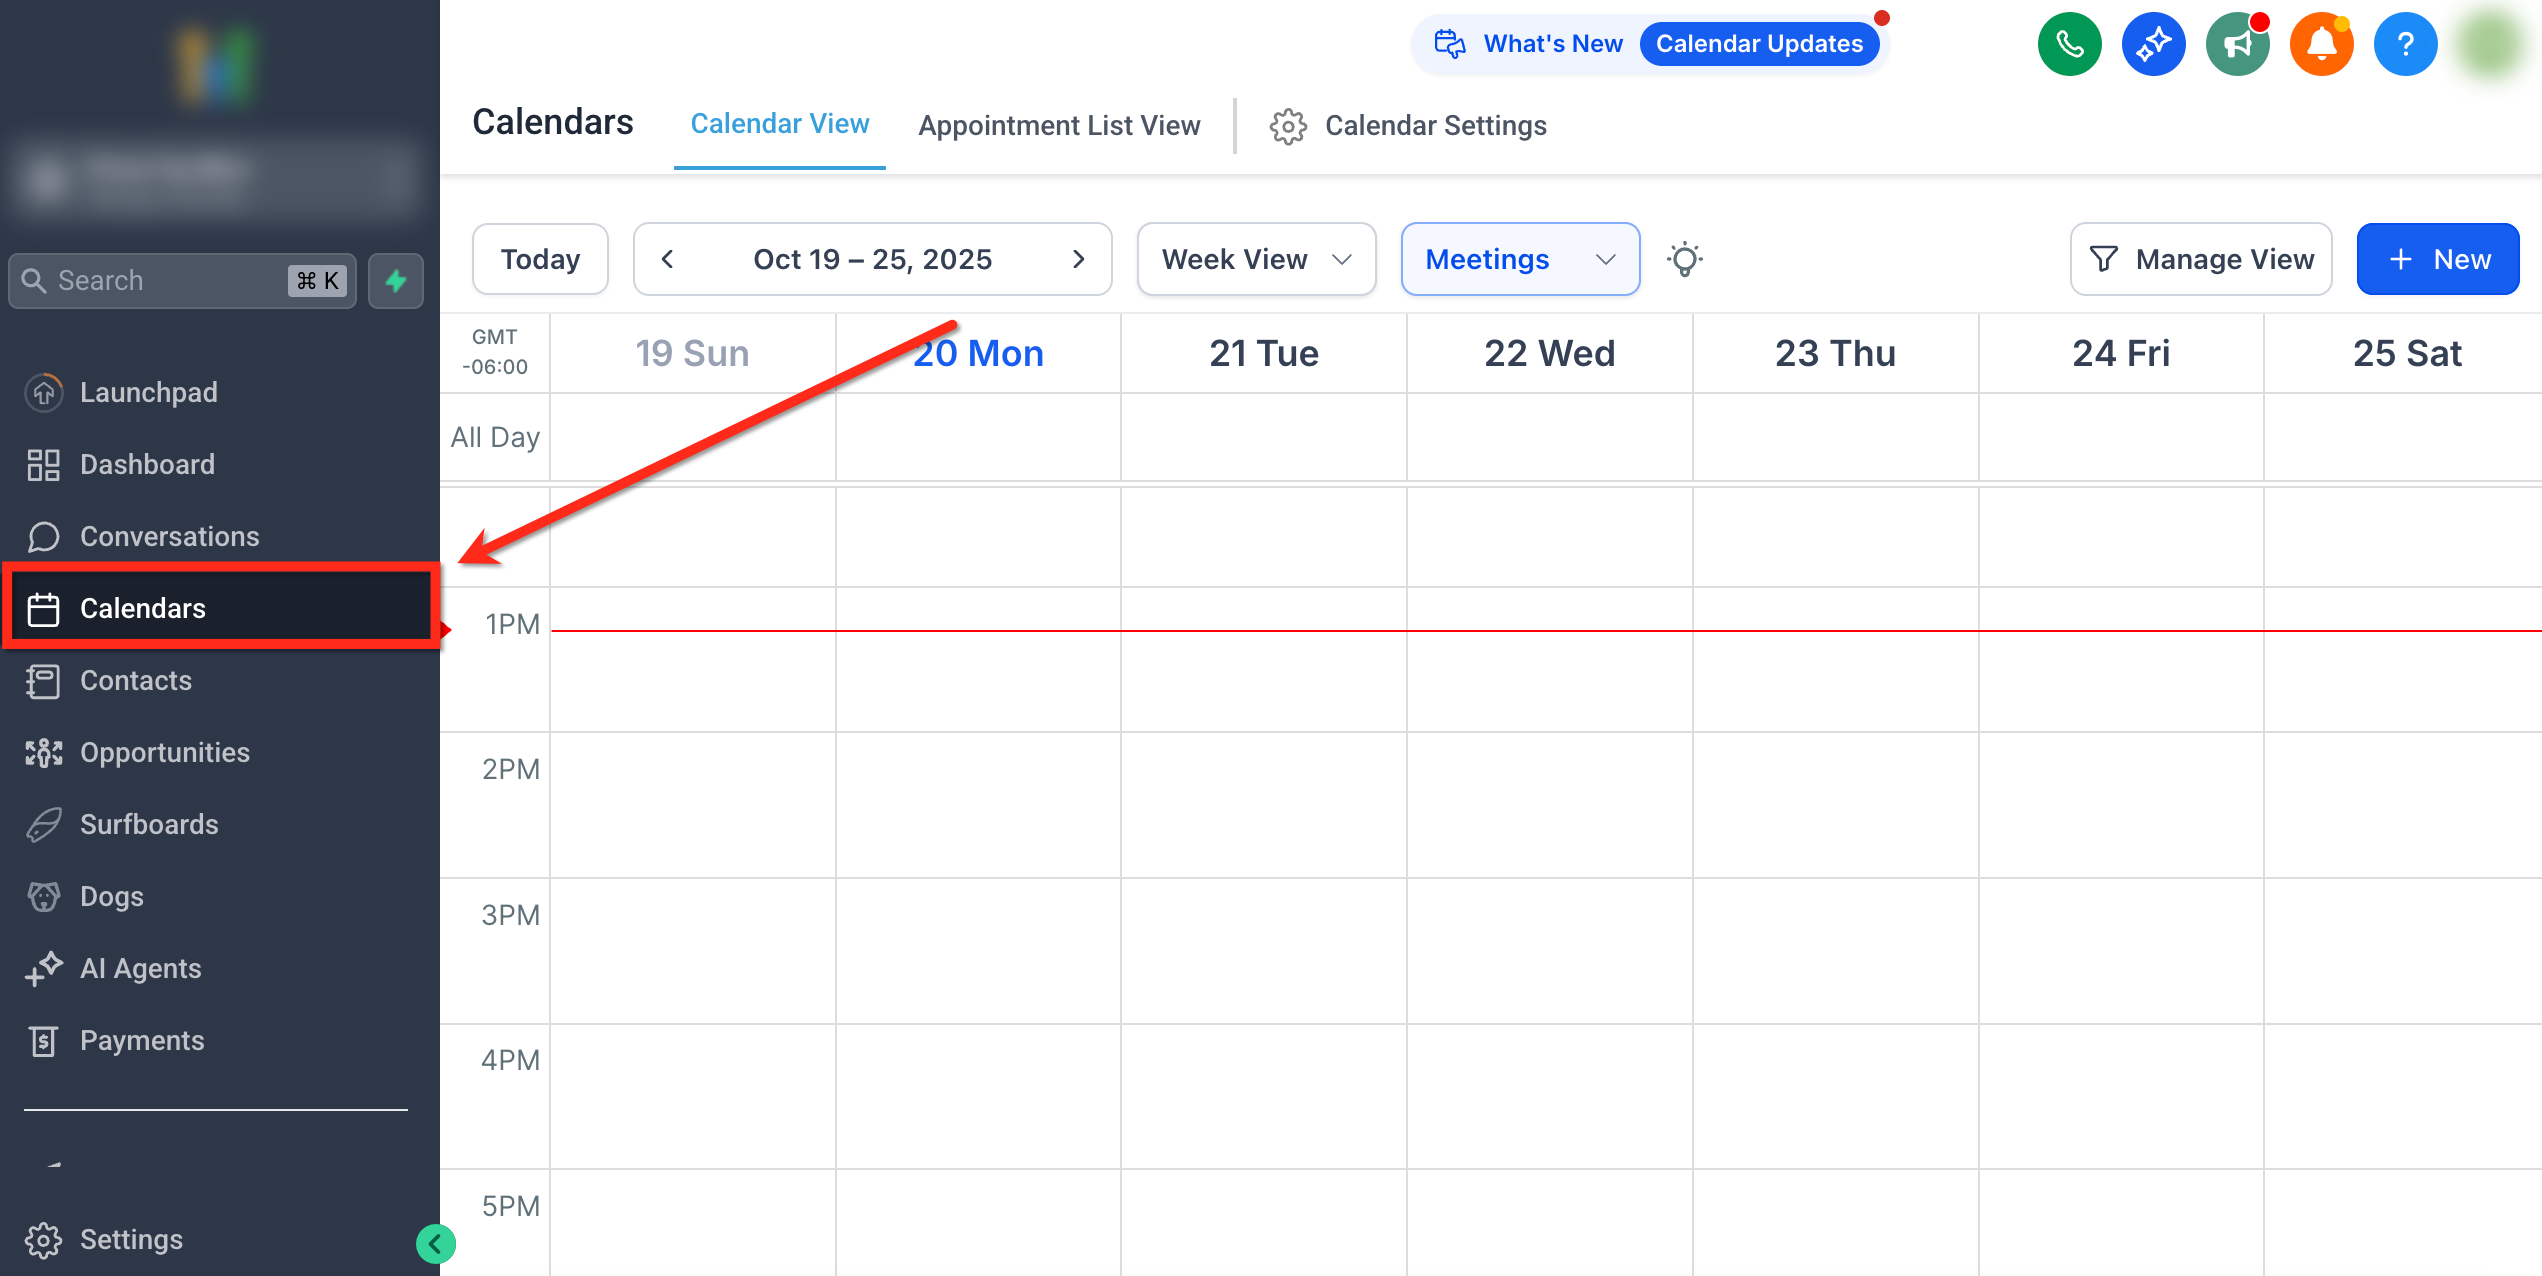
Select Calendar Settings from the top navigation ribbon.

Choose the Rentals tab from the top navigation bar.
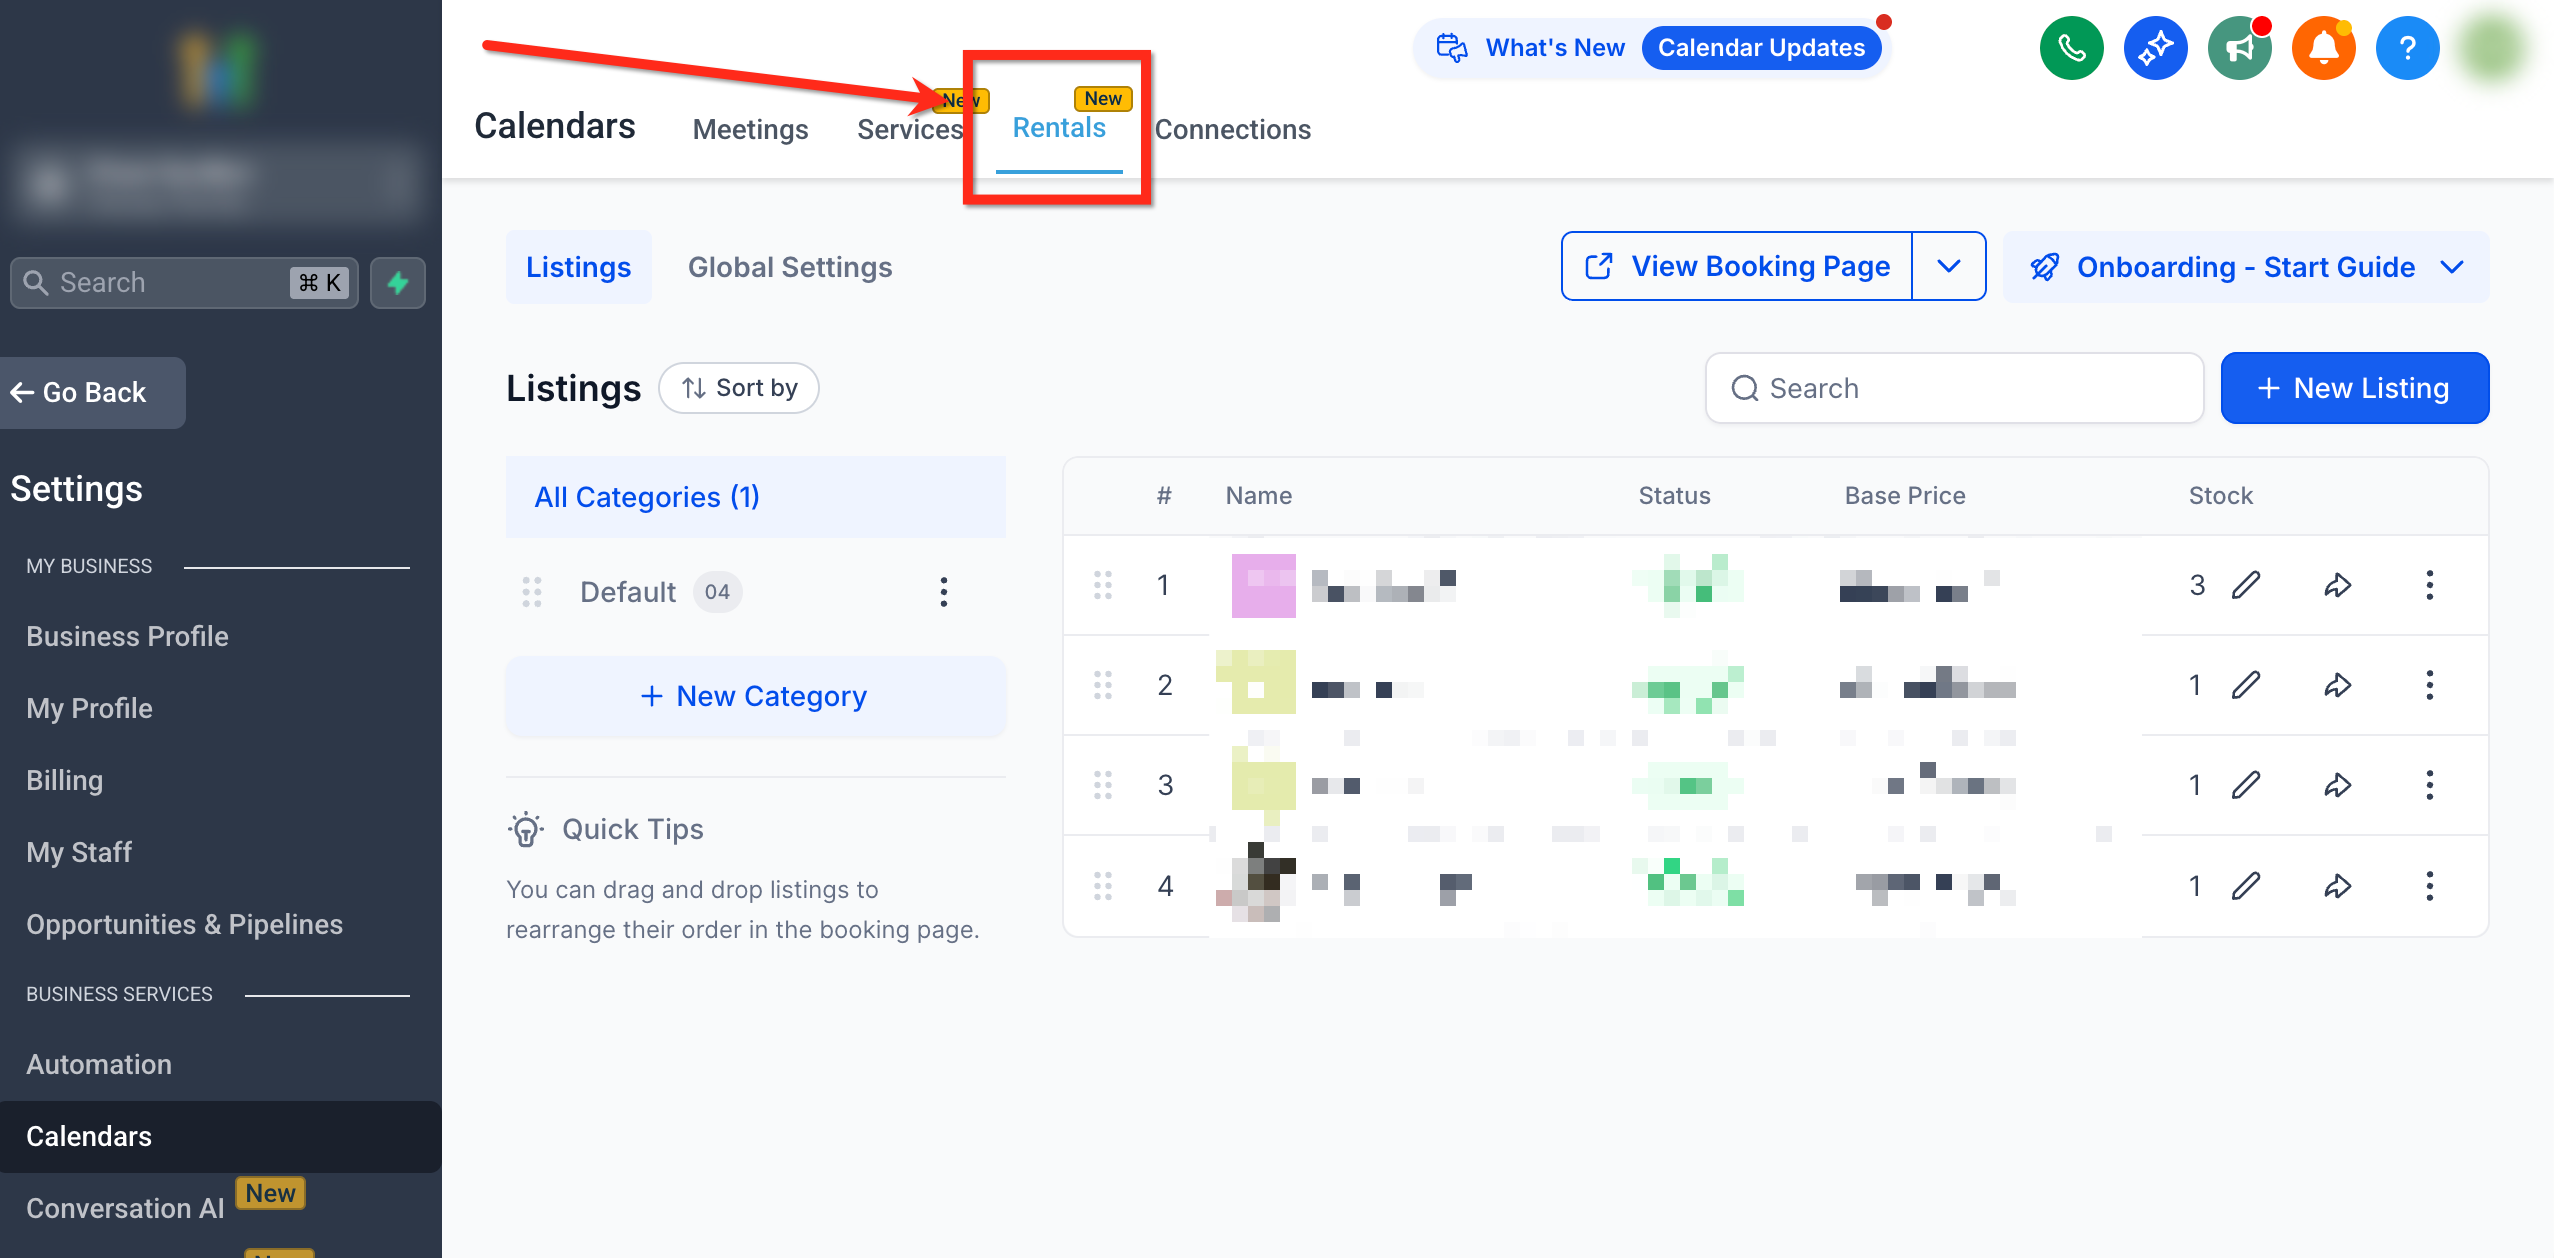
Click Listings under Rentals.

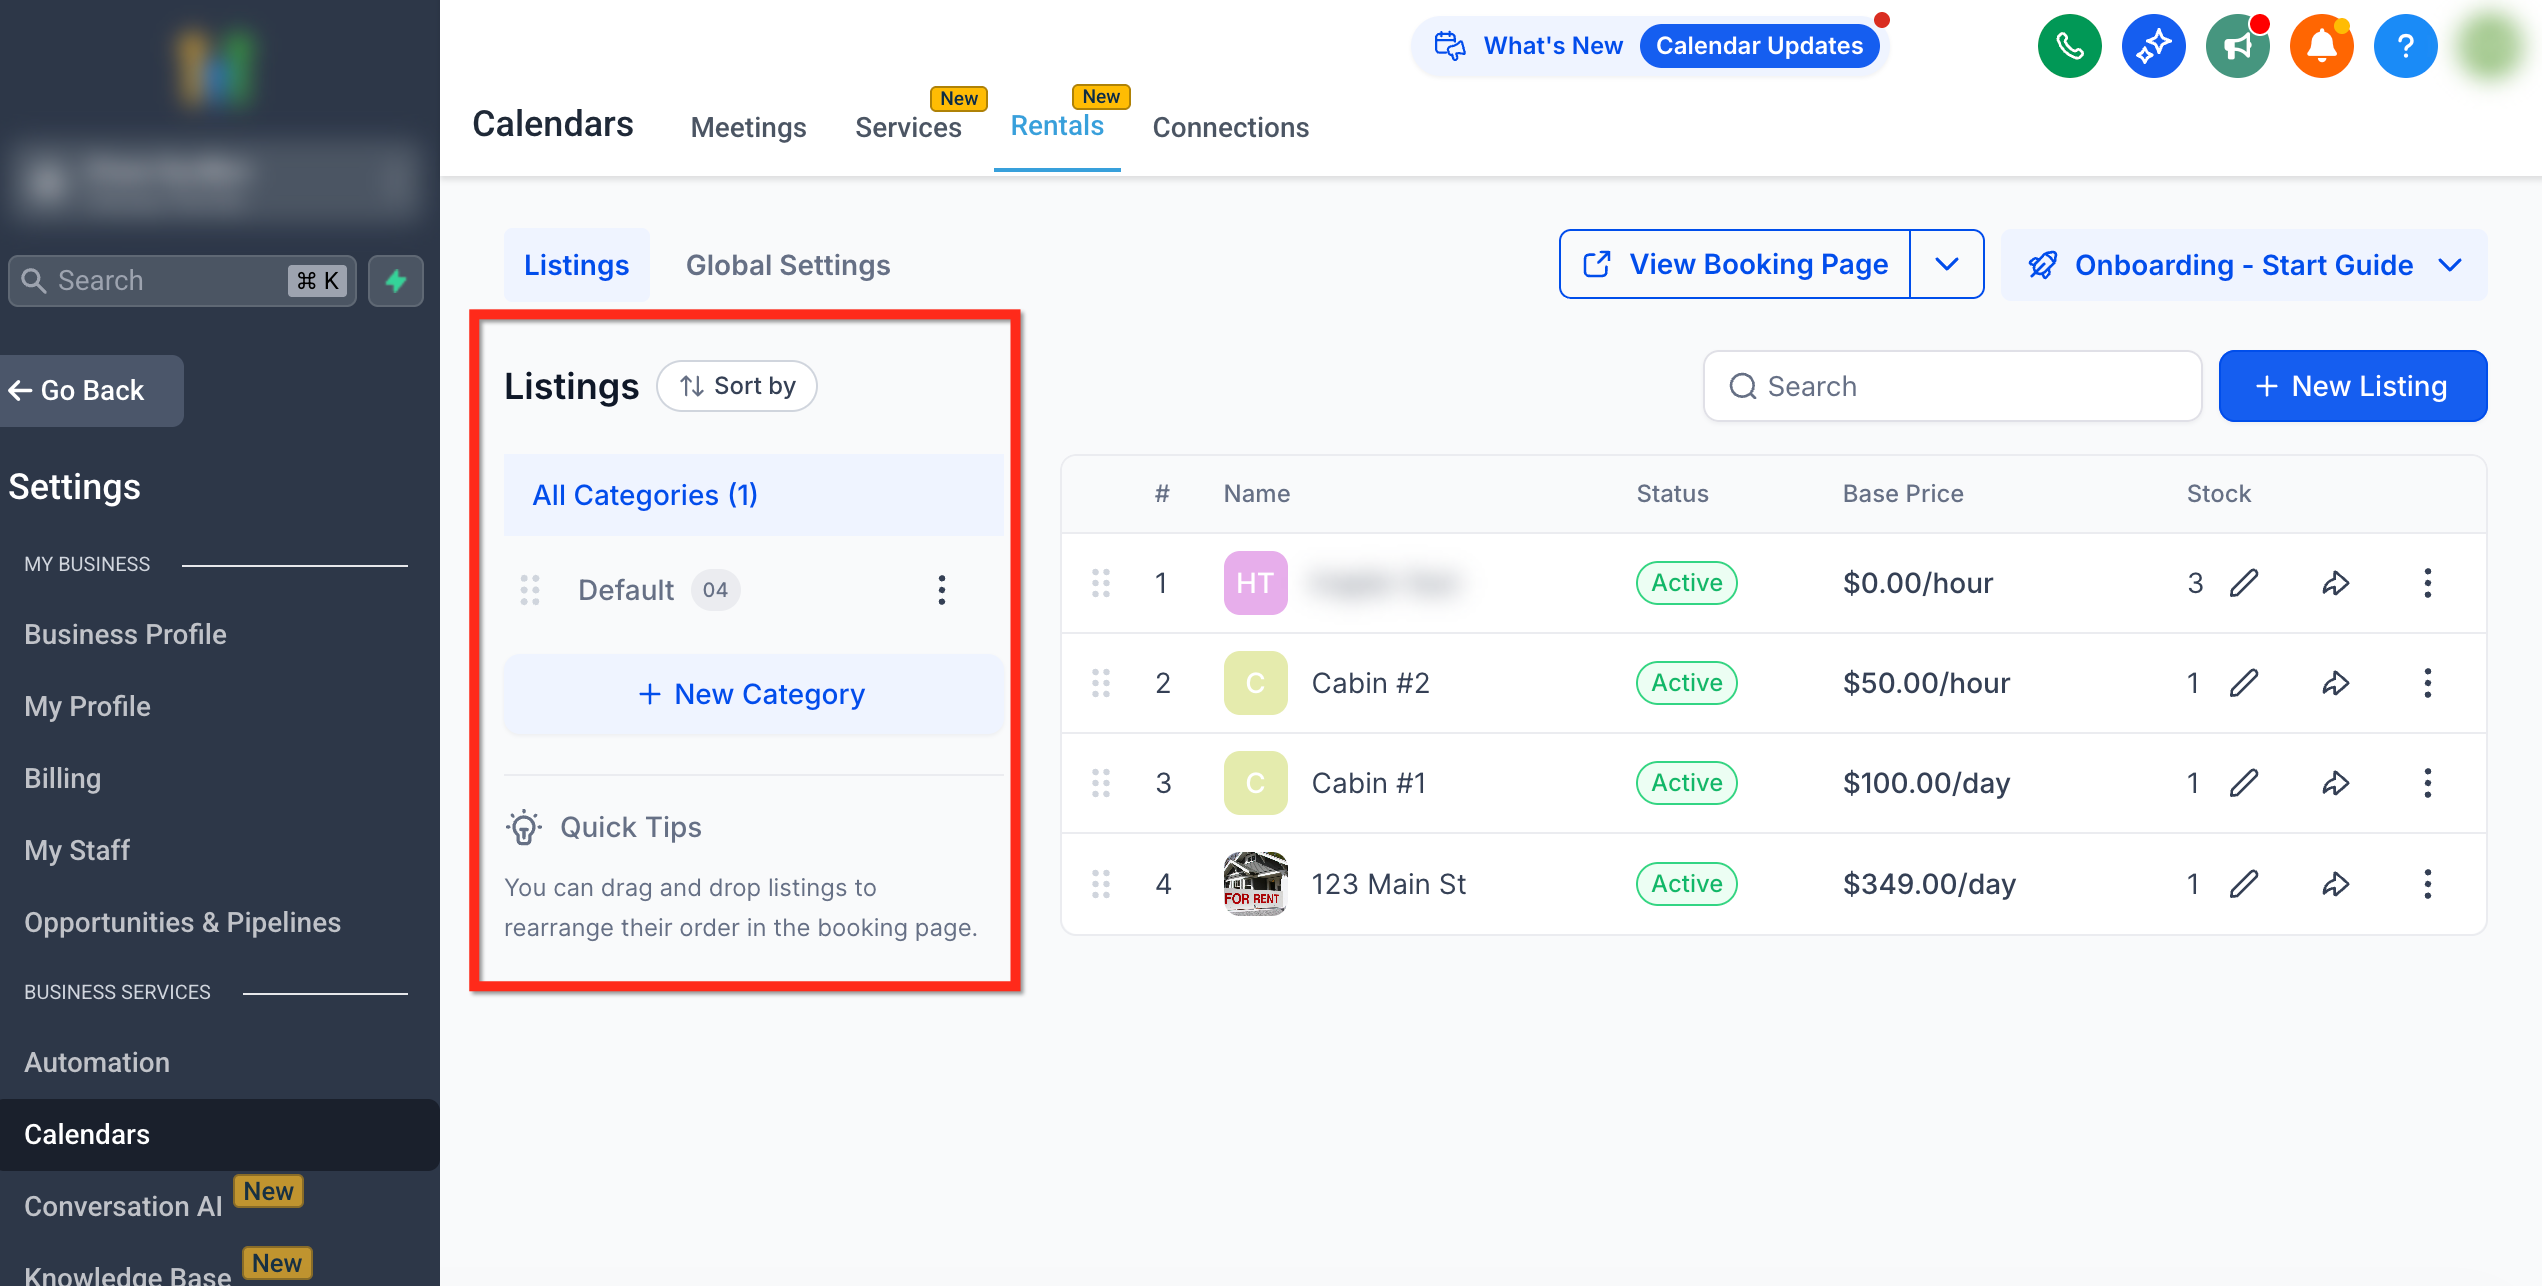
Understanding the Listings Panel
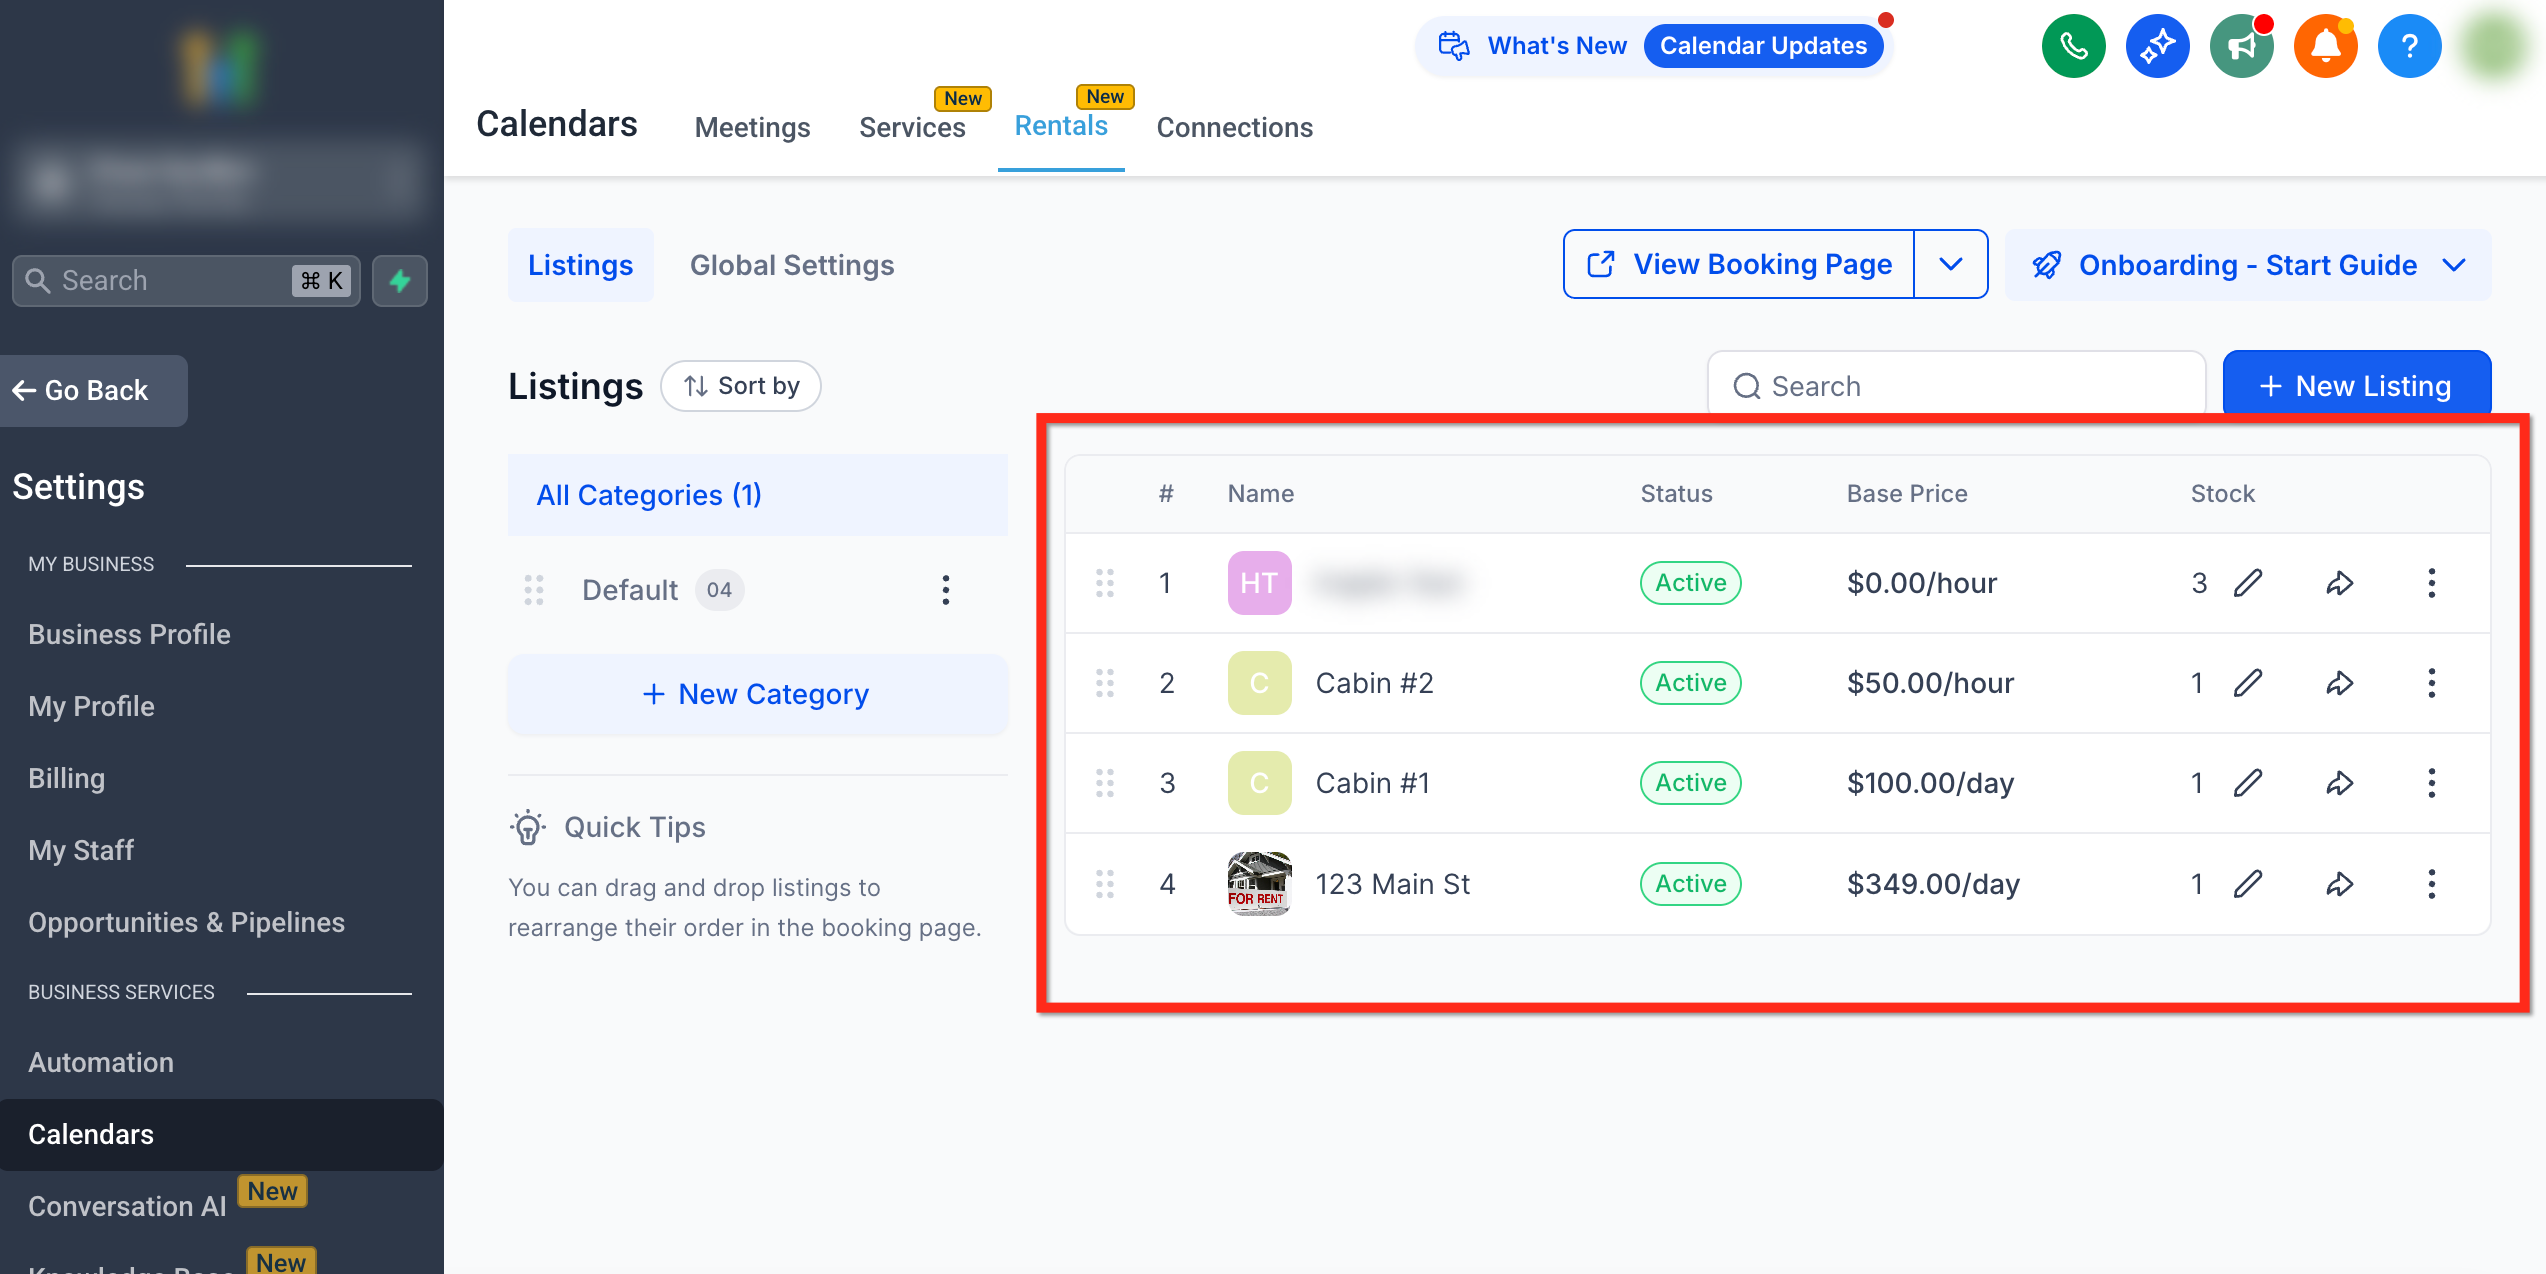
The Listings panel provides an at-a-glance view of all your rental listings and their details.
Listings Panel:
Image – Displays the listing’s thumbnail.
Name – Listing title.
Status – Active or Inactive.
Base Price – Shows the rental price per hour/day/week/month.
Stock – Number of available units.
Actions – Edit, duplicate, share, or delete listings.
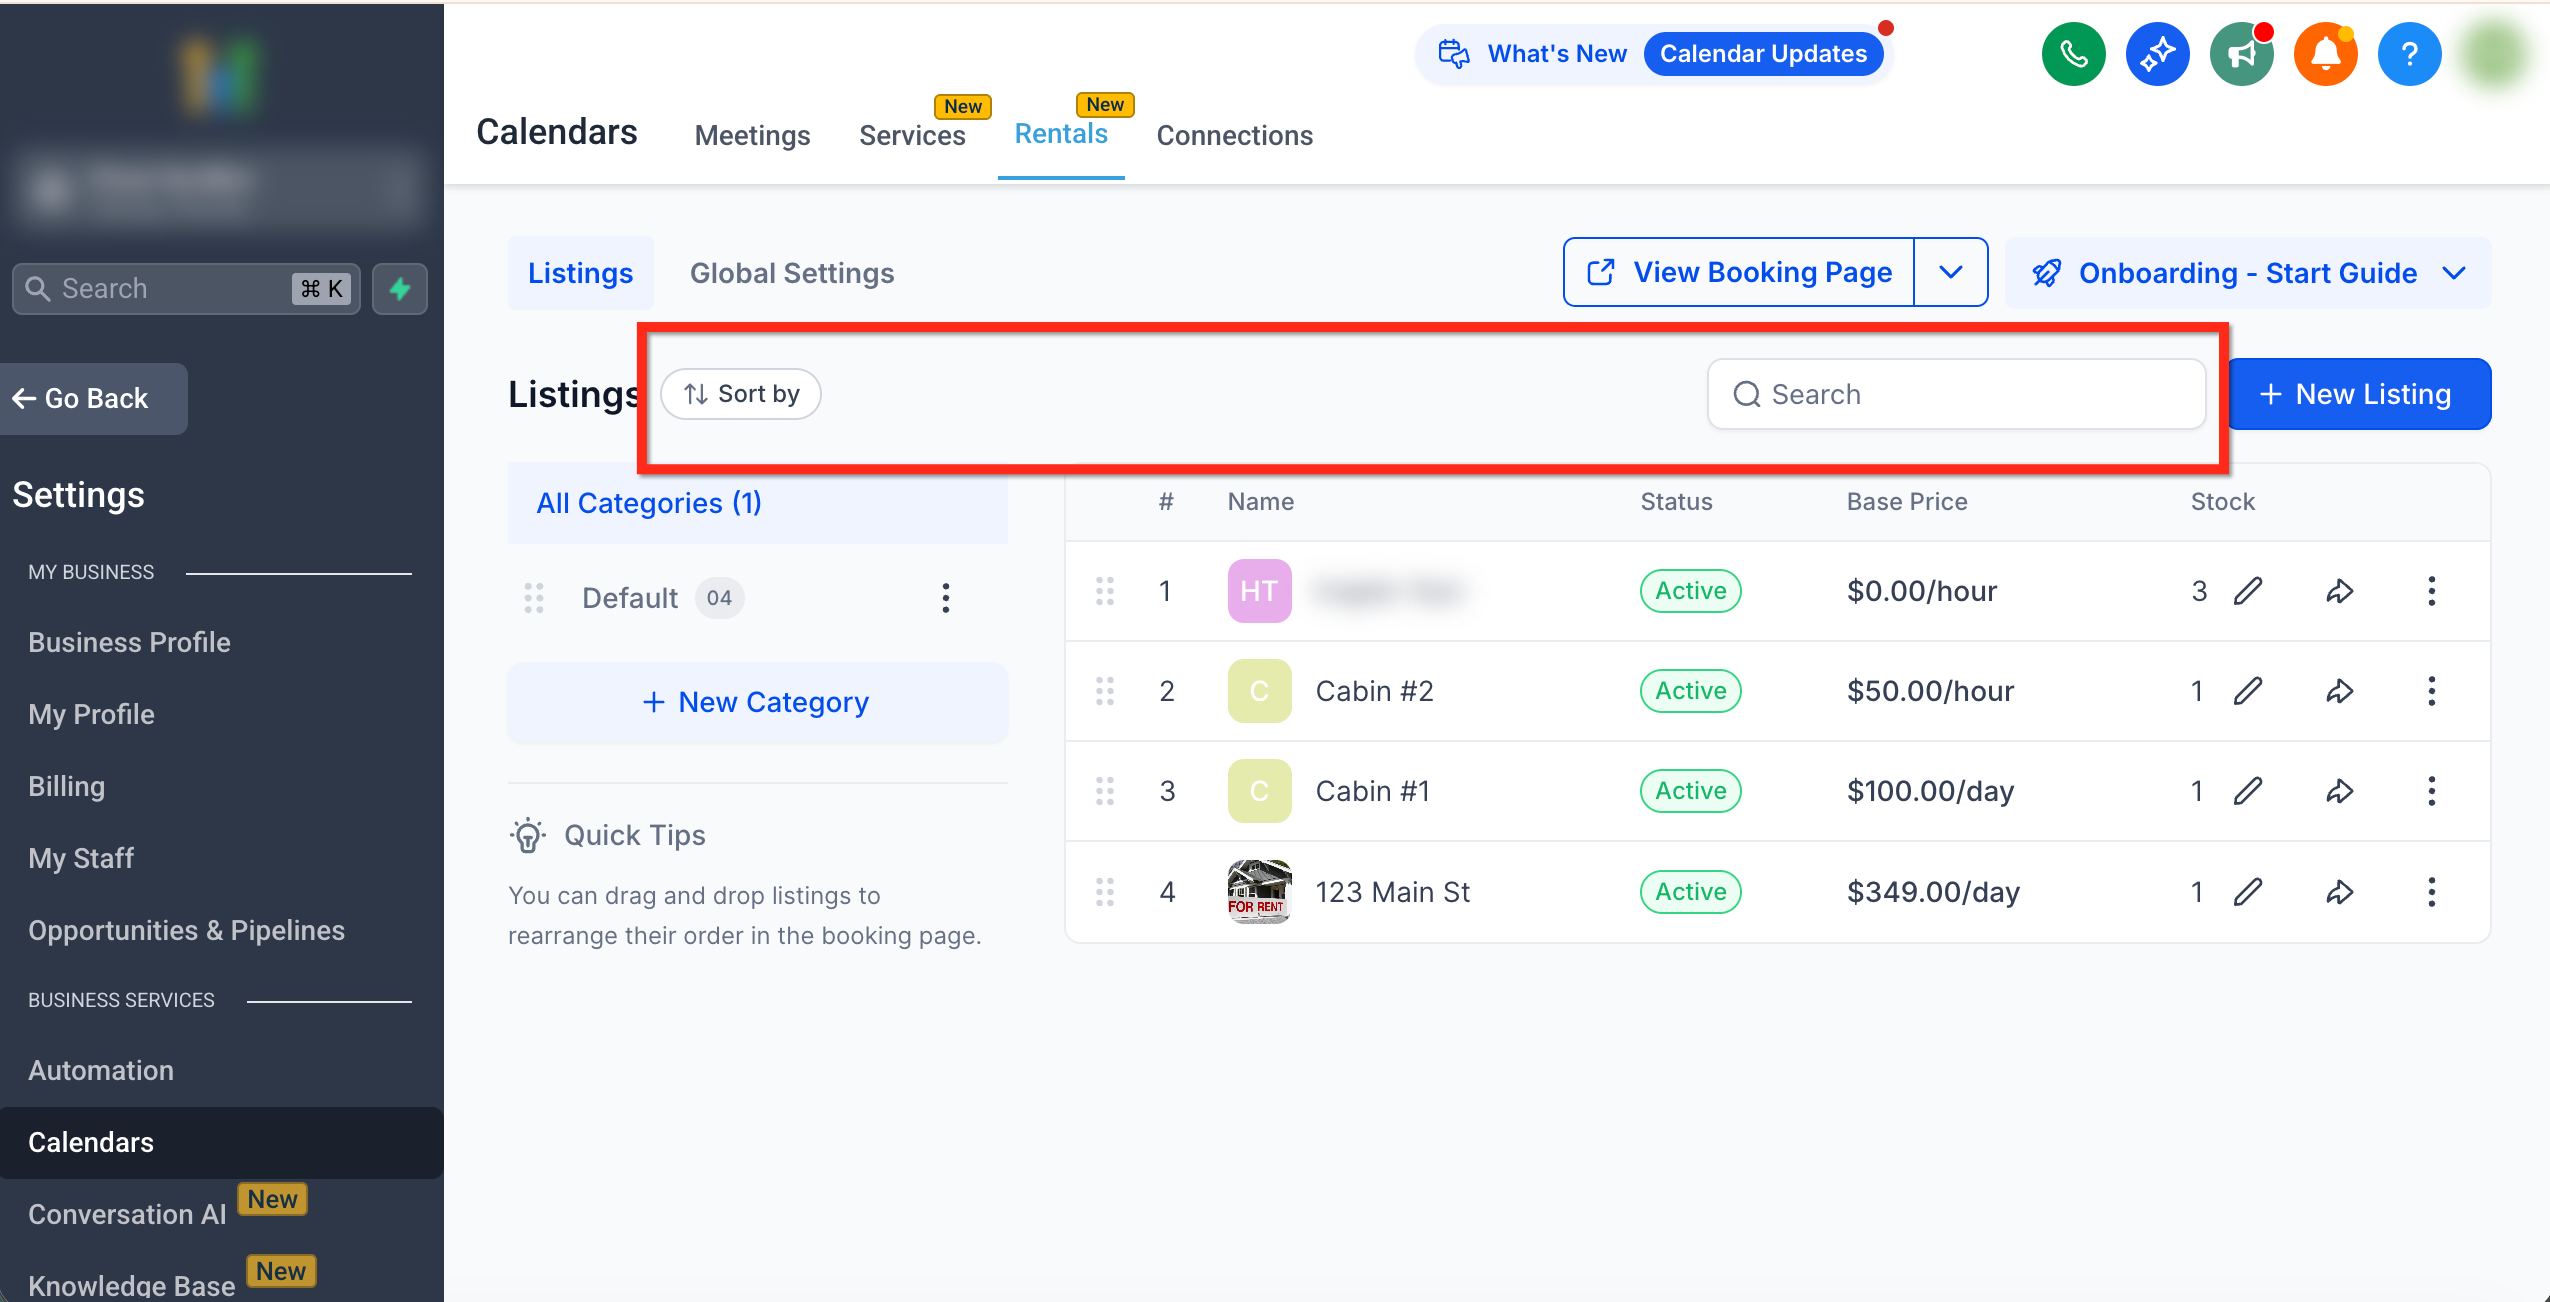
Toolbar Controls:
Search Bar – Quickly find listings by name or keyword.
Sort by Dropdown – Sort by name - Ascending or Descending.
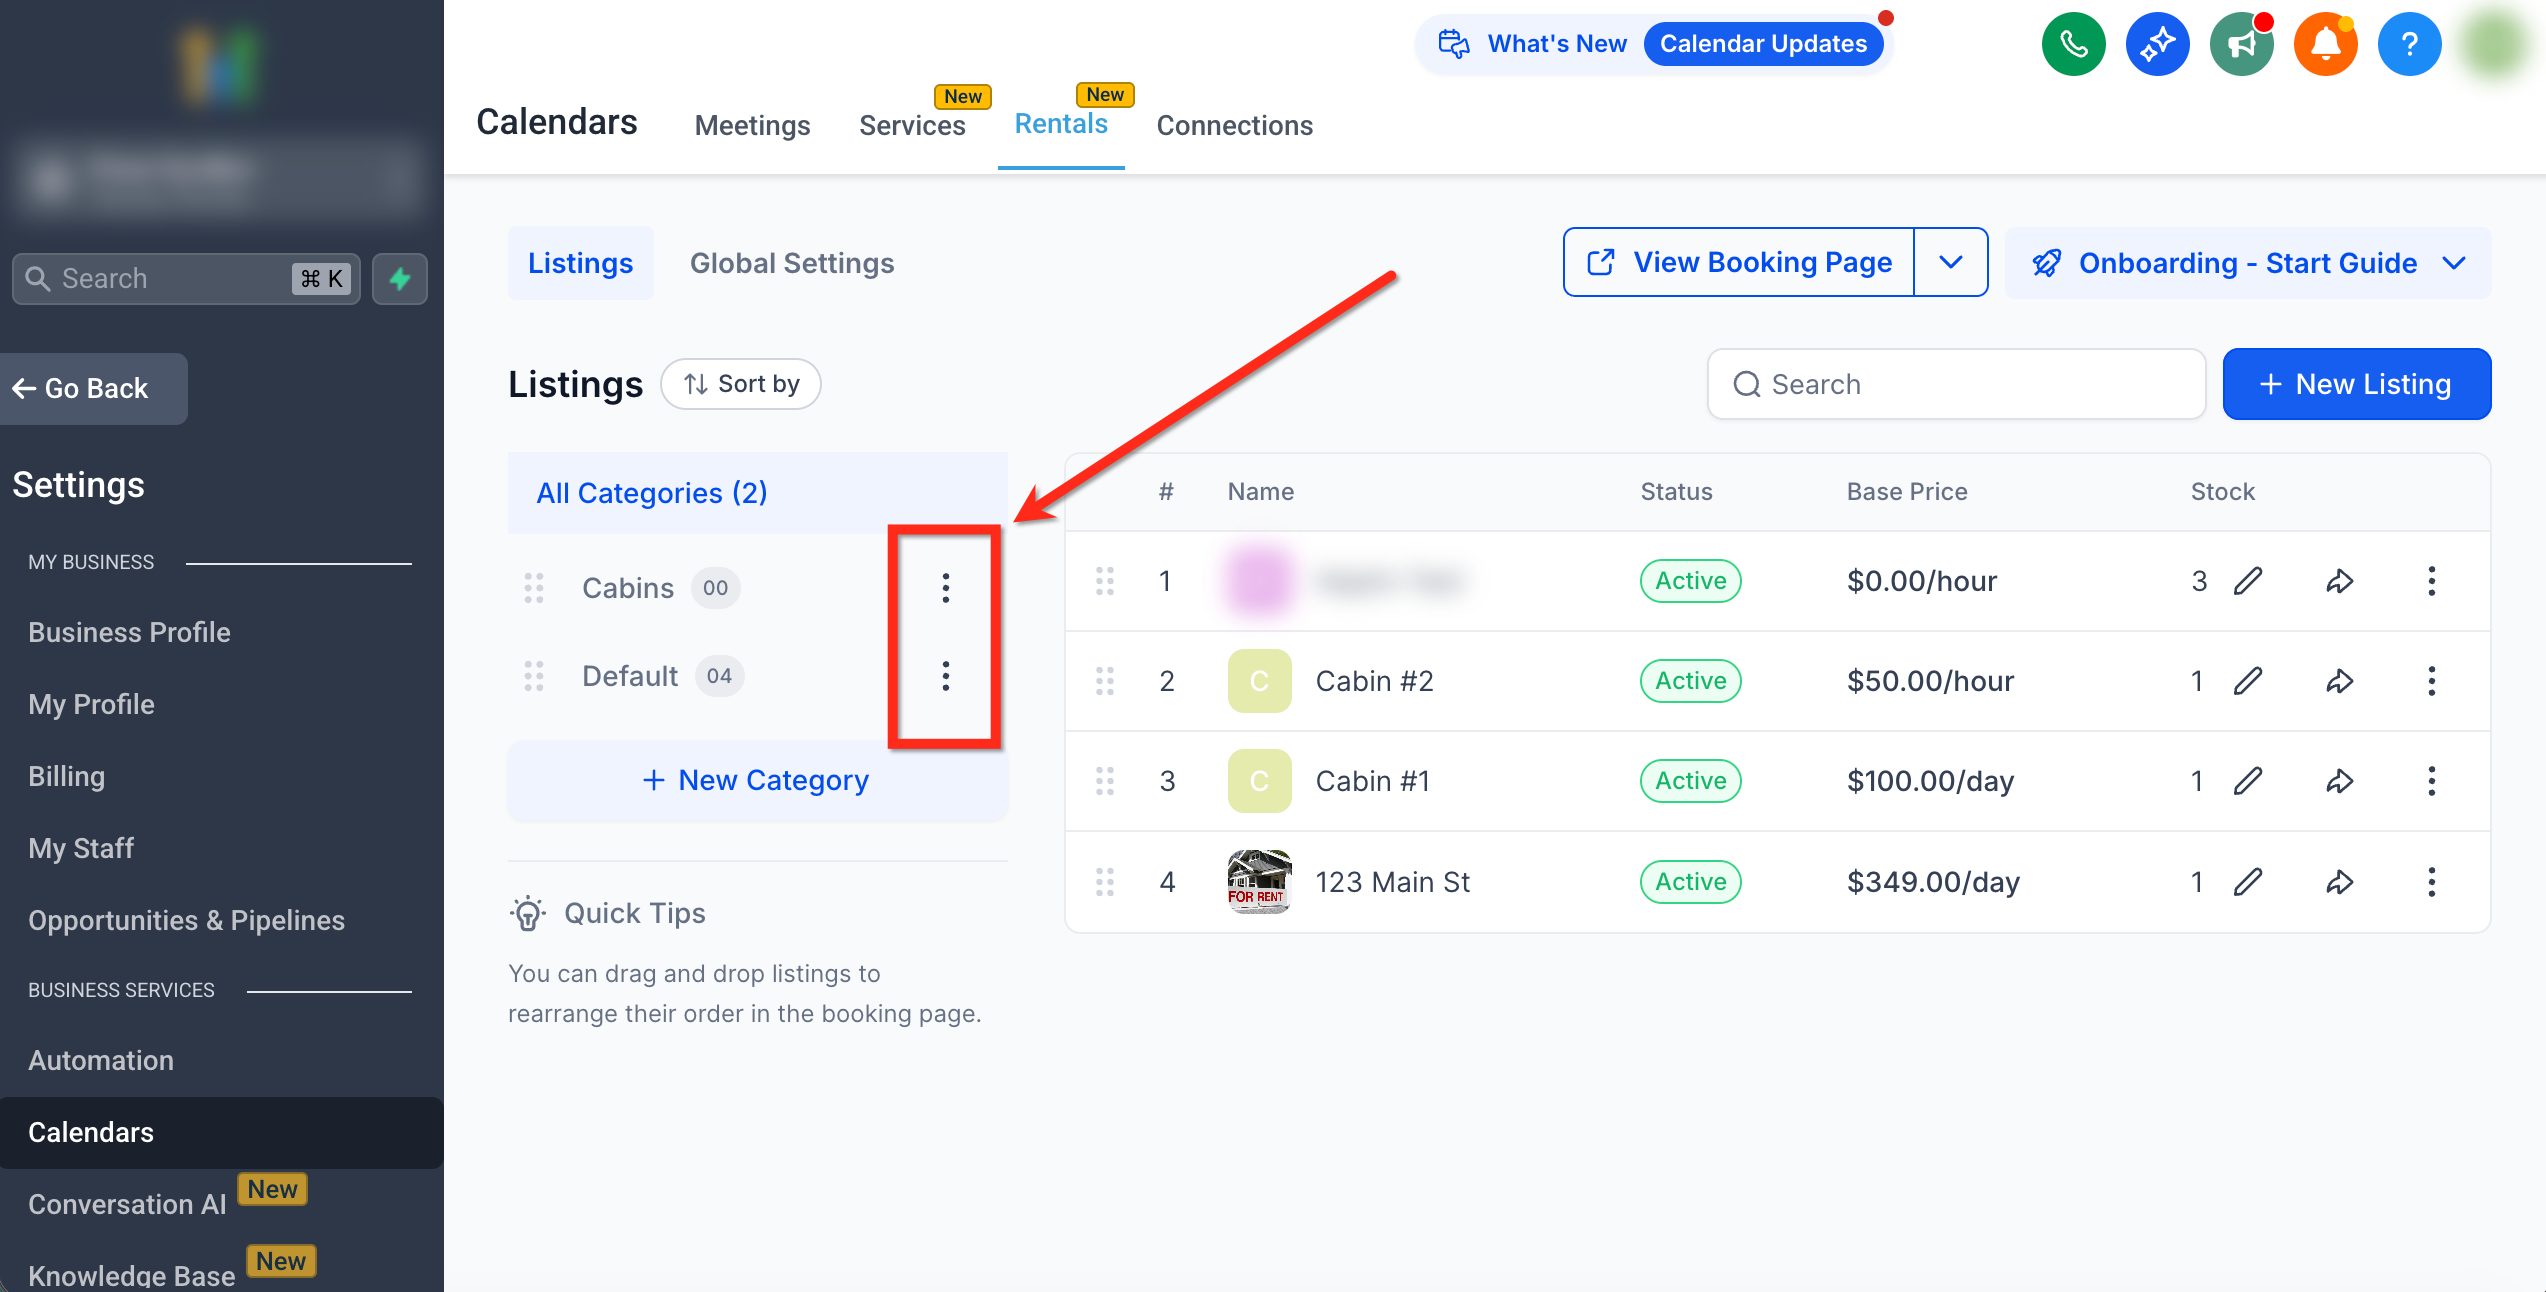
Category Panel:
Appears on the left-hand side, listing all existing categories.
Selecting a category filters the listings to show only items in that group.
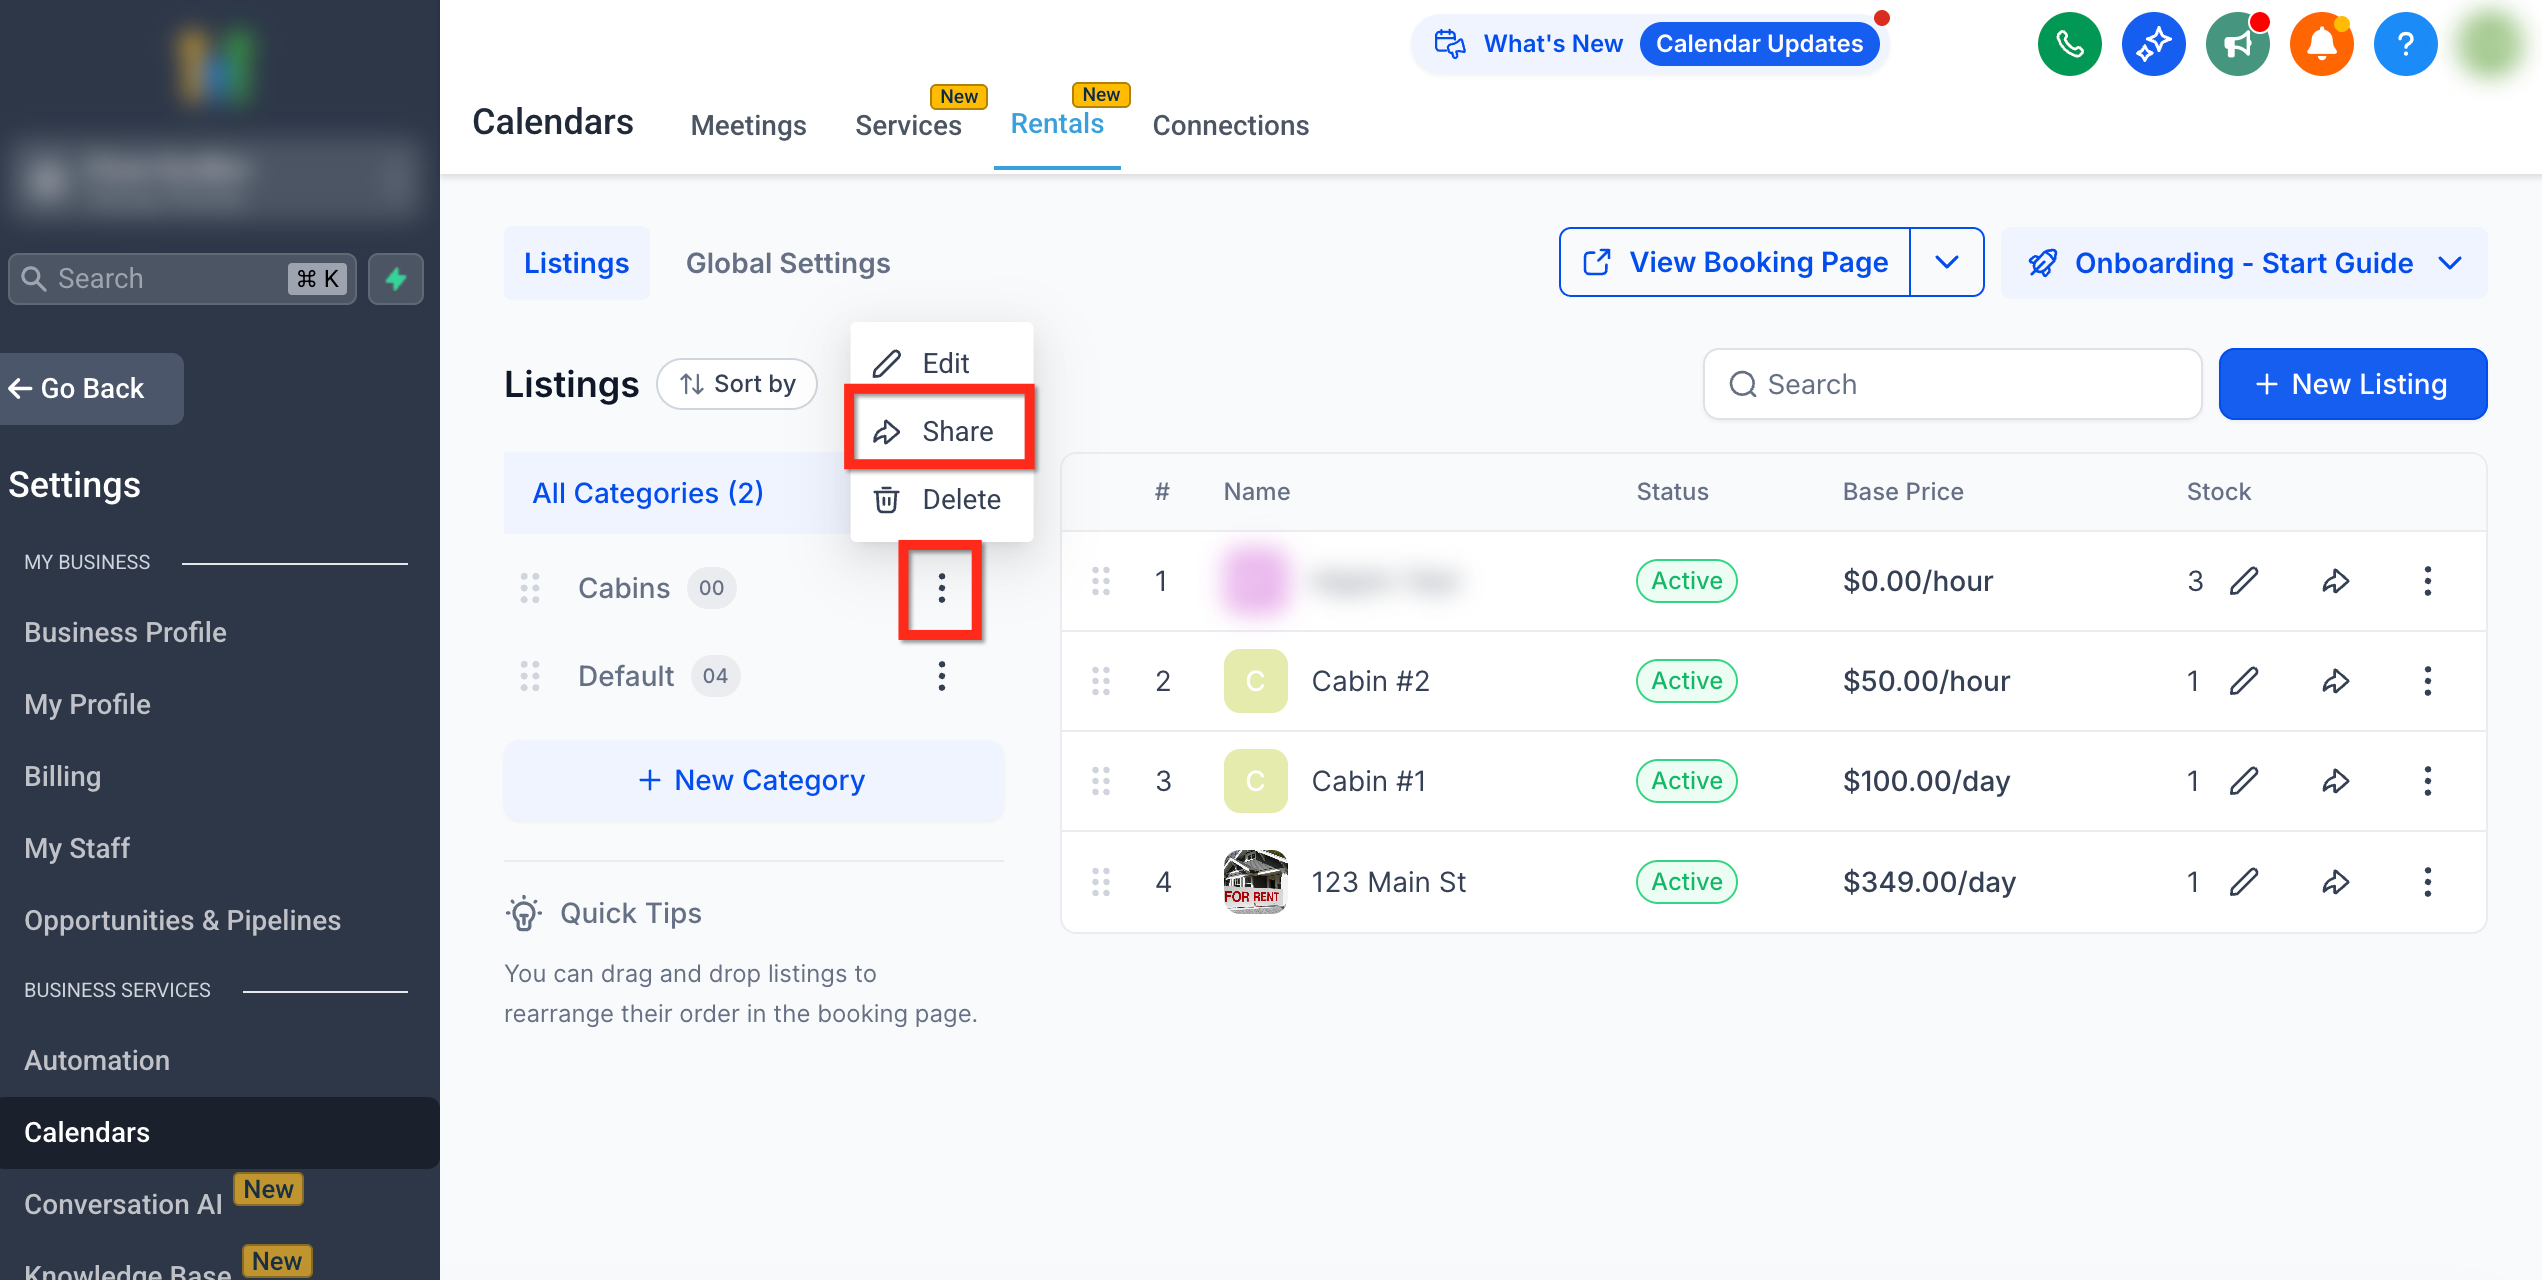
The ⋮ menu next to each category allows you to Edit, Share, or Delete the category.
Tip: Reordering categories on the left updates their order on the customer booking page.
Row Actions:
️ Edit – Open the listing editor to modify settings.
Duplicate – Clone a listing and reuse configurations.
Share – Copy the public booking URL for that listing.
Delete – Permanently remove the listing.

Creating a New Category
Each category you create appears in the sidebar for quick access and can hold multiple listings.
Tip: Keep category names short and clear (e.g., Luxury Cars, Economy Vehicles) for a clean UI.
Go to Rentals → Listings.

Click + New Category under the category panel.

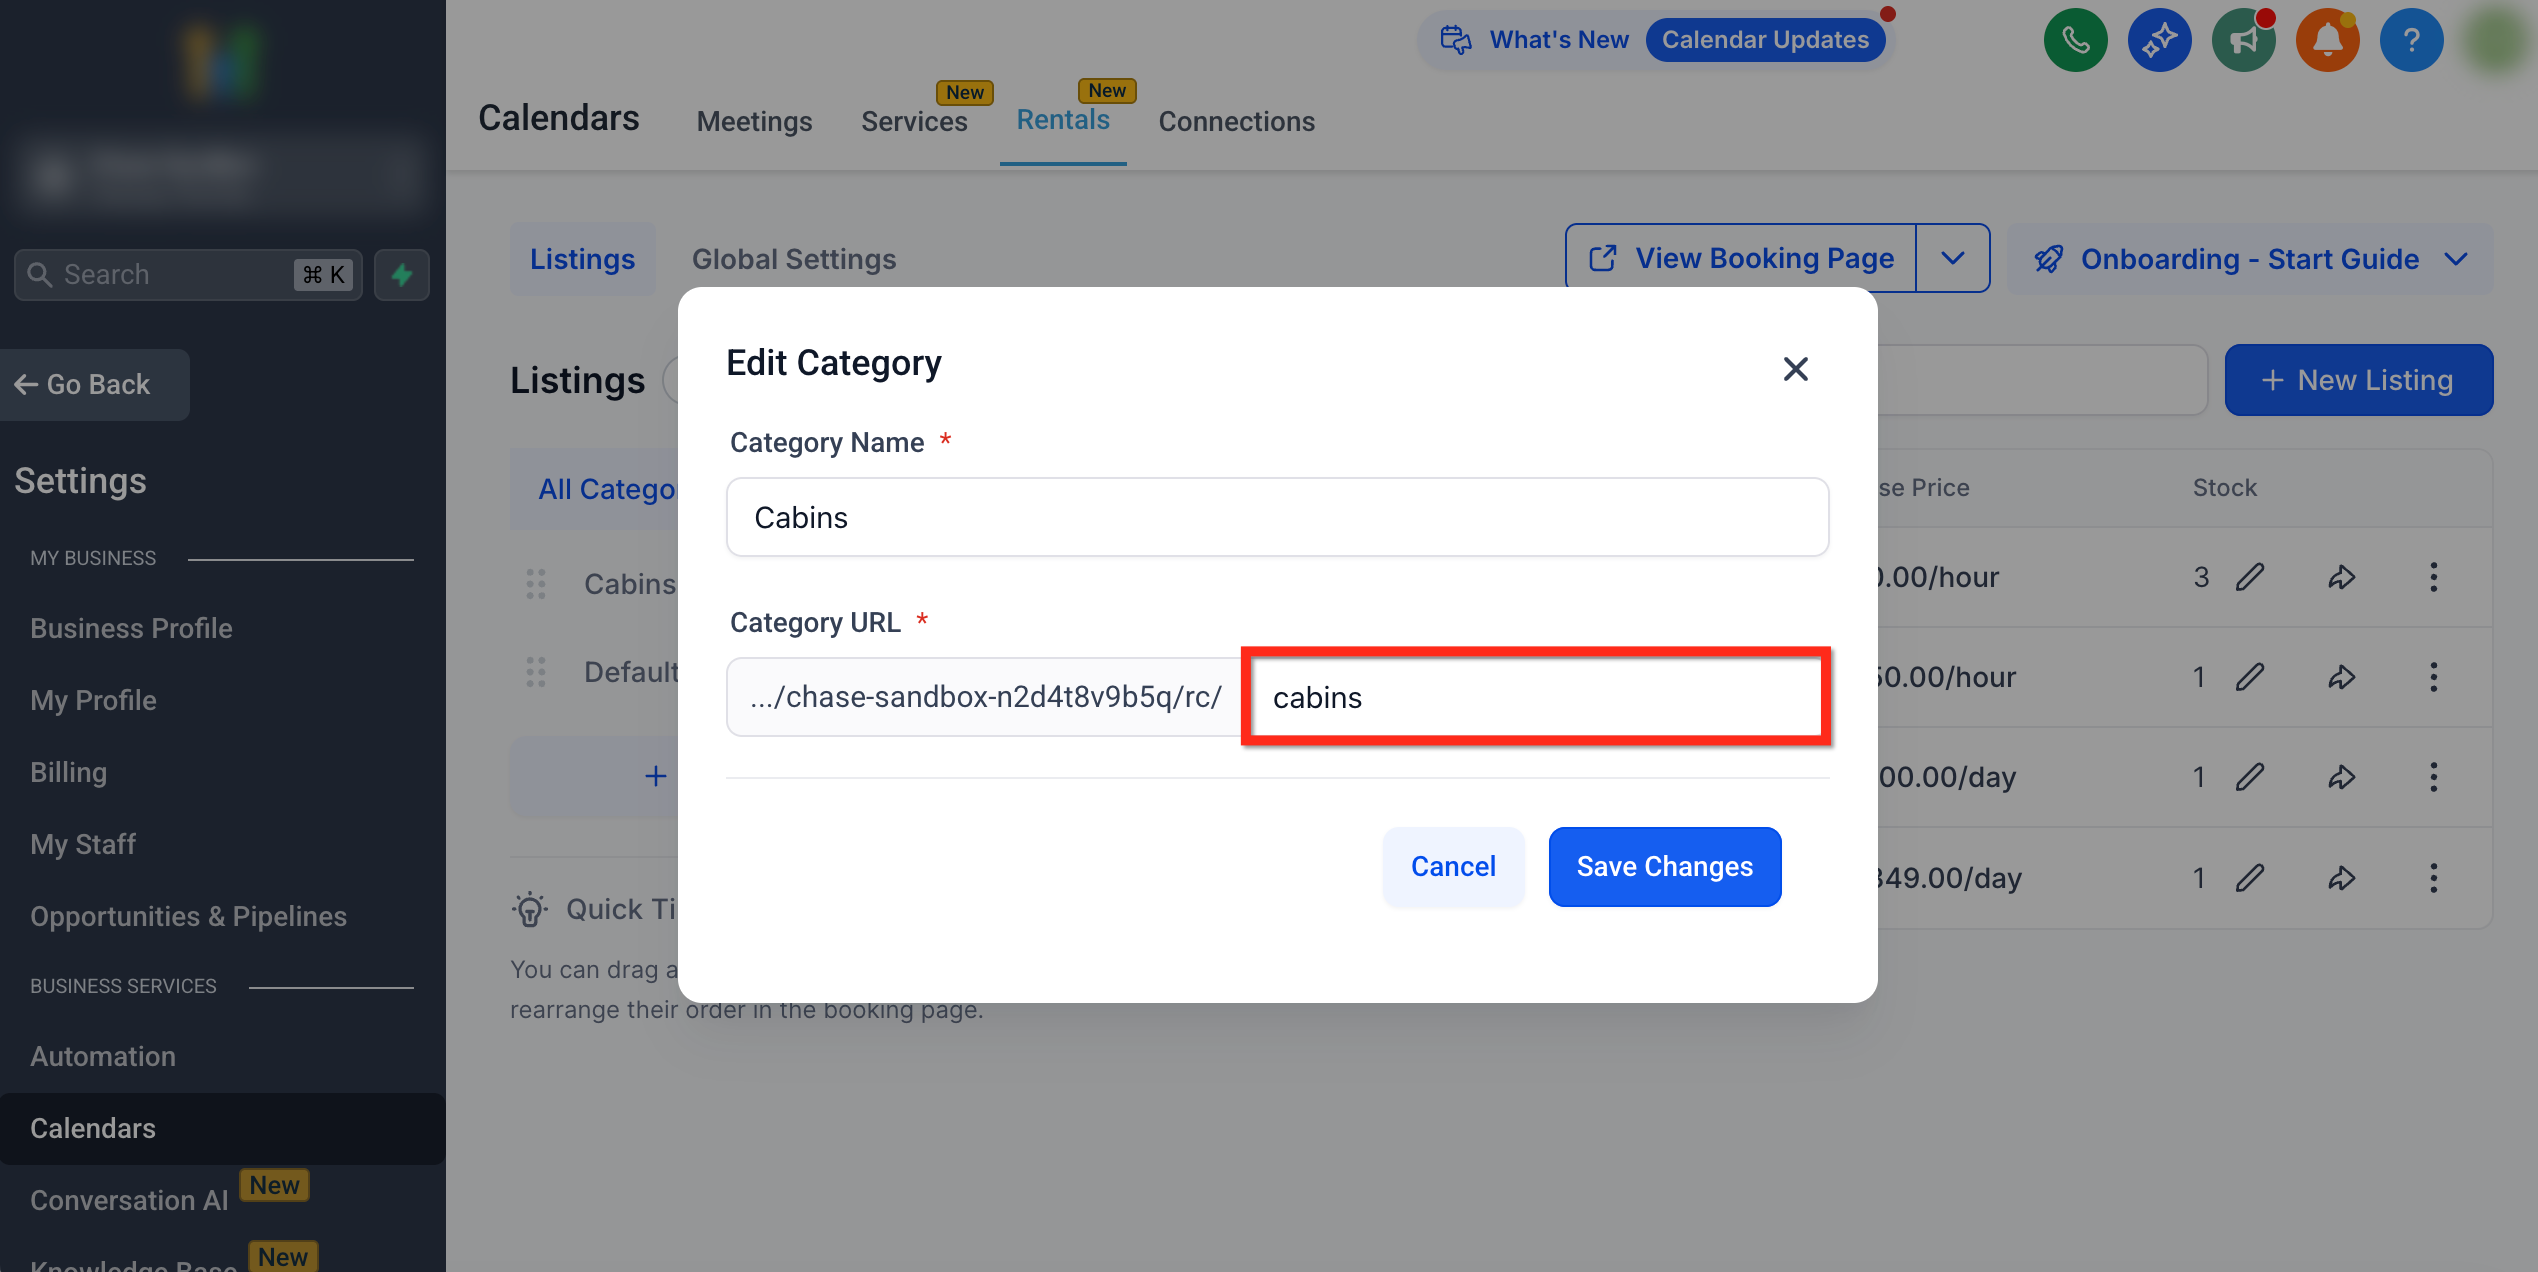
In the Add New Category modal, enter: Category Name (required) and Custom URL Slug – This forms the shareable link.

Click Create Category.

Managing and Sharing Categories
Edit a Category
Next to the category name, click the ⋮ menu then Edit.
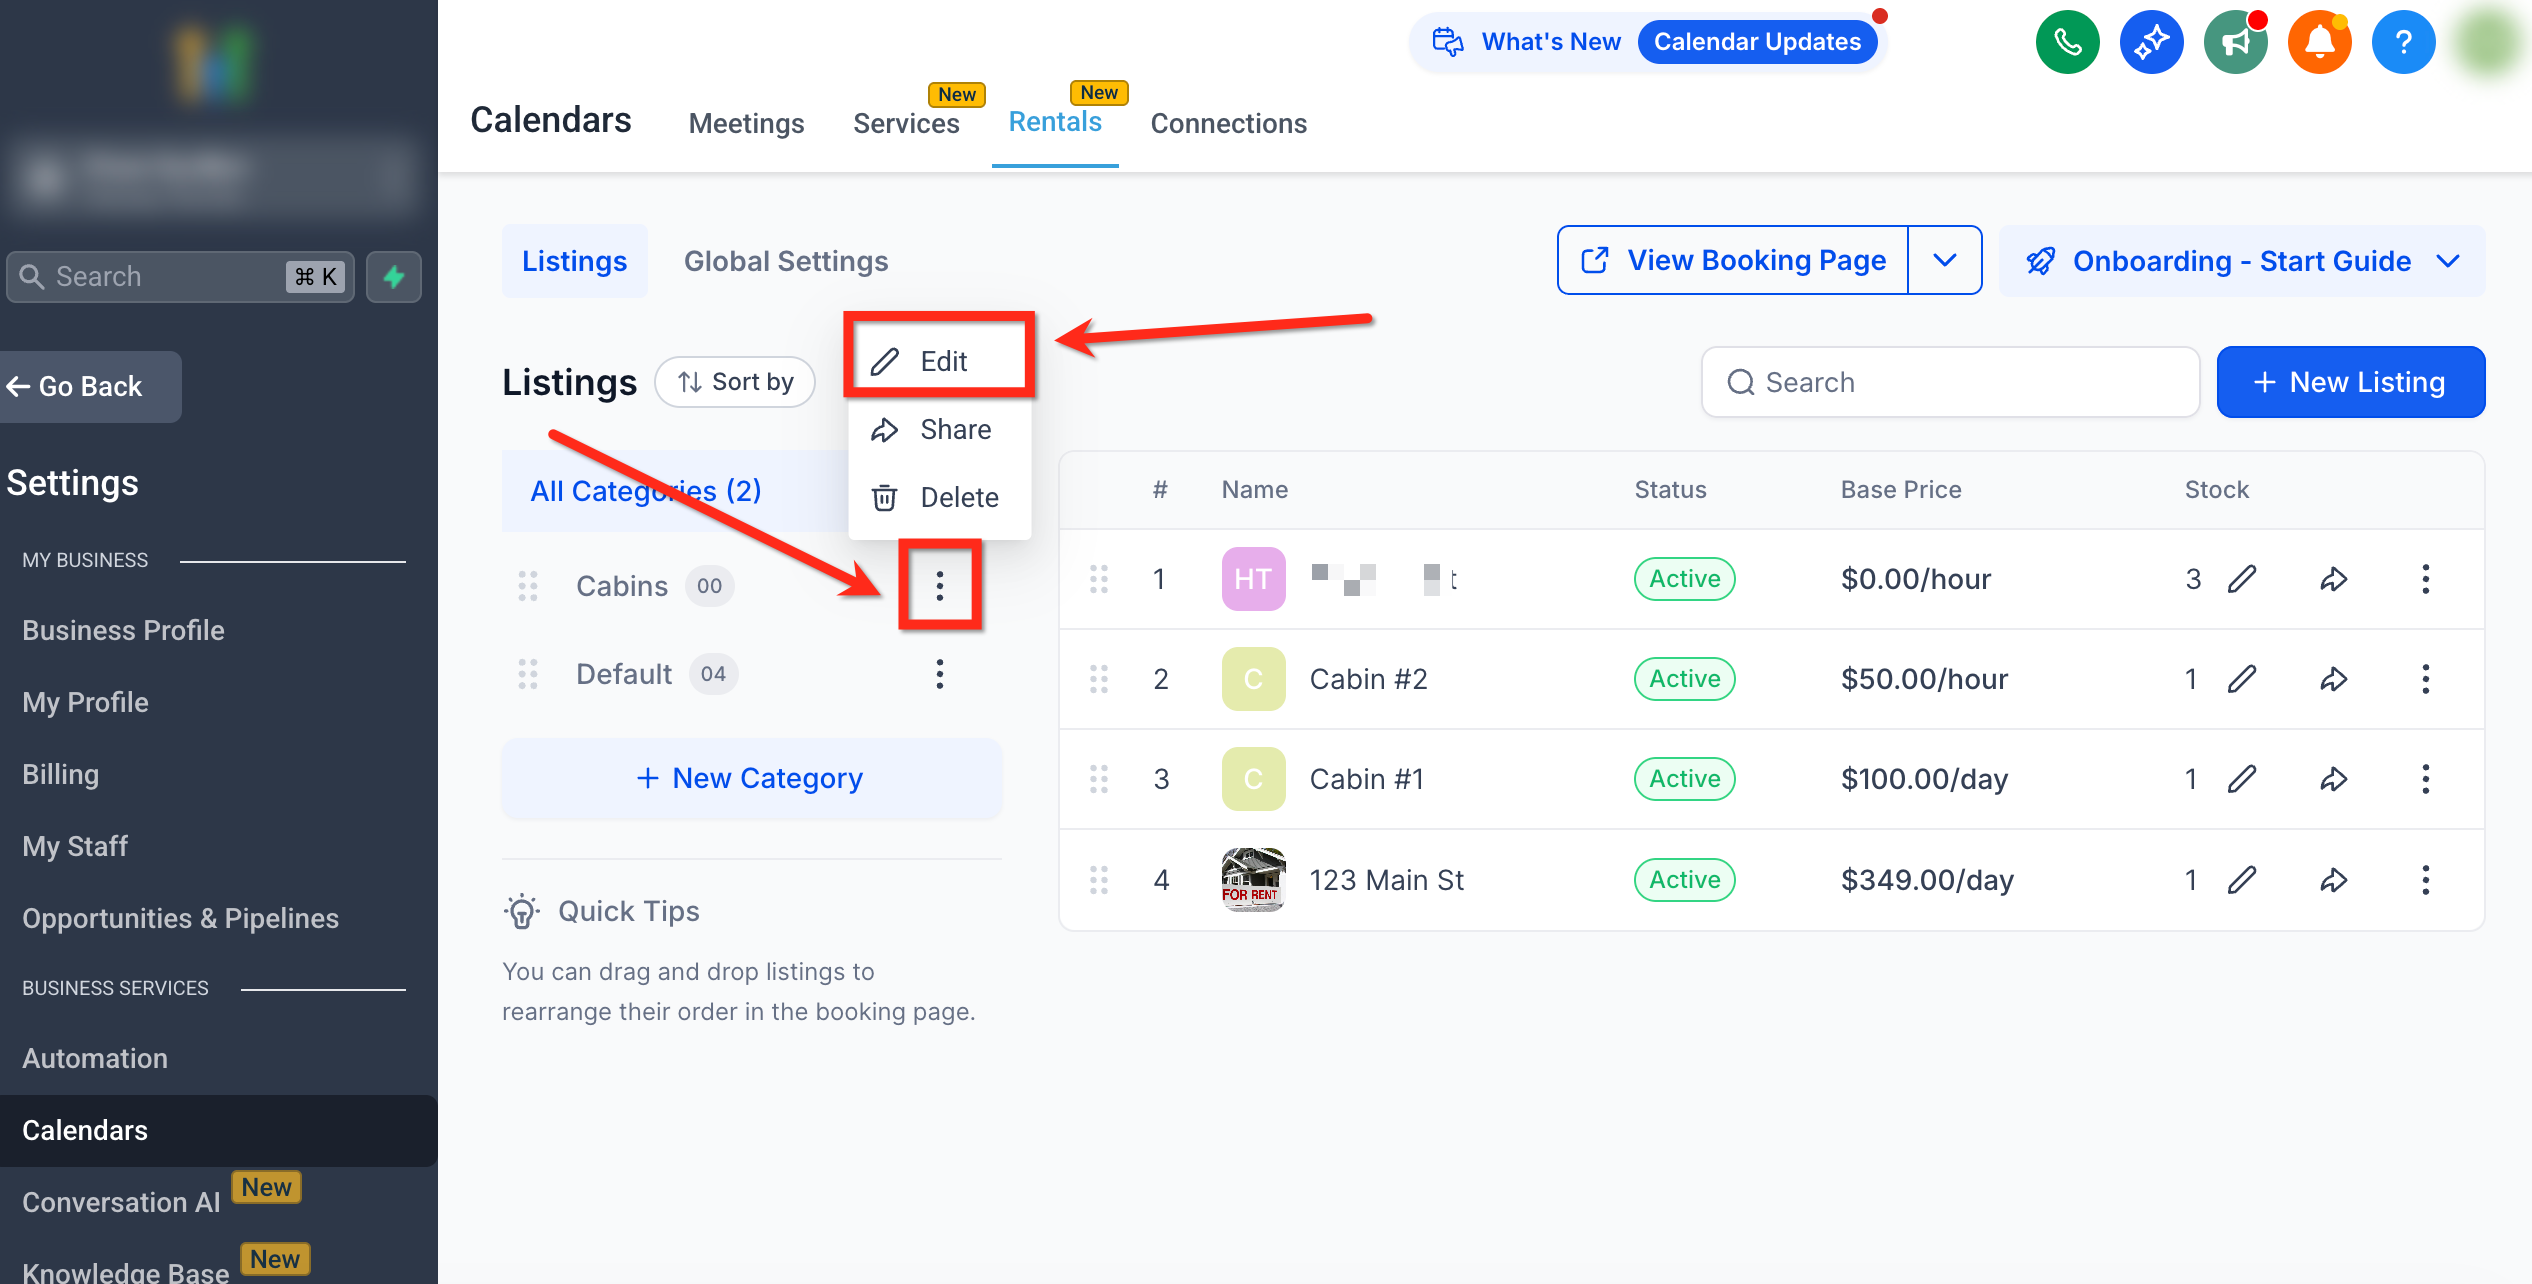
Update the name or slug and save your changes.
Share a Category
Use the Share Category option to share a public booking link filtered to that category.
Delete a Category
- Click ⋮ then Delete.
When a category is deleted, the listings grouped with it are linked to the default category.

Reorder Categories
Drag and drop categories in the left panel; their order mirrors what customers see on the booking page.
How Categories Influence Listings
Each listing must belong to one category. If you skip this, it defaults to the Default Category.
The order of categories dictates the order in which listings appear publicly.
Frequently Asked Questions
Q: Can a listing belong to multiple categories?
No. Each listing is assigned to a single category.
Q: Can I share a category page publicly?
Yes. Use Share Category to copy the direct booking link for that group.
Q: What happens if I delete a category?
When a category is deleted, the listings grouped with it are linked to the default category.
Q: How many categories can I create?
You can have up to 50 categories per account.
Q: Do categories affect pricing or calendar availability?
No. Pricing and availability are set per listing or variant.
Related Articles
Was this article helpful?
That’s Great!
Thank you for your feedback
Sorry! We couldn't be helpful
Thank you for your feedback
Feedback sent
We appreciate your effort and will try to fix the article