This article explains how to create a snapshot of fully configured Conversation AI bots in HighLevel, including bot prompts, actions, settings, and training data. Bot snapshots help you quickly deploy the same Conversation AI setup across multiple sub-accounts while keeping configurations consistent. This reduces manual setup time and helps agencies scale proven bot templates with less repetitive work.
TABLE OF CONTENTS
- What is the Conversation AI Bot Snapshot Feature?
- Key Benefits of Conversation AI Bot Snapshots
- How to Create a Snapshot with Bots
- Conversation AI Snapshot Options & Behaviors
- Frequently Asked Questions
- Related Articles
What is the Conversation AI Bot Snapshot Feature?
Conversation AI Bot Snapshots allow you to save configured Conversation AI bots into an account snapshot so they can be reused in other sub-accounts. This is useful when you have a tested bot setup that you want to deploy repeatedly without rebuilding prompts, actions, training data, and bot settings from scratch.
The Conversation AI Bot Snapshot feature lets you clone entire bots, including prompts, actions, configurations, Bot Training Web Crawler URLs, and Custom Bot Responses. This helps maintain consistency across client accounts and ensures each imported bot starts with the same structure, logic, and training setup as the original bot.
Key Benefits of Conversation AI Bot Snapshots
Bot snapshots help teams reduce setup time, avoid manual configuration errors, and keep bot behavior consistent across multiple accounts. They are especially useful for agencies or businesses managing repeatable bot templates for similar industries, services, or client workflows.
- Full bot configuration capture: Includes bot settings, prompts, actions, and related configuration details.
- Faster sub-account setup: Reduces the need to manually rebuild the same bot in each account.
- Consistent customer experience: Helps maintain the same tone, instructions, and bot logic across accounts.
- Training data included: Captures Bot Training Web Crawler URLs and Custom Bot Responses.
- Primary bot support: Automatically sets the imported bot as the primary bot when the destination account does not already have one.
- Flexible import handling: Lets you decide whether to overwrite or skip bots when a naming conflict exists.
How to Create a Snapshot with Bots
Creating a snapshot allows you to package your configured Conversation AI bot setup so it can be imported into another sub-account later. Before creating the snapshot, make sure the source sub-account contains the bot configuration, prompts, actions, and training data you want to reuse.
- Navigate to Account Snapshots from the left-hand navigation menu.
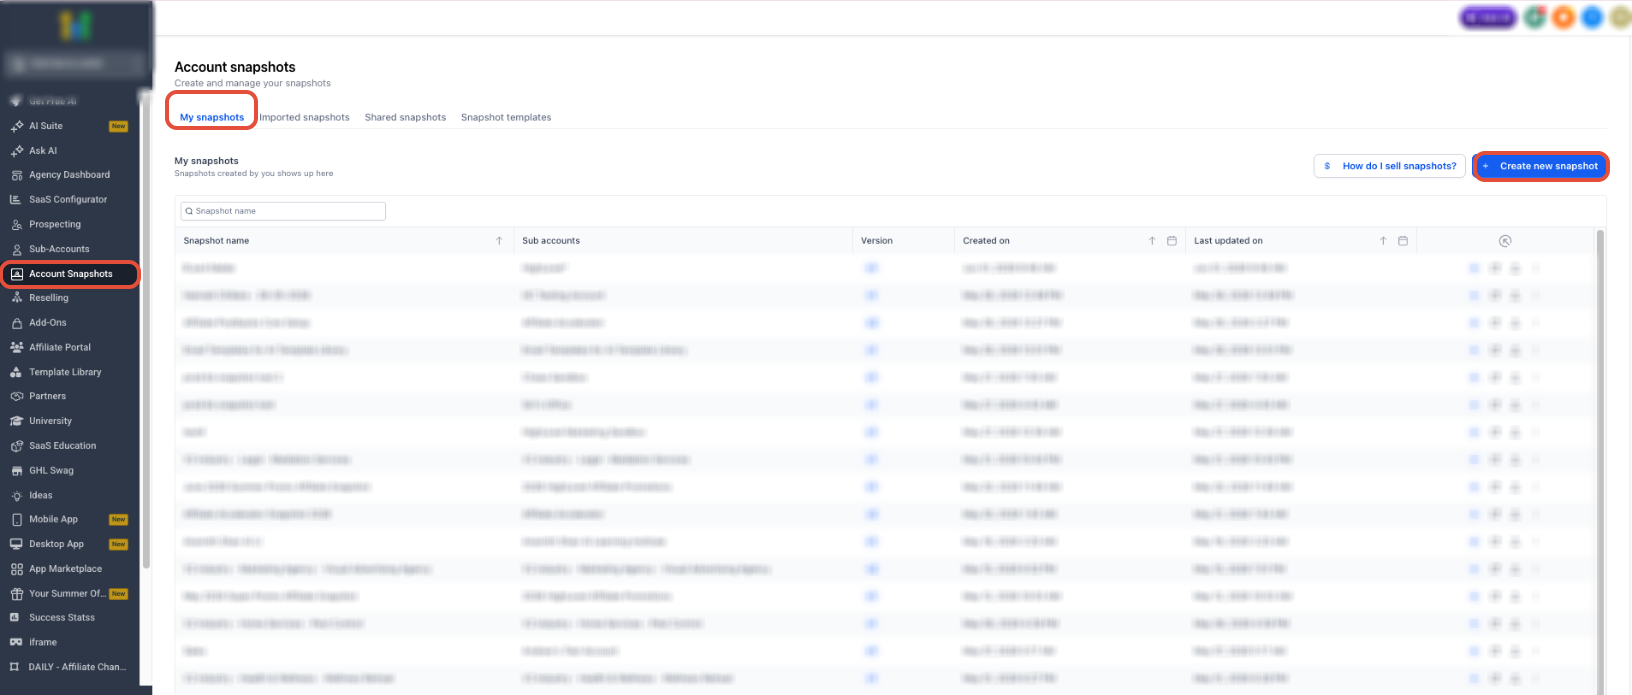
- Click Create new snapshot.
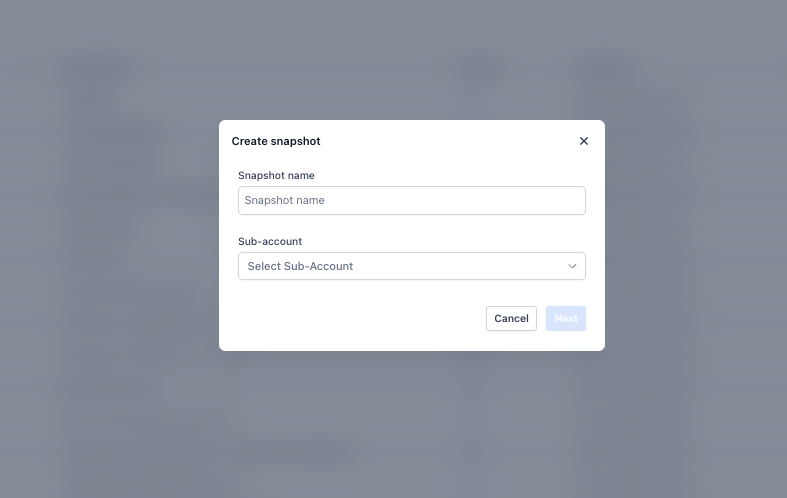
- Enter a descriptive Snapshot name.
- Click the Sub-account dropdown and select the source sub-account that contains the Conversation AI bot you want to include.
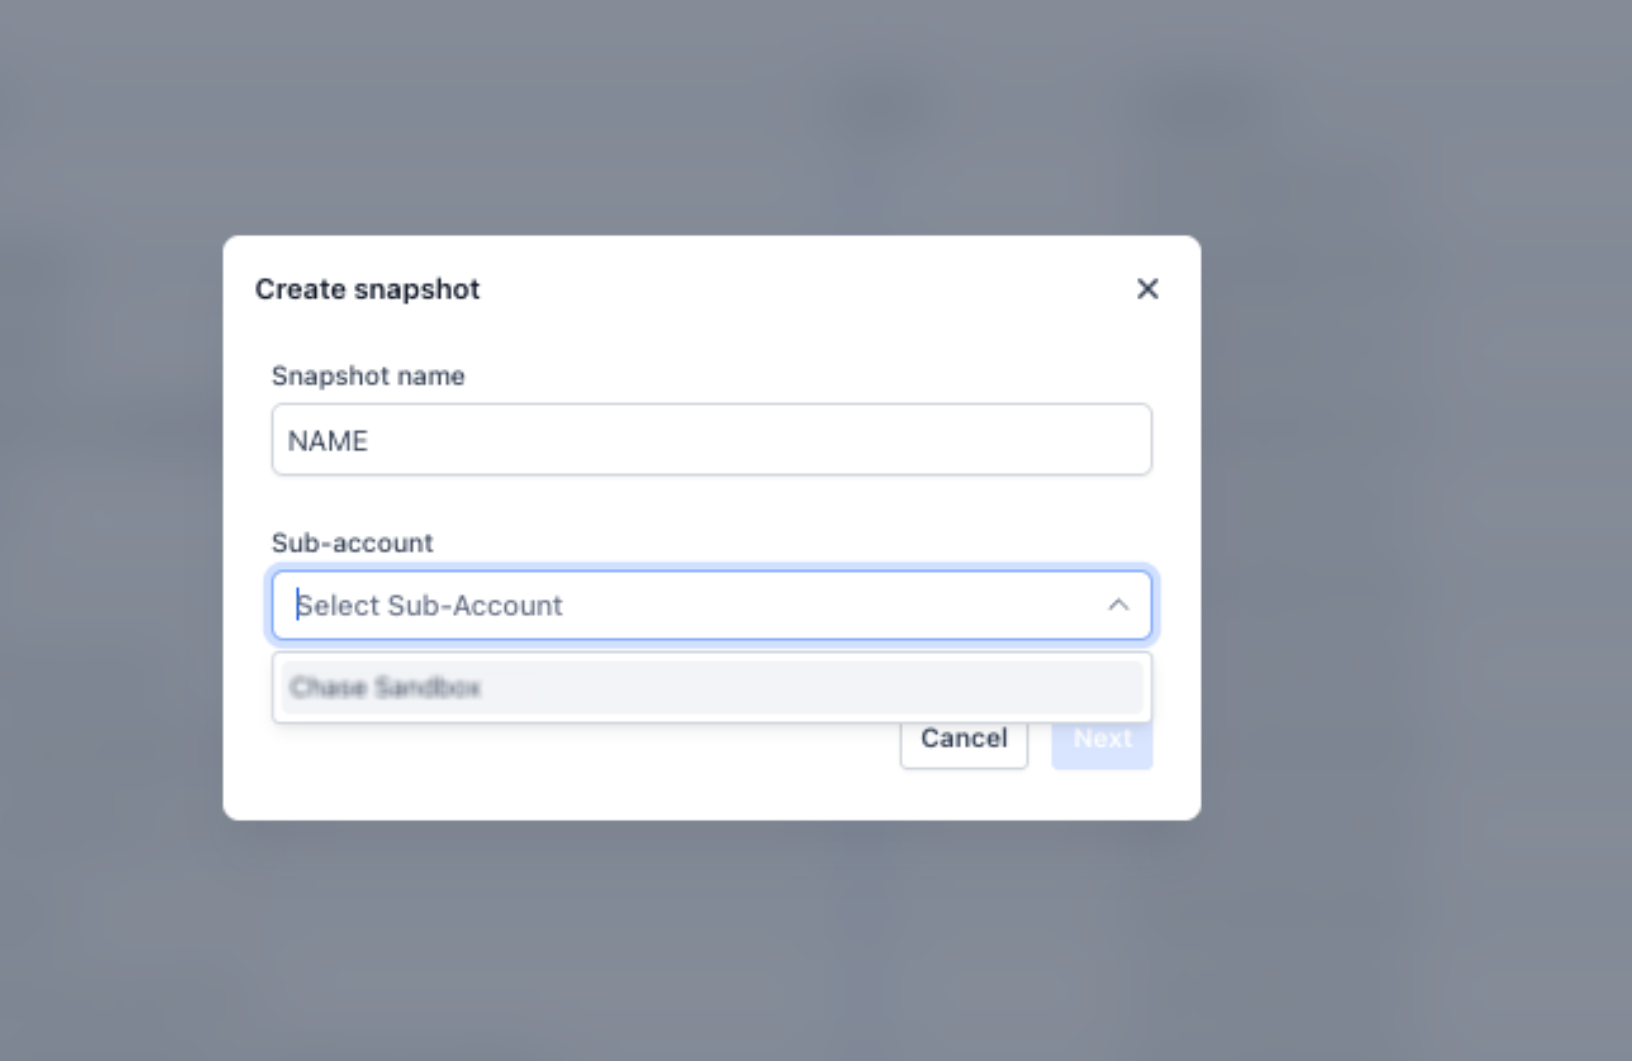
- Click Next.
- Continue through the snapshot creation flow and review the selected assets.
- Locate the Conversation AI section.
- Review the bots and related bot data included in the snapshot. This may include:
- Bot names
- Bot settings and configurations
- Bot actions
- Bot prompts
- Bot Training Web Crawler URLs
- Custom Bot Responses/FAQs
- Bot names
- Click Create Snapshot to finish creating the snapshot.
Conversation AI Snapshot Options & Behaviors
Understanding how Conversation AI bot data is copied helps prevent confusion when importing snapshots into other sub-accounts. These behaviors determine how bots are assigned, what information is included, and how conflicts are handled during import.
Primary Bot Auto-Assignment
If the destination sub-account does not already have a primary Conversation AI bot, the imported bot from the snapshot is automatically set as the primary bot. If a primary bot already exists, you can manually review and update the primary bot setting after import.
Conflict Handling
If a bot with the same name already exists in the destination sub-account, HighLevel provides options during import so you can decide how to handle the conflict.
- Overwrite: Replaces the existing bot with the bot from the snapshot.
- Skip: Keeps the existing bot and does not import the matching bot from the snapshot.
What’s Included in the Snapshot?
Conversation AI bot snapshots are designed to preserve the core bot setup needed to recreate the bot in another sub-account.
Included items may include:
- Complete bot structure
- Bot actions
- Prompt and response mappings
- Bot settings and configurations
- Bot Training Web Crawler URLs
- Custom Bot Responses/FAQs created in Bot Training
Frequently Asked Questions
Q: What happens if a bot with the same name already exists in the destination sub-account?
During import, you can choose to overwrite the existing bot or skip the bot from the snapshot.
Q: Will my bot prompts and action logic be preserved?
Yes. The snapshot preserves the bot’s configured prompts, actions, settings, and related bot logic.
Q: Does the snapshot include training data like FAQs and Web Crawler URLs?
Yes. Bot Training data, including Web Crawler URLs and Custom Bot Responses/FAQs, is included in the snapshot.
Q: Will the imported bot automatically become the primary bot?
If the destination sub-account does not already have a primary bot, the imported bot will automatically be set as the primary bot.
Q: Can I change the primary bot after importing a snapshot?
Yes. You can manually update the primary bot from the Conversation AI bot settings after import.
Q: Can I edit an existing snapshot after it has been created?
No. Snapshots cannot be edited after creation. If you update the original bot, create a new snapshot to capture the latest configuration.
Q: Should I test the bot after importing a snapshot?
Yes. Always test the imported bot in the destination sub-account to confirm prompts, actions, training data, and primary bot settings are working as expected.
Related Articles
Was this article helpful?
That’s Great!
Thank you for your feedback
Sorry! We couldn't be helpful
Thank you for your feedback
Feedback sent
We appreciate your effort and will try to fix the article