Launching your own website from scratch can feel overwhelming, but don't let the blank page stop you. With these instructions you can go from idea to published in record time.
TABLE OF CONTENTS
- Preparation & Planning
- Create Blank Website
- Build the Home Page
- Add More Pages
- Add Navigation
- Previewing, Settings & Publishing
Preparation & Planning
Before you even log into GoHighLevel or drag your first element, taking some time to plan your website will save you significant time and effort, and result in a much more effective site.
- Define Your Website's Purpose:
- What is the primary goal of this website? Is it to generate leads, sell products, provide information, build brand awareness, or book appointments? Knowing this will guide all your design and content decisions.
- Who is your target audience? Understanding their needs, preferences, and pain points will help you tailor the website's content and design to resonate with them.
- What is the primary goal of this website? Is it to generate leads, sell products, provide information, build brand awareness, or book appointments? Knowing this will guide all your design and content decisions.
- Outline Your Content & Structure:
- What pages do you need? Most business websites start with a Home, About, Services/Products, and Contact page. You might need more or fewer depending on your goals.
- What key information or call-to-action needs to be on each page? Think about what you want visitors to do or learn on each page.
- Gather your assets: Do you have your logo, brand colors, images, videos, and written content (or at least an idea of it) ready?
- What pages do you need? Most business websites start with a Home, About, Services/Products, and Contact page. You might need more or fewer depending on your goals.
- A Simple Plan: A table can help you map this out. Your plan might look something like this:
| Page/Element | Purpose | Sections & Contents |
|---|---|---|
| Home | Introduce the business, highlight key offerings, main call to action | Main Headline (ex: Welcome to Business) Sub Headline (ex: We help you do Thing) Call To Action (ex: Book a Call) Intro Media (ex: hero image or video sales letter) Overview of each product/service |
| About Us | Build trust, tell your story, introduce the team | Company history/mission Team member photos & bios Values/What makes us different |
| Contact | Allow visitors to get in touch, provide a location | Contact form Phone number, email Address Map |
| Services/Products | Details about what you offer | List and description of products/services Pricing information Benefits Case studies |
| Navigation Menu | Easy site-wide navigation | Logo, links to pages |
| Footer | Important links, copyright, contact info | Copyright notice Privacy policy Terms of service Contact info Social media icons |
Create Blank Website
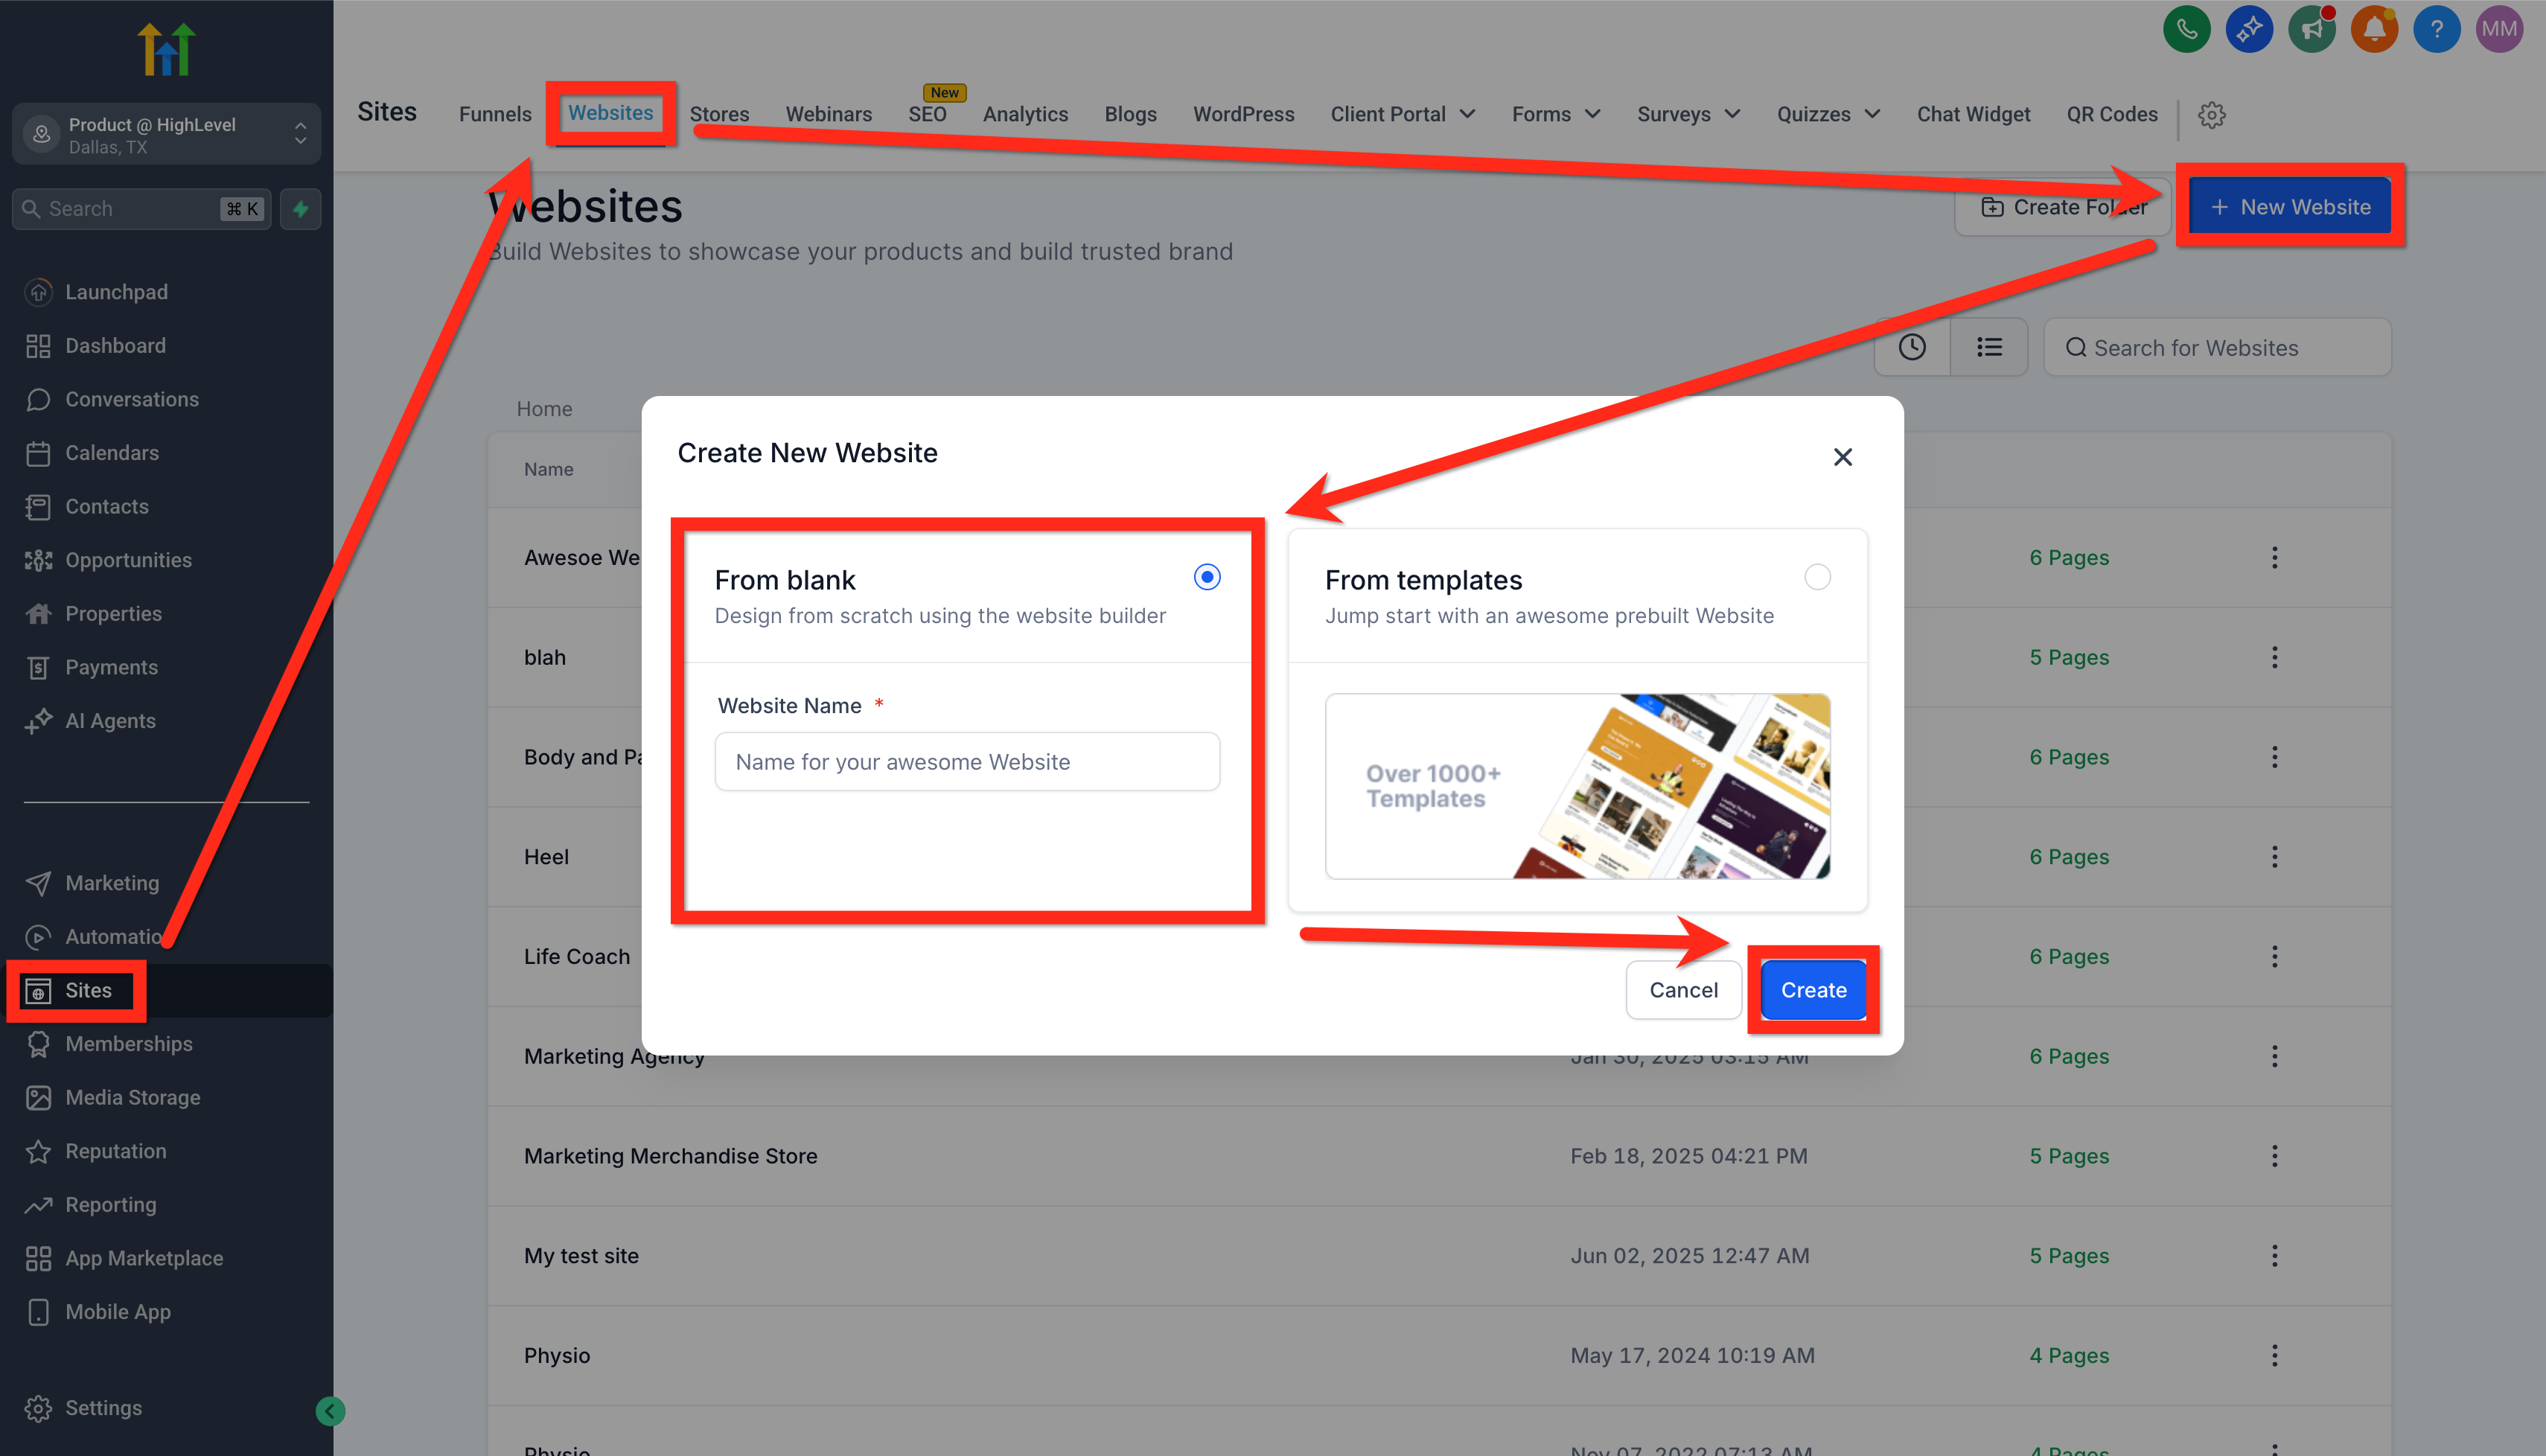
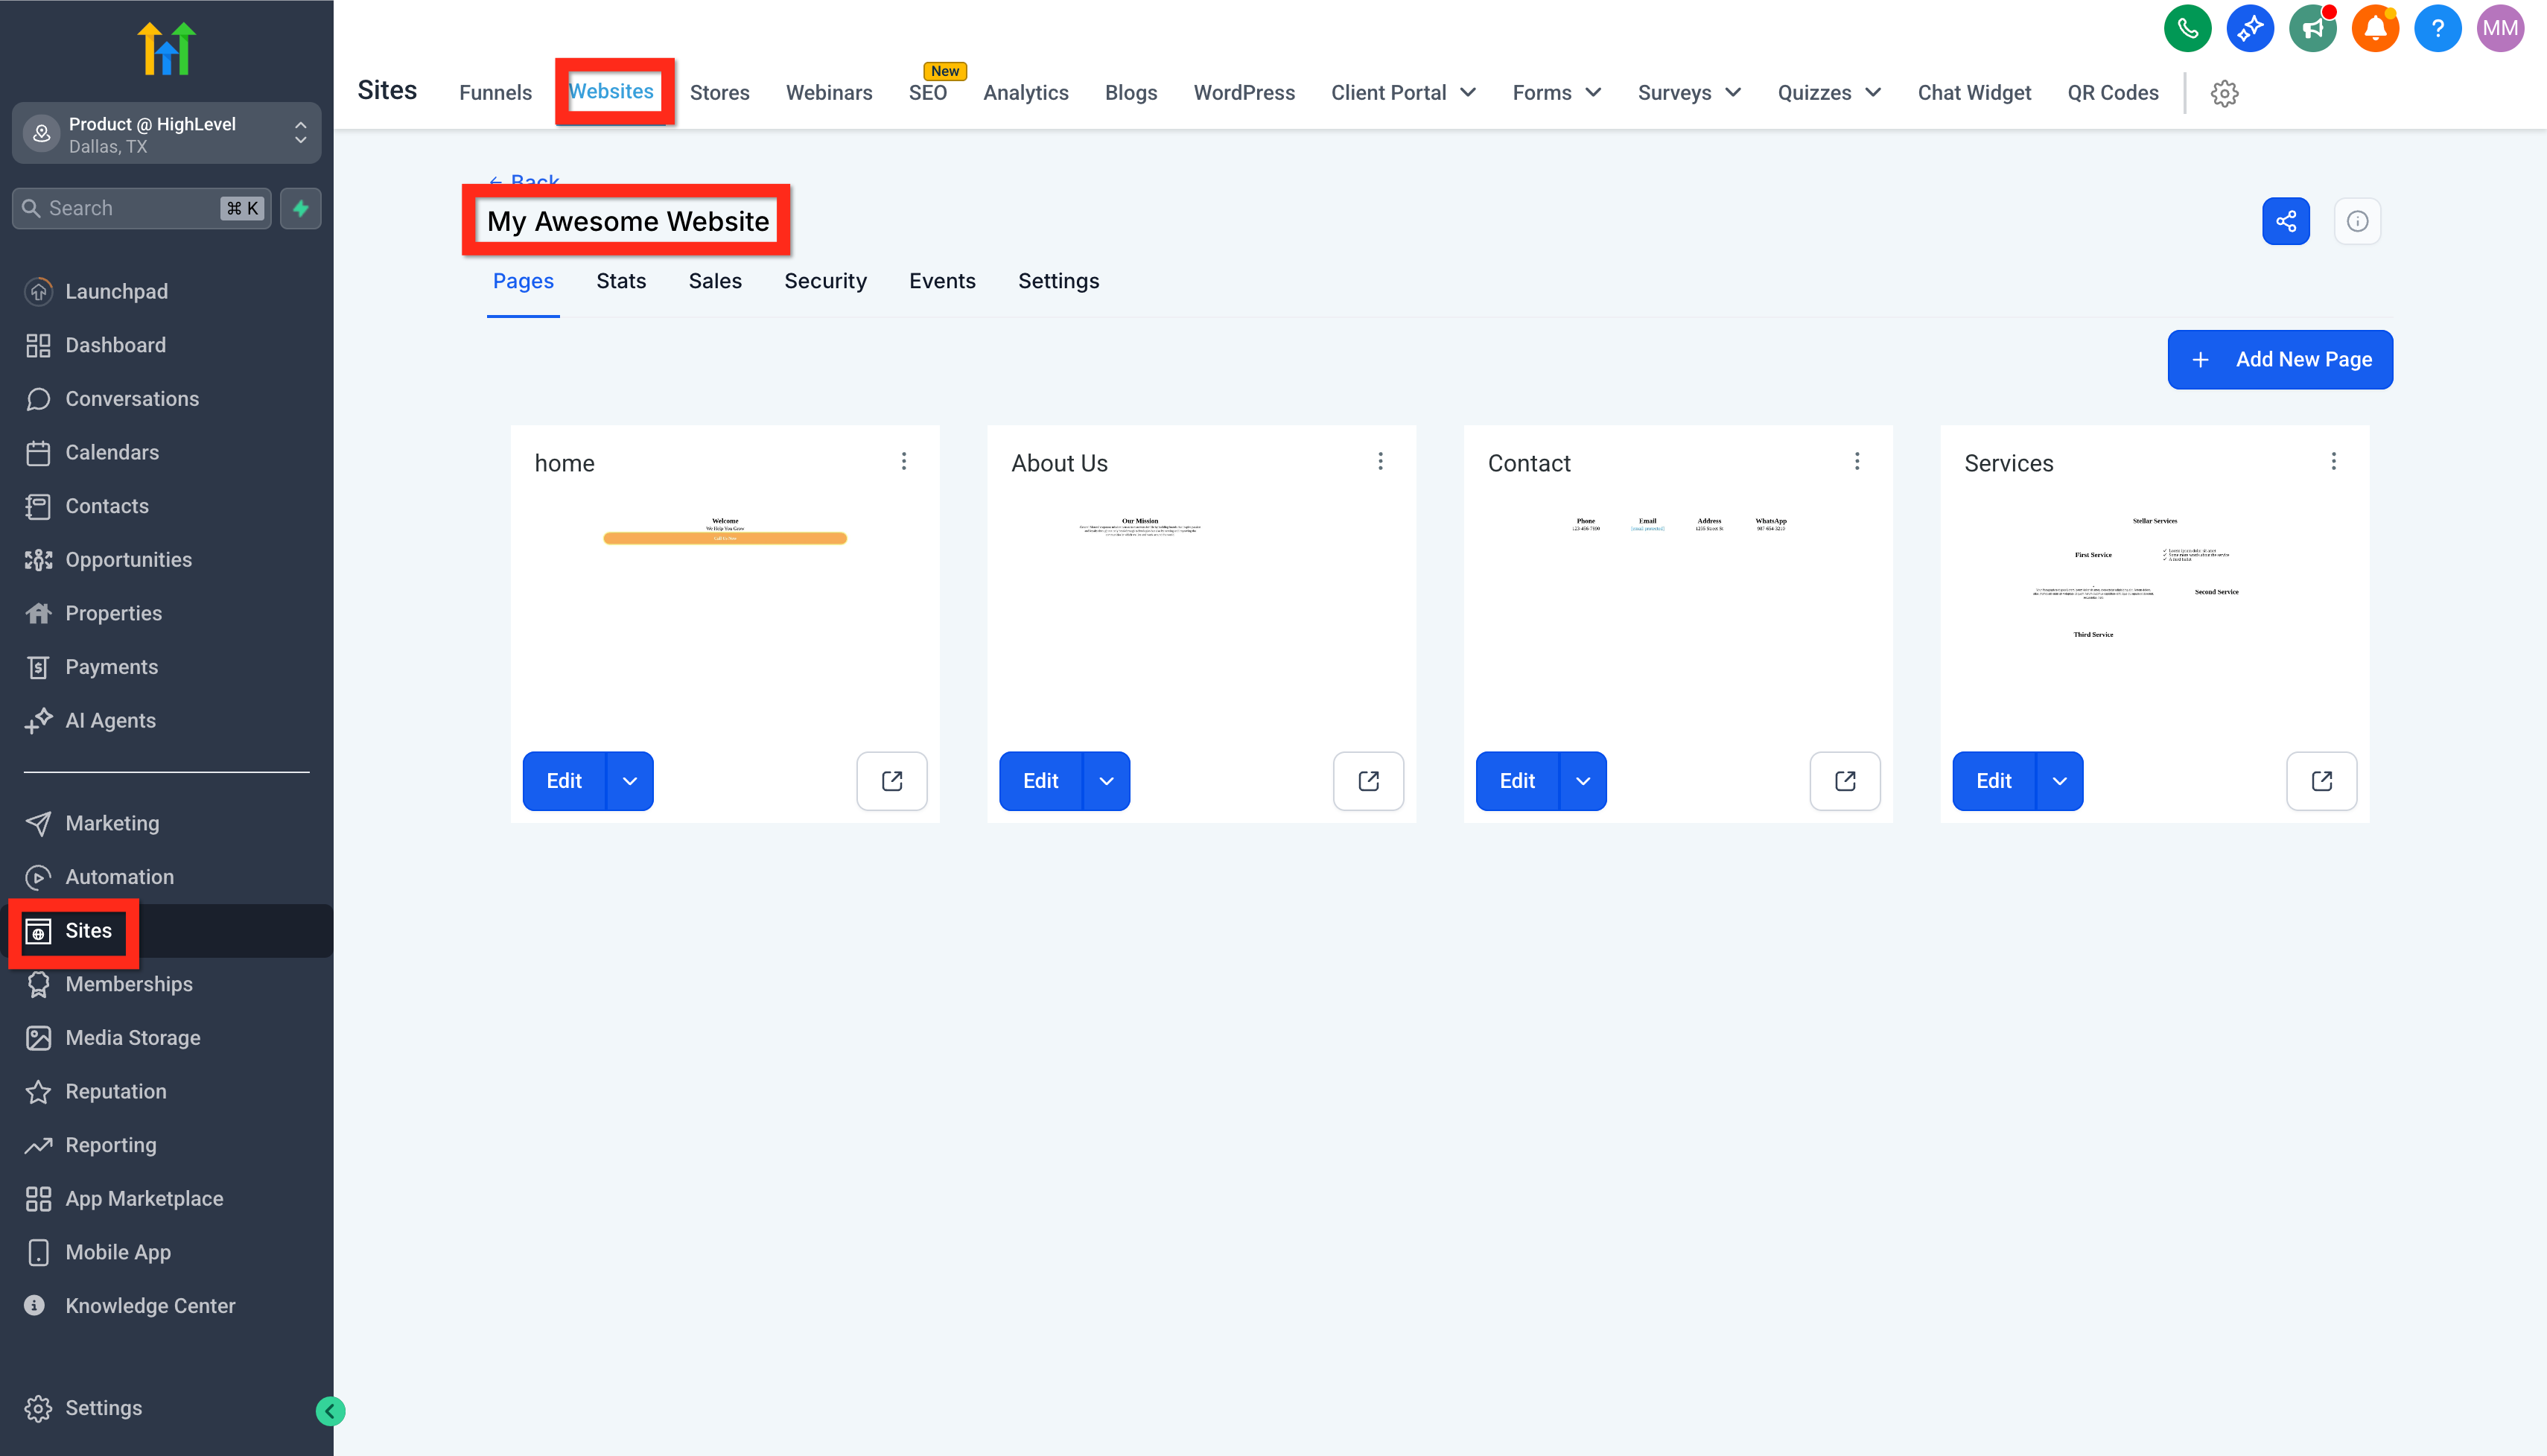
- Navigate to Sites > Websites > New Website > From Blank and click Create.
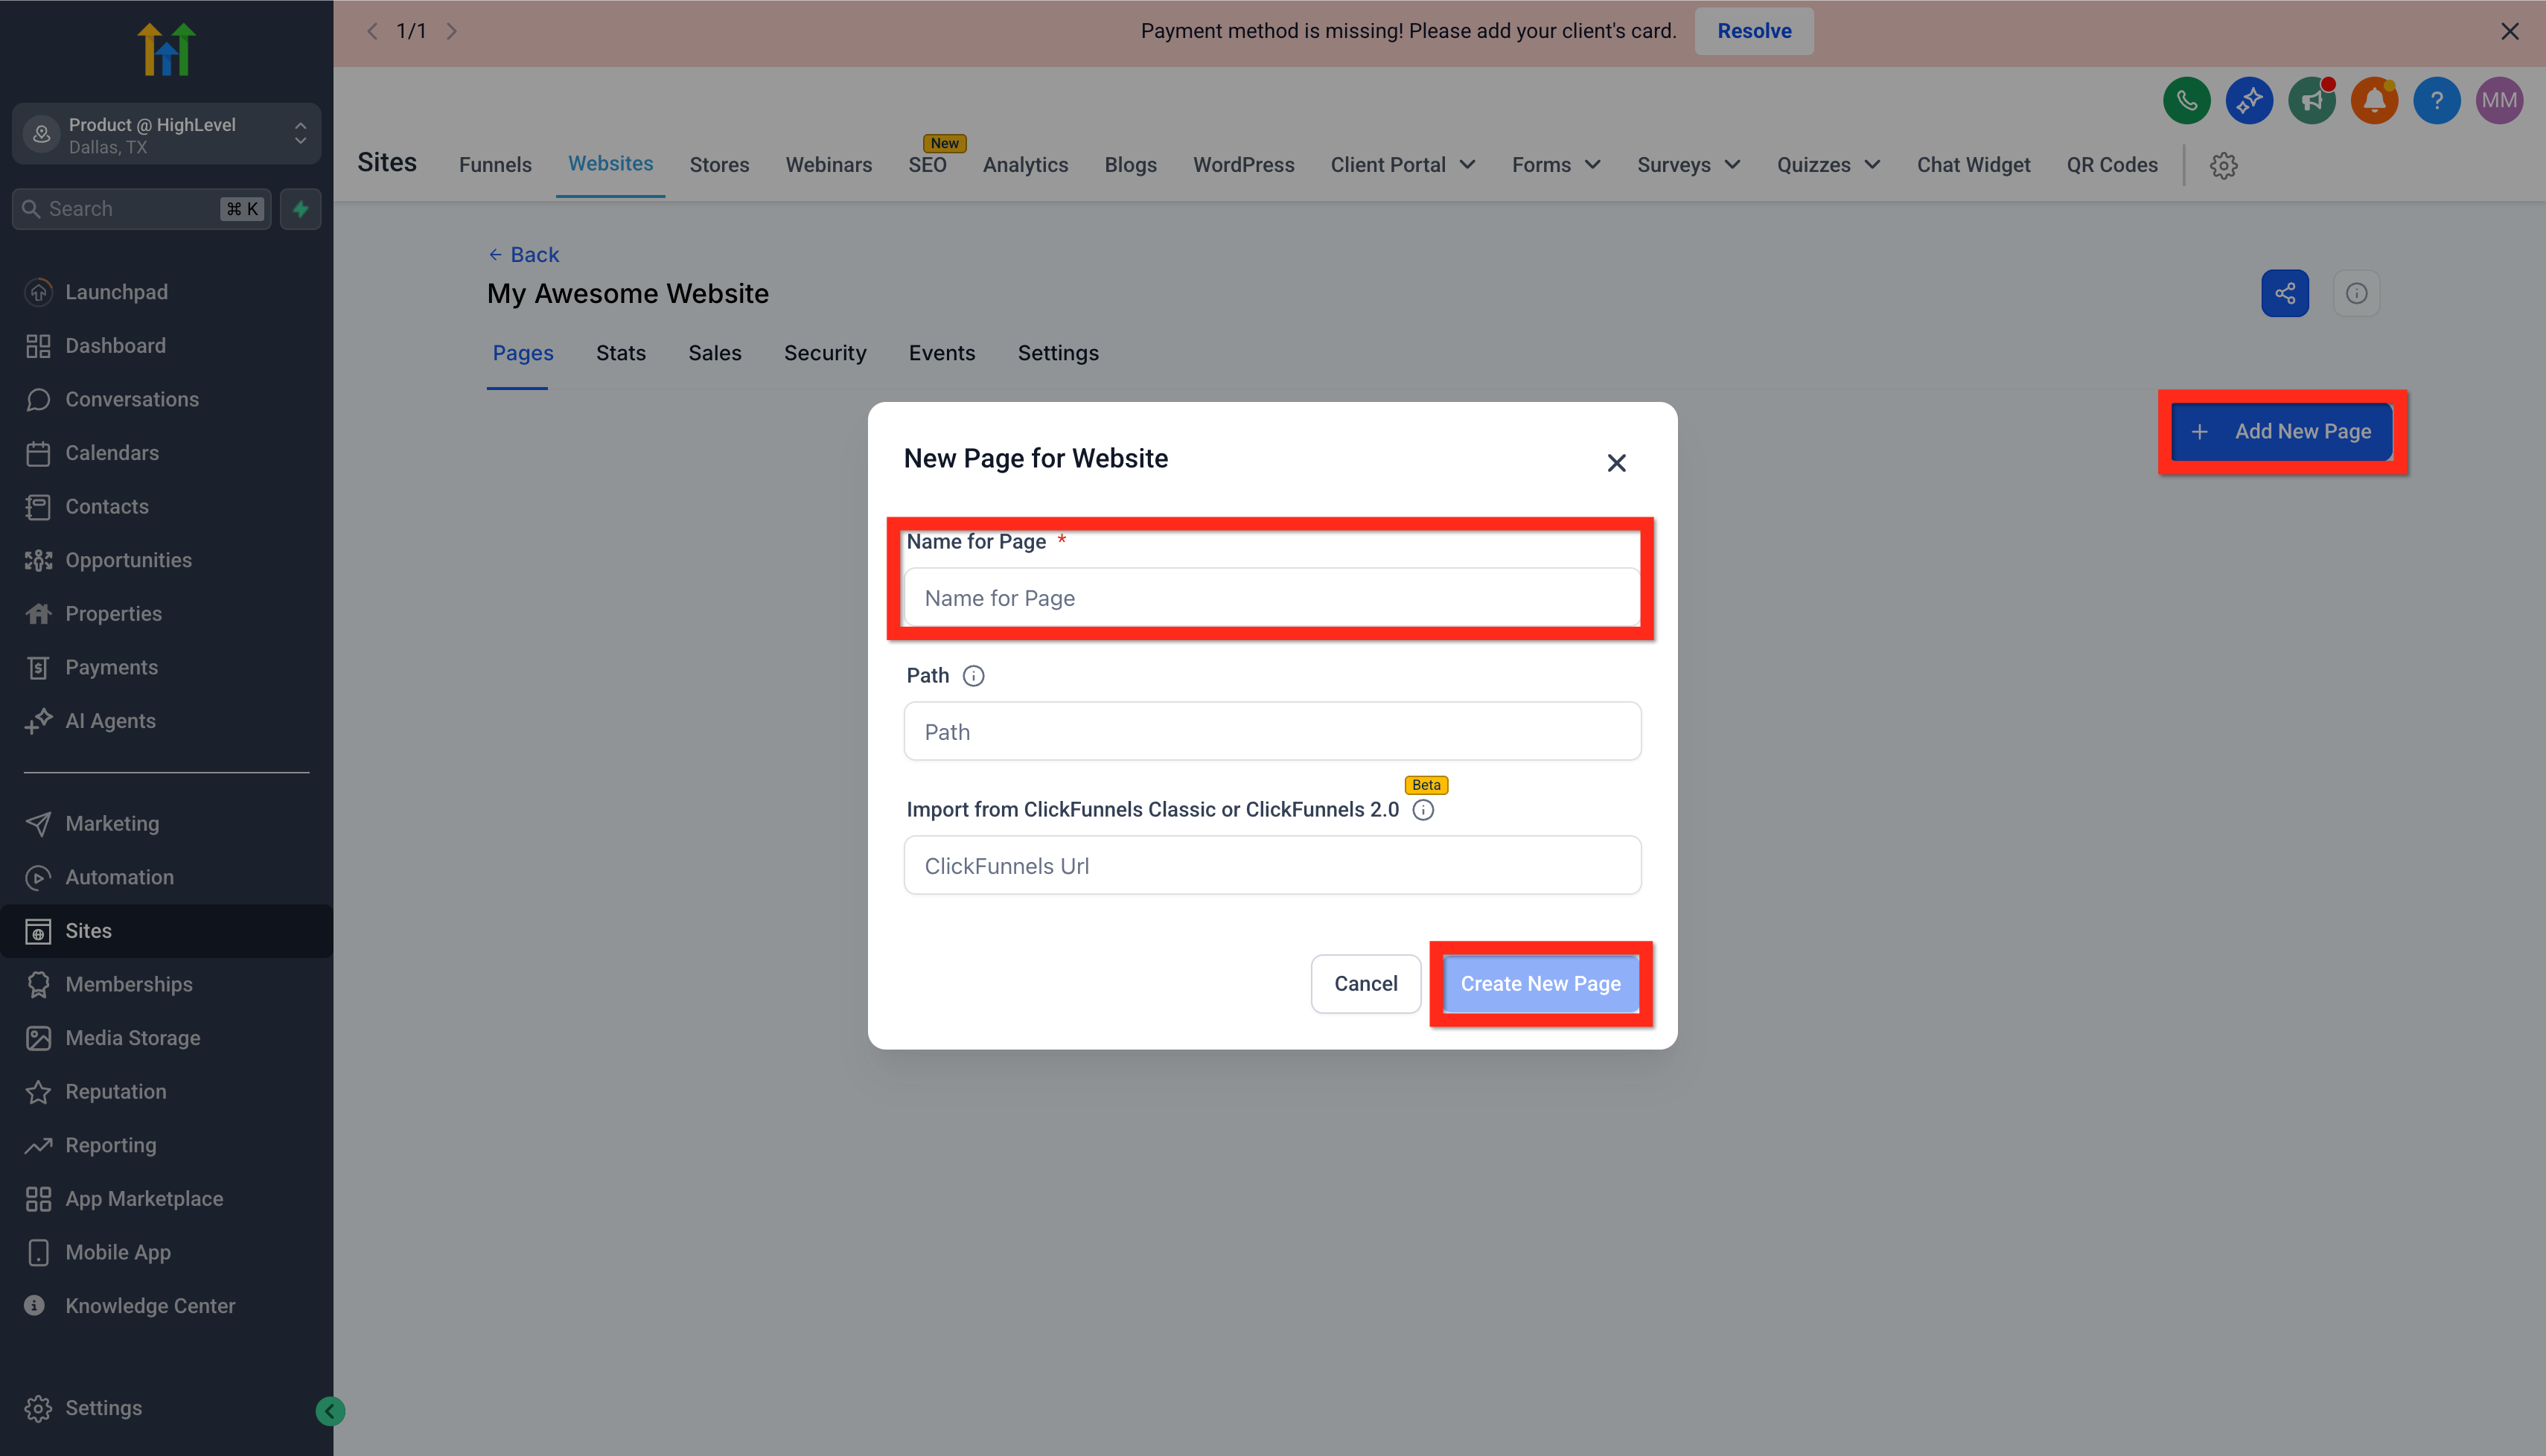
- Click Add New Page then give it a name (ex: Home) and click Create New Page.
Build the Home Page
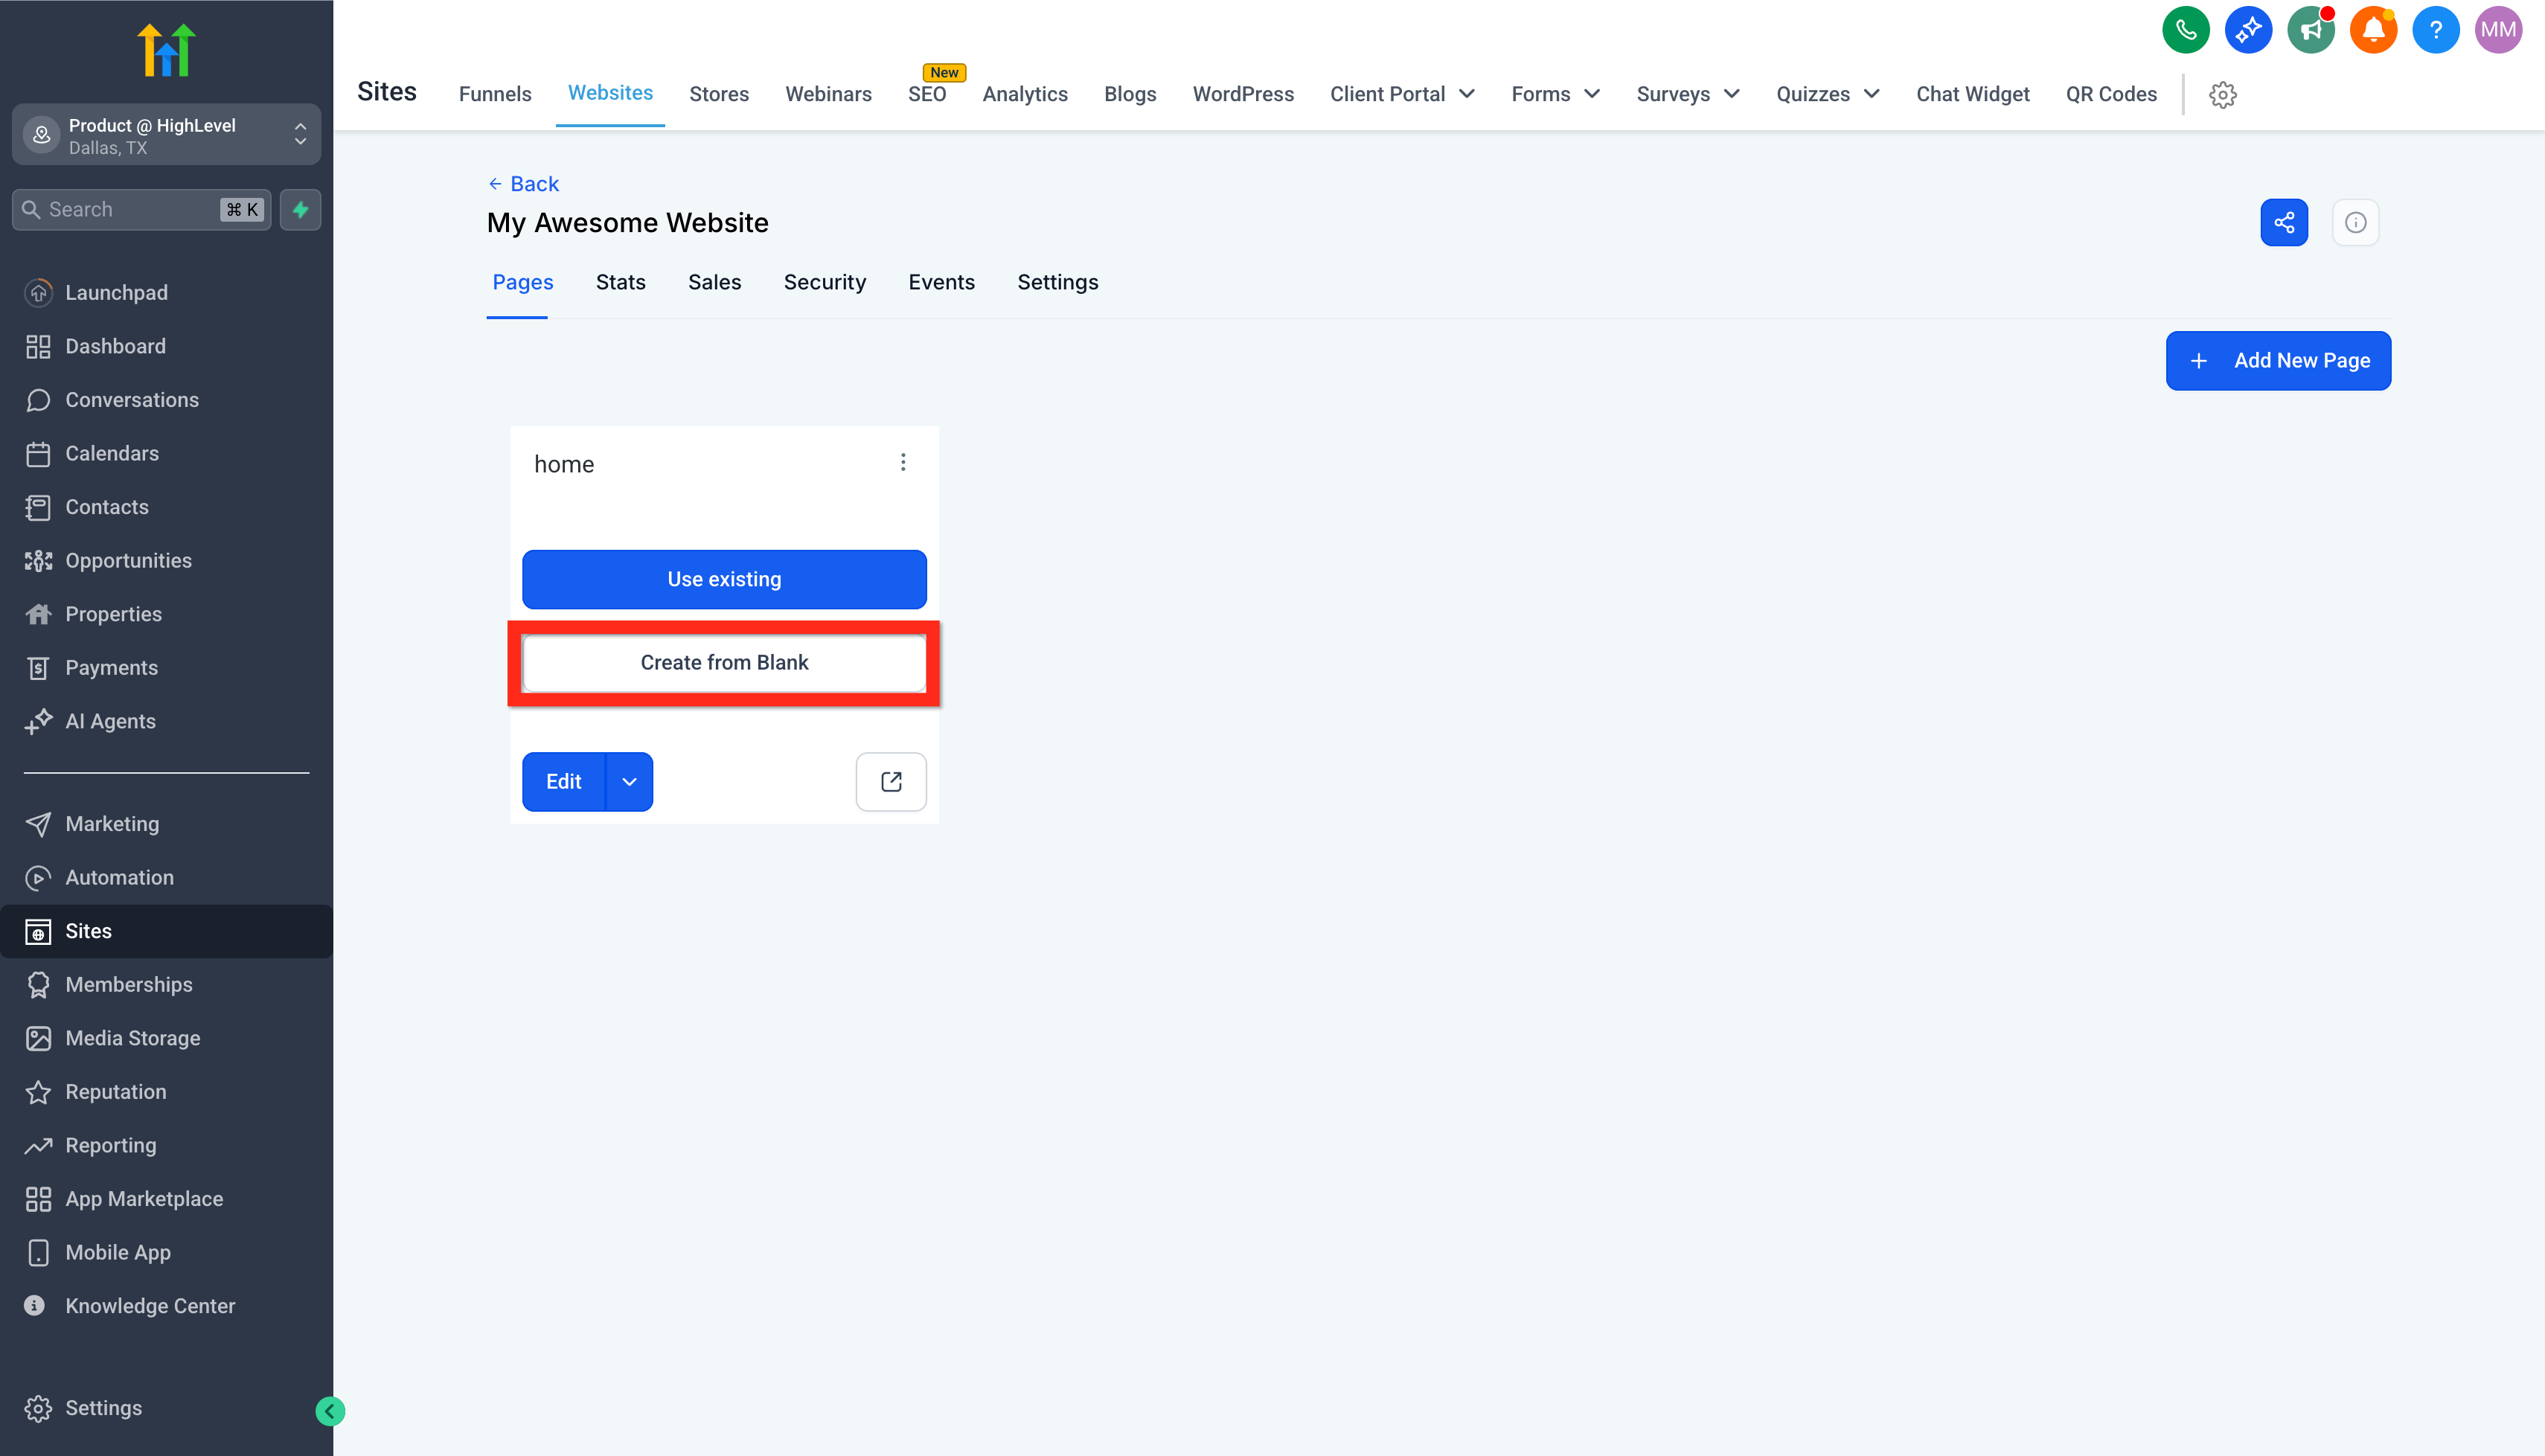
- Click Create From Blank
- Open the Website Builder.
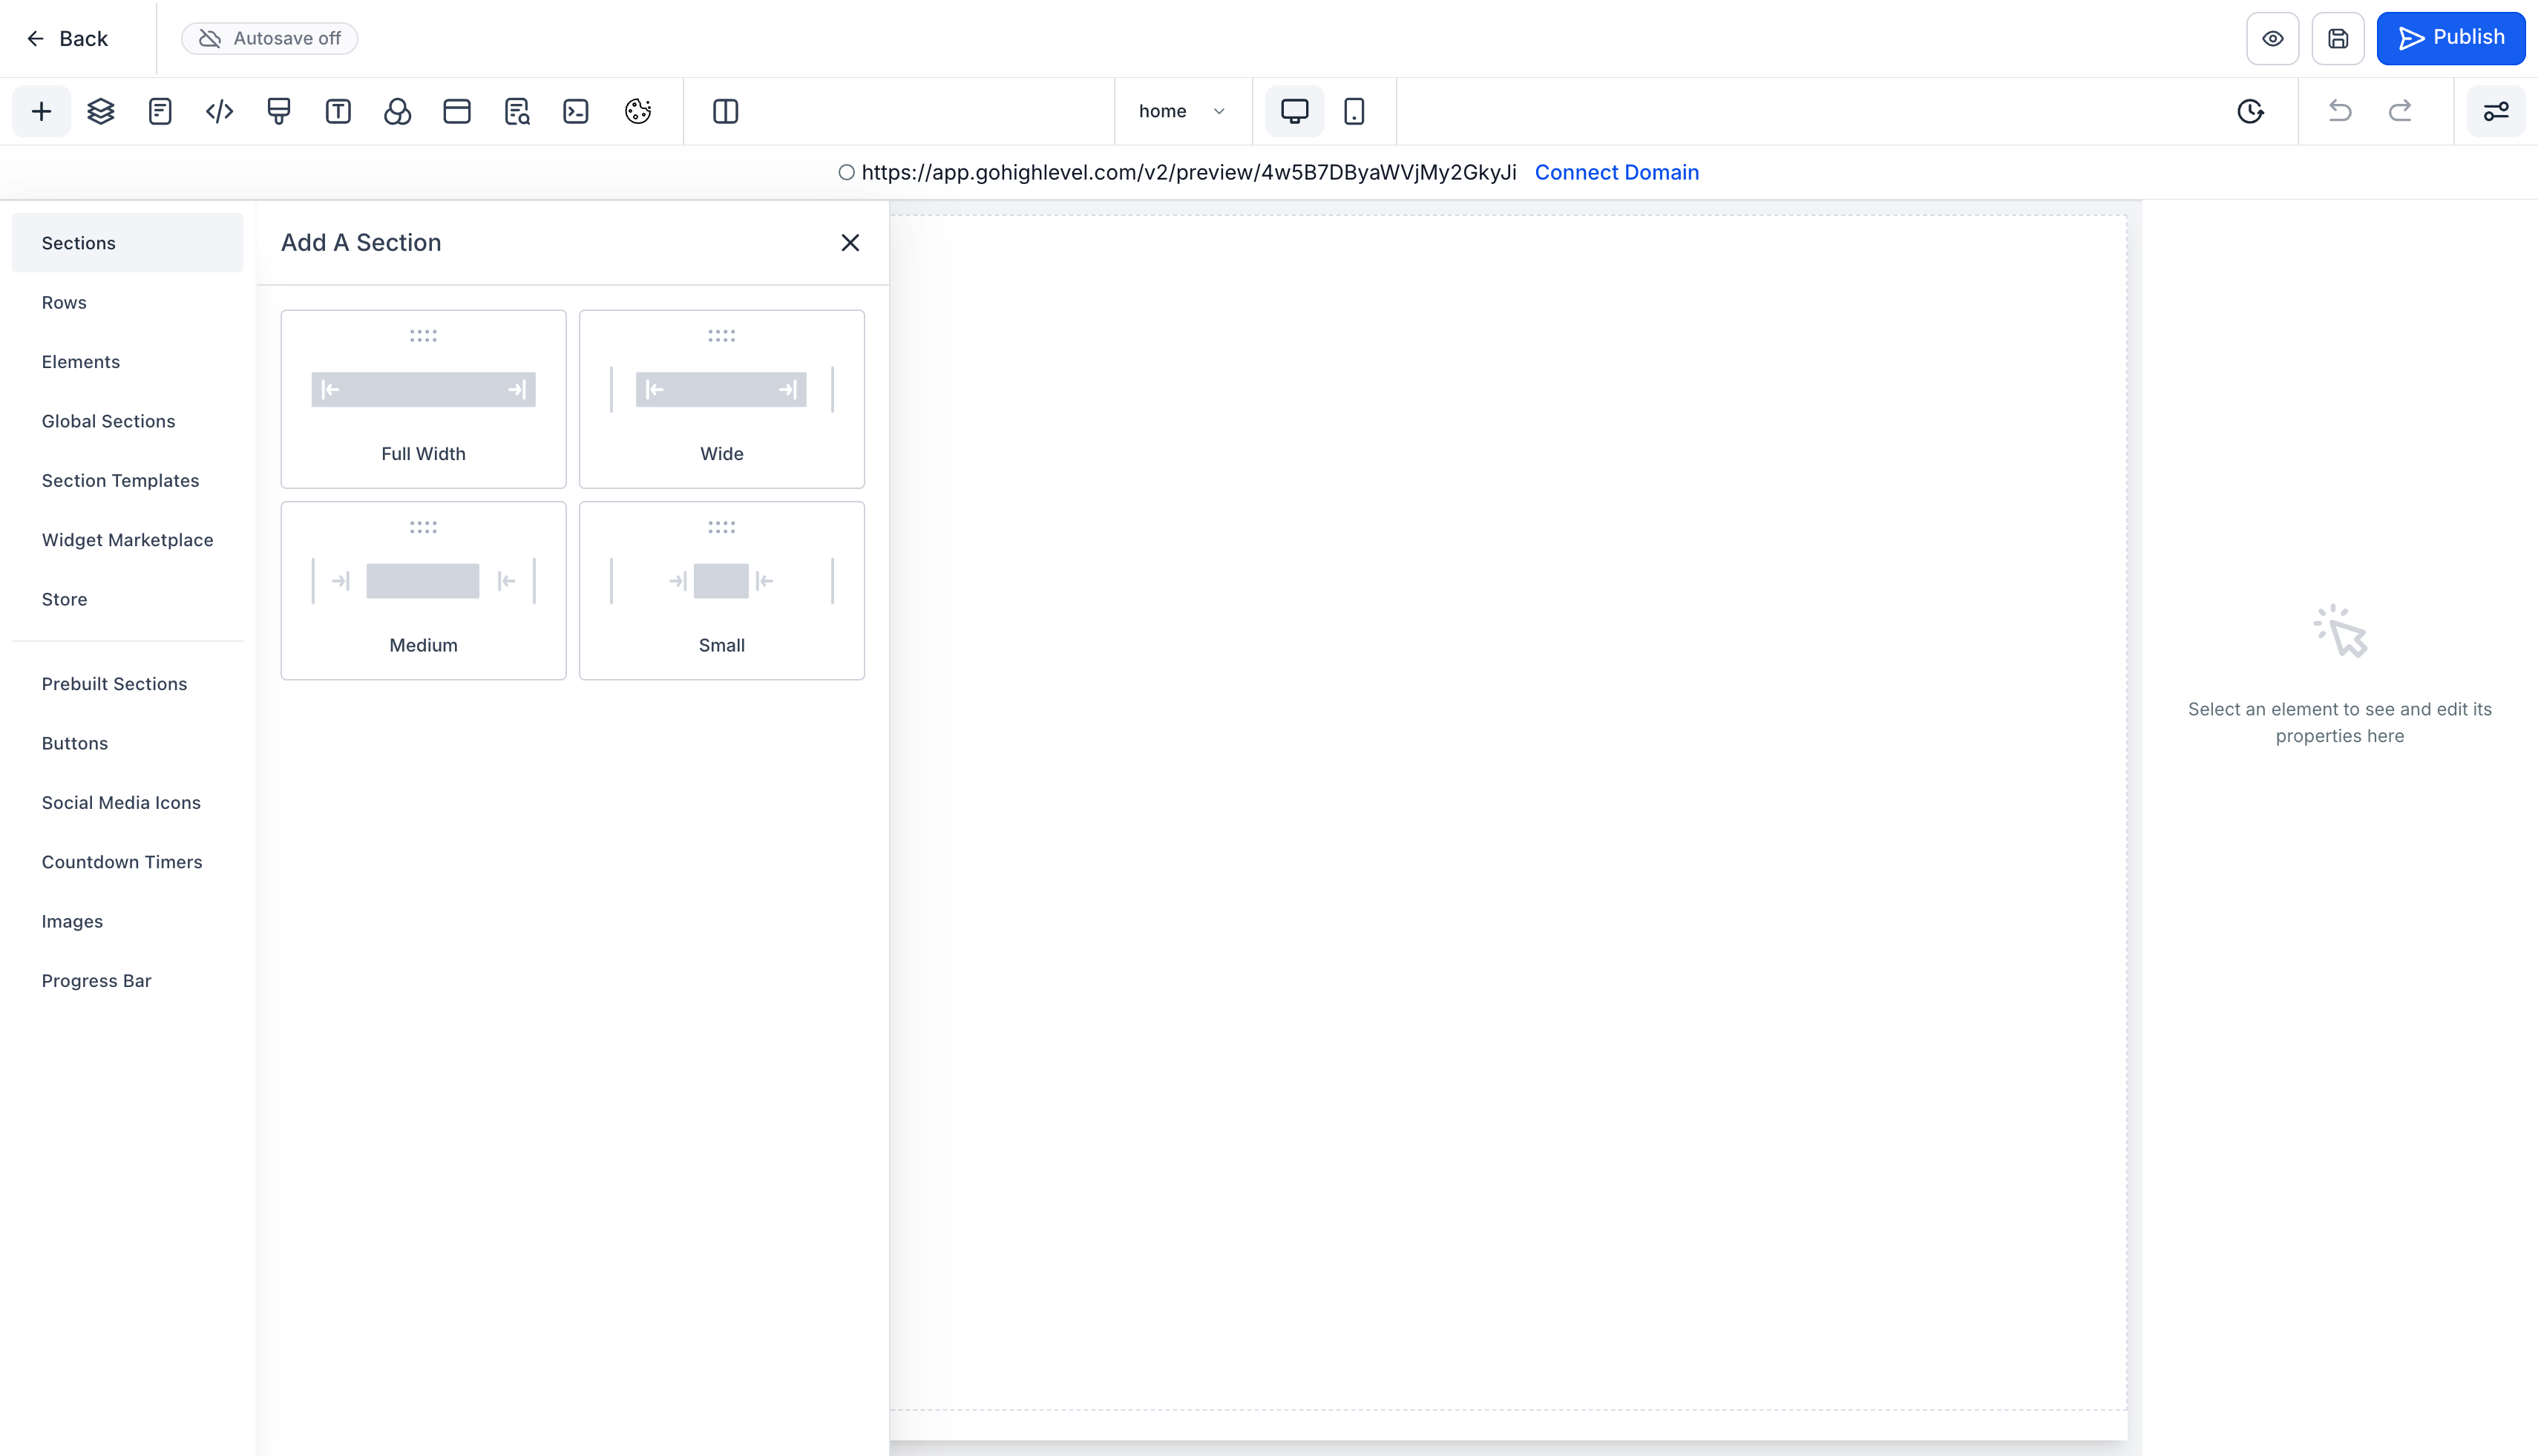
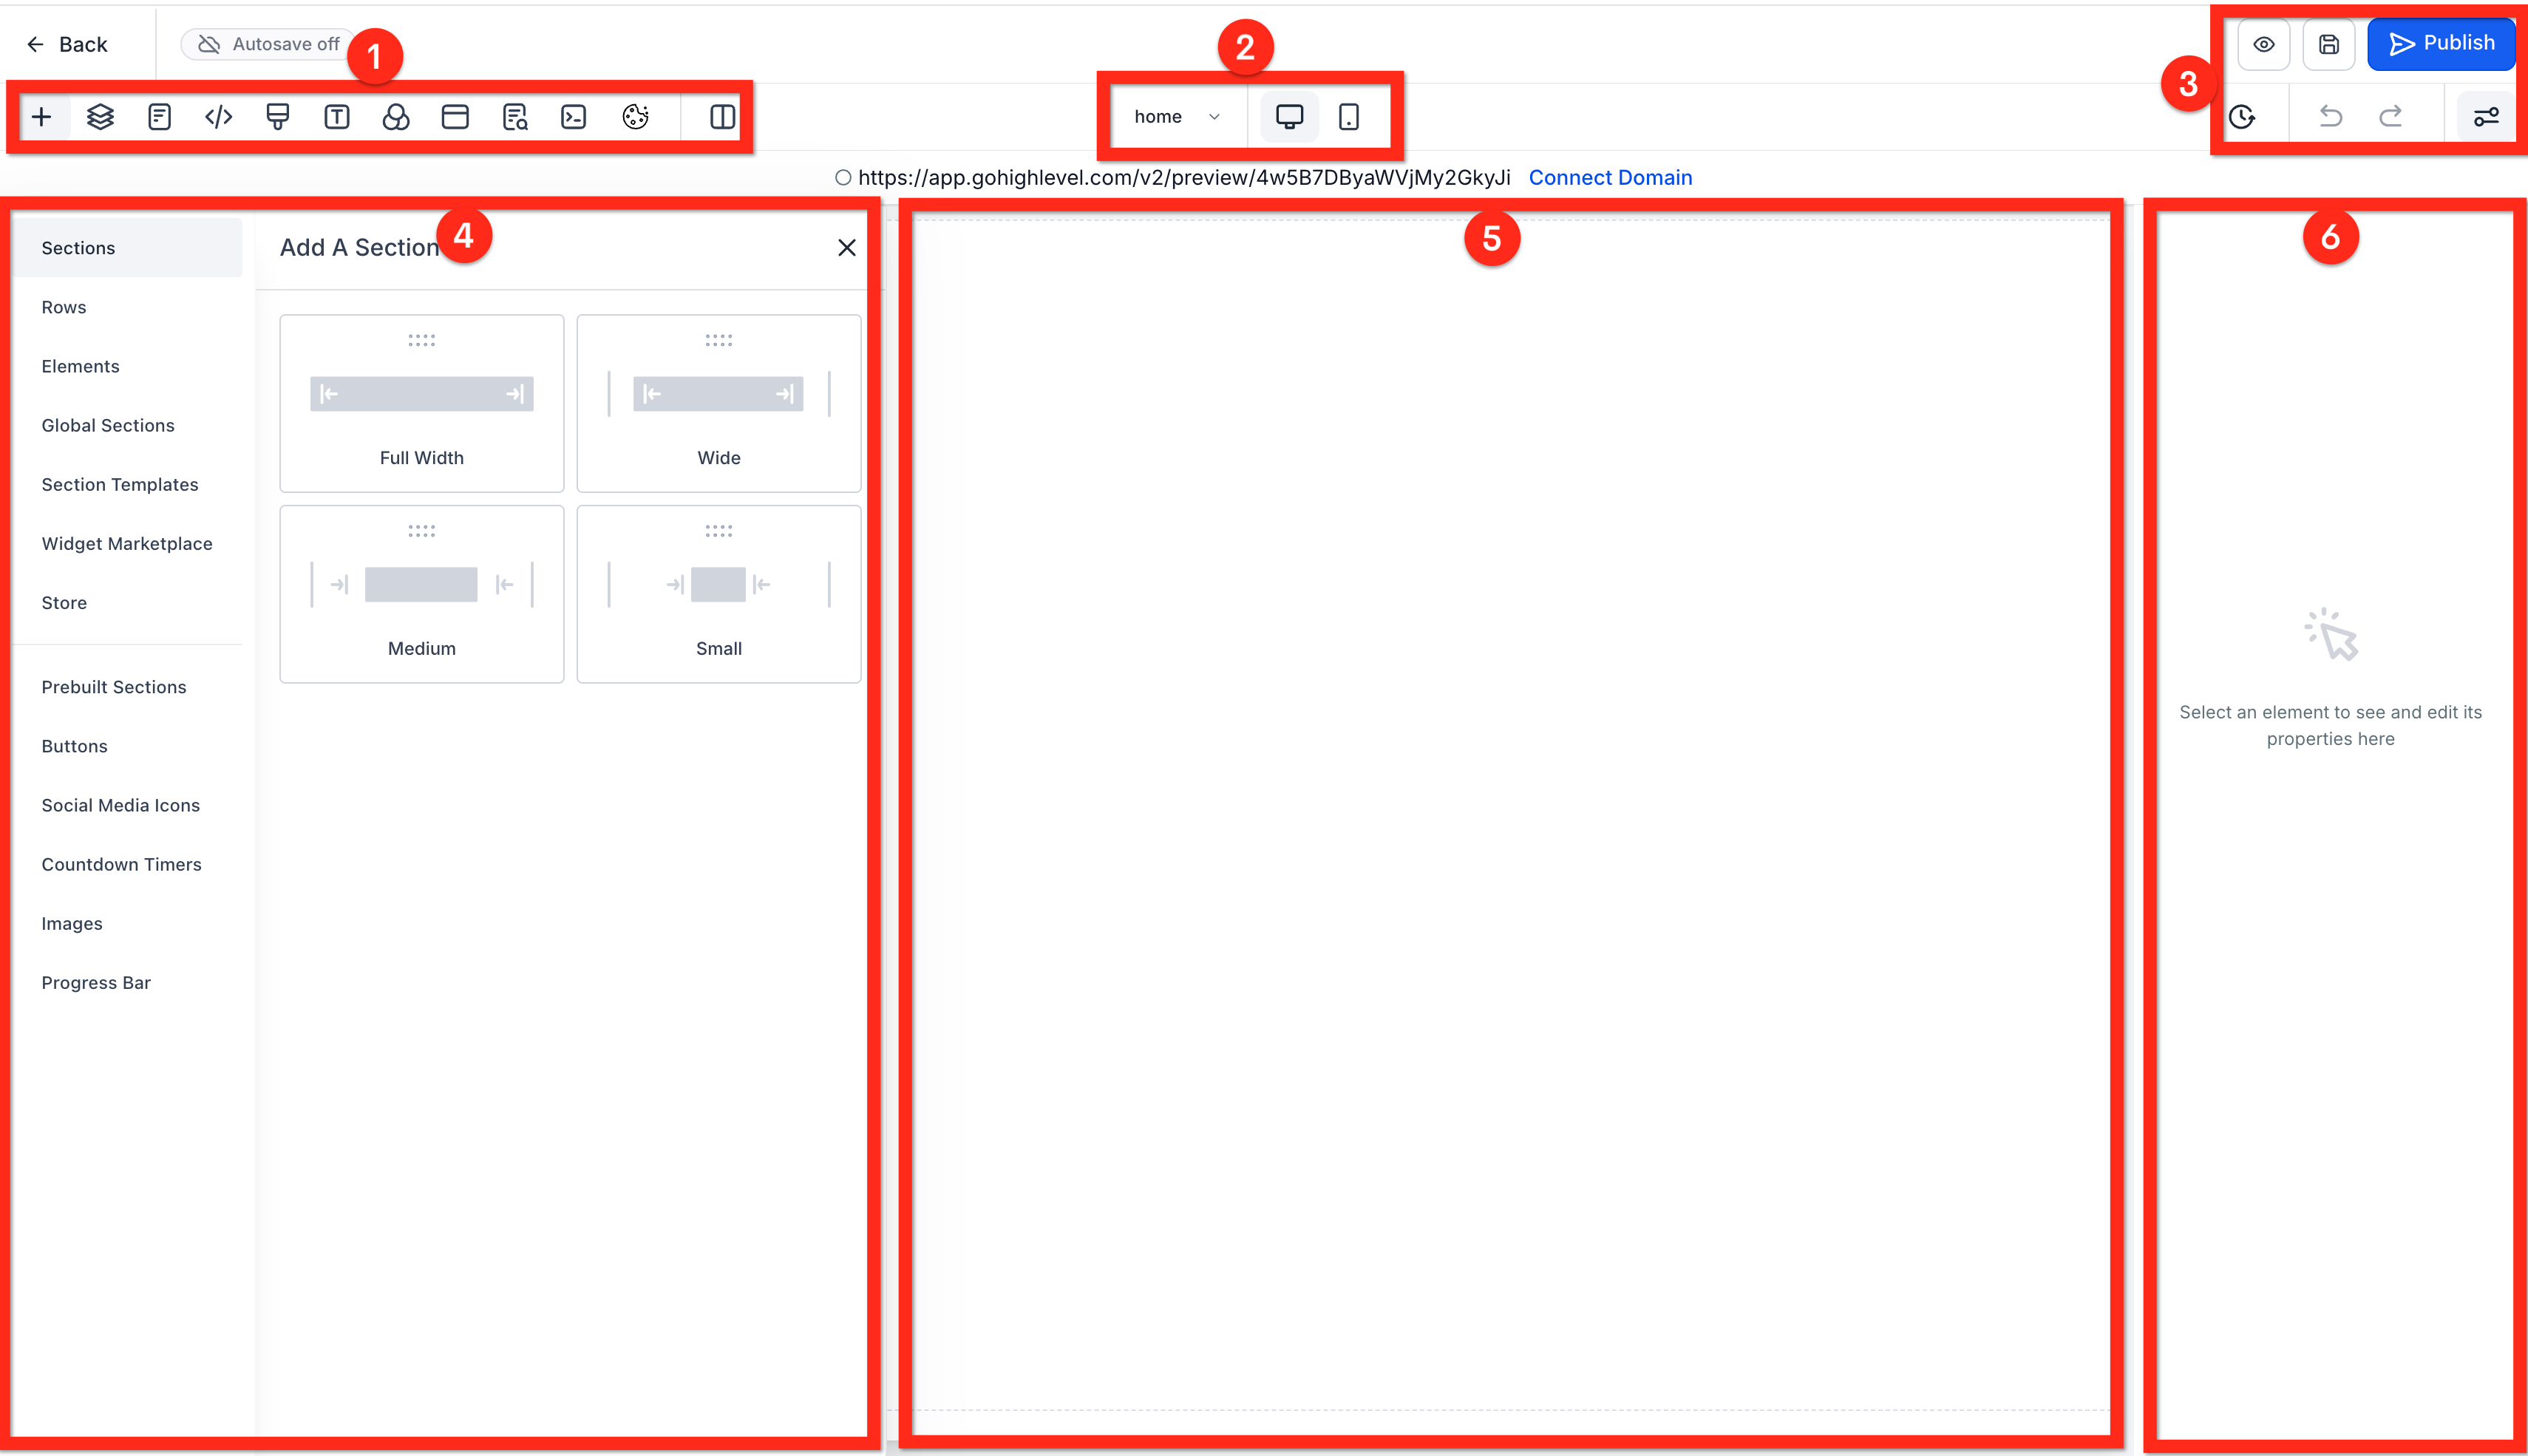
- Understand the Editor:
- Control Panel: Control what appears in the Left Panel (4) such as elements, pages, and metadata.
- Device Switcher: Switch between desktop and mobile views to test responsiveness.
- Meta Controls: History, undo, preview, save, publish, etc.
- Left Panel: Elements and settings for the page.
- Center Panel: Live editable preview of your page.
- Right Panel: Settings and styling options for the selected Section, Row, or Element.
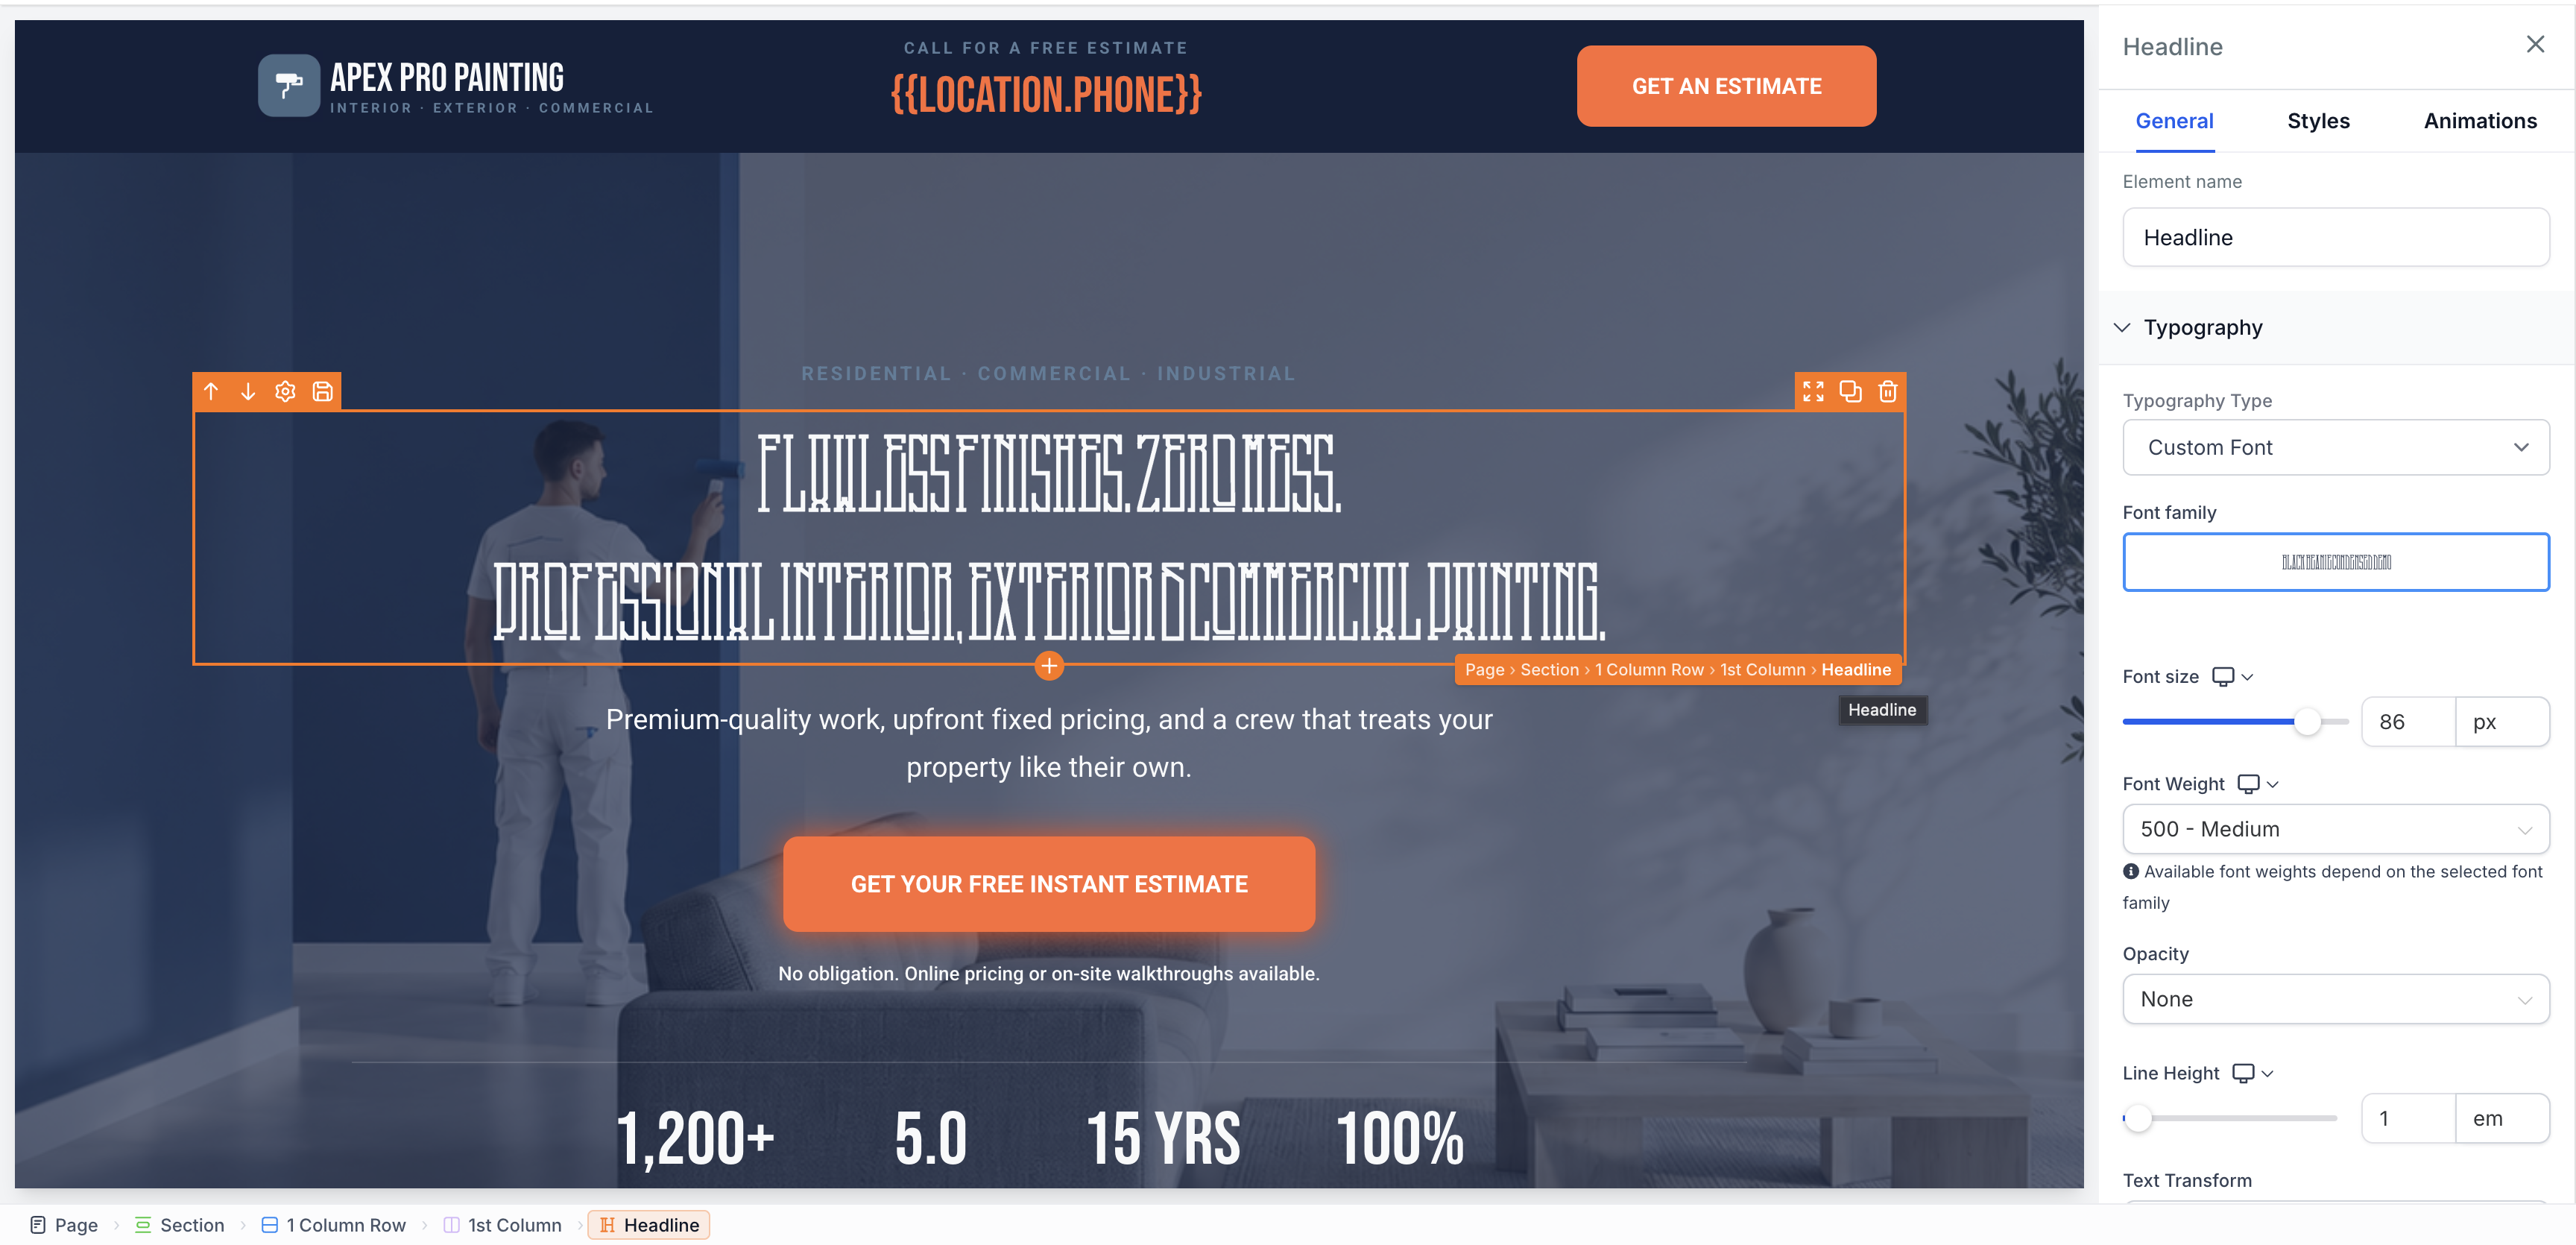
- Breadcrumb Bar: Shows the hierarchy of the selected element at the bottom of the builder. Hover over an ancestor to highlight it on the canvas, or click it to select and edit it.
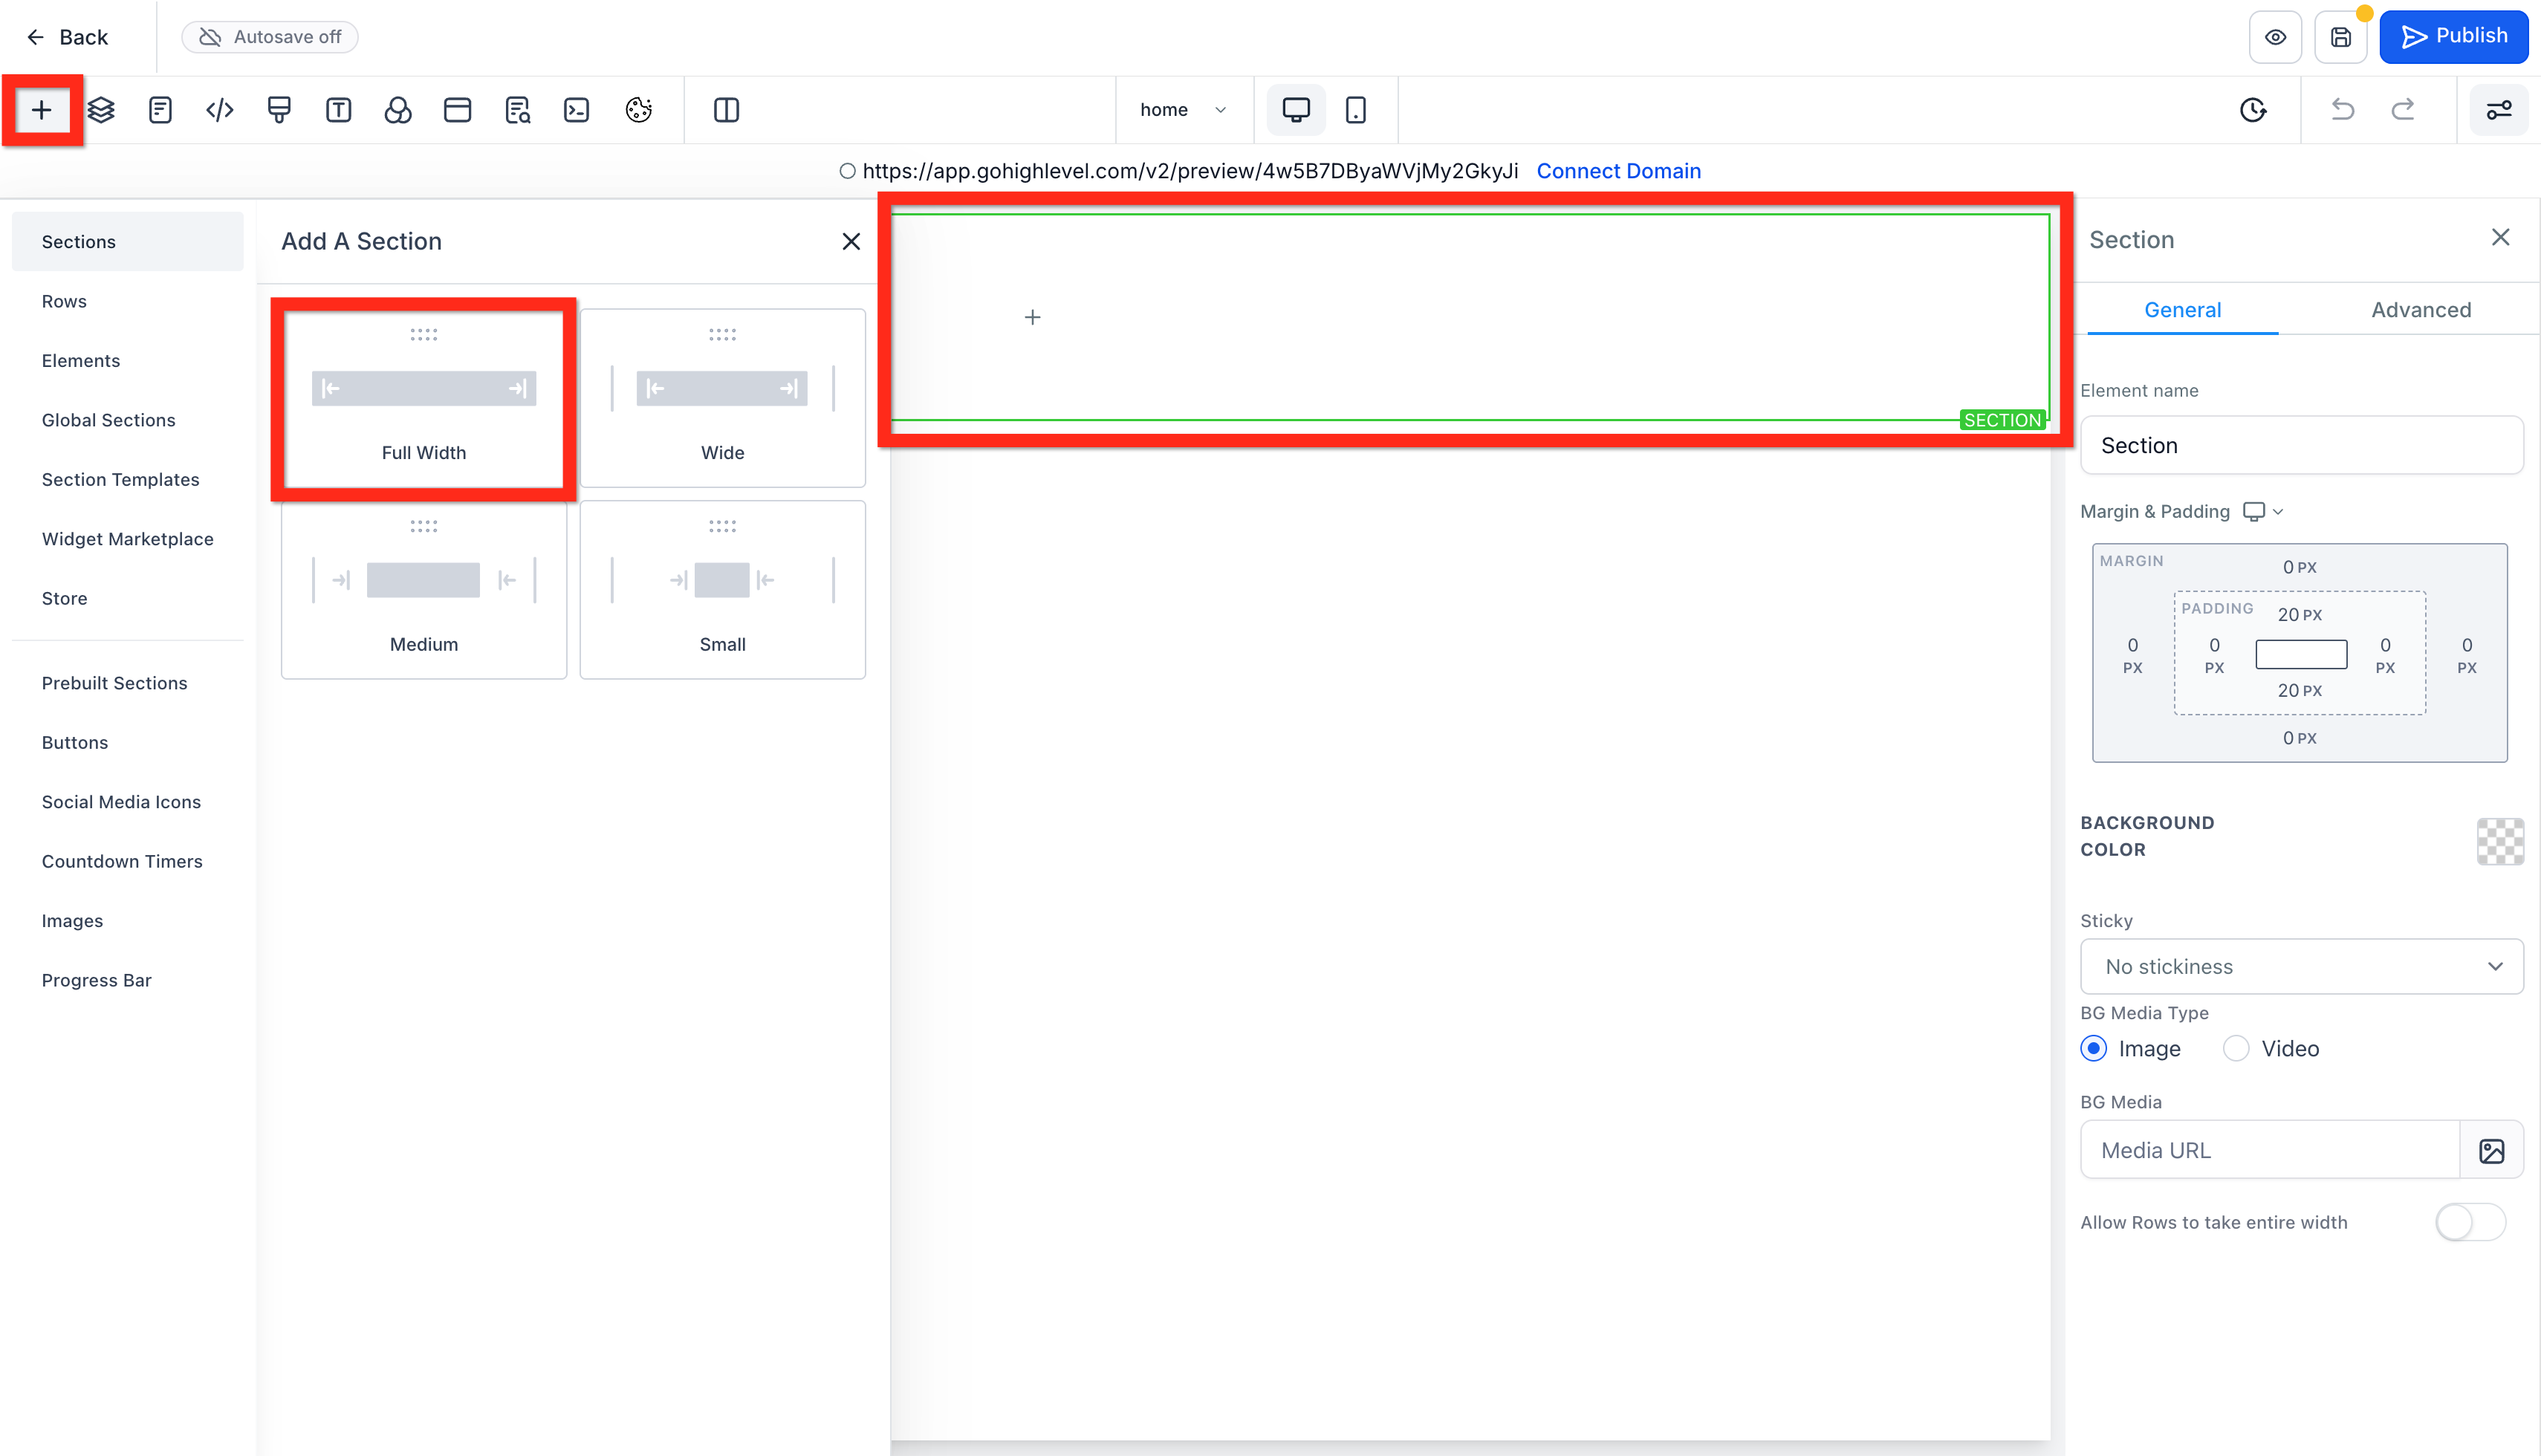
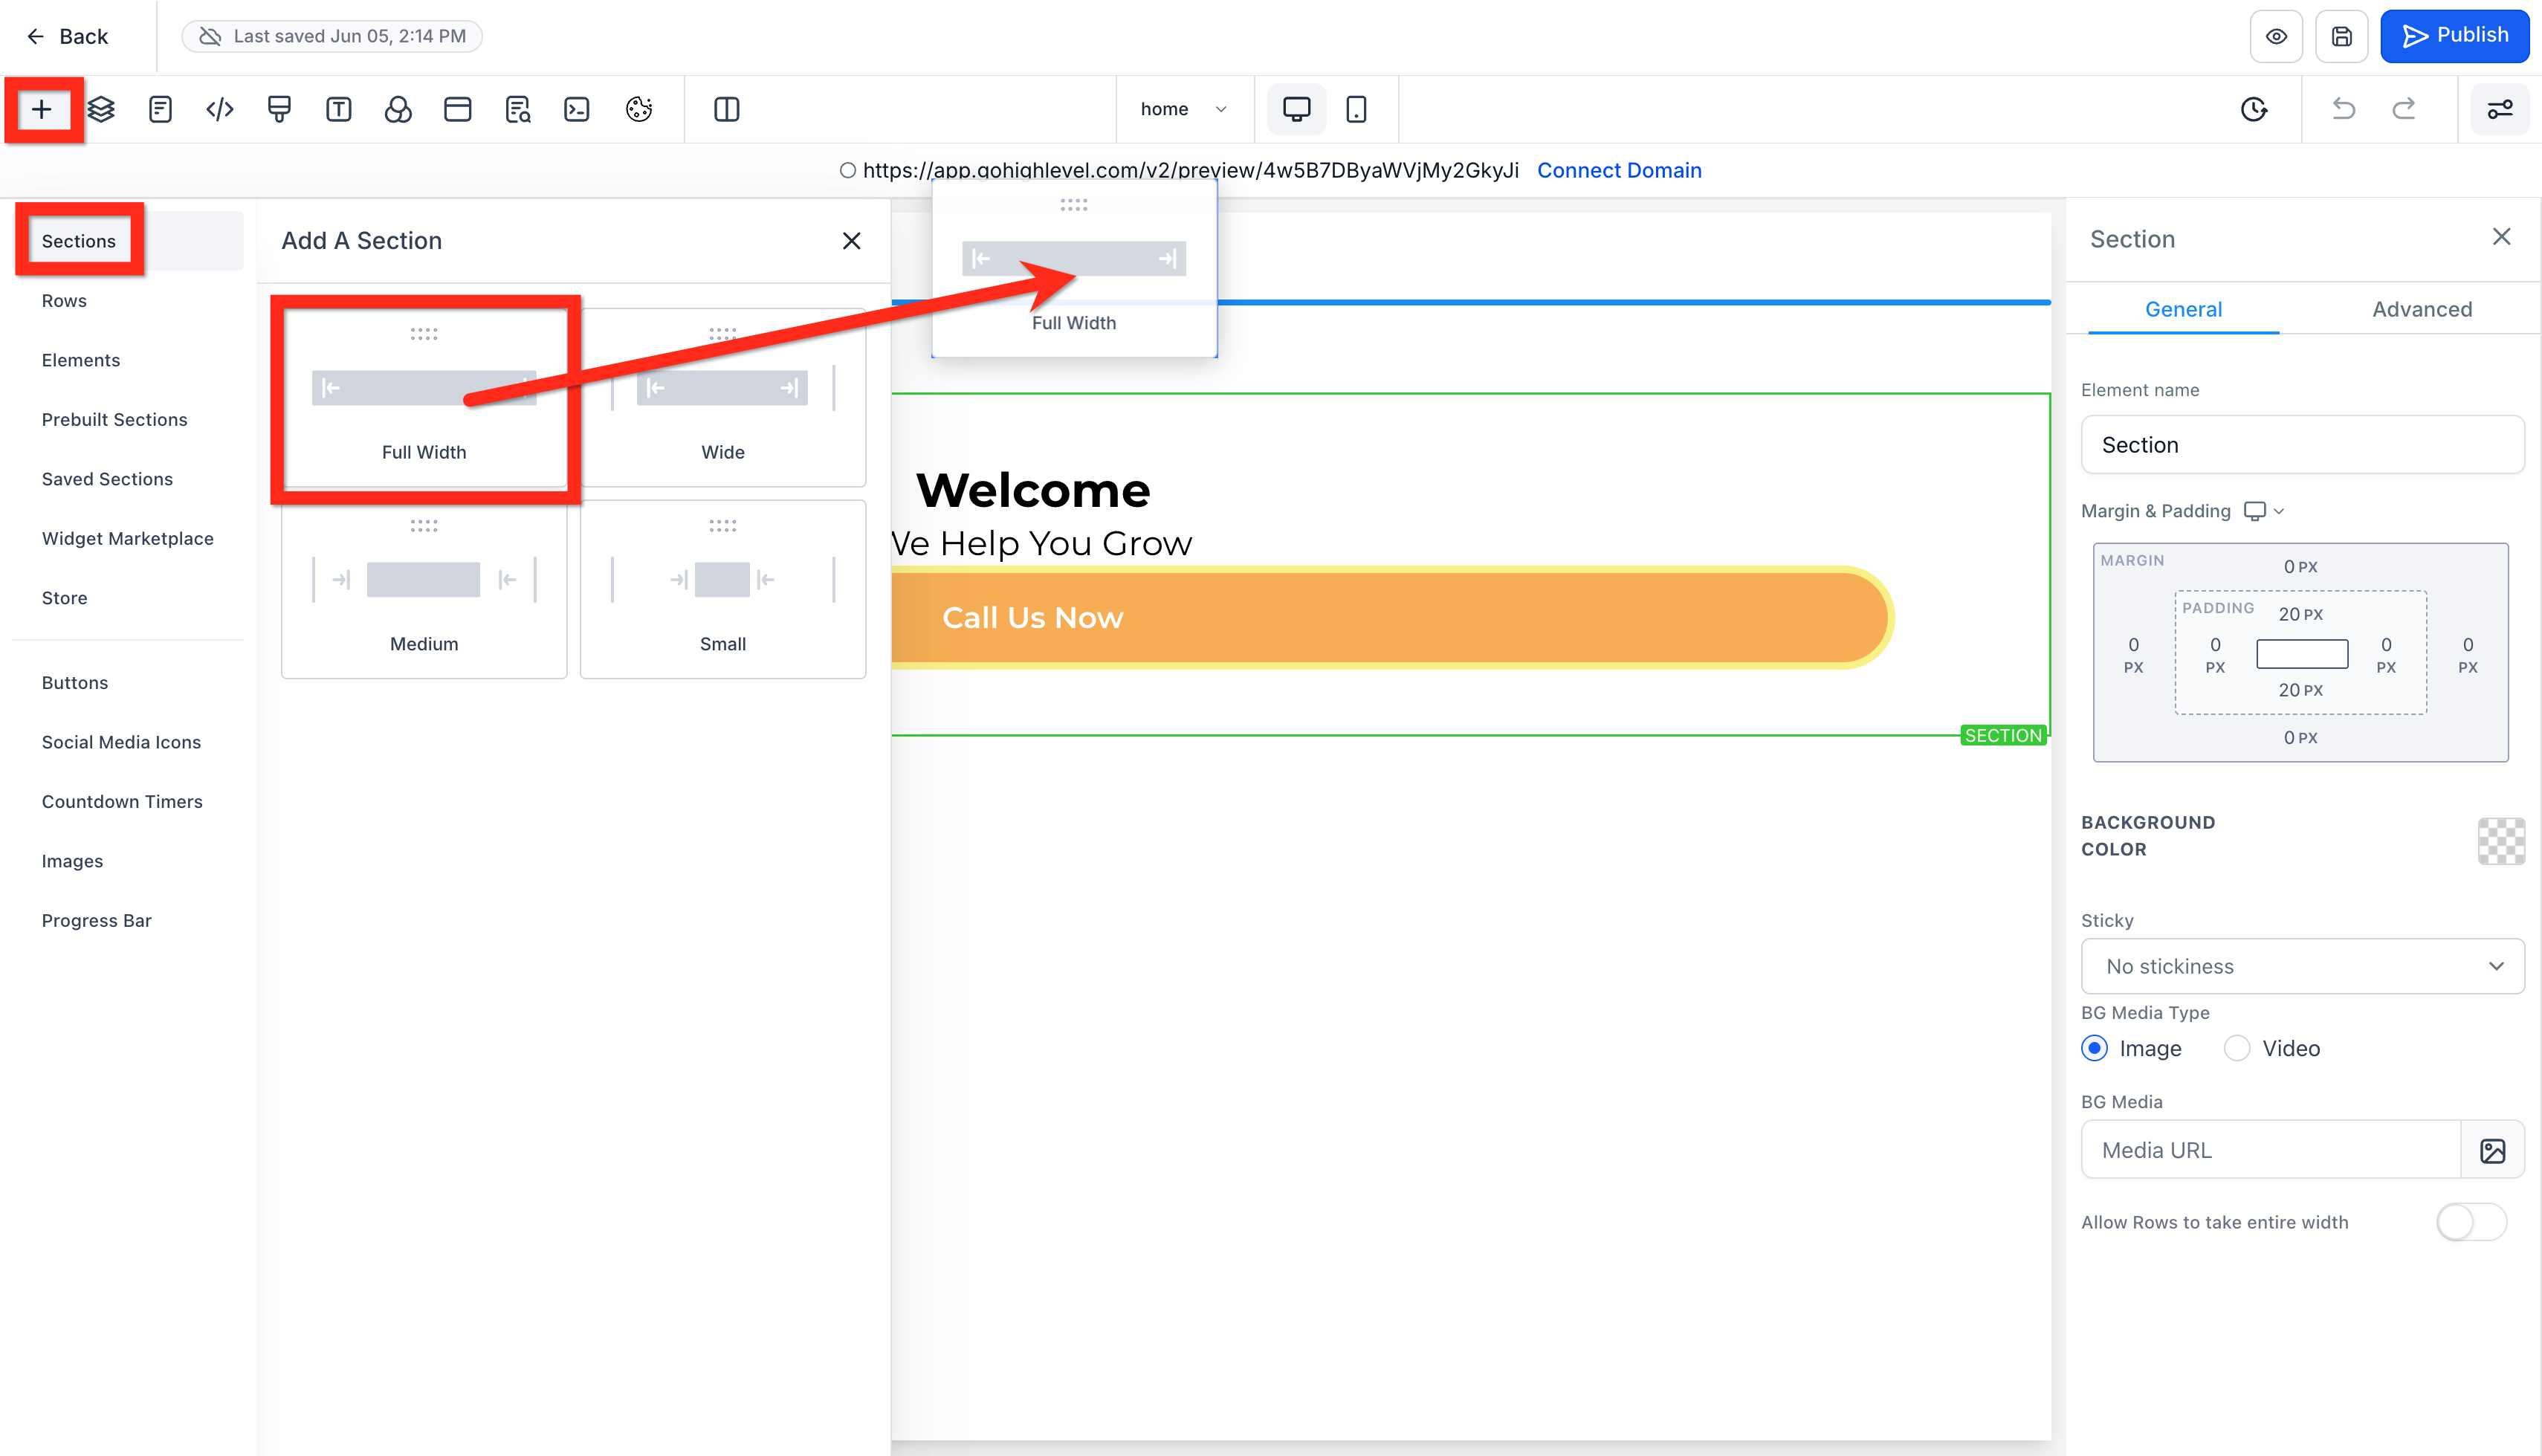
- Add a Section: In the center (if empty) or by clicking the + (Add Element/Section) icon on the left sidebar, choose Sections, then select a section width (e.g., Full Width).
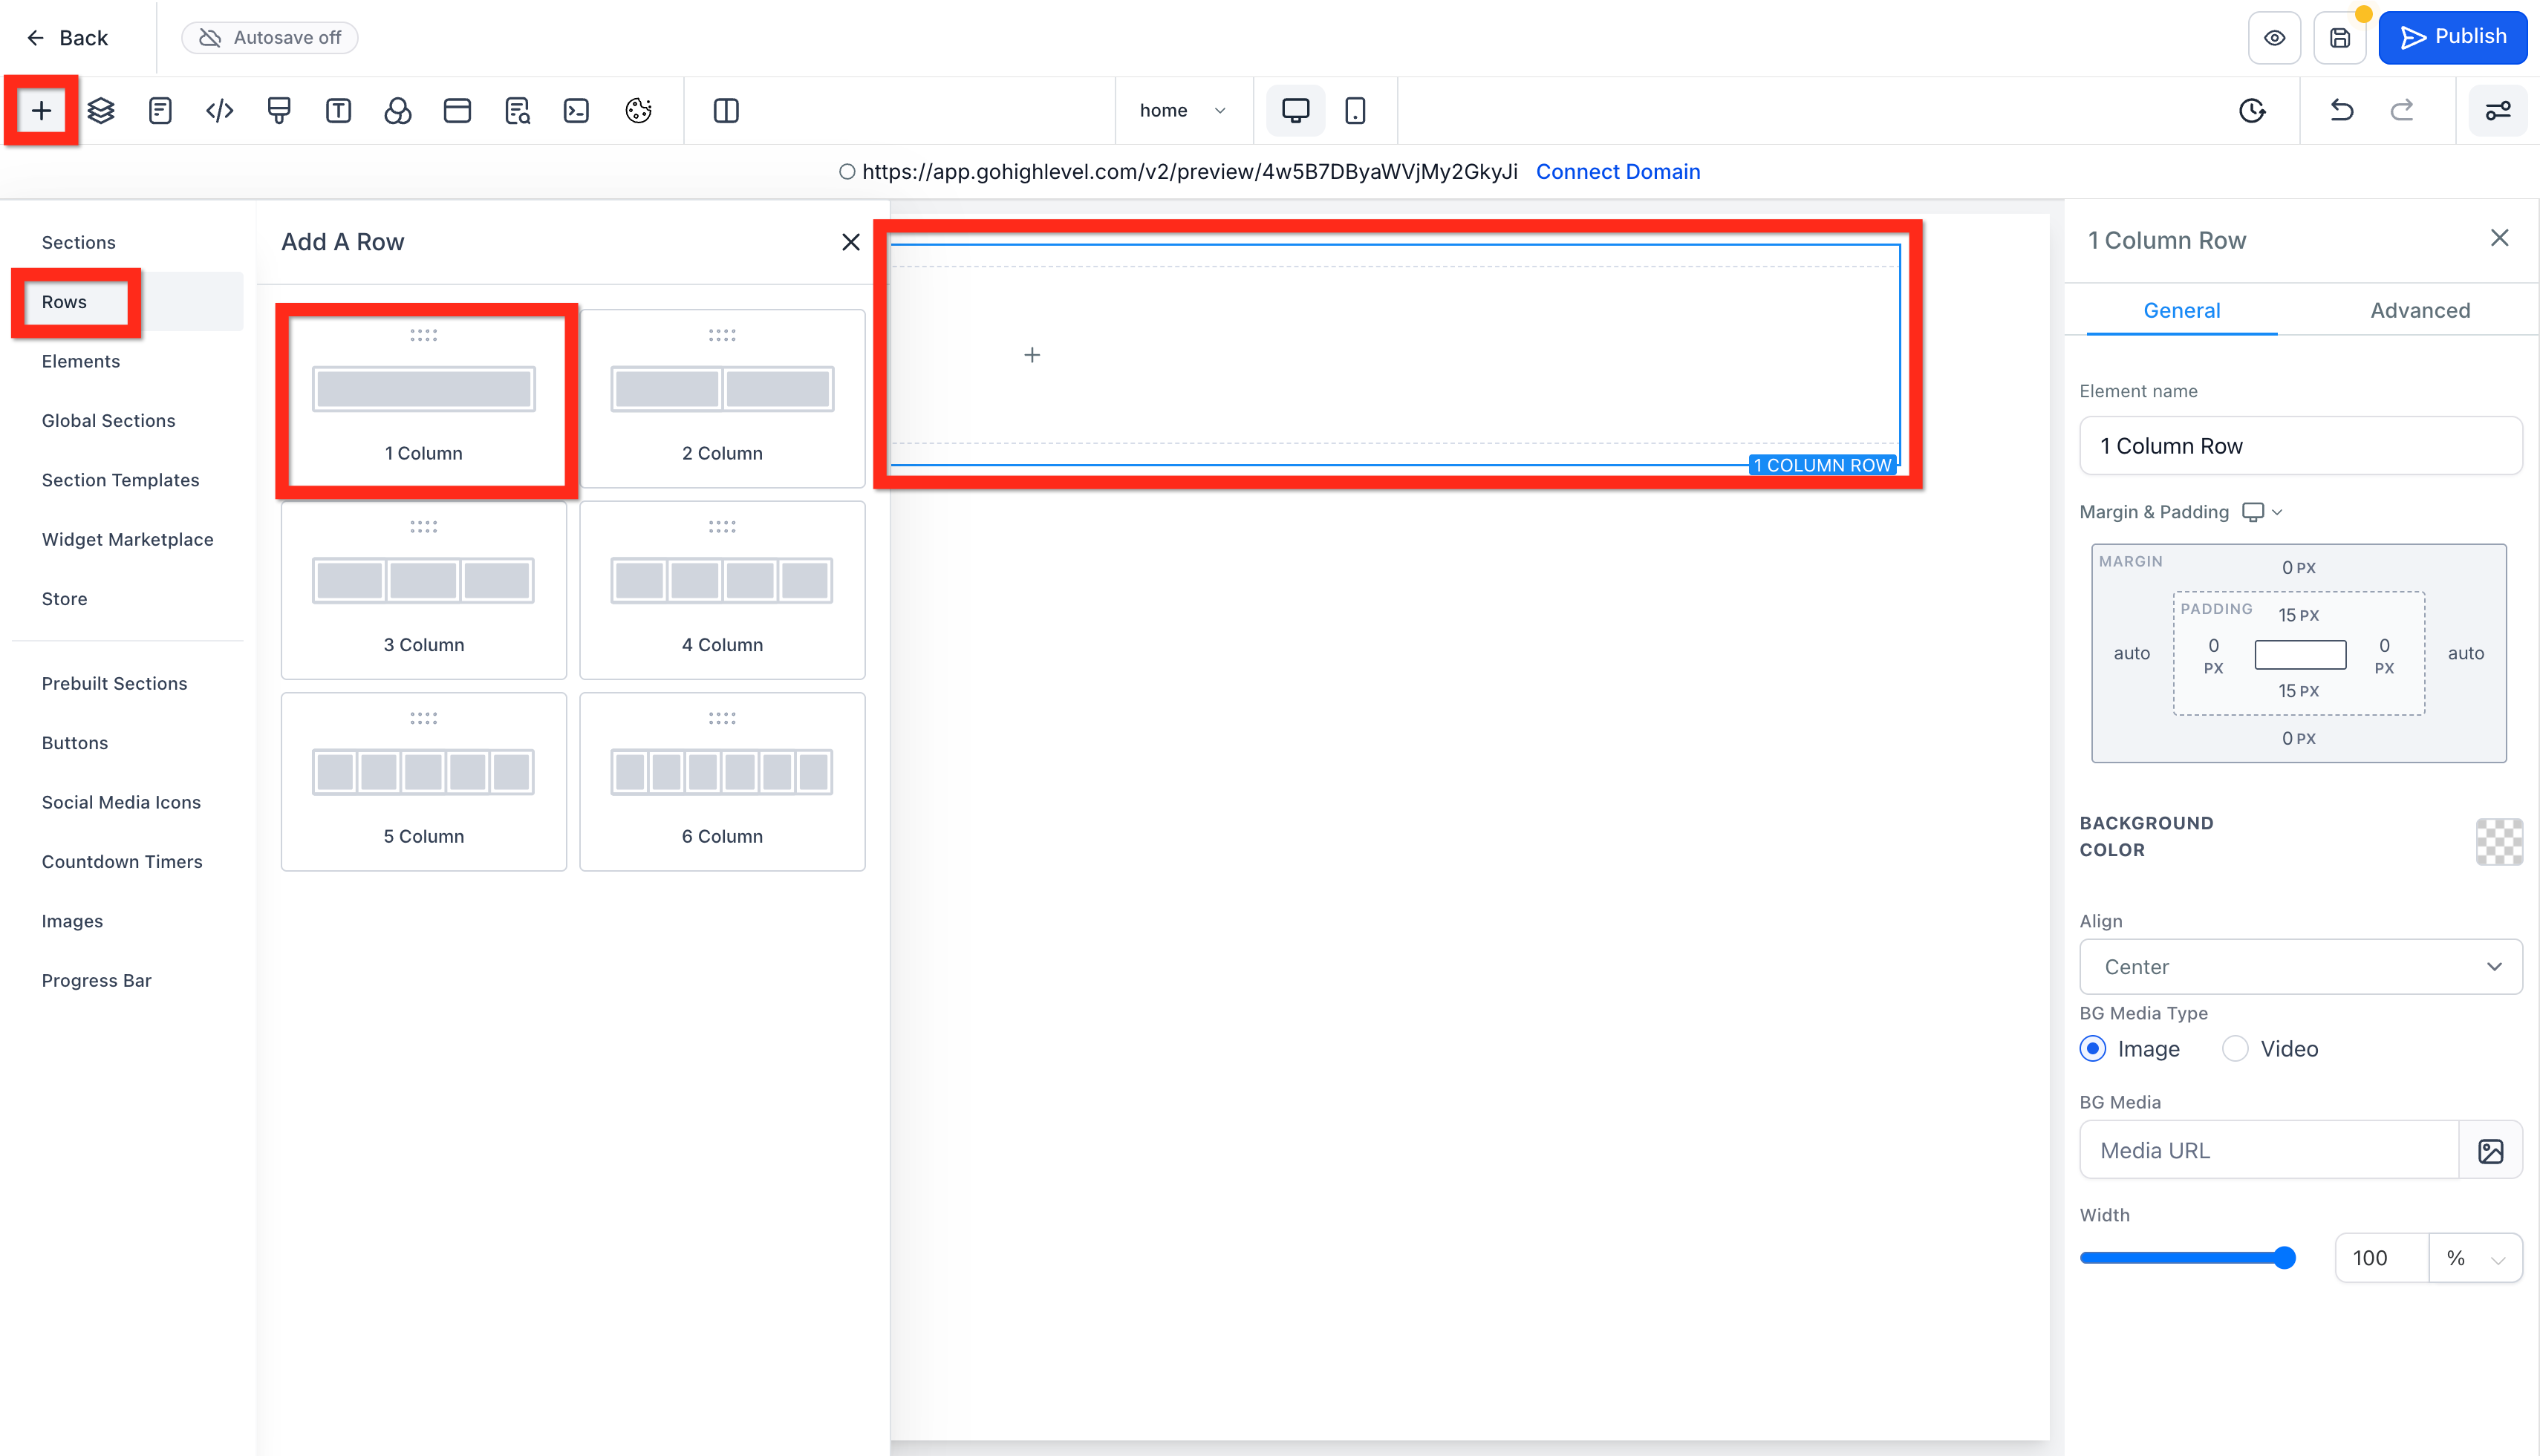
- Add a Row: Inside the new green-bordered section, drag to add a Row and select 1 Column.
- Add Headline and Sub-Headline: In the 1 Column Row, click Add Element.
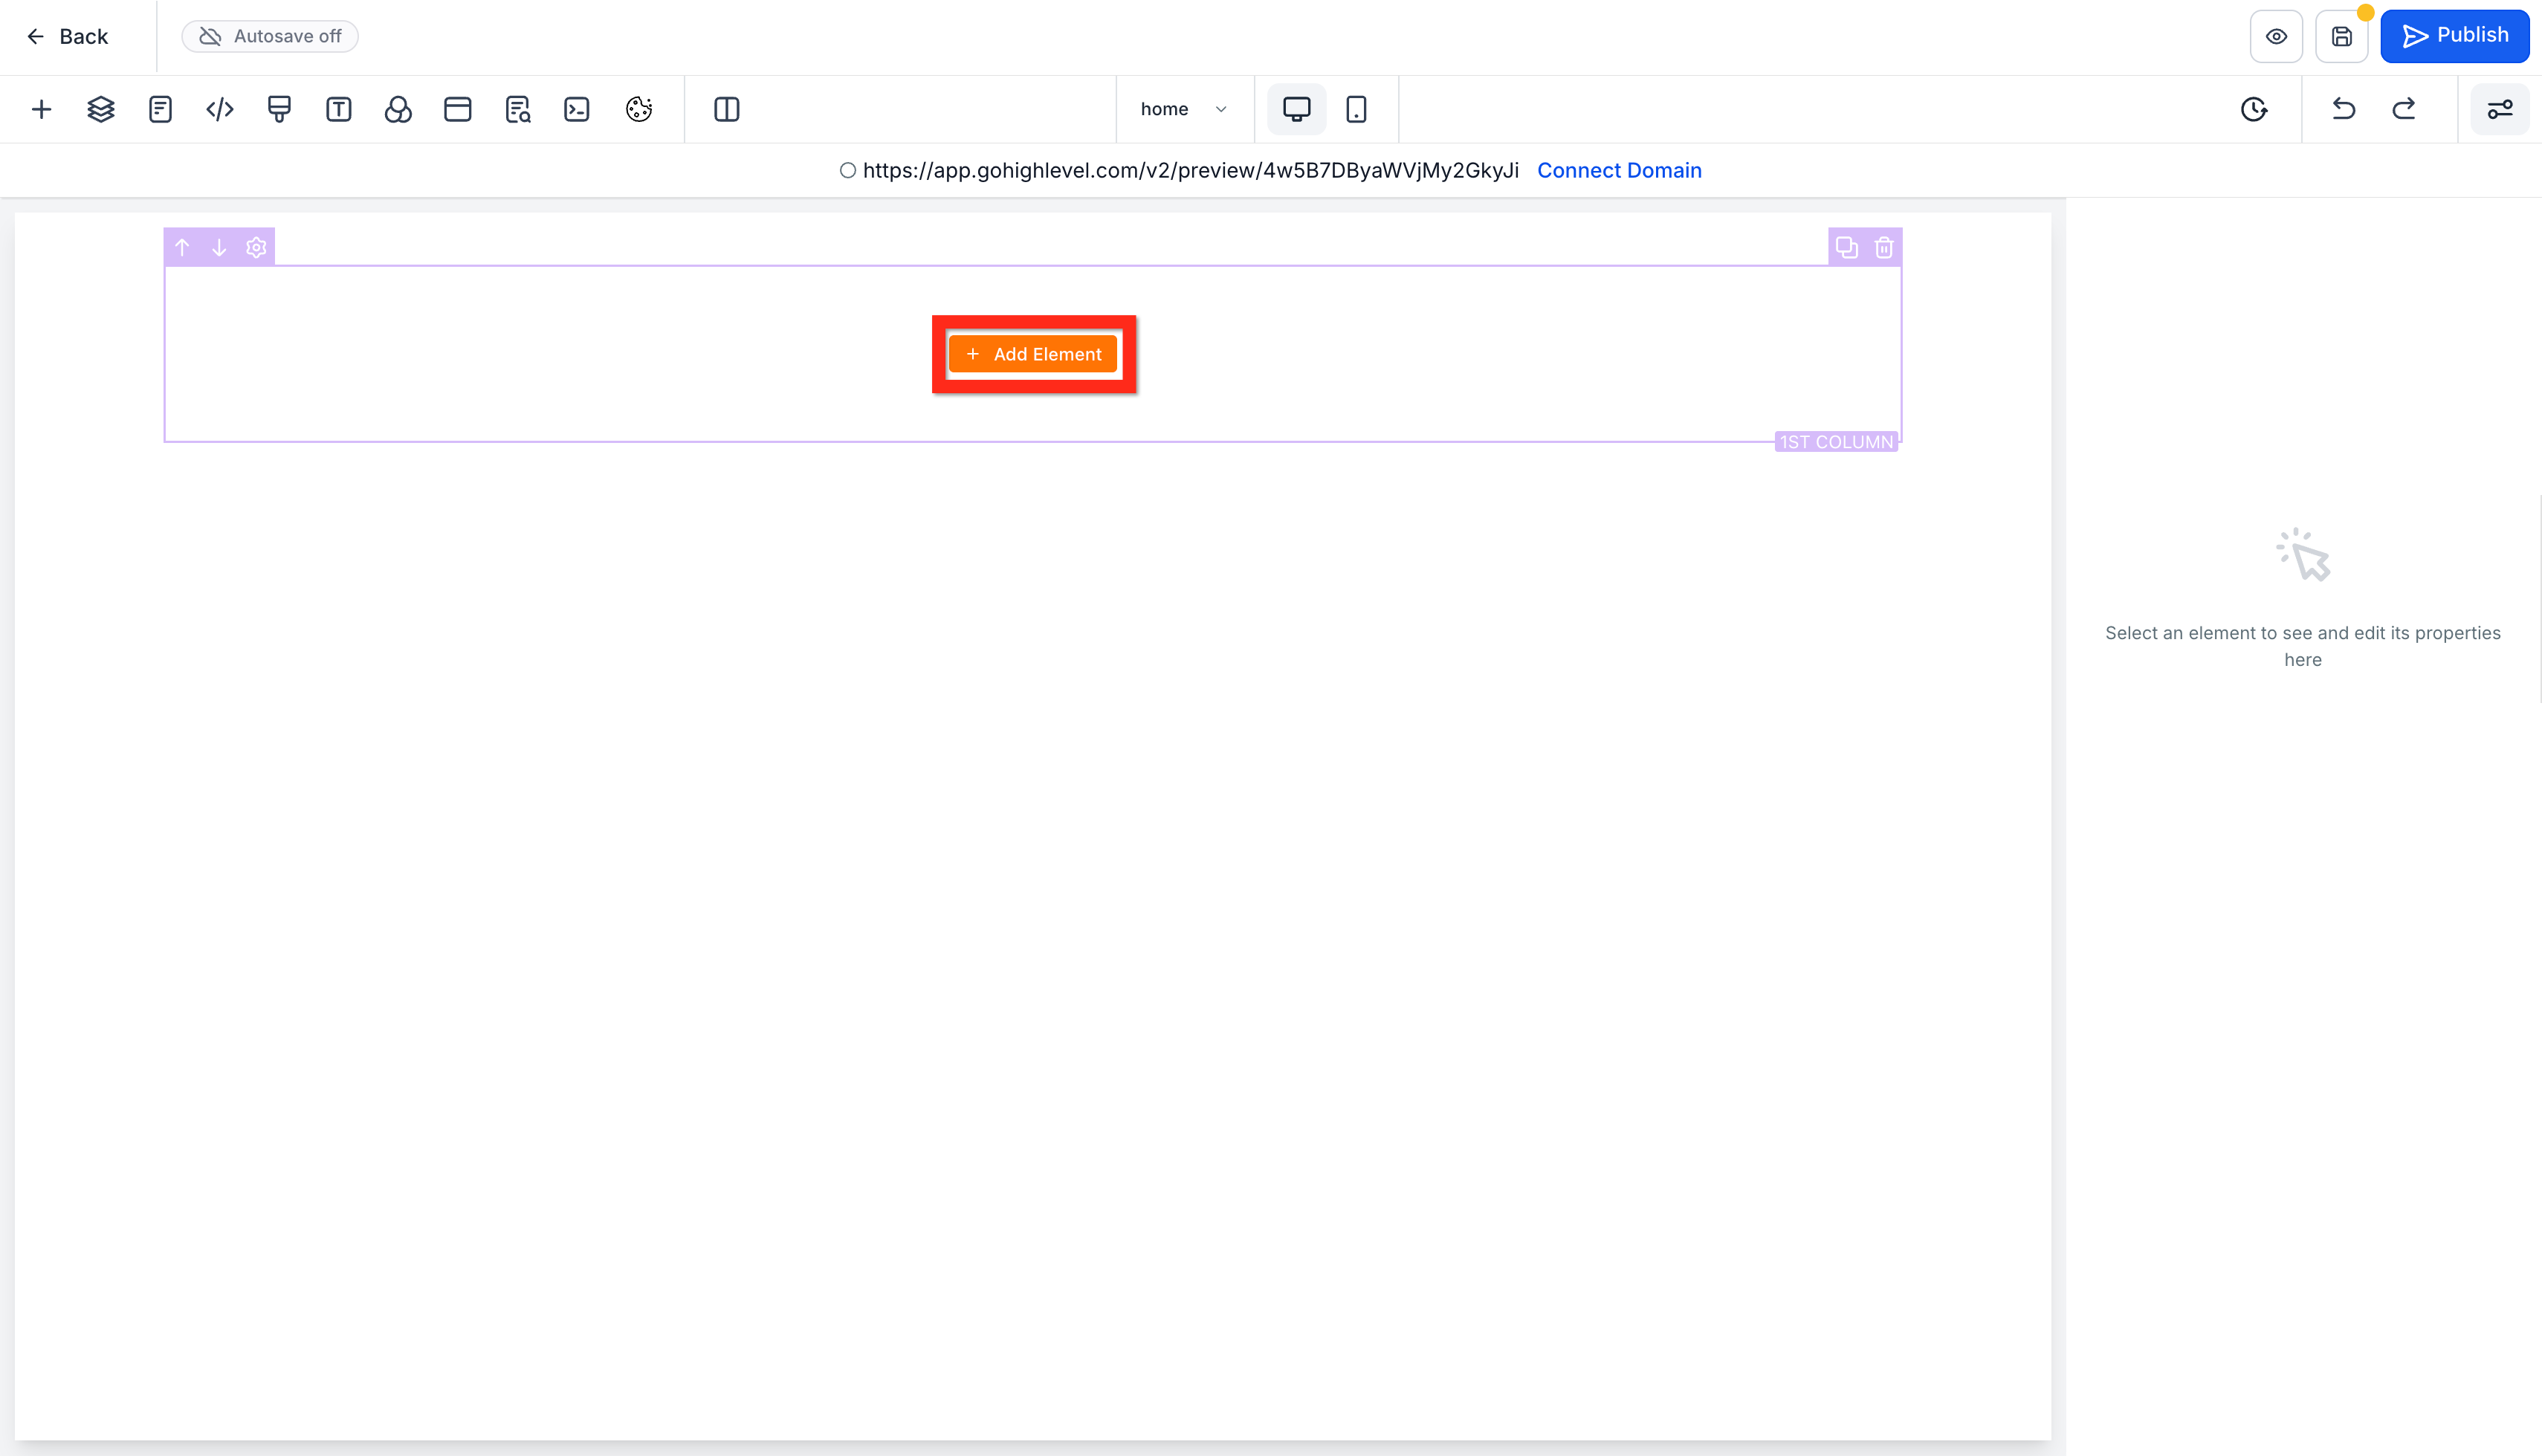
- Headline: Drag a "Headline" element into the row. Click the text to edit it (e.g., "Welcome"). Use the right panel to change font, size, color, etc.
- Sub-Headline: Click + Add Element again, drag a "Sub-Headline" below the main headline. Edit its text and style (ex: We Help You Grow).
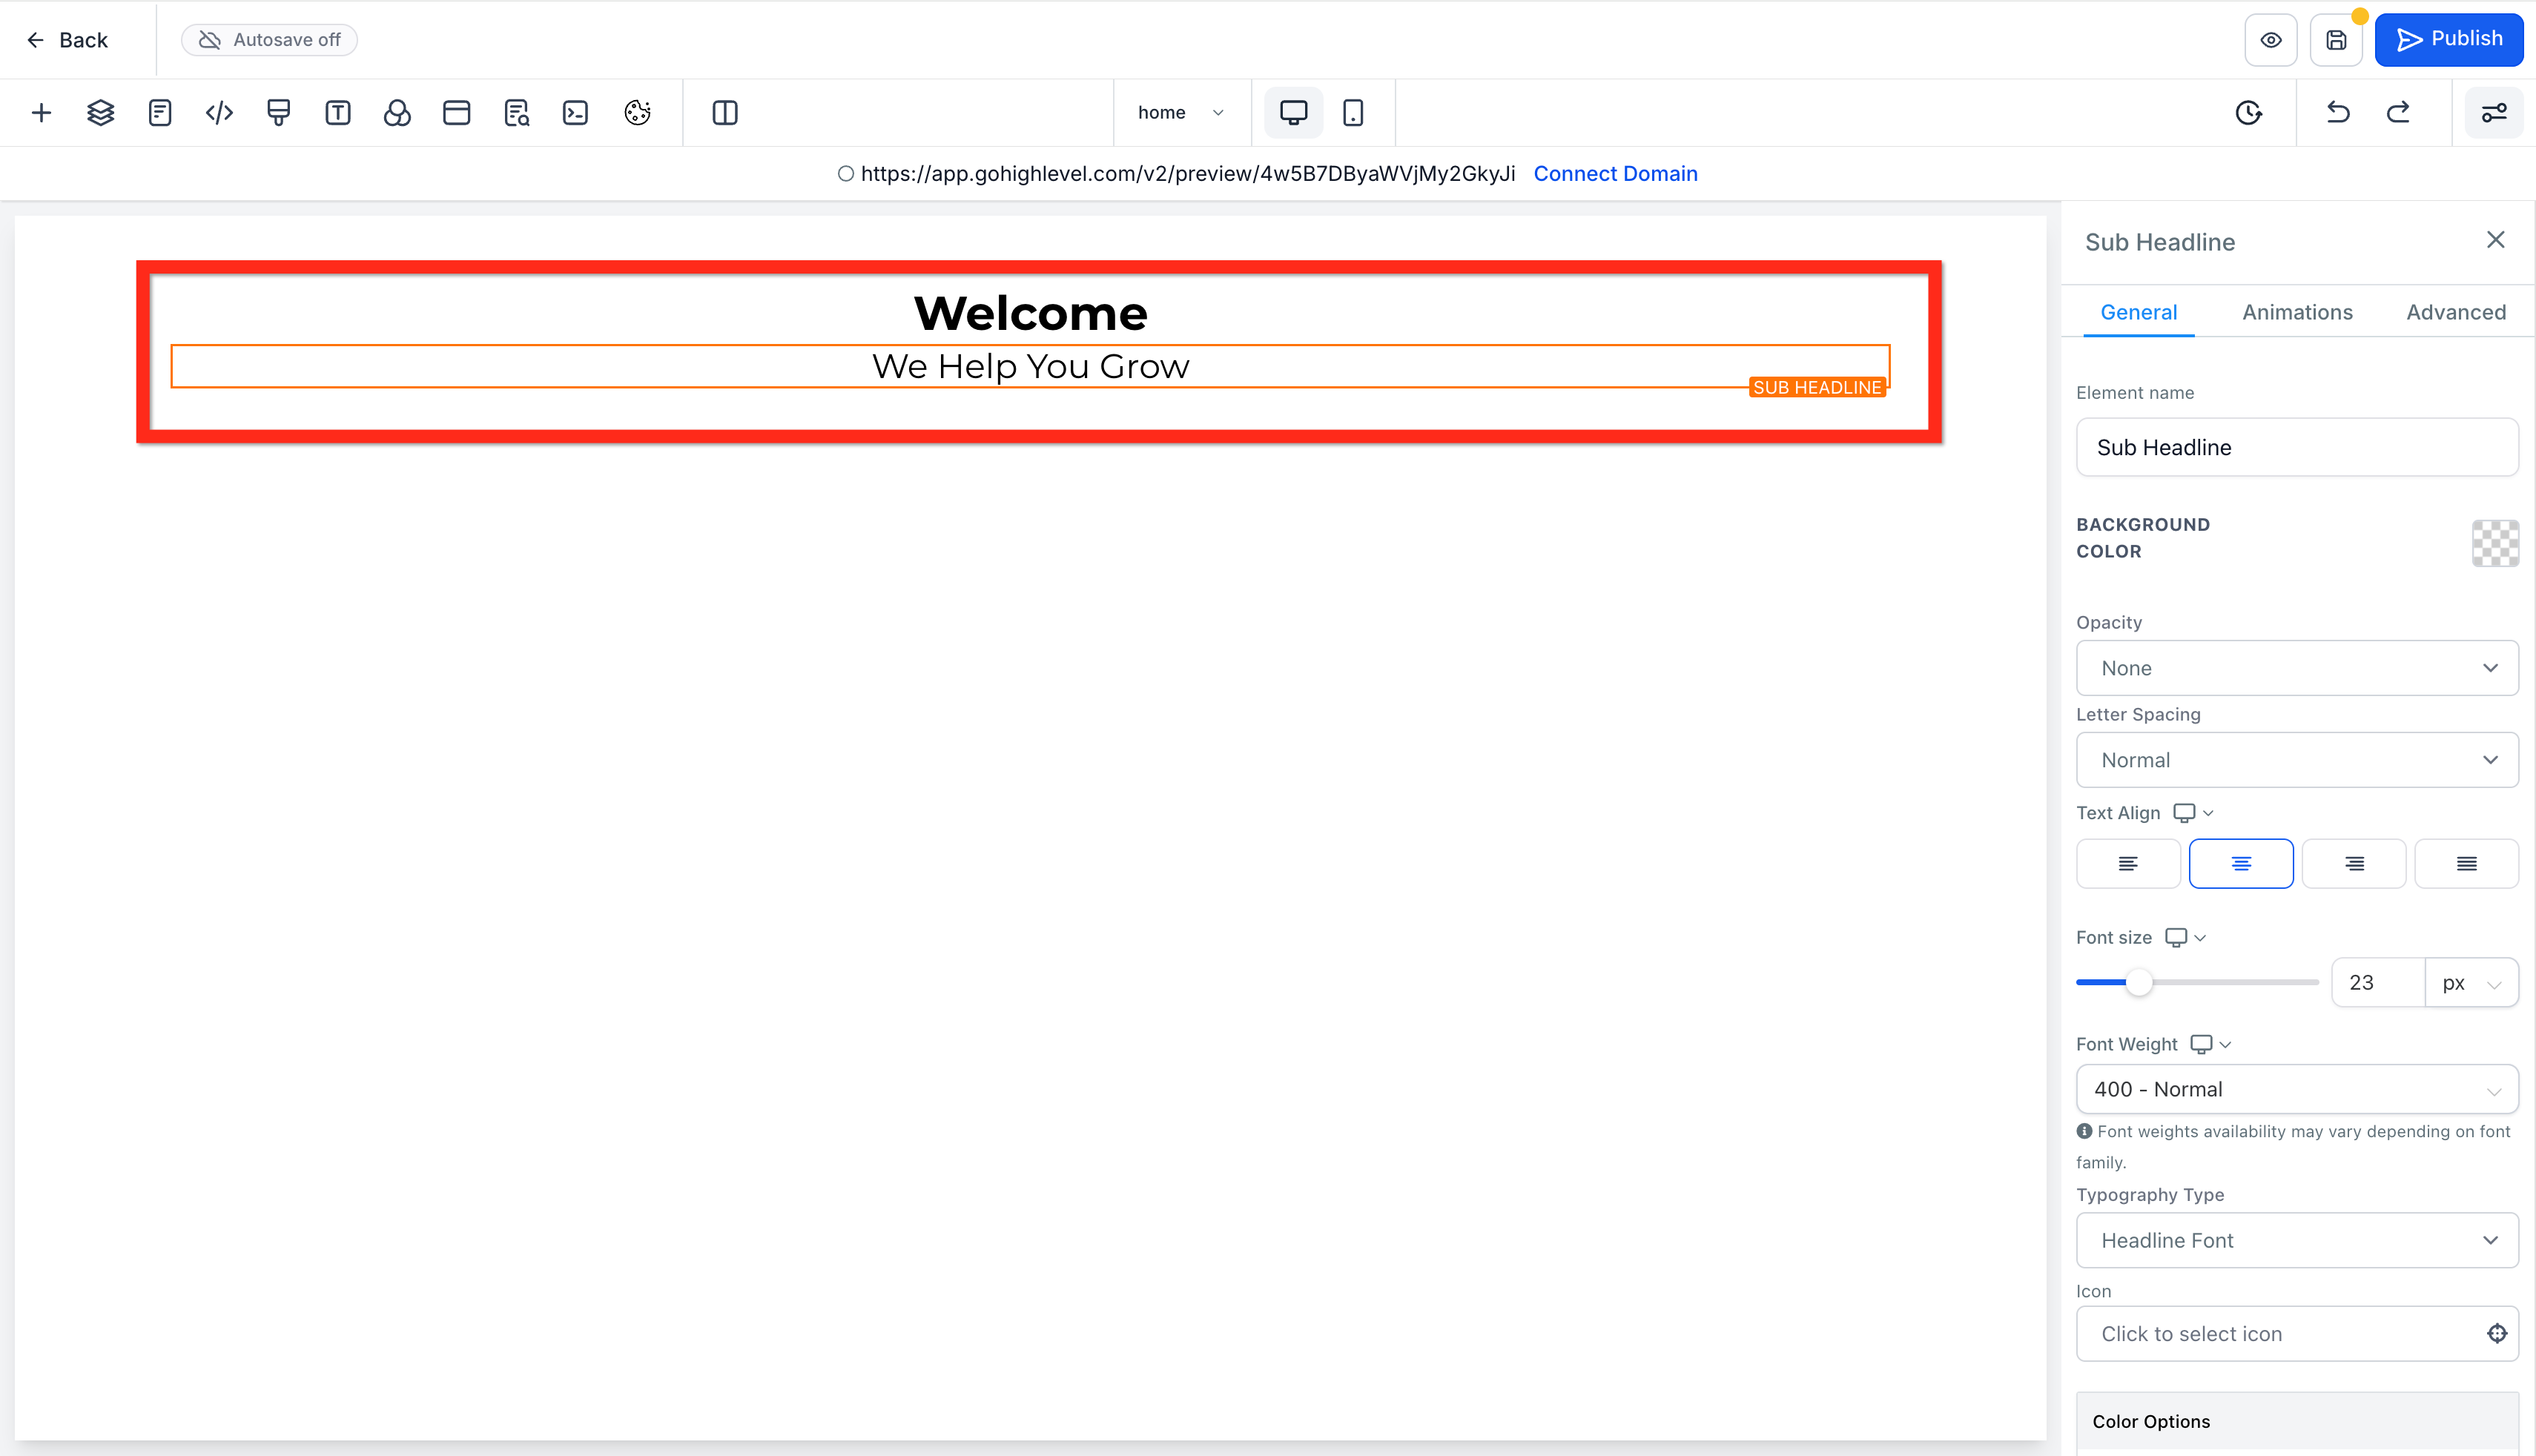
- Headline: Drag a "Headline" element into the row. Click the text to edit it (e.g., "Welcome"). Use the right panel to change font, size, color, etc.
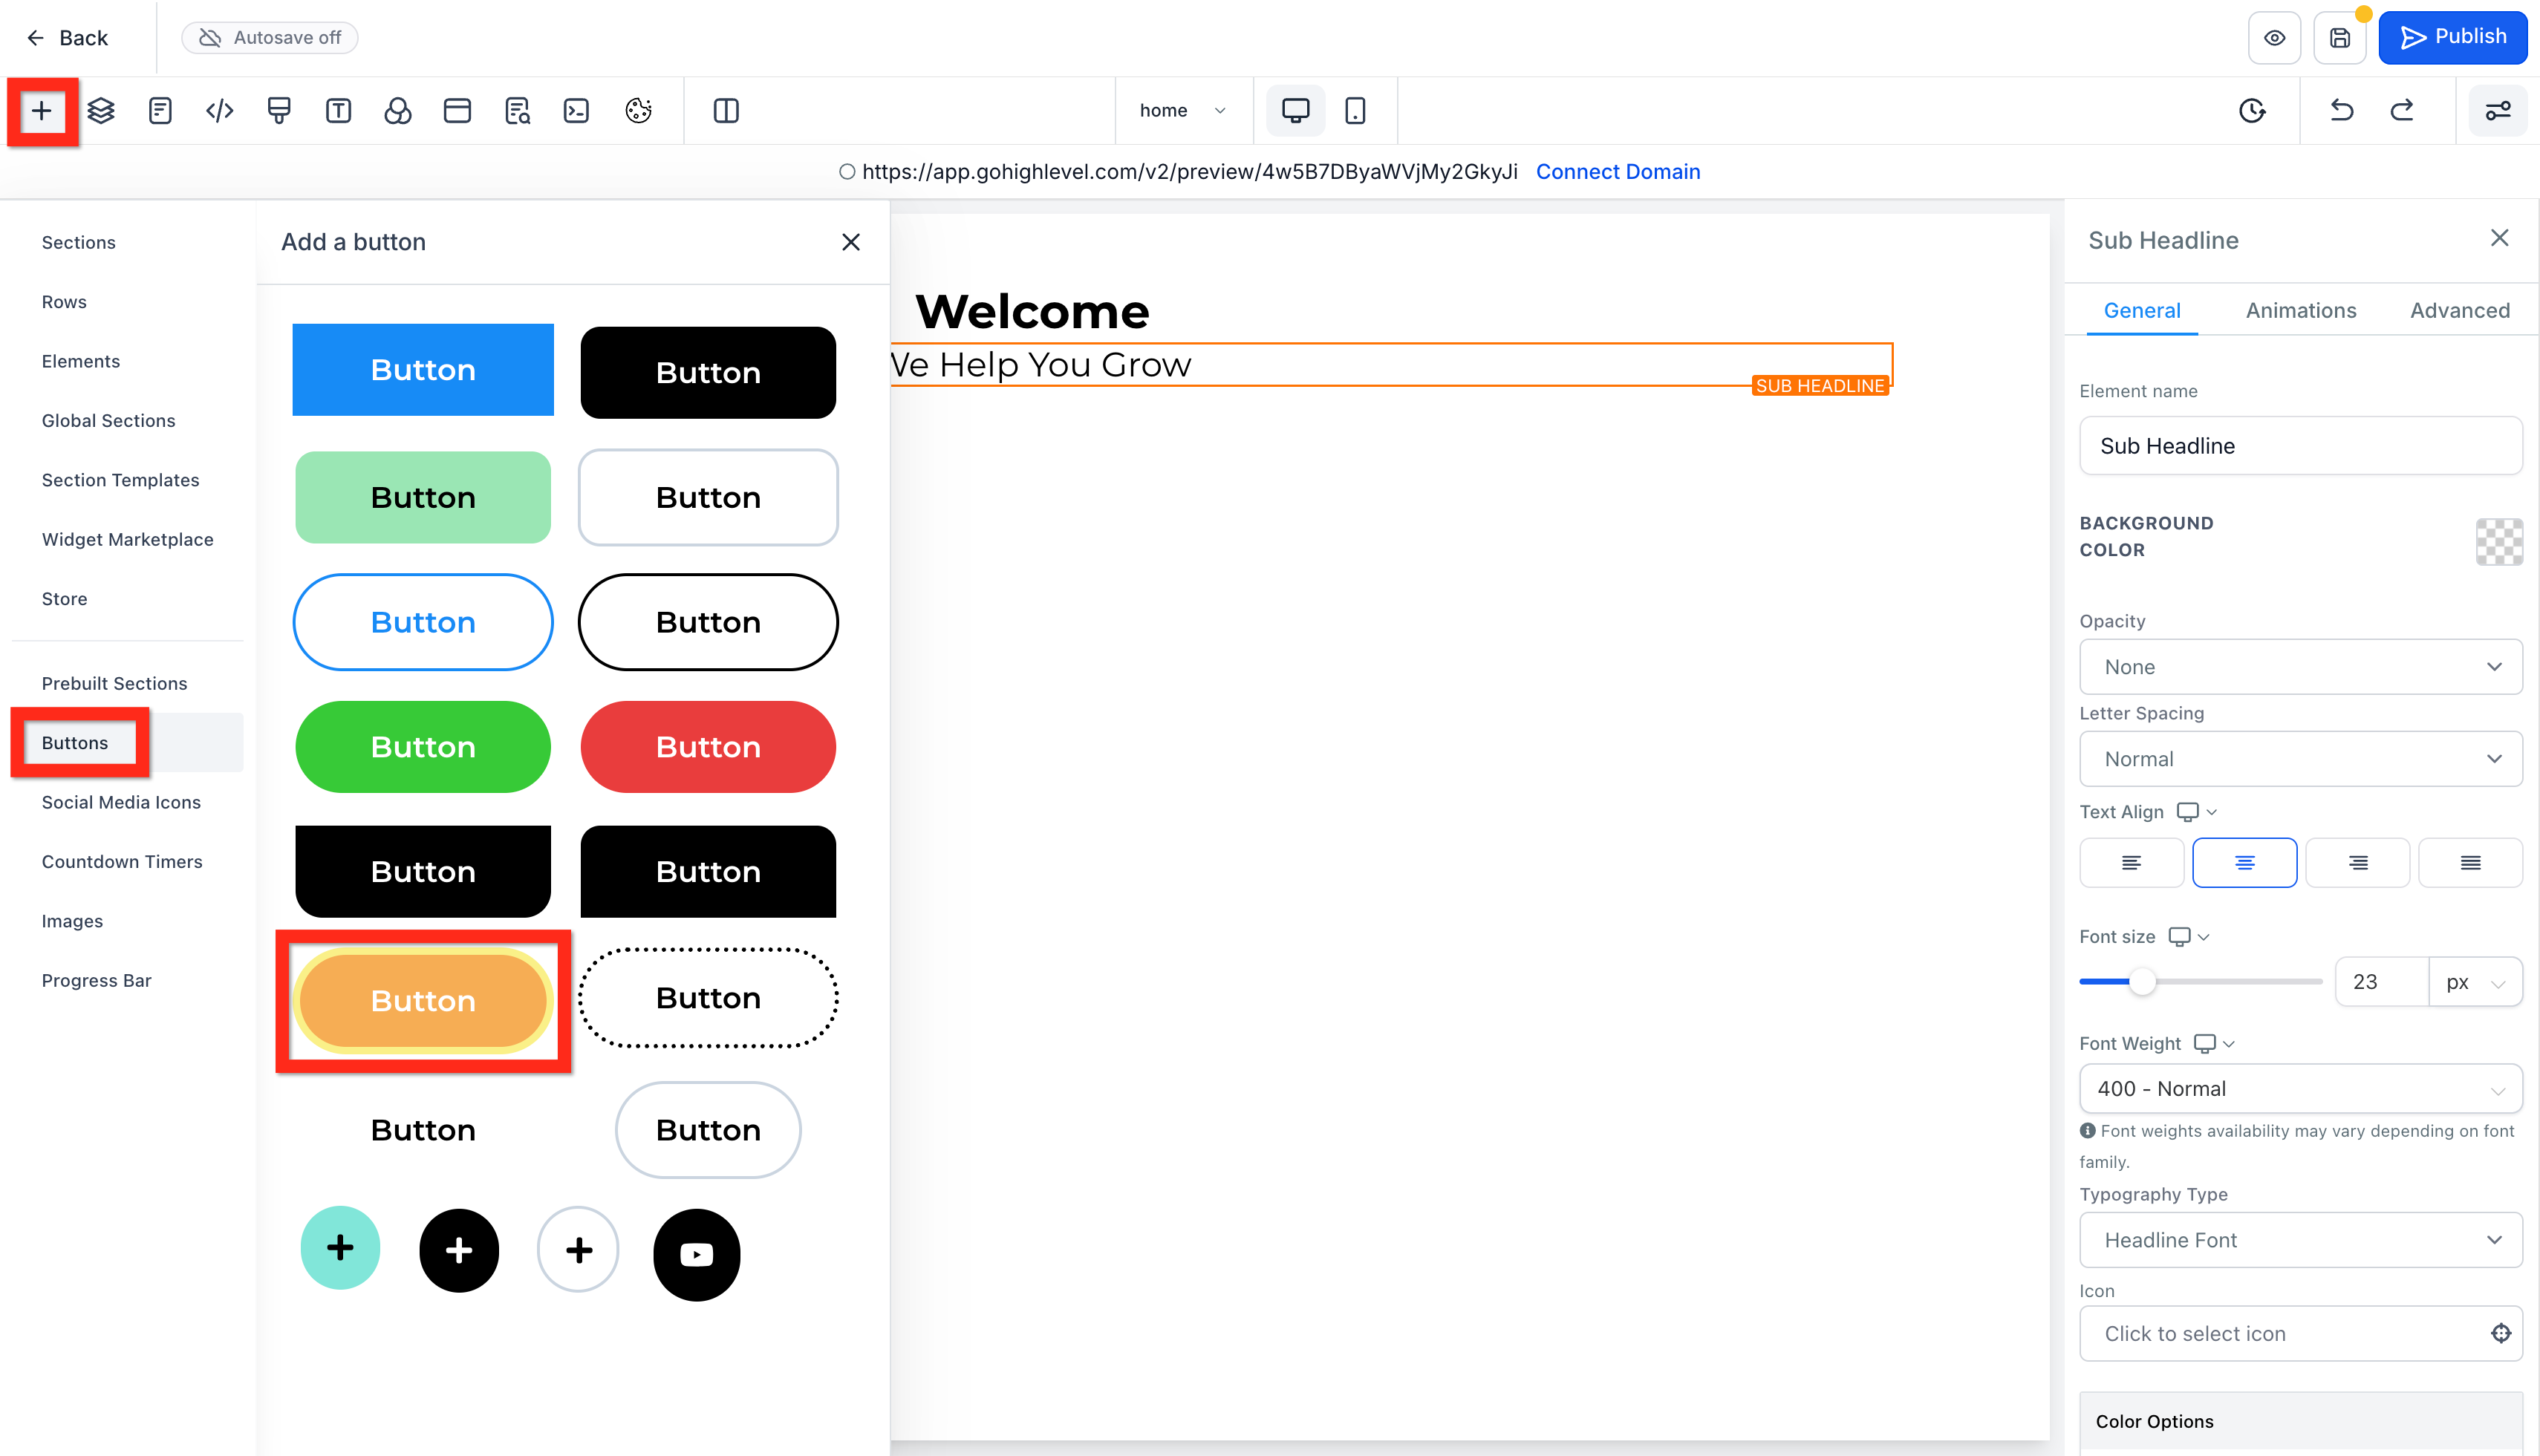
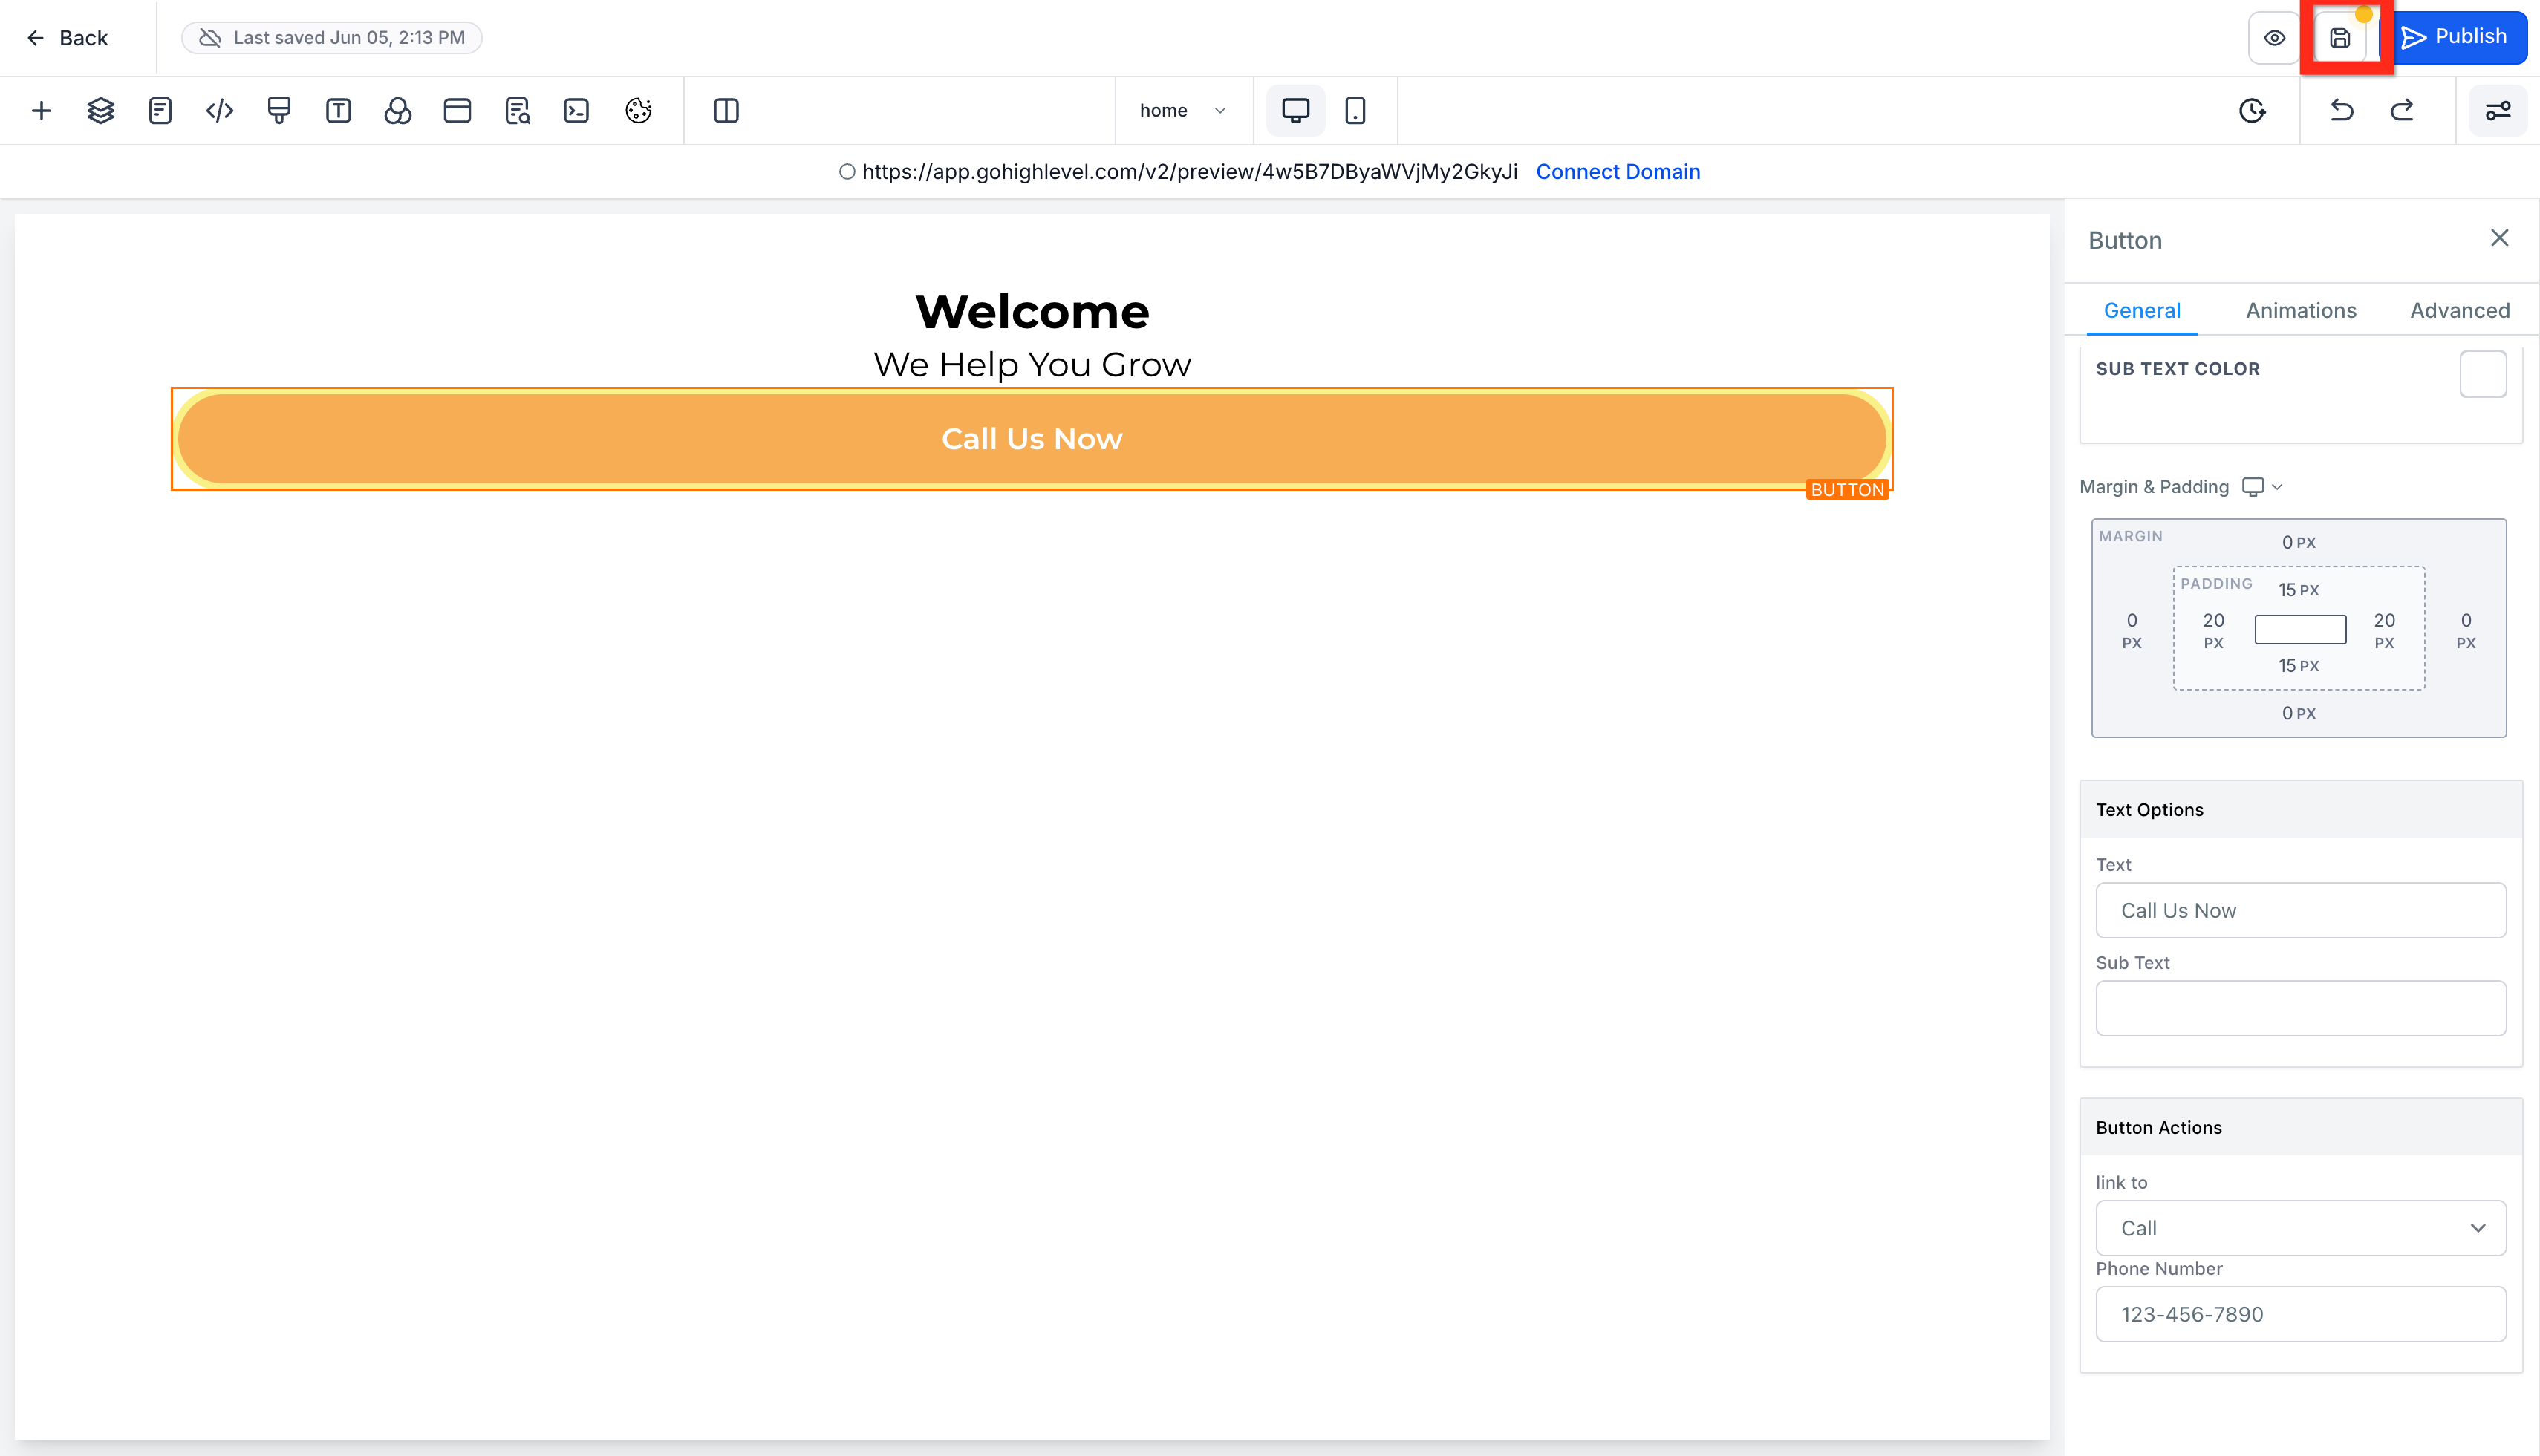
- Add a Button: Under the sub-headline add a button. Then, edit the text of the button to "Call Us Now",
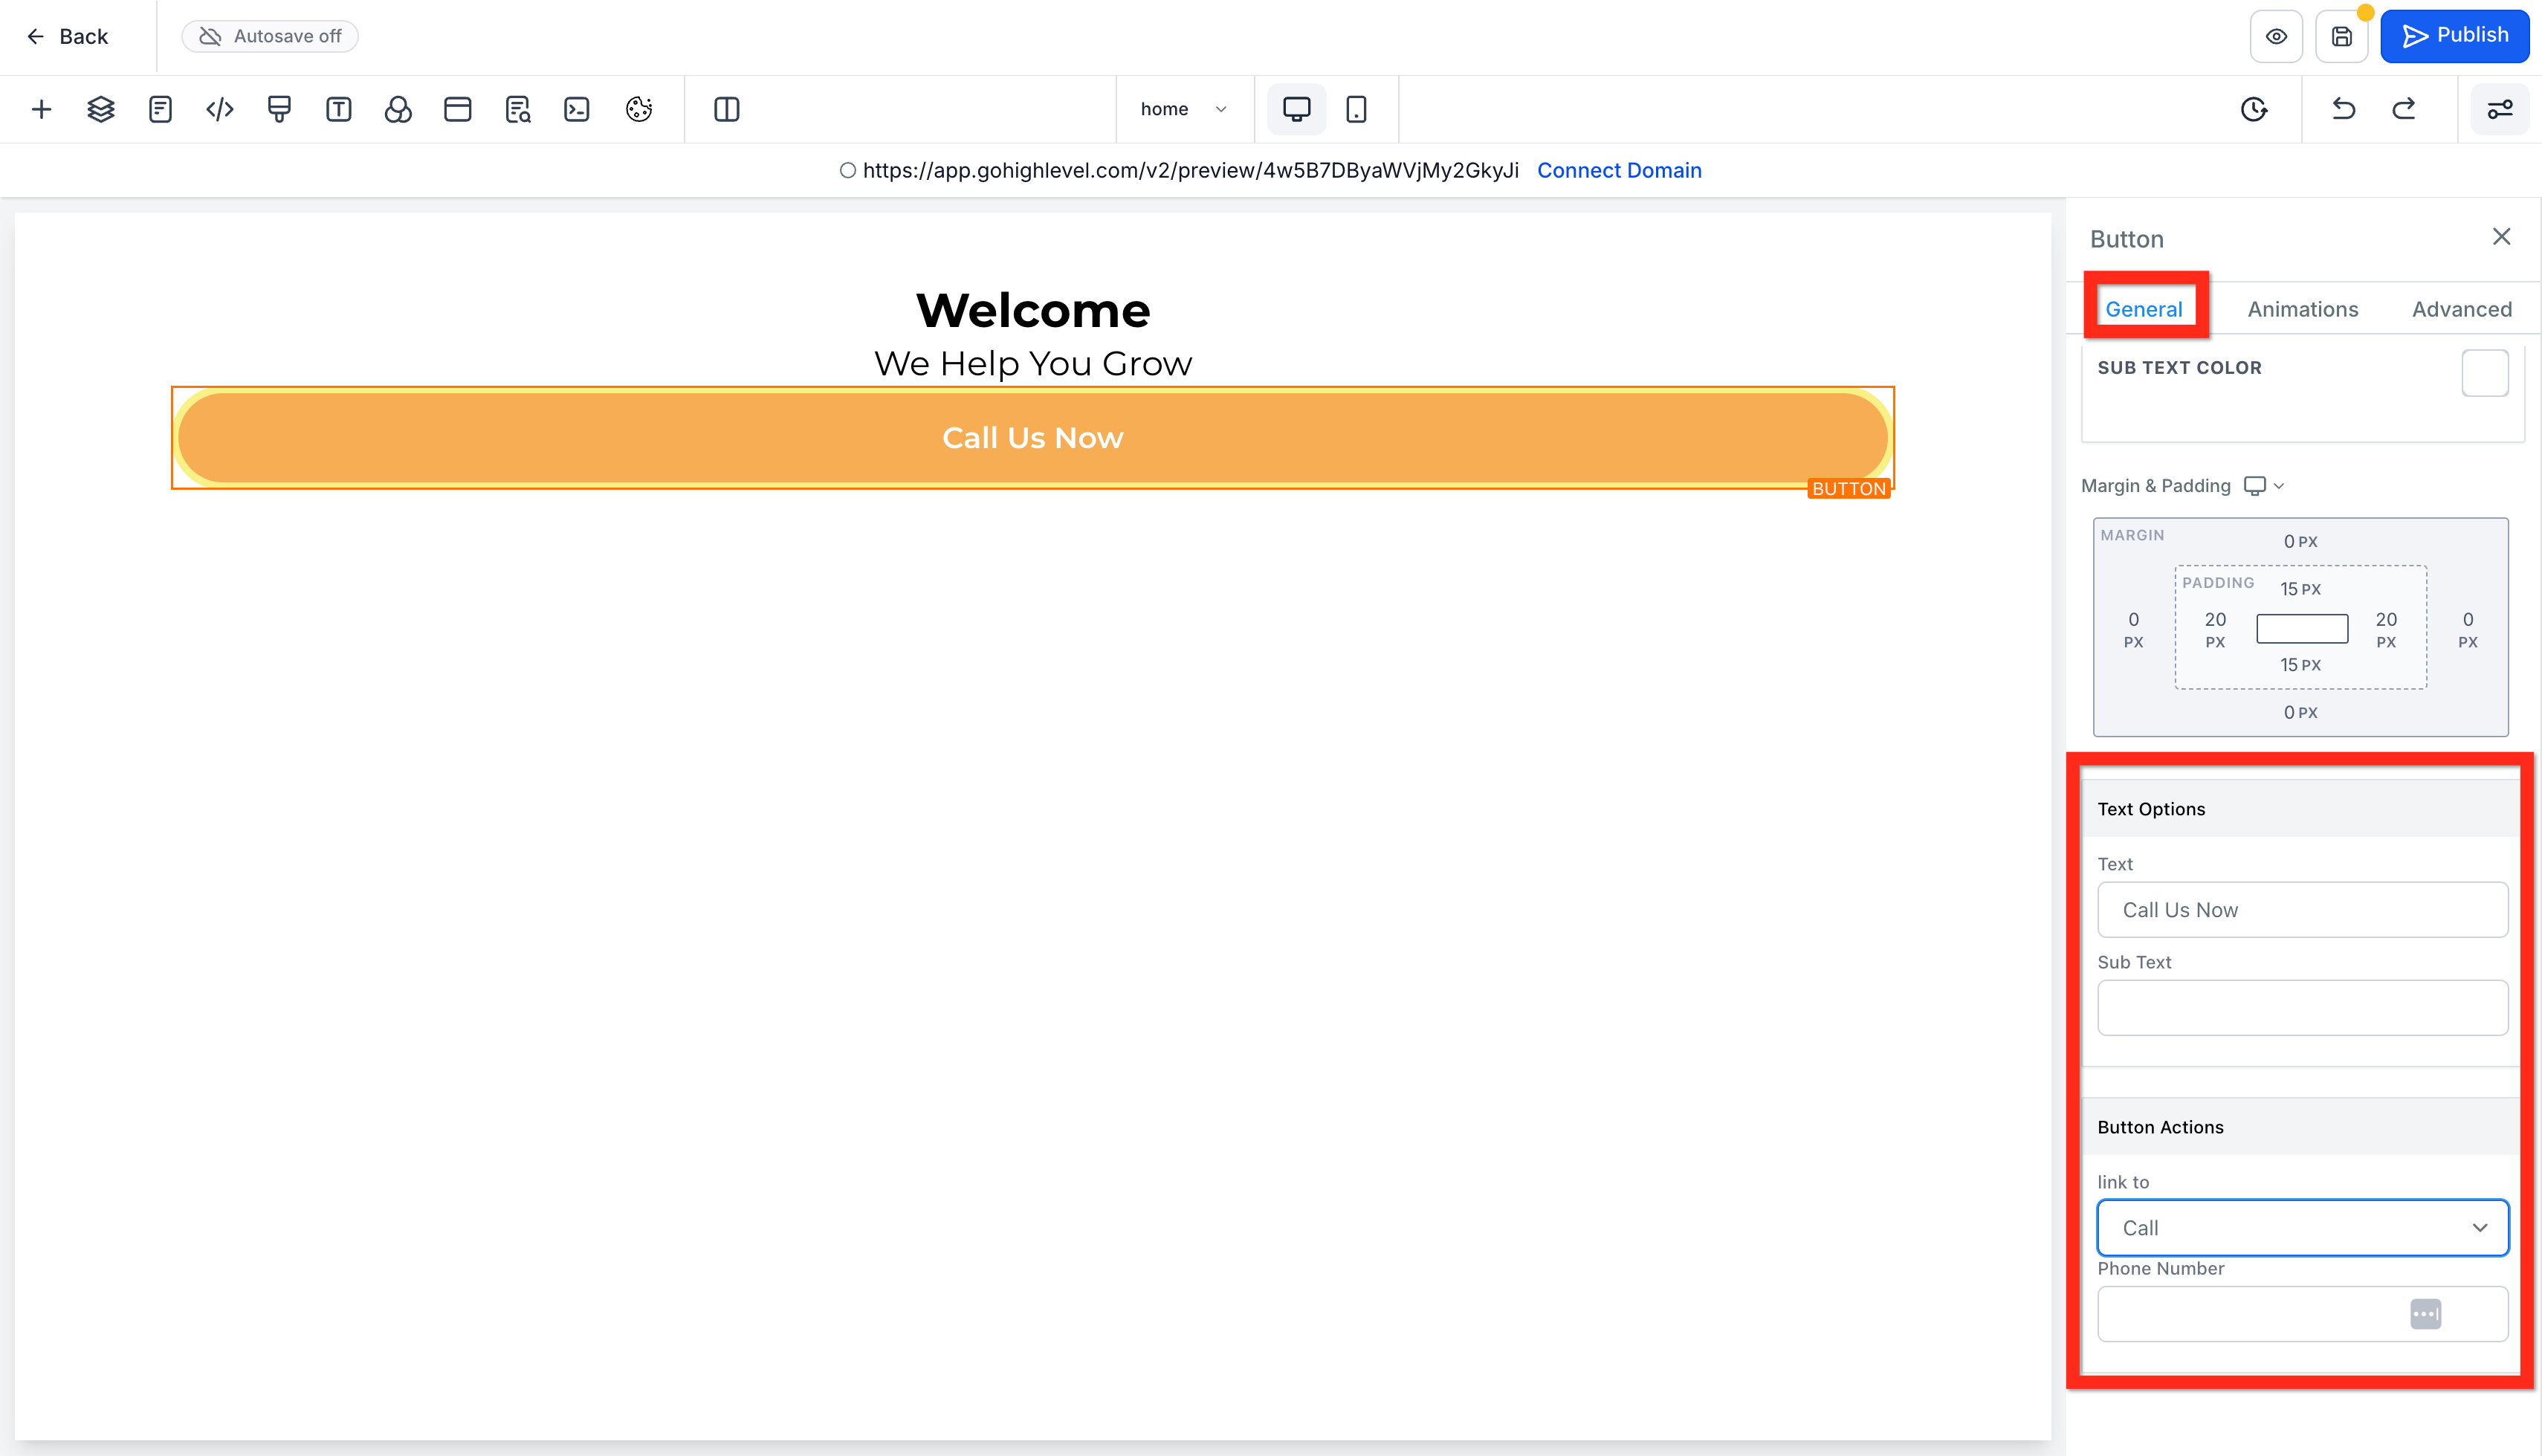
- Add an Action: In the button's settings (Right Panel) scroll down to Button Actions, select Call, then input your phone number.
- Repeat: Continue adding sections, rows, and elements to build out your homepage.
- Save: Click the save icon.
Add More Pages
- Navigate to Sites > Websites > Site Details (if you are still in the page editor click the back button).
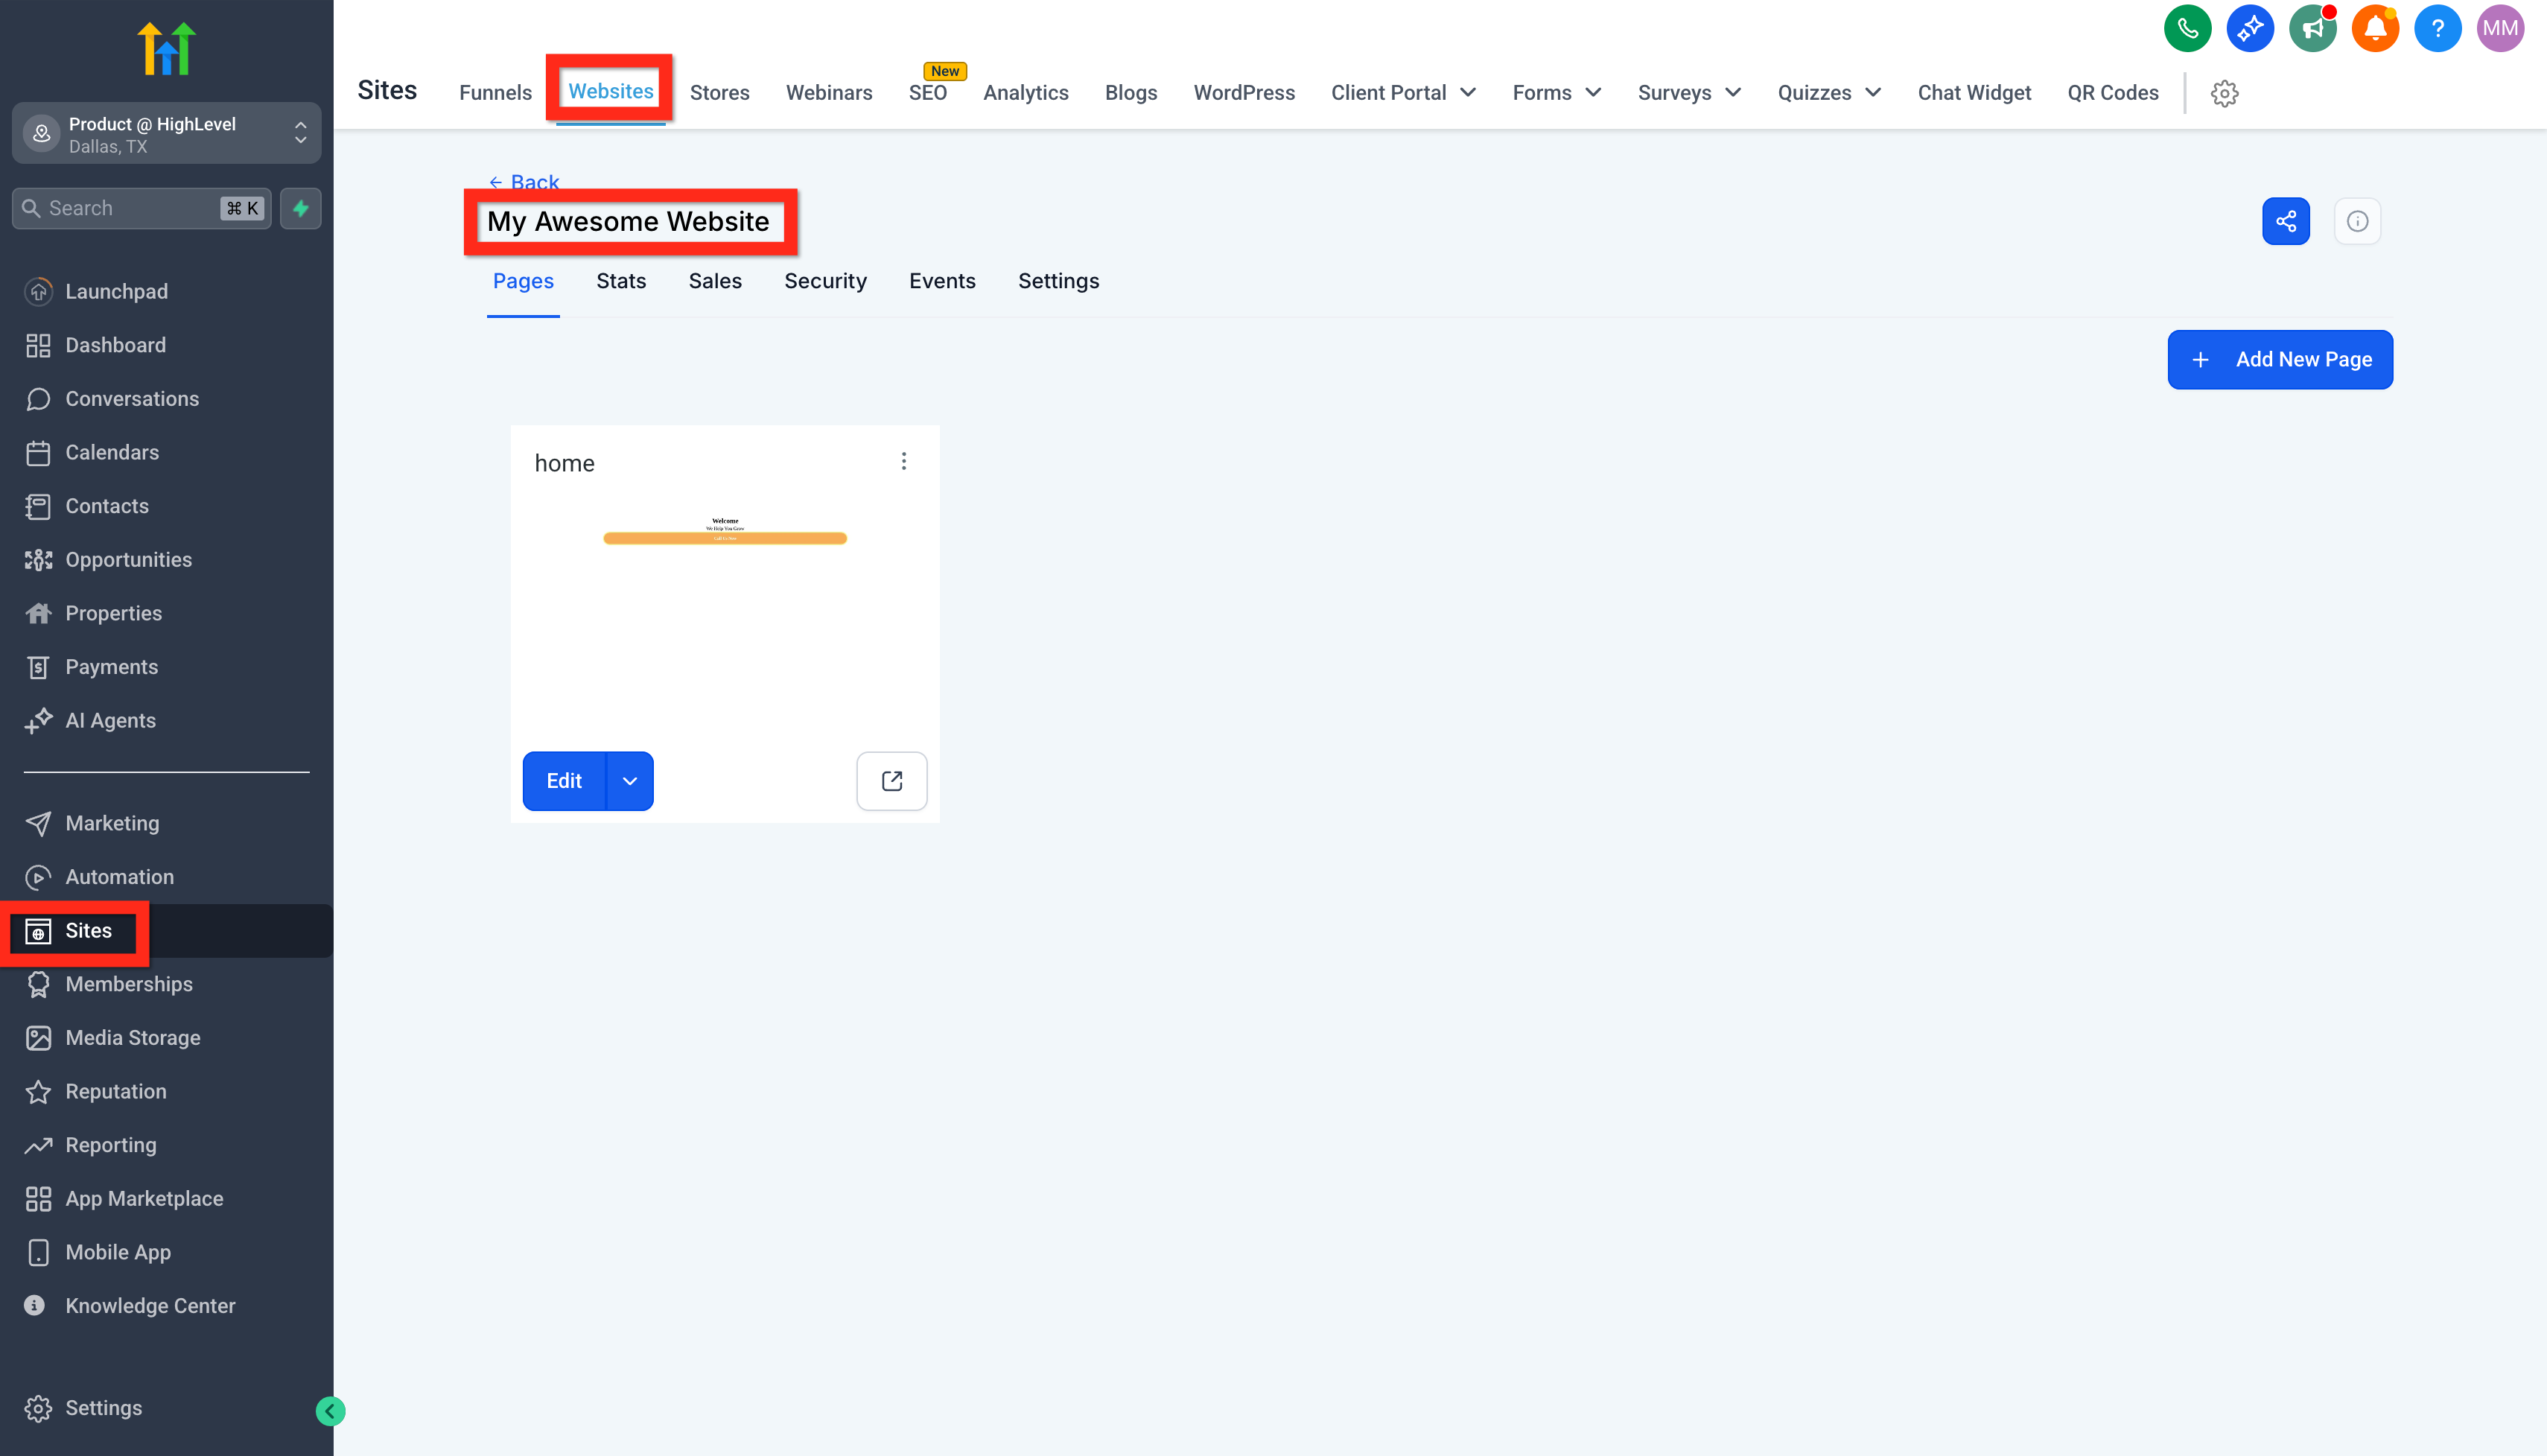
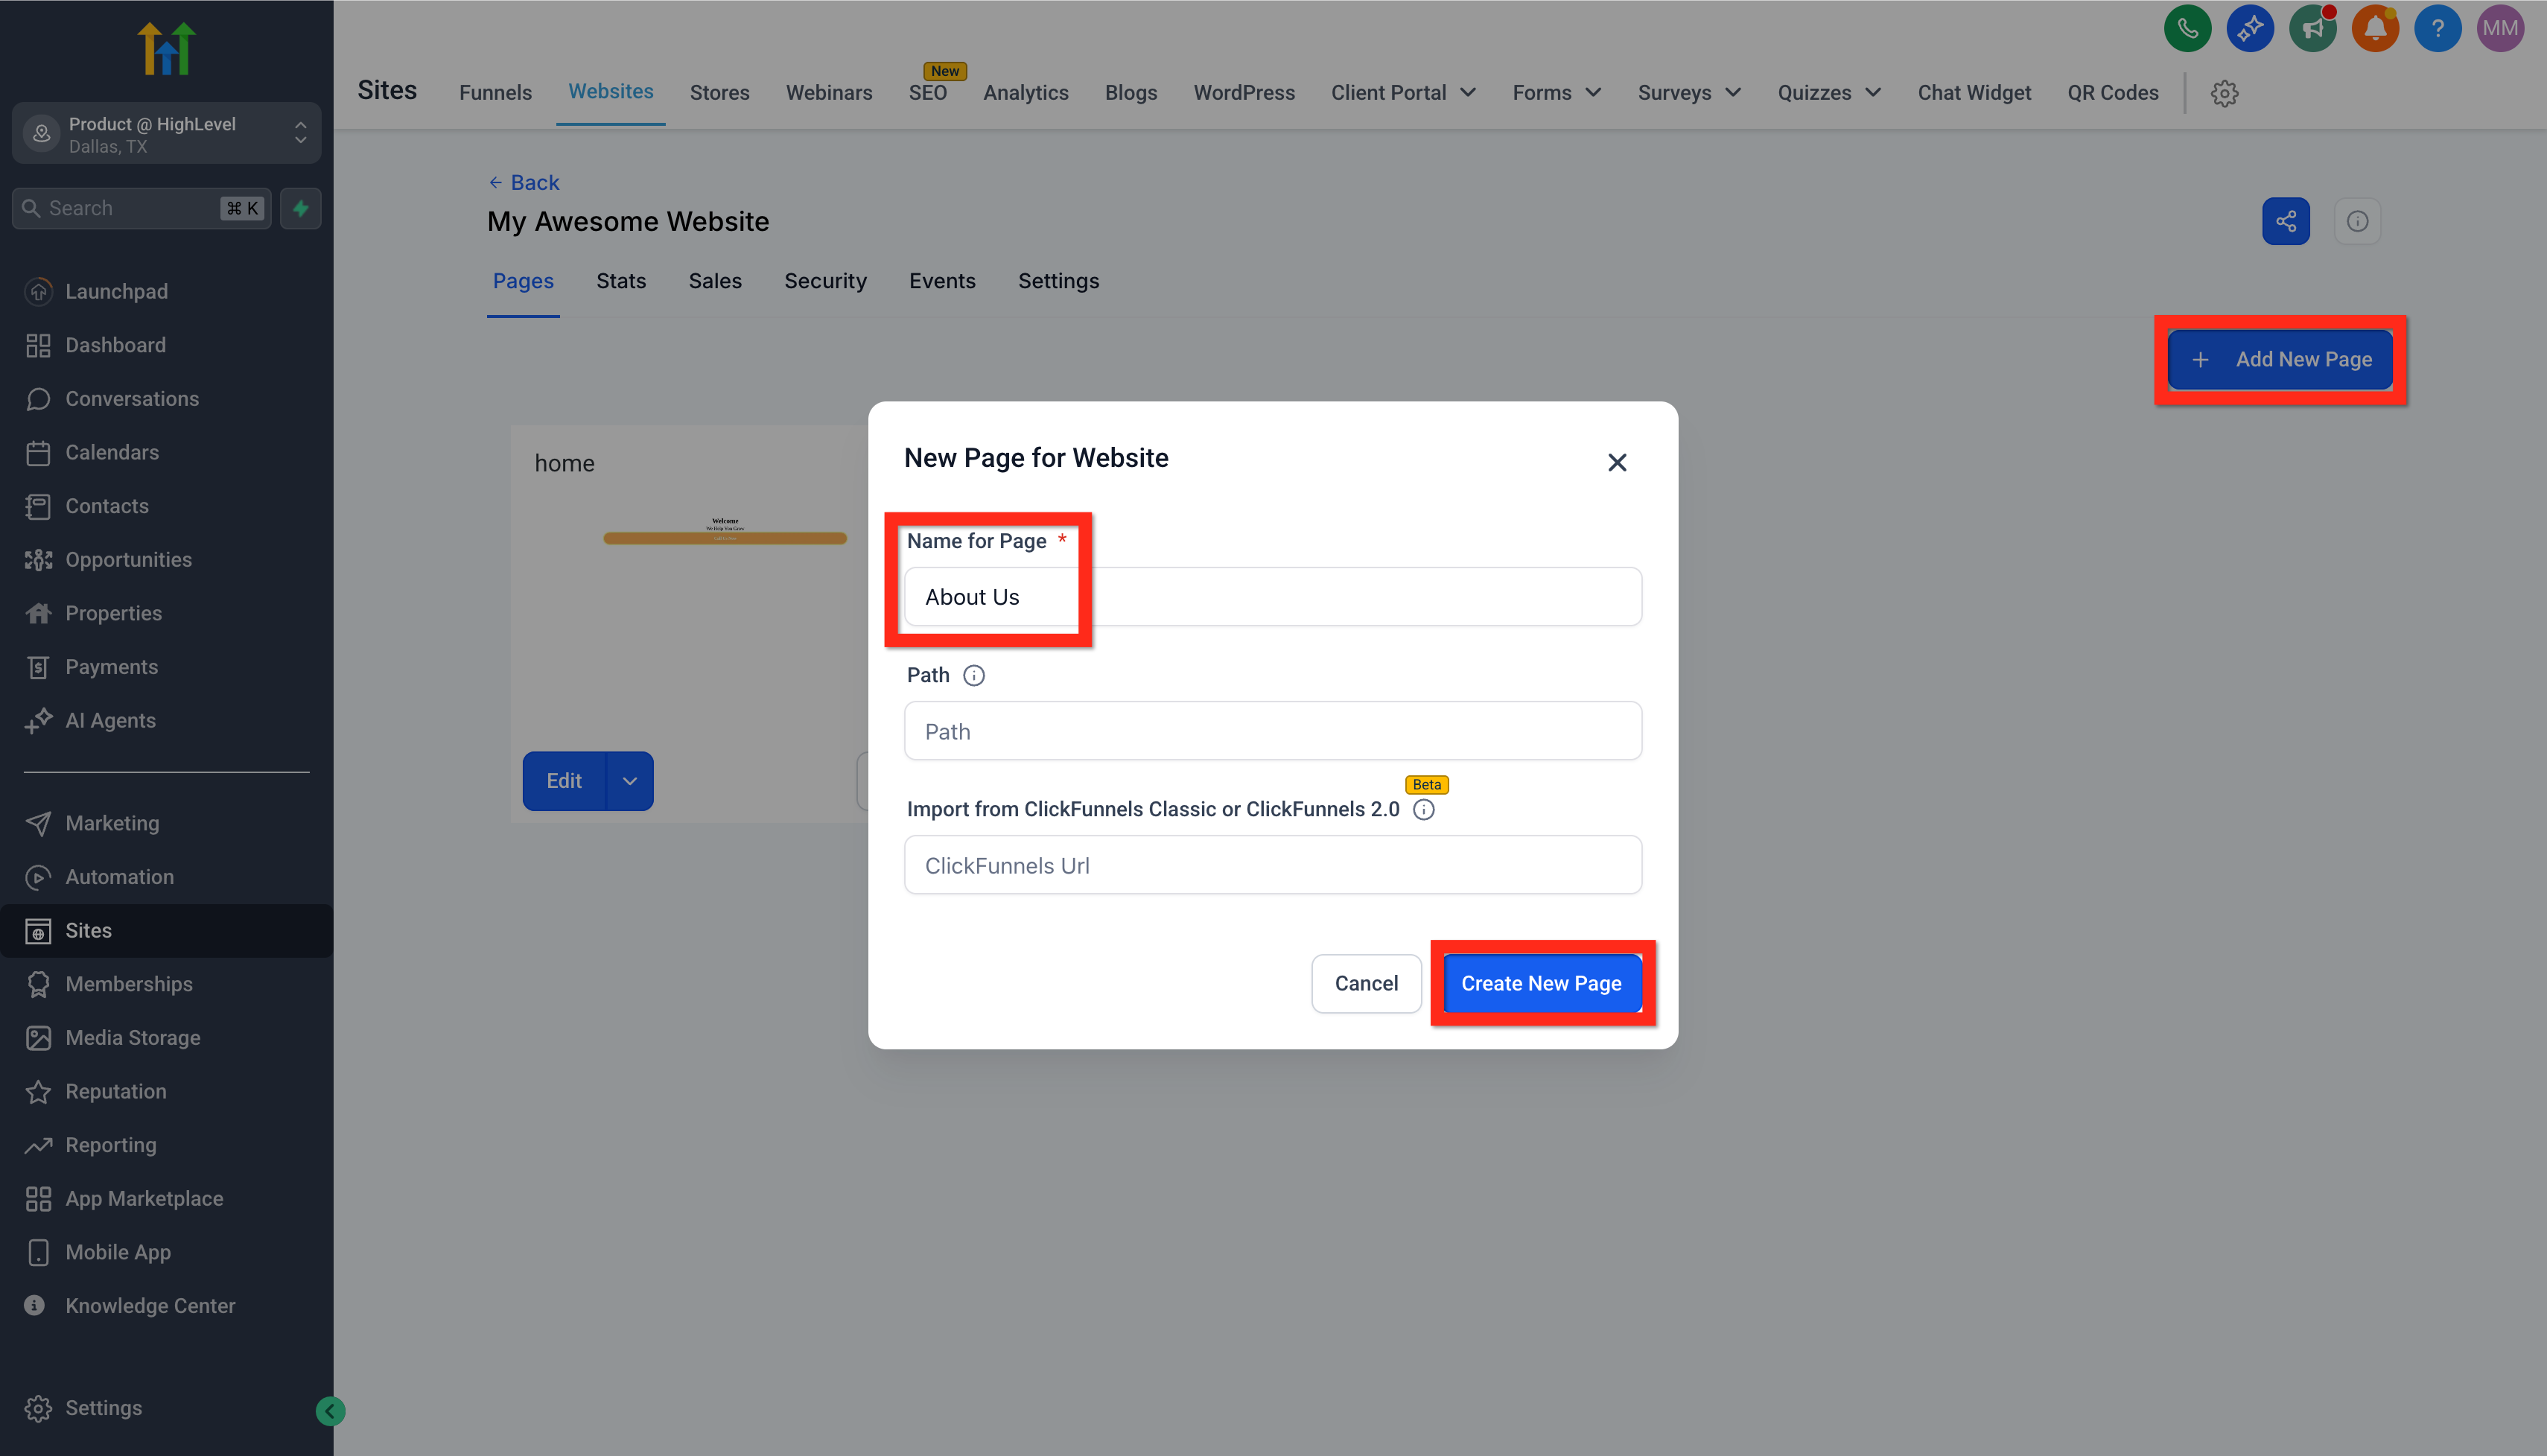
- Add a New Page: Click the Add New Page button. Name the page (Ex: About Us) Click Create New Page.
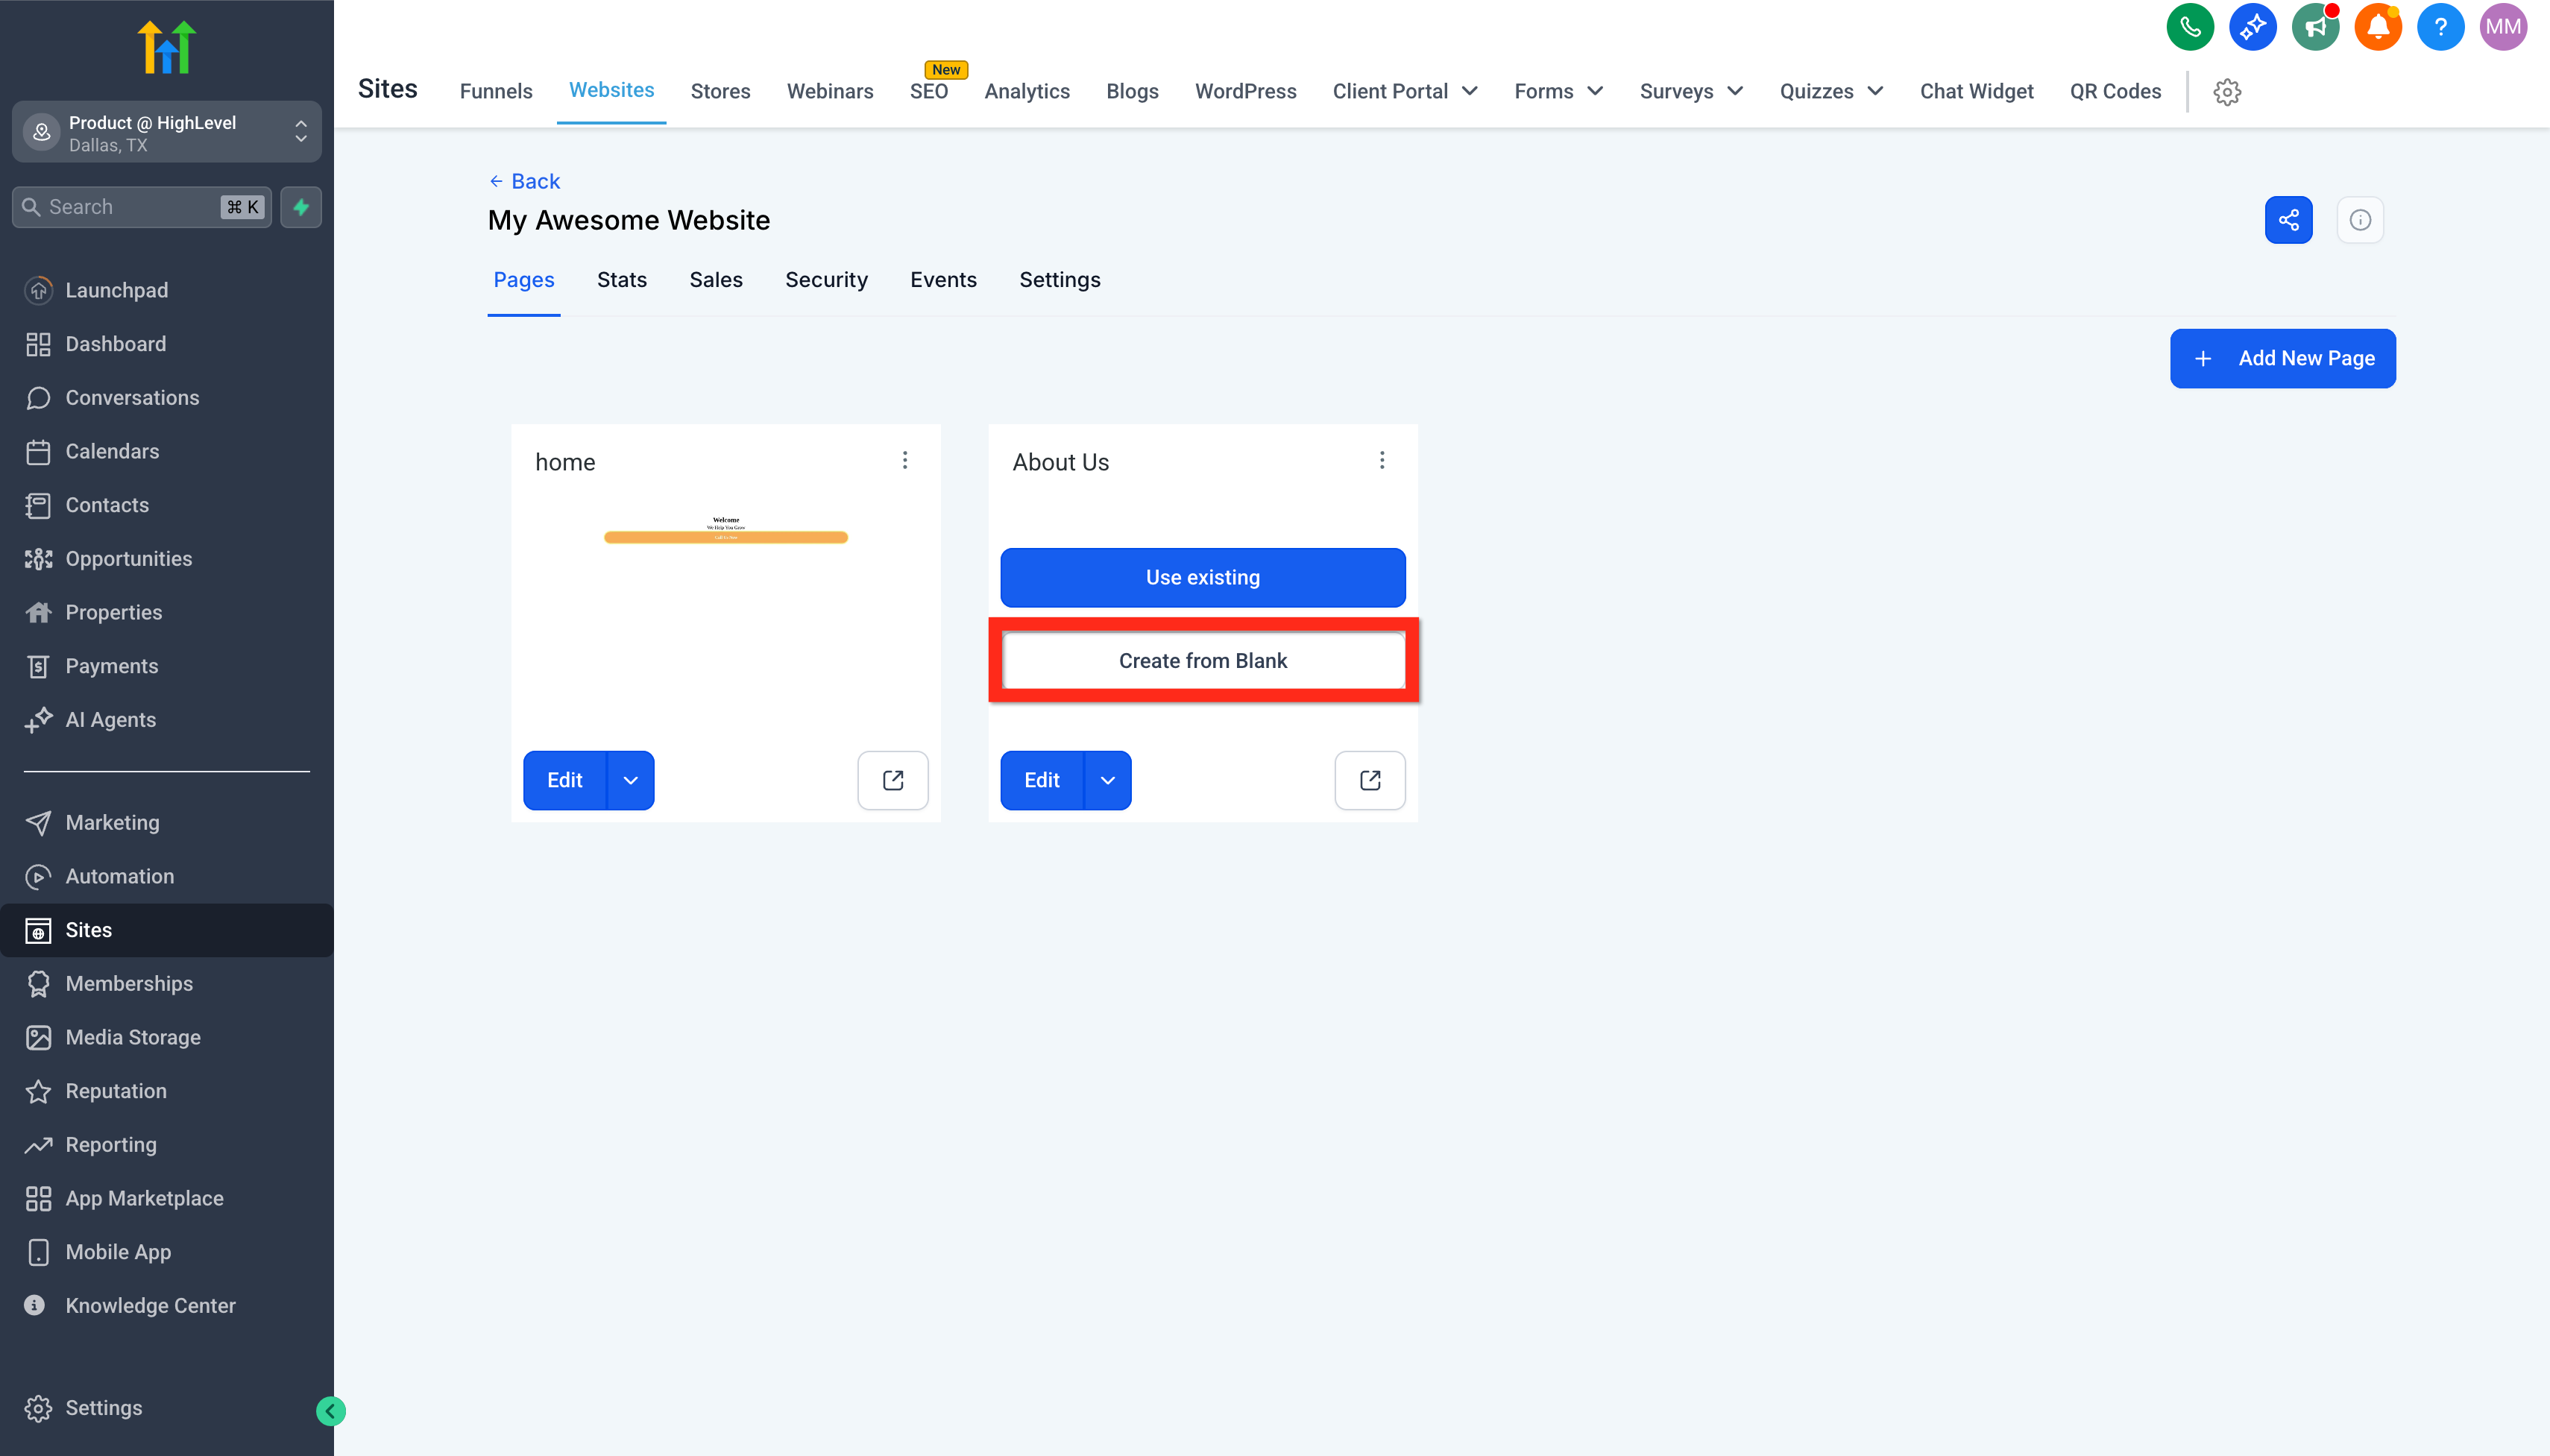
- Create From Blank: In this case, click the Create From Blank button.
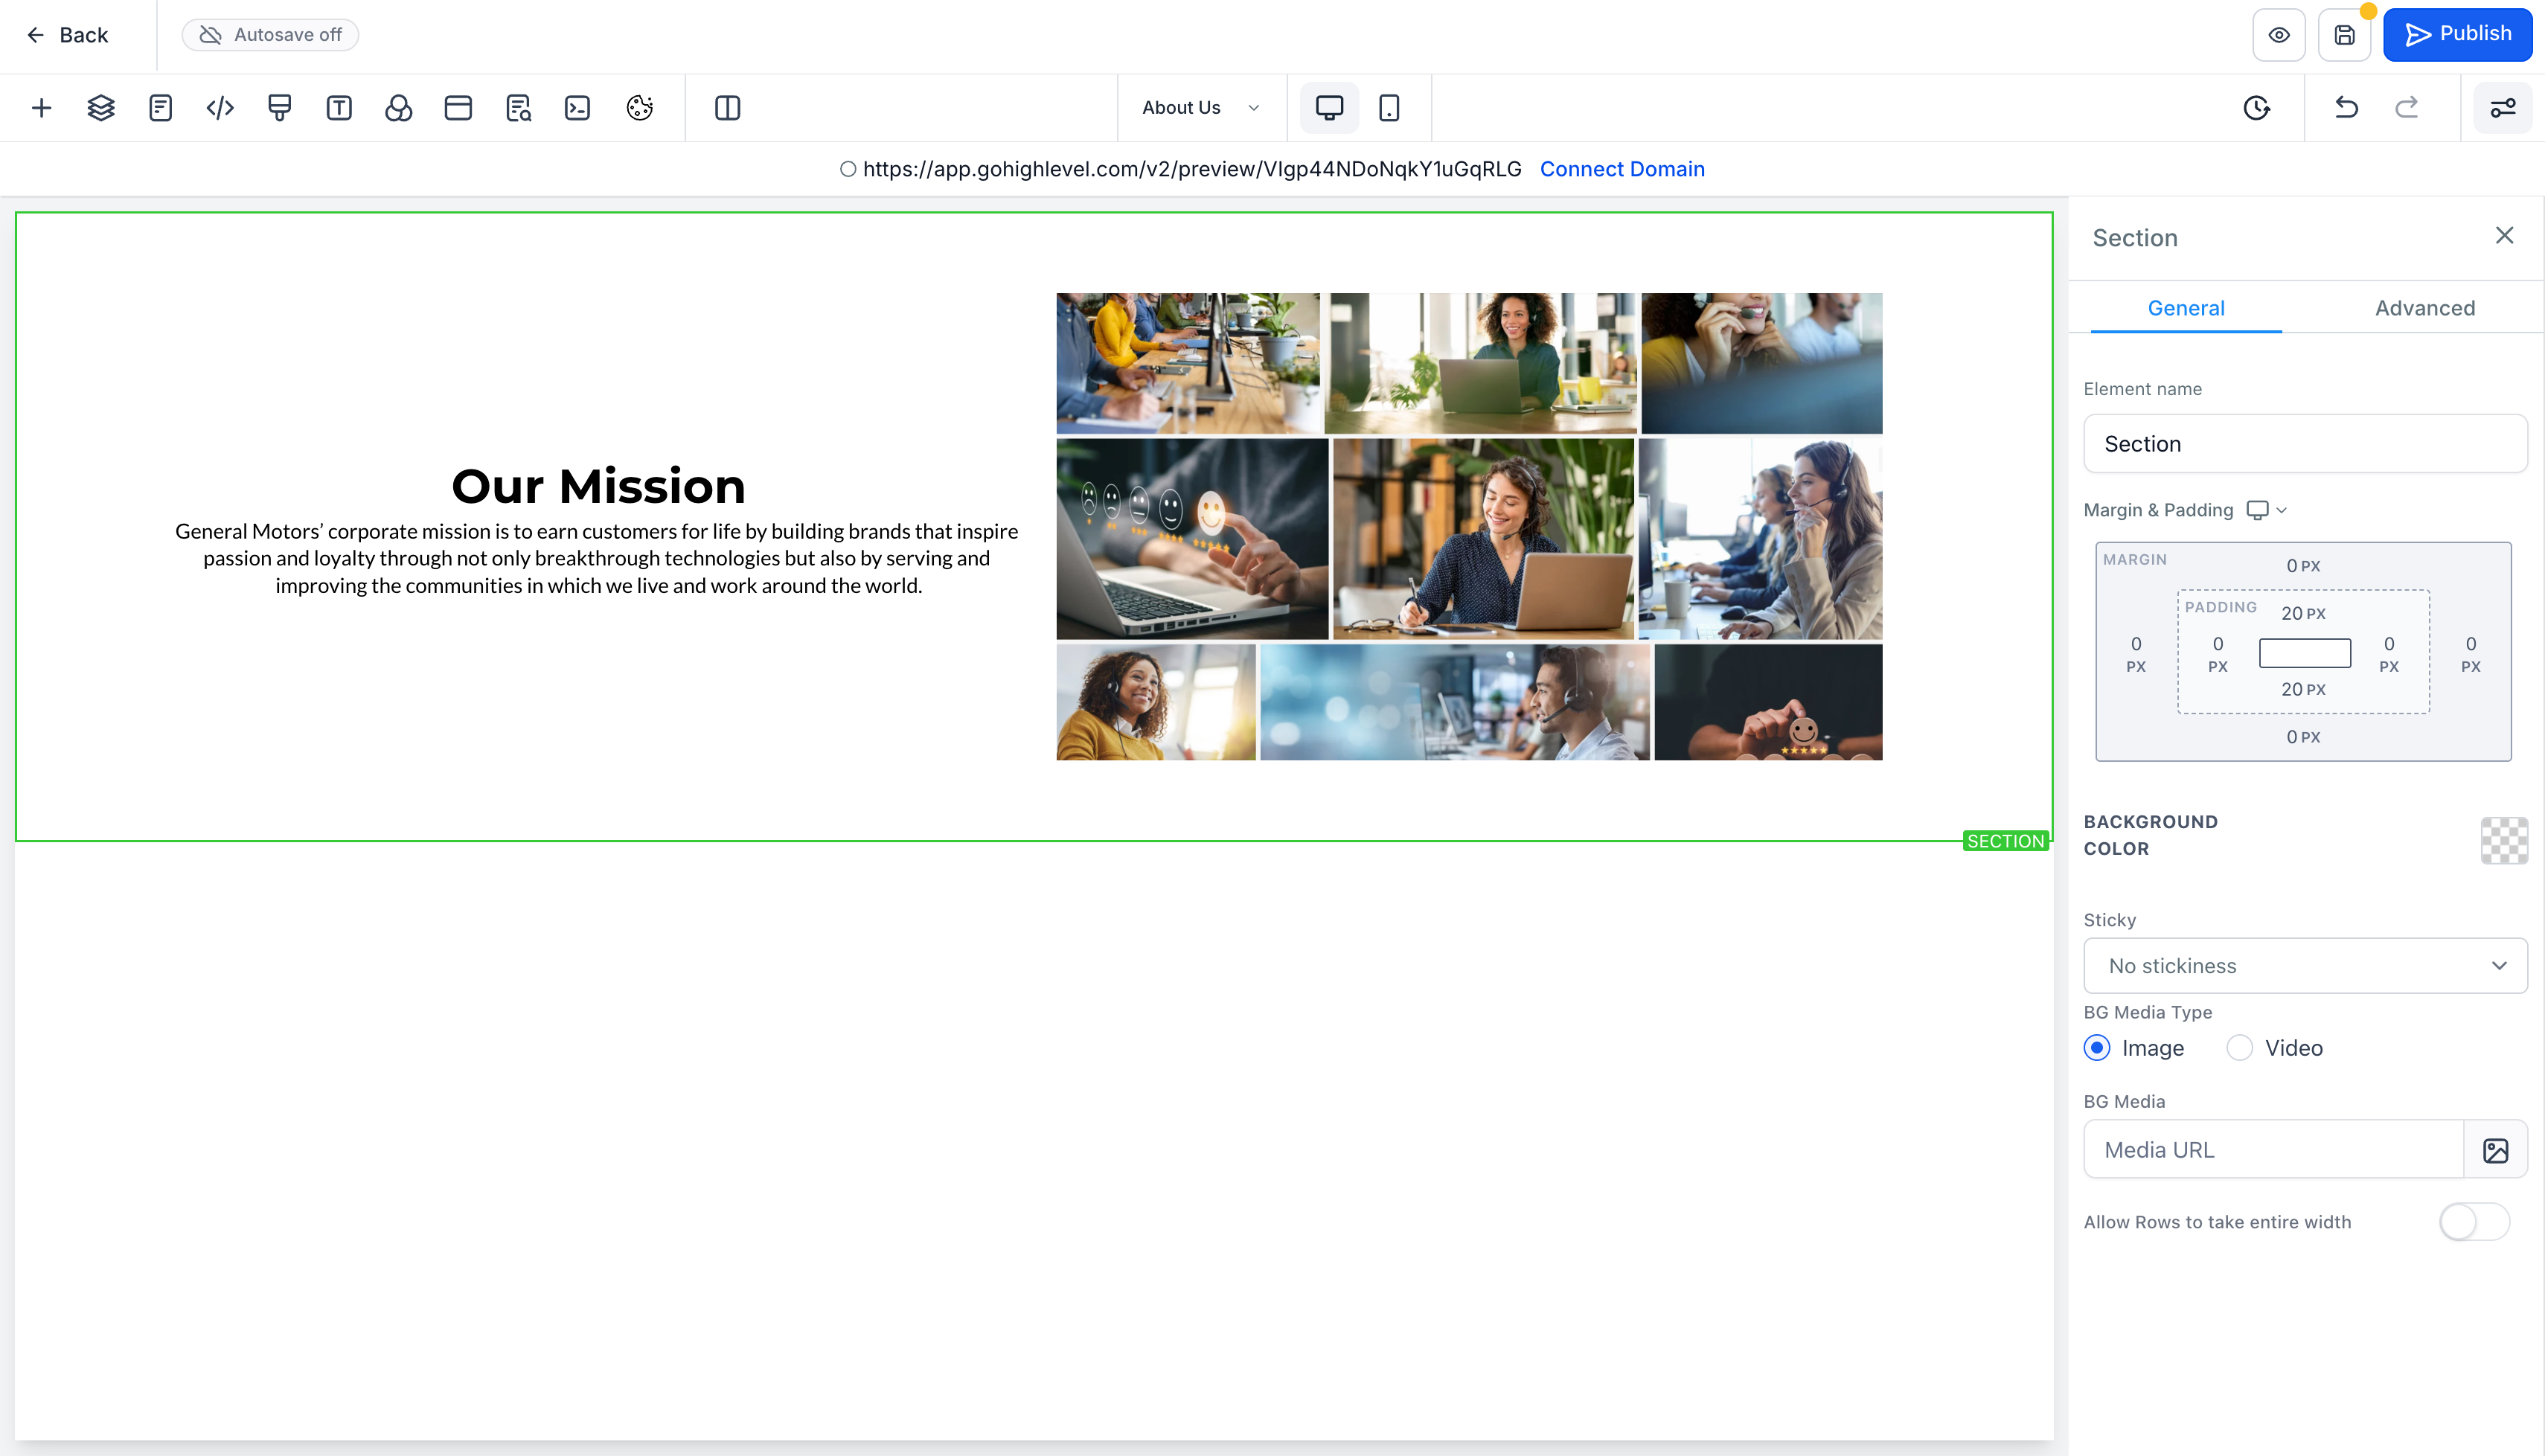
- Build Page: Add elements and content to the page in the same way. You can add a text element and an image element. Make sure to click Save and then Back.
Add Navigation
- Navigate to Sites > Websites > Site Details (if you are still in the page editor click the back button).
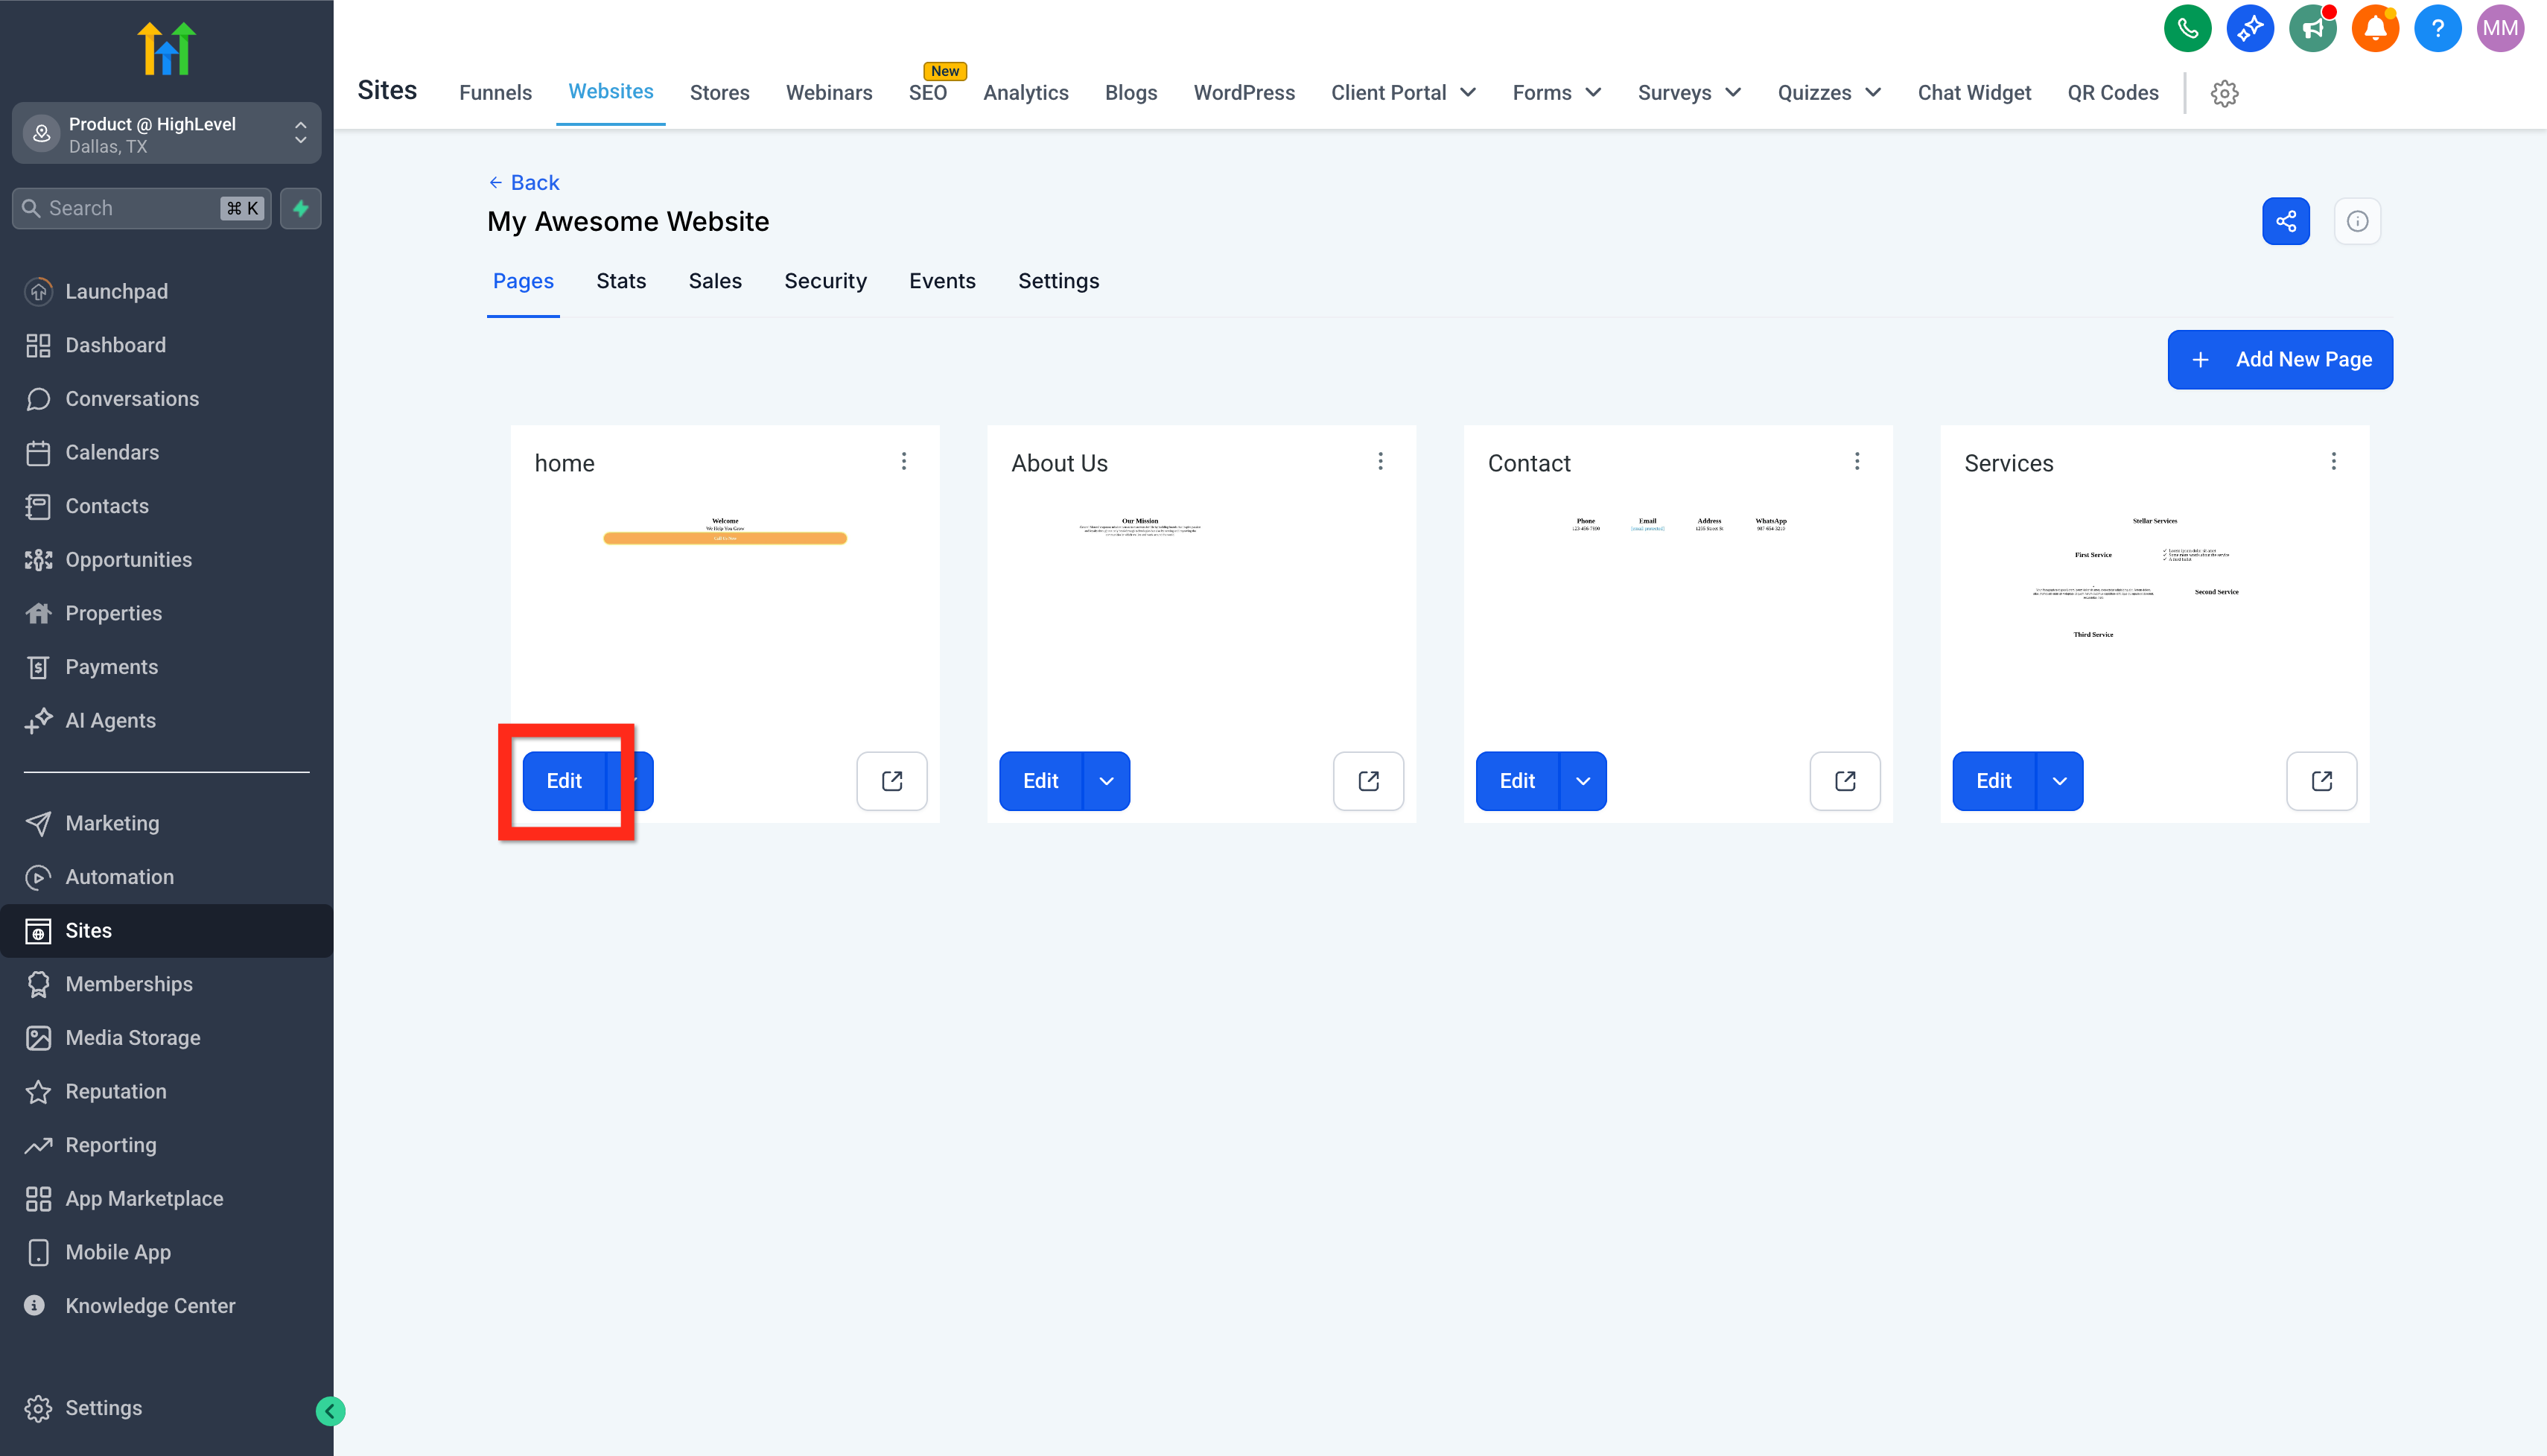
- Edit the Home Page: Under the page card titled "home" click Edit.
- Add new top full width section: At the very top of the page, above all the other sections, add a new full width section.
- Add a 1 column row and Navigation Menu: Inside the new top section, add a 1 column row, then add the element called Navigation Menu.
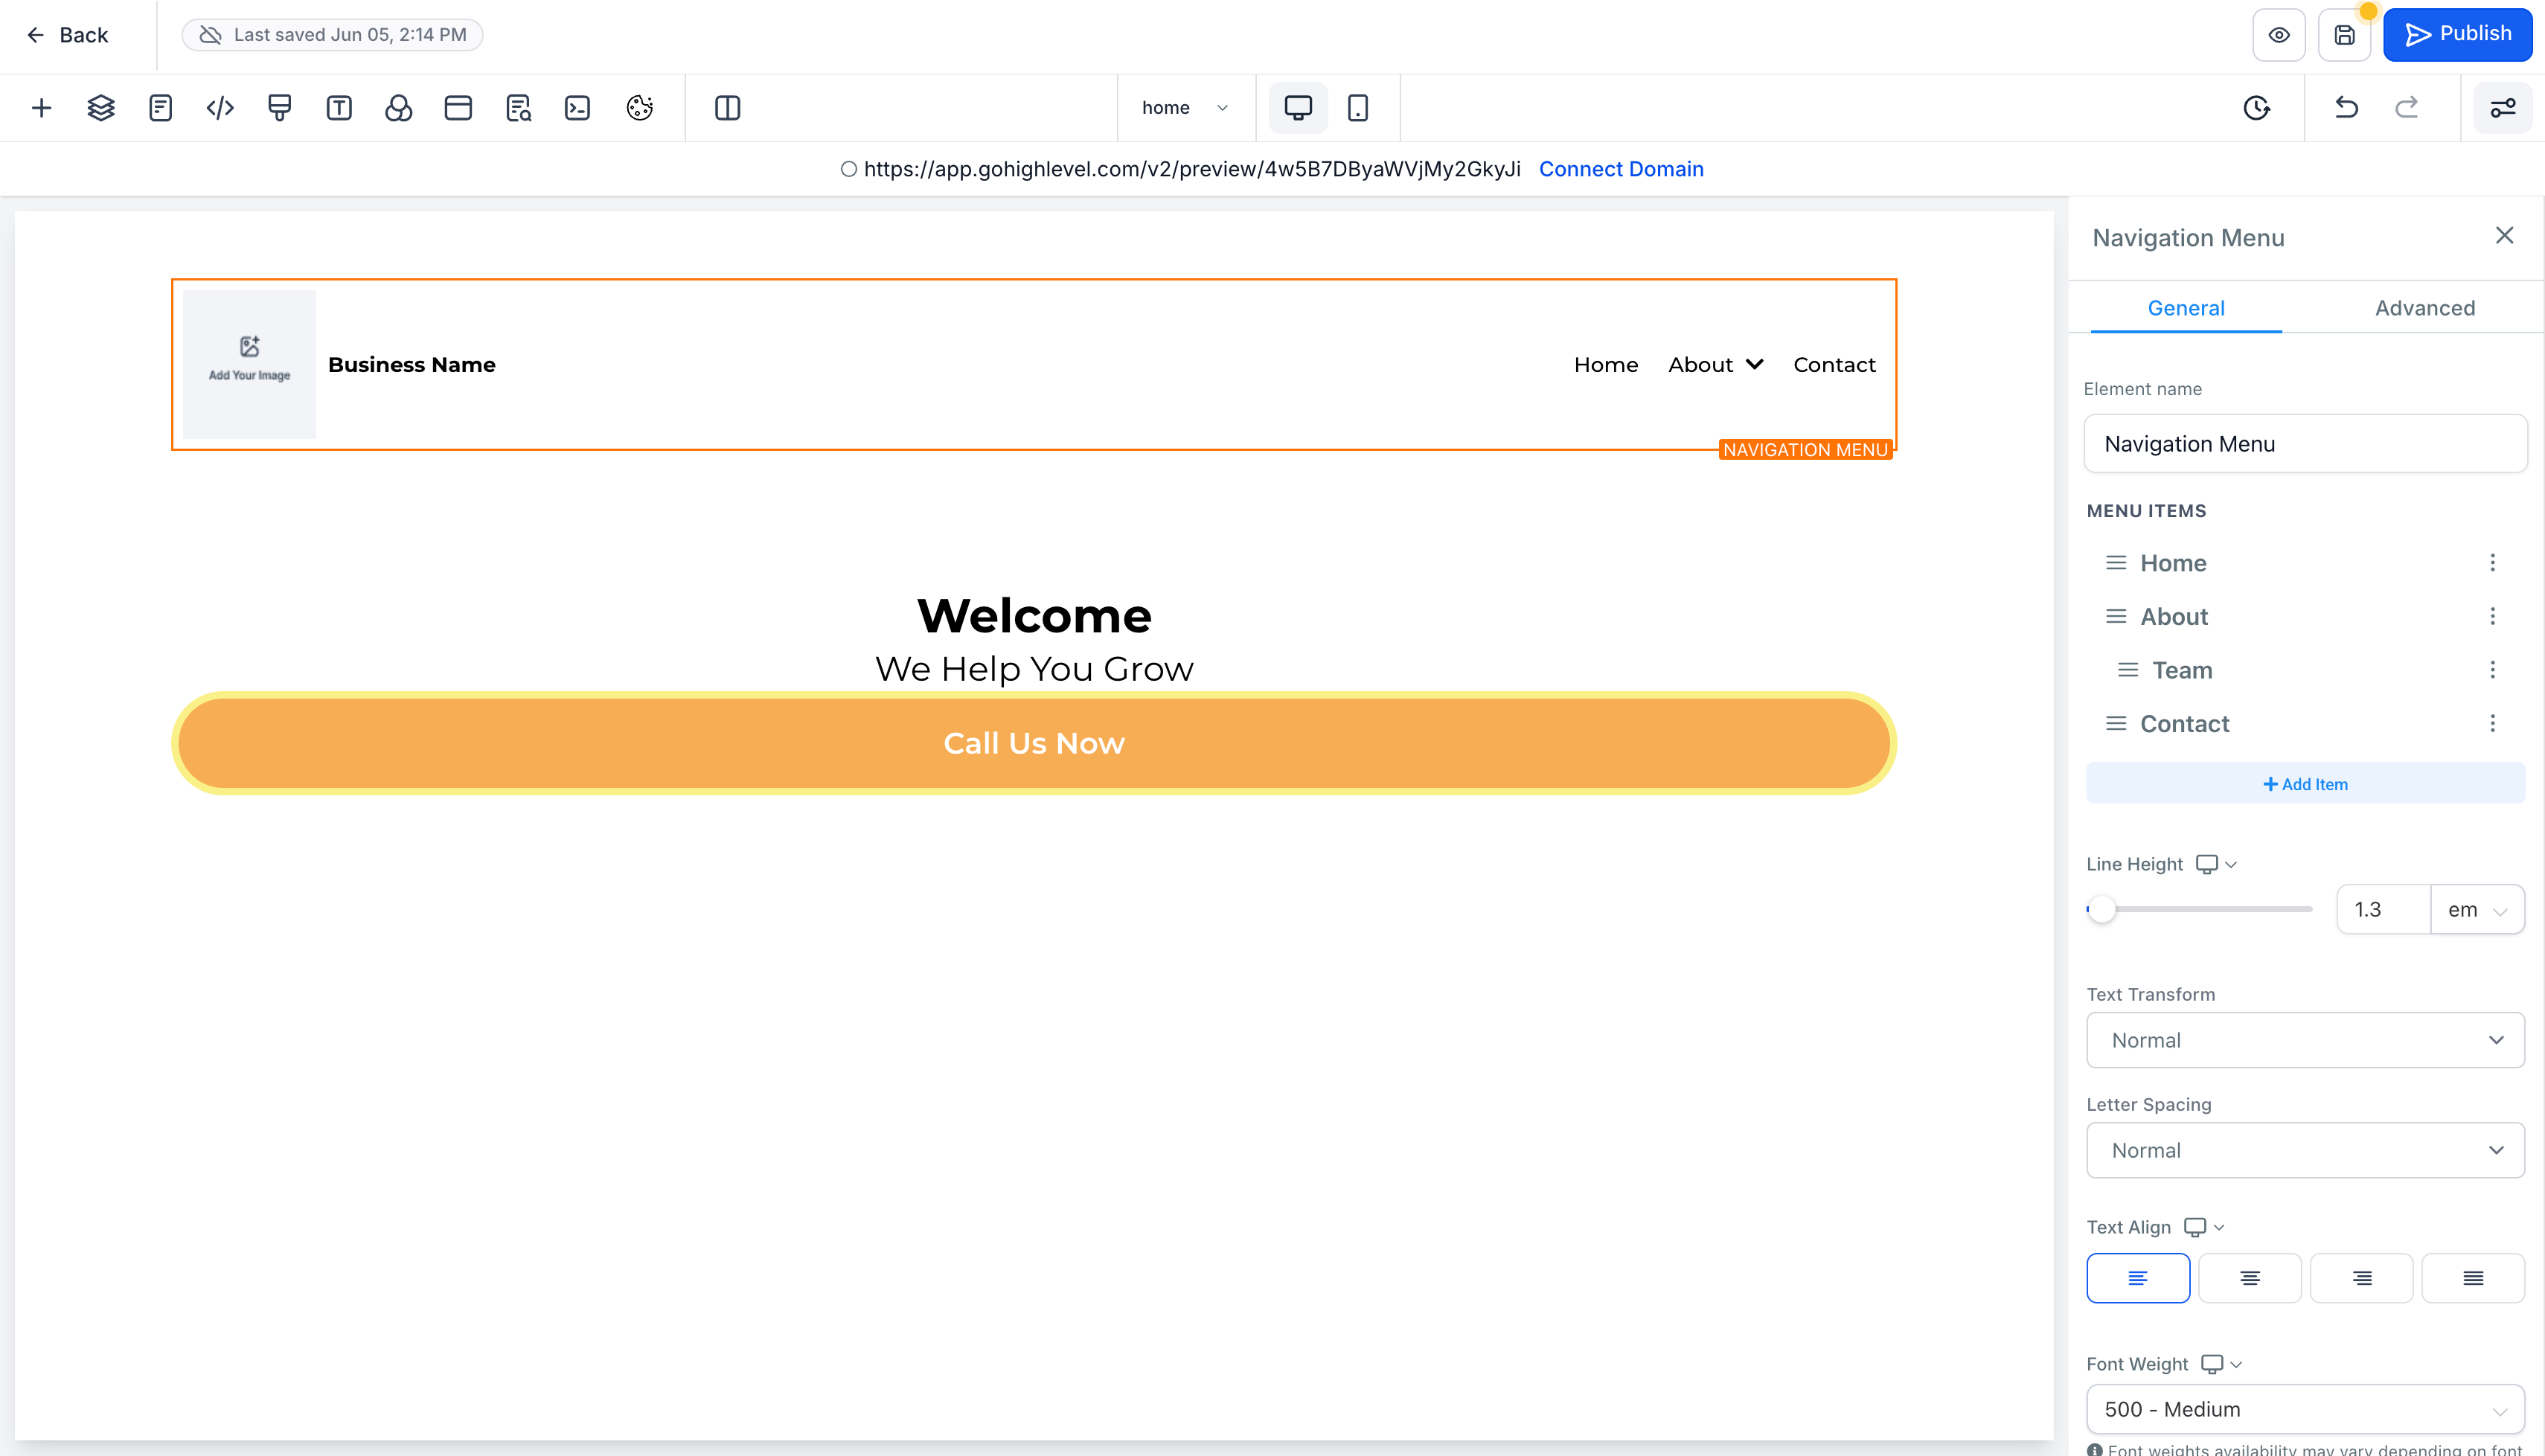
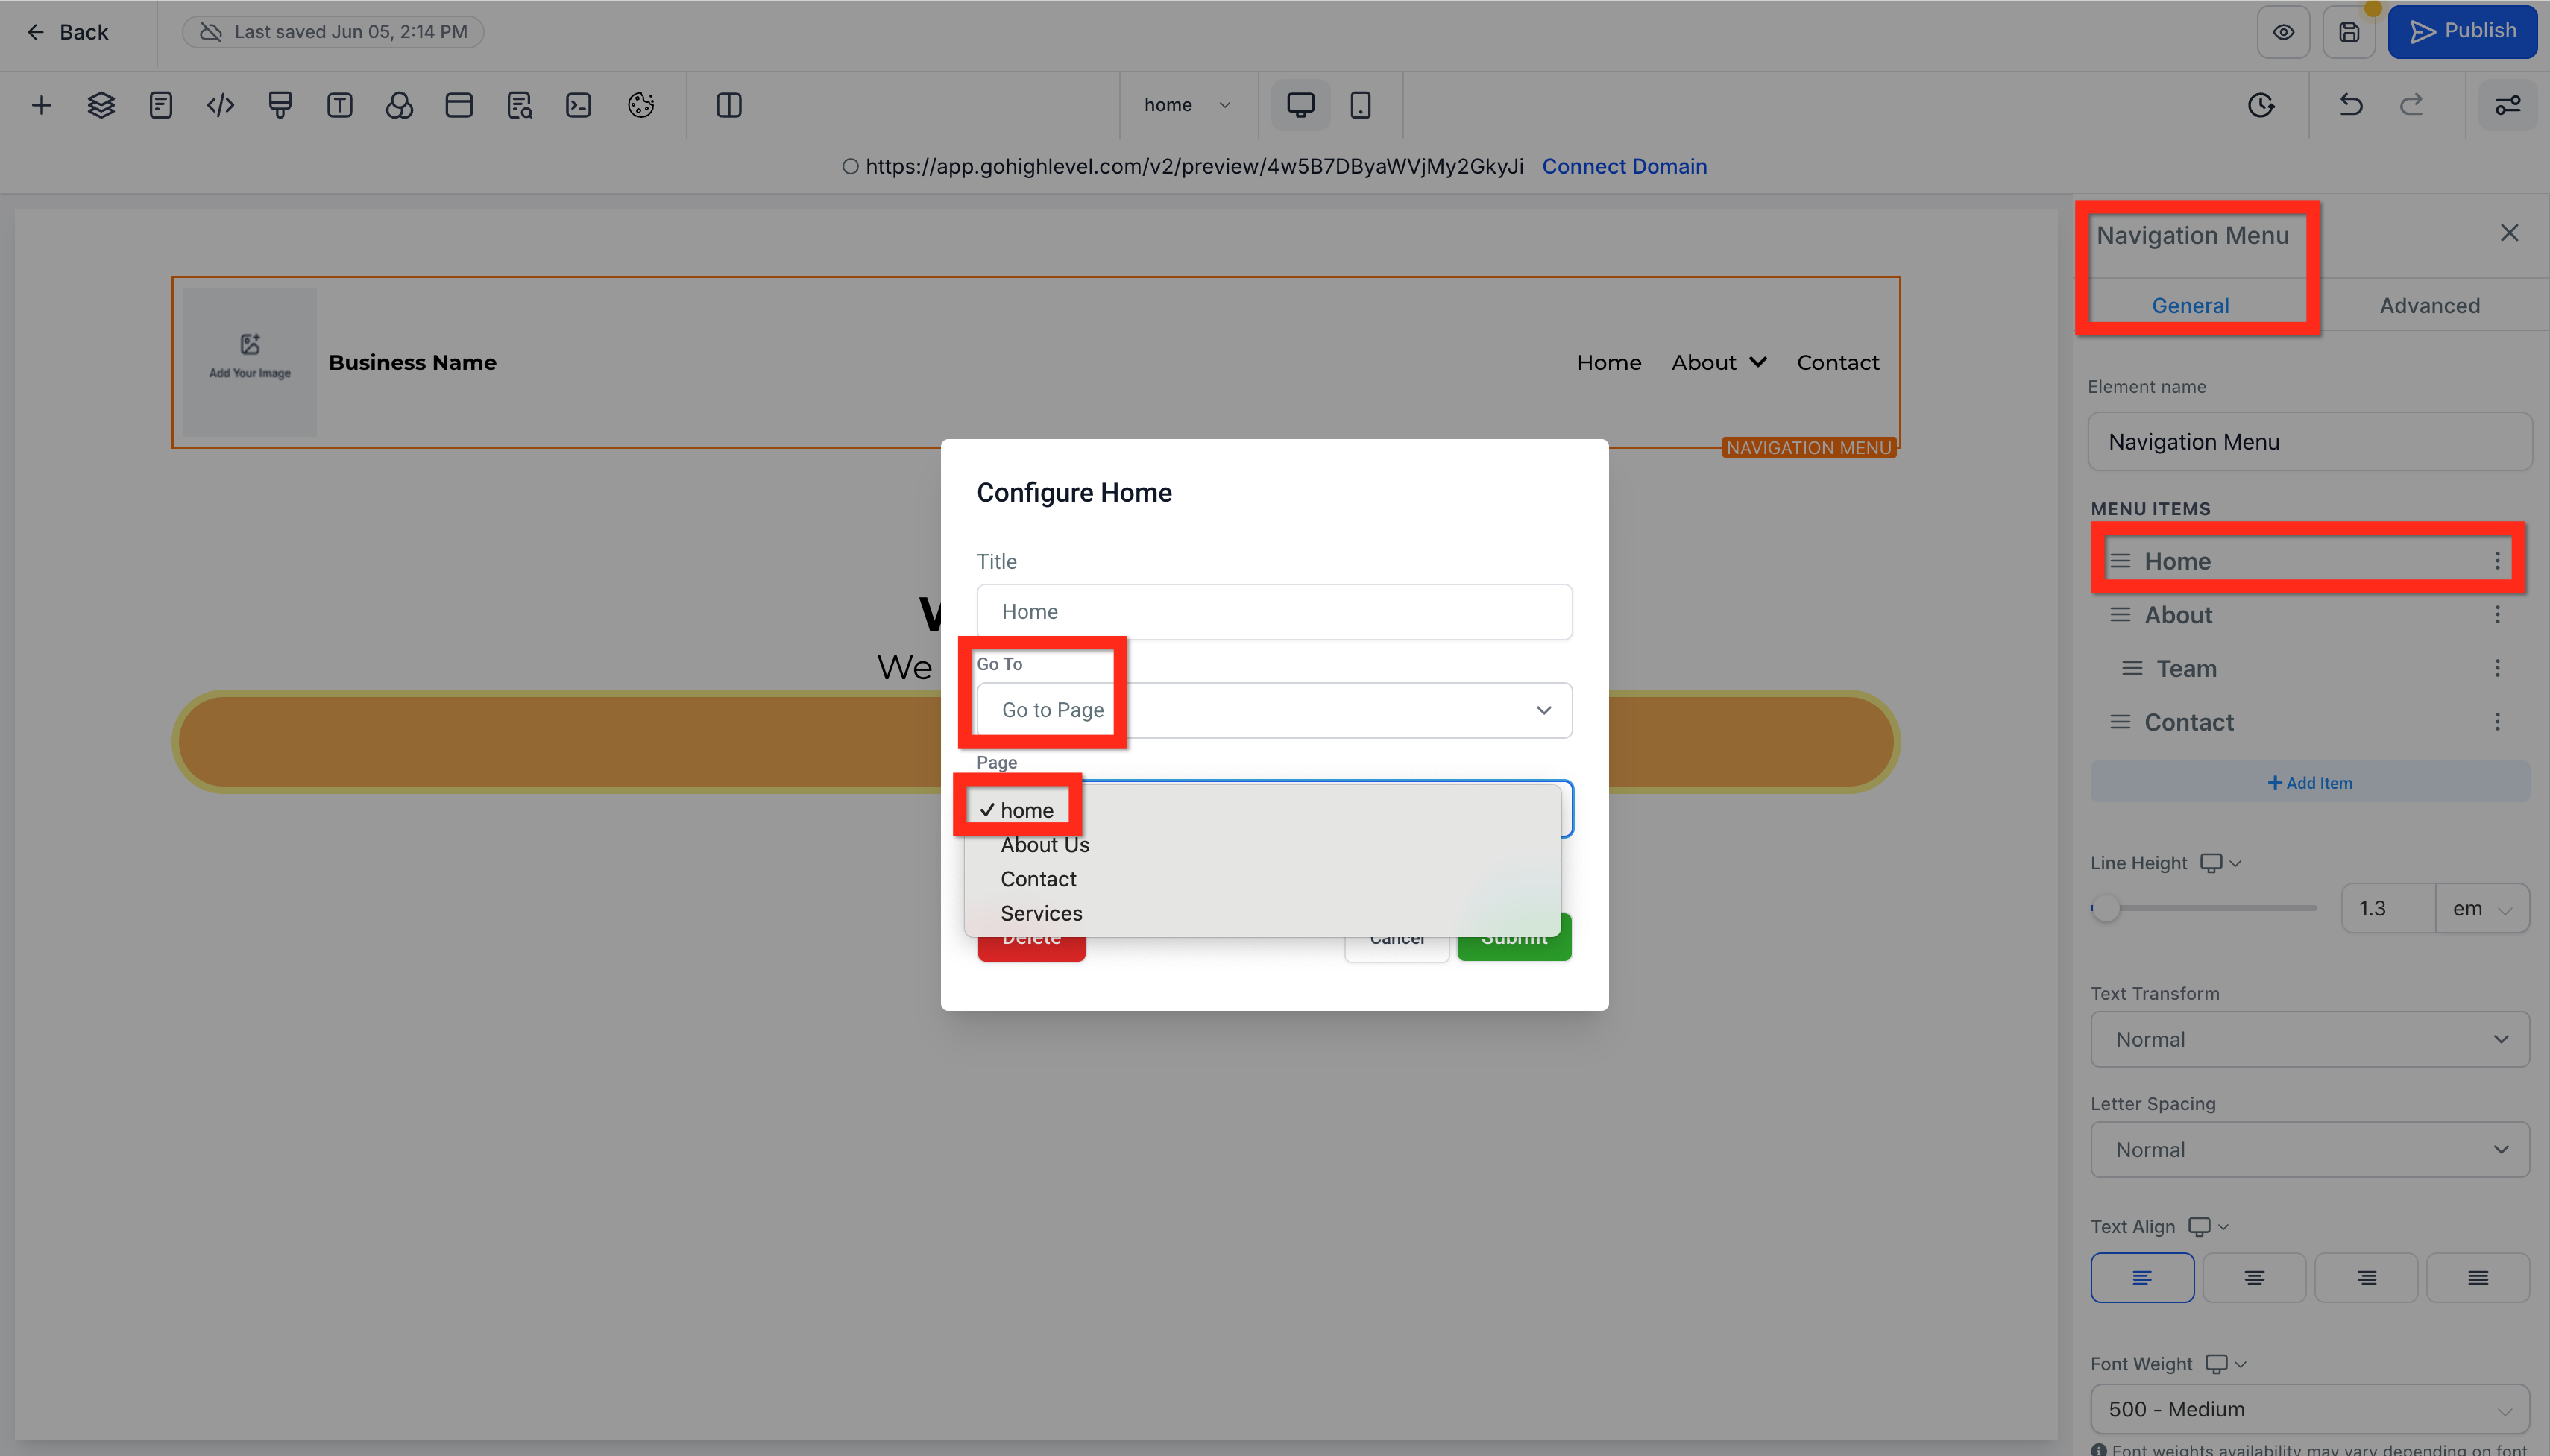
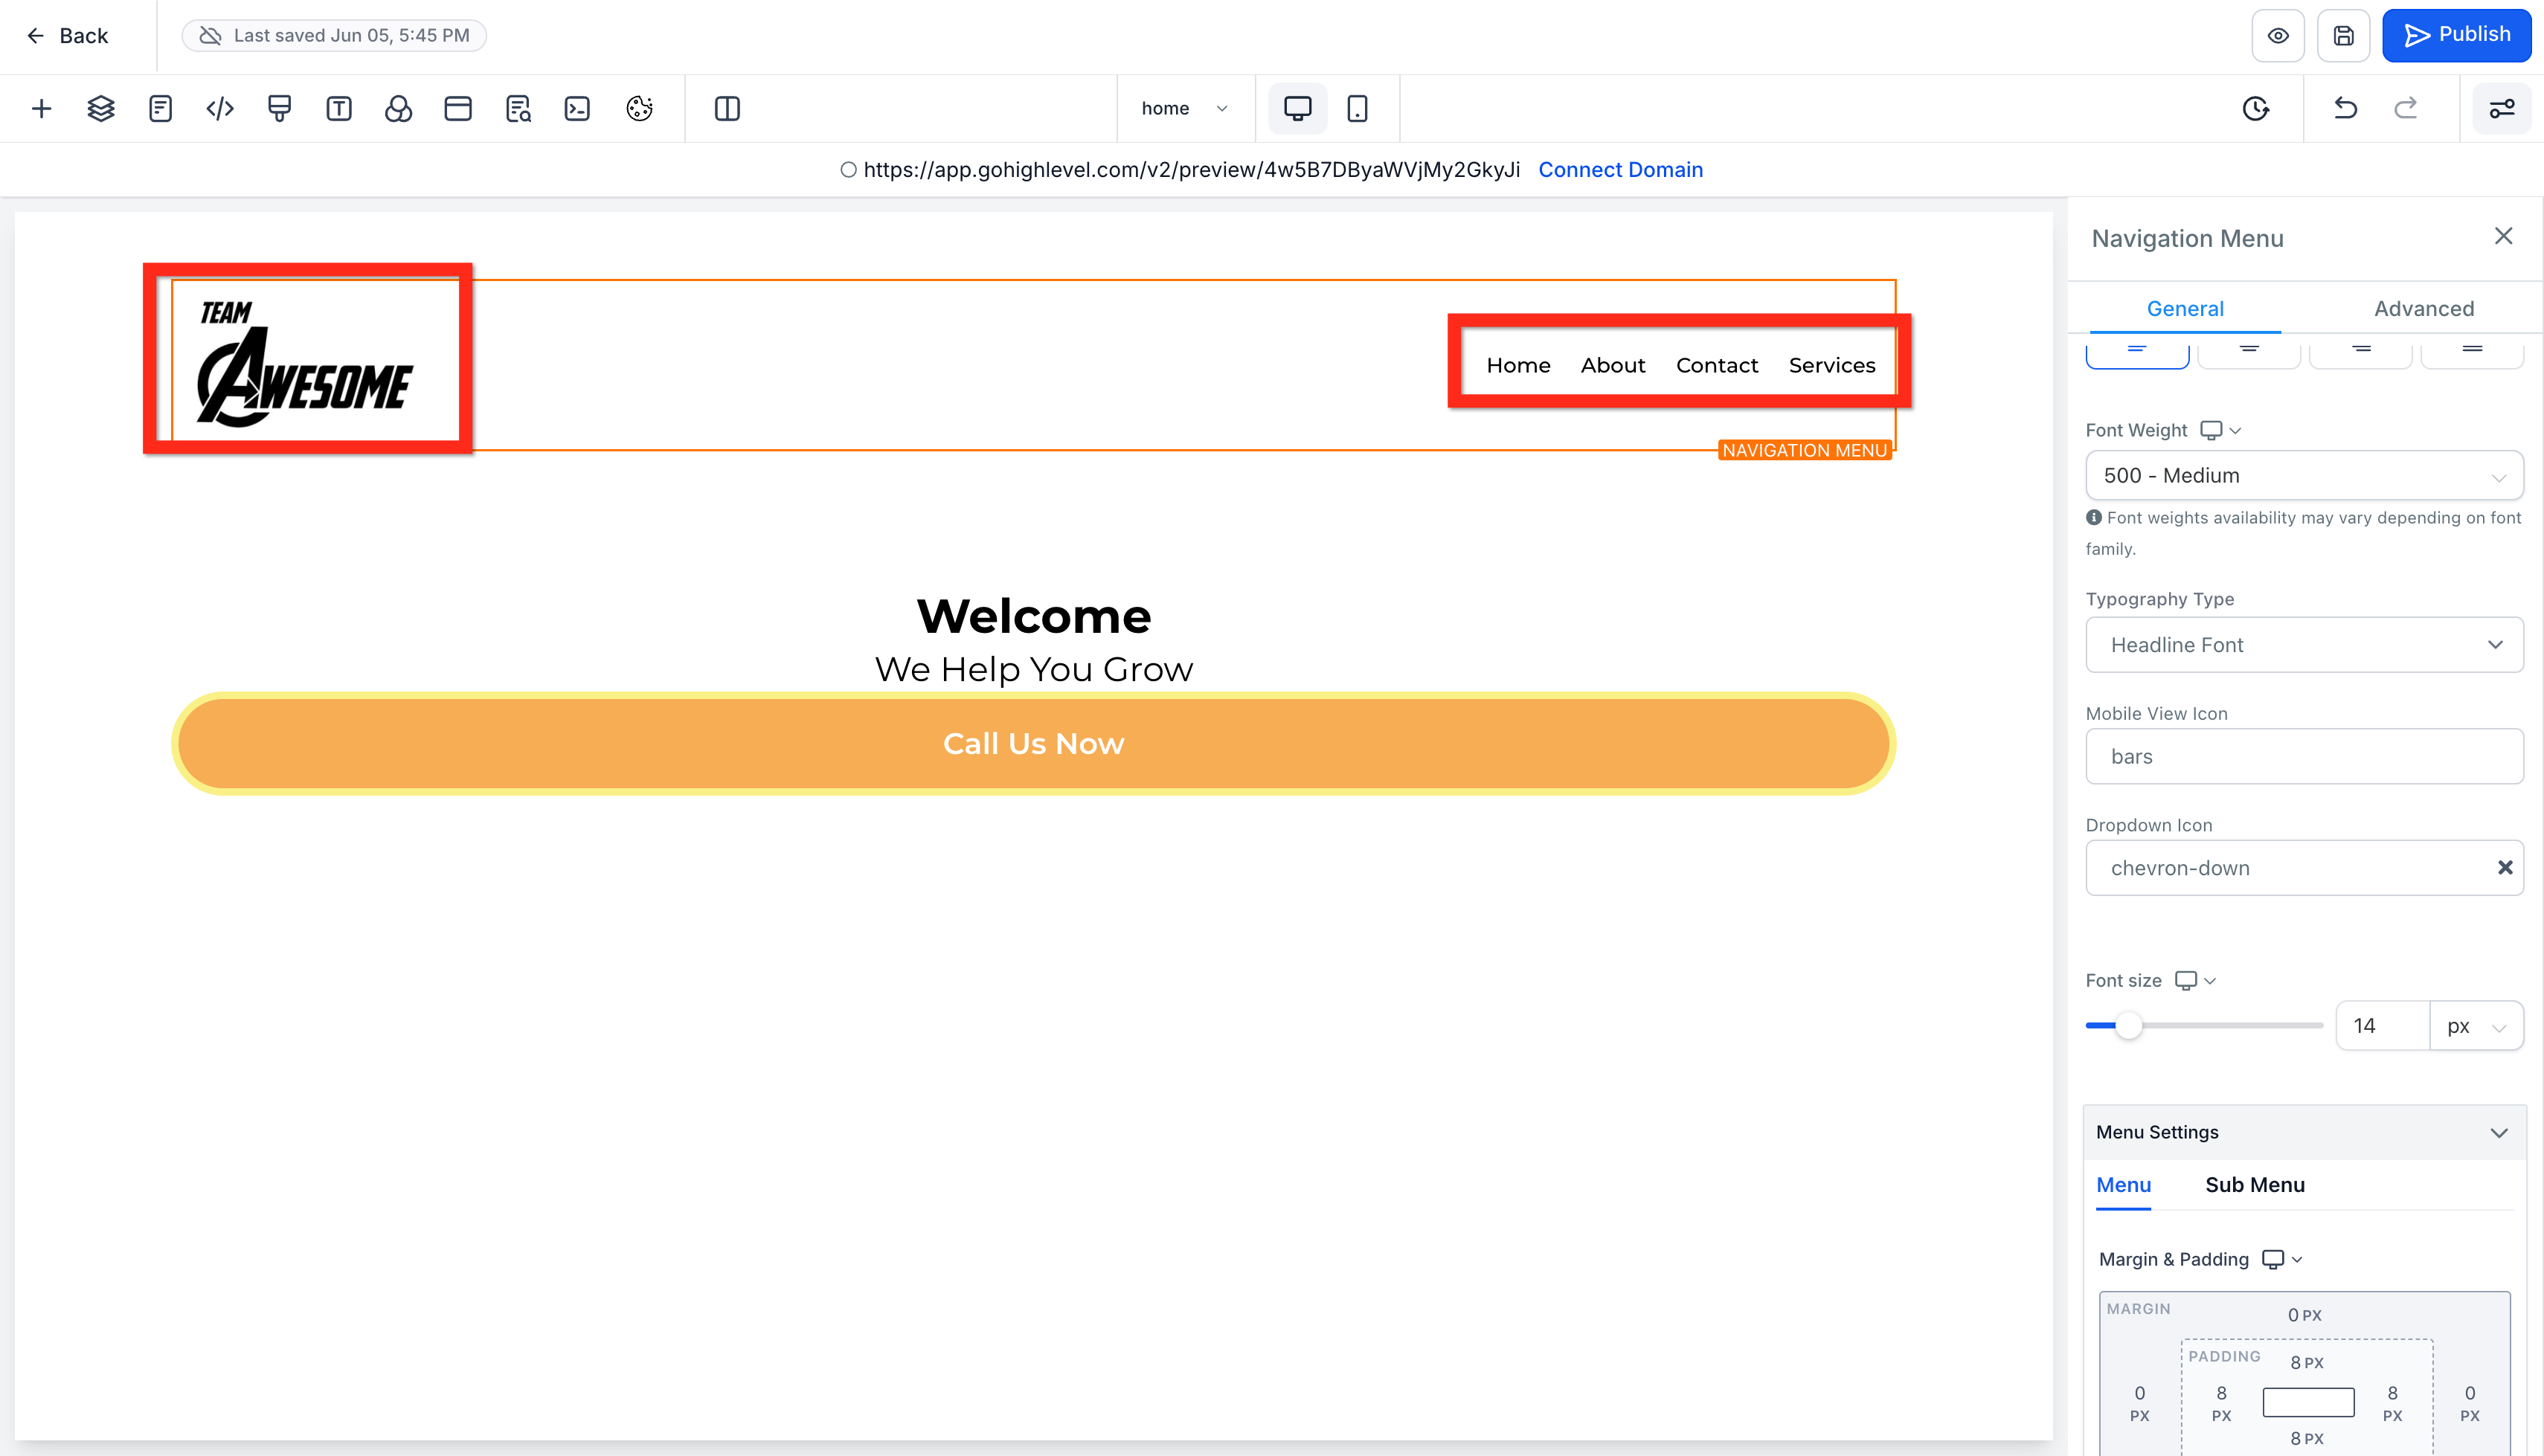
- Edit Navigation Menu Settings: Click to select the navigation menu, then in the right settings bar, make sure each link goes to the right page, add a logo, etc.
- Add a new bottom full width section: At the bottom of the page, under all the other sections, add a new full width section.
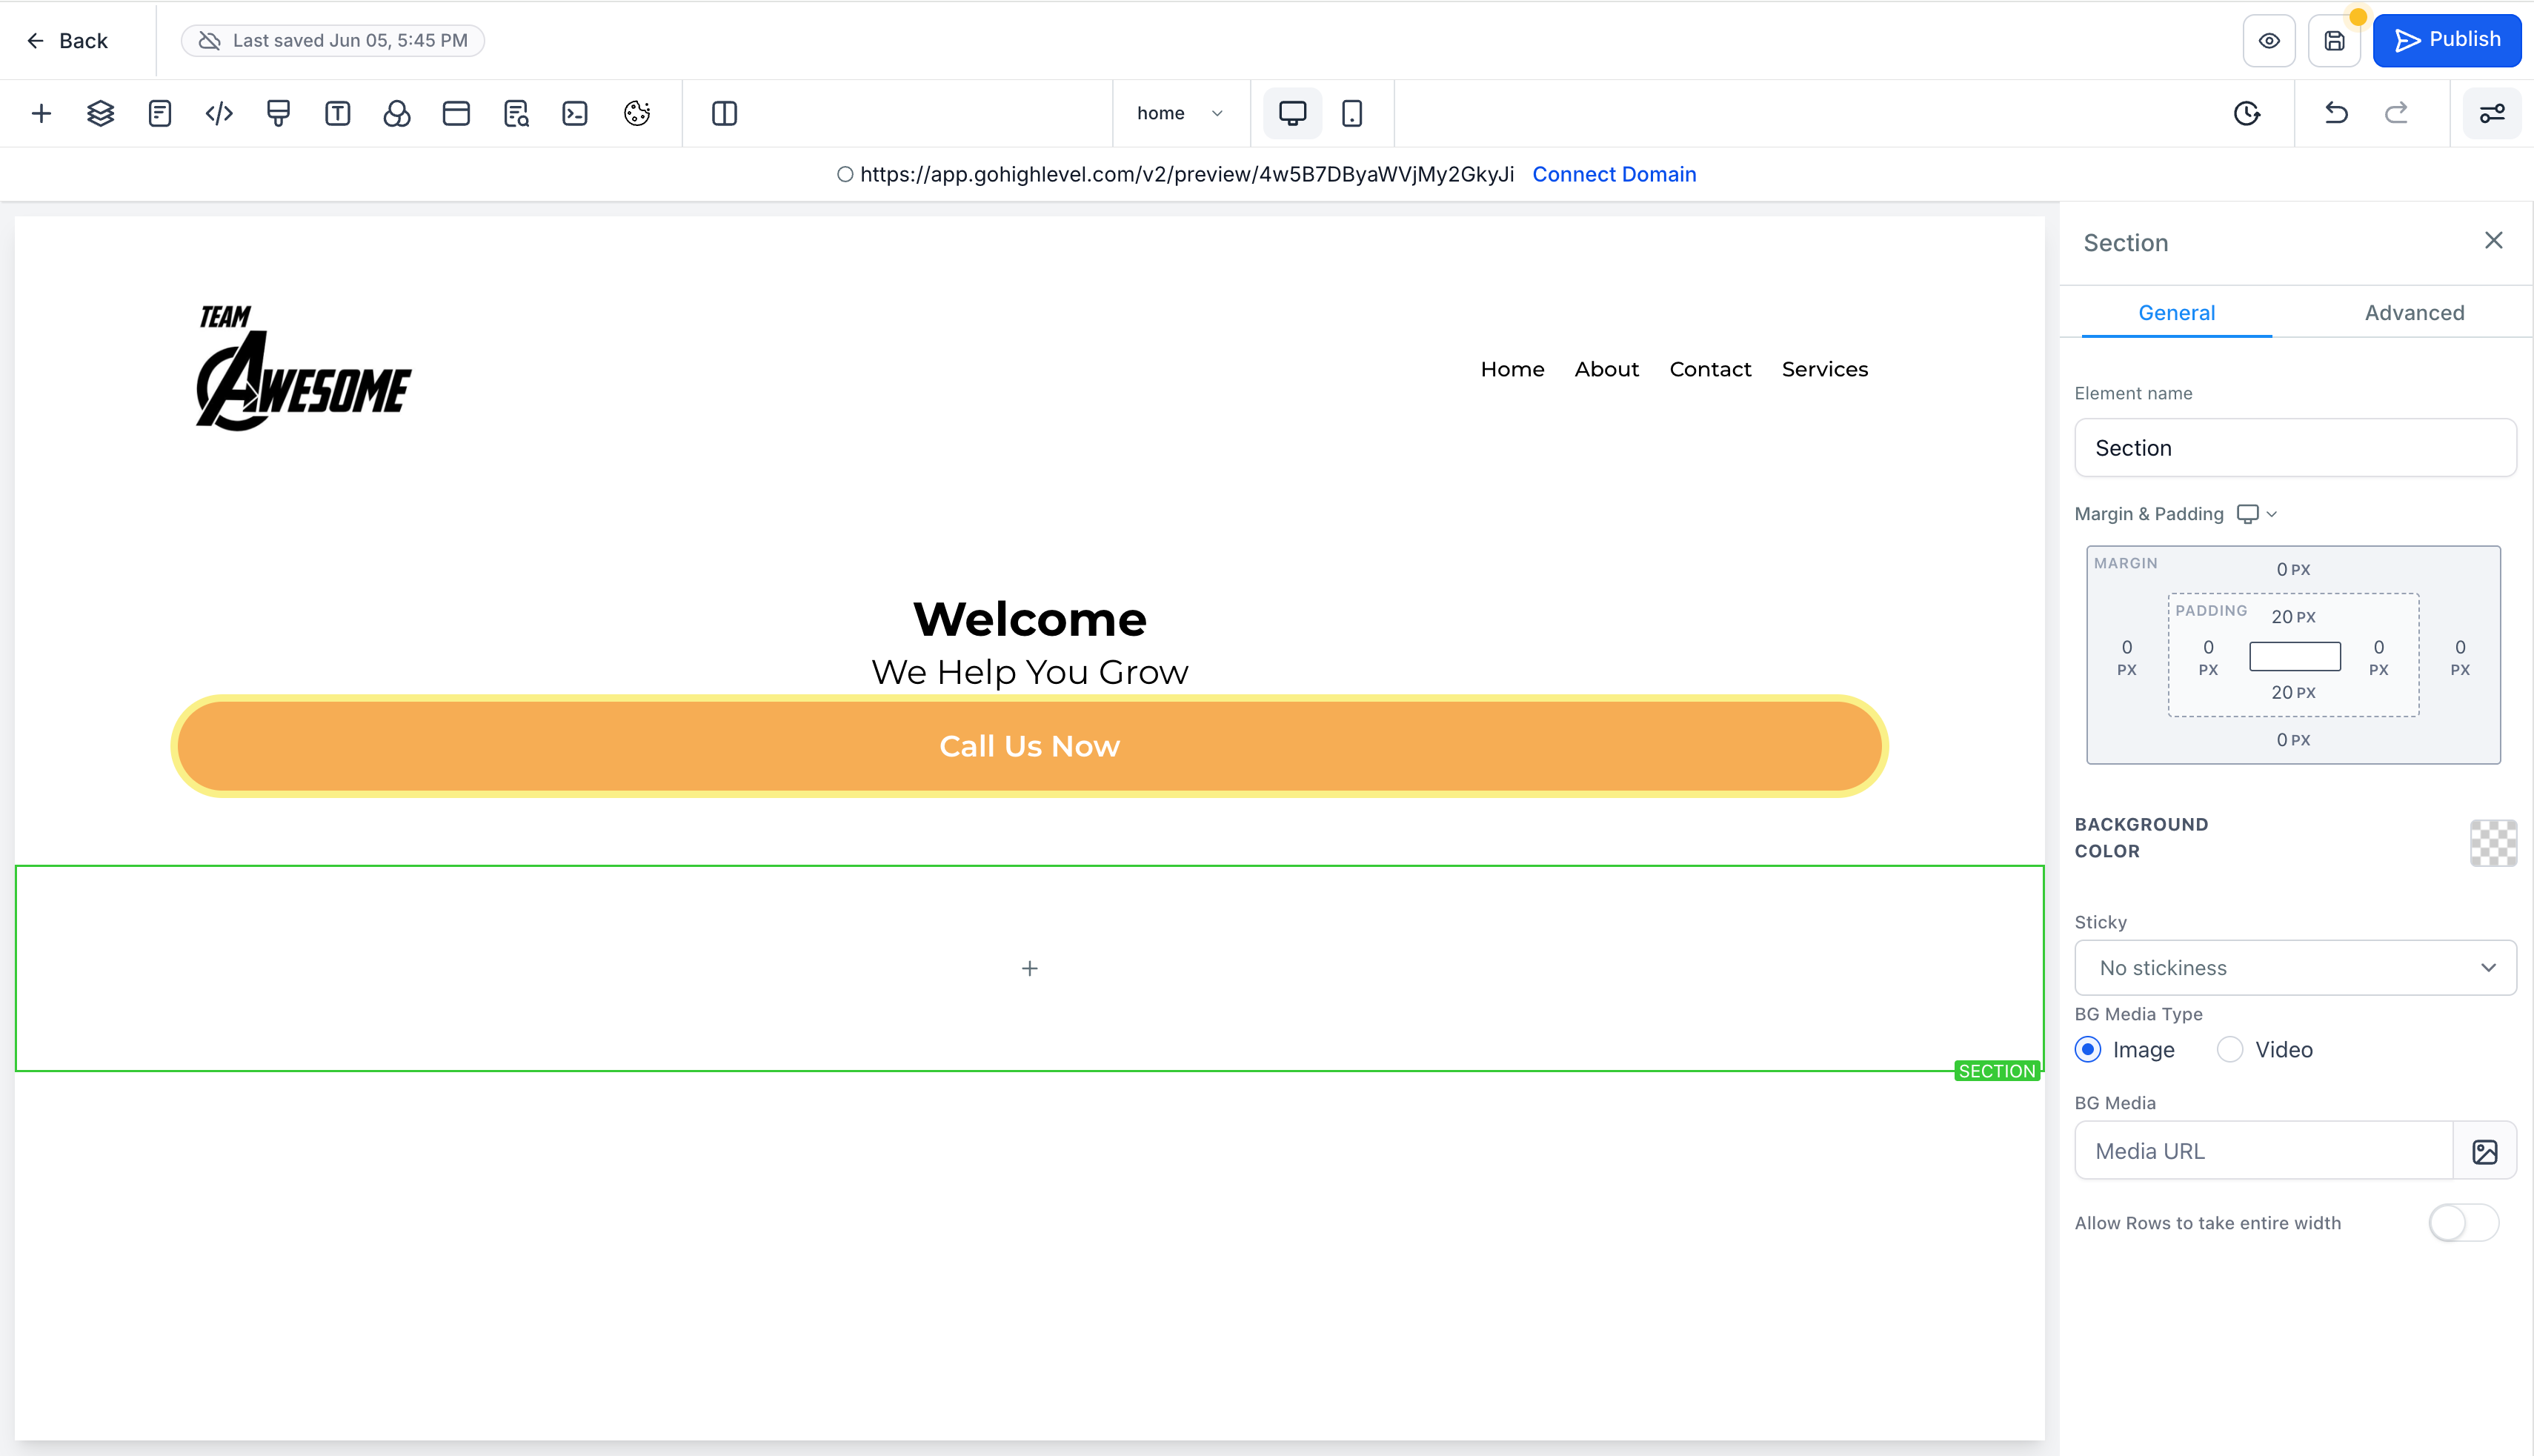
- Add a prebuilt footer: Open Elements > Prebuilt Elements > Footer and drag a footer into the bottom section.
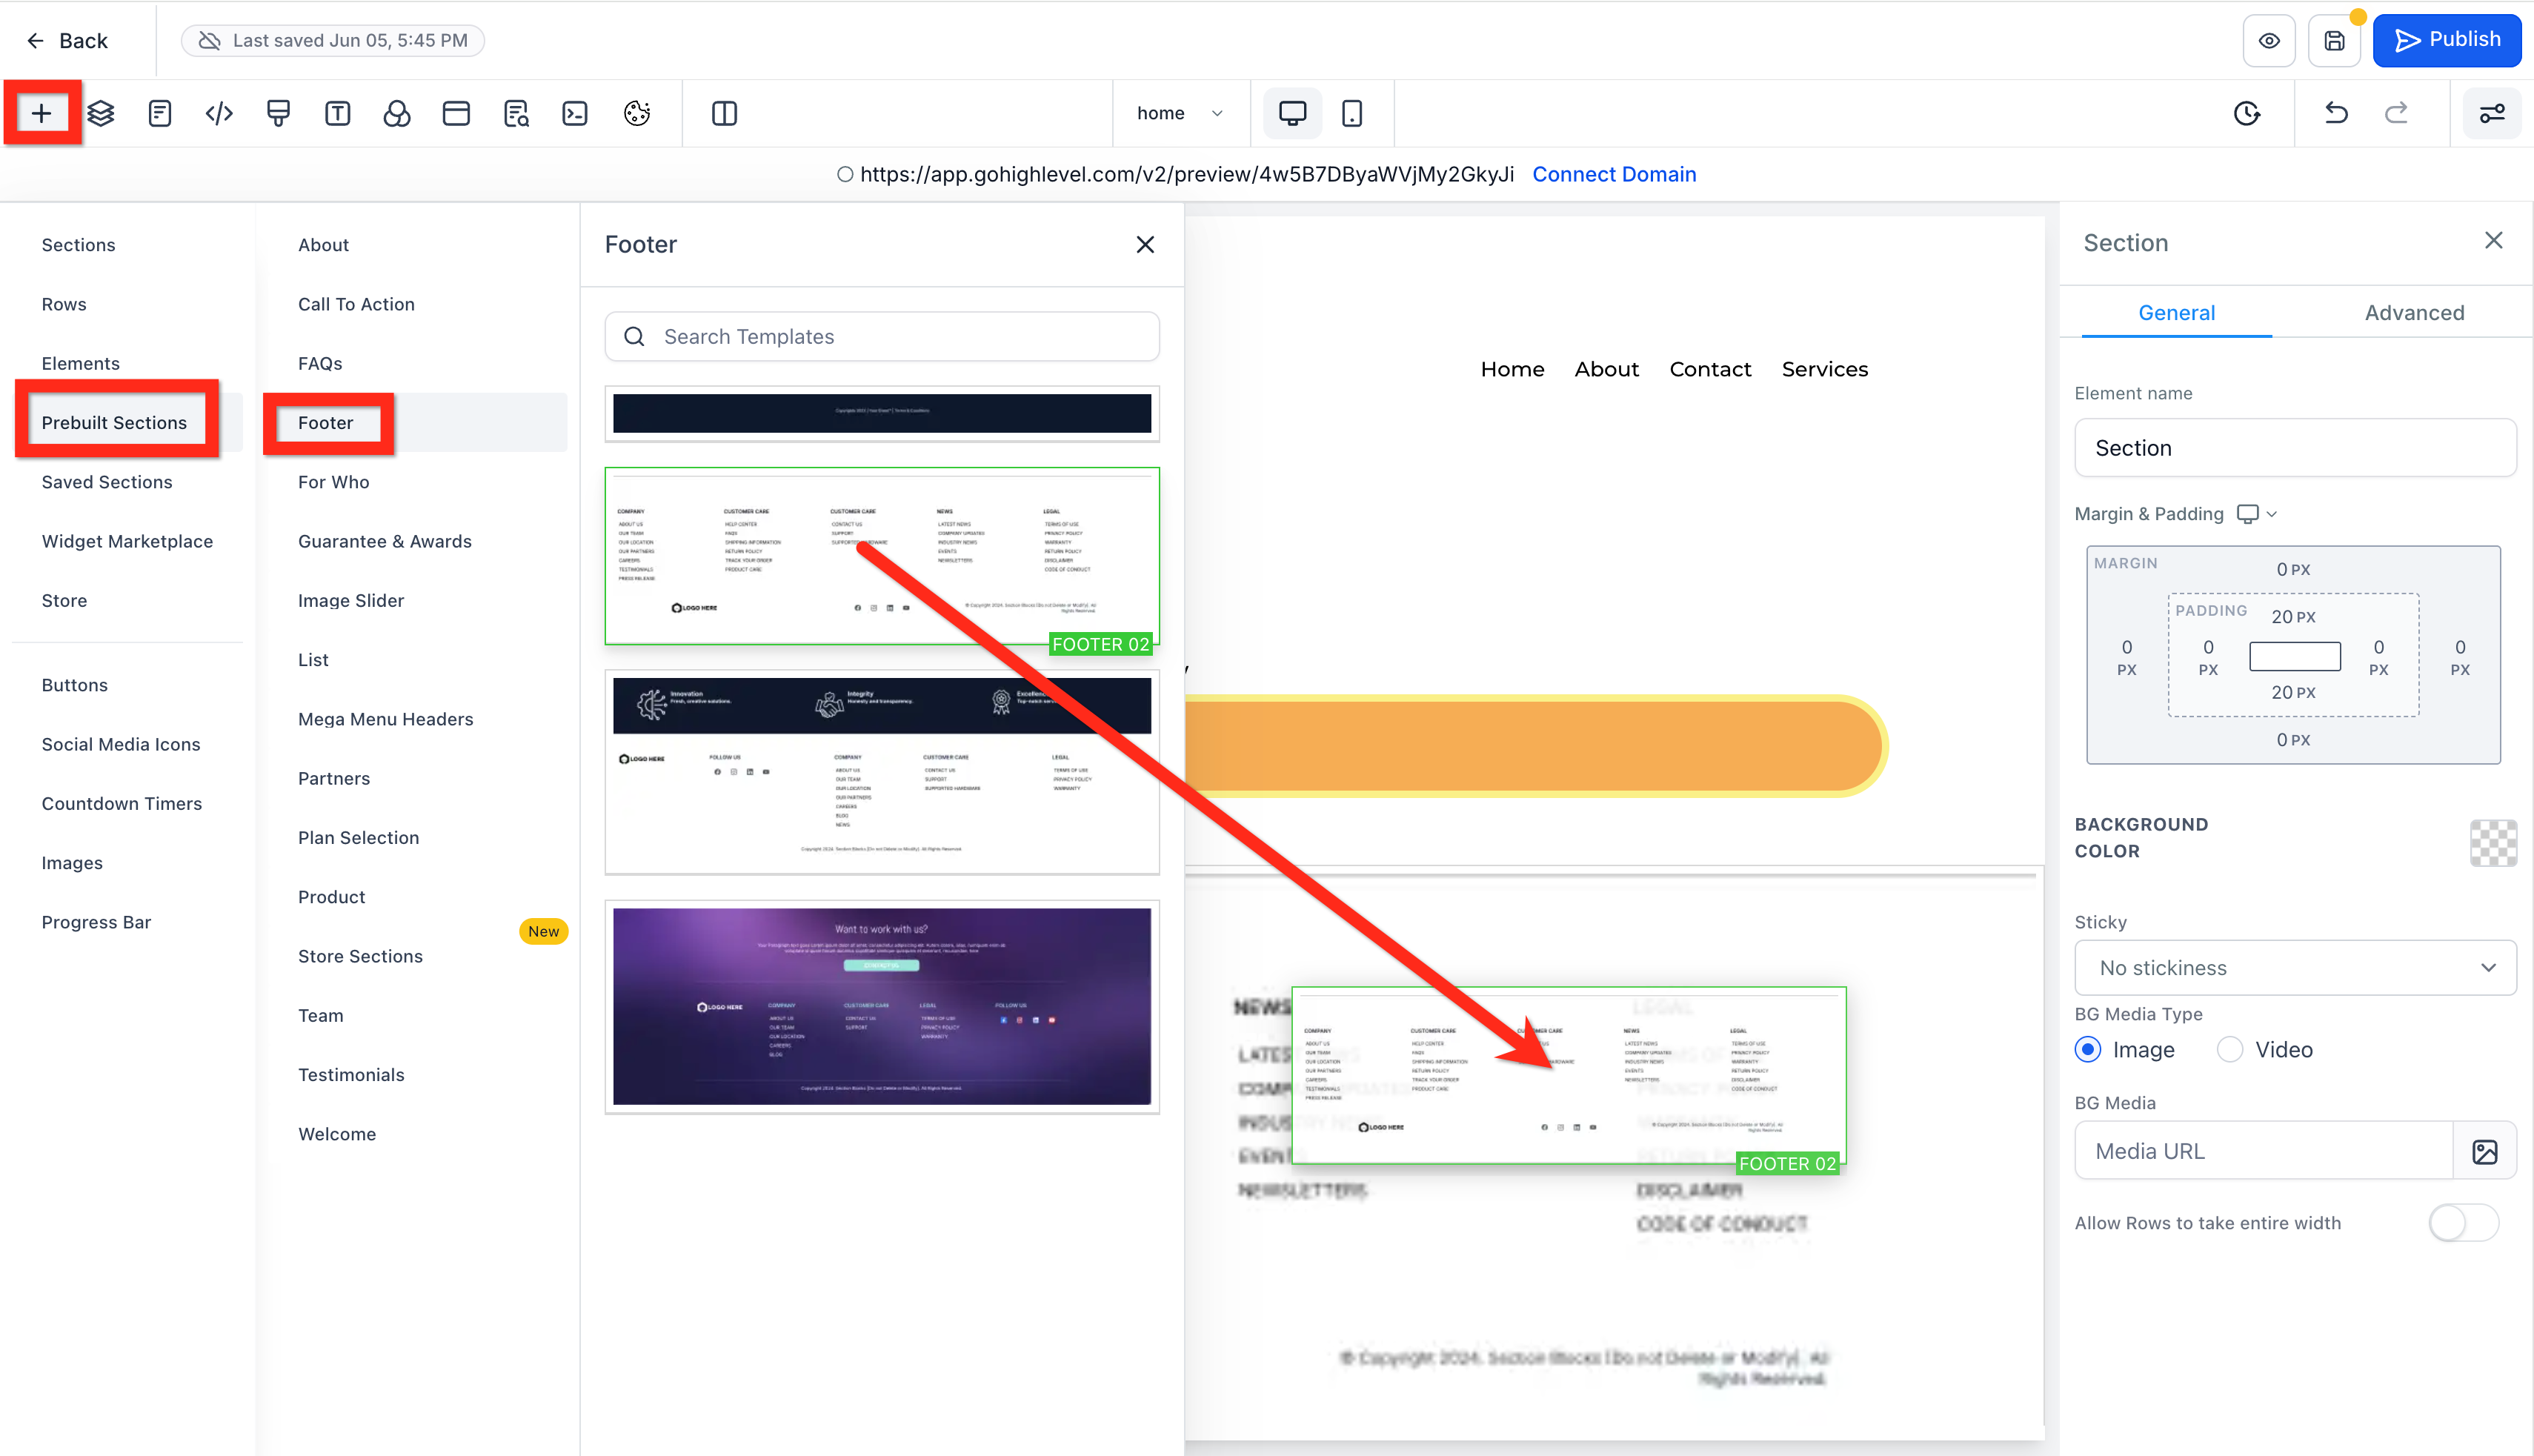
- Edit Navigation Menu and Footer: Select each element and delete it or edit its settings in the Right Panel. When you're done, click Save and Back.
Previewing, Settings & Publishing
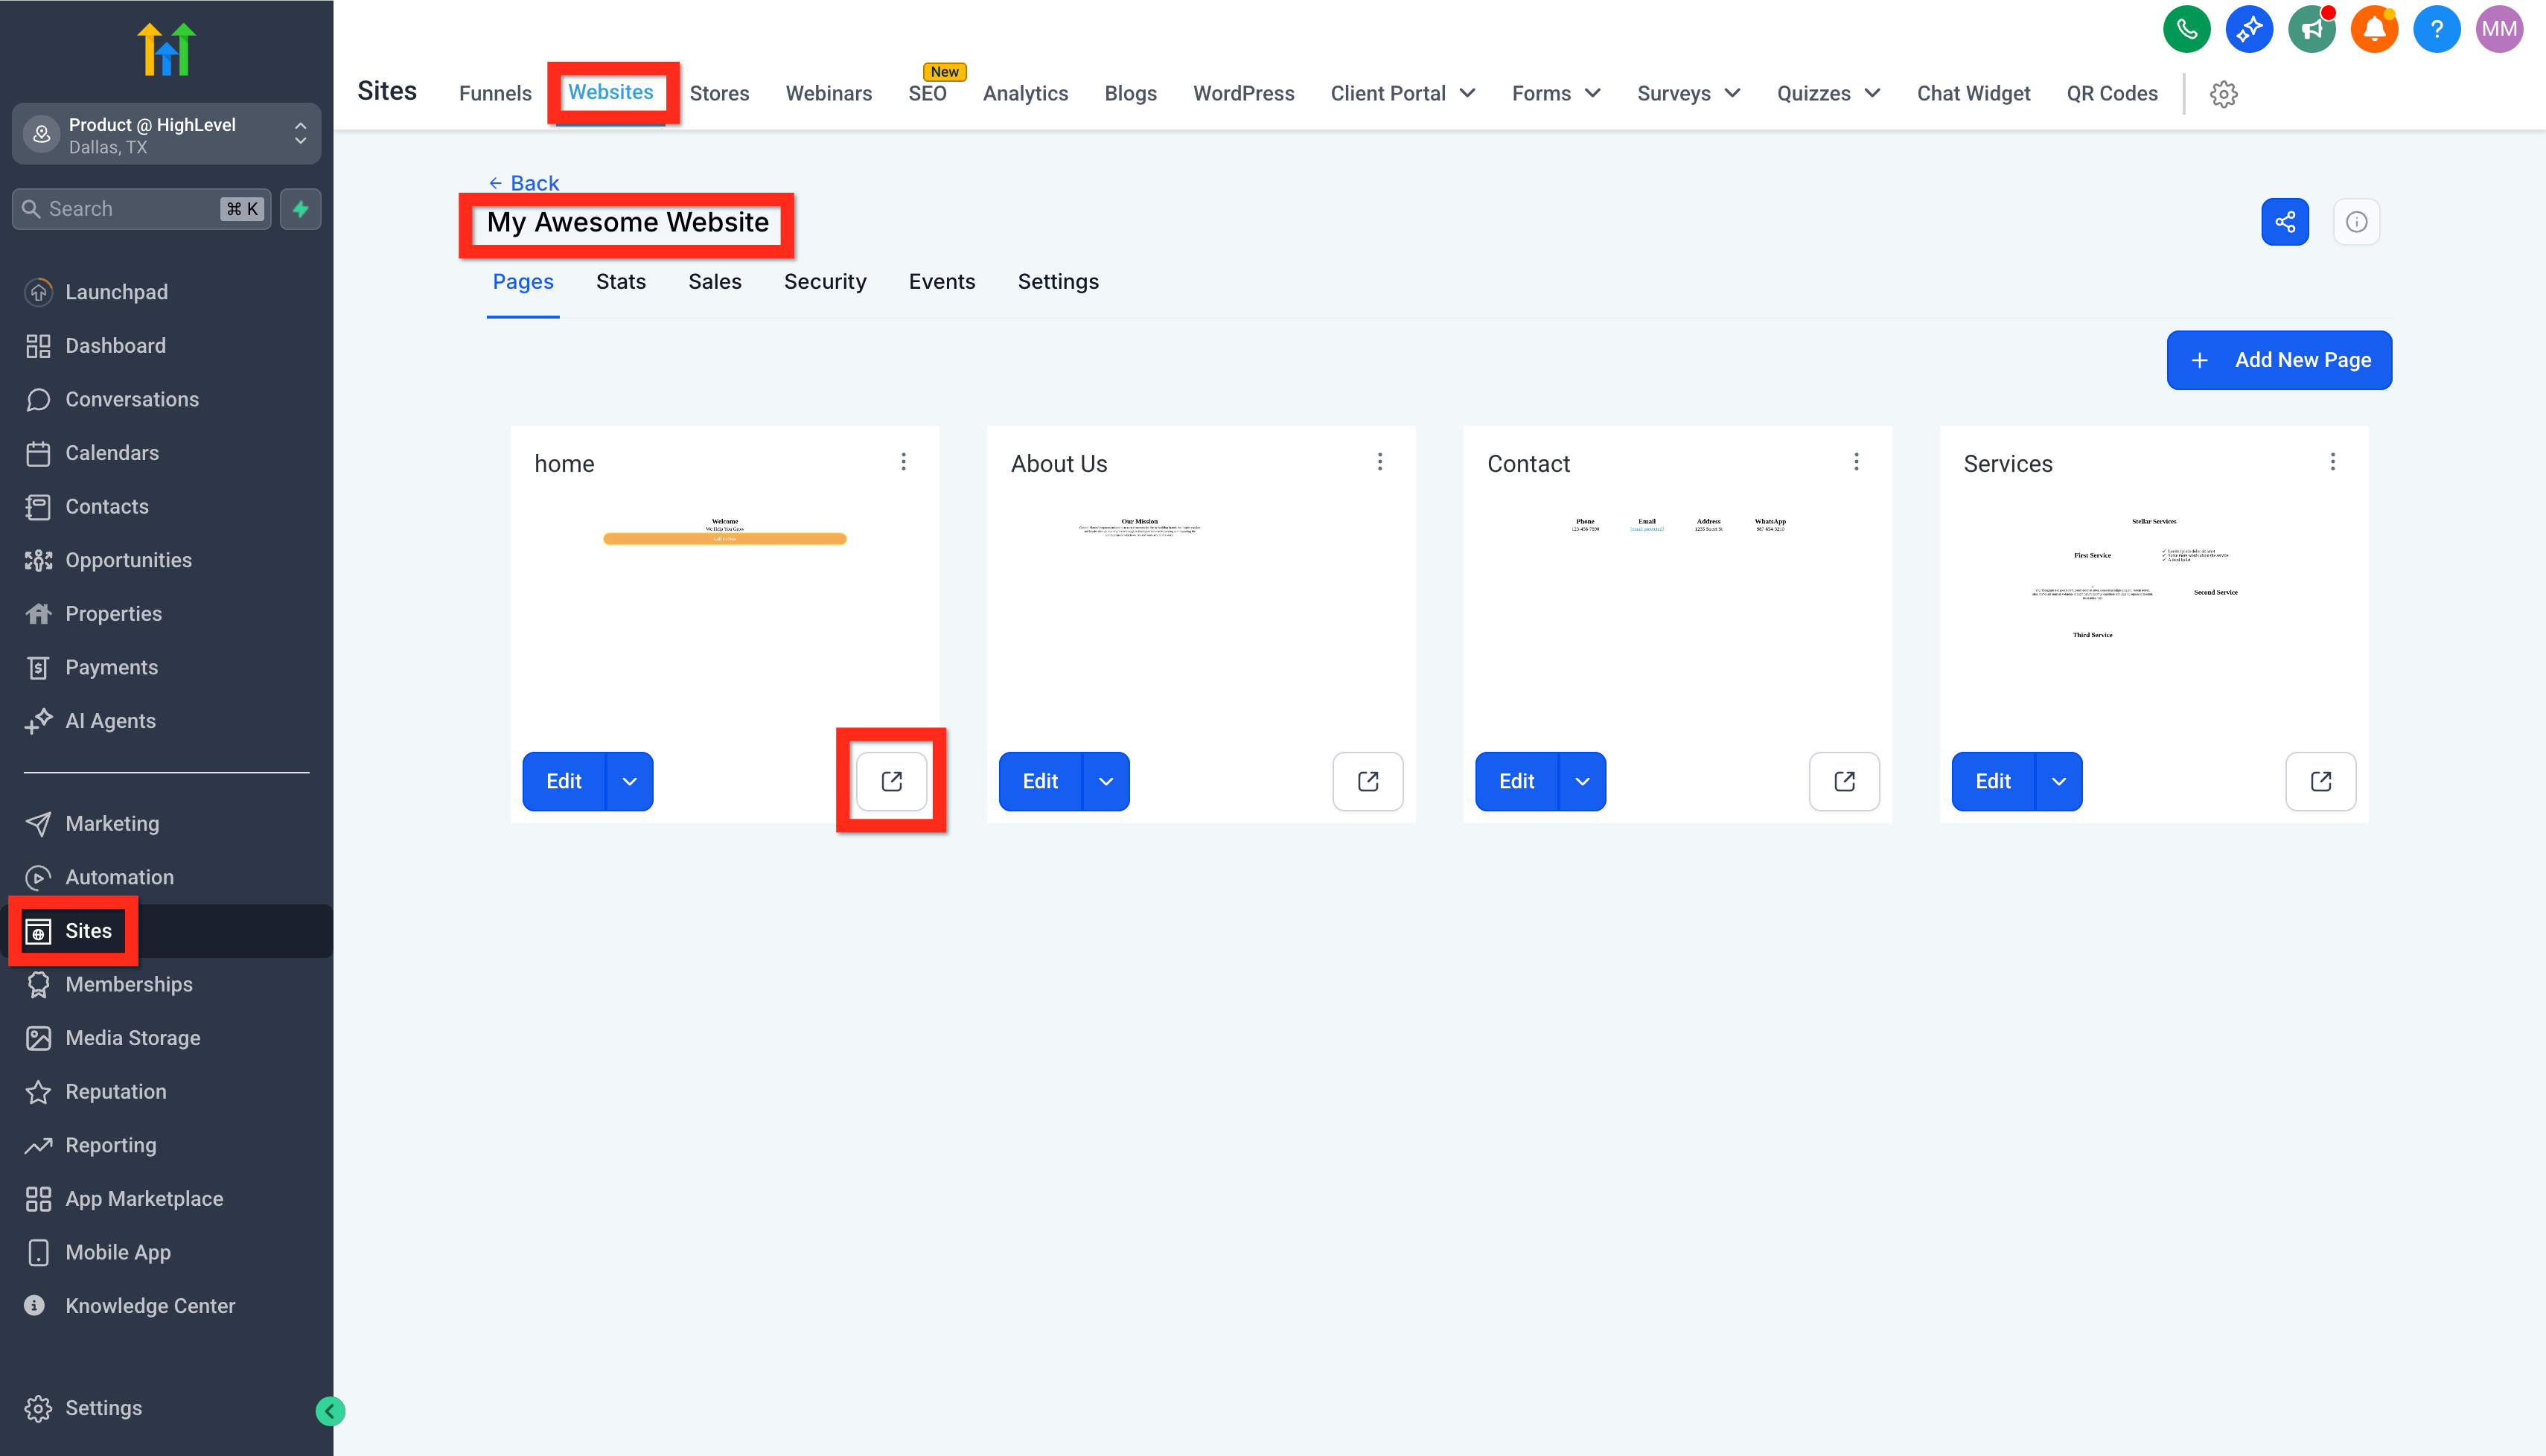
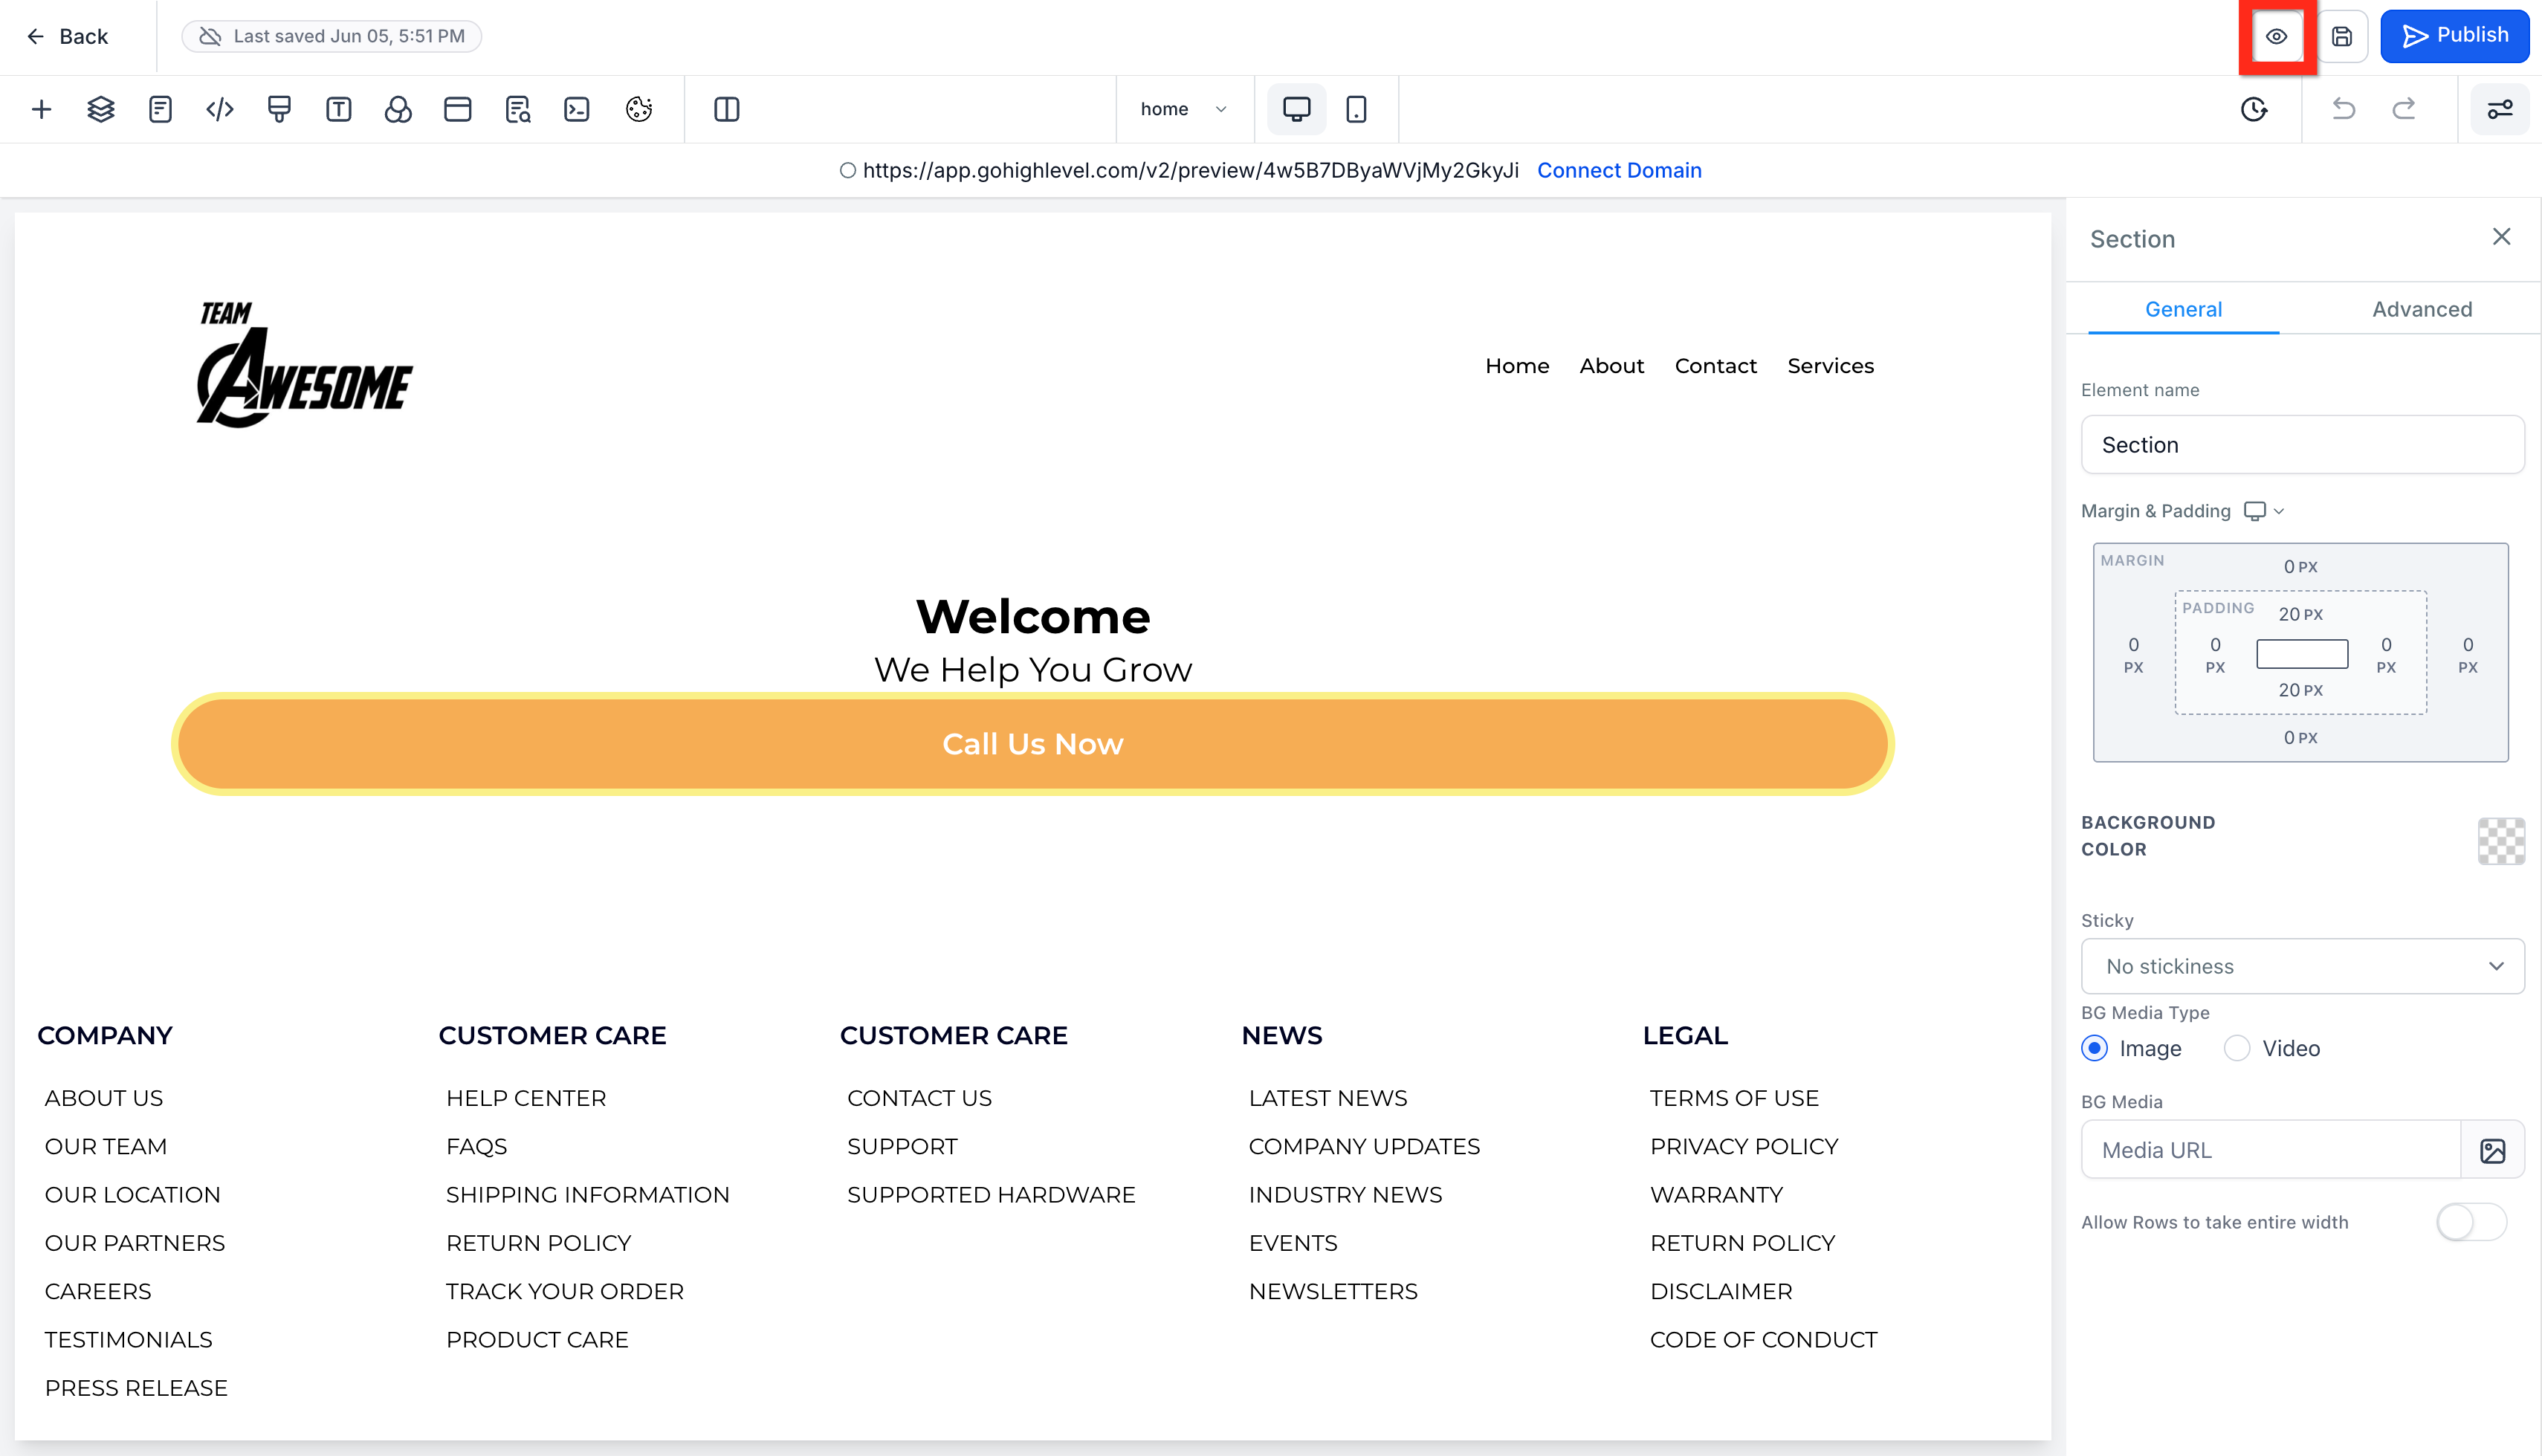
- Navigate to Sites > Websites > Site Details and click the preview page button (box with arrow icon). OR if you are in the page builder, click the preview button (eyeball icon).
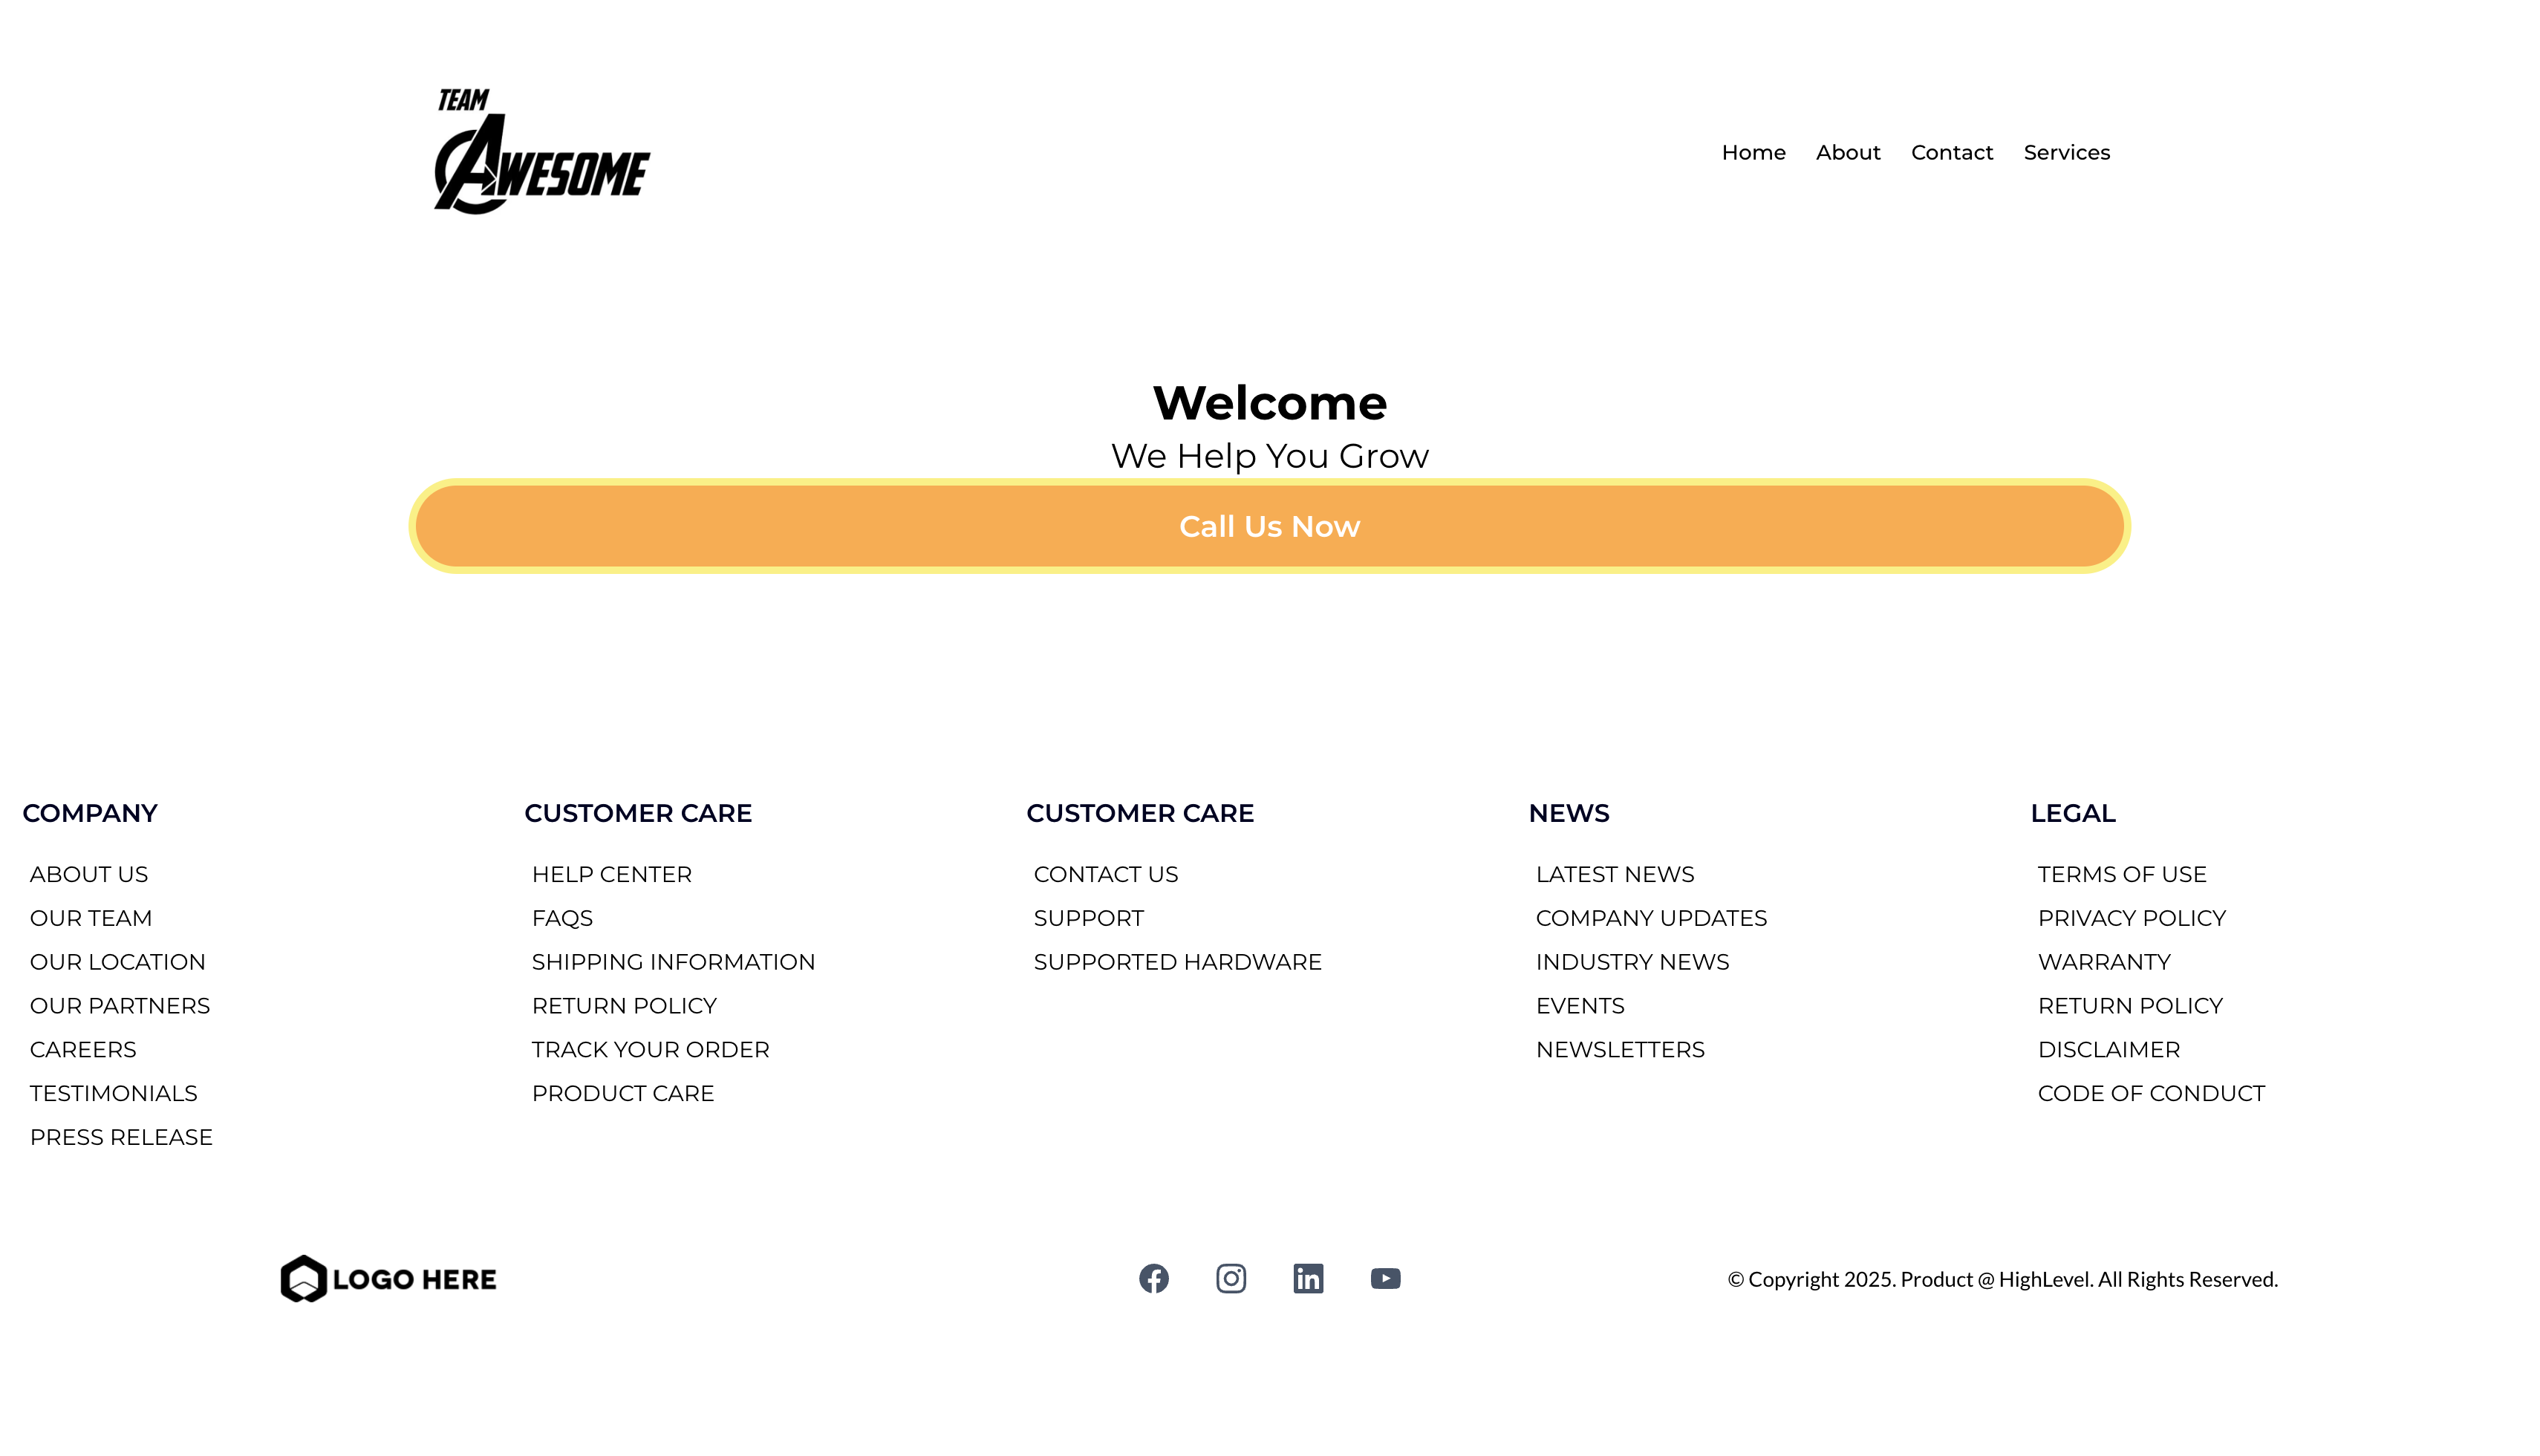
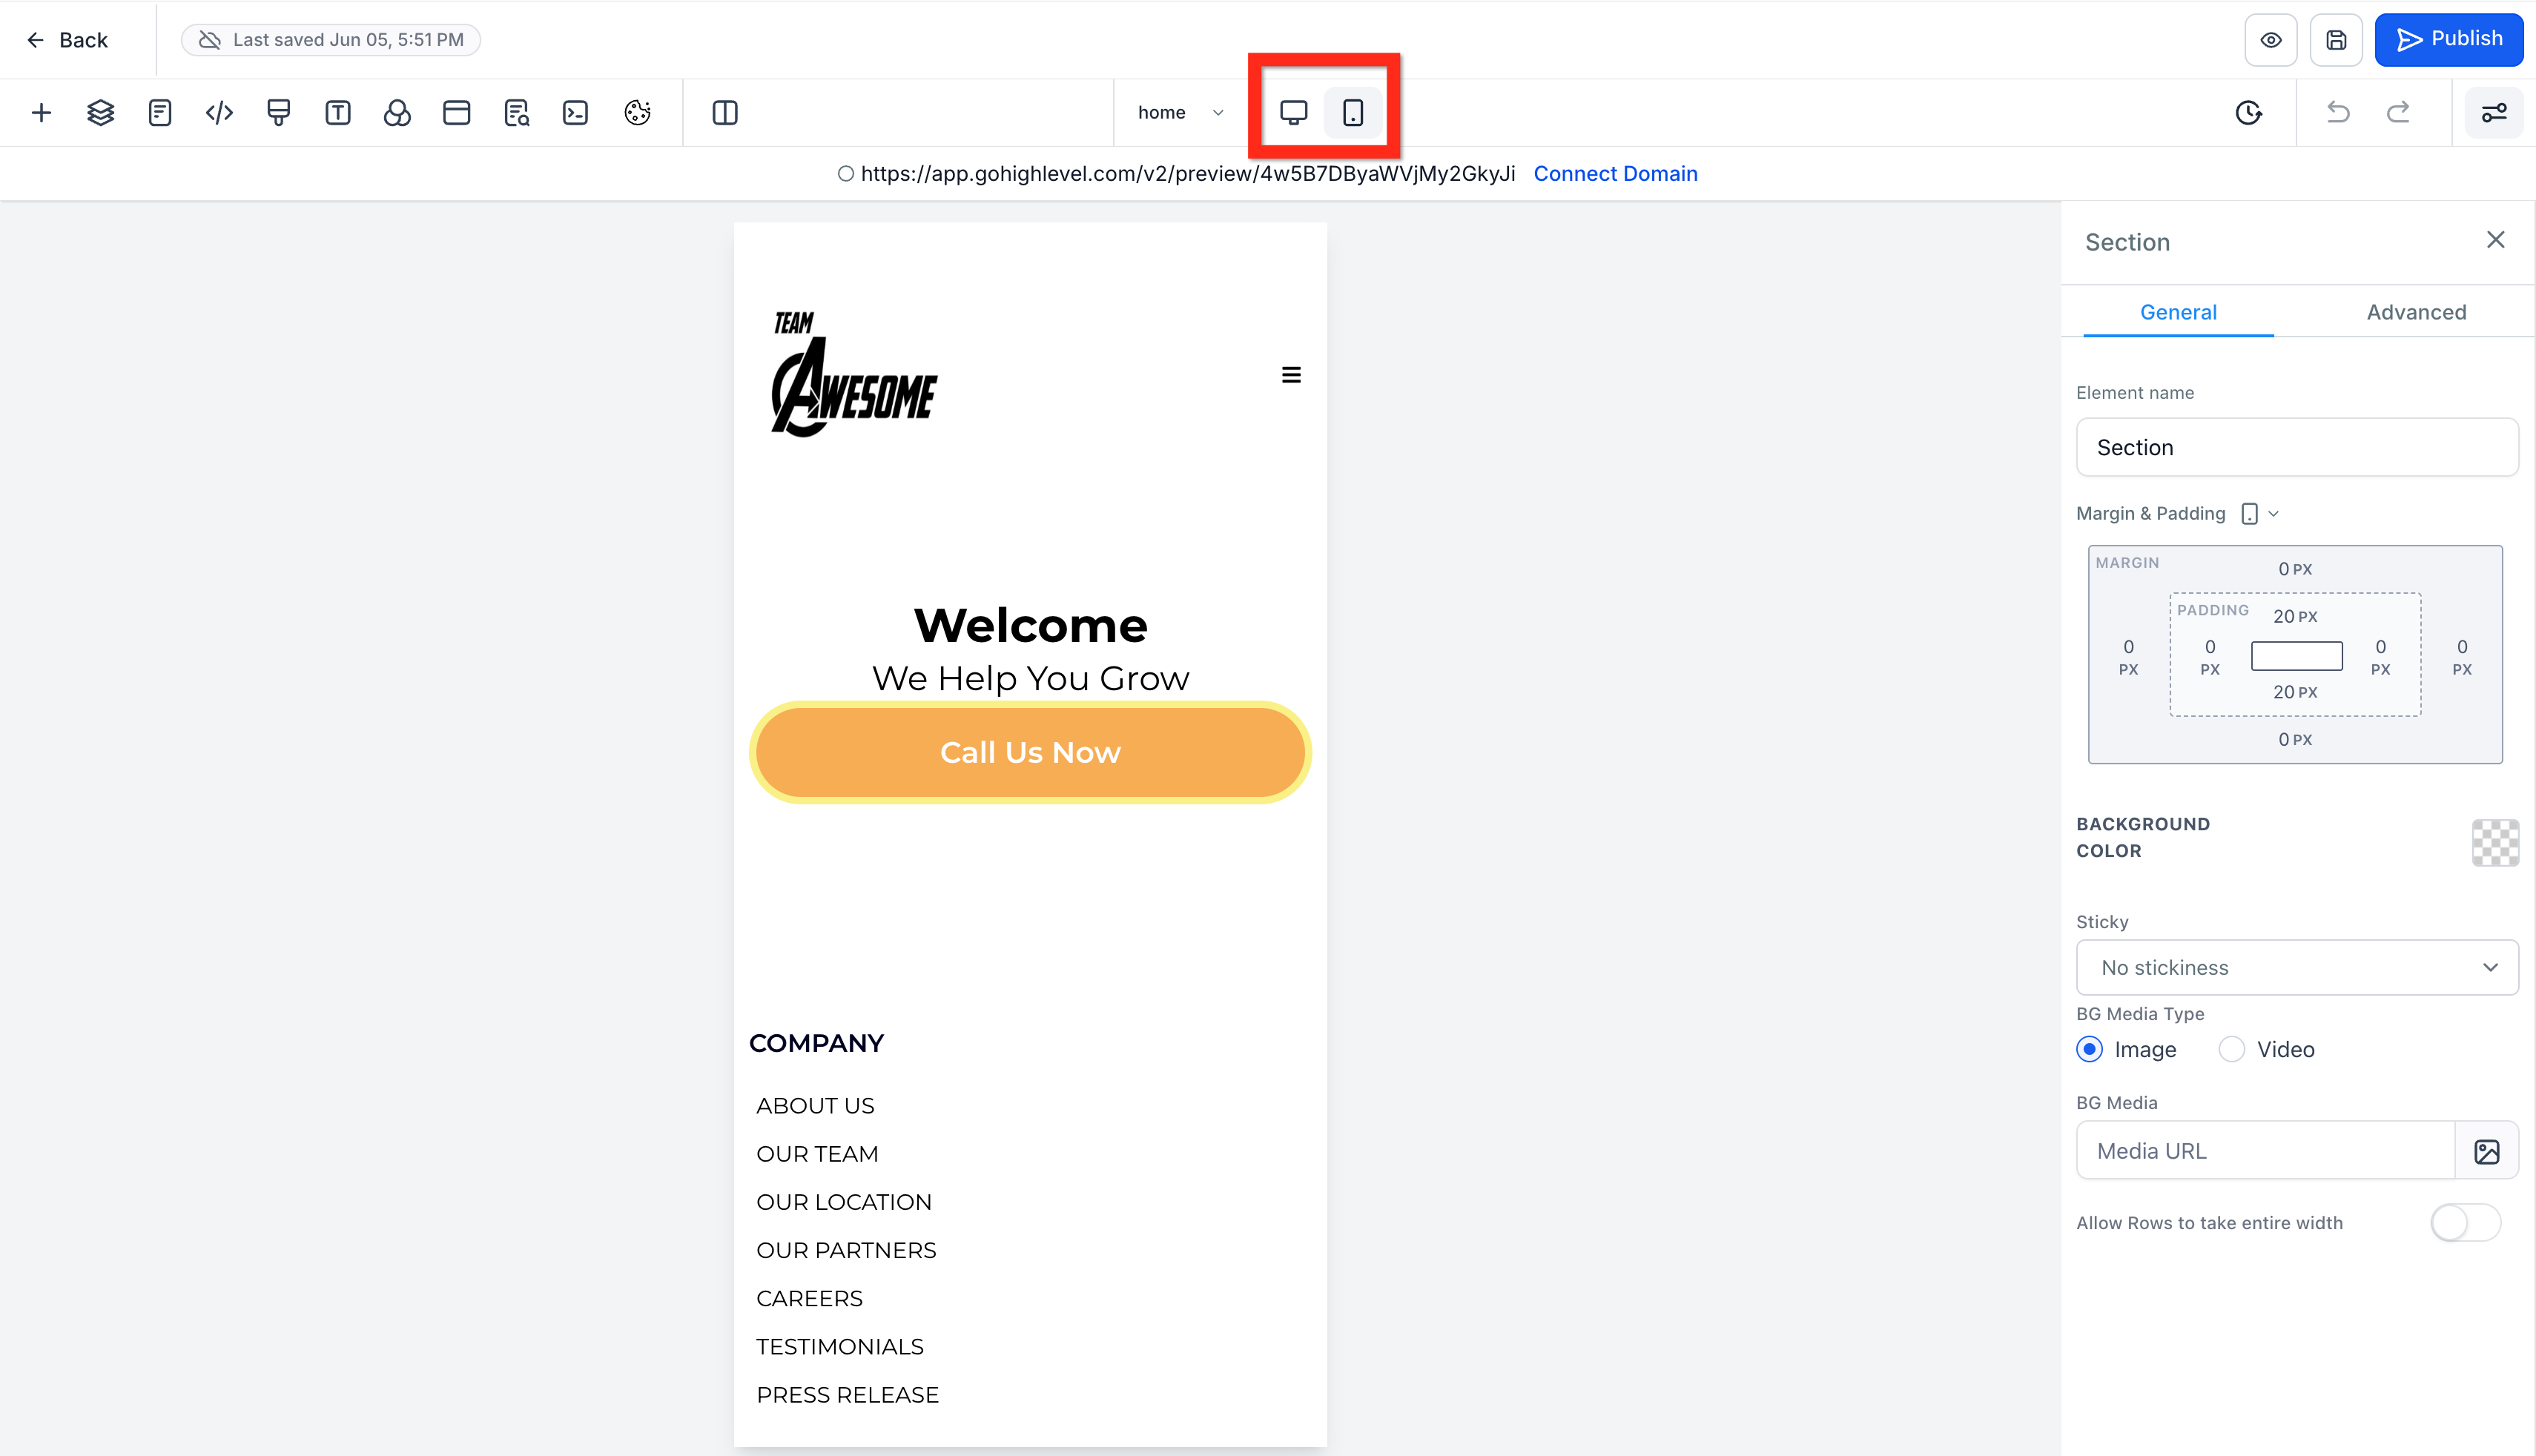
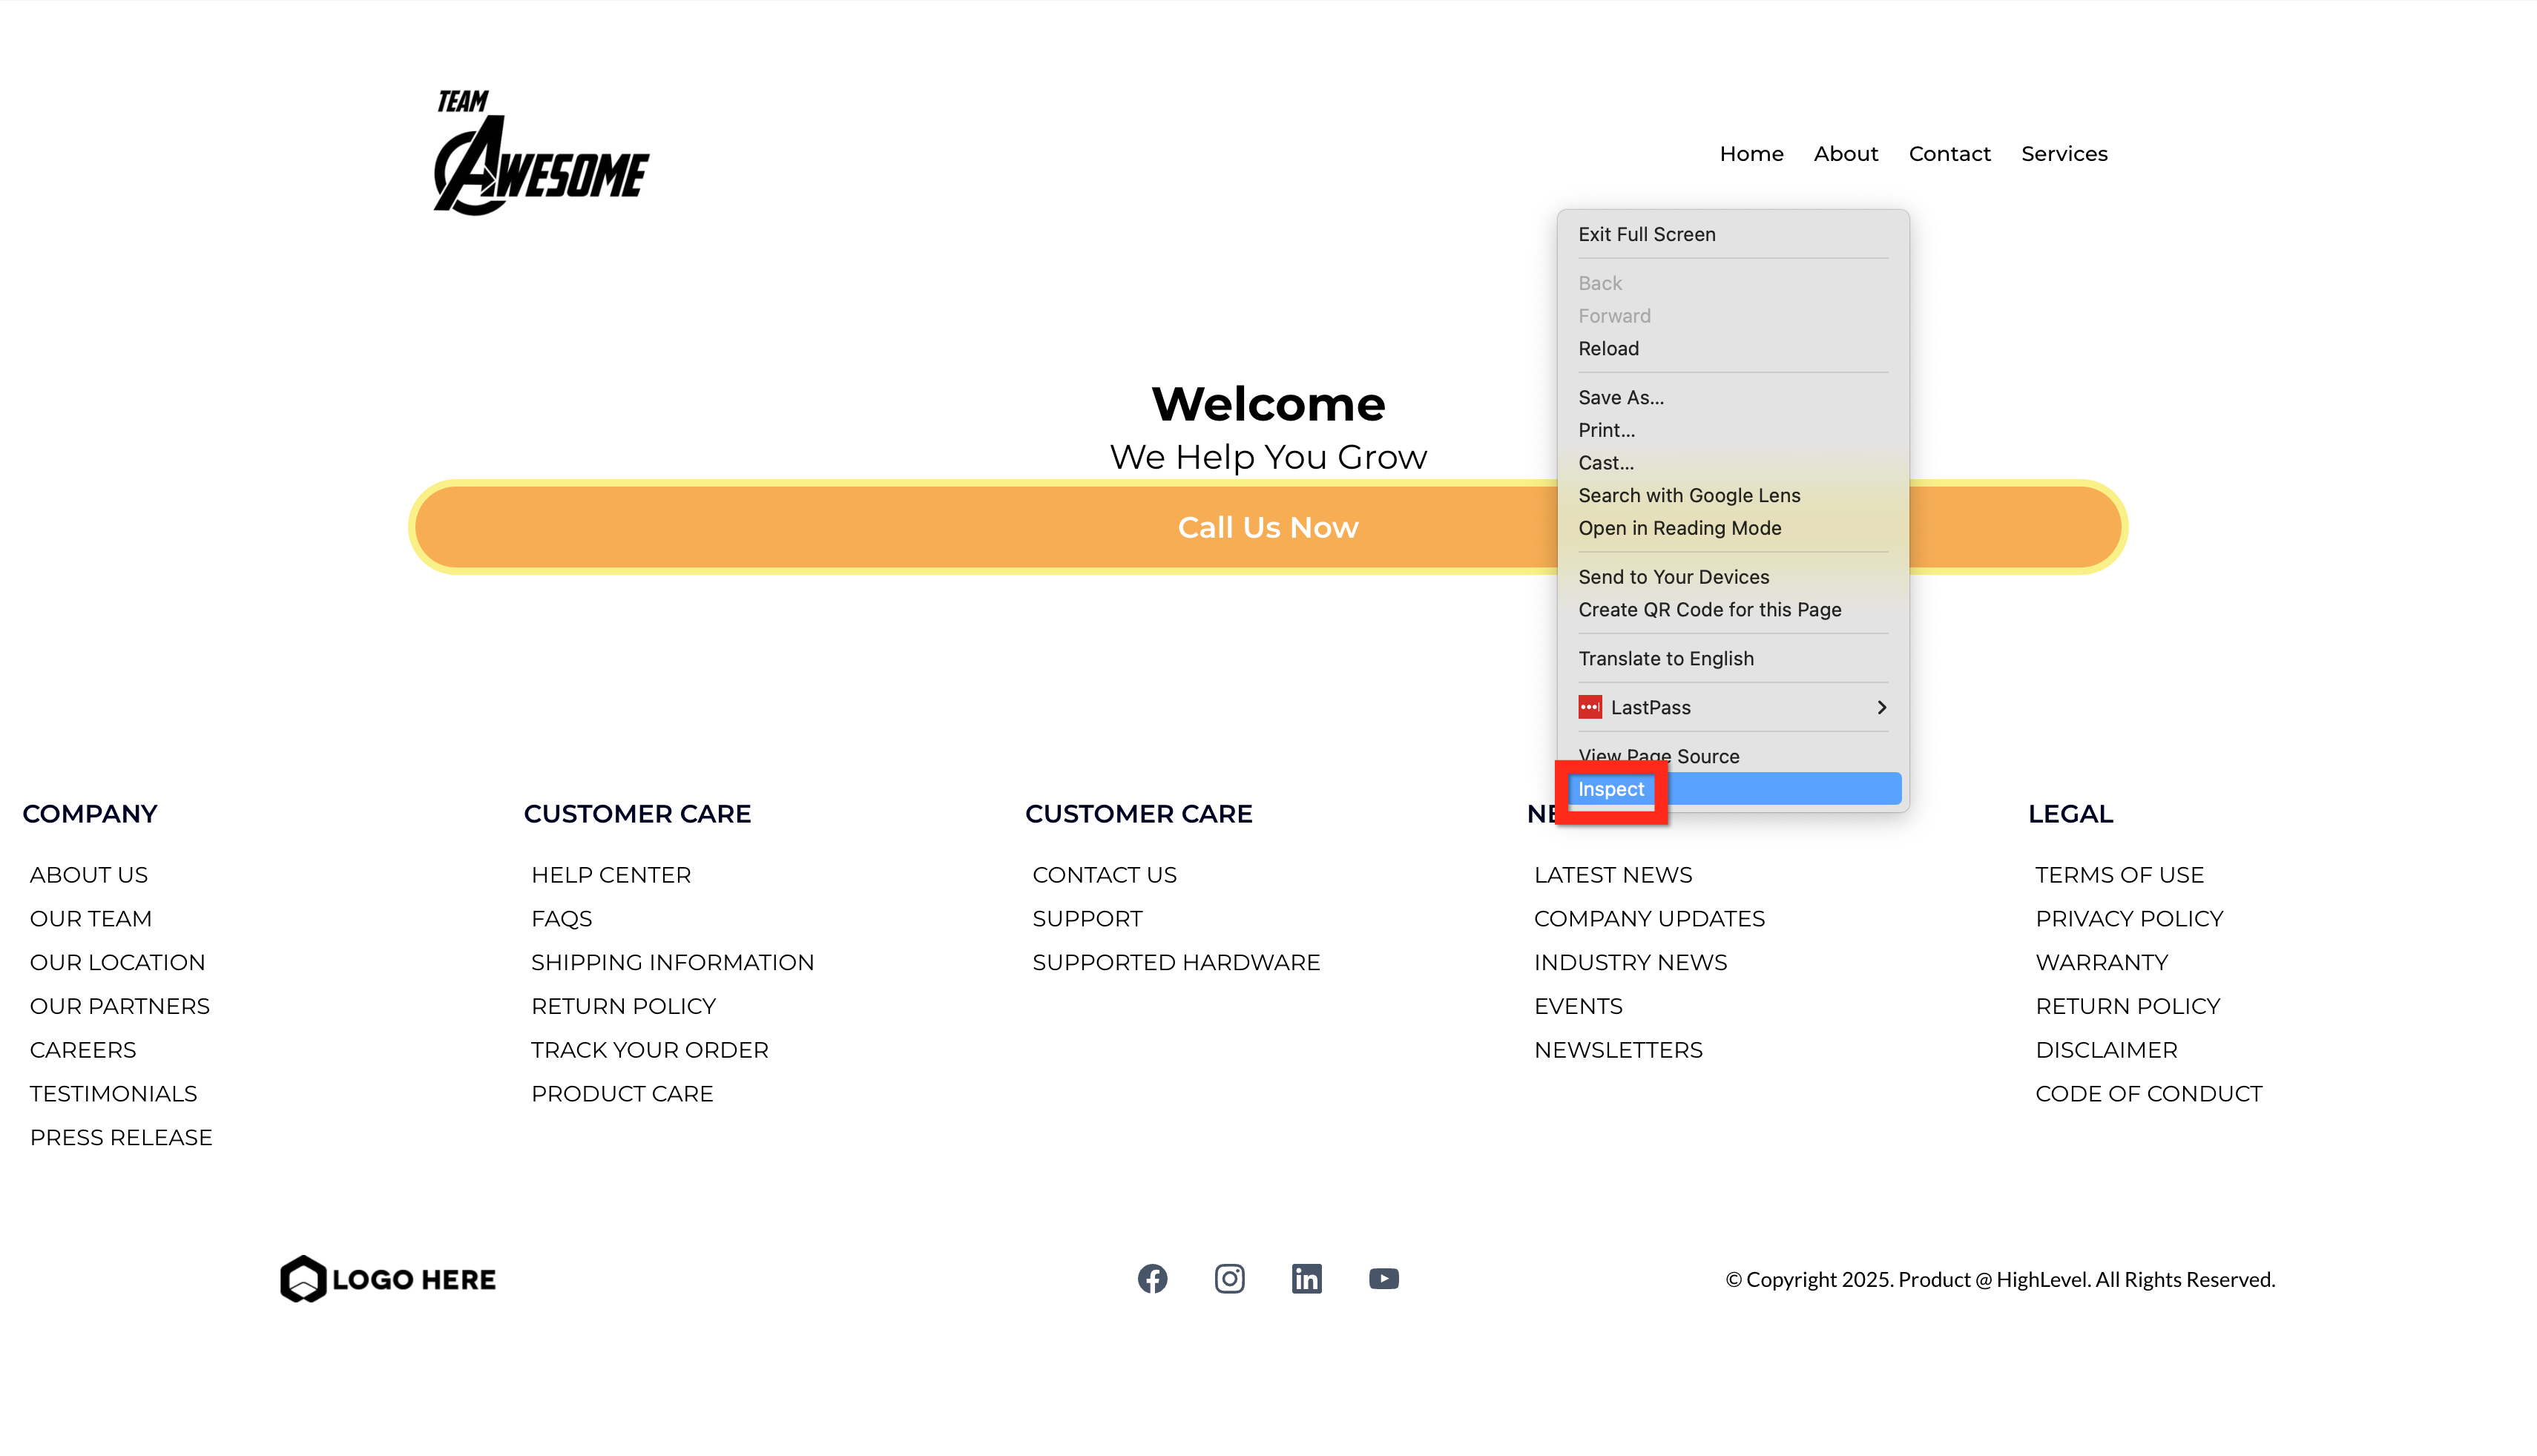
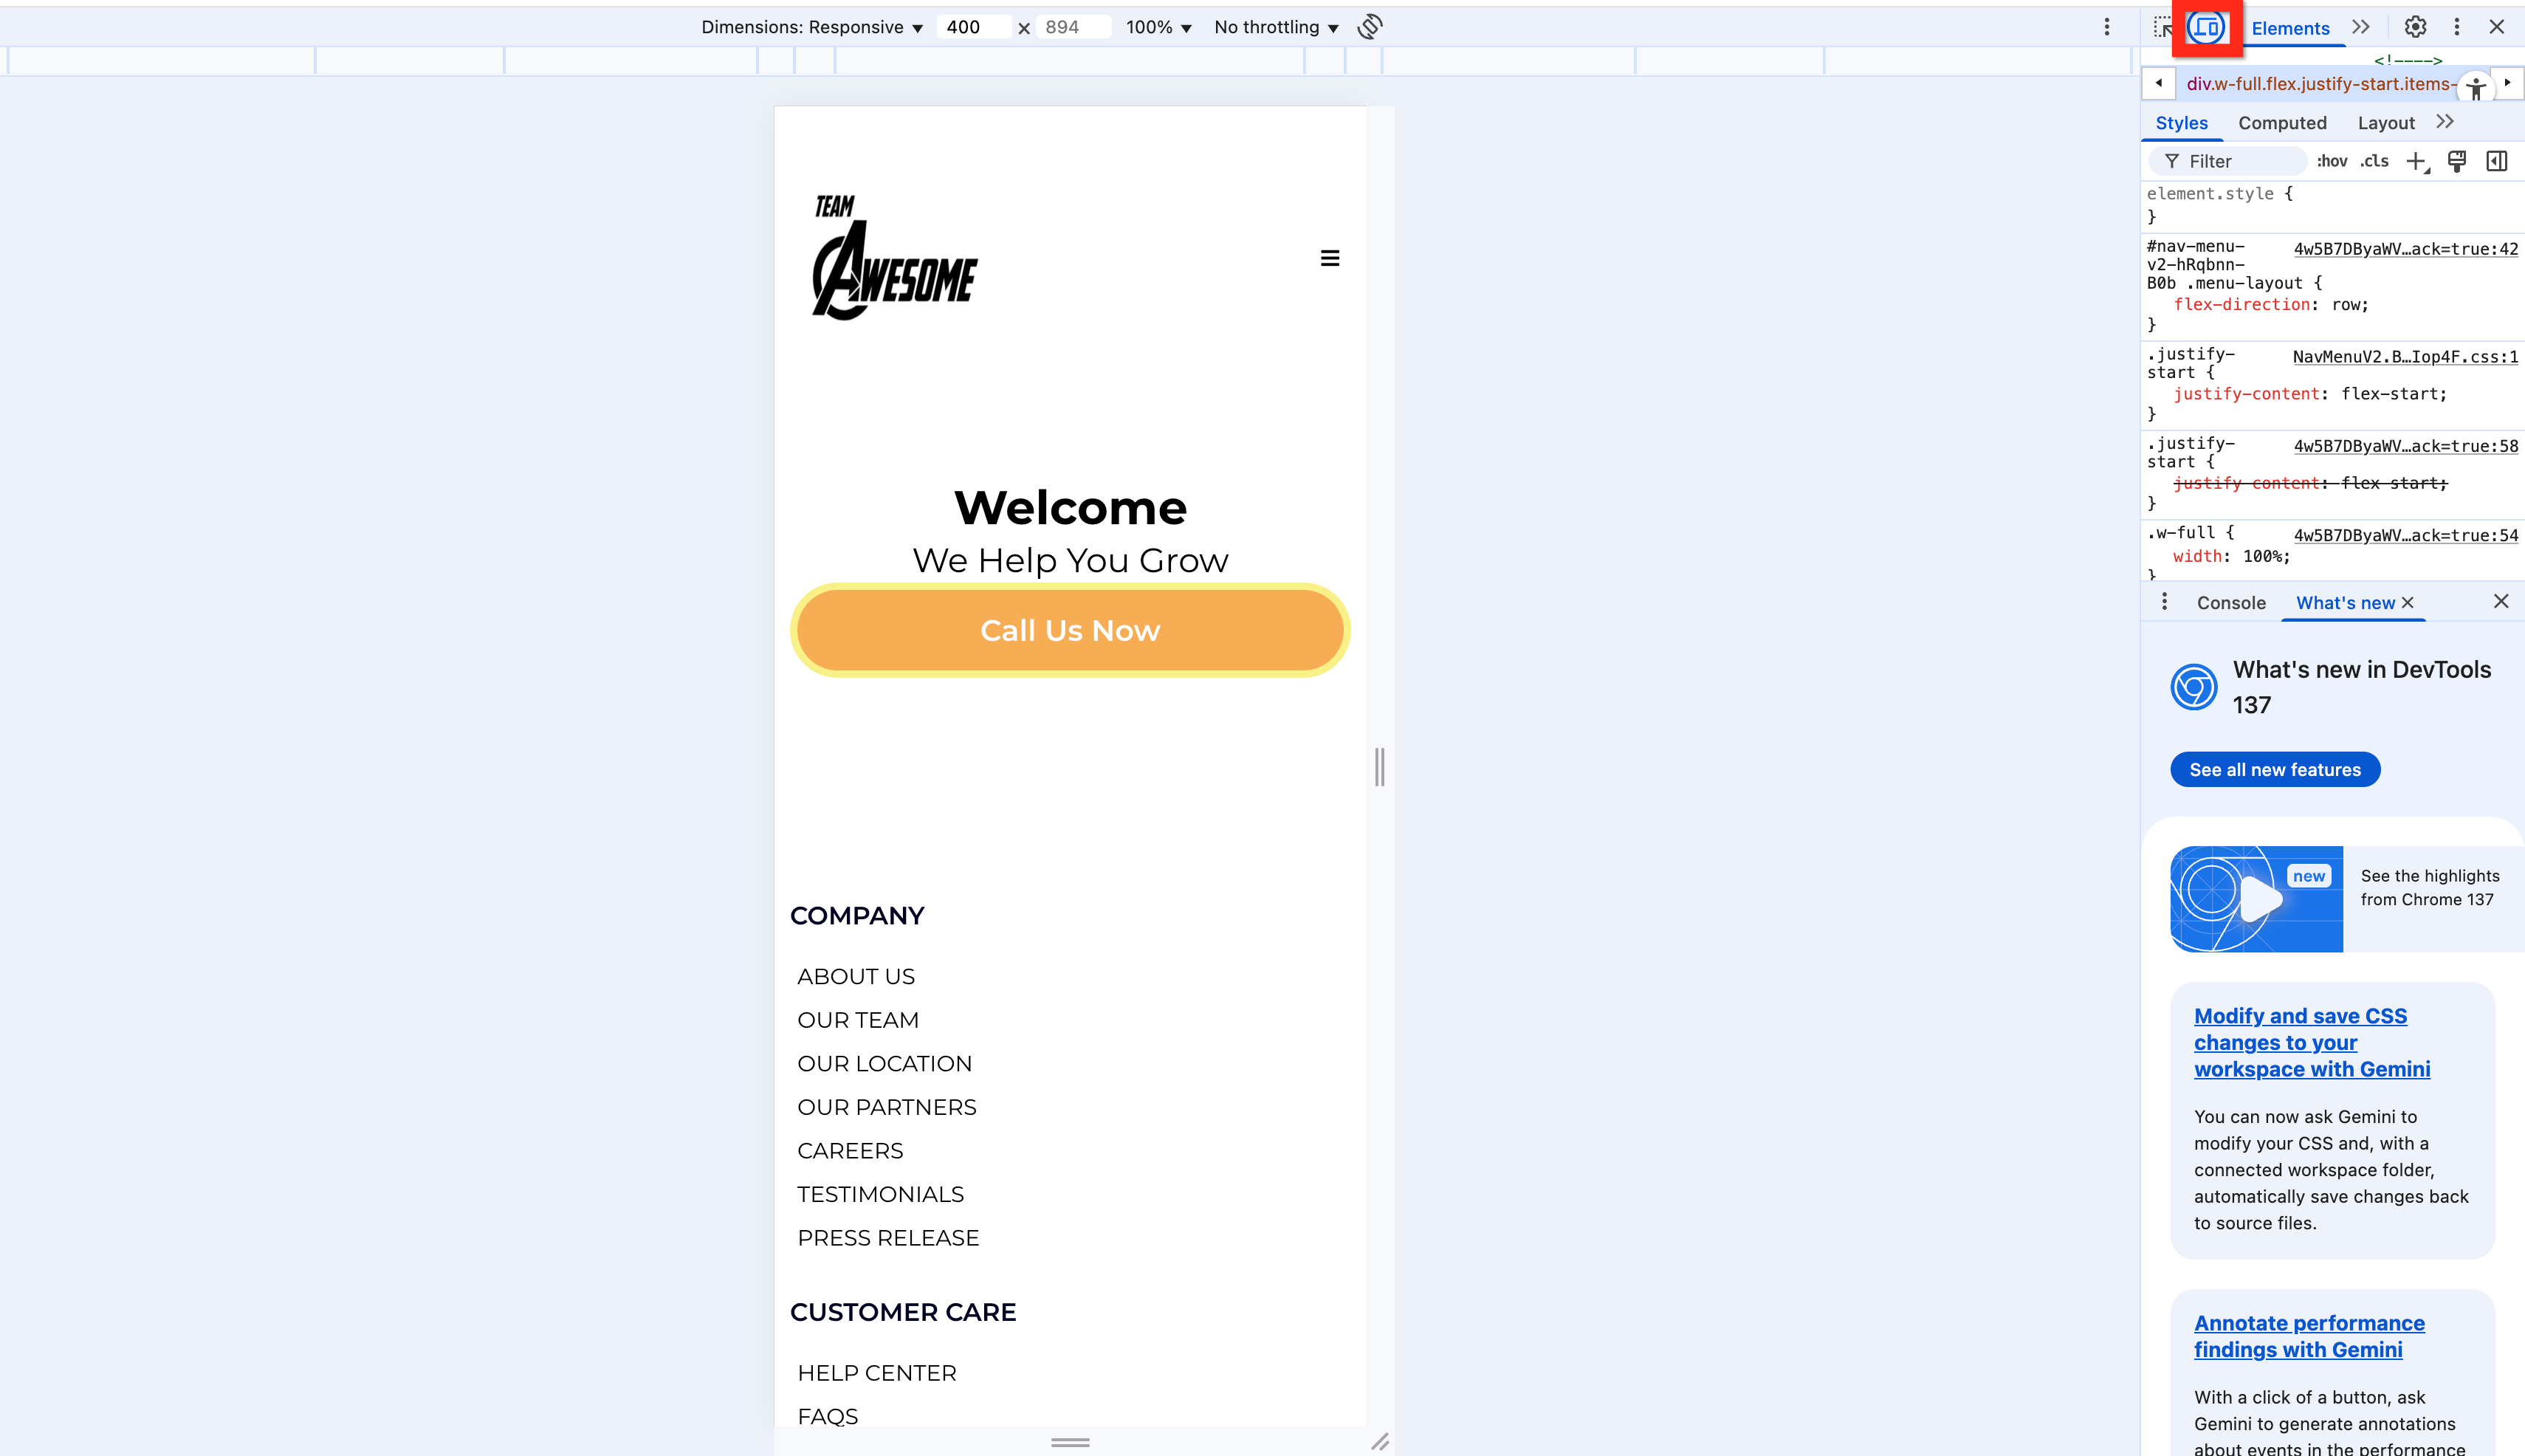
- Preview mobile: In the page builder, click the mobile phone icon to switch between desktop and mobile views. OR in the preview, right click and select inspect, then in the inspector panel click the desktop/mobile icon.
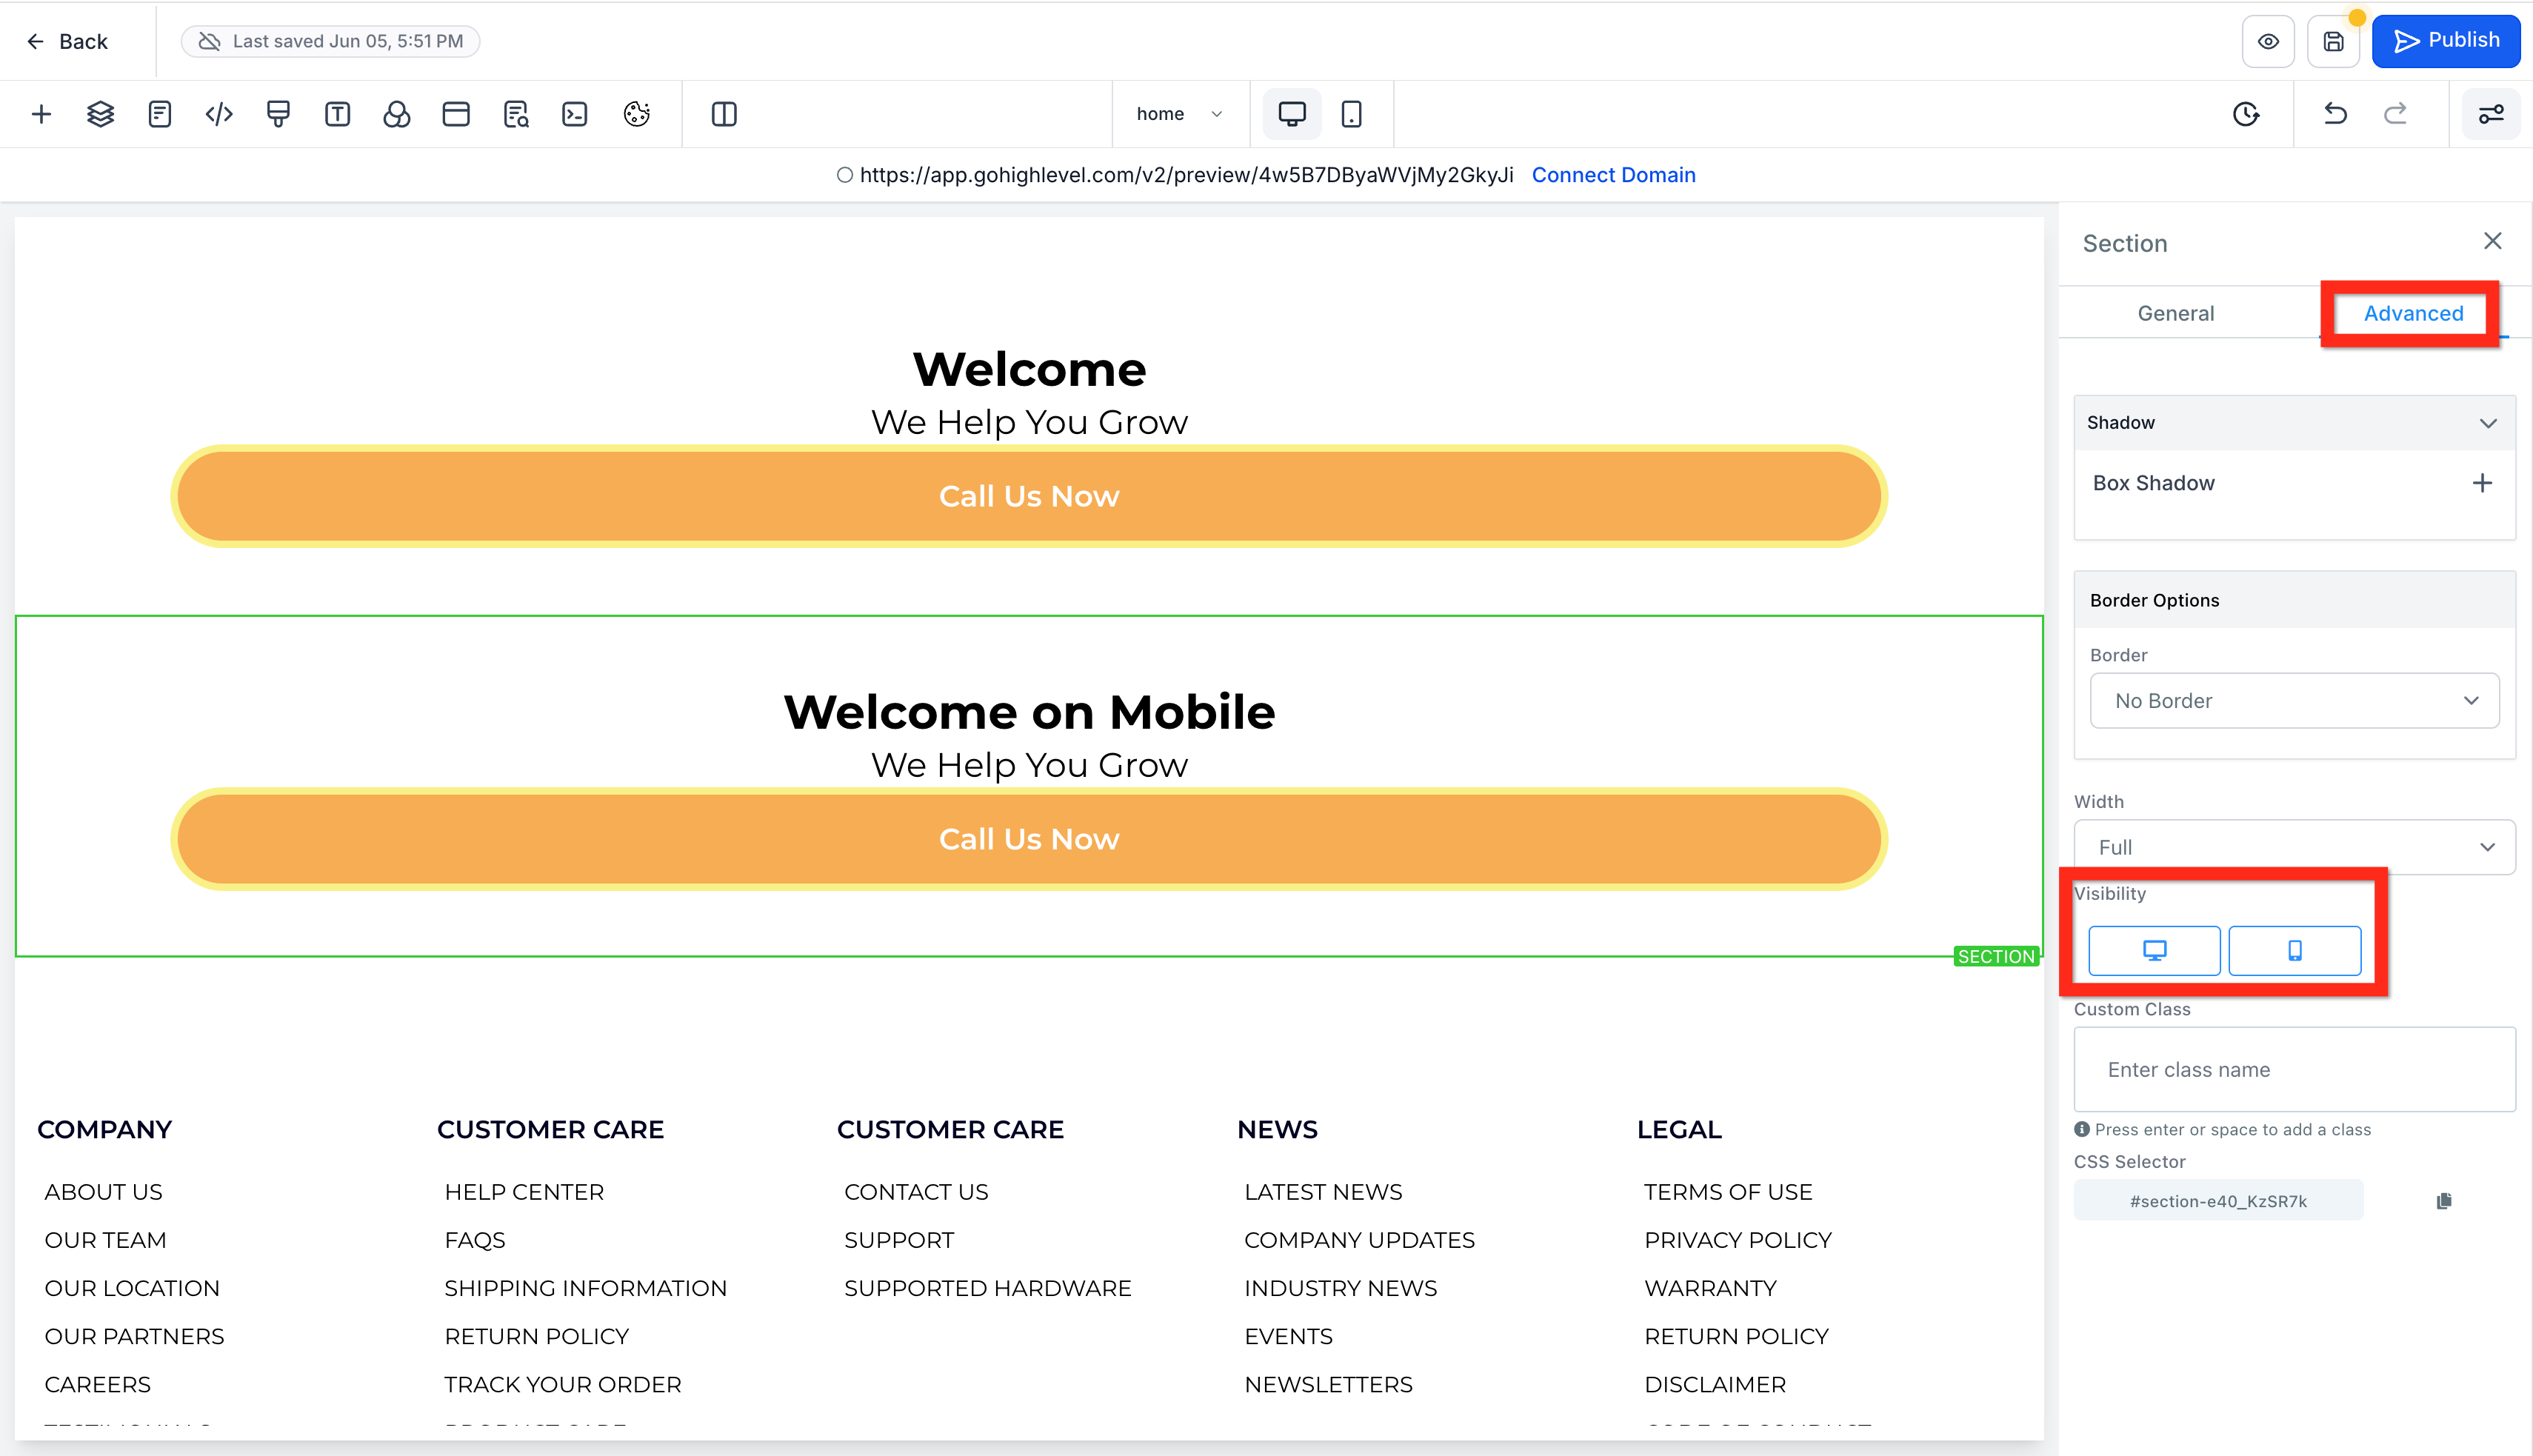
- Adjust for responsiveness: In the page editor, adjust the elements and settings until everything looks good on both desktop and mobile. If you can't get one element looking the way you want, you can duplicate it and in advanced settings make one element visible on desktop and the other visible on mobile.
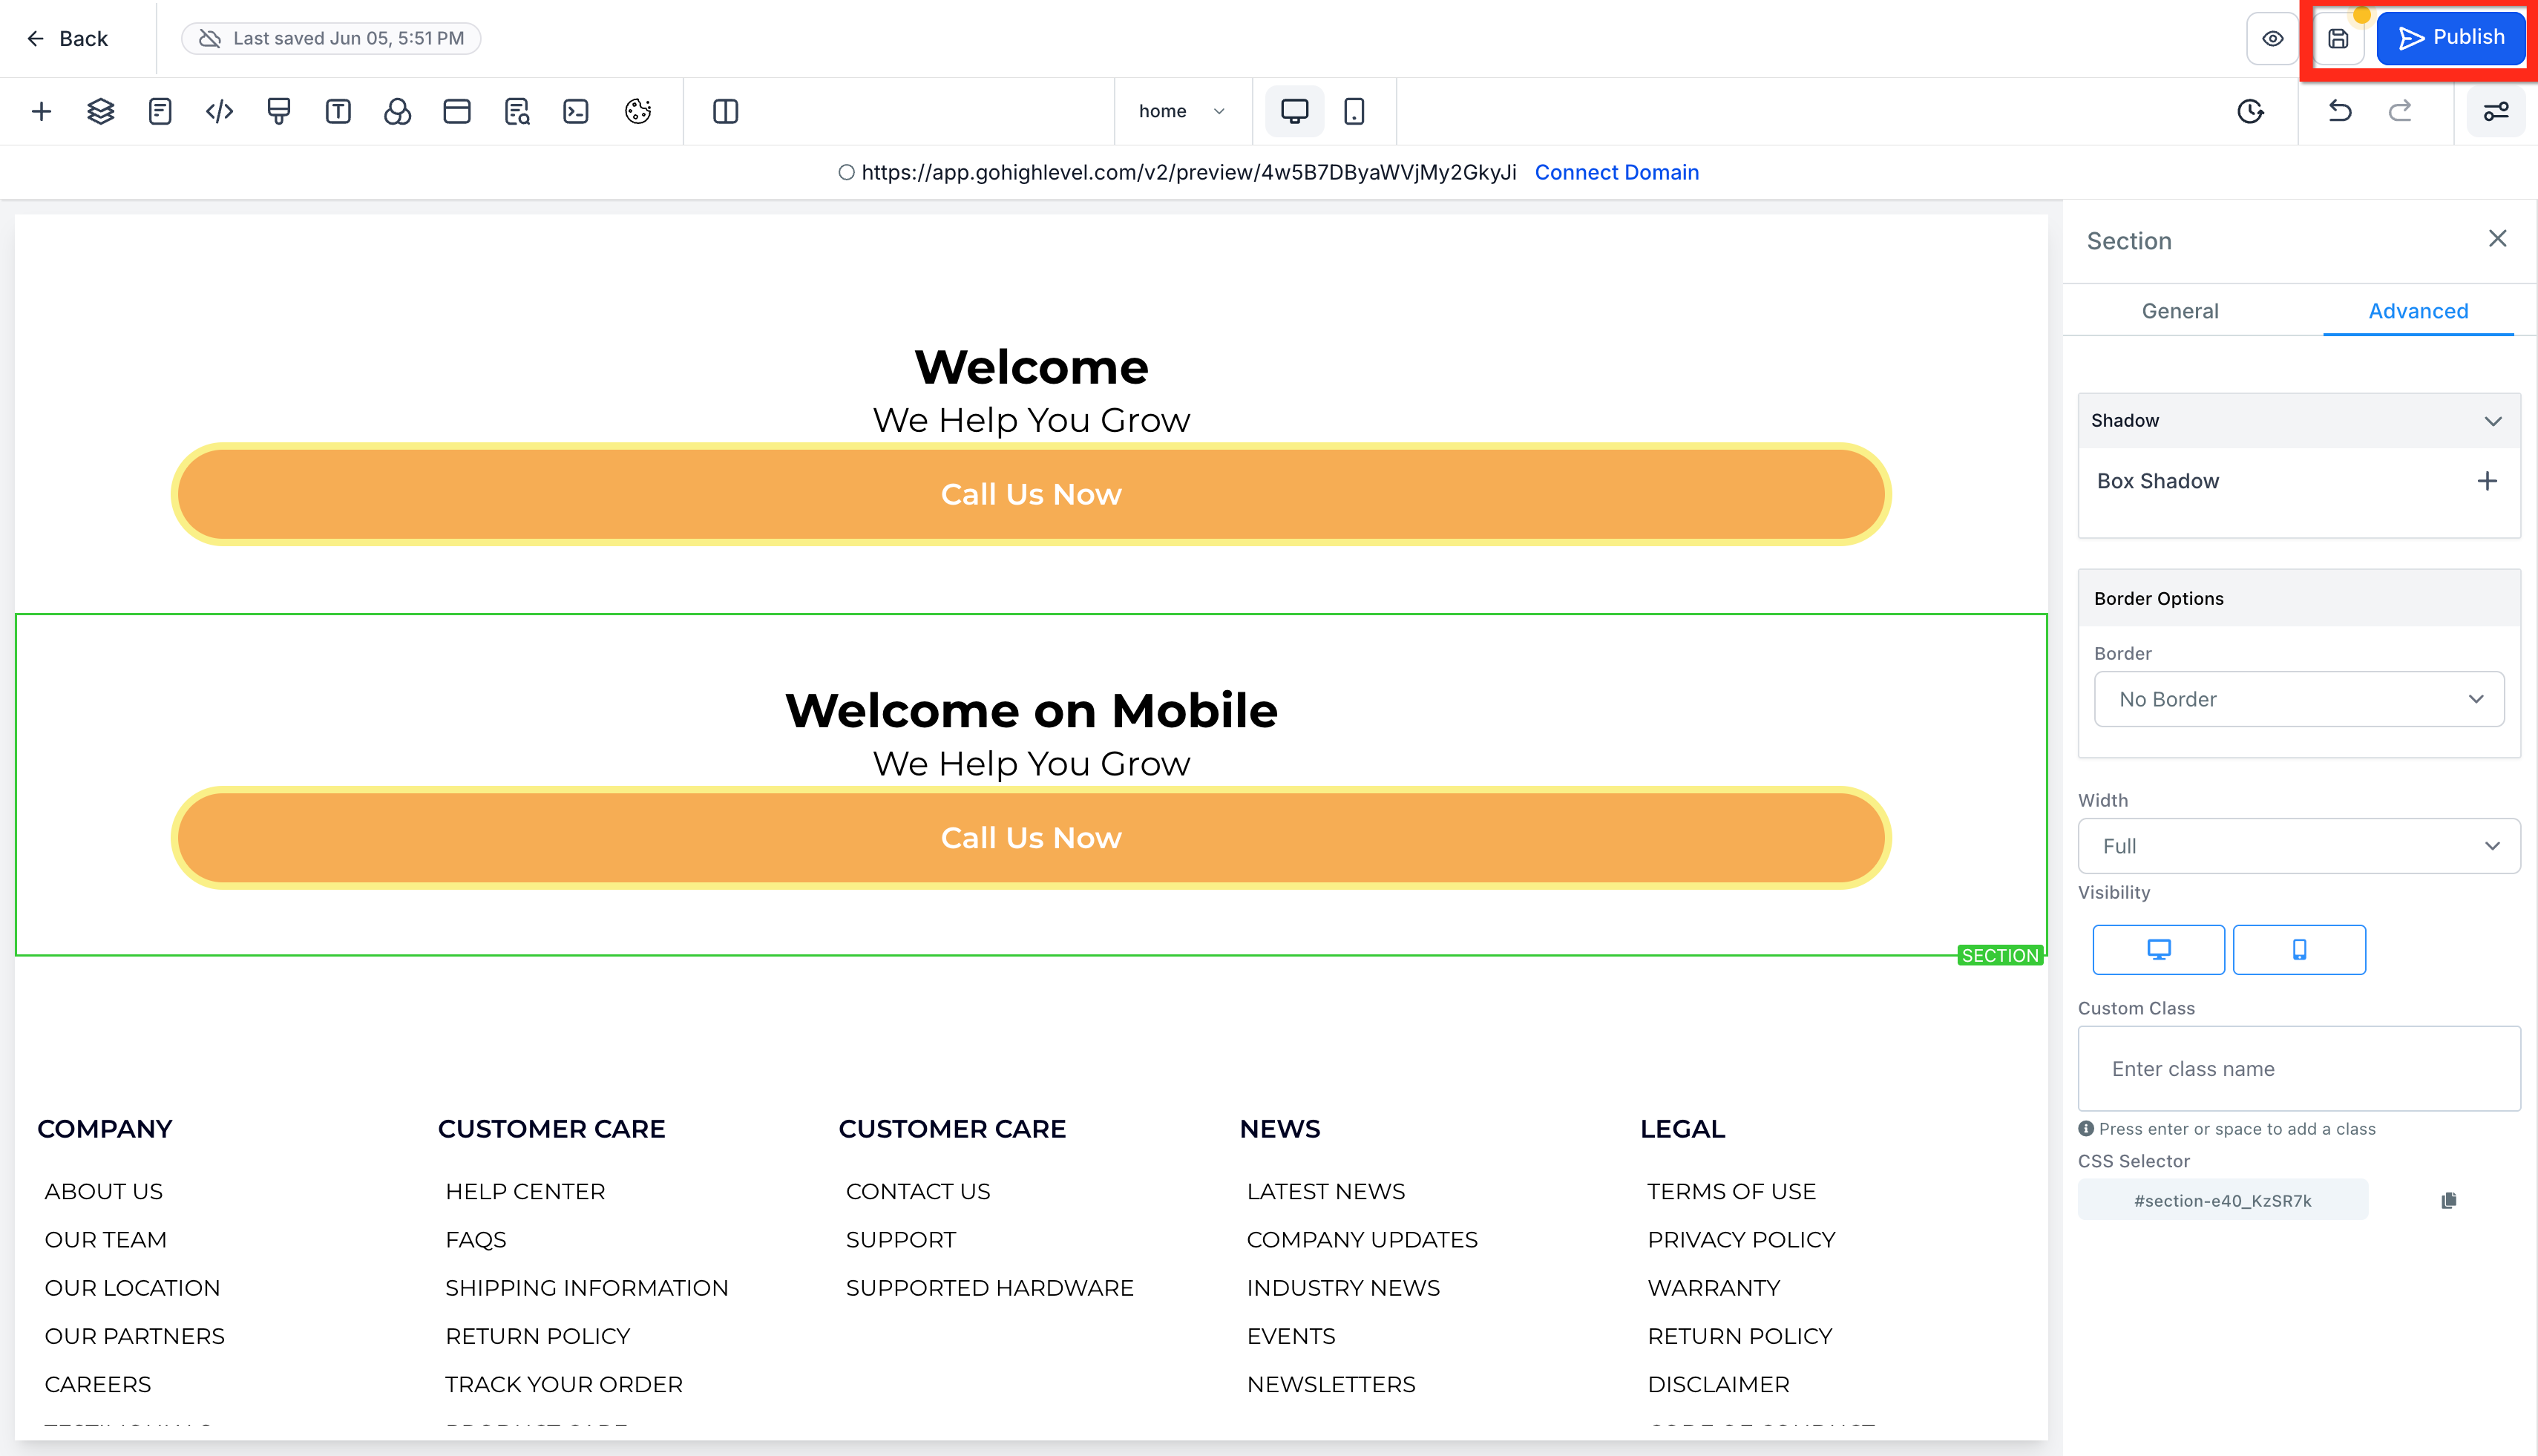
- Save and Publish: You should be frequently saving and maybe publishing. When you're done, make sure to save and publish for the last time.
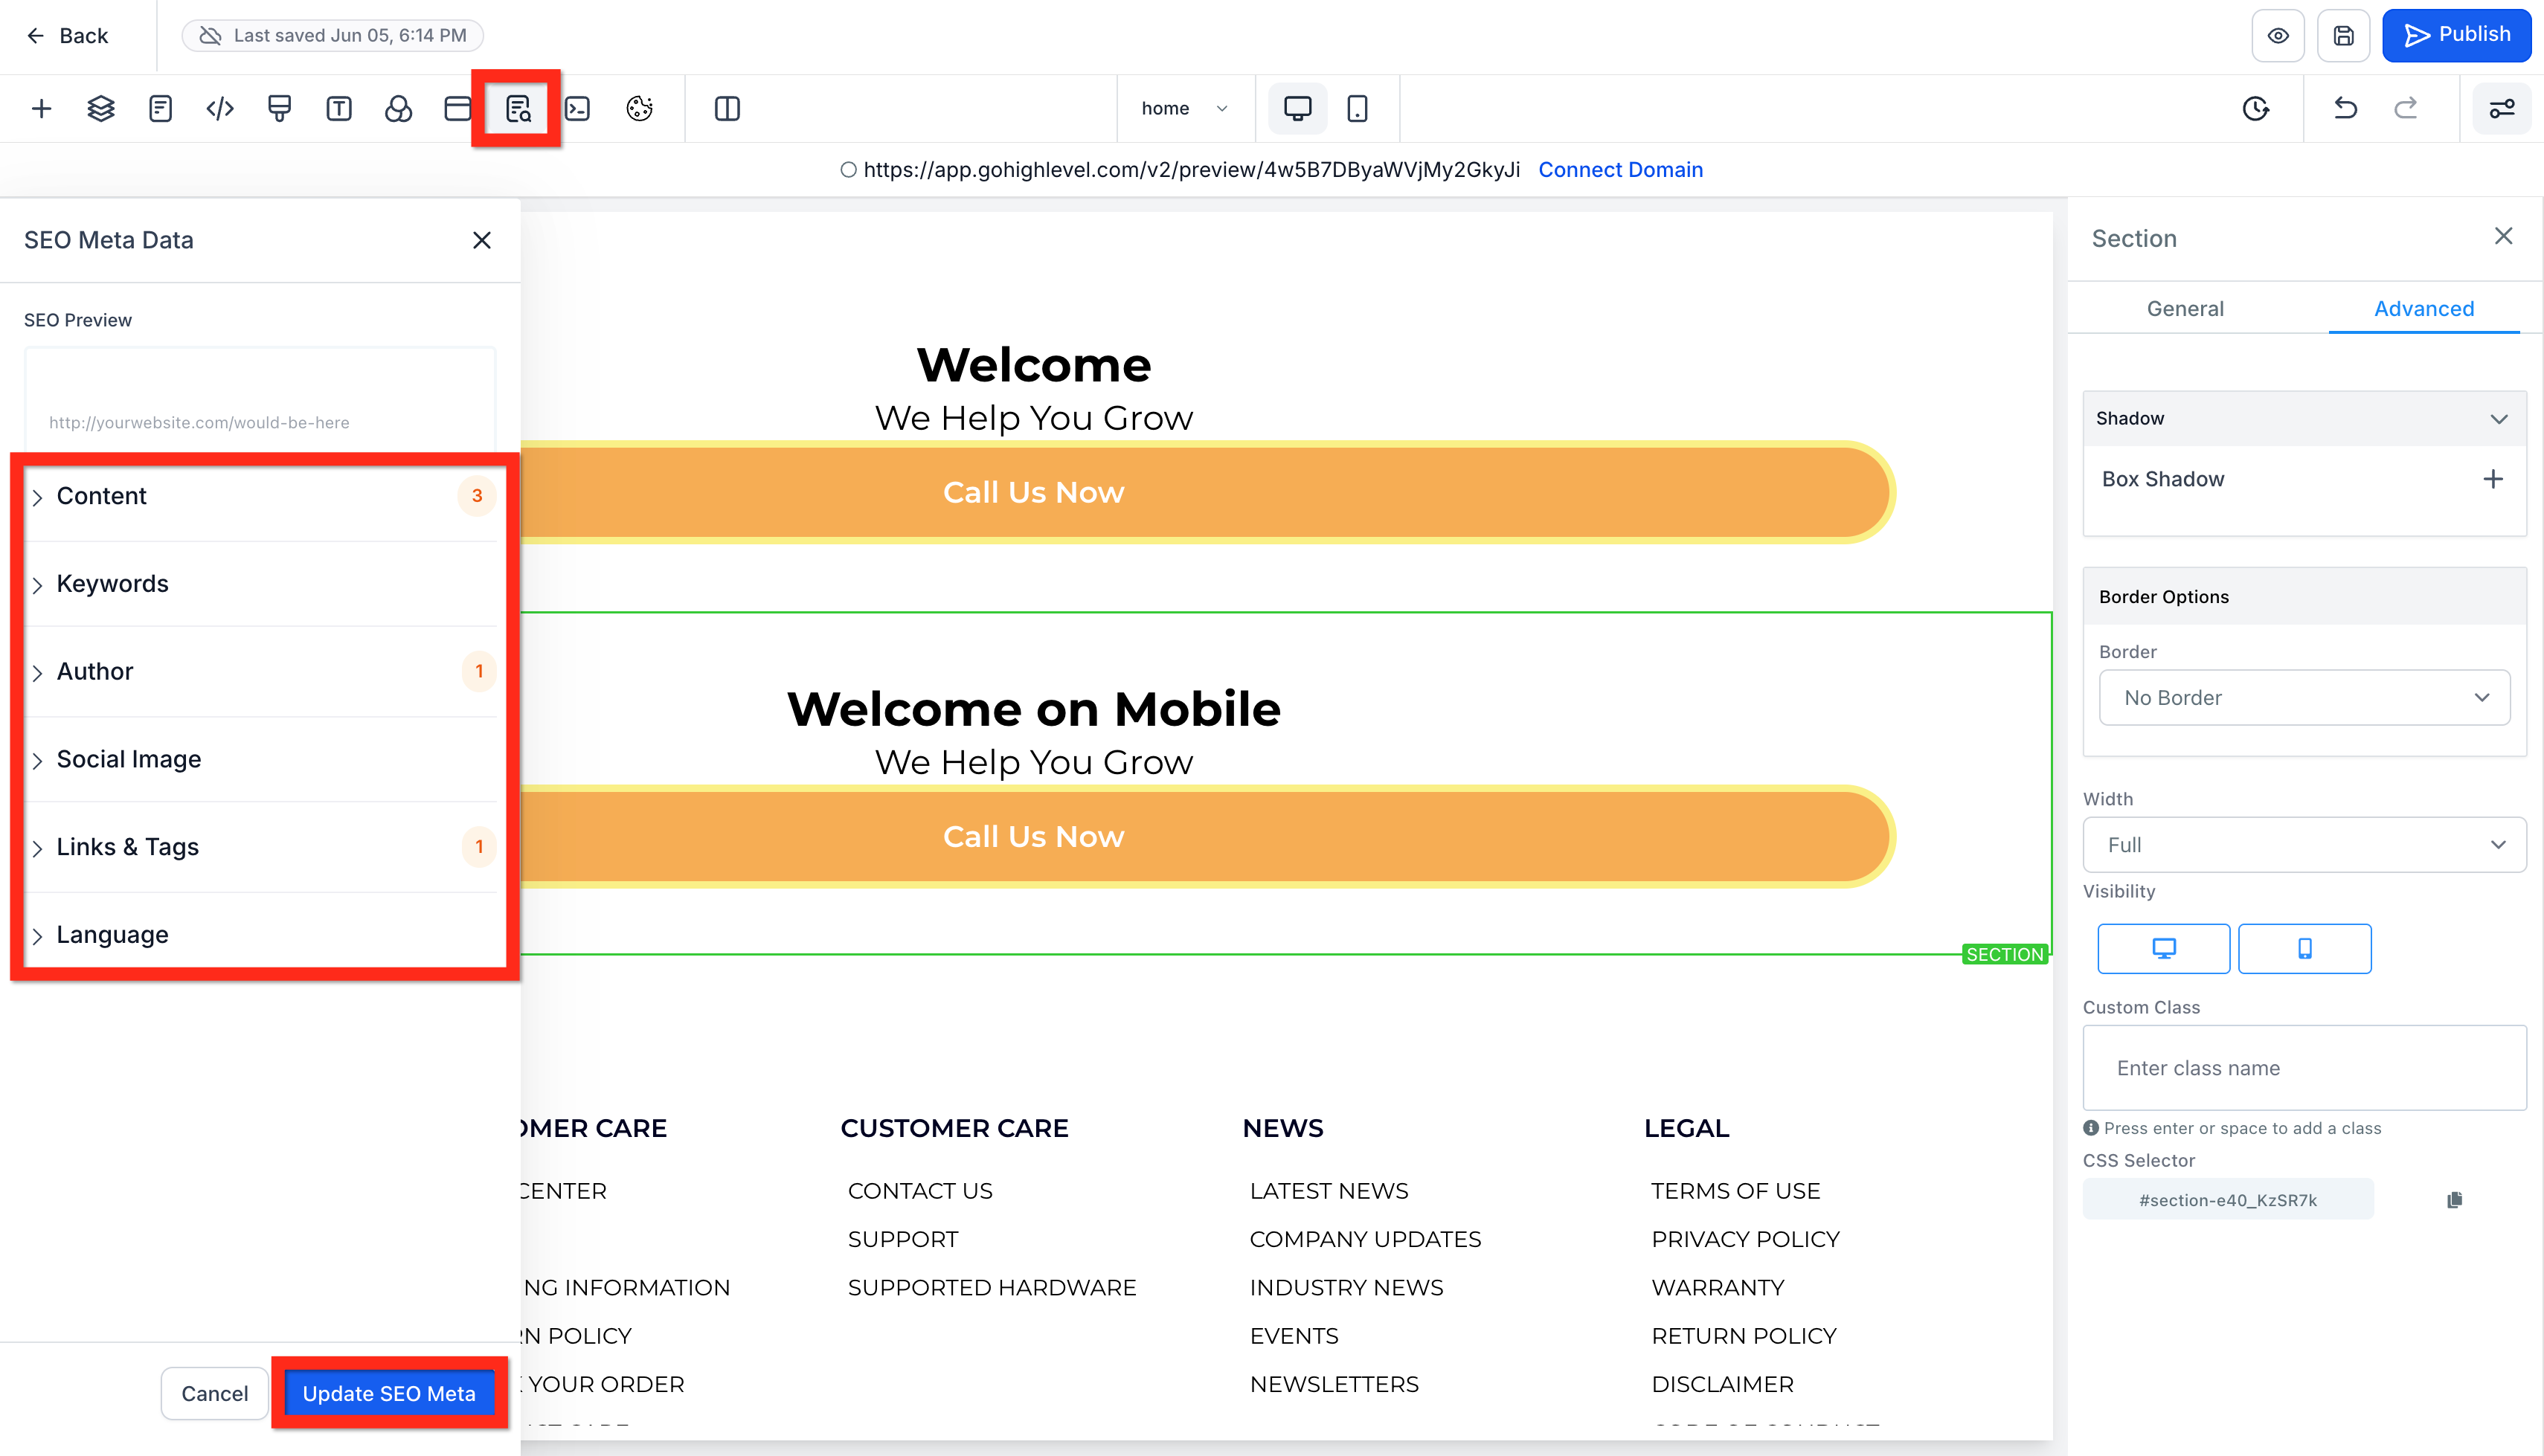
- SEO Meta Data: In the page builder, click the SEO icon to open the SEO Meta Data panel. Edit SEO and meta data details (title, description, etc).
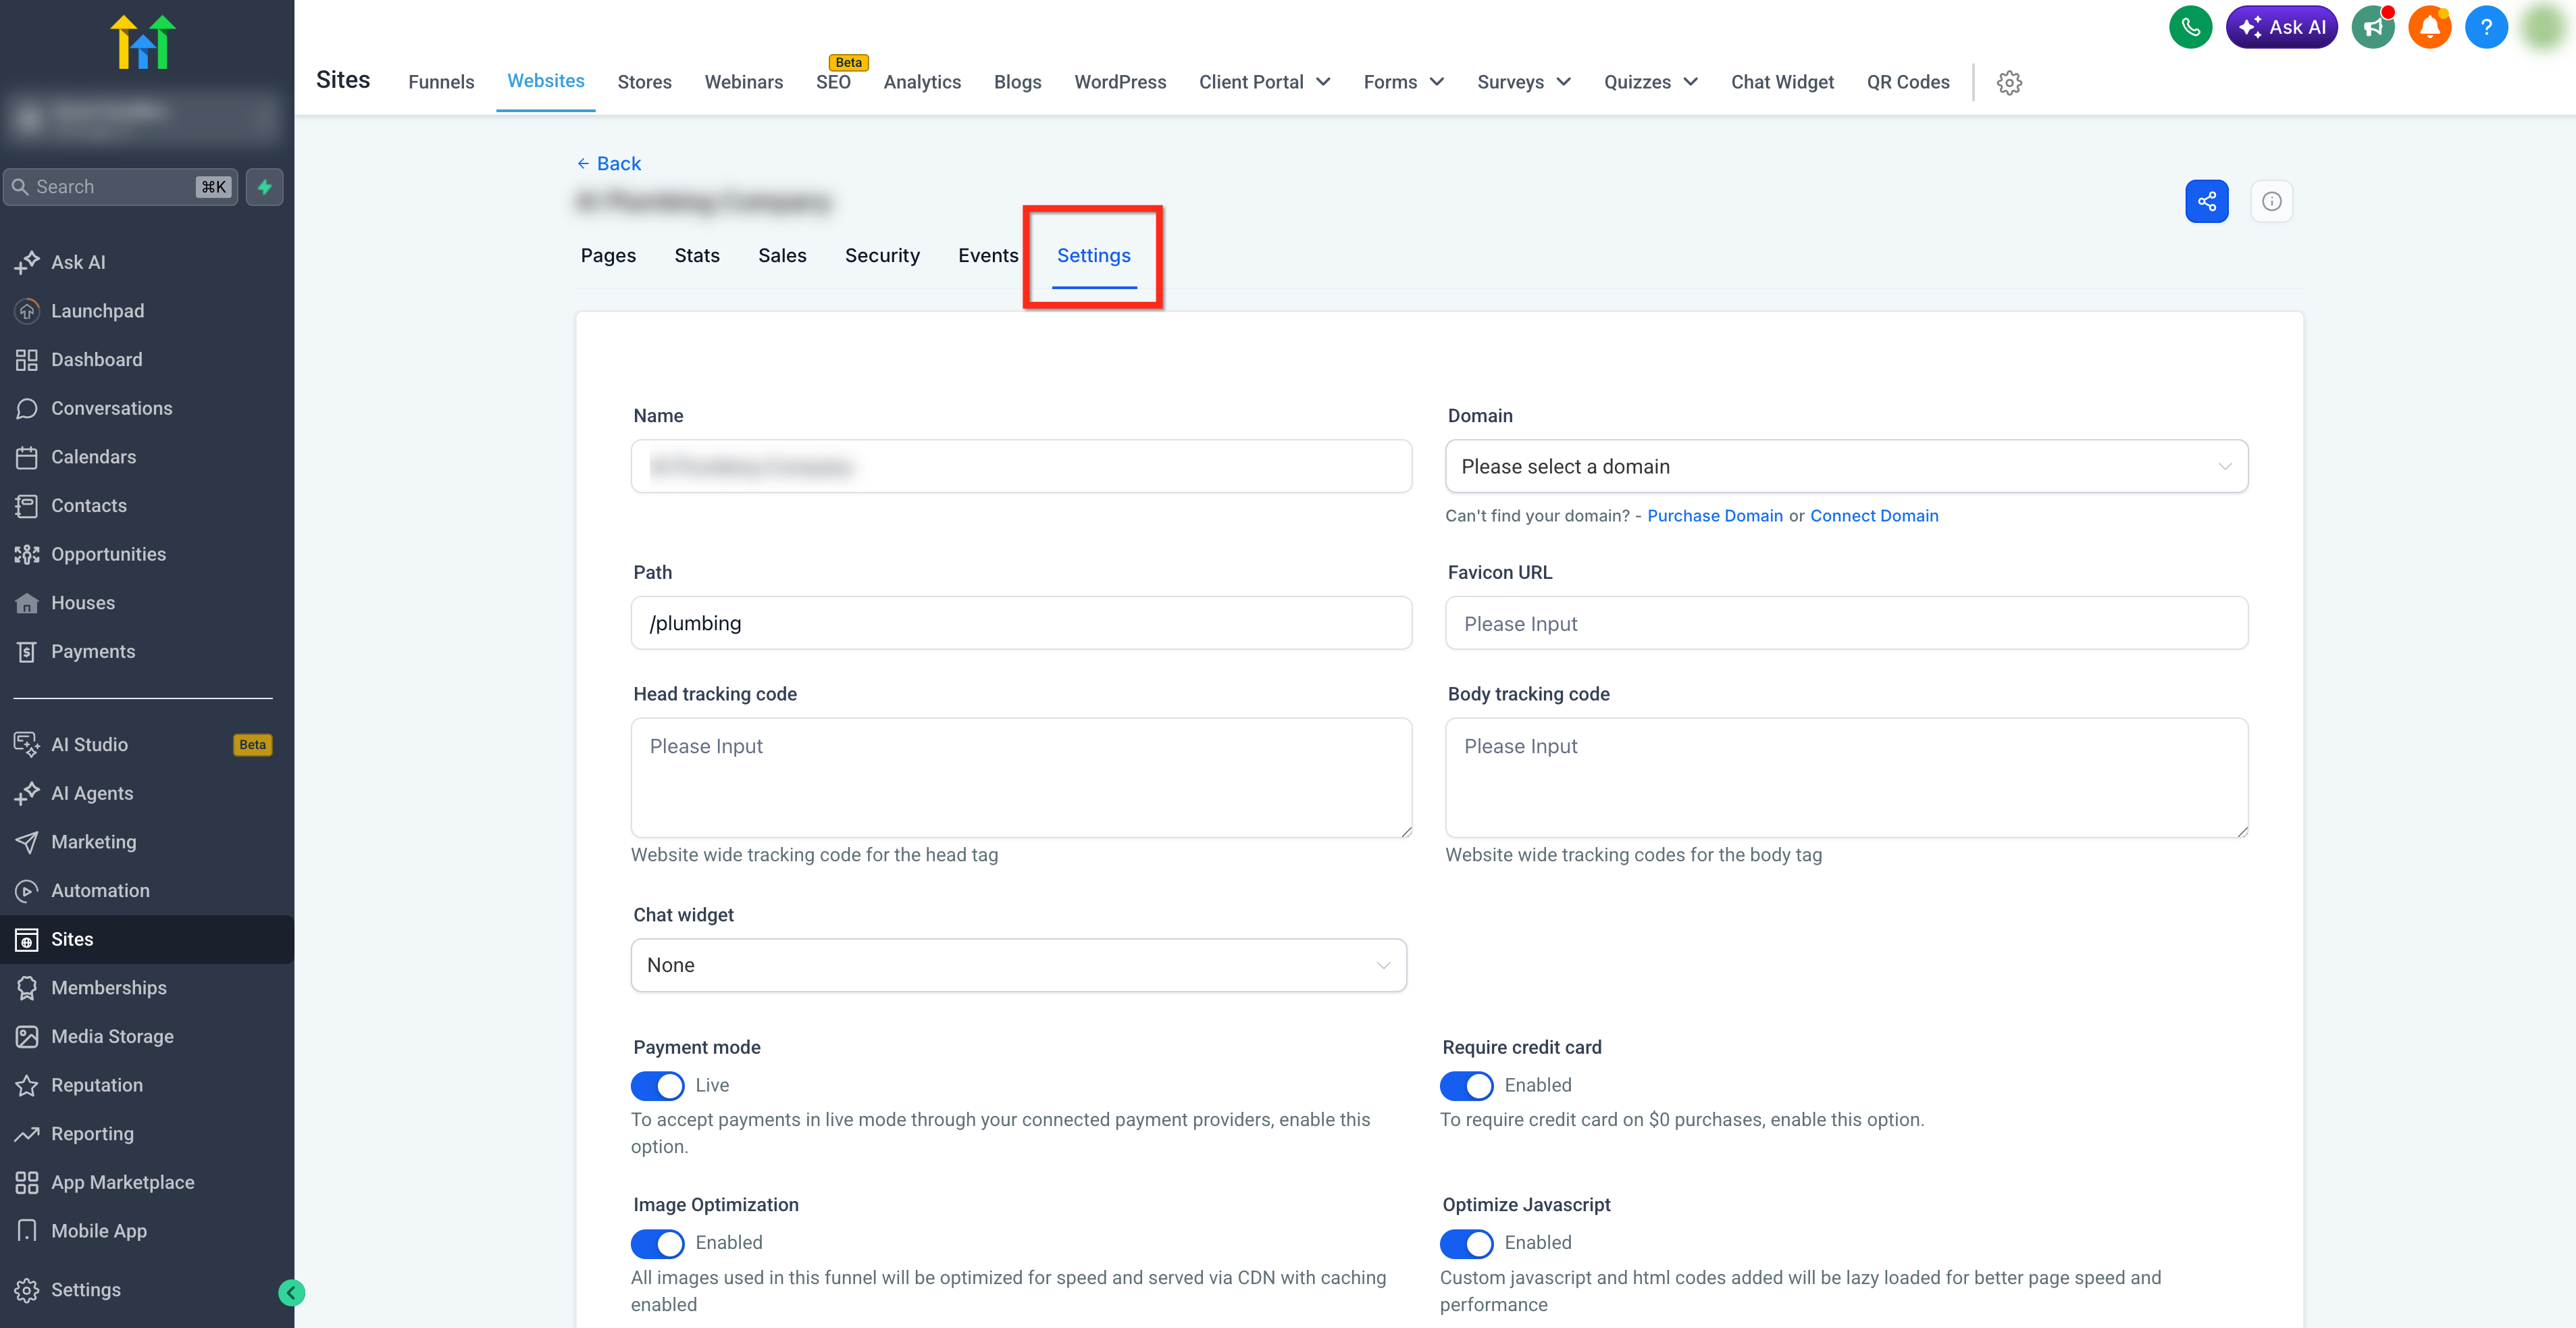
- Connect a domain: Optional, but if you have a custom domain you can attach it to your site. To connect a domain, leave the page builder and go to the Settings tab. From here, you can select a domain, add a favicon, add tracking code, add a chat widget and more.
Troubleshooting Website Launch Issues
If your website does not look or behave as expected after publishing, use the checks below.
The live website still shows old content
Saving a page does not always make the latest version live.
Open the affected page in the Website Builder.
Click Save.
Click Publish.
Open the live URL in an incognito or private browser window and check the page again.
Make sure each page that should be live has been published.
The domain shows as pending or is not connecting
If the domain has not finished connecting:
Confirm the DNS records match the values provided by HighLevel.
Check the record type, host/name, and value for typing errors.
Remove conflicting DNS records when applicable.
Allow time for recent DNS changes to propagate.
If automatic domain connection is unavailable, use the manual DNS configuration option provided during setup.
The website opens a 404 page
Confirm that:
The domain is assigned to the correct website.
The intended page has been published.
The page URL path is configured correctly.
The correct page is configured as the website's default or home page.
The website shows an SSL or privacy warning
Check for incorrect or conflicting DNS records.
If you use Cloudflare, confirm that records requiring direct DNS resolution are configured as DNS only when instructed by HighLevel.
After correcting the DNS records, allow time for the SSL certificate to be issued.
Navigation links open the wrong page
Open the Navigation Menu element and confirm that every menu item points to the correct page or URL.
If pages were added, renamed, or reordered, review the navigation links again before publishing.
The website looks incorrect on mobile
Open the page in the Website Builder and switch to the mobile view.
Check:
Element spacing and alignment.
Font and button sizes.
Section and row widths.
Elements configured as desktop-only or mobile-only.
Adjust the mobile layout as needed, then save and publish the page again.
Forms, calendars, or buttons are not working
Before sharing the site publicly:
Submit each form as a test visitor.
Test calendar booking links.
Click each button and call-to-action.
Confirm links open the intended page or destination.
Verify that test submissions create the expected record or notification.
Final Website Launch Check
Before sharing your website, confirm that:
The domain is connected and verified.
The website loads securely over
https://.The correct homepage appears.
All required pages are published.
Navigation links work.
Forms and buttons work.
Desktop and mobile layouts display correctly.
The latest published content appears on the live site.
Was this article helpful?
That’s Great!
Thank you for your feedback
Sorry! We couldn't be helpful
Thank you for your feedback
Feedback sent
We appreciate your effort and will try to fix the article