A contact form helps you capture leads, inquiries, and customer information directly through your website, funnel, or shared form link. HighLevel lets you build customizable forms, collect standard and custom contact information, configure notifications, automate follow-up, and review submissions from one place. A properly configured contact form makes it easier to collect accurate information and move new leads into your follow-up process.
TABLE OF CONTENTS
- What is a Contact Form in HighLevel?
- Key Benefits of Contact Forms in HighLevel
- Form Fields and Custom Fields
- Form Styling and Themes
- Form Notifications and Auto Responder
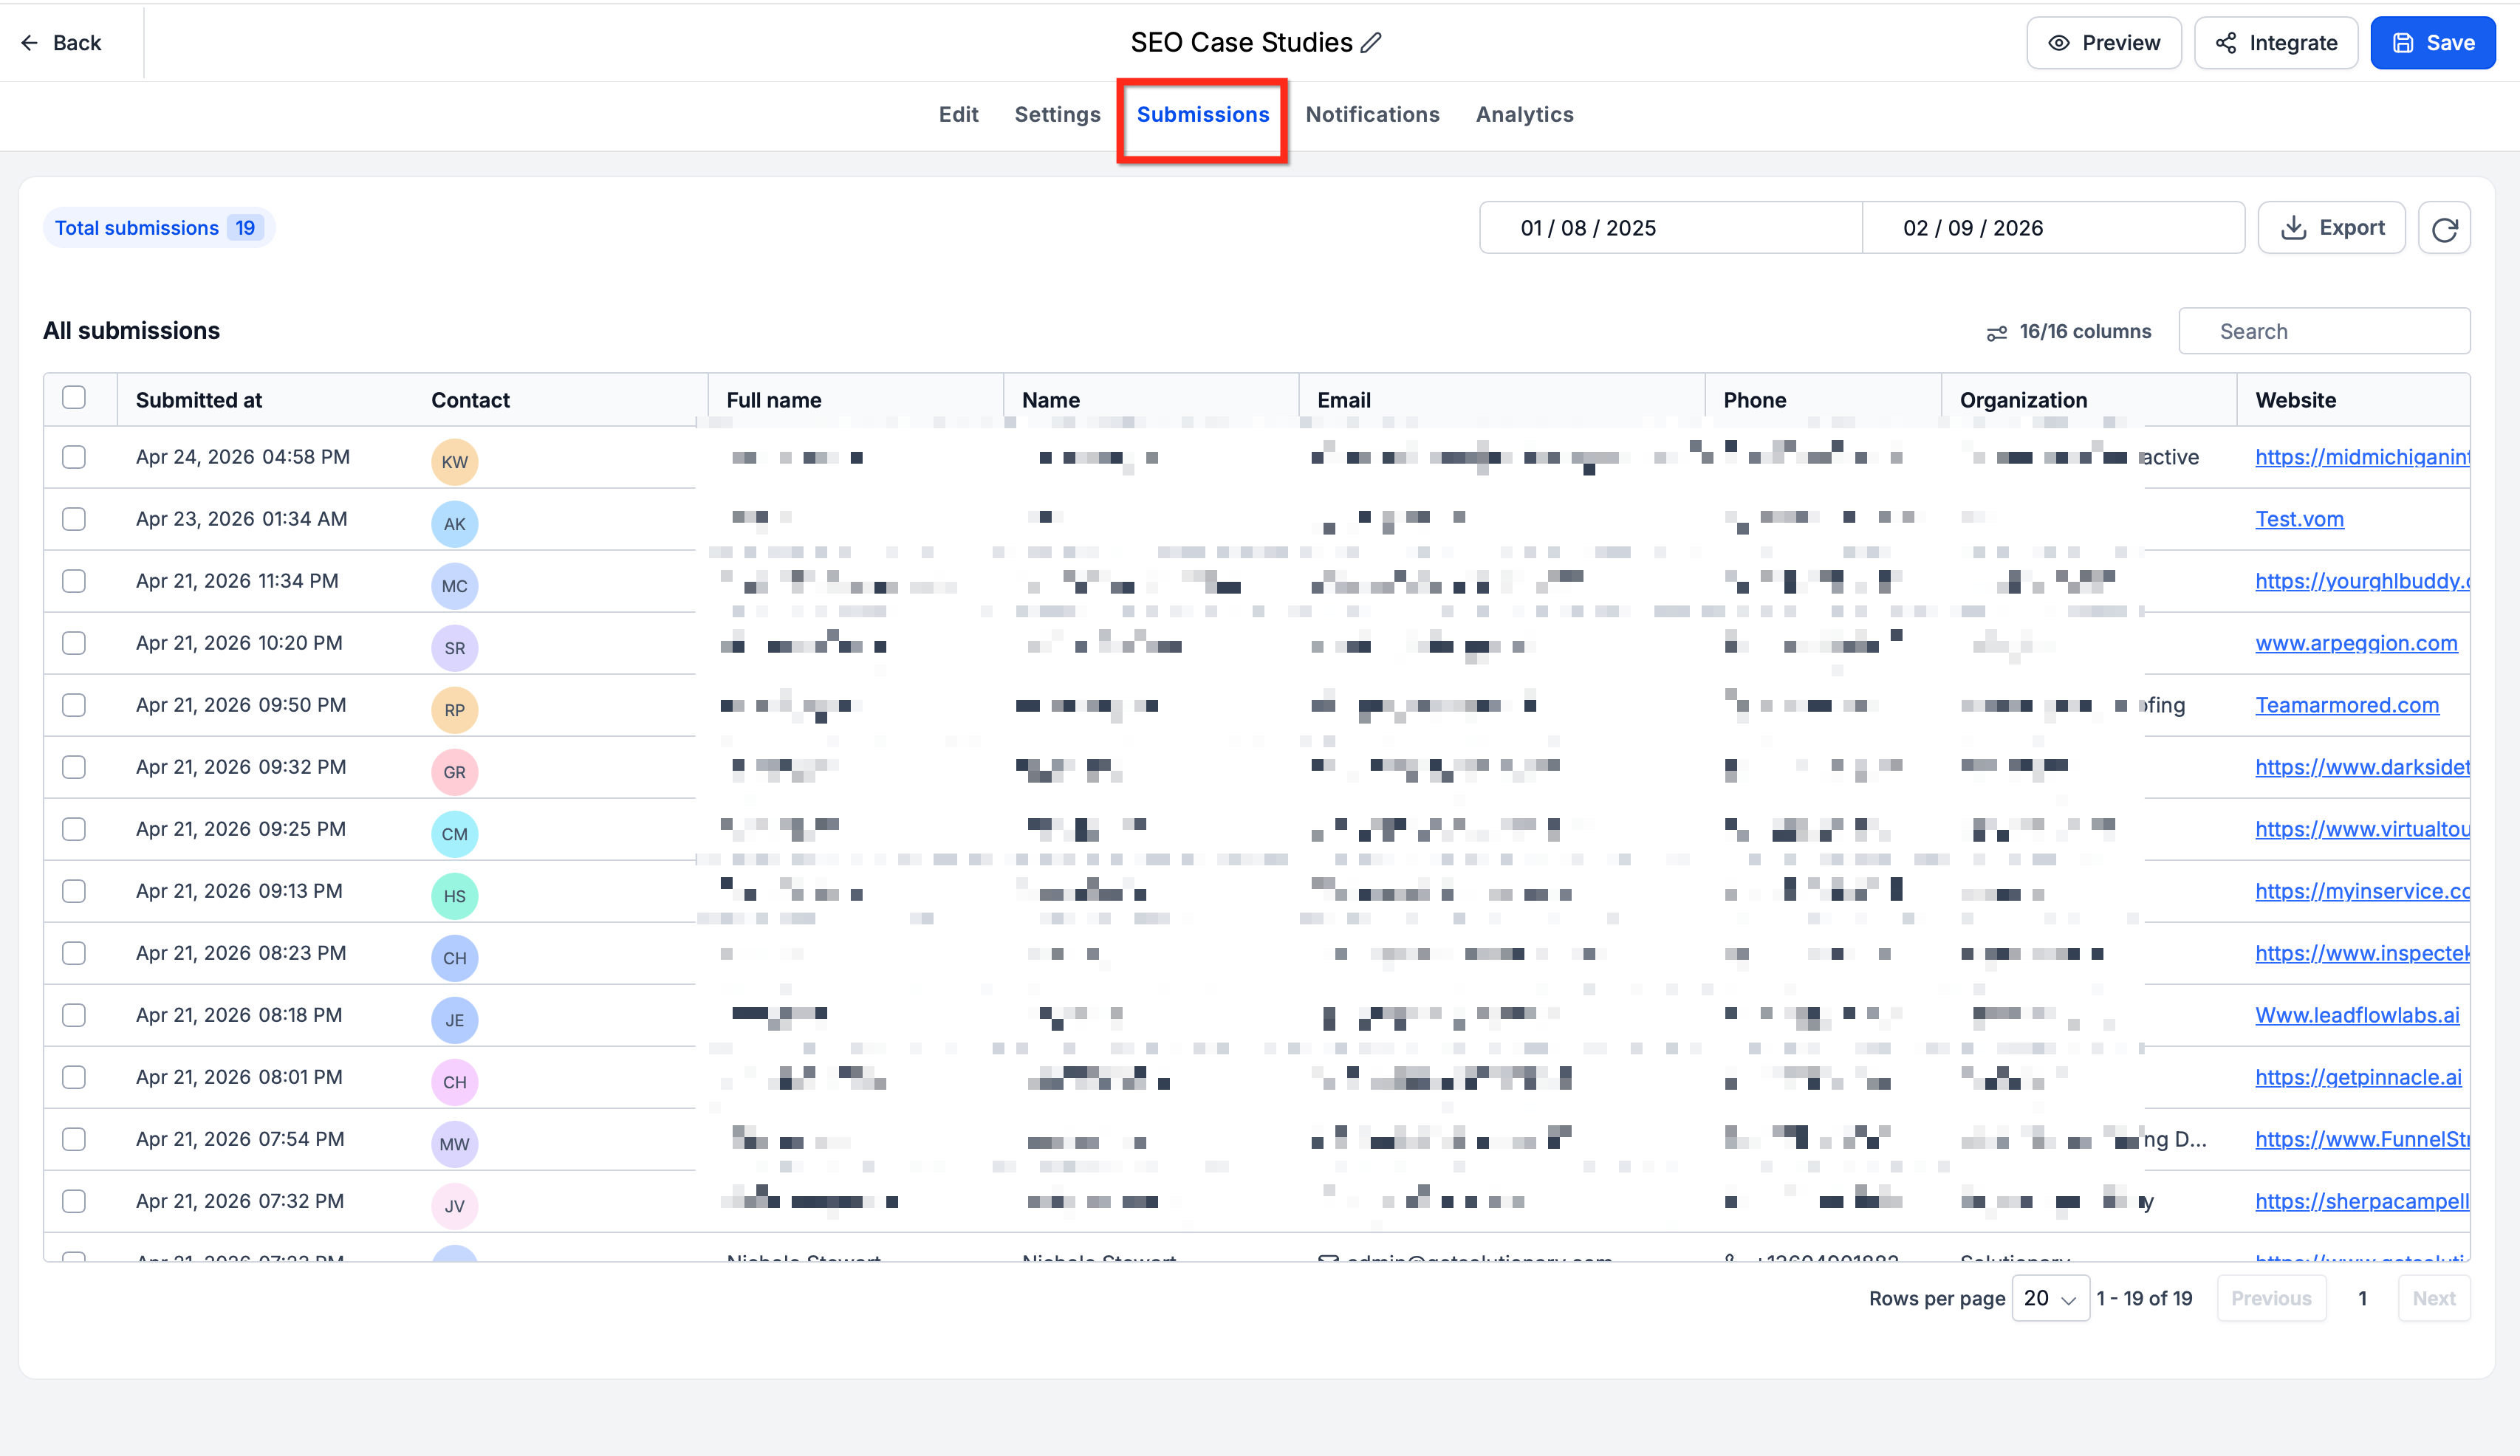
- Form Submissions: Where to Access Them and How They Appear
- How To Create a Contact Form
- Frequently Asked Questions
- Related Articles
What is a Contact Form in HighLevel?
A contact form in HighLevel is a customizable form used to collect information from leads and customers. Forms can include standard contact details such as name, email, and phone number as well as custom fields that capture information specific to your business. When a new lead submits a HighLevel form, a contact record is automatically created so the information can be managed inside the CRM.
Key Benefits of Contact Forms in HighLevel
Centralized lead capture: Collect contact details and inquiry information directly inside HighLevel instead of transferring submissions manually between tools.
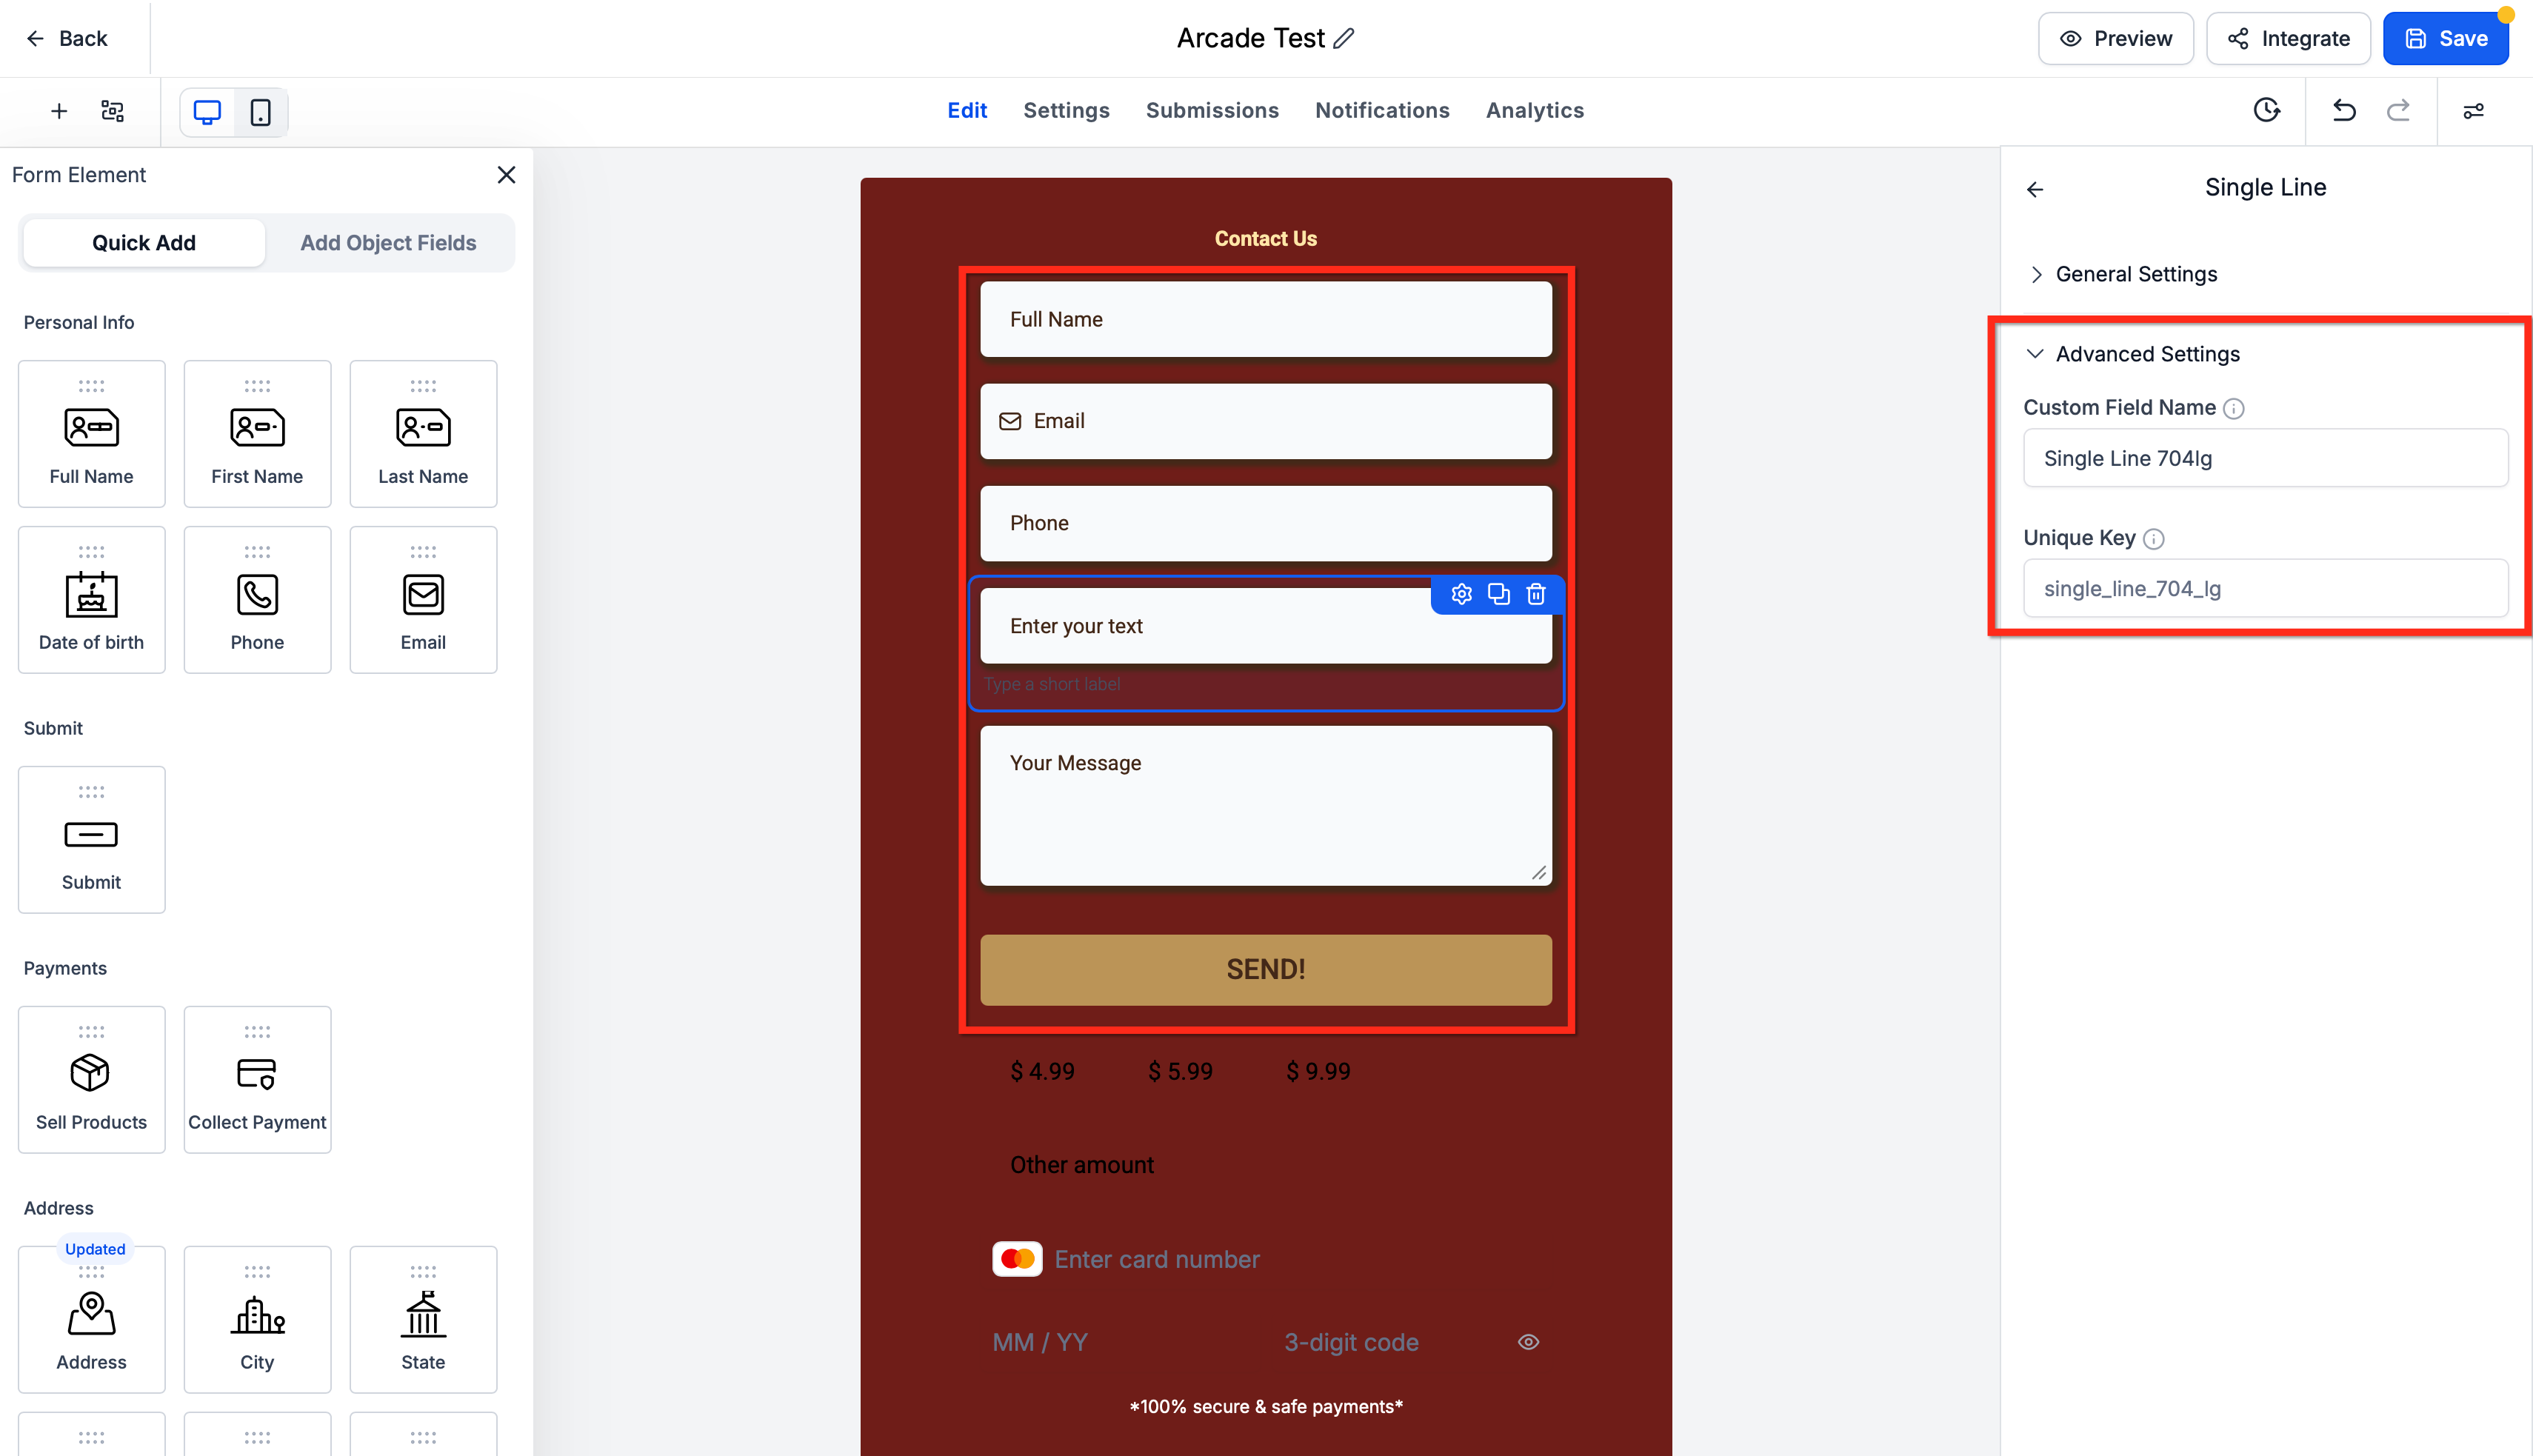
Customizable data collection: Add standard fields or contact custom fields to collect information that matches your business process.
Flexible design options: Use Styles, Themes, and Advanced settings to control the appearance and layout of your form.
Submission notifications: Notify team members when a form is submitted and optionally send an automatic response to the person who completed it.
Workflow automation: Use the Form Submitted workflow trigger to begin follow-up actions after a specified form is completed.
Flexible publishing: Share a direct form link or embed the form into a HighLevel or compatible external website.
Form Fields and Custom Fields
Choosing the right fields keeps your contact form focused while ensuring your team receives enough information to respond effectively. Standard fields are useful for common contact information, while custom fields allow you to collect business-specific details such as inquiry type, preferred service, budget range, or preferred contact method.
Common contact-form fields include:
First Name
Last Name
Email
Phone
Message
Drop-downs
Checkboxes
Radio buttons
Contact custom fields
HighLevel also supports creating and editing several custom field types directly from the Form and Survey Builder. Depending on the field type, you can add options such as drop downs, checkboxes, radio selections, date pickers, numbers, monetary fields, file uploads, and text fields.
Form Styling and Themes
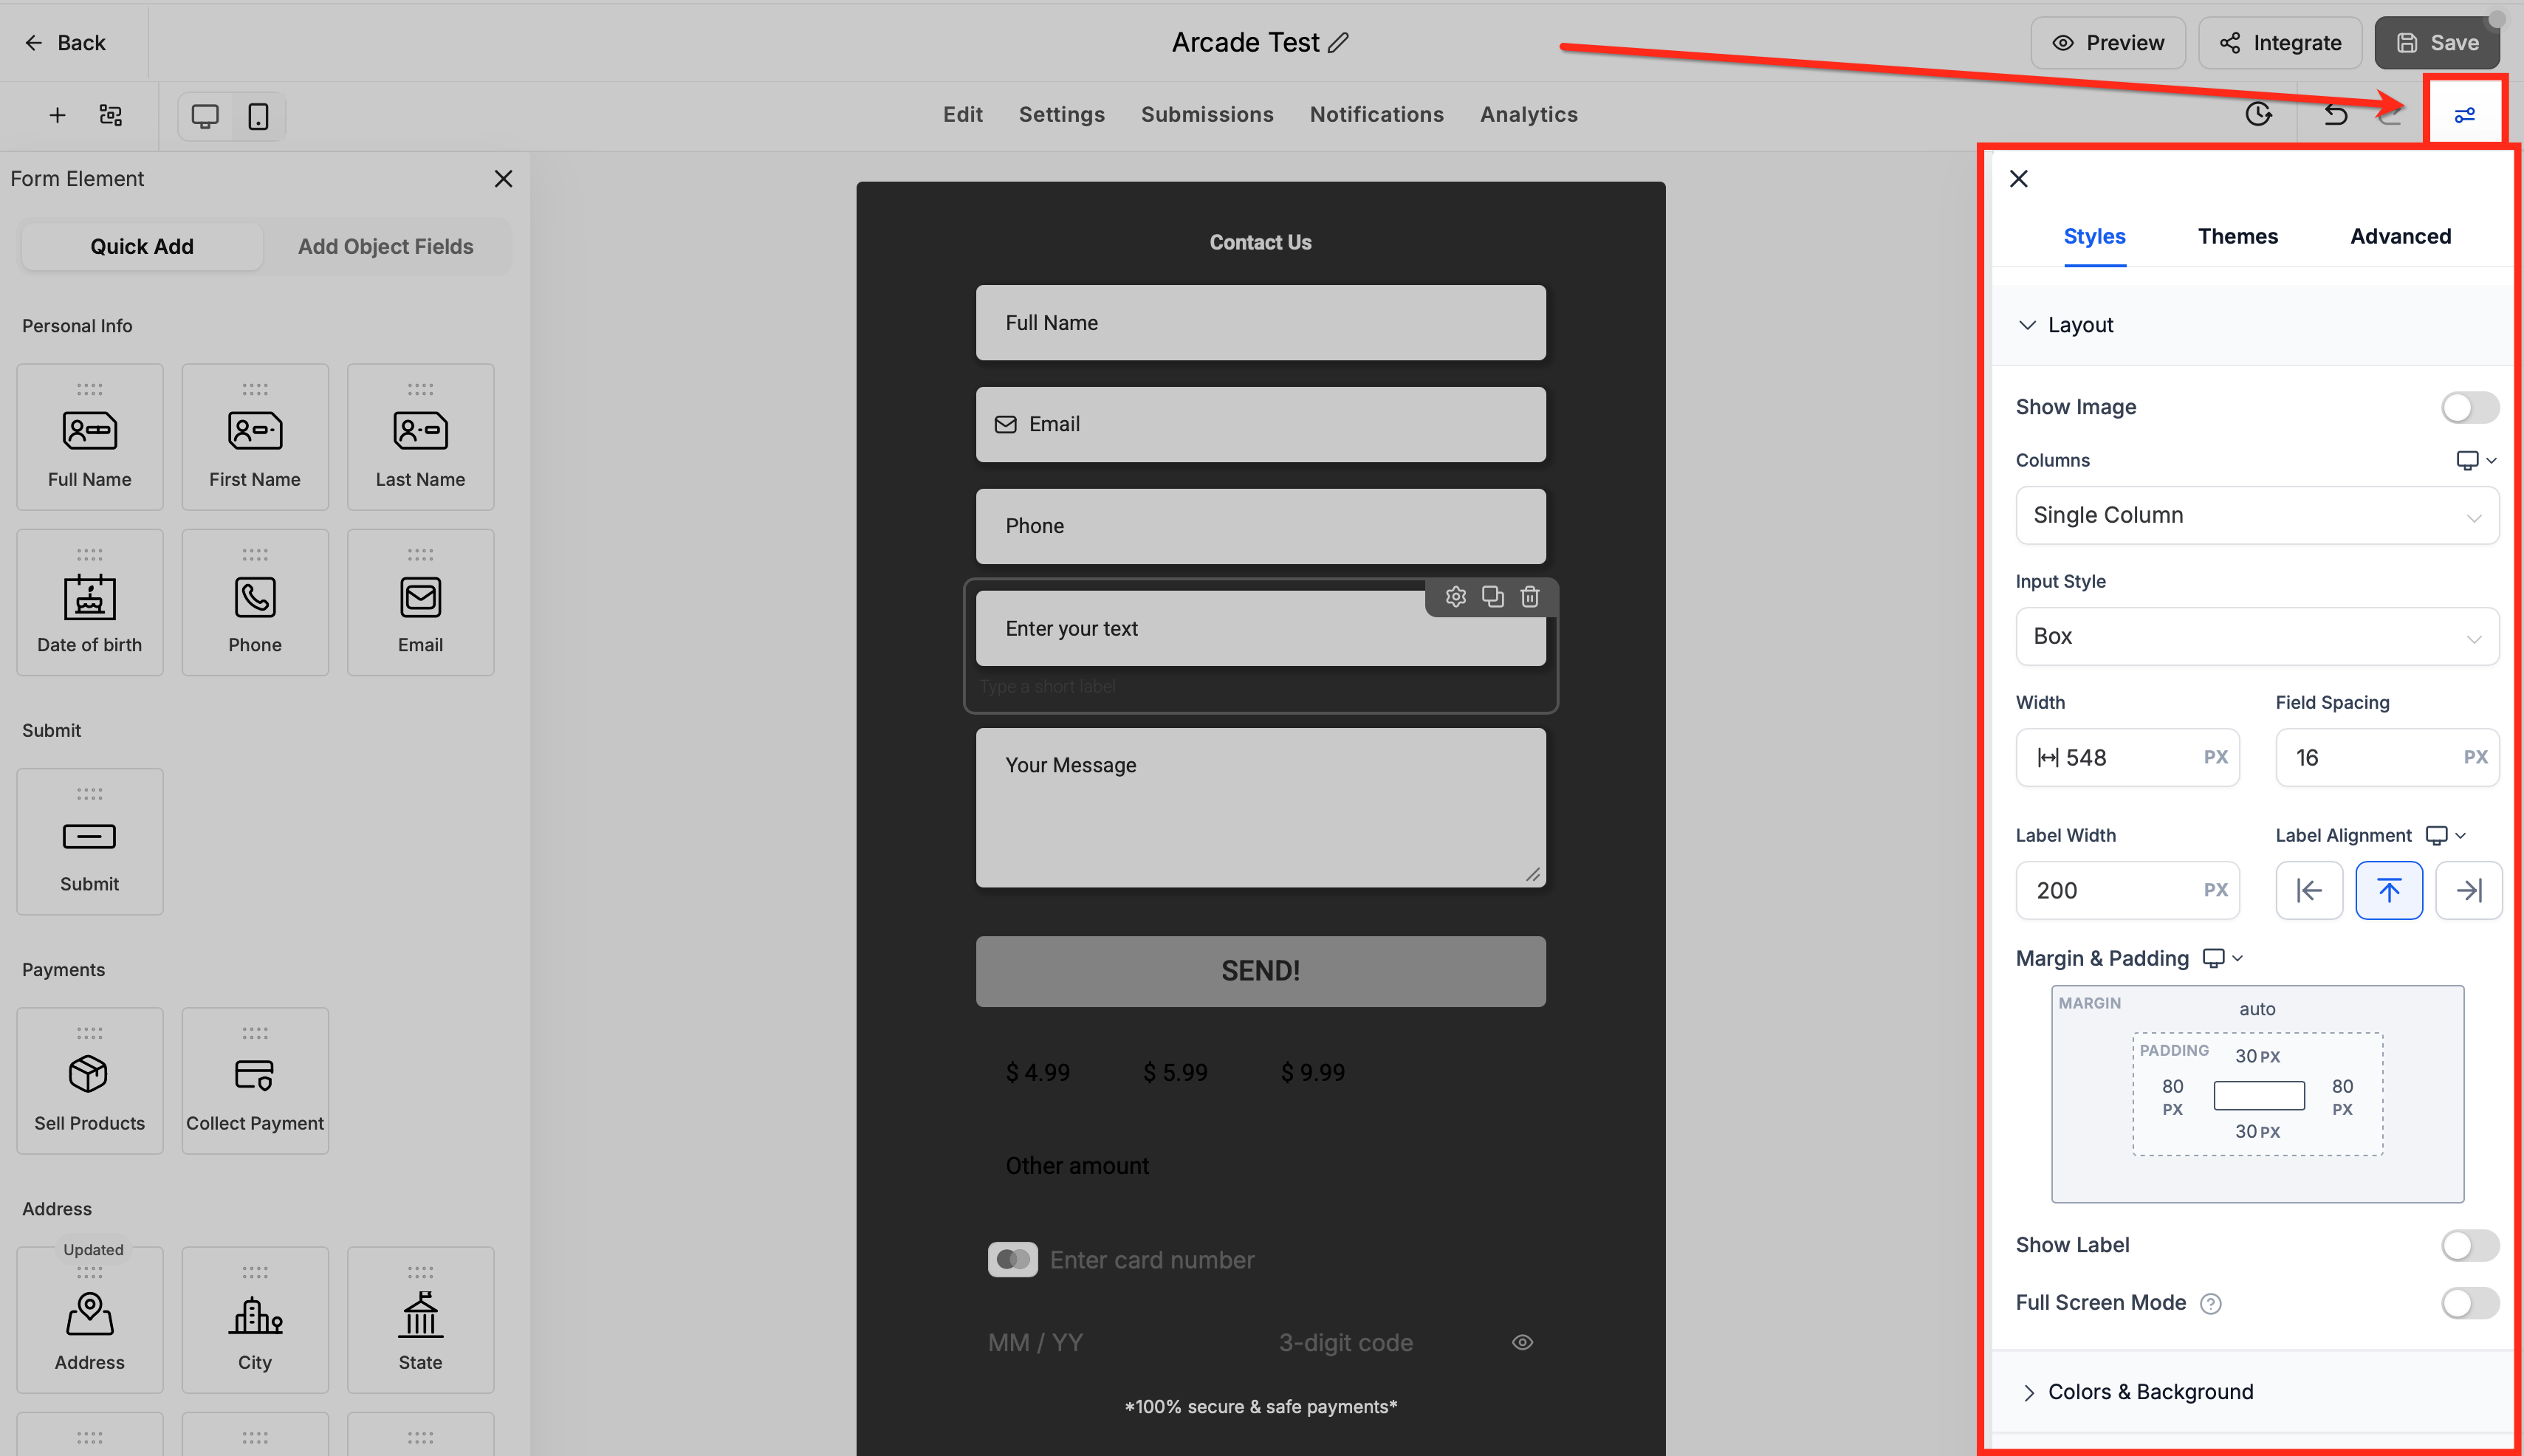
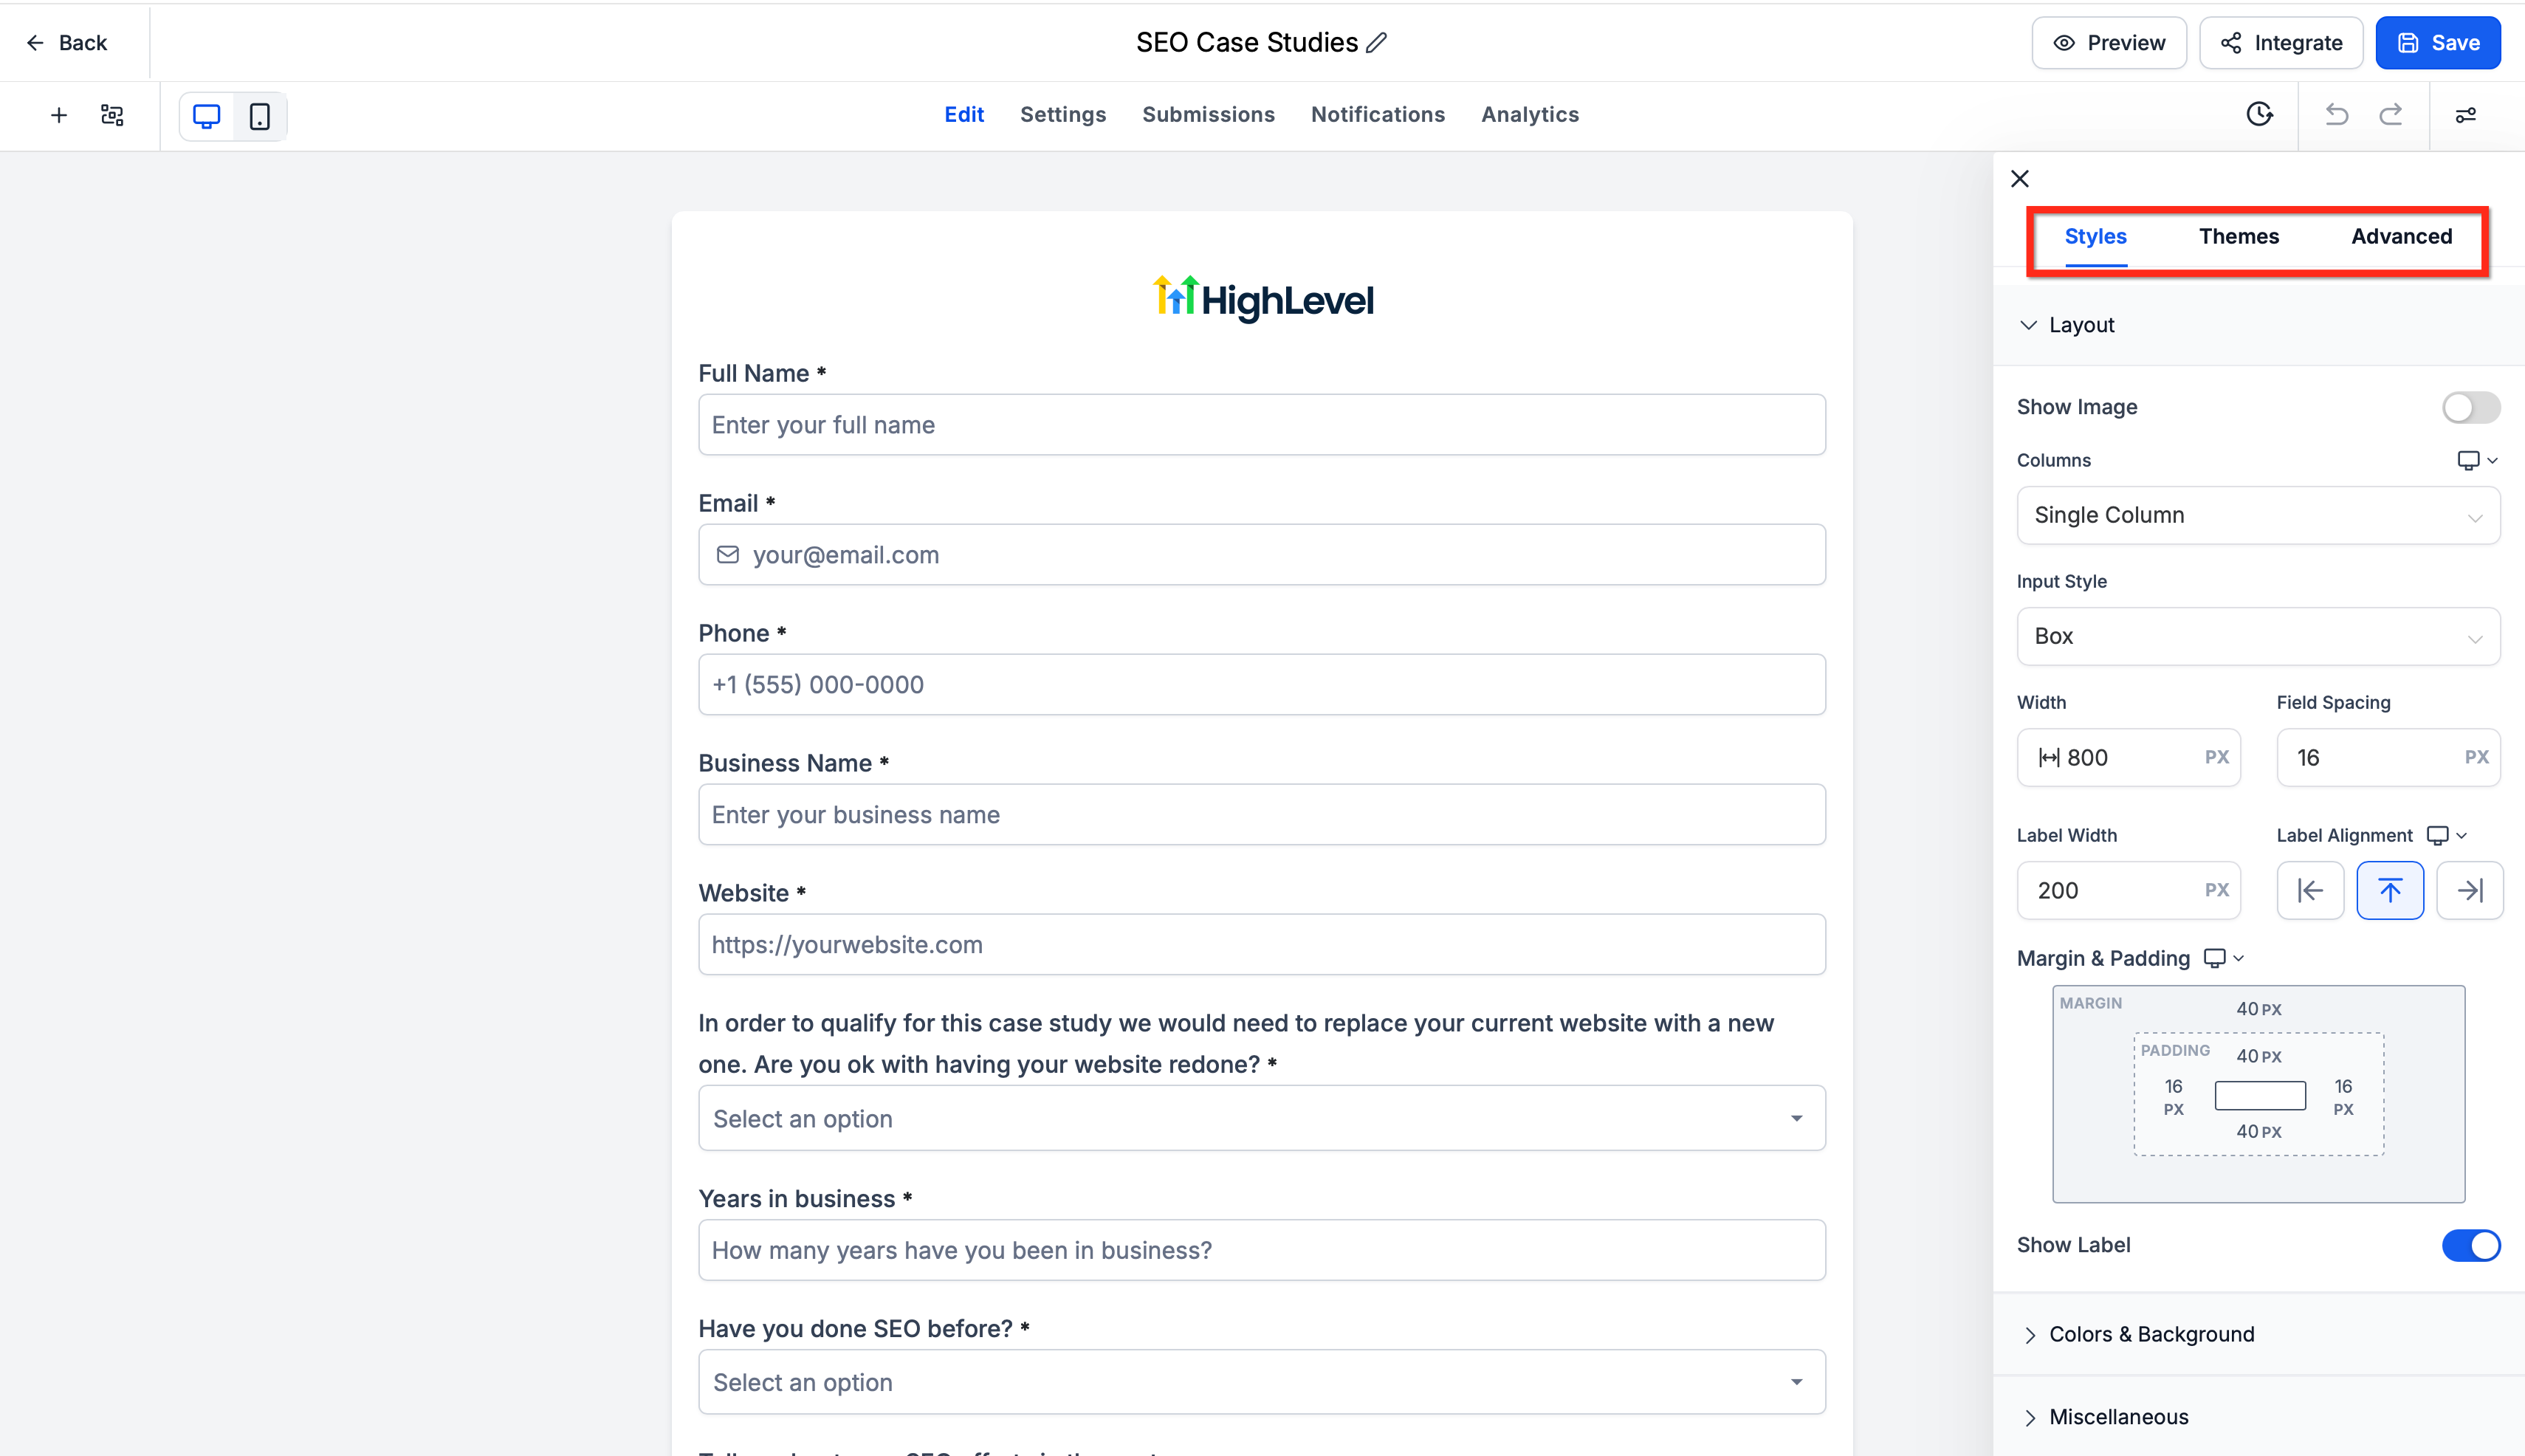
A consistent form design helps the form feel like a natural part of your website or funnel. HighLevel's Styles & Options controls let you adjust layout, spacing, colors, input appearance, buttons, and other design settings, while Themes provide prebuilt visual presets that can help you start with a polished design.
Inside the Form Builder, click Styles & Options to access:
Styles: Adjust layout, colors, backgrounds, spacing, inputs, buttons, borders, and other visual settings.
Themes: Apply a ready-made visual preset and then refine it using Styles.
Advanced: Access additional configuration options for specialized needs.
For additional design options, see Right Sidebar in Form and Survey Builder and Themes in Forms/Surveys.
Form Notifications and Auto Responder
Form notifications help your team respond quickly without repeatedly checking the submissions page. HighLevel can send an internal Email Notification when someone submits the form, while Auto Responder can automatically acknowledge the person who completed it.
From the Notifications area of the Form Builder, you can configure:
Email Notification: Sends submission alerts to designated team members or email addresses.
Auto Responder: Sends an automatic email to the person who submitted the form.
Email Notification settings can include details such as the subject, recipient email address, reply-to email, and sender name.
For detailed notification settings, see Email Notifications in Forms and Surveys.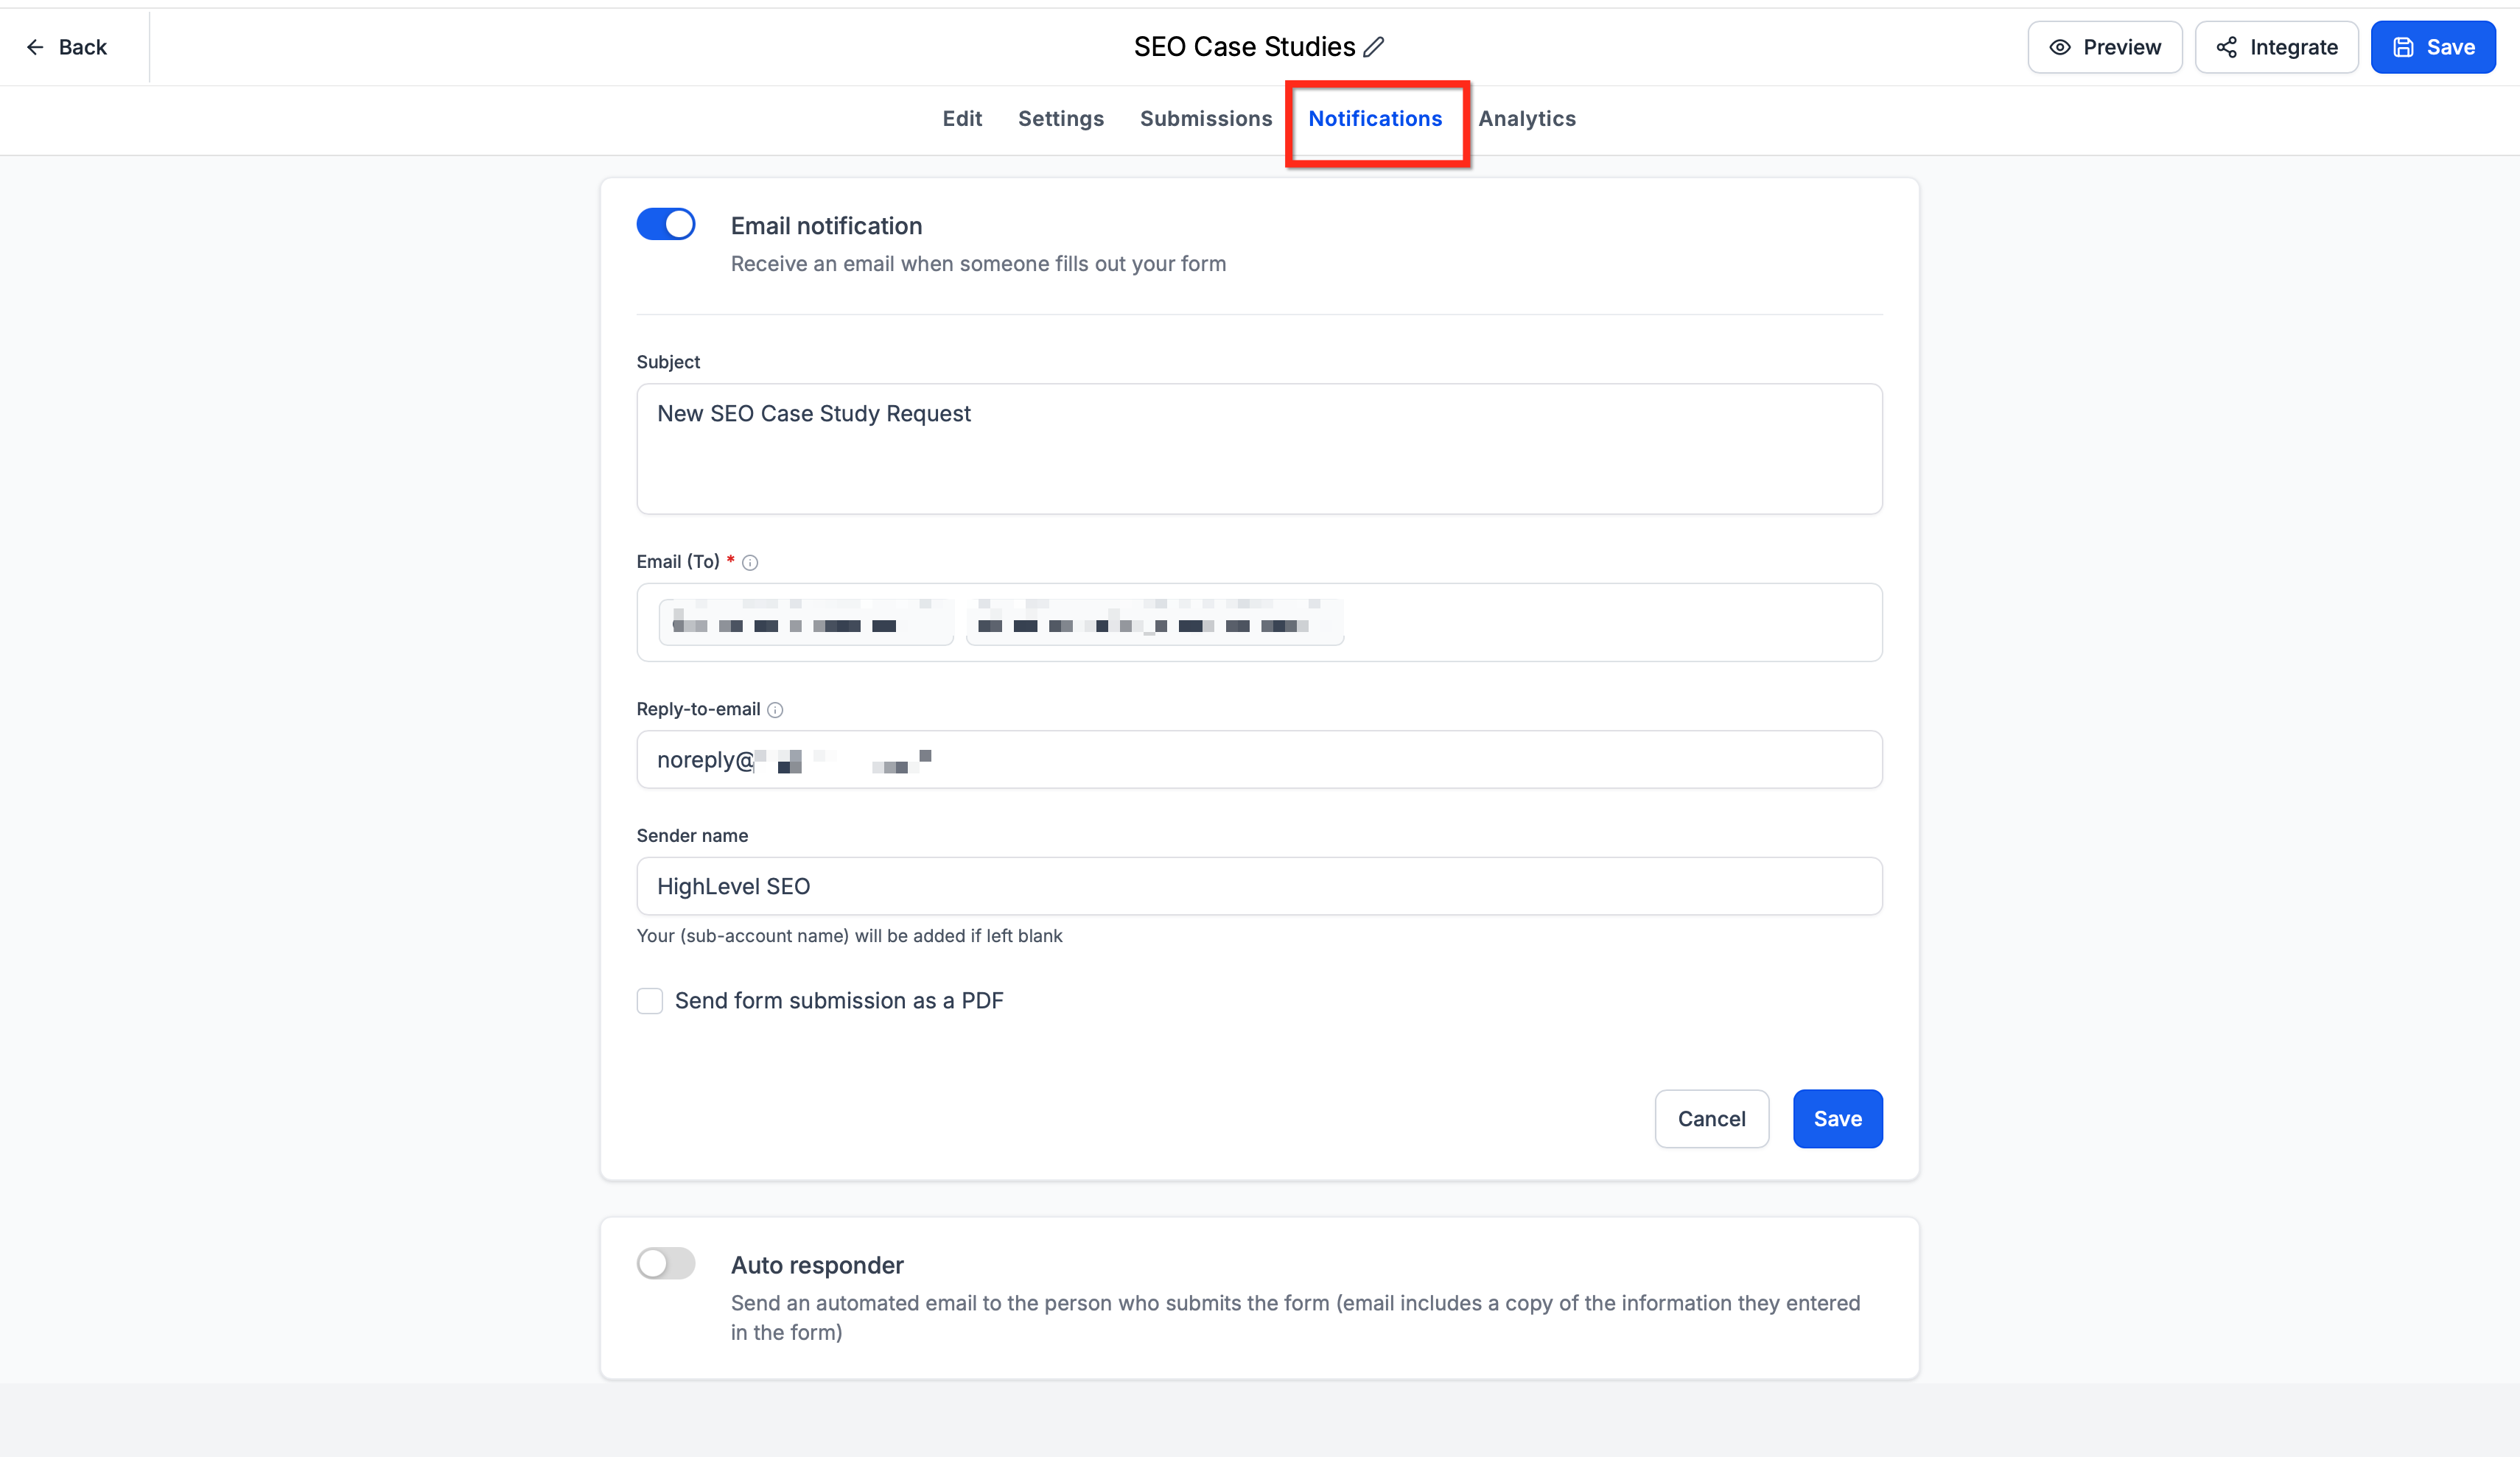
Form Submissions: Where to Access Them and How They Appear
How To Create a Contact Form
A complete contact form setup includes adding the right fields, configuring the design and behavior, testing the form, and confirming that submissions are captured correctly before sharing it with leads.
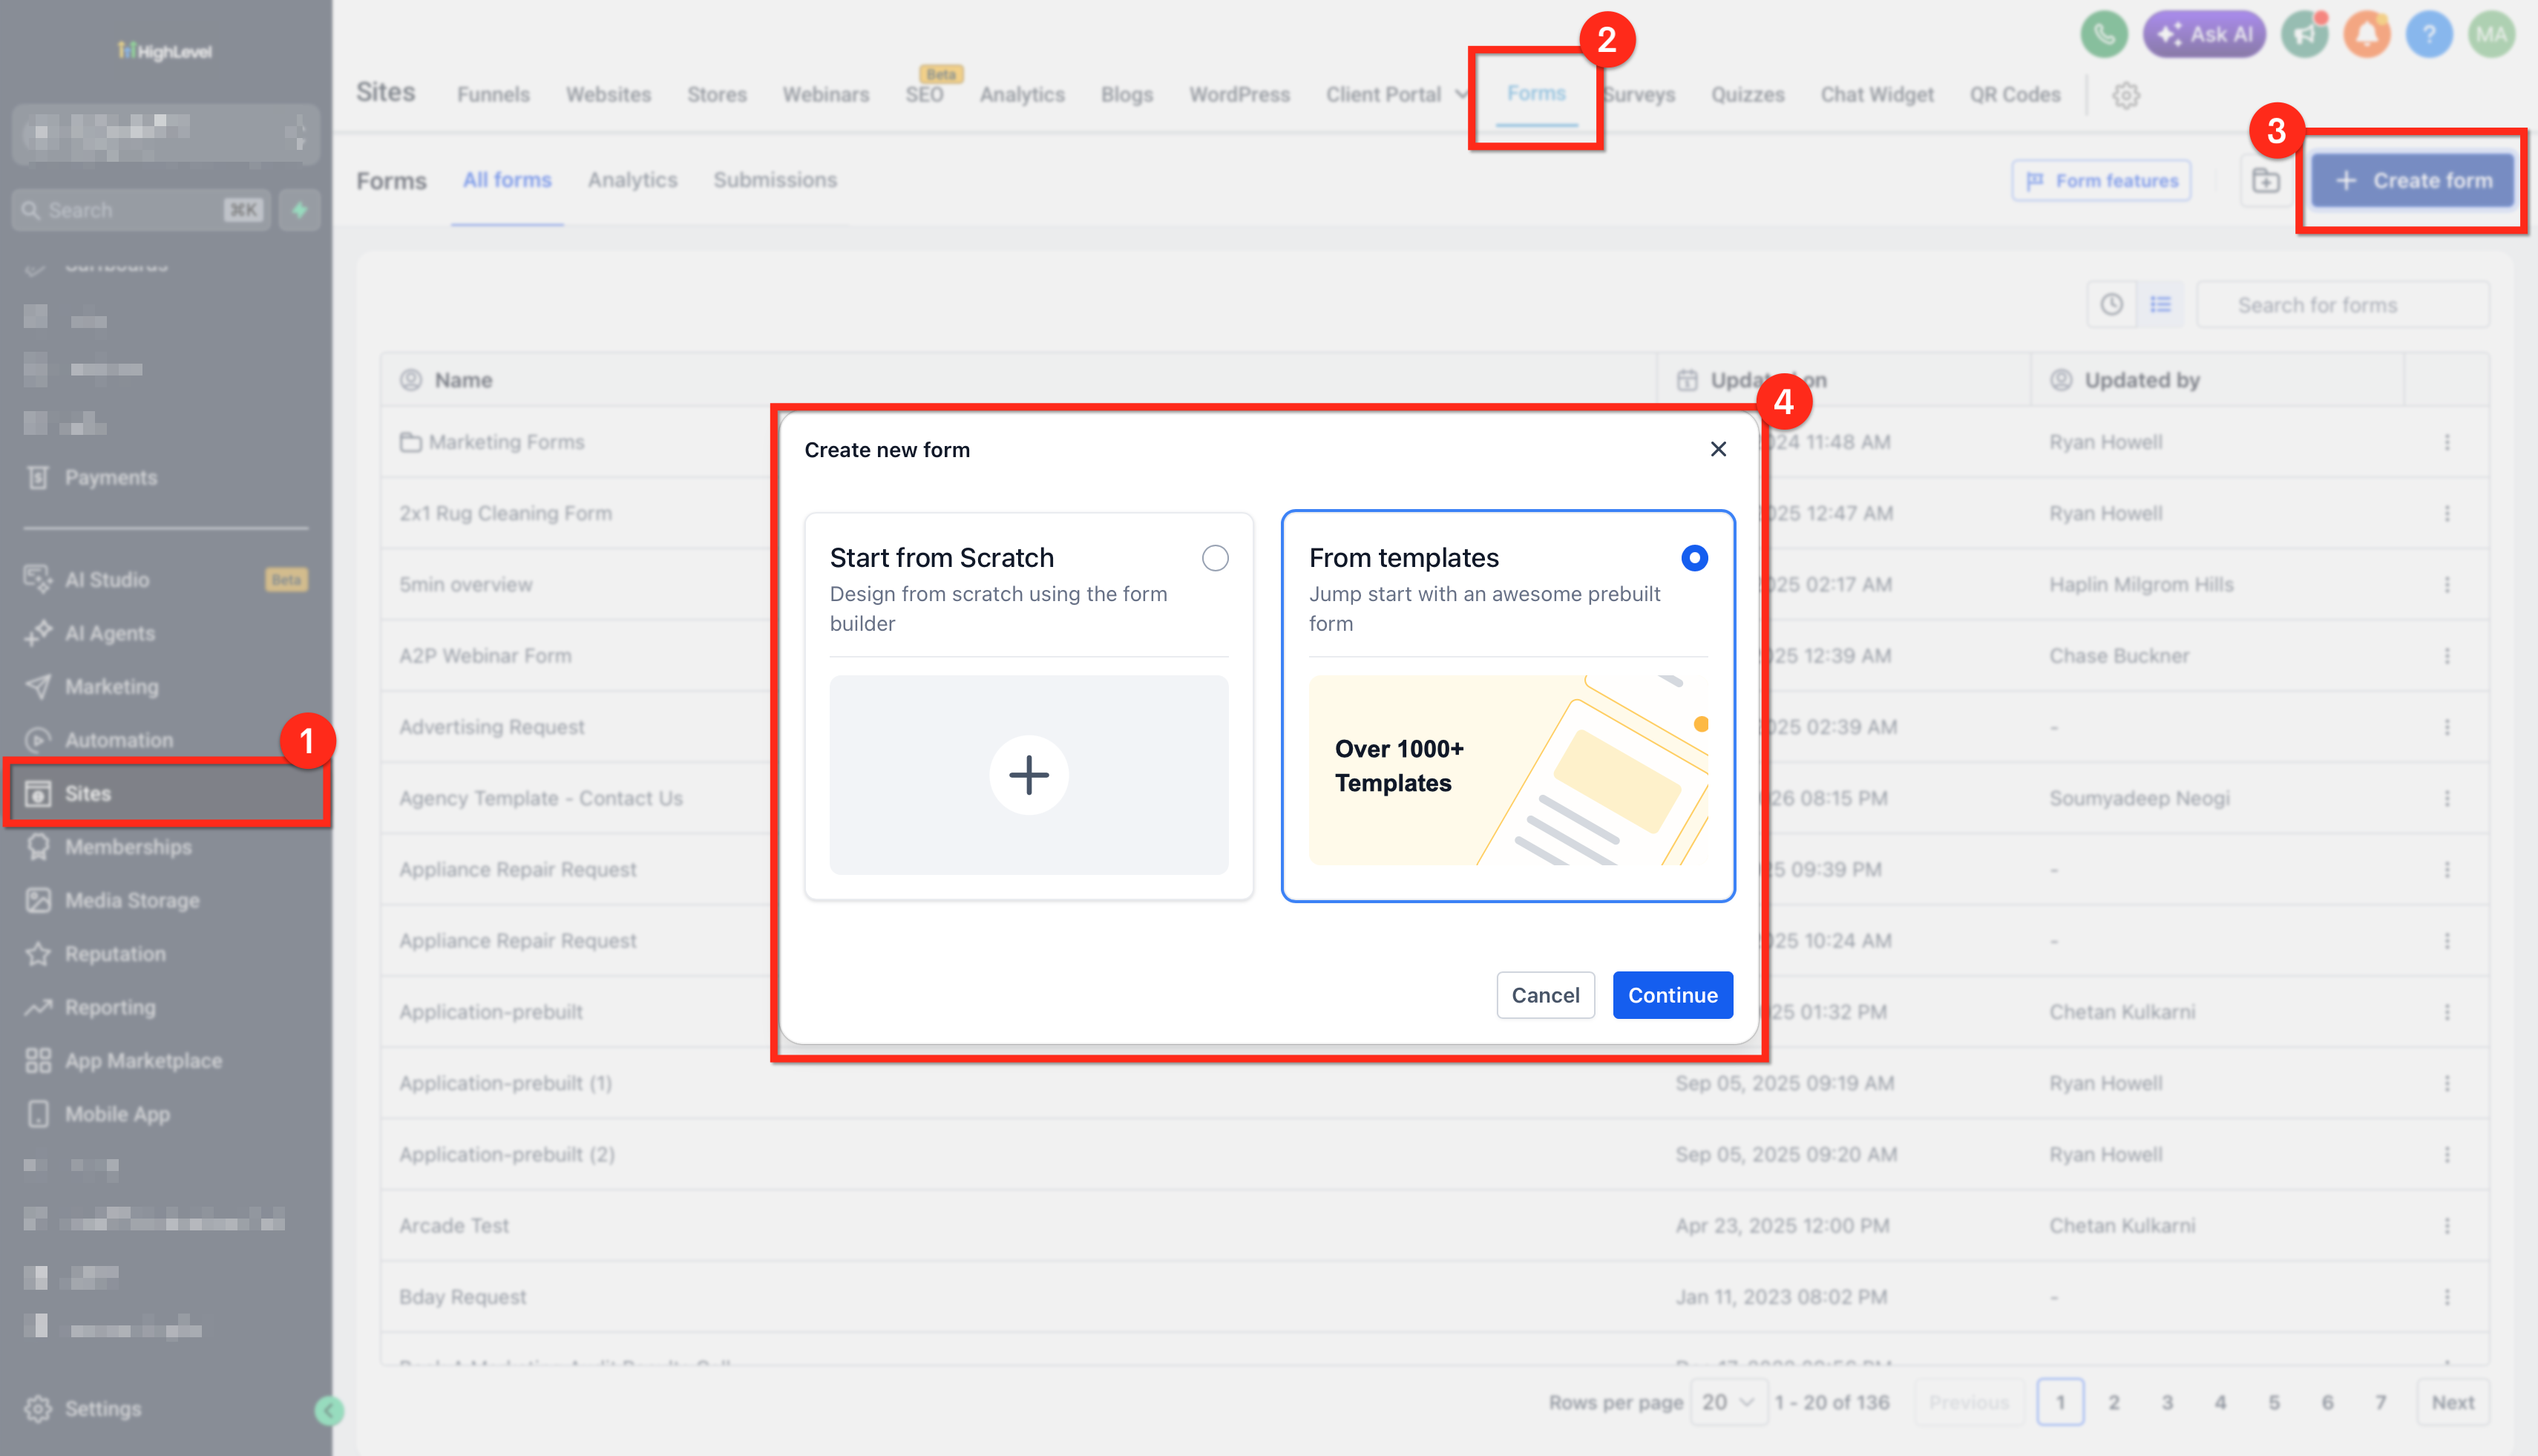
Step 1: Create the Form
- Go to Sites → Forms.
- Click + Create New Form.
- Start with a blank form or select an available template from the Template Library
Step 2: Add and Arrange Form Fields
Add the information you want to collect, such as Name, Email, Phone, Message, and any required custom fields. Drag and rearrange the fields into the preferred order and mark important fields as required where appropriate.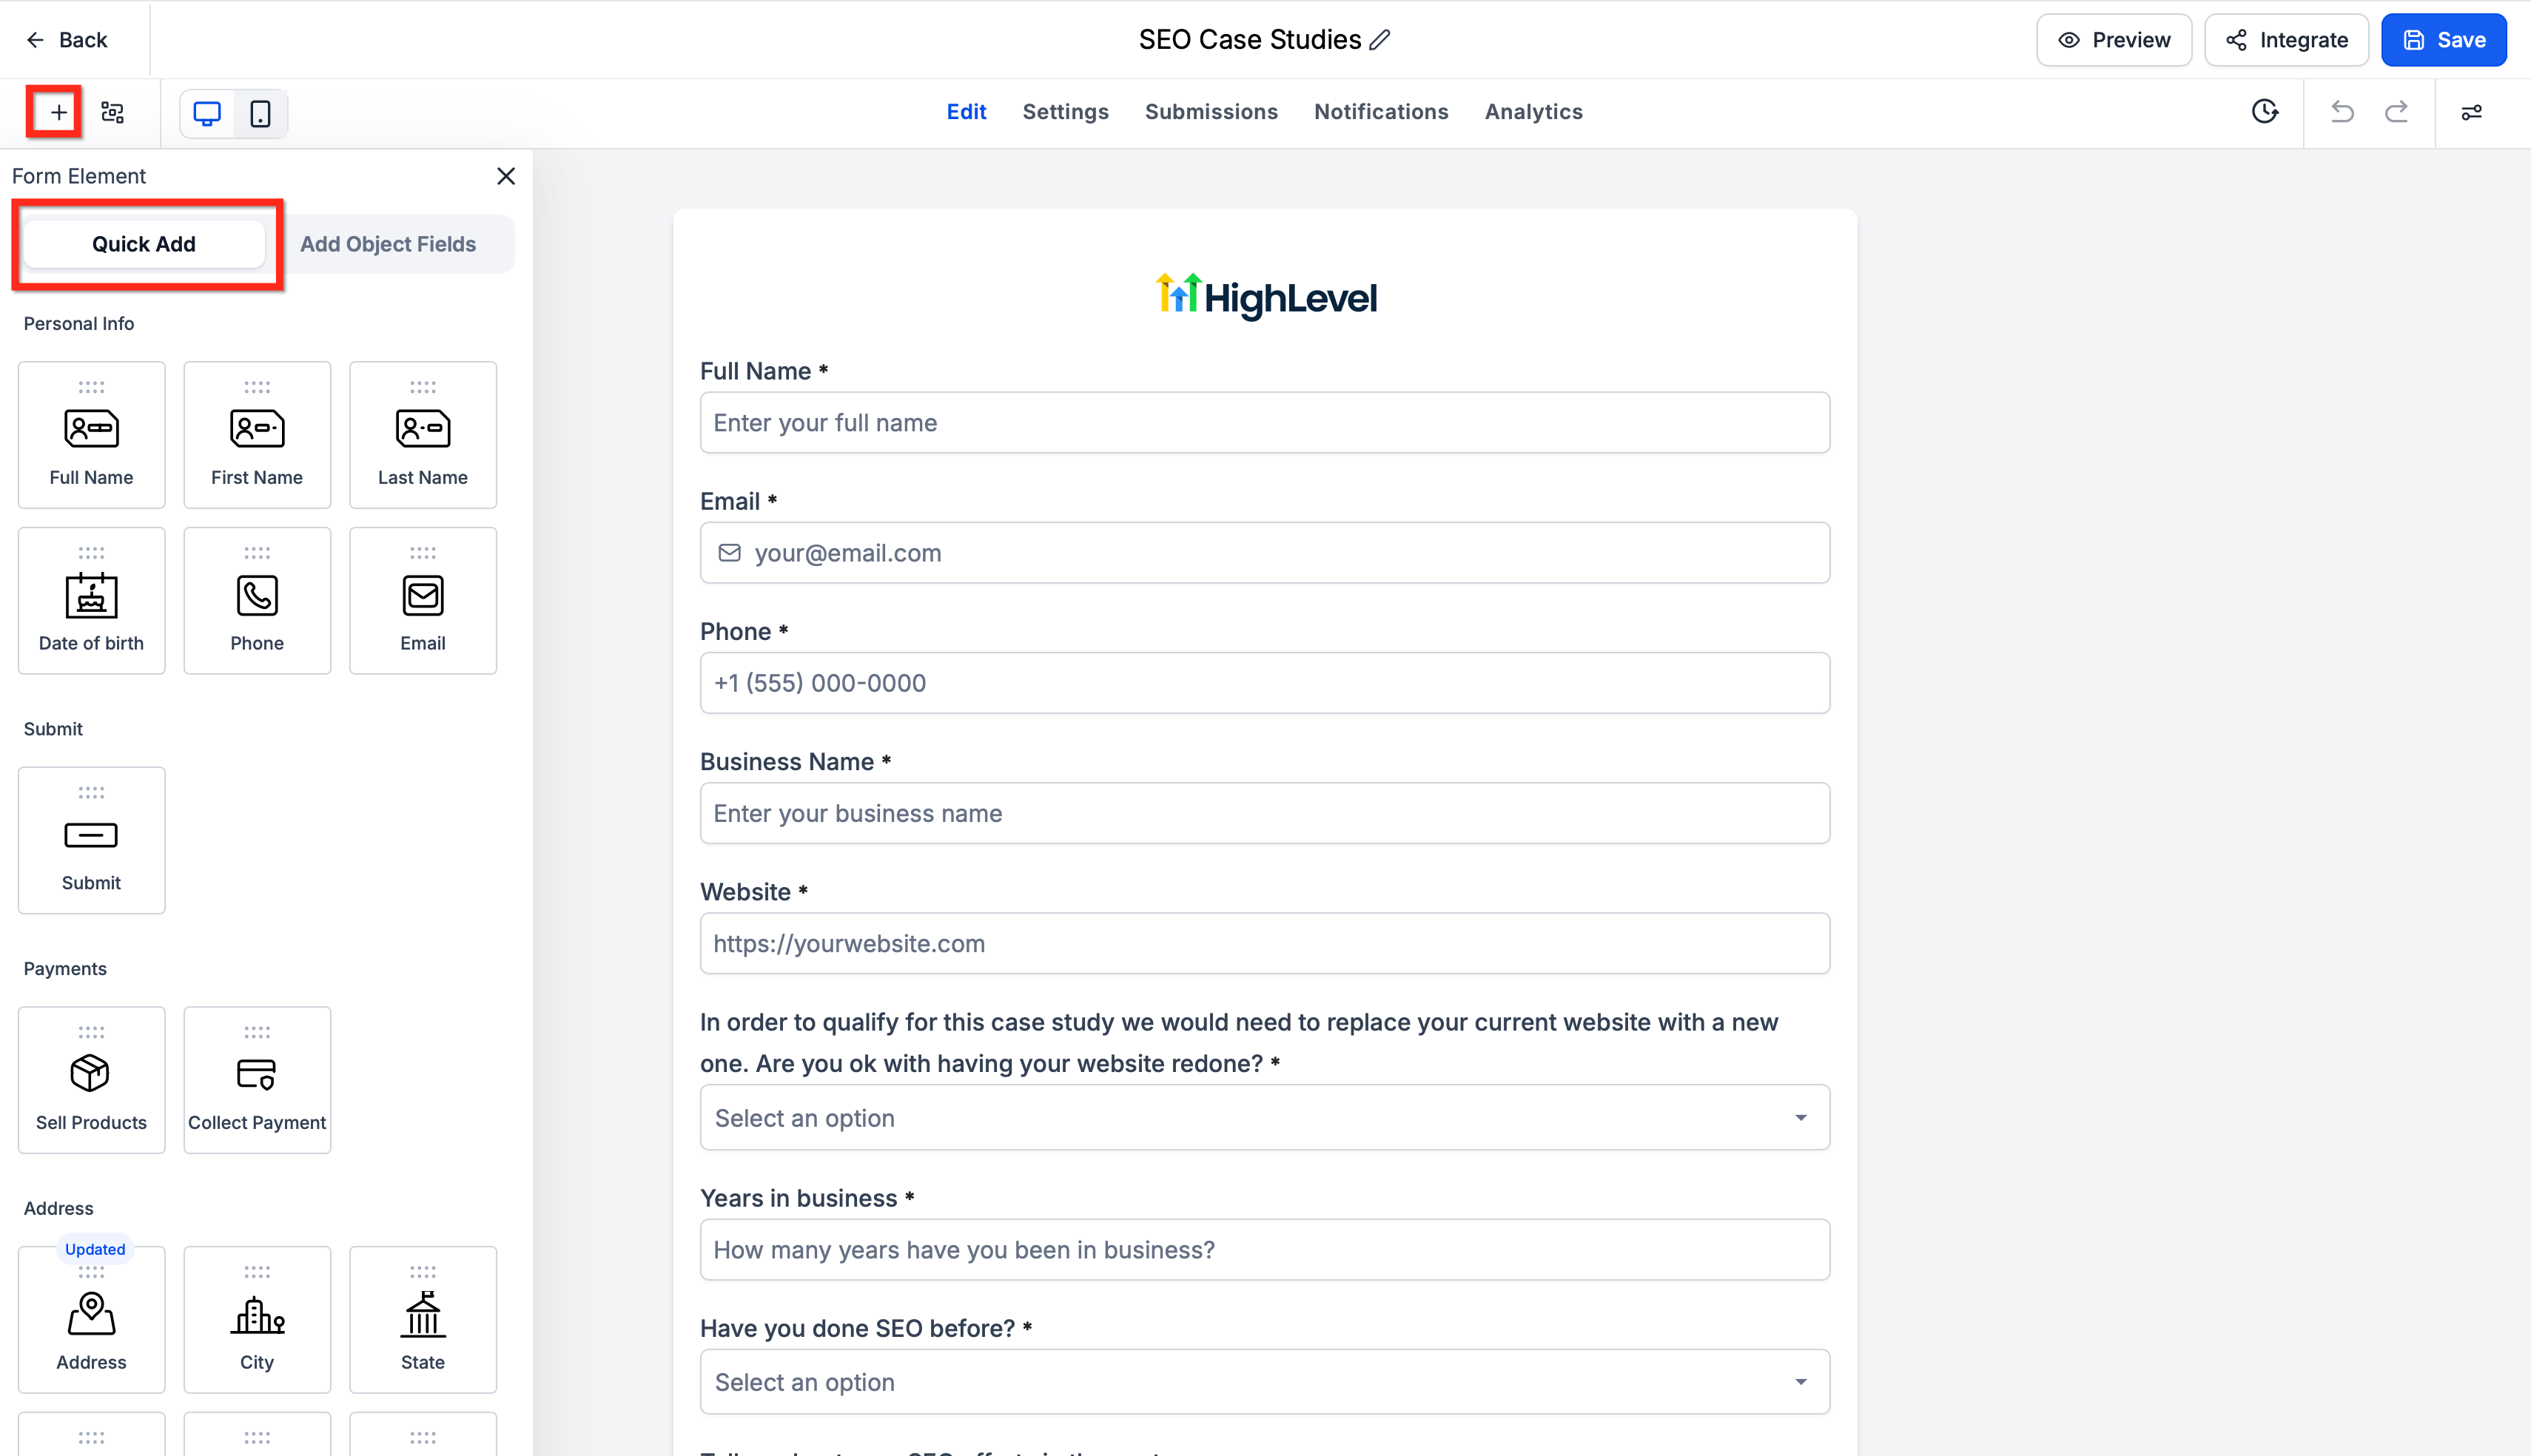
Step 3: Customize the Form
Use the Form Builder settings to configure:
- Styles & Options: Adjust layout, colors, spacing, buttons, and themes.
- Notifications: Configure internal Email Notifications and an Auto Responder if needed.
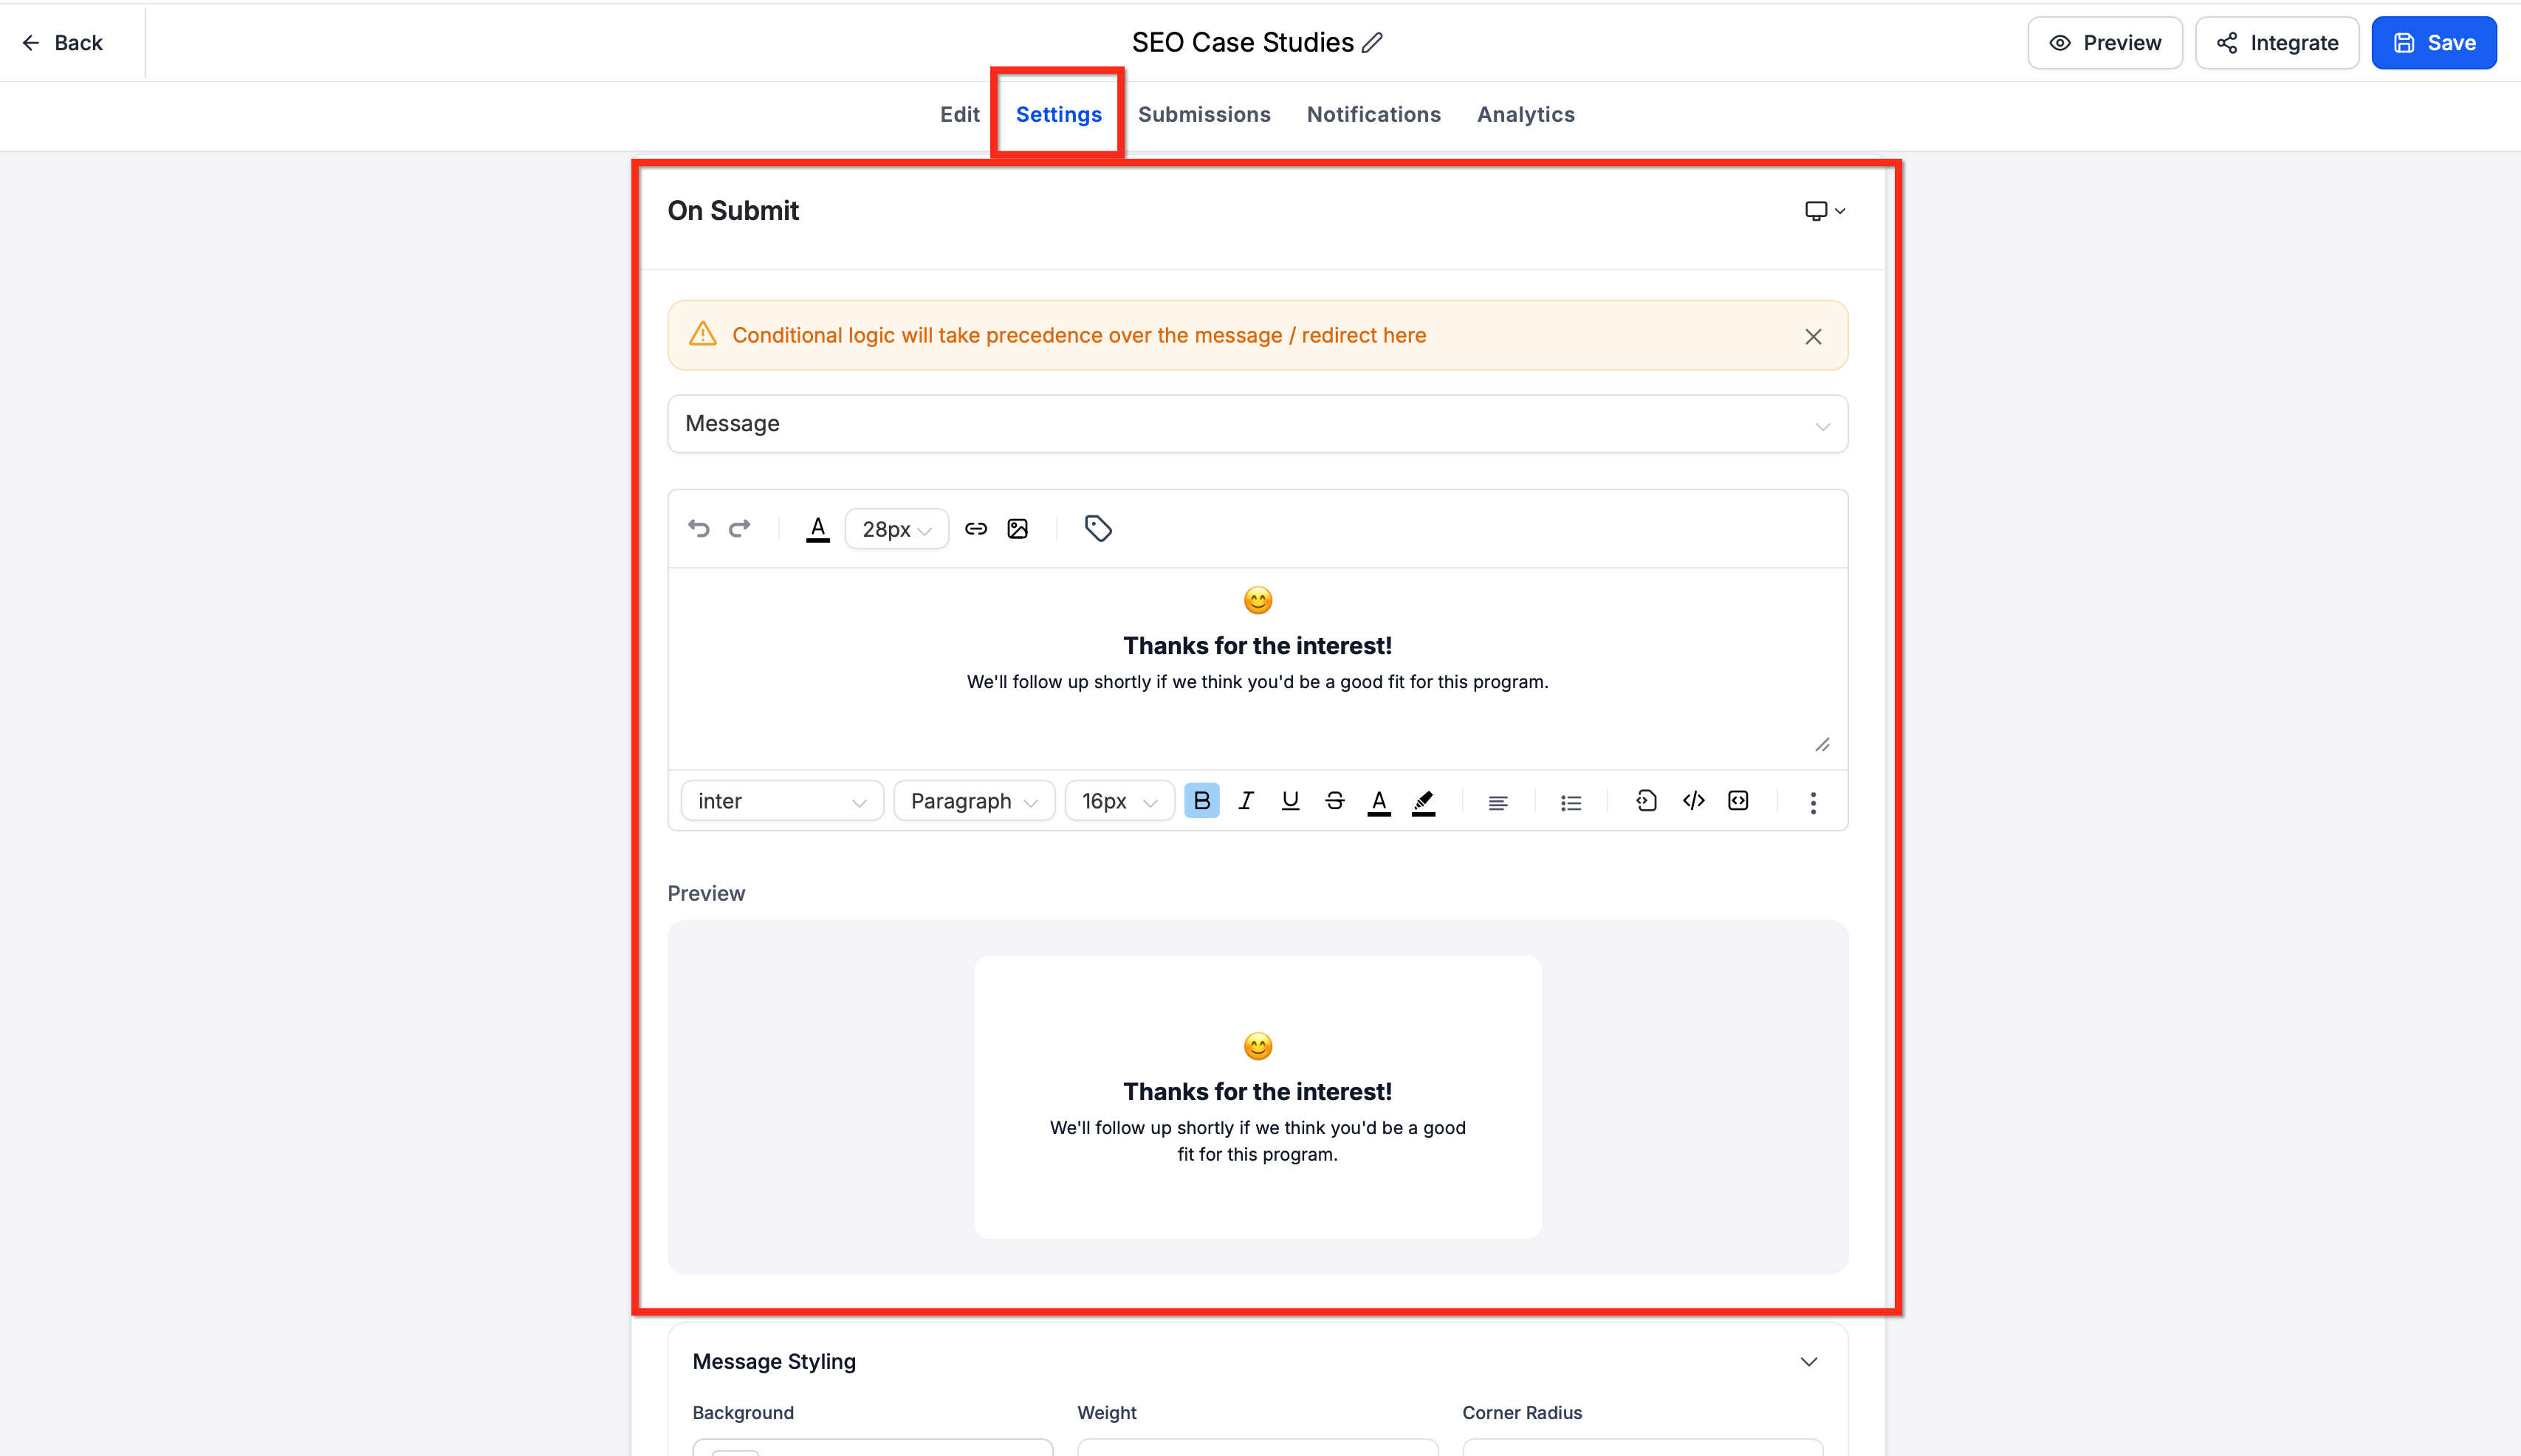
- Post-submission behavior: Display a confirmation message or redirect visitors after submission.
Step 4: Save, Test, and Monitor the Form
Save and preview the form, then complete a test submission to confirm that everything works as expected.
- Submit the form using test information.
- Confirm the expected thank-you message or redirect.
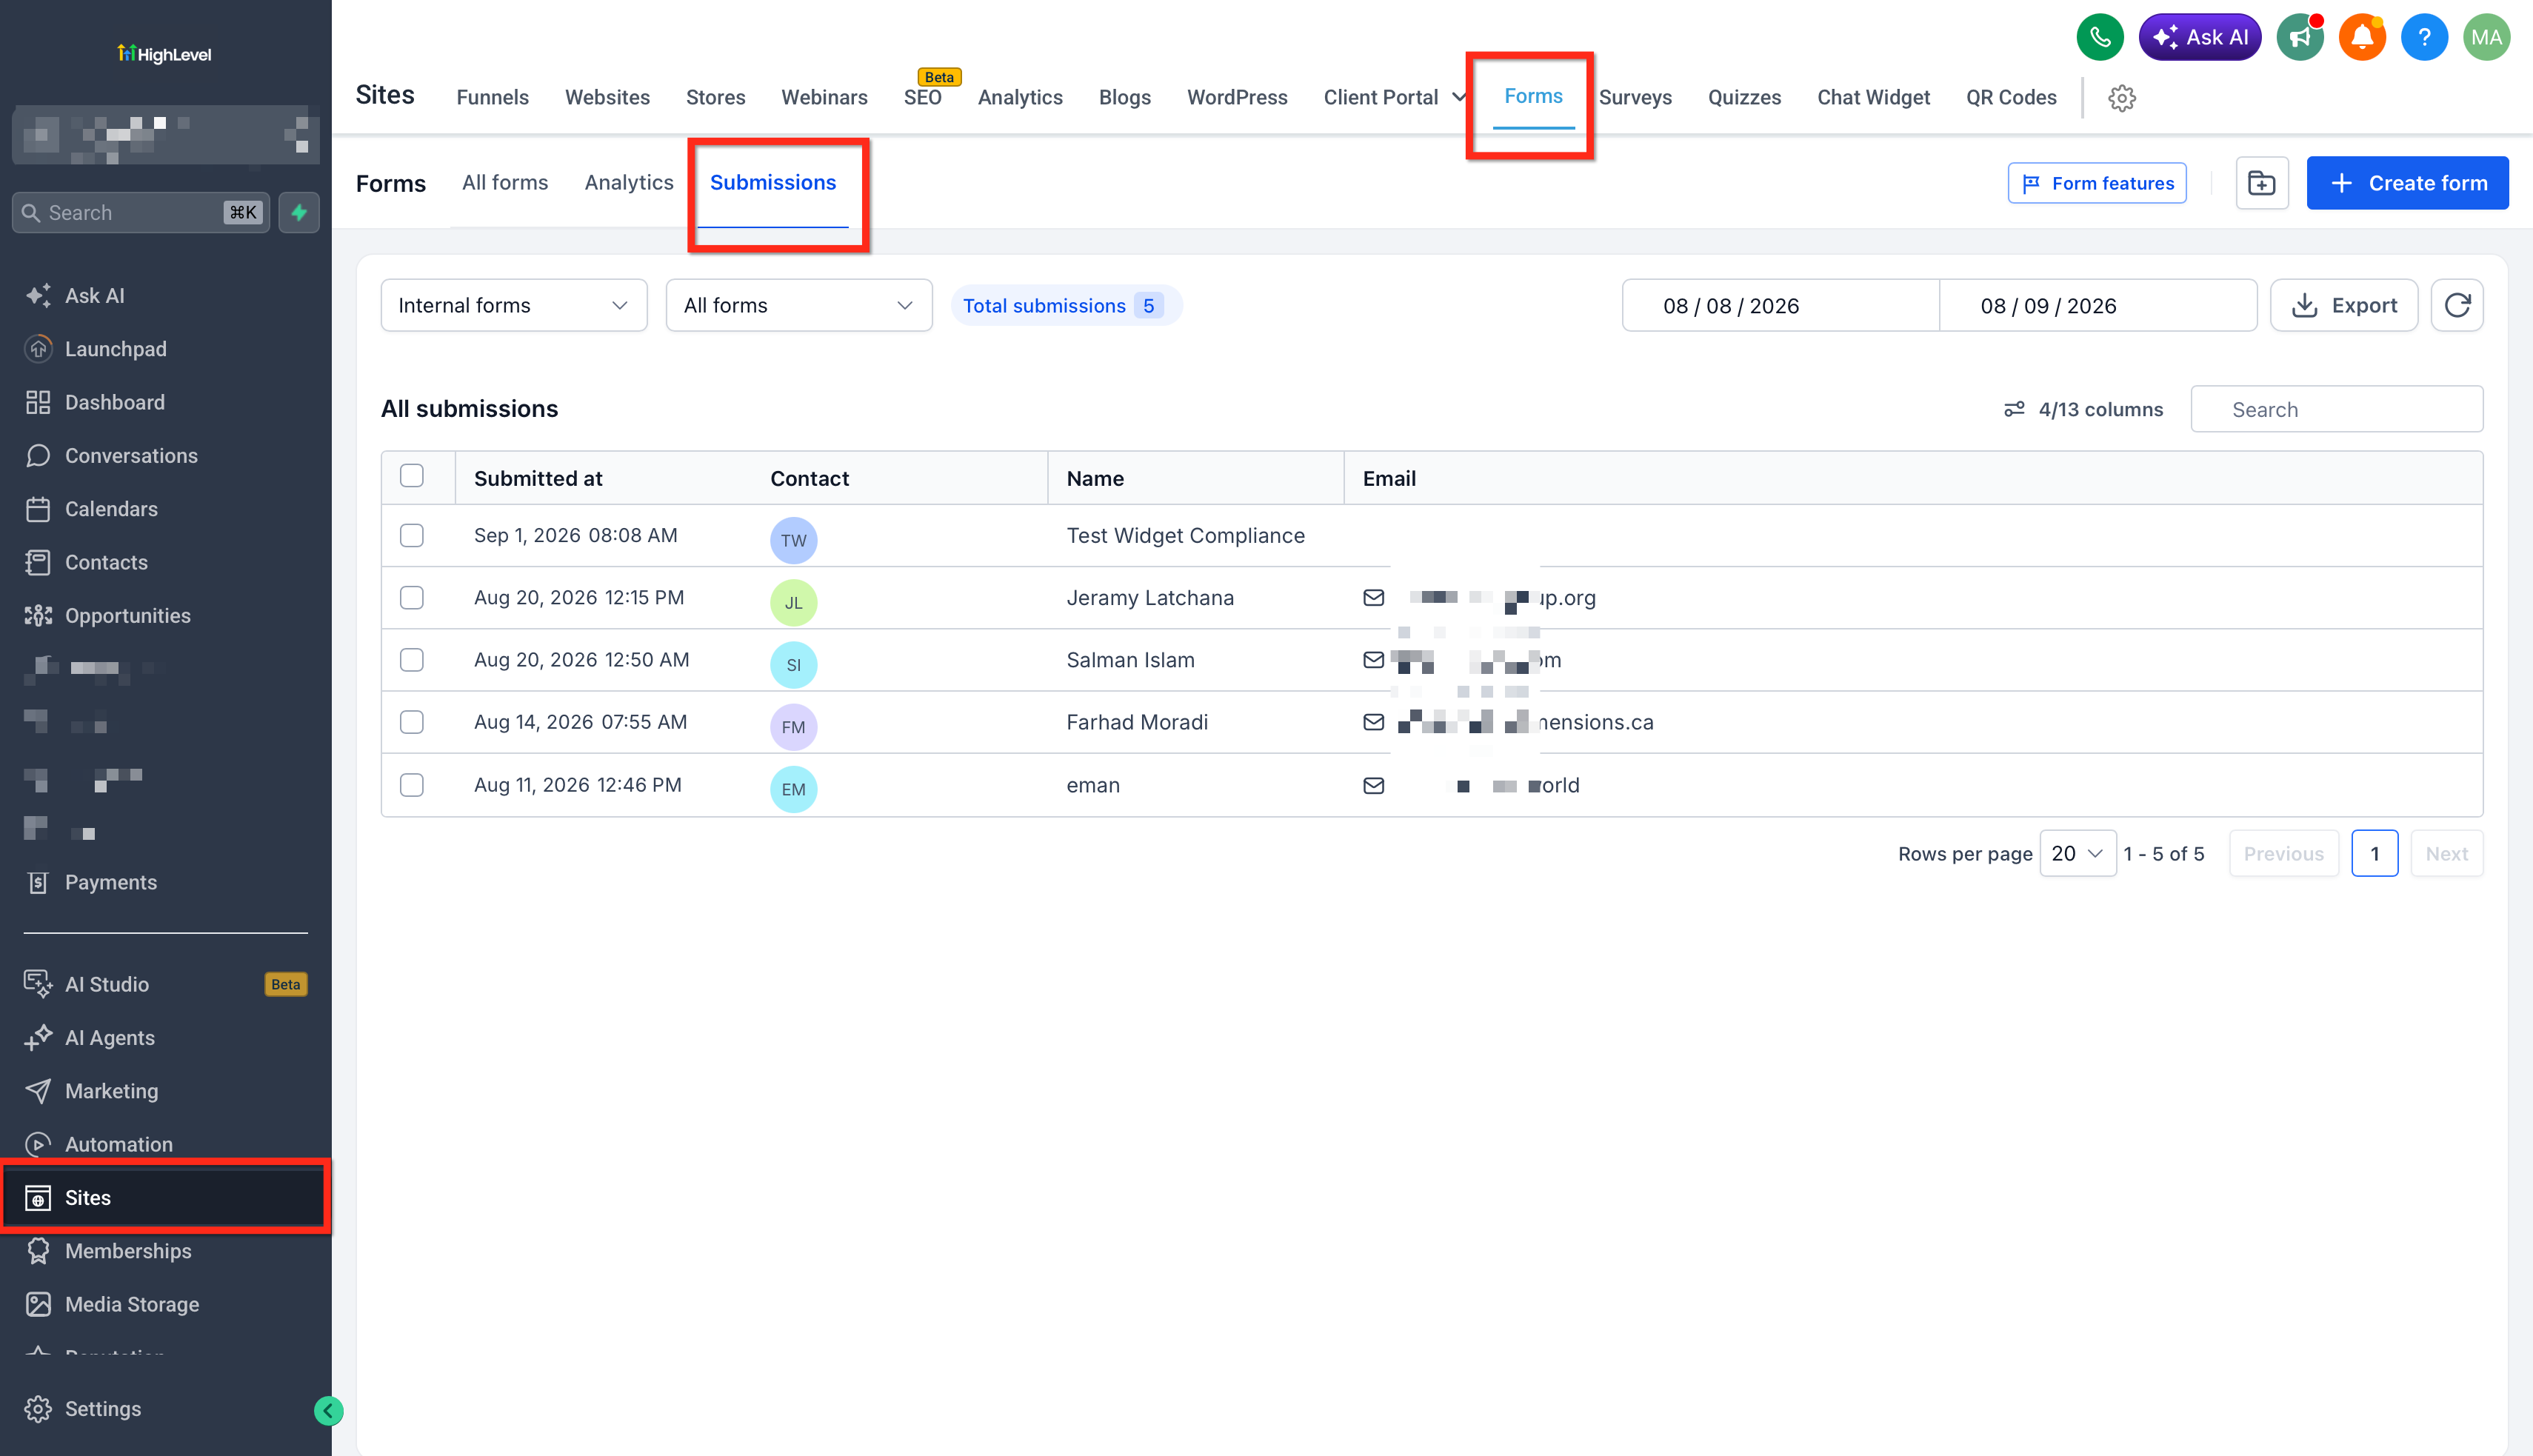
- Review the response from the Submissions tab.
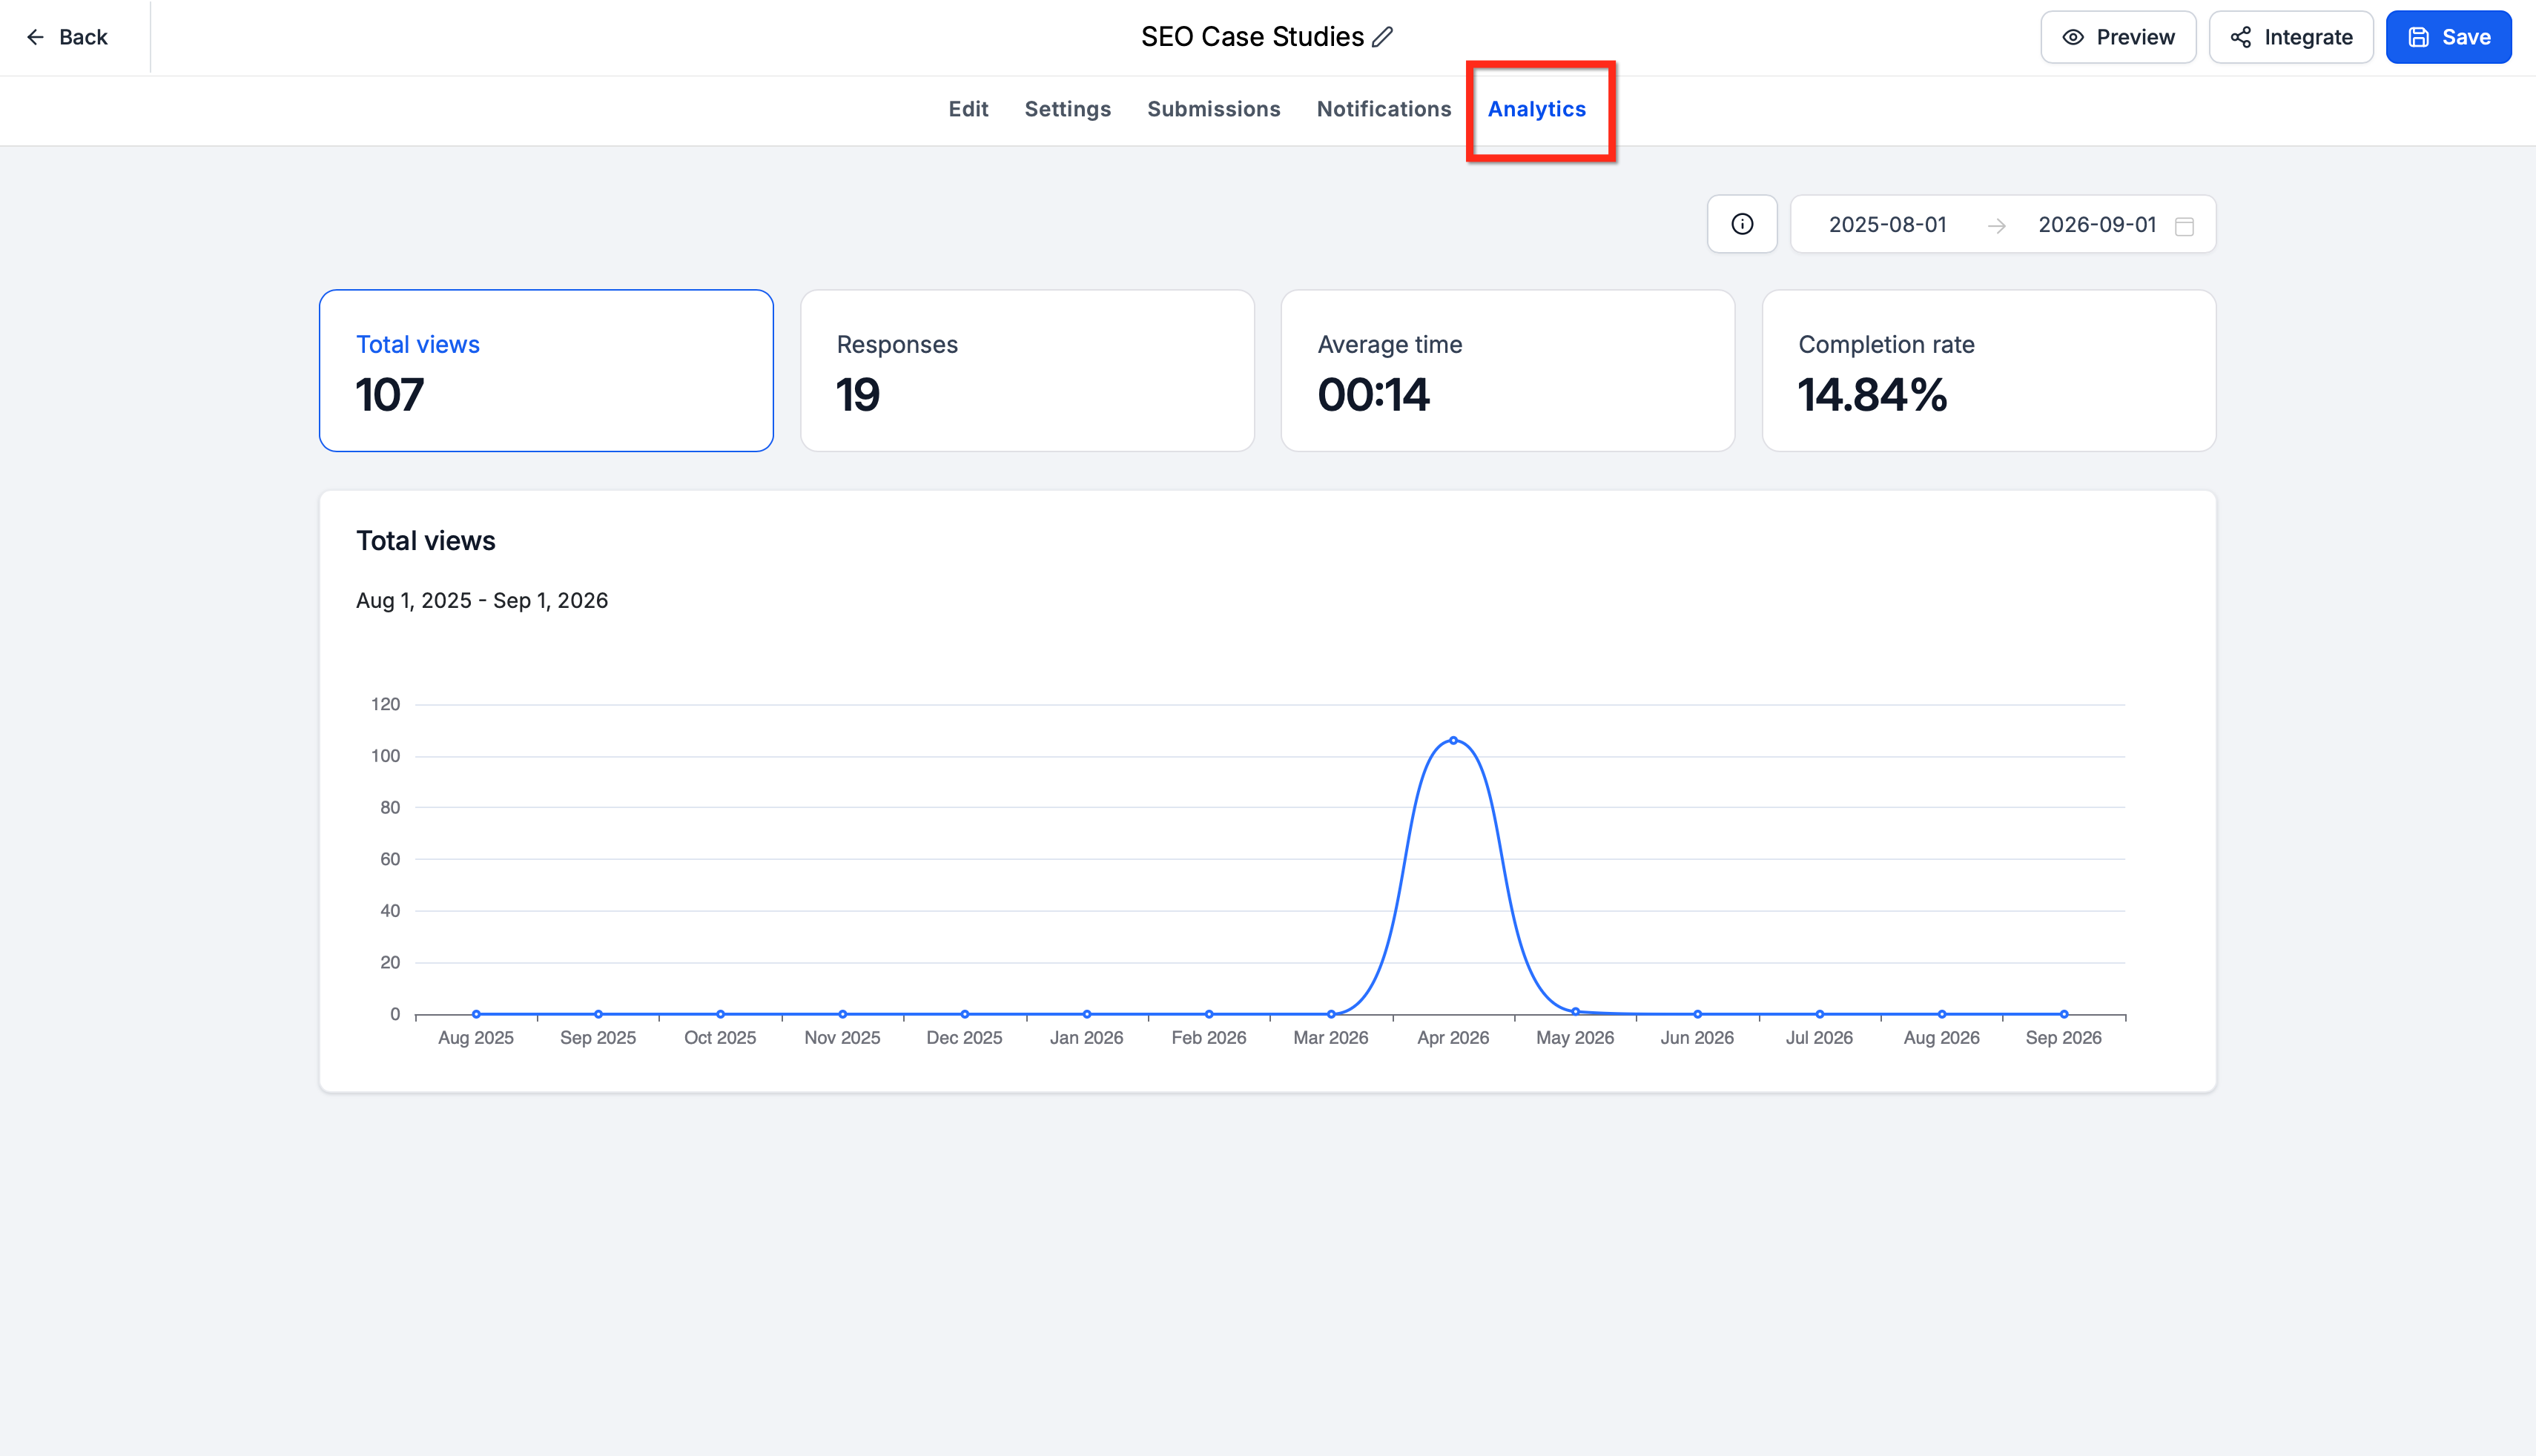
- After the form is published, use the Analytics tab to monitor views, responses, average completion time, and completion rate.
Step 5: Integrate or Share the Form
Click Integrate and choose how you want to publish the form. Copy the embed code to add it to a website or use the direct form link to share it independently.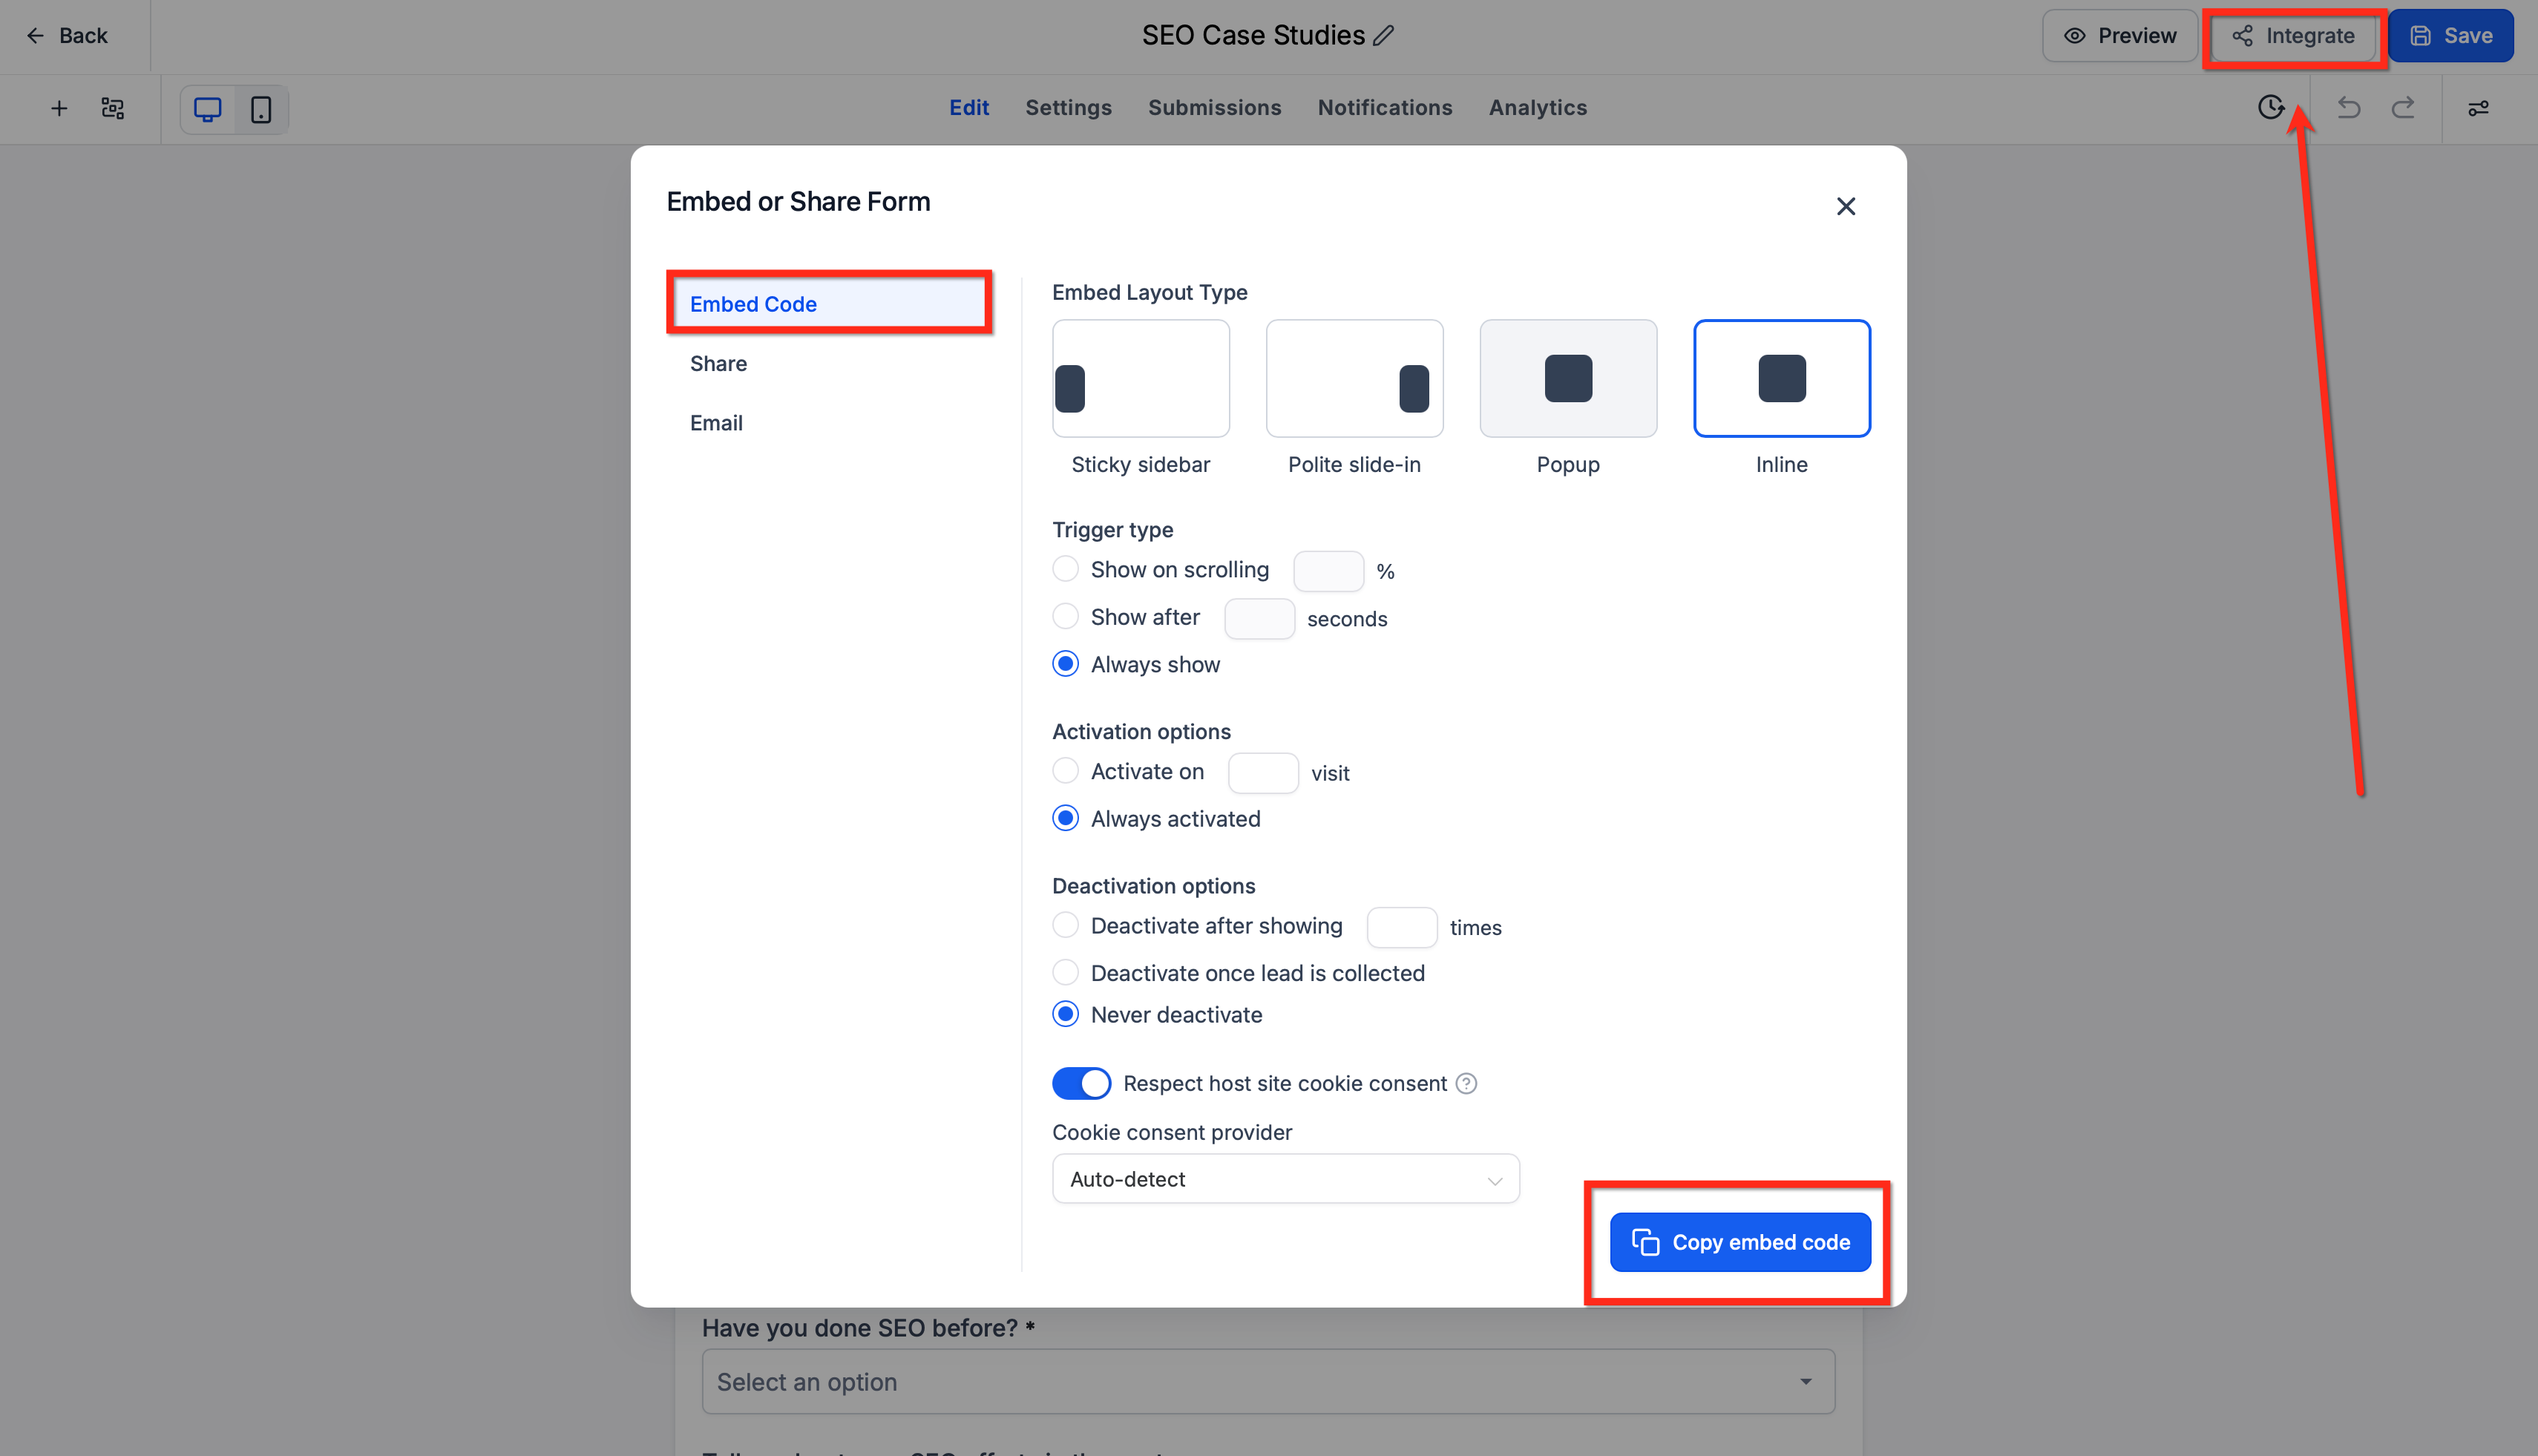
Frequently Asked Questions
Q: Can I create a contact form without leaving the Funnel or Website Builder?
Yes. HighLevel allows forms and surveys to be created or reused directly inside supported Funnel and Website Builders. Forms created there also appear in the centralized Forms list.
Q: Can I use the same form in more than one place?
Yes. Existing forms can be reused through the Form Picker in supported HighLevel builders. Keeping a consistent naming structure makes reusable forms easier to locate and manage.
Q: What happens if the person submitting the form is a brand-new lead?
When a new lead completes a HighLevel Form or Survey, HighLevel automatically creates a contact record.
Q: Can I show different fields or outcomes based on someone's answers?
Yes. HighLevel's Conditional Logic can perform actions such as showing or hiding fields, displaying messages, redirecting visitors, or disqualifying leads based on their responses.
Q: Can I use a HighLevel contact form on a website hosted somewhere else?
Yes. HighLevel provides embed code that can be added to compatible external website platforms.
Q: How can I reduce unwanted or spam form submissions?
HighLevel provides options such as CAPTCHA and email or phone validation that can help reduce automated or invalid submissions. This is particularly important when form submissions trigger automated email or SMS follow-up.
Q: Can repeated submissions result in duplicate contact records?
Duplicate behavior depends on the account's contact deduplication configuration. If avoiding duplicate contacts is important, review the account's Contact Deduplication Preferences so matching form submissions are handled according to your desired rules.
Related Articles
Was this article helpful?
That’s Great!
Thank you for your feedback
Sorry! We couldn't be helpful
Thank you for your feedback
Feedback sent
We appreciate your effort and will try to fix the article