HighLevel Ad Manager allows you to create and manage Google Search ad campaigns. You can write your ad content, set a daily budget, and target your audience by location and language.
TABLE OF CONTENTS
- Overview
- Prerequisites for Ad Manager
- Step 1 | Create Campaign
- Step 2 | Ad Campaign Configuration
- Step 3 | Review and Publish
- Important note:
How to Create a Google Search Ad Campaign in HighLevel Ad Manager
This guide walks you through creating a Google Search ad campaign in HighLevel, from setup through publishing. It outlines how to:
Create your Google Search campaign and configure its settings.
Set up an ad group with relevant search keywords.
Add headlines, descriptions, and a landing-page URL to your ad.
- Review and publish your campaign.
For information about managing multiple ad groups and ads after creating a campaign, see Google Ads: Multiple Ad Groups and Ads in HighLevel.
Prerequisites for Ad Manager
Before creating a Google Search campaign, make sure the following requirements are met:

1. The agency has enabled Ad Manager for the sub-account and configured its reselling settings, if applicable.

2. Ad Manager is available under the sub-account's Marketing > Ad Manager section.

3. The user has the required Ad Manager permission, managed under Settings > My Staff/Teams > Permissions.

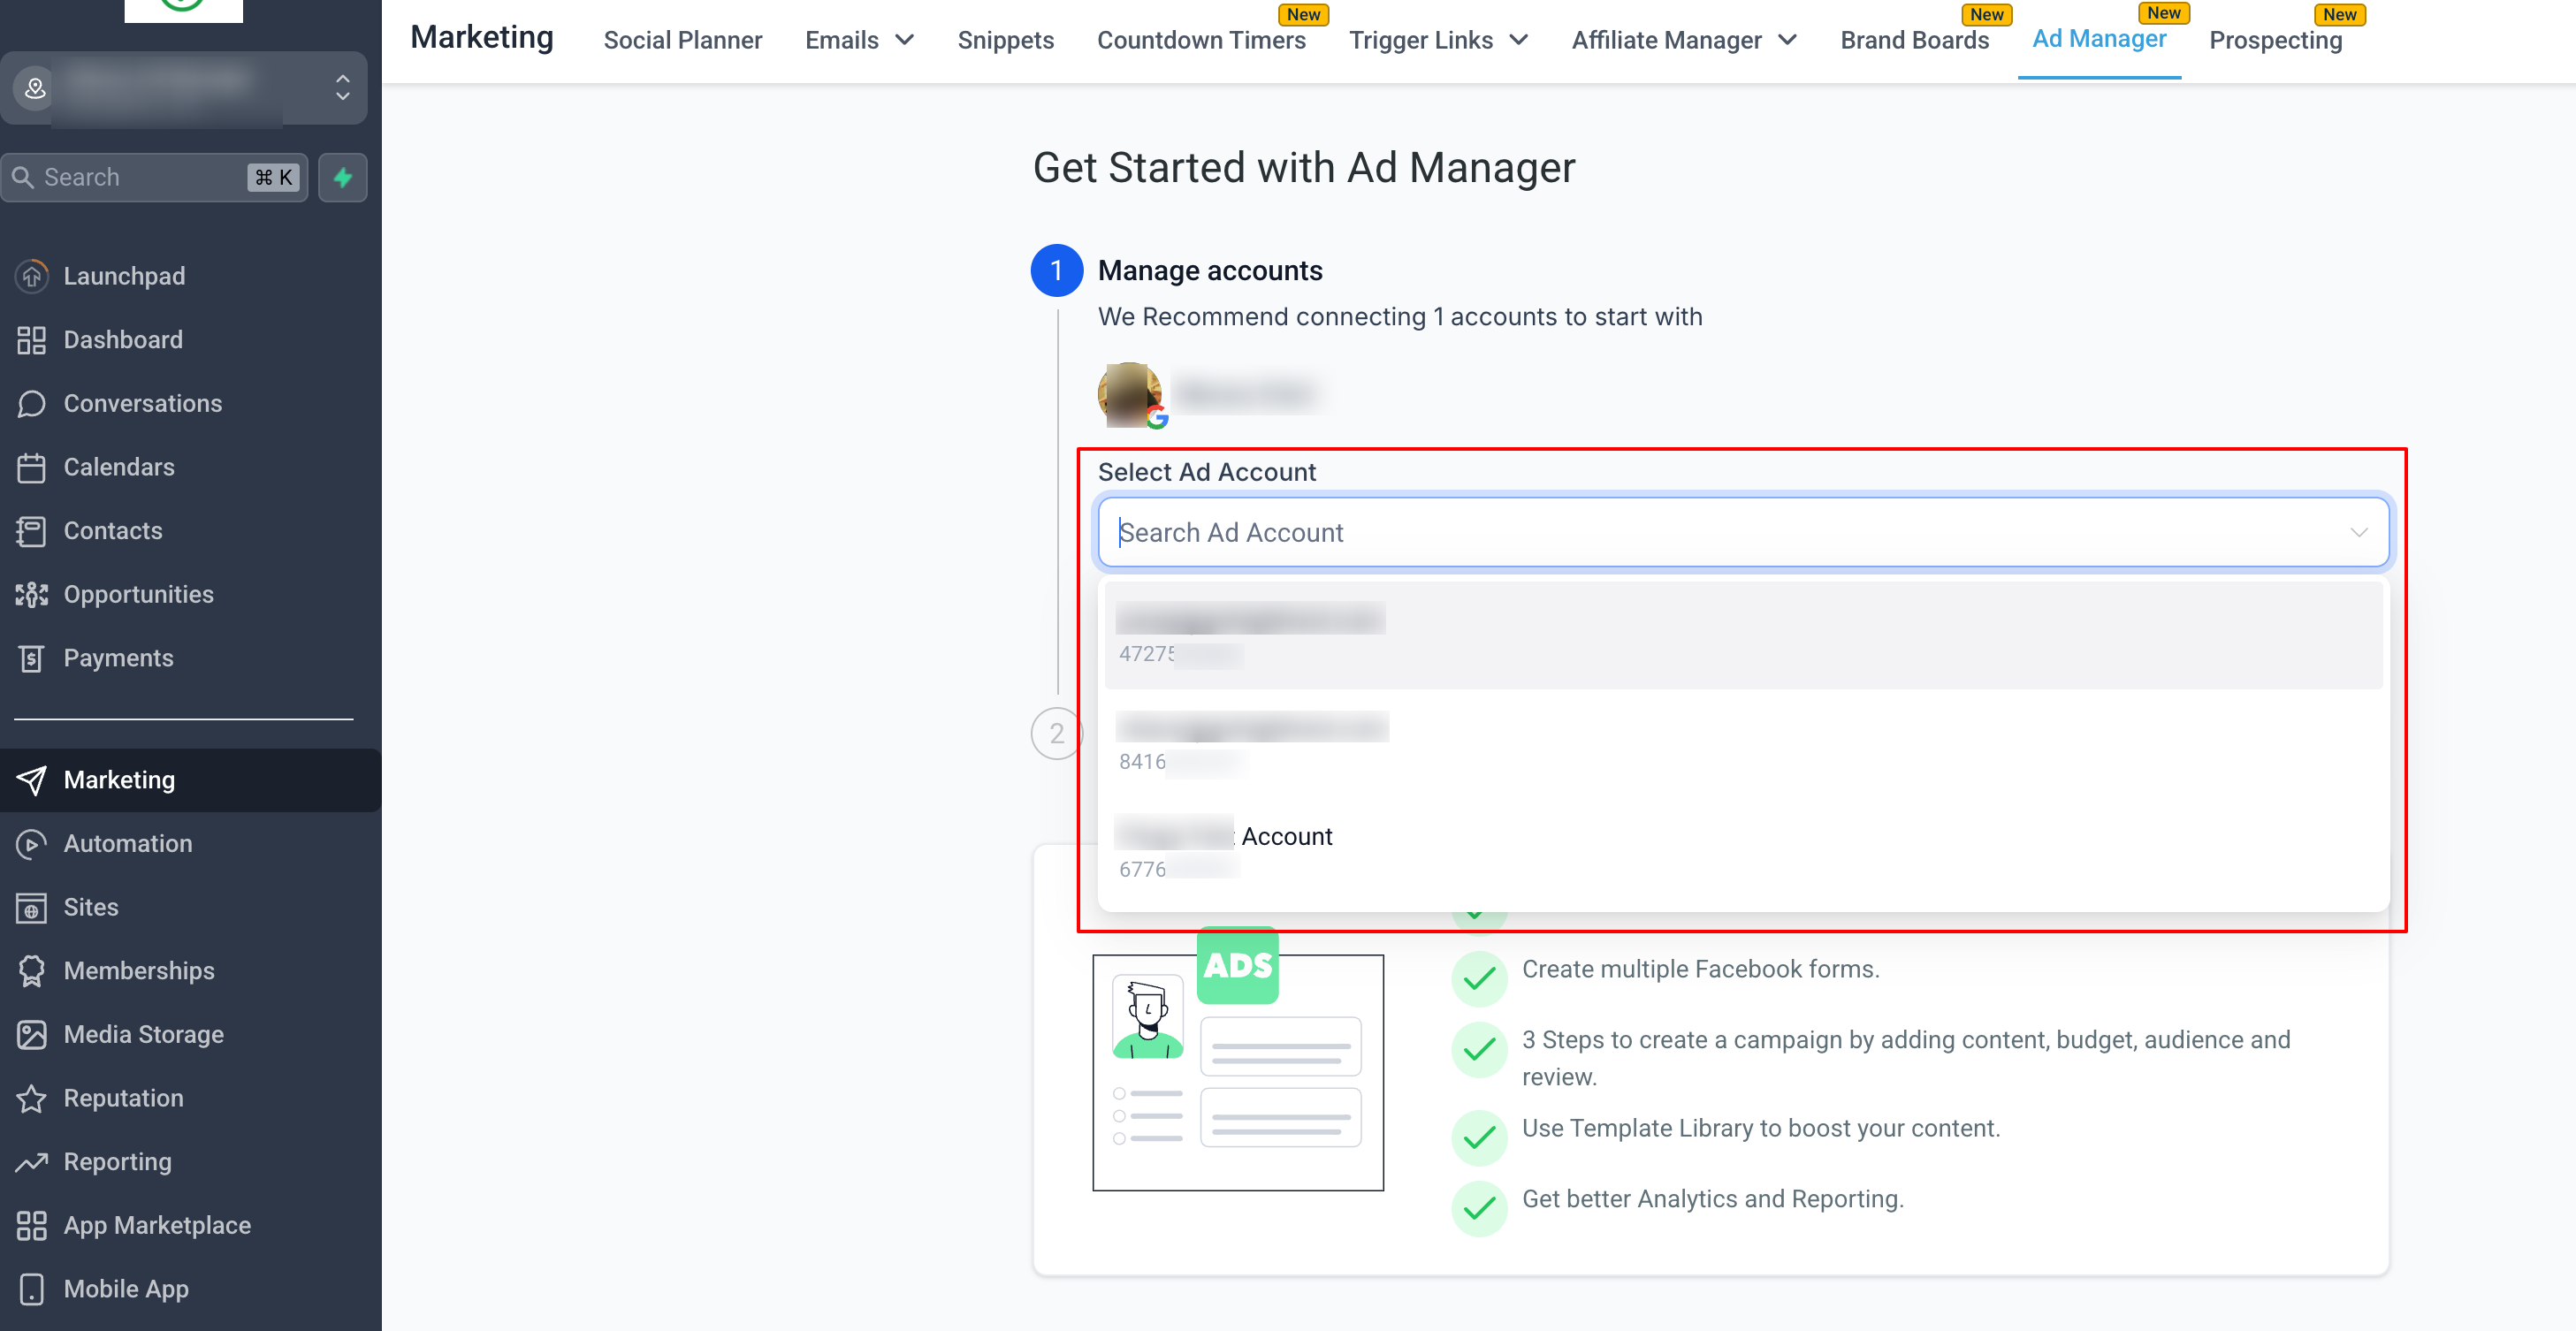
4. A Google account and eligible Google Ads account have been connected through the LeadConnector authorization flow. One Google Ads account can be selected for use with Ad Manager. For setup steps, see How to Connect Google Ads to Ad Manager.
Step 1 | Create Campaign
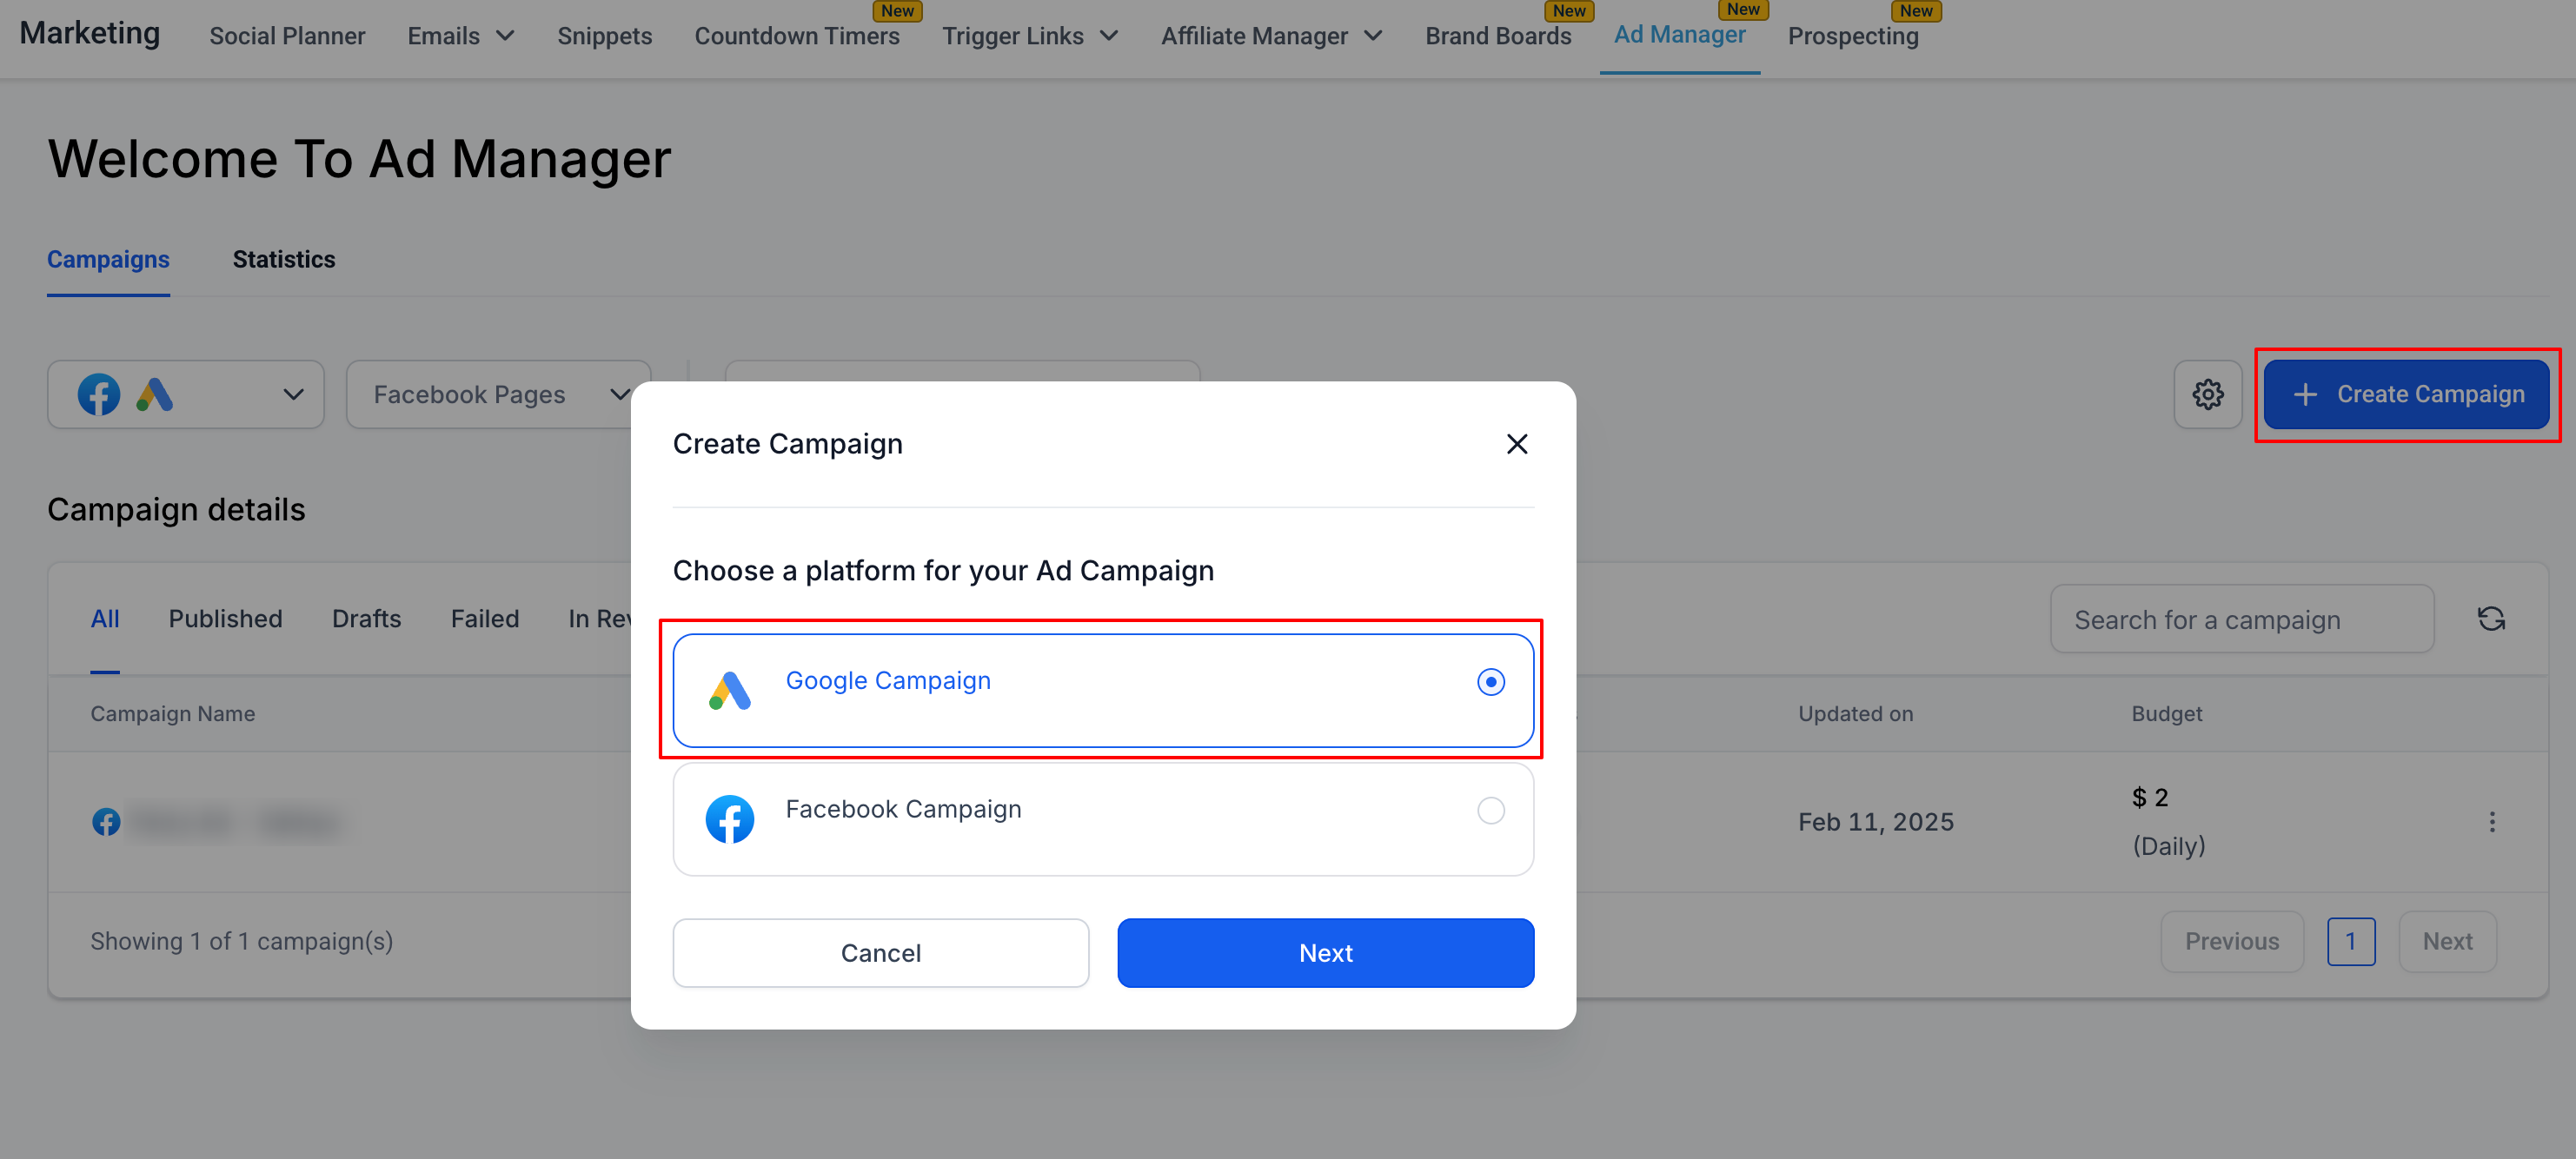
Go to Marketing > Ad Manager, click Create Campaign, and select Google as the advertising platform.
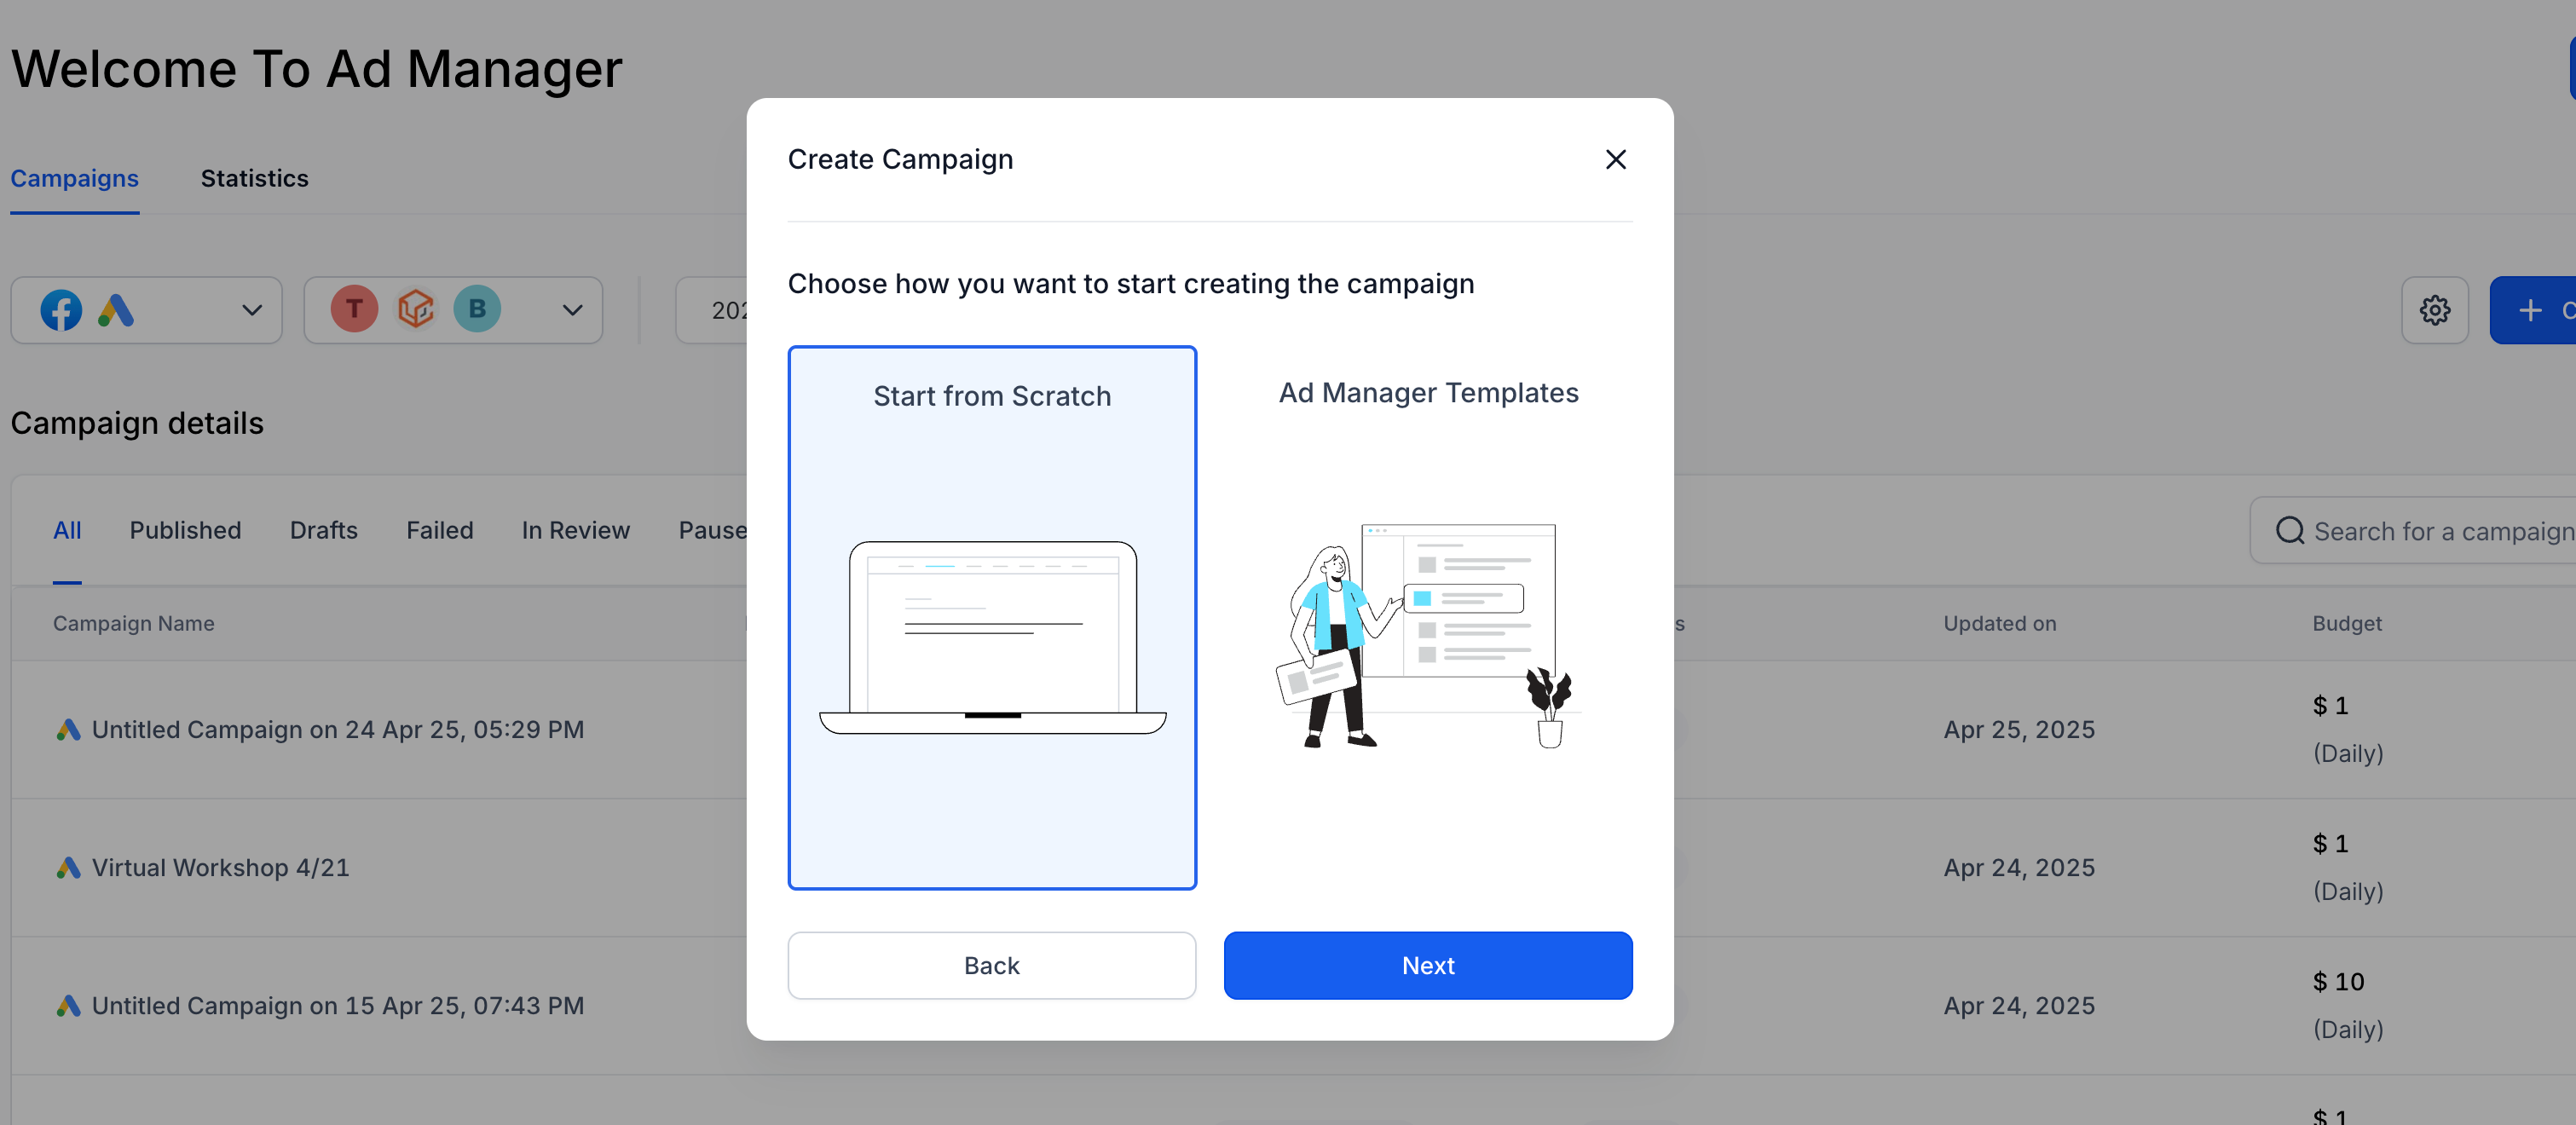
Click Next. Then choose Start from Scratch or an available Ad Manager template to create your Google Search campaign.
Click Next to configure your campaign.
Step 2 | Ad Campaign Configuration
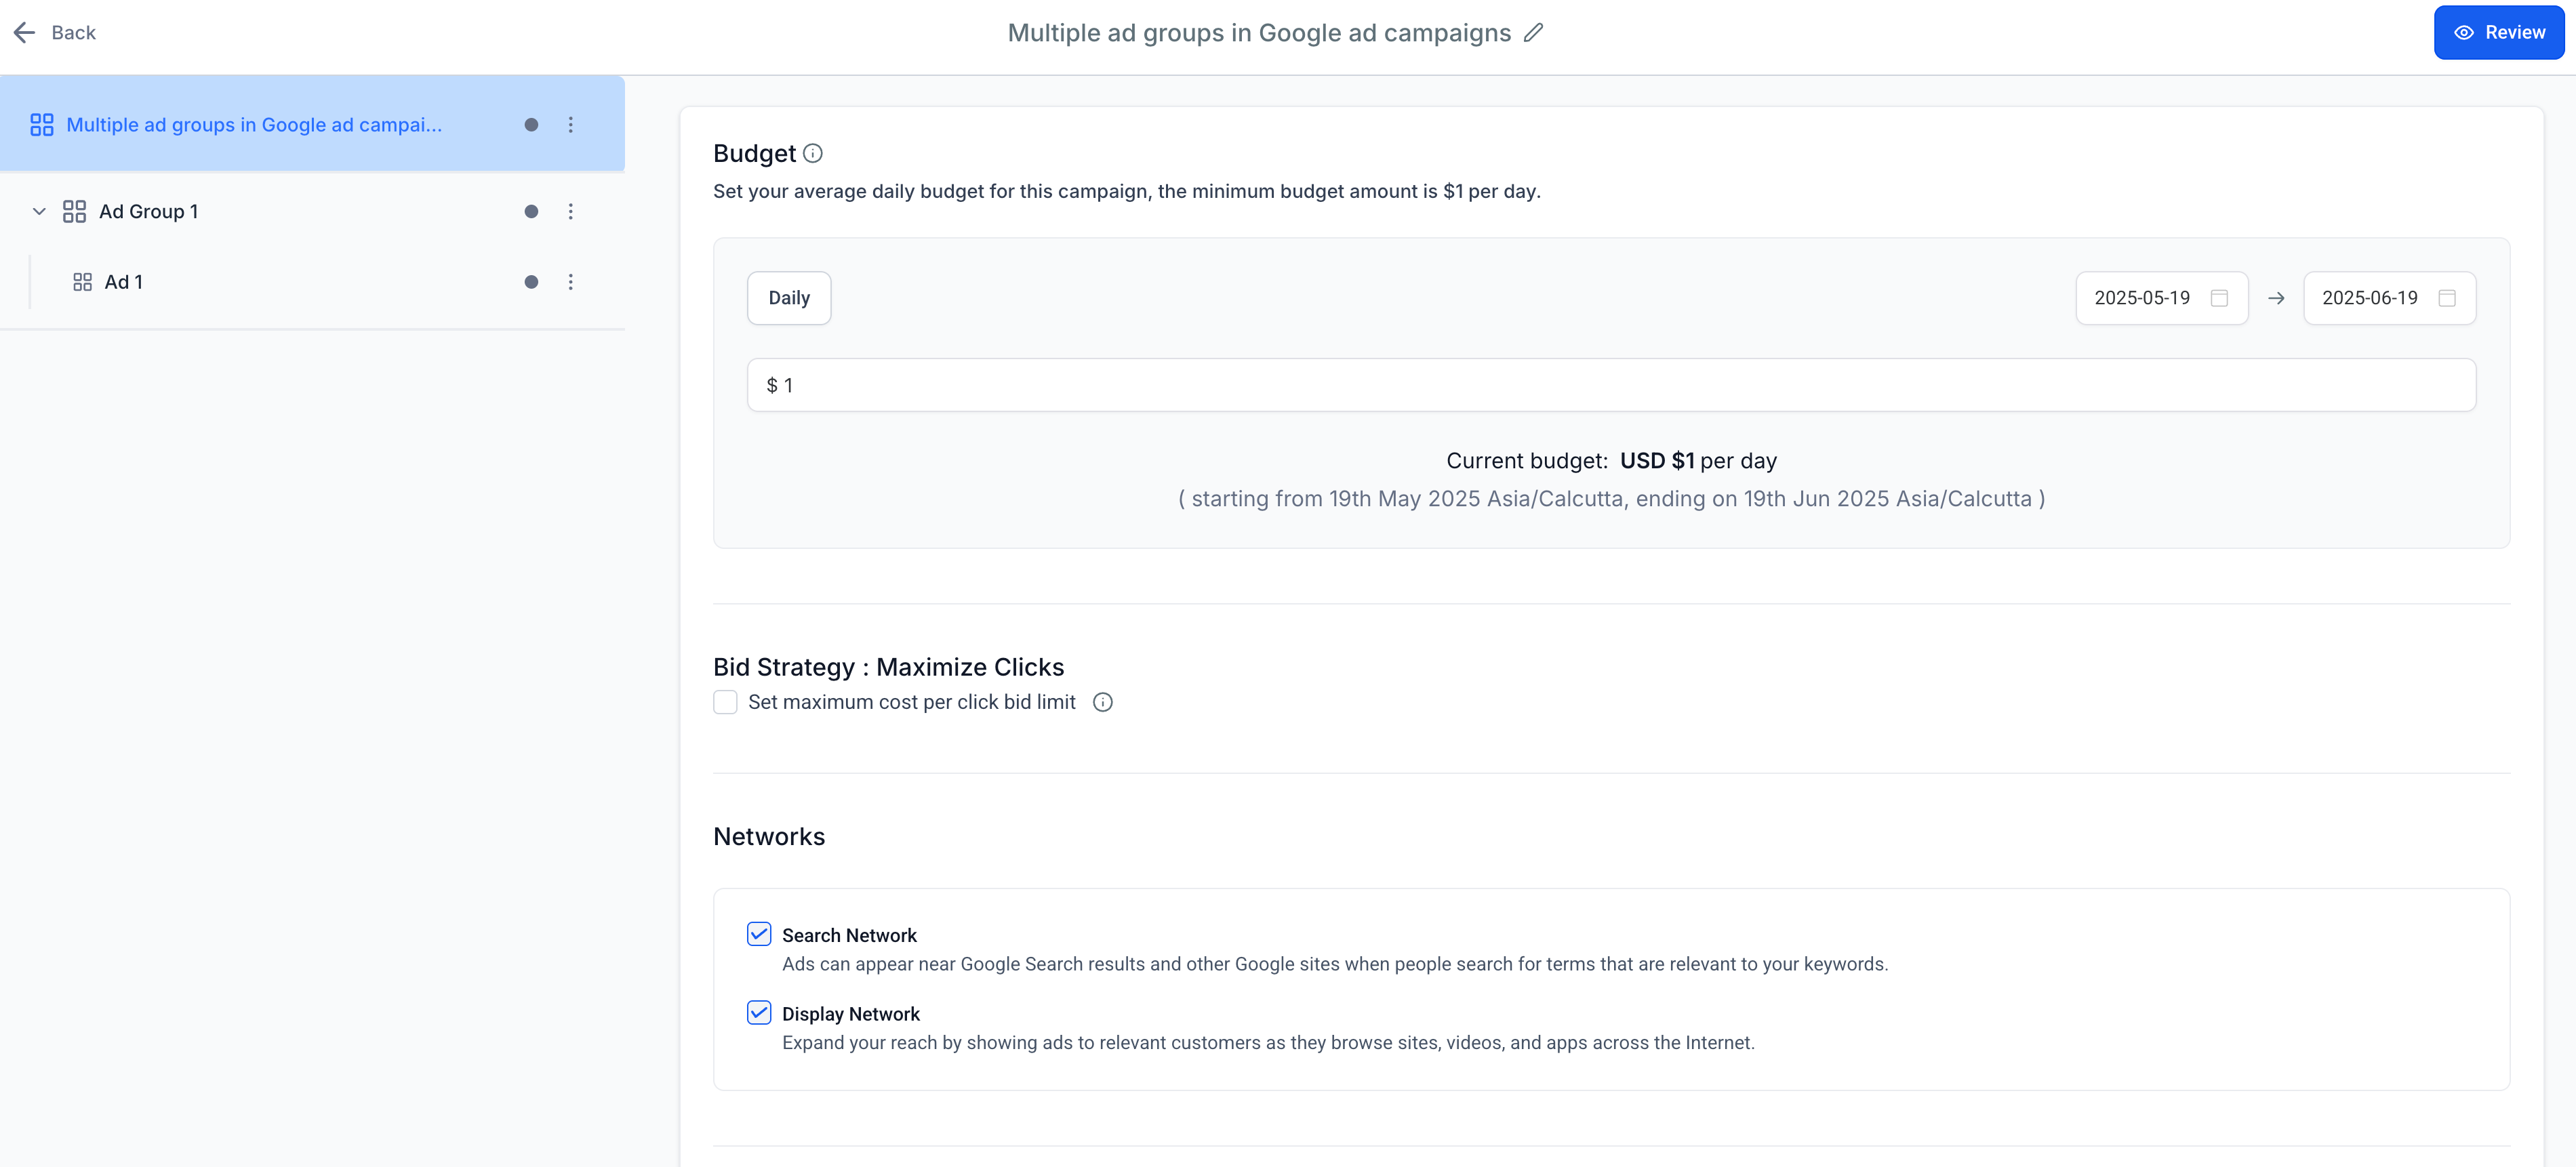
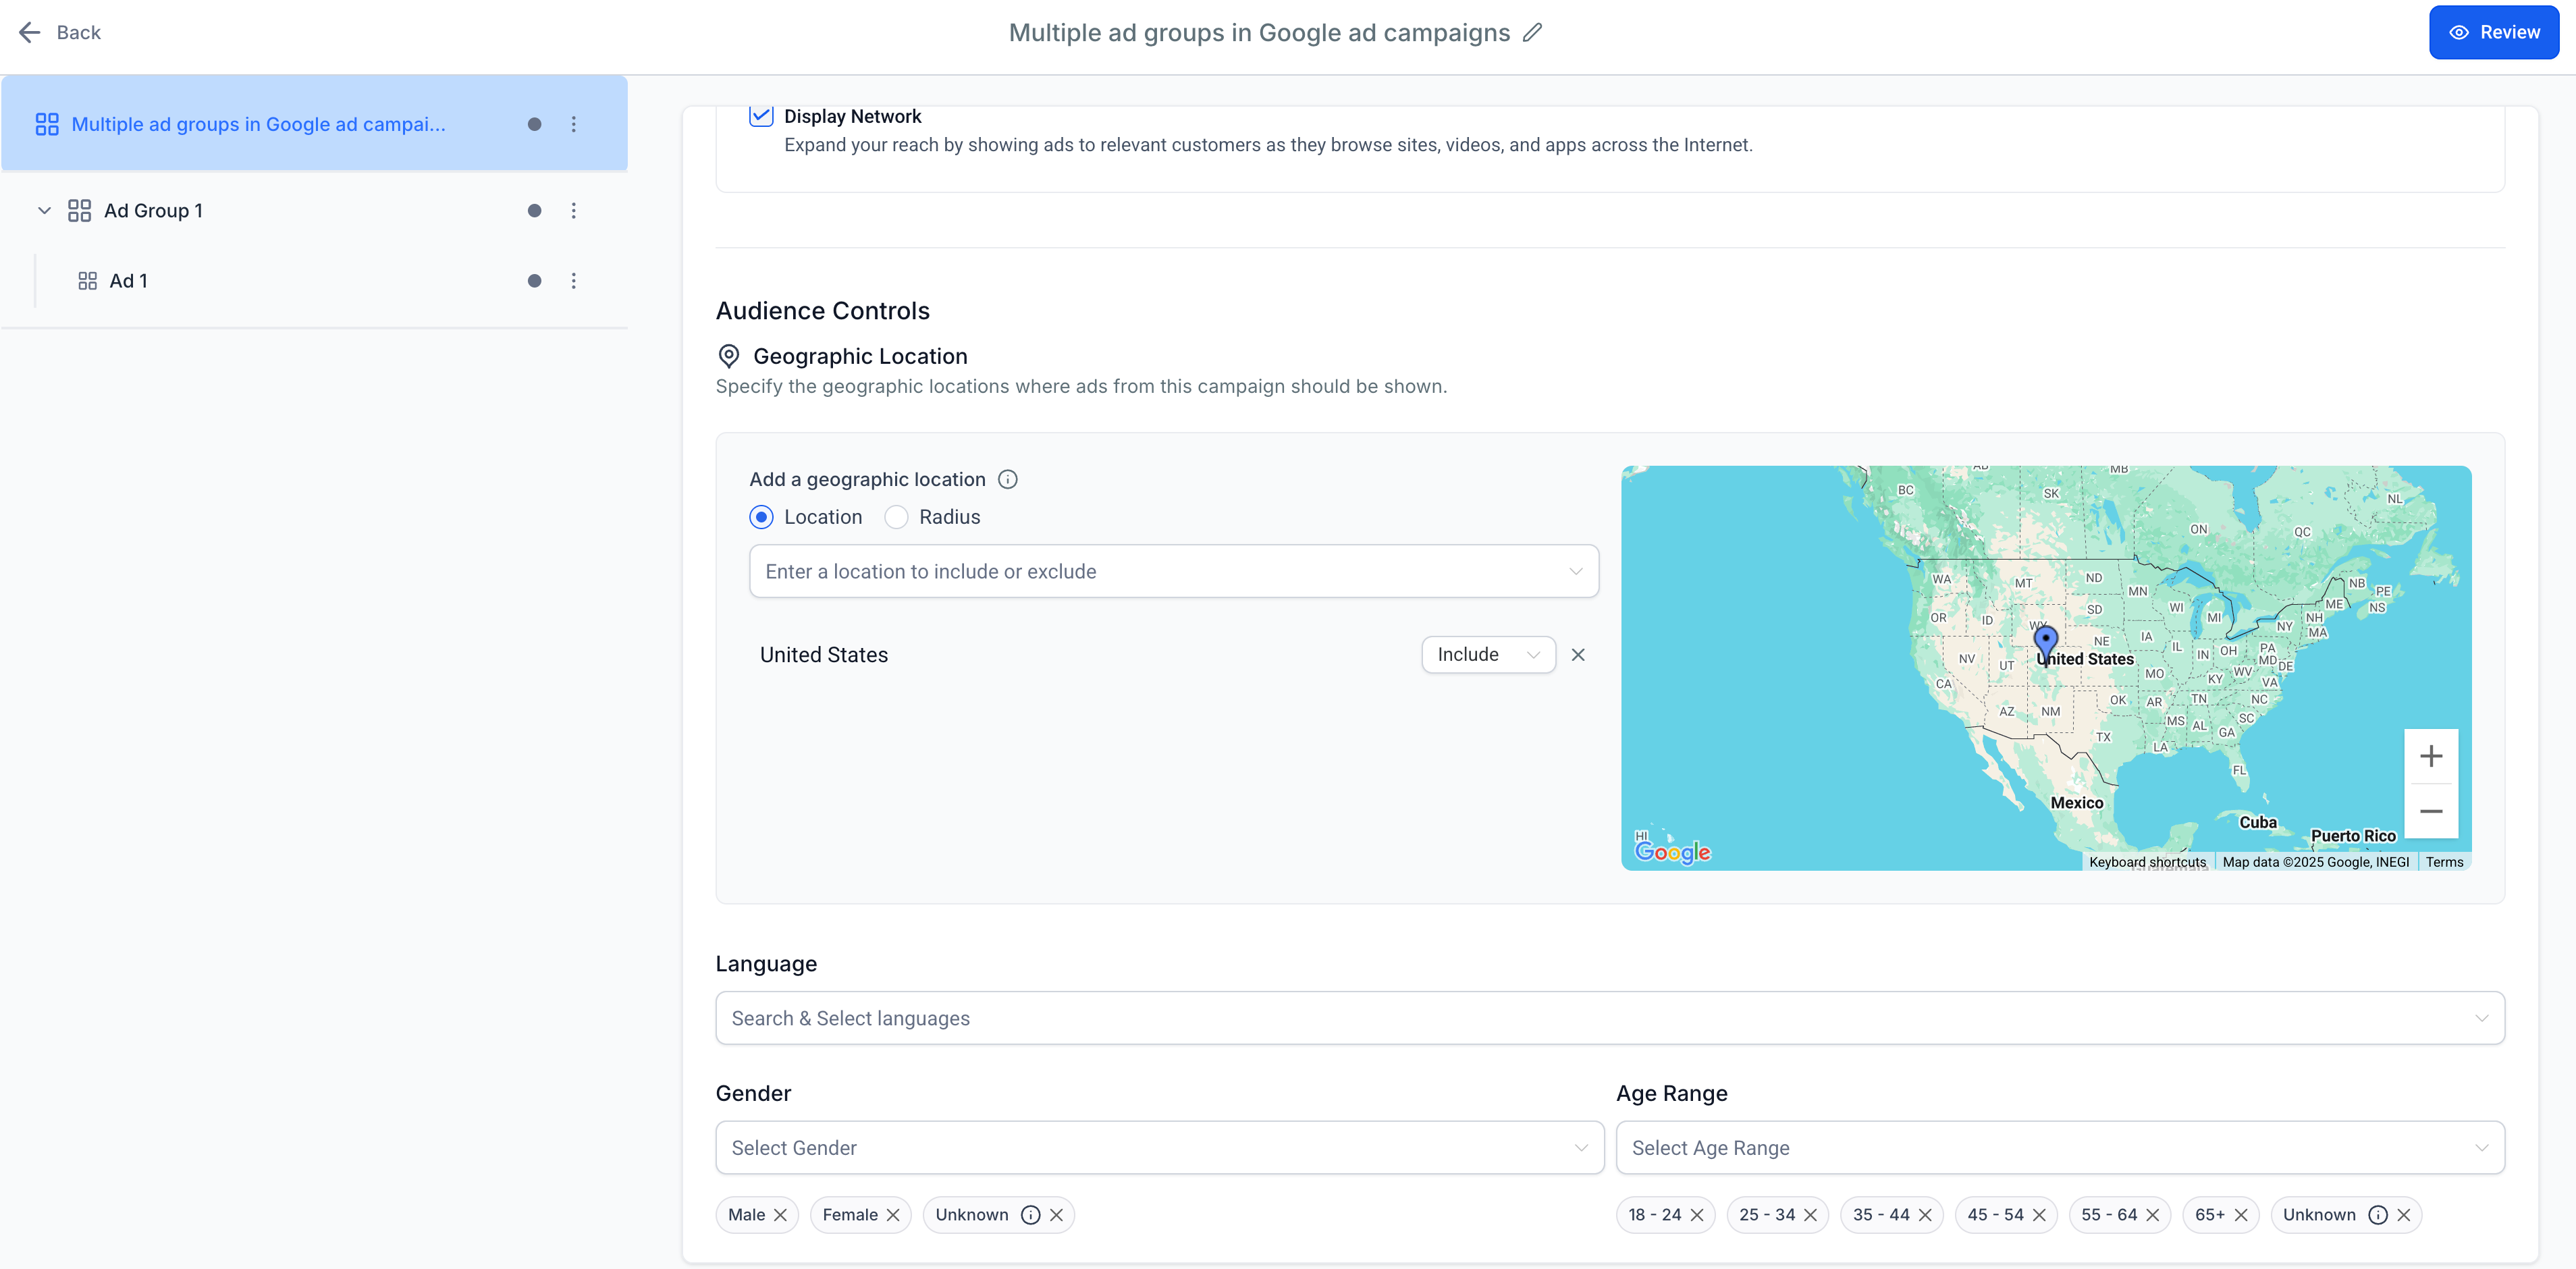
Ad content creation is now part of a three-level structure:
Campaign Level
Ad Group Level
Ad Level
Each level has its own configuration process:
A. Campaign Level Setup
Define the campaign name.
Choose the bid strategy (e.g., Maximize Clicks).
Bid Strategy - Maximize Clicks
A maximum CPC bid limit is an optional setting for the Maximize Clicks bid strategy. It helps control the maximum cost-per-click bid.
Optional toggle to set a maximum cost-per-click (CPC) limit to control spend.
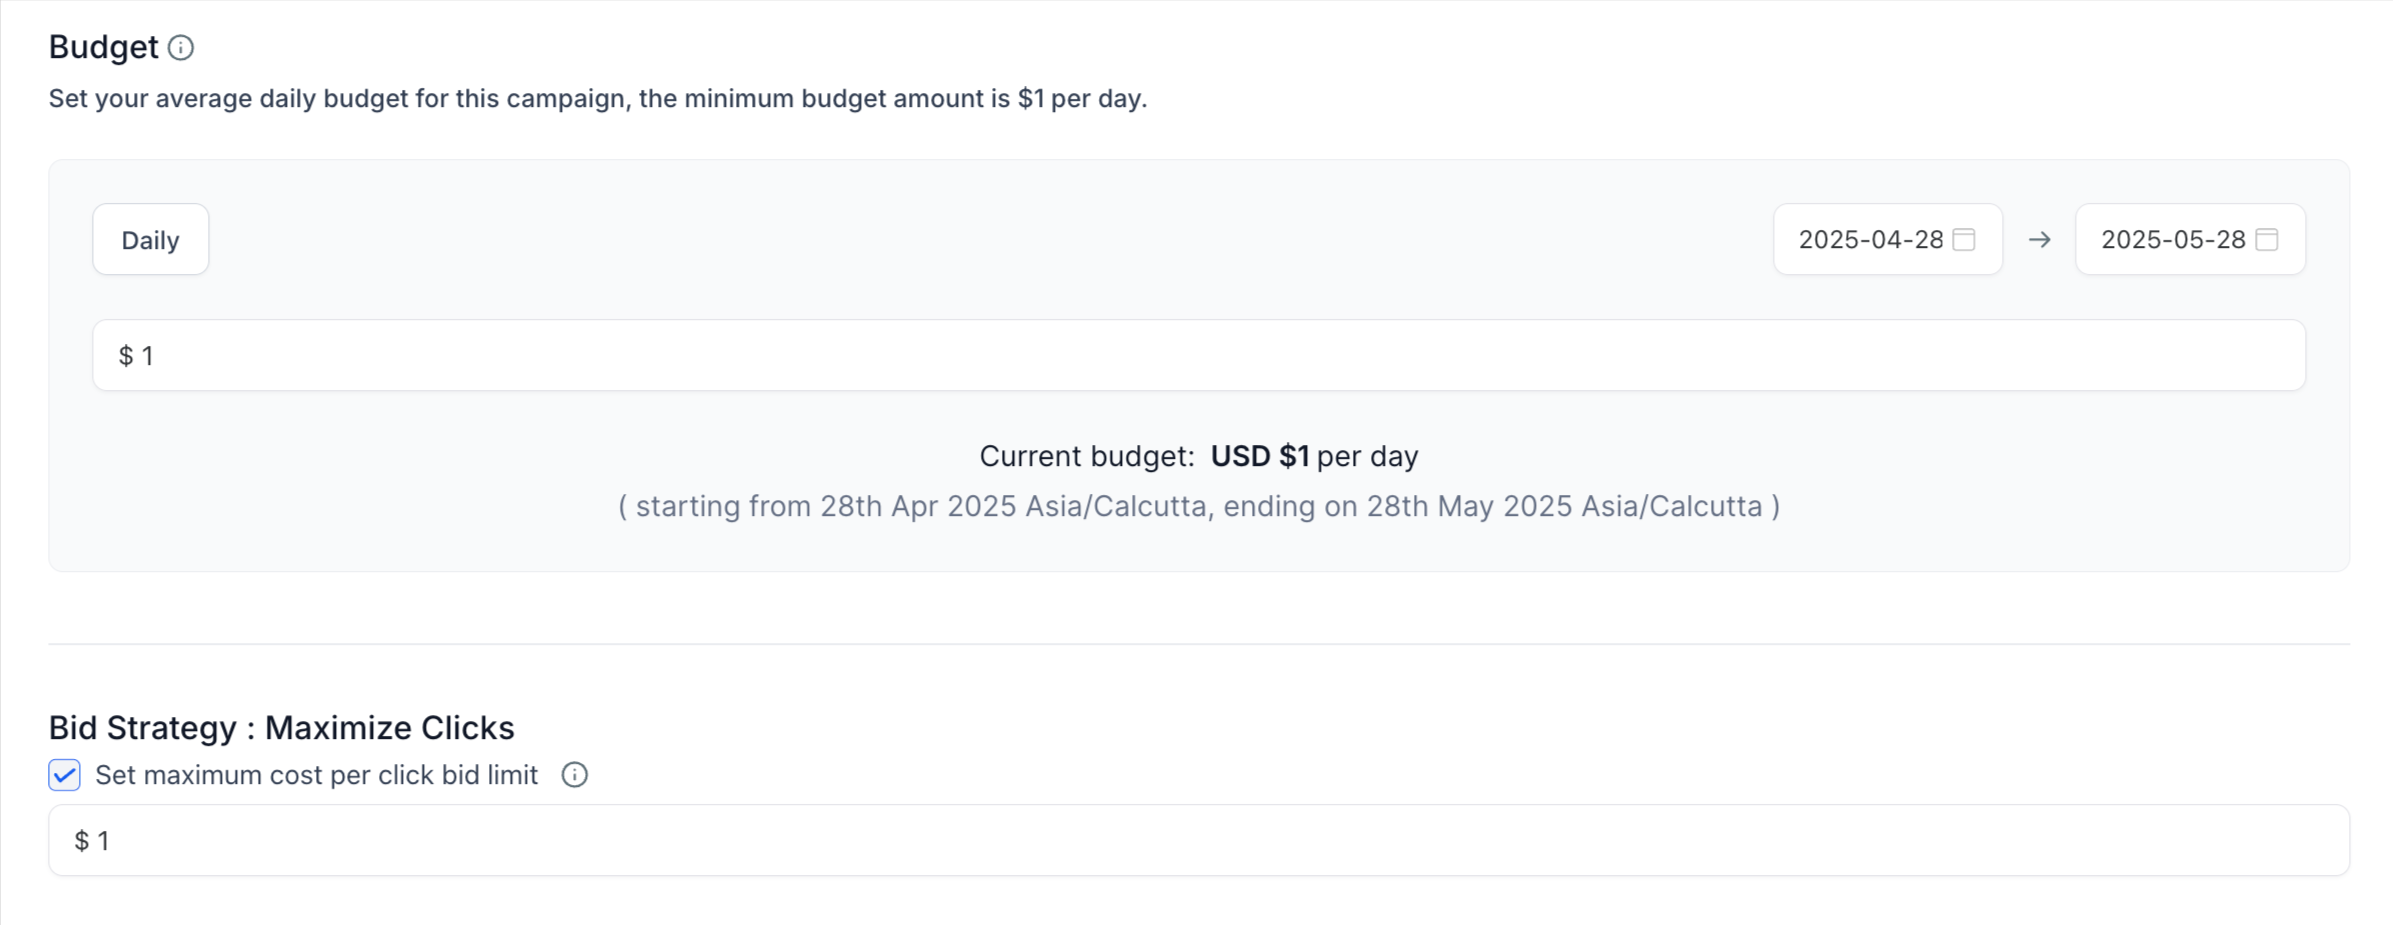
Note: Maximize Clicks is the default bid strategy shown for Website Traffic Search campaigns. Available bid strategies depend on the campaign options supported in Ad Manager.Set a daily budget:
Set the campaign's average daily budget and start and end dates. This budget controls Google advertising spend; it is not an Ad Manager subscription charge. Google Ads bills advertising costs through the payment method on the connected Google Ads account. Actual daily spend can vary, and you can edit the budget later.
Note: The currency is based on your connected Google Ads account. Review the time zone shown when scheduling the campaign.
Configure audience controls:
Set the required Geographic Location and EU Political Ads declaration. Additional audience settings may be available depending on your campaign.
A: Geographic Location - Target specific locations or exclude locations when the selected geographic targeting mode supports it.
Choose Location or Radius targeting, then search for the desired country, city, place, address, or coordinates.
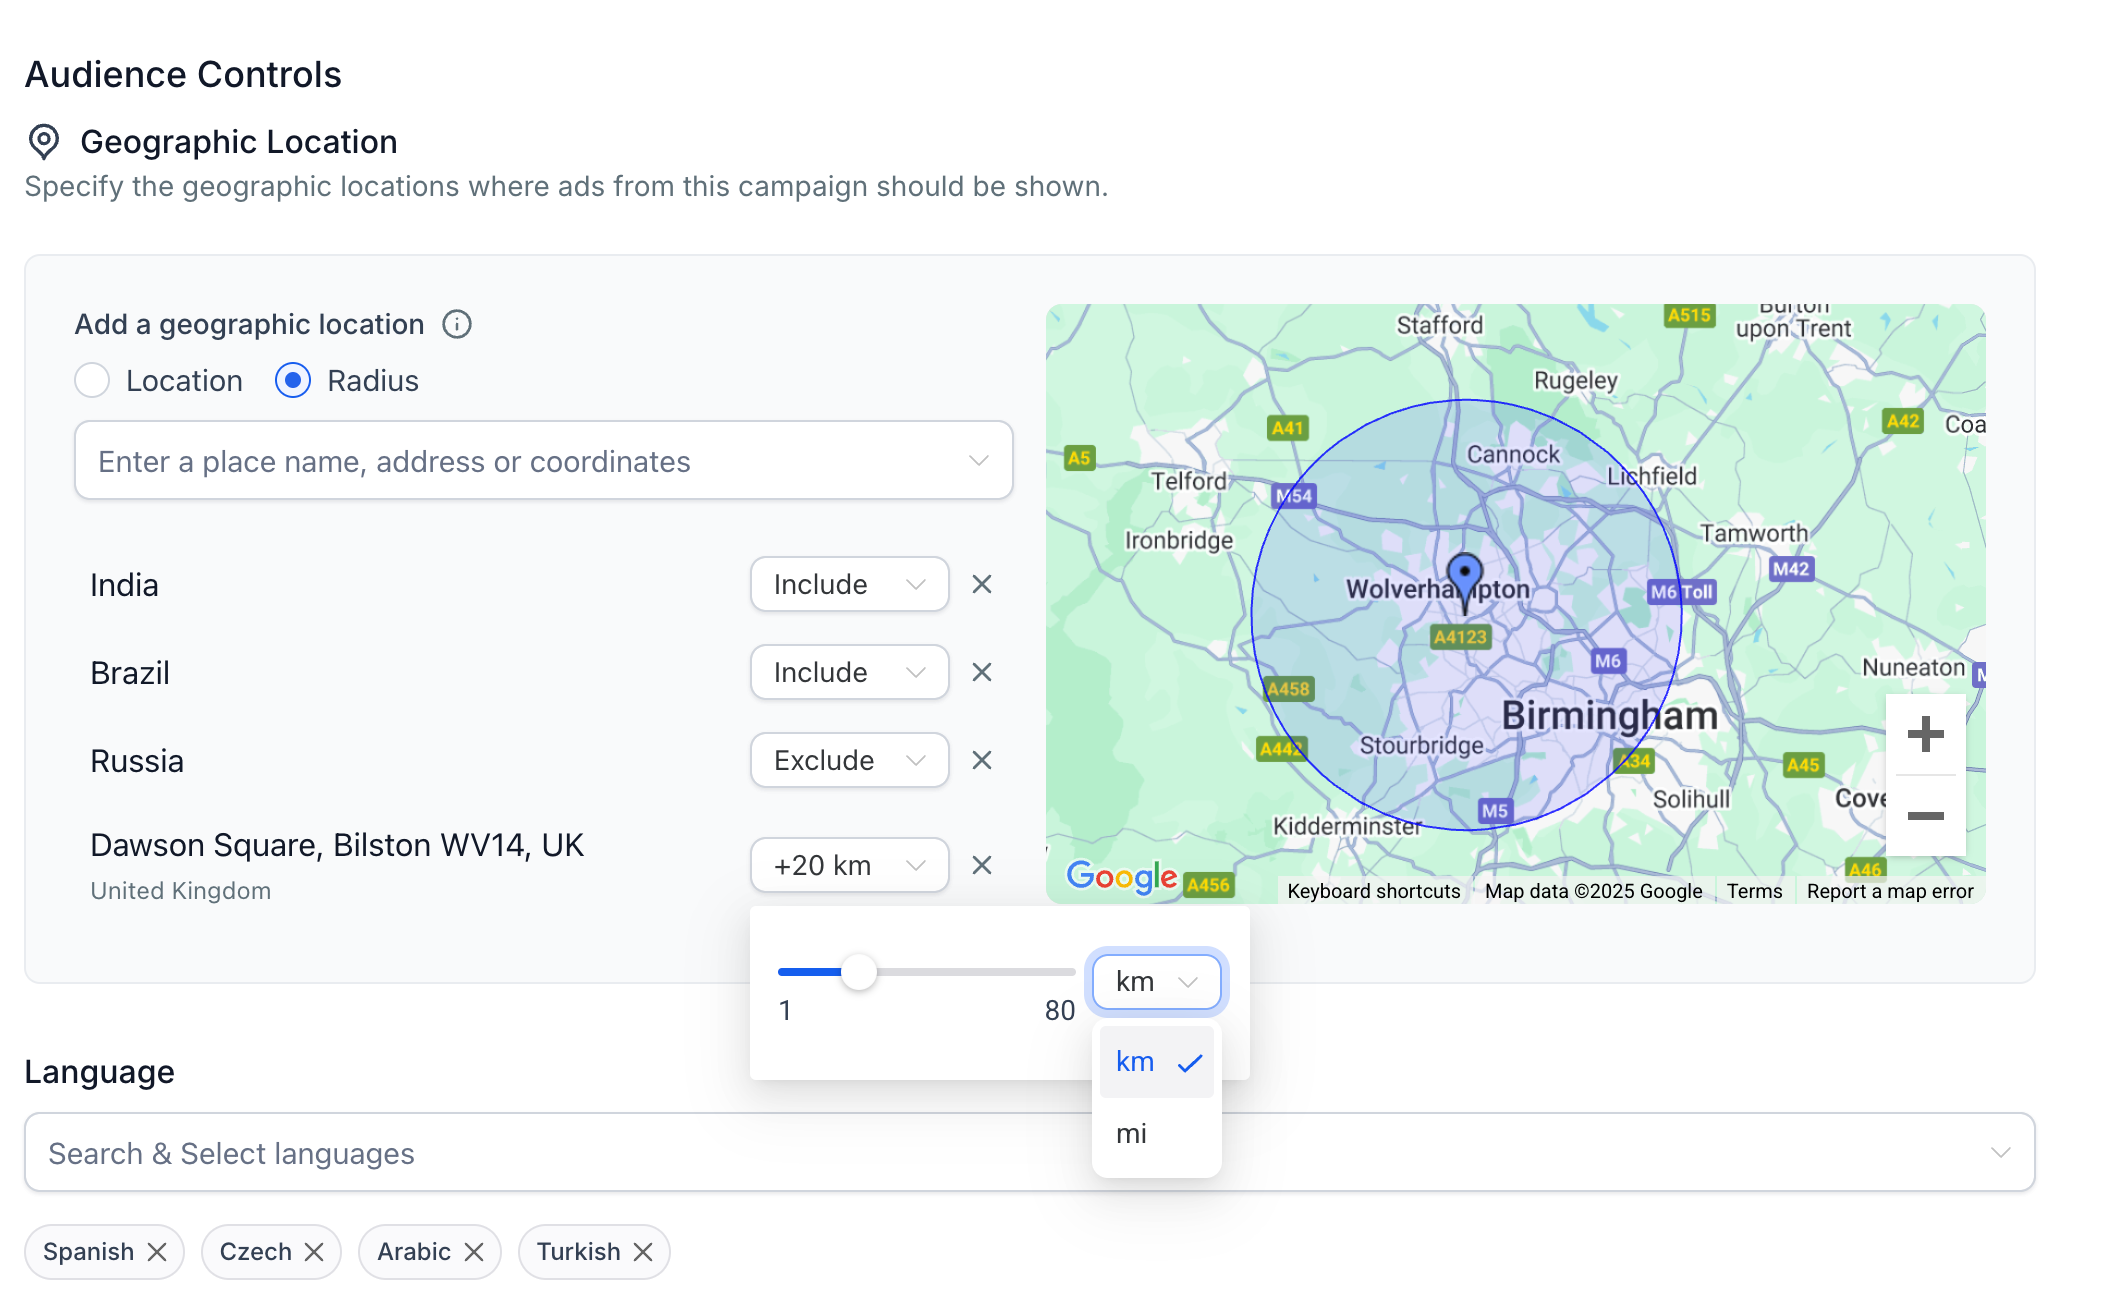
Note: Google Search campaigns do not support separate Include/Exclude controls in Radius mode. Set a radius around the selected address or coordinates to define the included geographic reach.
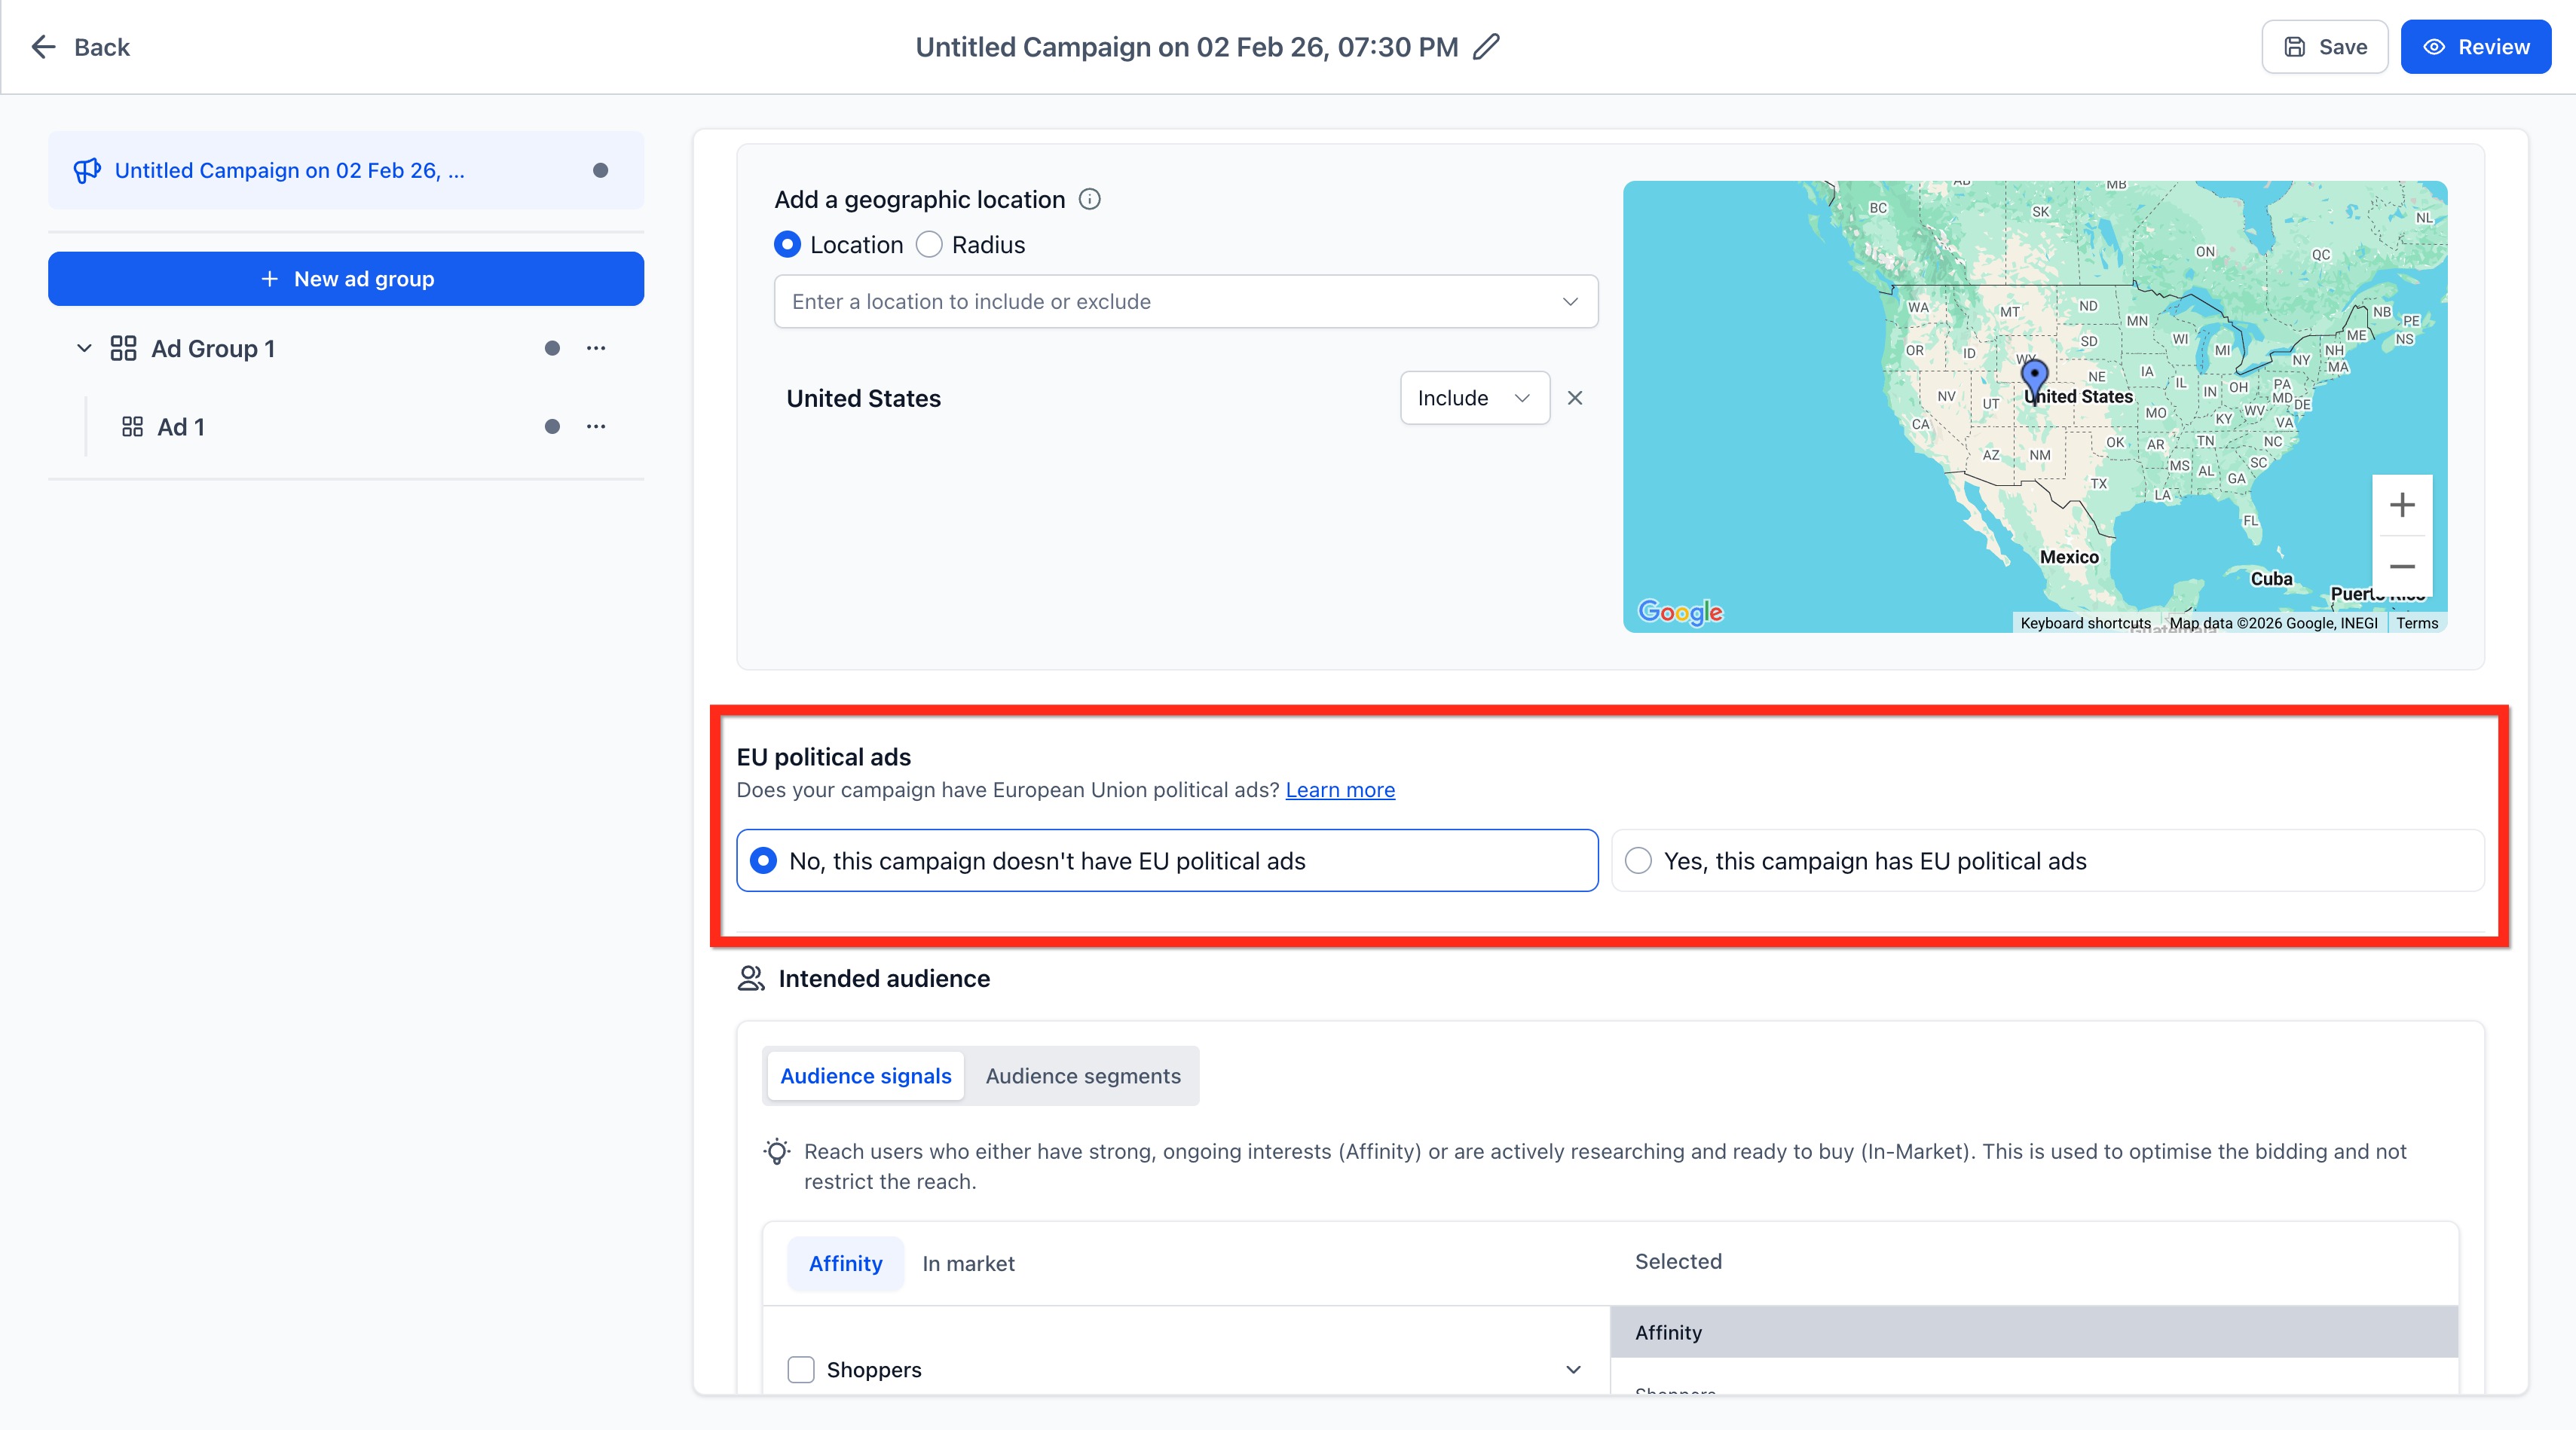
B: EU Political Ads
When creating a Google Ads campaign, you must confirm whether the campaign includes European Union (EU) political ads.
Note: You must make a selection to continue and publish the campaign. Use this article to review Google’s Political content policy.
Select one option:
- Yes: The campaign contains EU political ads.
- No: The campaign does not contain EU political ads.
C: Language - Select the languages spoken by the audience you want to reach. You can select multiple languages.
Audience Segments (optional): Additional Google audience options may be available depending on campaign type. For details, see Audience Segments for Google Ads.
D: Gender and Age Targeting - When available, select gender (Male, Female, Unknown) and age ranges (18–24 through 65+, and Unknown). The Unknown option includes users whose age or gender is not specified.

Add optional Additional Assets, such as:
- Business Logos
- Image Assets
- Call Extensions
- Sitelinks
Note: For more details, see How to Configure Google Ads Additional Assets at Campaign Level
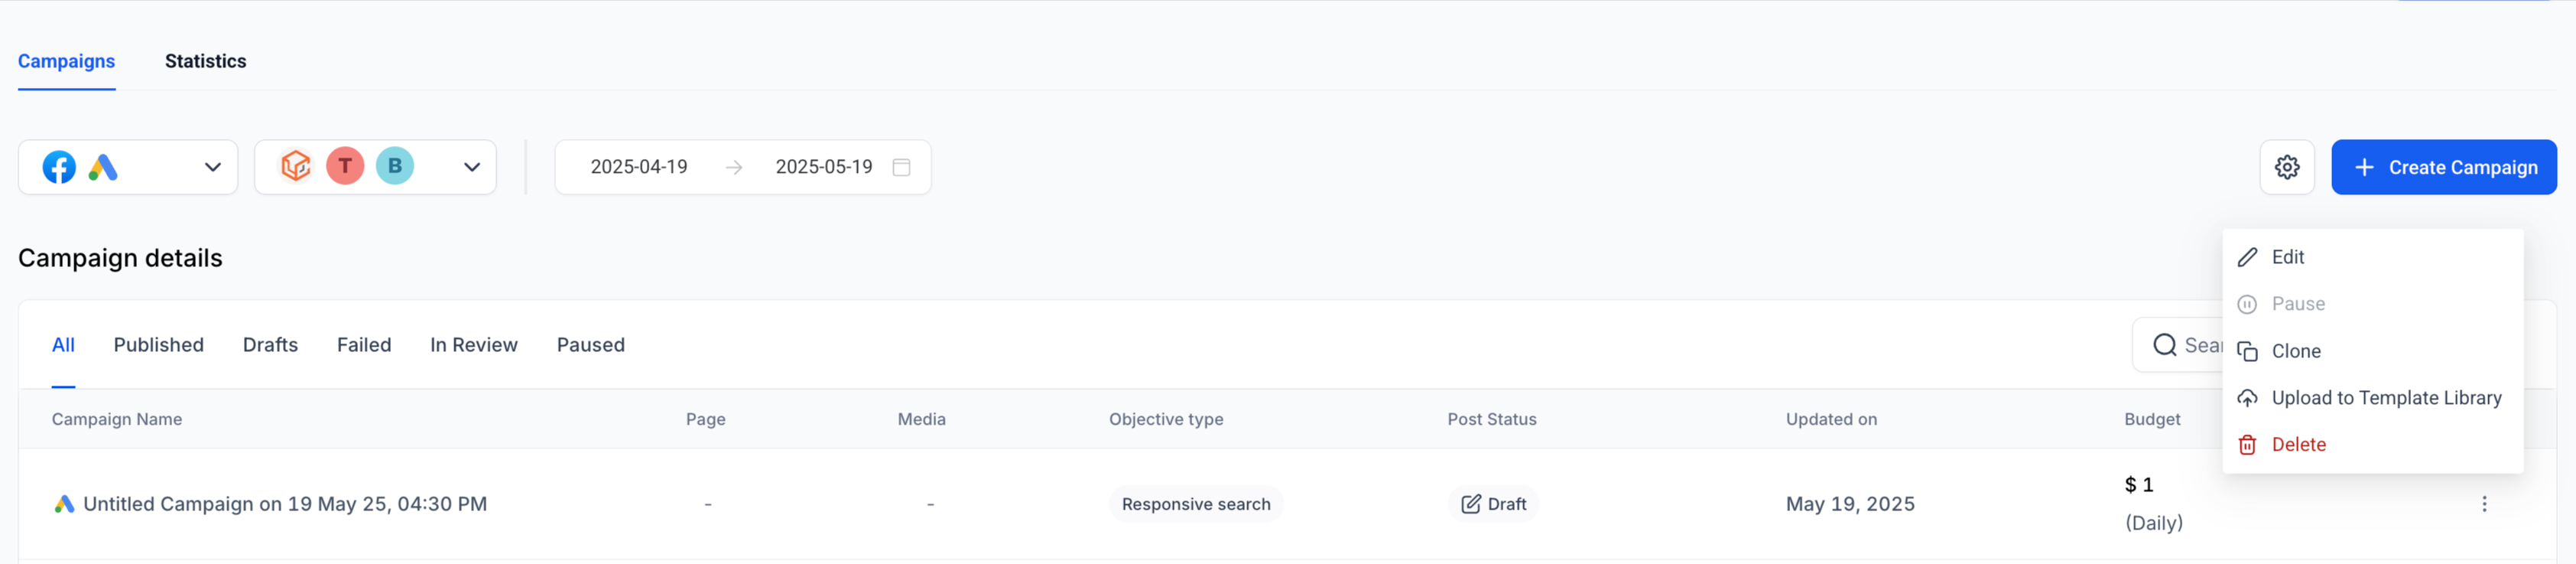
Ellipsis menu options at Campaign Level:
Changes that can be made from campaign listing page:
Delete campaign
Clone campaign
Edit campaign settings
Upload to template library
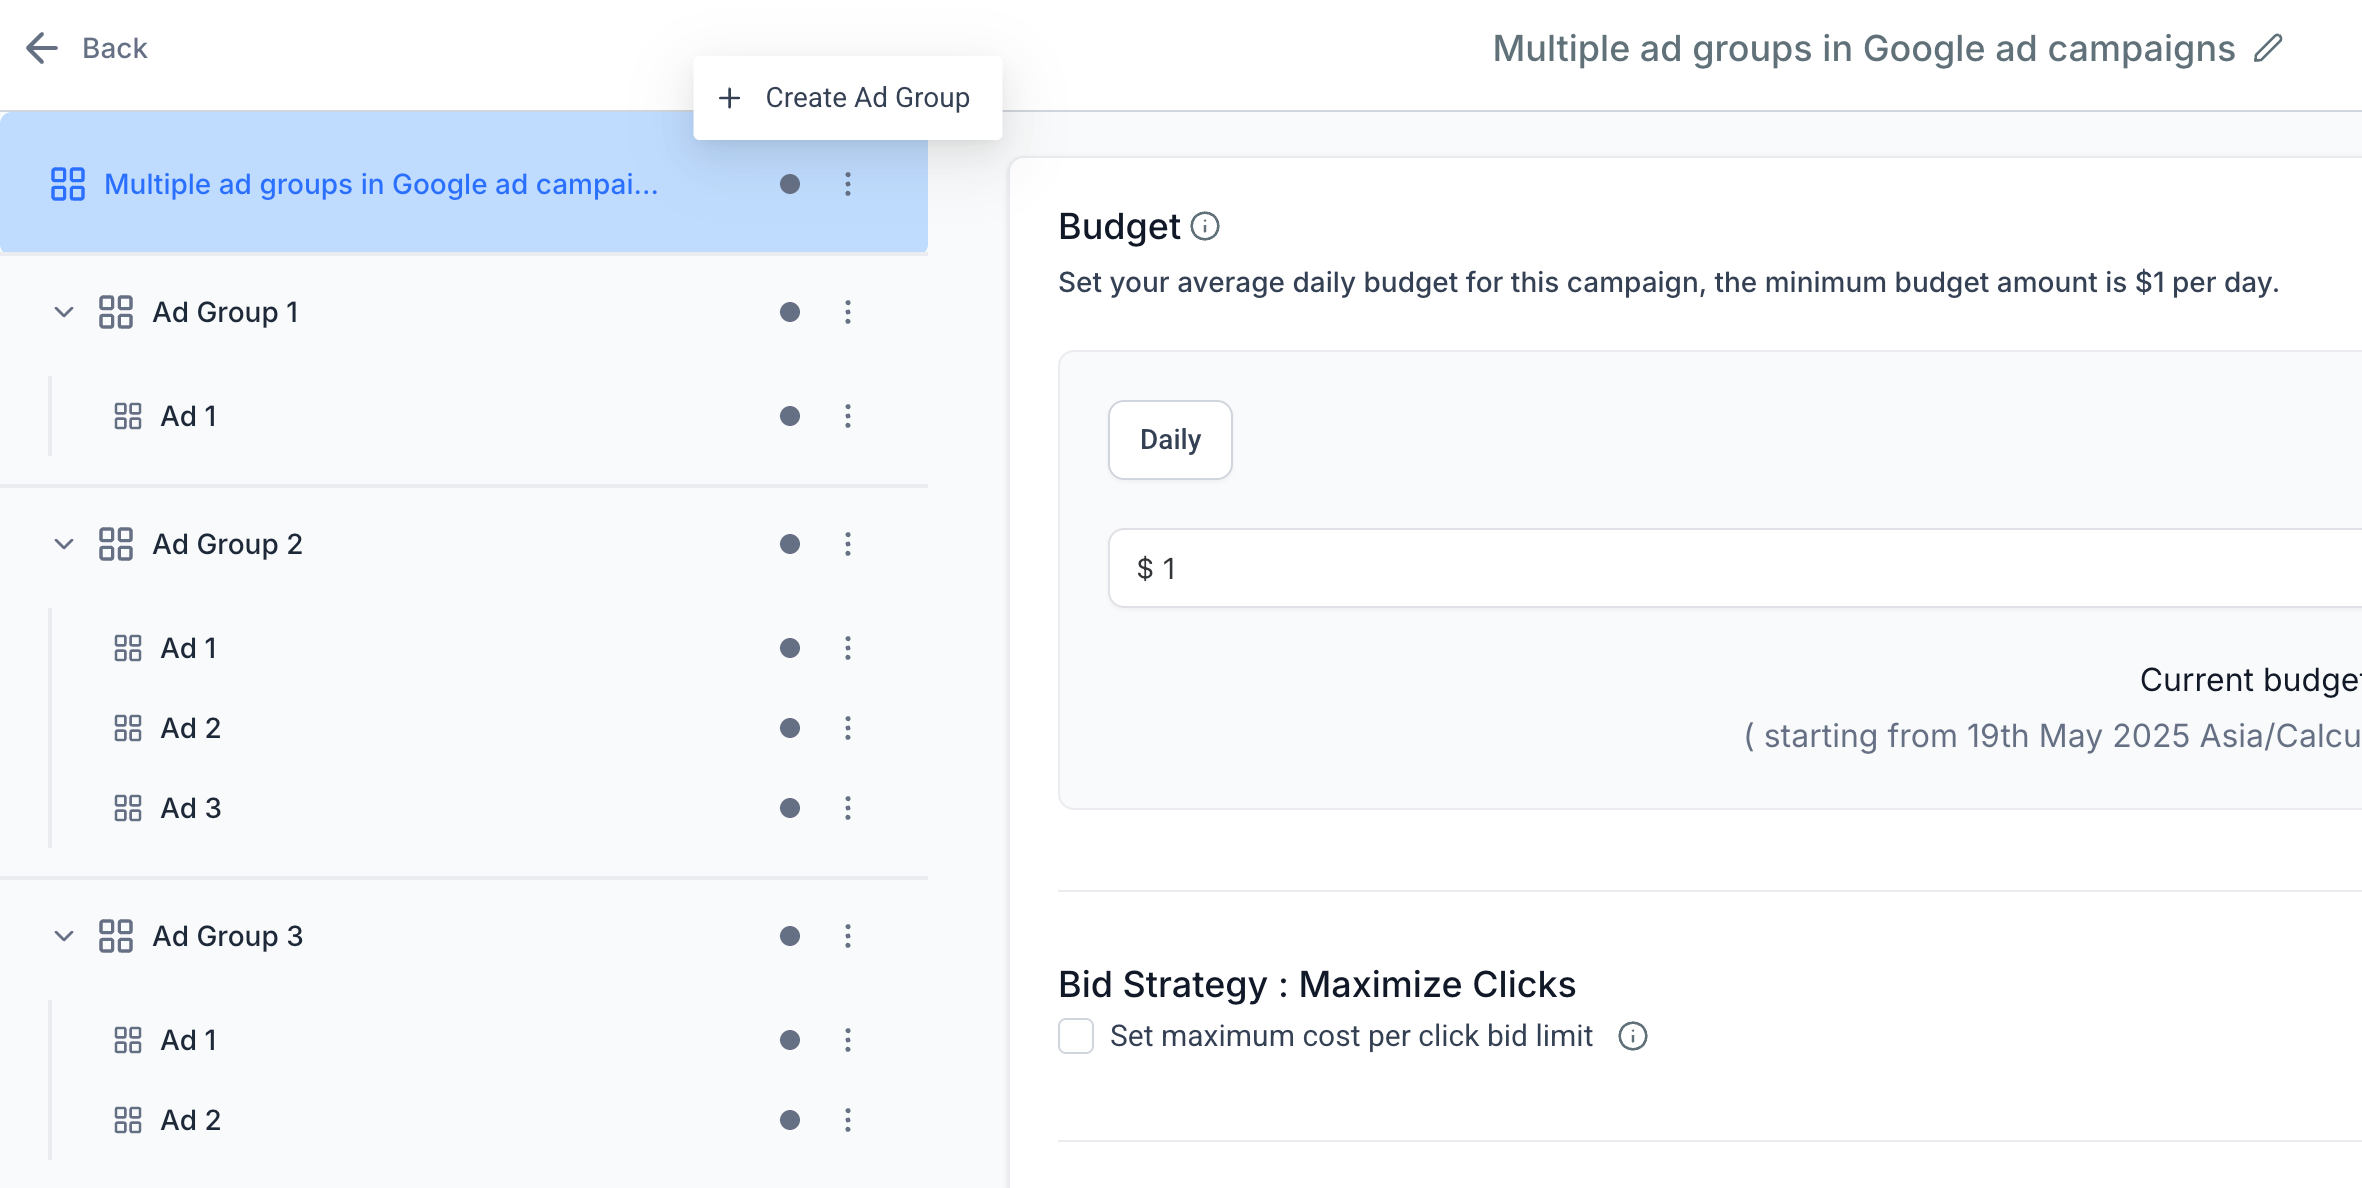
Ellipses option in the campaign builder flow at the campaign level:
- Create Ad Group
B: Ad Group Level Setup
Create and name your ad group (up to 10 ad groups per campaign).
For each ad group:
Enter a base website URL. This URL will:
Generate keyword suggestions.
Be applied to all ads in the group.
Add keywords manually or select from auto-suggestions.
Define match types: Broad, Phrase, Exact.
Enter up to 40 positive and 40 negative keywords.
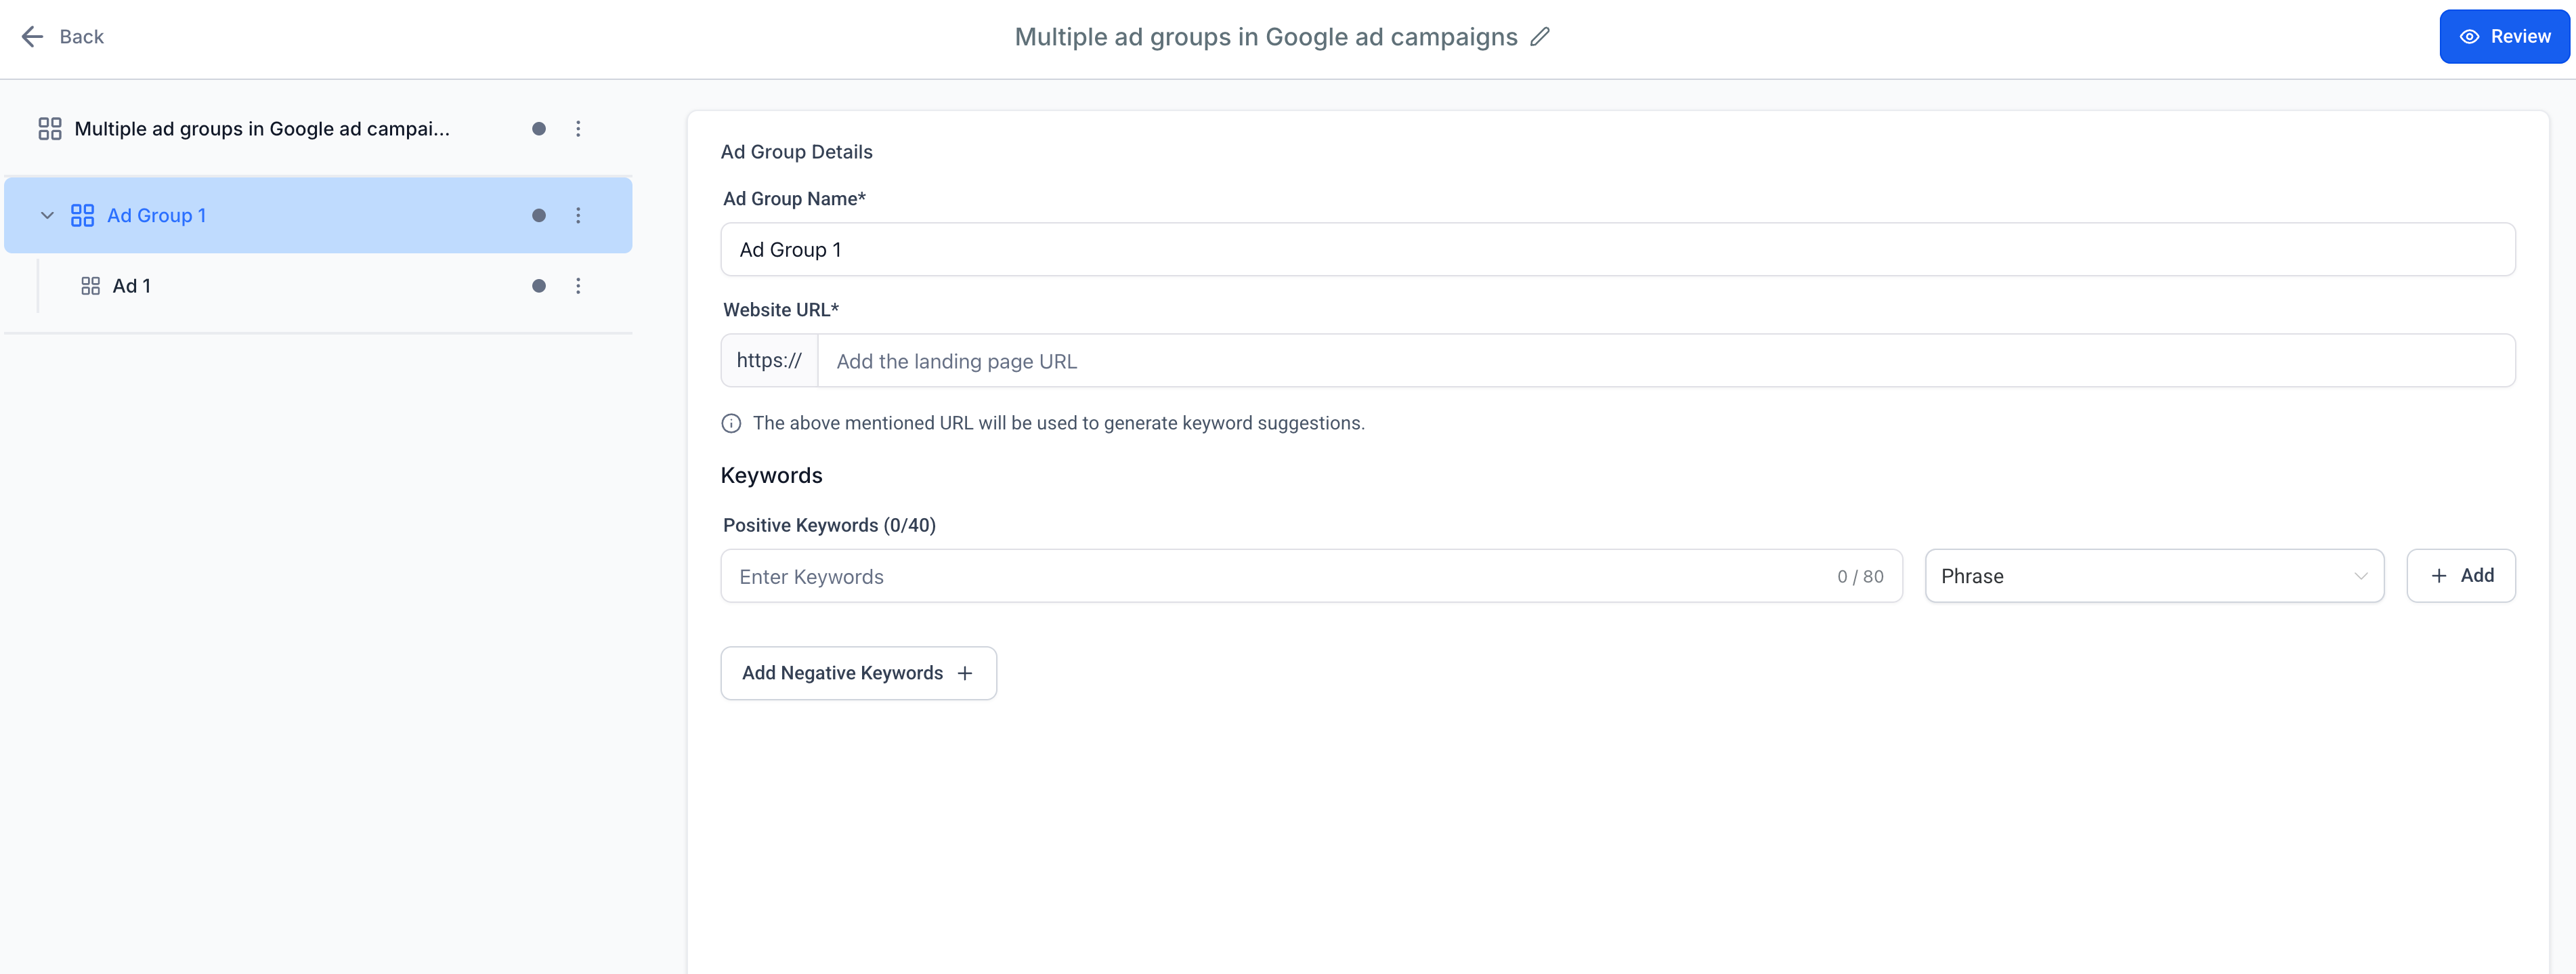
Manage your search ad keywords from the Ad Group section. There are 2 sub-sections to the Keywords section namely, Positive Keywords and a button which turns into a section to enter 'Negative Keywords':
- Under Keywords, enter any relevant words or phrases that will match what users might search for on Google to connect with your business:
- For each keyword, enter a word or phrase, after entering the phrase or word in the Keyword section, click enter to save that keyword or press 'Add' after selection of the keyword match type.
- Each keyword now has a match type dropdown:
- Broad (
keyword) - Phrase (default:
"keyword") - Exact (
[keyword])
- Each keyword now has a match type dropdown:
- Applies to positive and negative keywords (limit: 40 each, 80 characters/keyword)
- Add another phrase or word in the keyword box to create additional keywords, or click on the cross icon on the selected keyword to delete it.
Notes:
1. Each word or a phrase keyword can be upto 80 characters.
2. The ad-group editor supports up to 40 positive keywords and 40 negative keywords per ad group.
3. Suggested keywords are shown based on the website entered in the ad.
Click on the 'Add Negative Keywords' button to optionally add negative keywords.
Under Negative keywords, you can optionally add words or phrases that you do not want matched with your ad.
Negative keywords help prevent your ad from showing for searches that match those terms, according to Google's negative keyword matching rules.
For each negative keyword, enter a word or phrase, then click Enter or 'Add' button for that keyword to be selected as a negative keyword.
Add another phrase or word in the keyword box to create additional keywords, or click on the cross icon on the selected keyword to delete it.
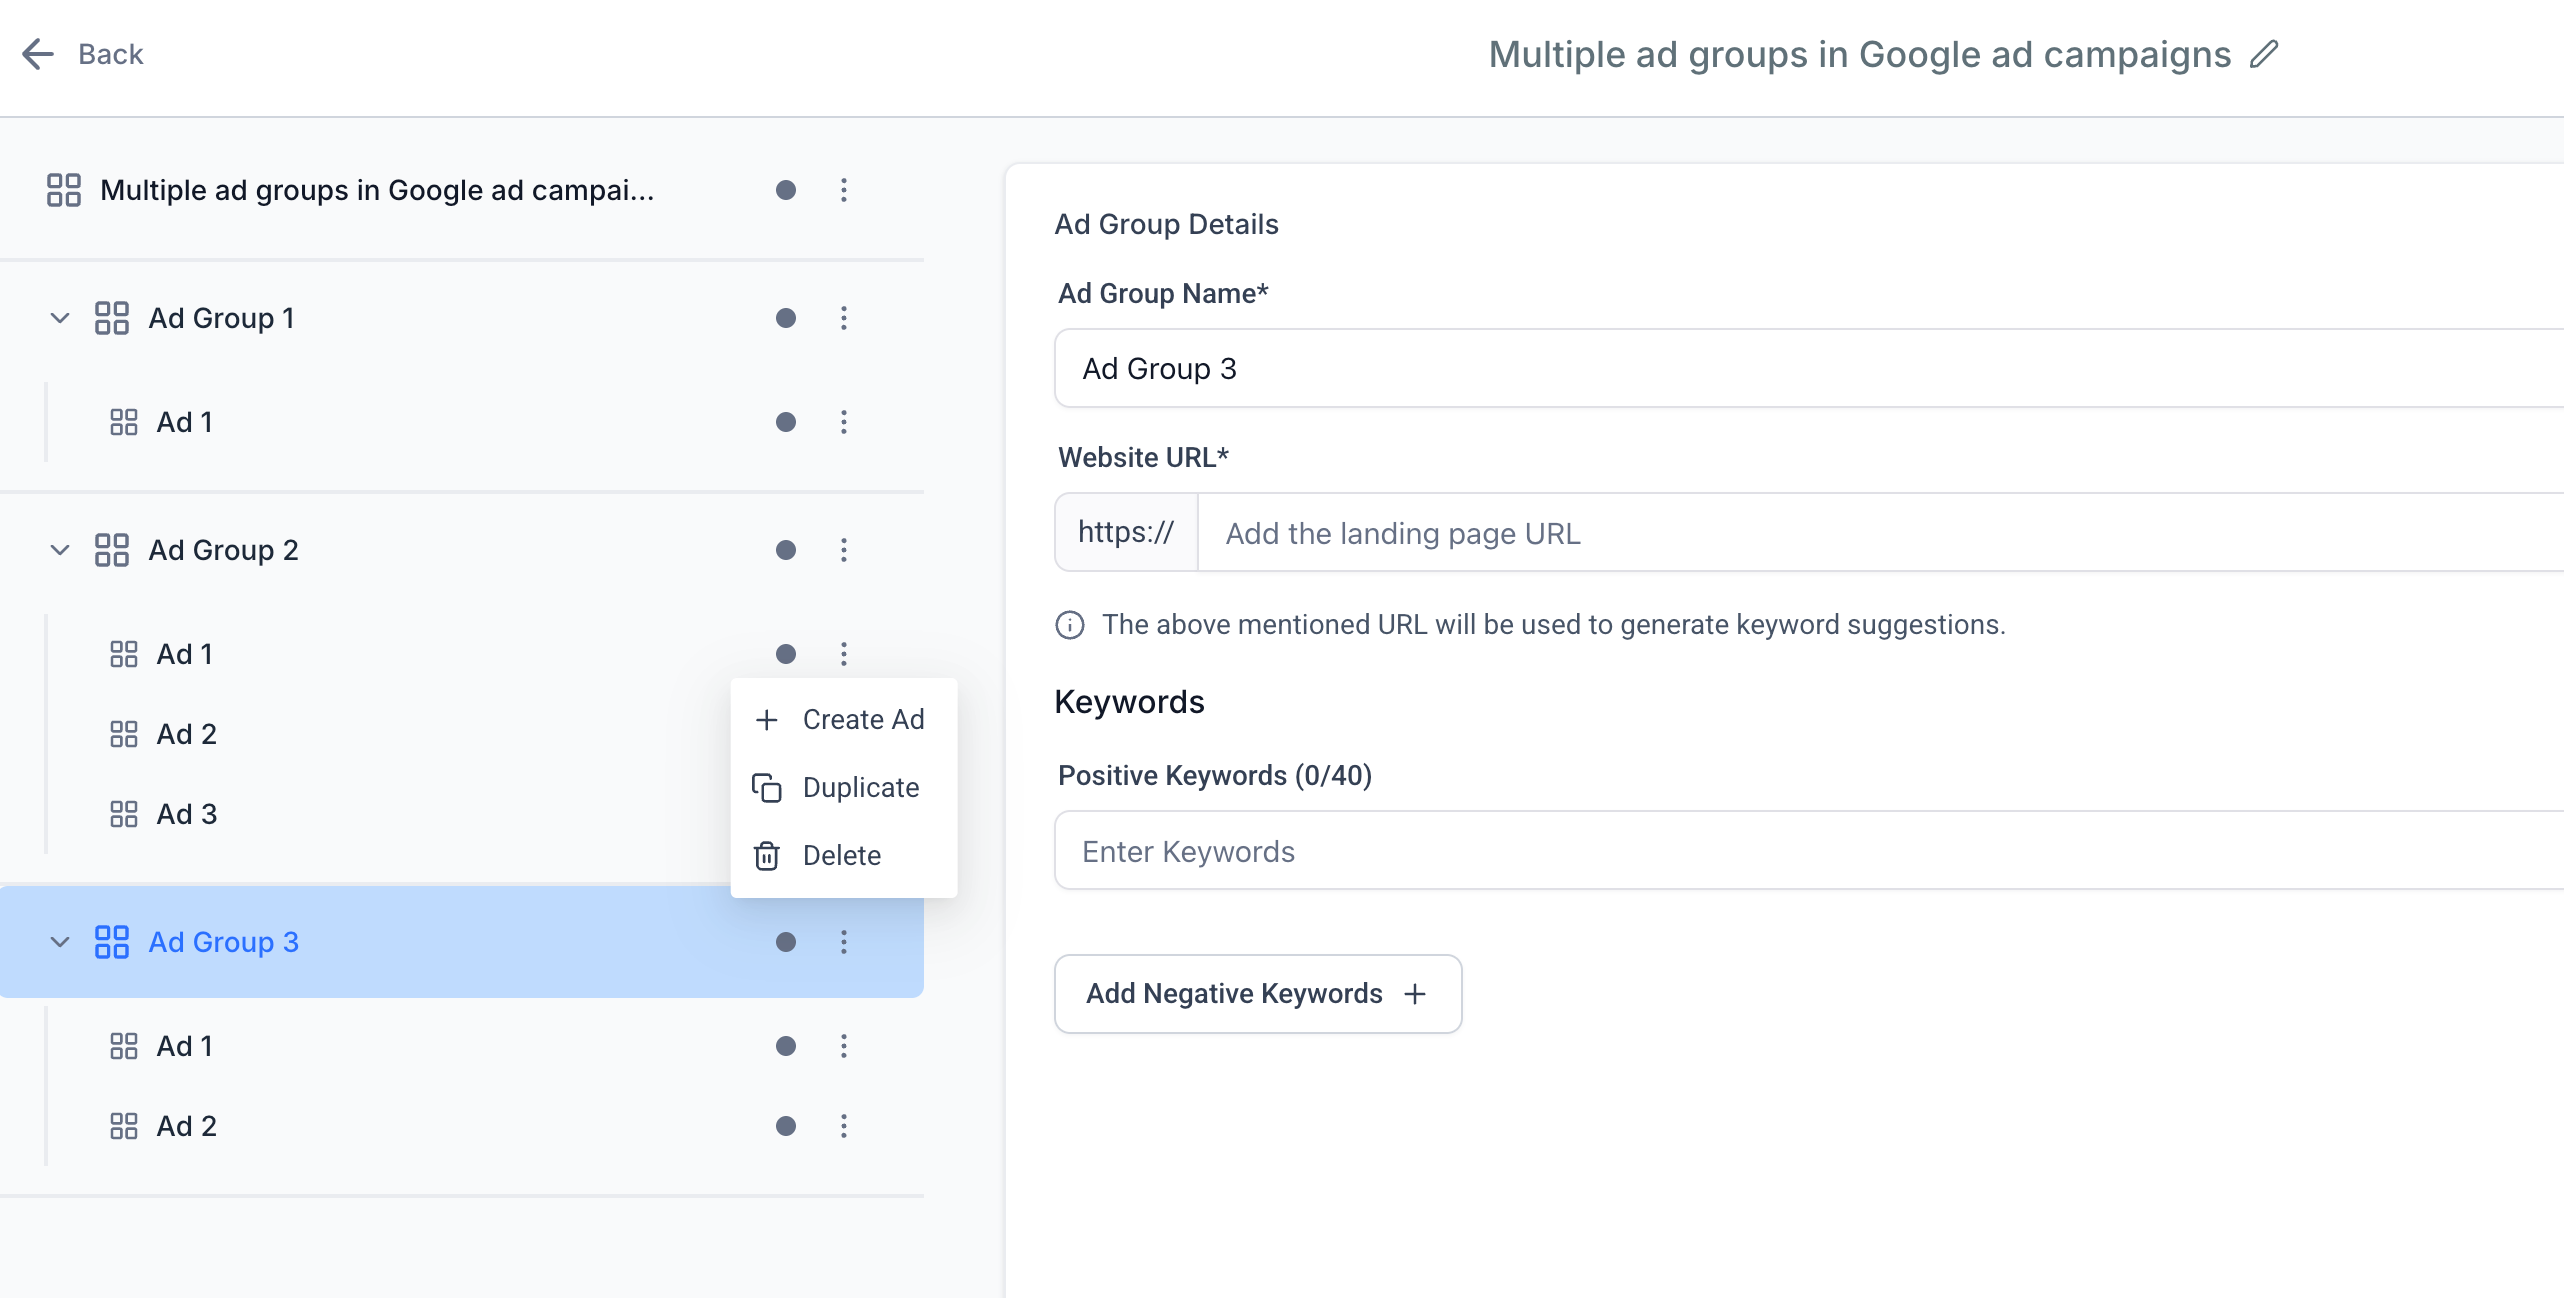
Ellipsis menu options at Ad Group level:
Create new ad
Duplicate ad group
Delete ad group (cannot delete if only one exists)
C: Ad Level Setup
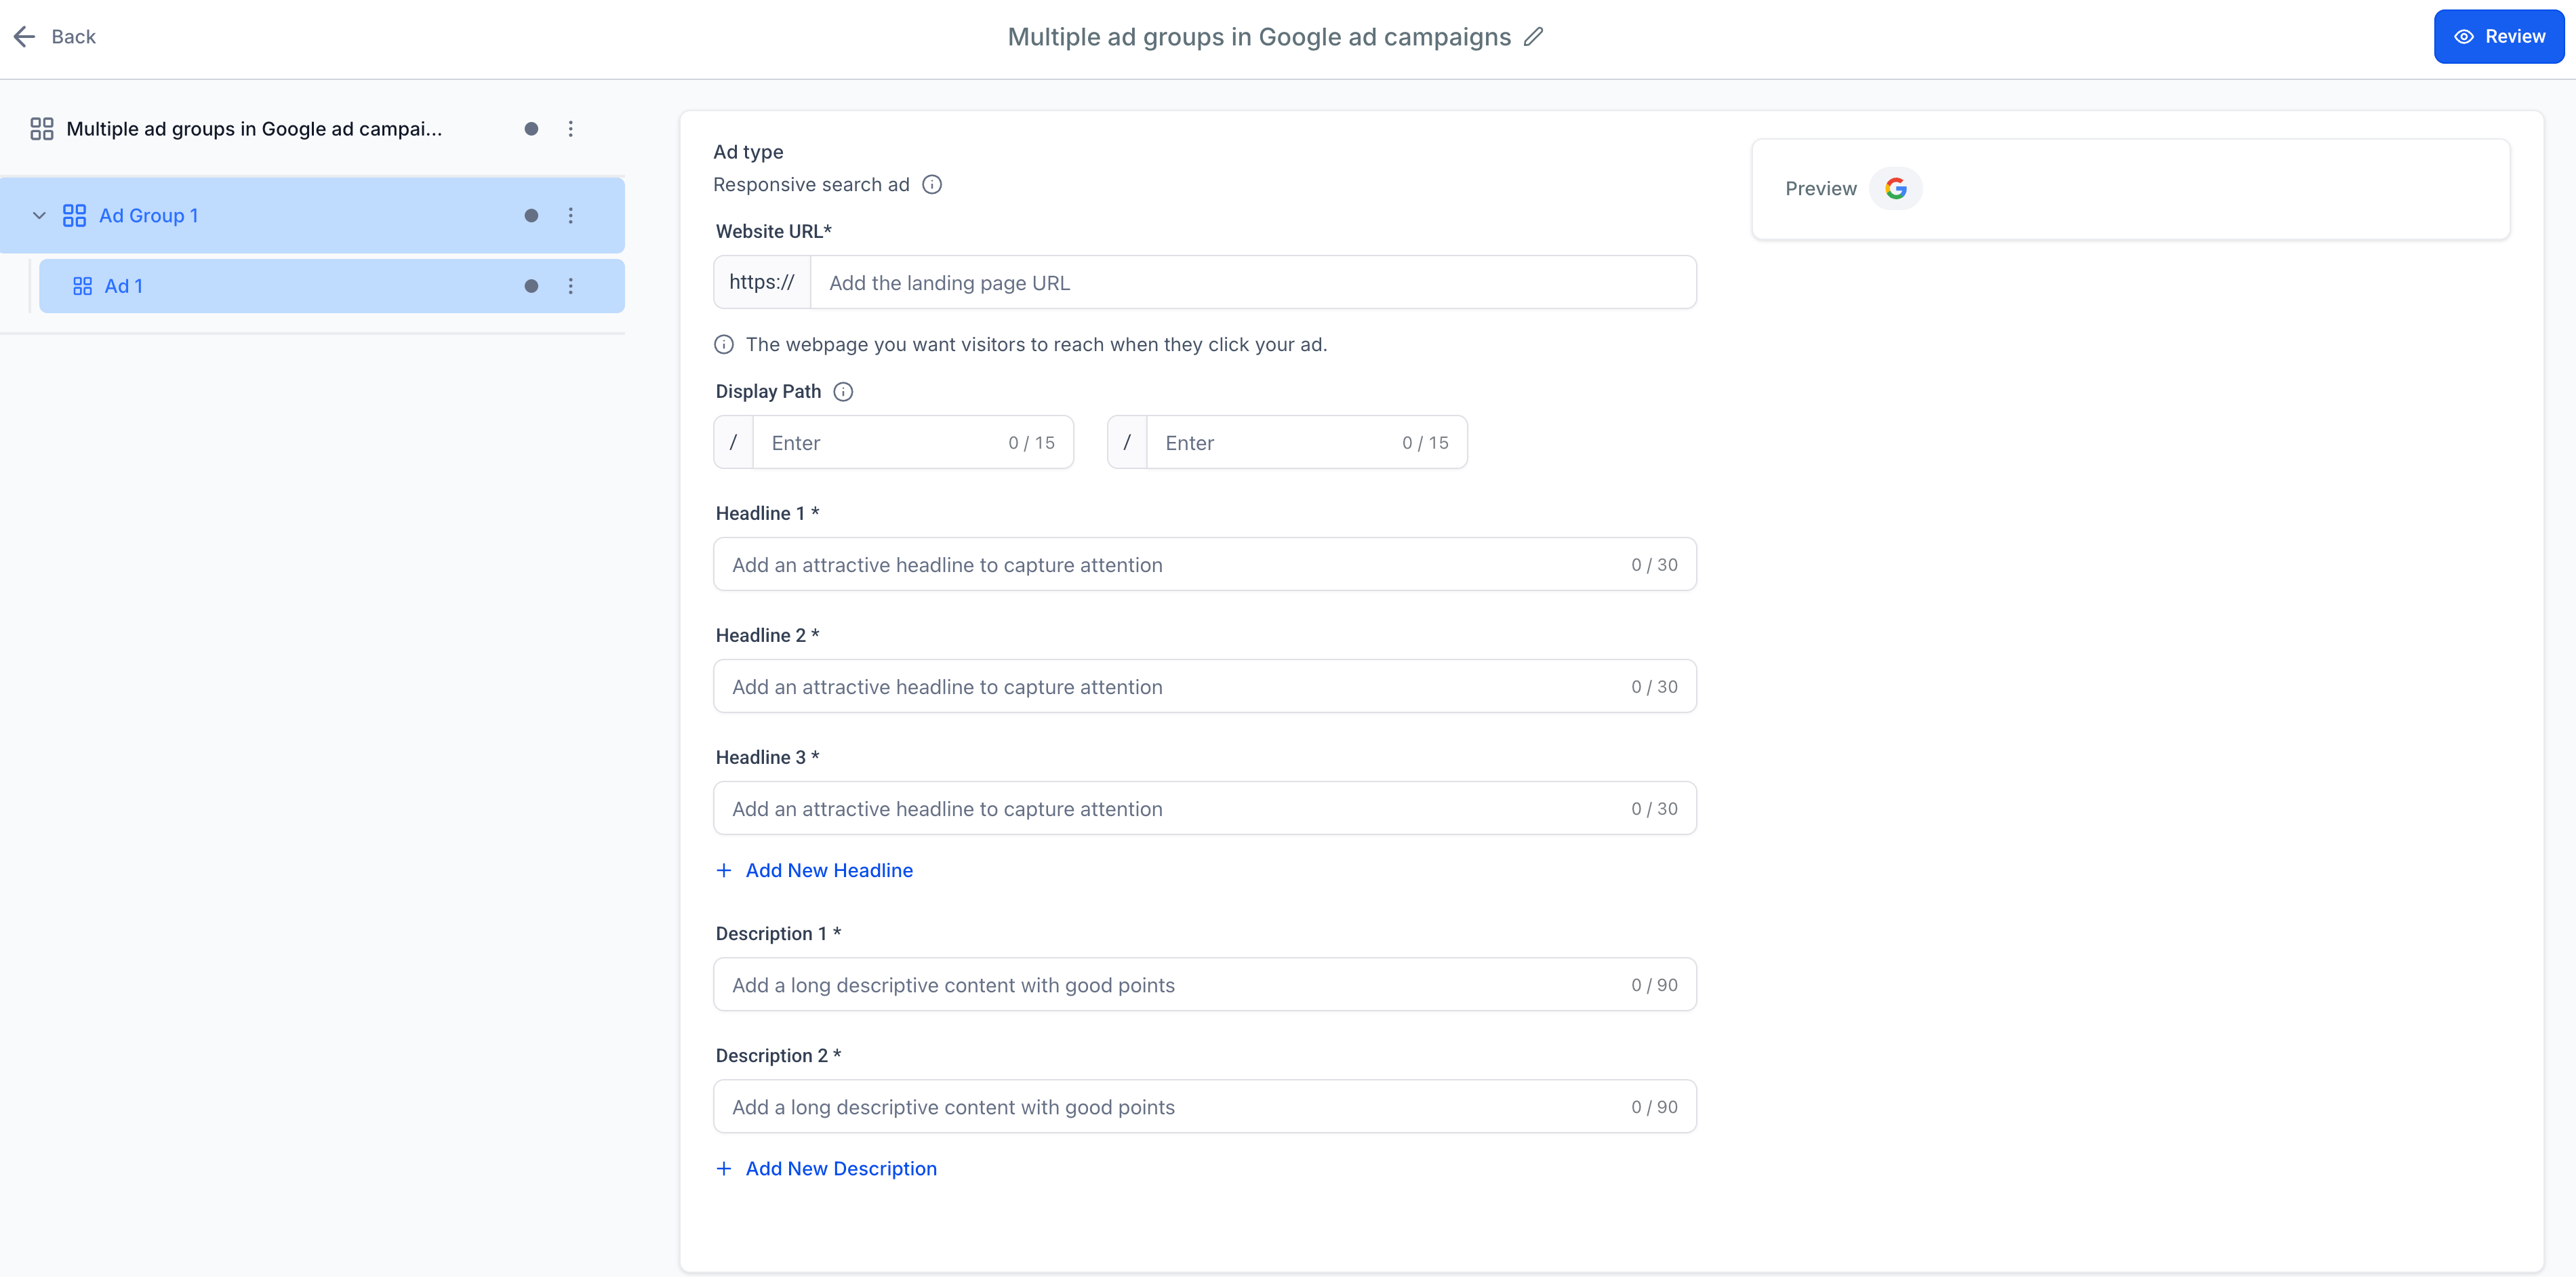
Each ad group can have up to 3 ads and for each ad:
Add up to 15 headlines (30-character limit each).
- Enter a distinct headline in each field. Google can show up to three headlines in various combinations and orders.
- Each headline must stay within 30 characters. Use additional headline fields to provide different messages or variations.
- Use Add New Headline to add more headlines, up to 15 headlines (30 characters each). At least 3 headlines are required.
- Enter a distinct headline in each field. Google can show up to three headlines in various combinations and orders.
Add up to 4 descriptions (90-character limit each).
- Enter a description for your ad in Description 1. Each description must stay within 90 characters. Use Description 2 to add another description.
- Use Add New Description to add up to 4 descriptions (90 characters each). At least 2 descriptions are required.
- Enter a description for your ad in Description 1. Each description must stay within 90 characters. Use Description 2 to add another description.
Provide a final URL and optional display paths (up to 15 characters each).
- Specify the URL that your ad will link to, manually enter the website URL.
- The optional Display Path fields show a user-friendly path in your ad without changing the actual landing-page URL. You can add up to two segments (15 characters each).
- Specify the URL that your ad will link to, manually enter the website URL.
Note: All ads within a single ad group must share the same base URL, but may vary in display path.
You can optionally create Ad 2 and Ad 3 to test different ad messages. For detailed multi-ad management instructions, see the multiple ad groups and ads guide.
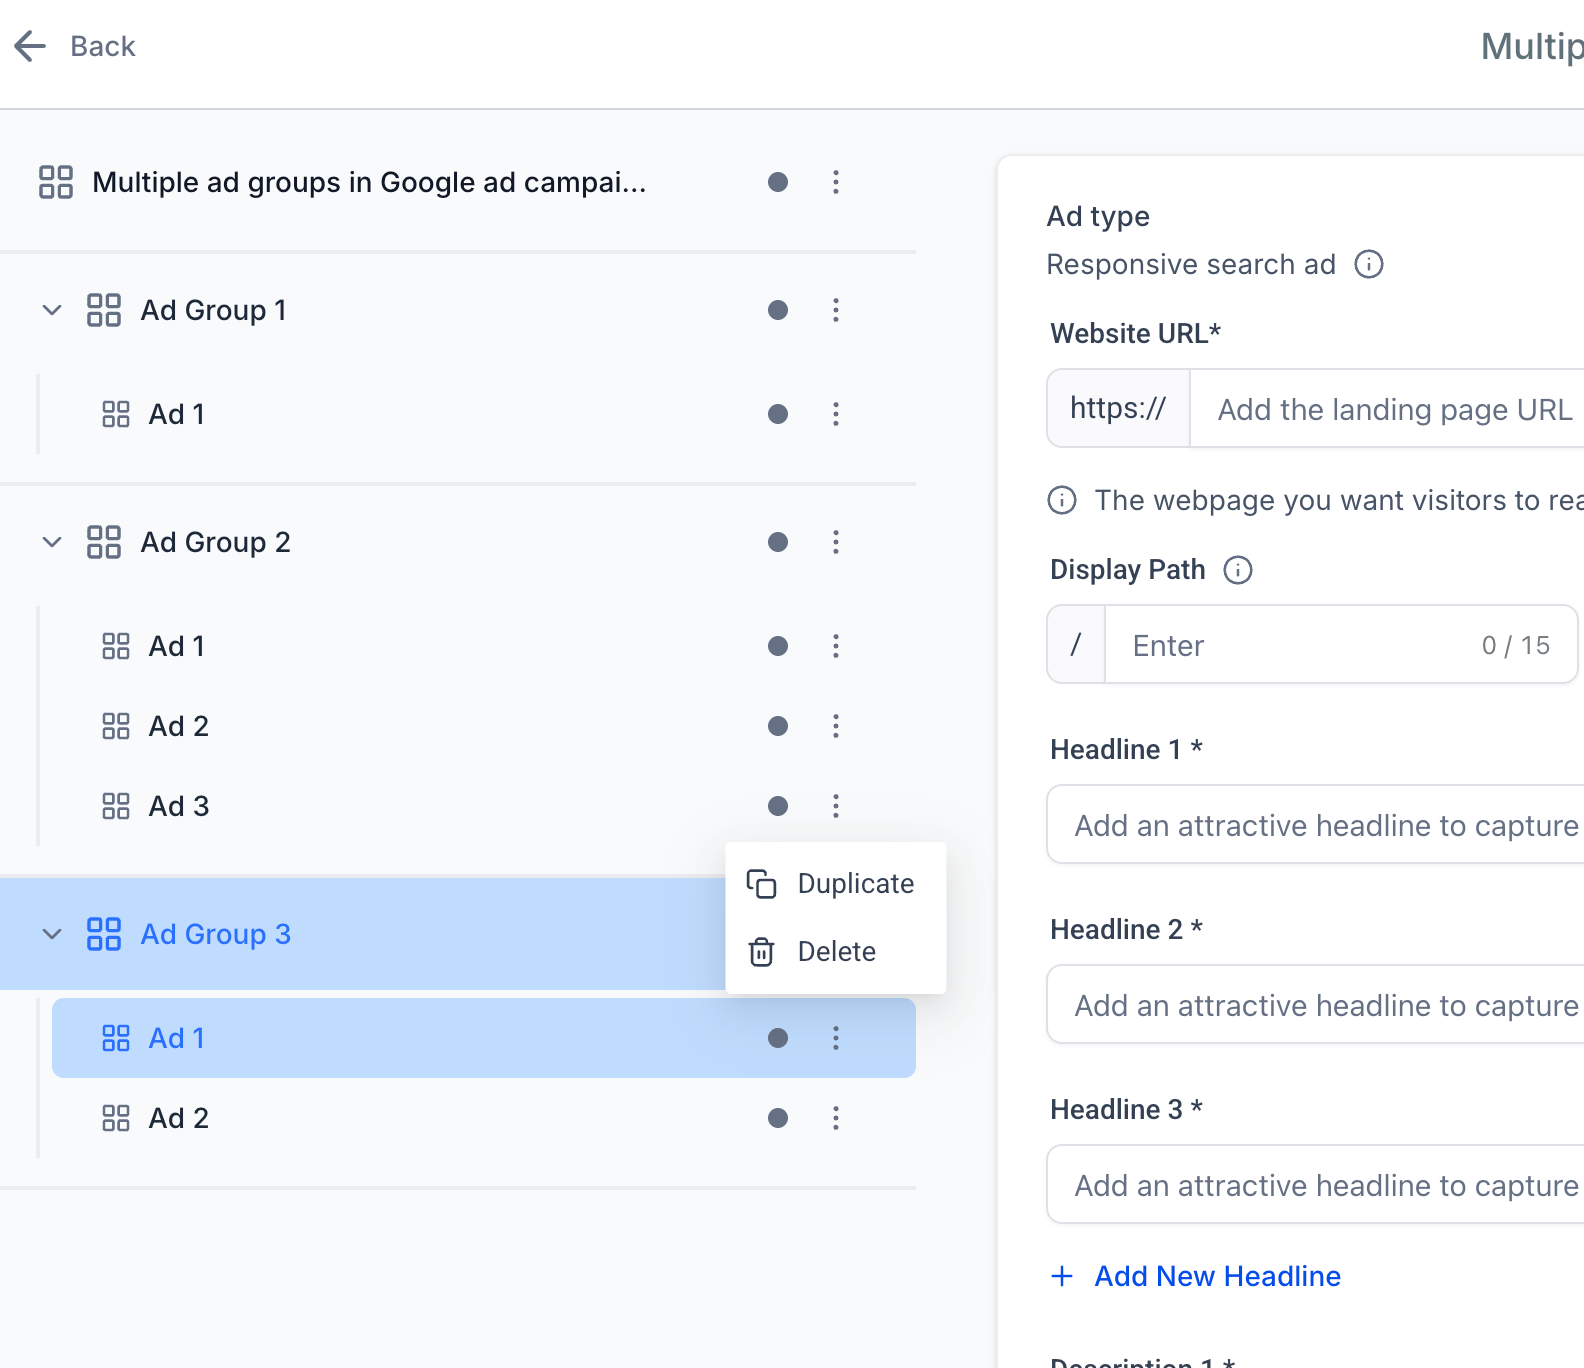
Ad Actions:
Use the ellipsis menu to:
Duplicate ad
Delete ad (must have at least one remaining ad in the group)
Step 3 | Review and Publish
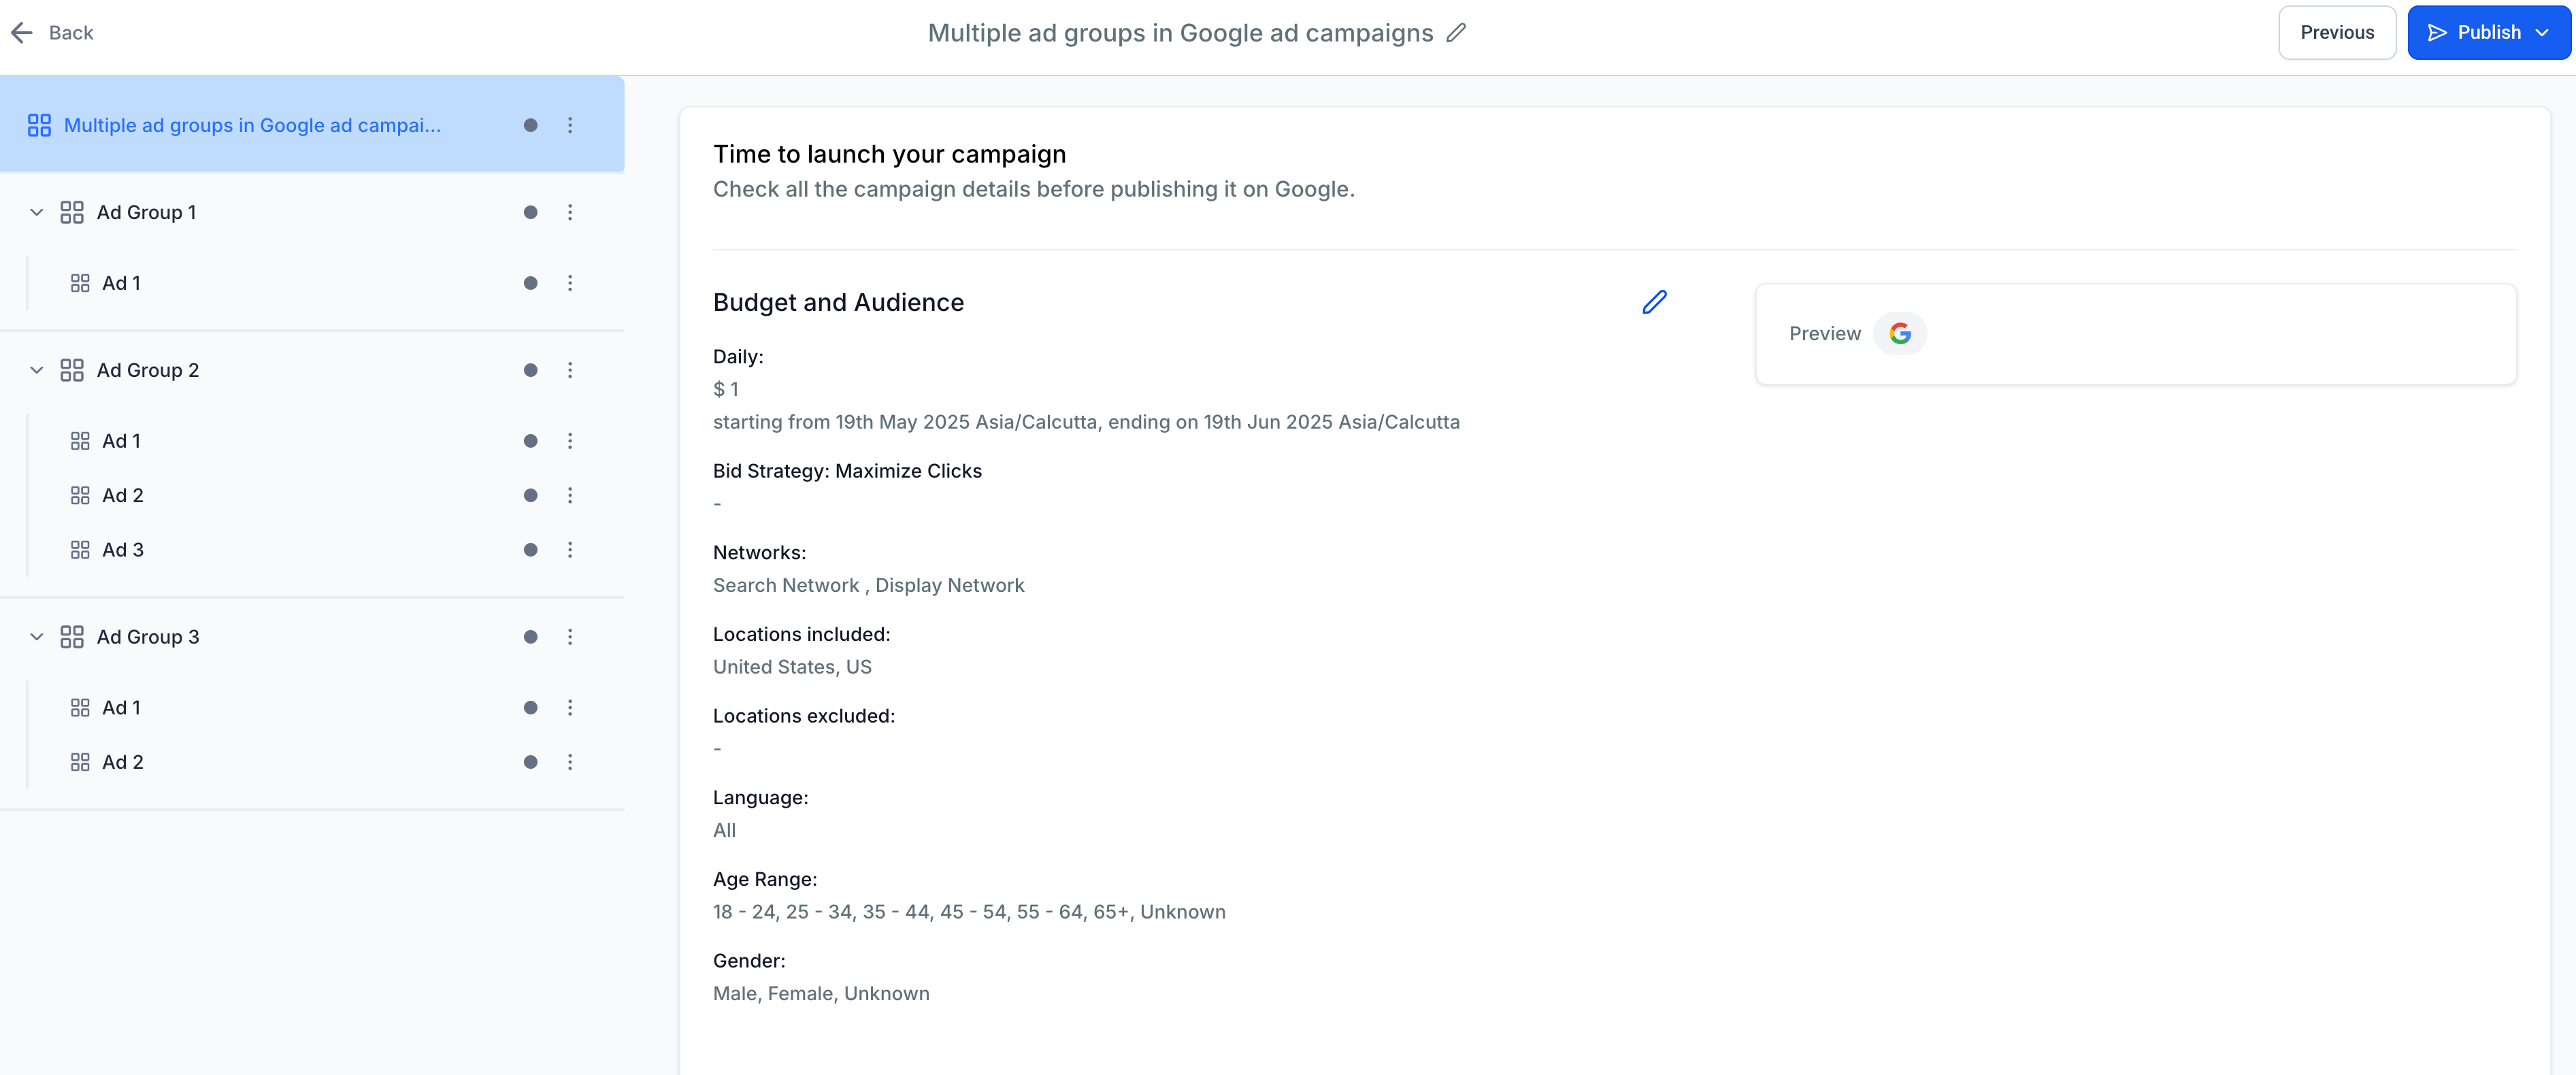
Click on the "Review" button at top right to see the campaign configuration details. Once the campaign is in review stage, you can verify all the details of aesthetics, content, budget and other entries before taking your campaign live.
The Review screen allows you to:
Toggle between ad groups and view ads inside each group.
Ensure all required elements are in place:
At least 1 ad group.
At least 1 ad per ad group.
Easily visualise the campaign’s hierarchical structure before publishing.
Important note:
1. When creating a campaign, follow Google Ads policies to reduce the risk of ad rejection. Refer to the official Google Ads policy guide below.
https://support.google.com/adspolicy/answer/6008942
Related Articles
Was this article helpful?
That’s Great!
Thank you for your feedback
Sorry! We couldn't be helpful
Thank you for your feedback
Feedback sent
We appreciate your effort and will try to fix the article