HighLevel Communities lets you share courses from your course library directly in a group's Learning tab. Choose whether courses are available to everyone, unlocked through participation or time, purchased, or restricted to specific members. This guide walks you through adding courses, configuring visibility and pricing, and managing access after publication.
TABLE OF CONTENTS
- What Are Courses in HighLevel Communities?
- Key Benefits of Courses in HighLevel Communities
- Course Visibility Options
- Managing Existing Courses
- How to Add and Manage Courses in HighLevel Communities
- Frequently Asked Questions
- Related Articles
What Are Courses in HighLevel Communities?
Community courses bring learning content into the same space where members participate in discussions and events. Group owners and admins can add courses from their existing course library to the Learning tab and choose how members gain access. Course visibility rules help you support open learning, guided progression, paid programs, or invitation-only training without making every course available to the entire group.
Key Benefits of Courses in HighLevel Communities
Pairing courses with community participation gives members a central place to learn and interact. Visibility controls also let admins deliver content to the right audience as a group grows.
Centralized Learning: Make courses accessible from the community's Learning tab alongside discussions and events.
Flexible Access: Select from open, level-based, time-based, paid, channel-specific, or admin-granted access.
Monetization: Offer one-time course purchases or recurring subscriptions from within the community.
Member Segmentation: Reserve content for members of selected private channels or named individuals.
Easy Management: Edit course settings, reorder courses, share course links, and grant or revoke manual access.
Course Visibility Options
Course visibility controls when and how members can access learning content in your HighLevel community. You can make a course available to everyone, require members to reach a participation level or wait a set number of days, charge for access, or limit enrollment to a private channel or selected individuals. Choosing the right option helps you organize learning paths, protect exclusive content, and provide members with the appropriate access.
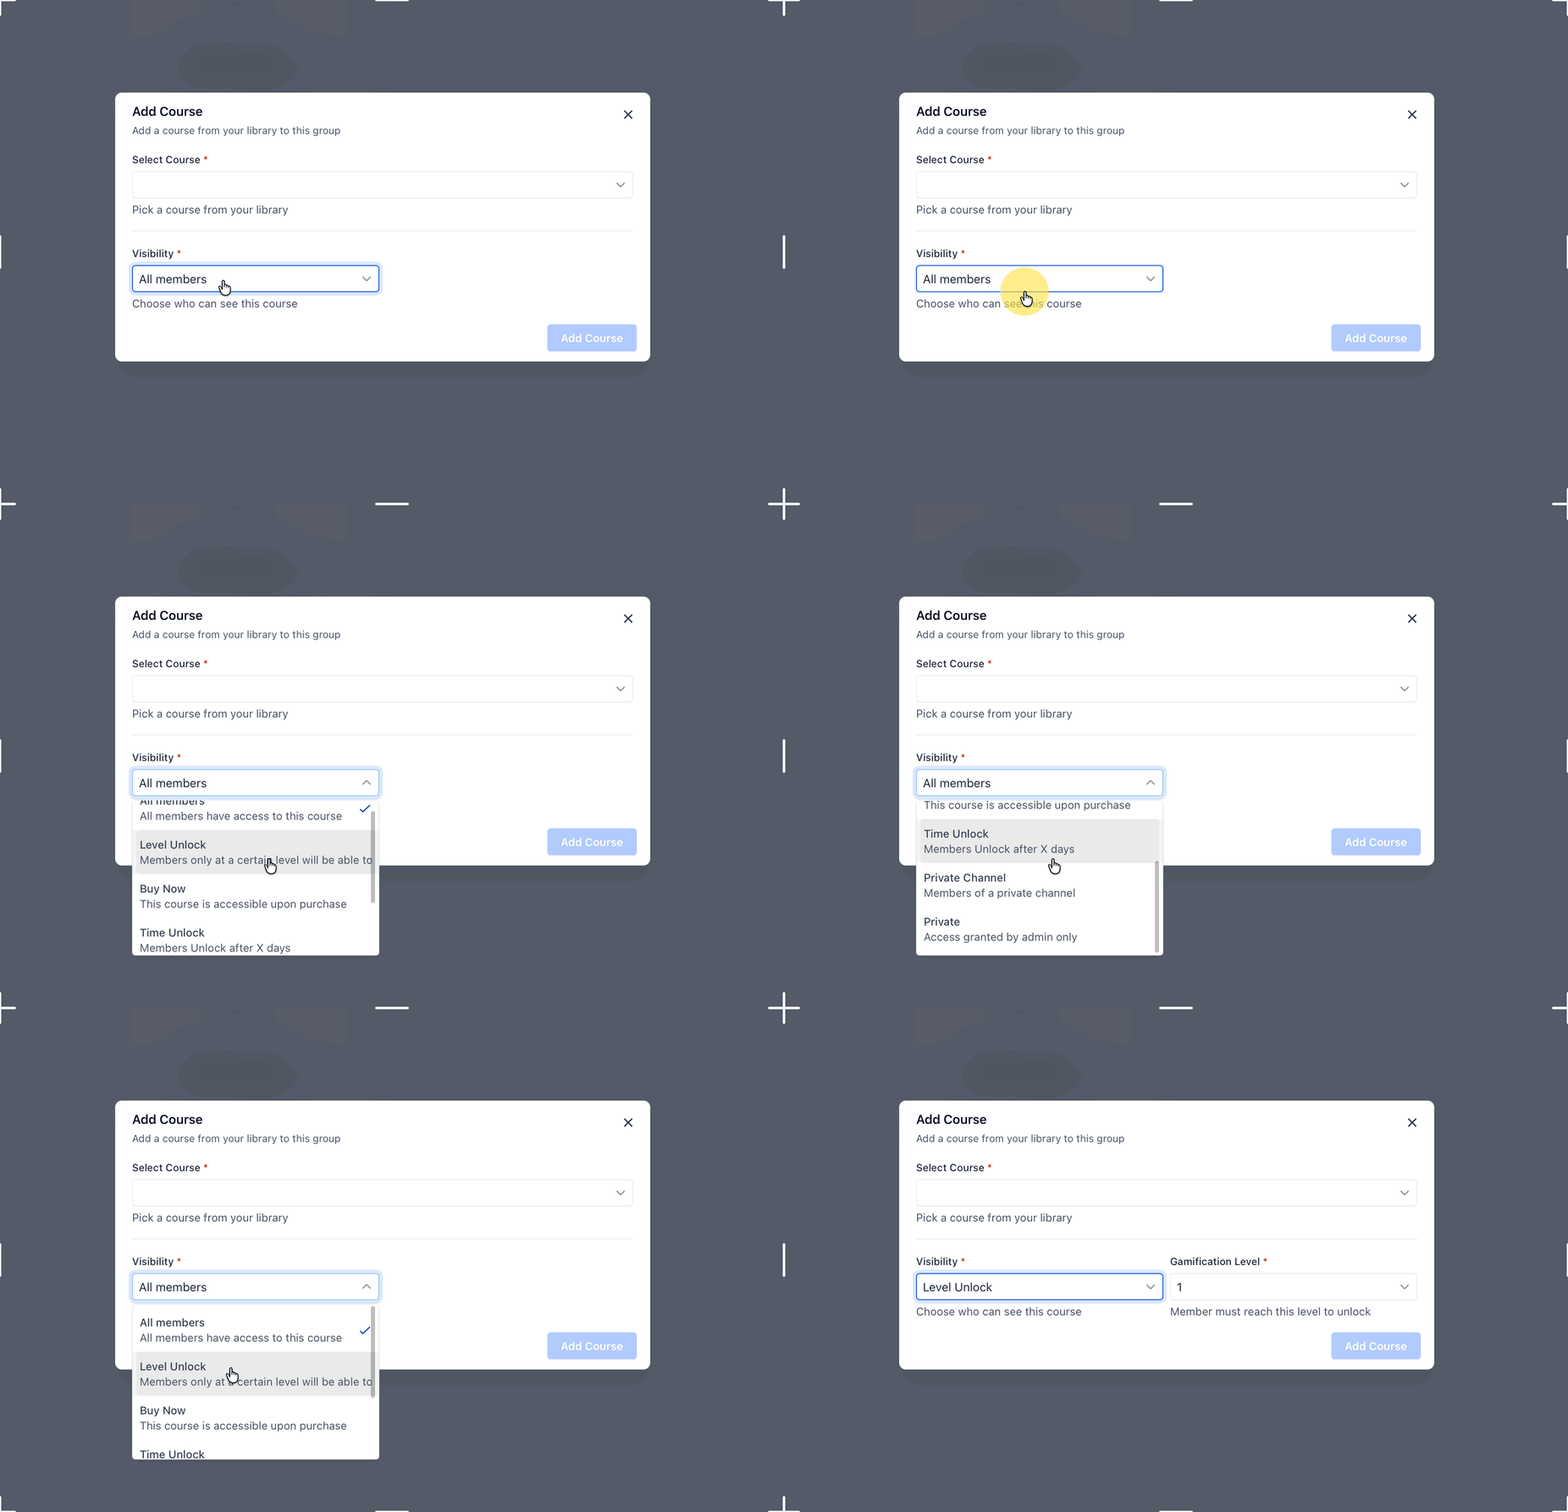
Use the table below to compare each visibility type and identify the settings required before adding the course.
Course Type | How Access Works | Required Settings |
|---|---|---|
All Members | All community members can access the course. | None |
Level Unlock | Members unlock the course after reaching a specified gamification level. | Gamification Level |
Buy Now | Members purchase access through a one-time payment or subscription. | Payment Type, Price, Billing Period and Trial Days (for subscriptions) |
Time Unlock | Members unlock the course after a specified number of days from joining the group. | Days to Unlock (maximum 365) |
Private Channel | Only members of the selected private channel can access the course. | Private Channel |
Private | An admin manually grants course access to individual members. | Manual access through Manage Courses |
Managing Existing Courses
After a course appears in the Learning tab, owners and admins can update its configuration and presentation without adding a duplicate. Member-specific access can also be managed separately from the course's automatic unlock rules.
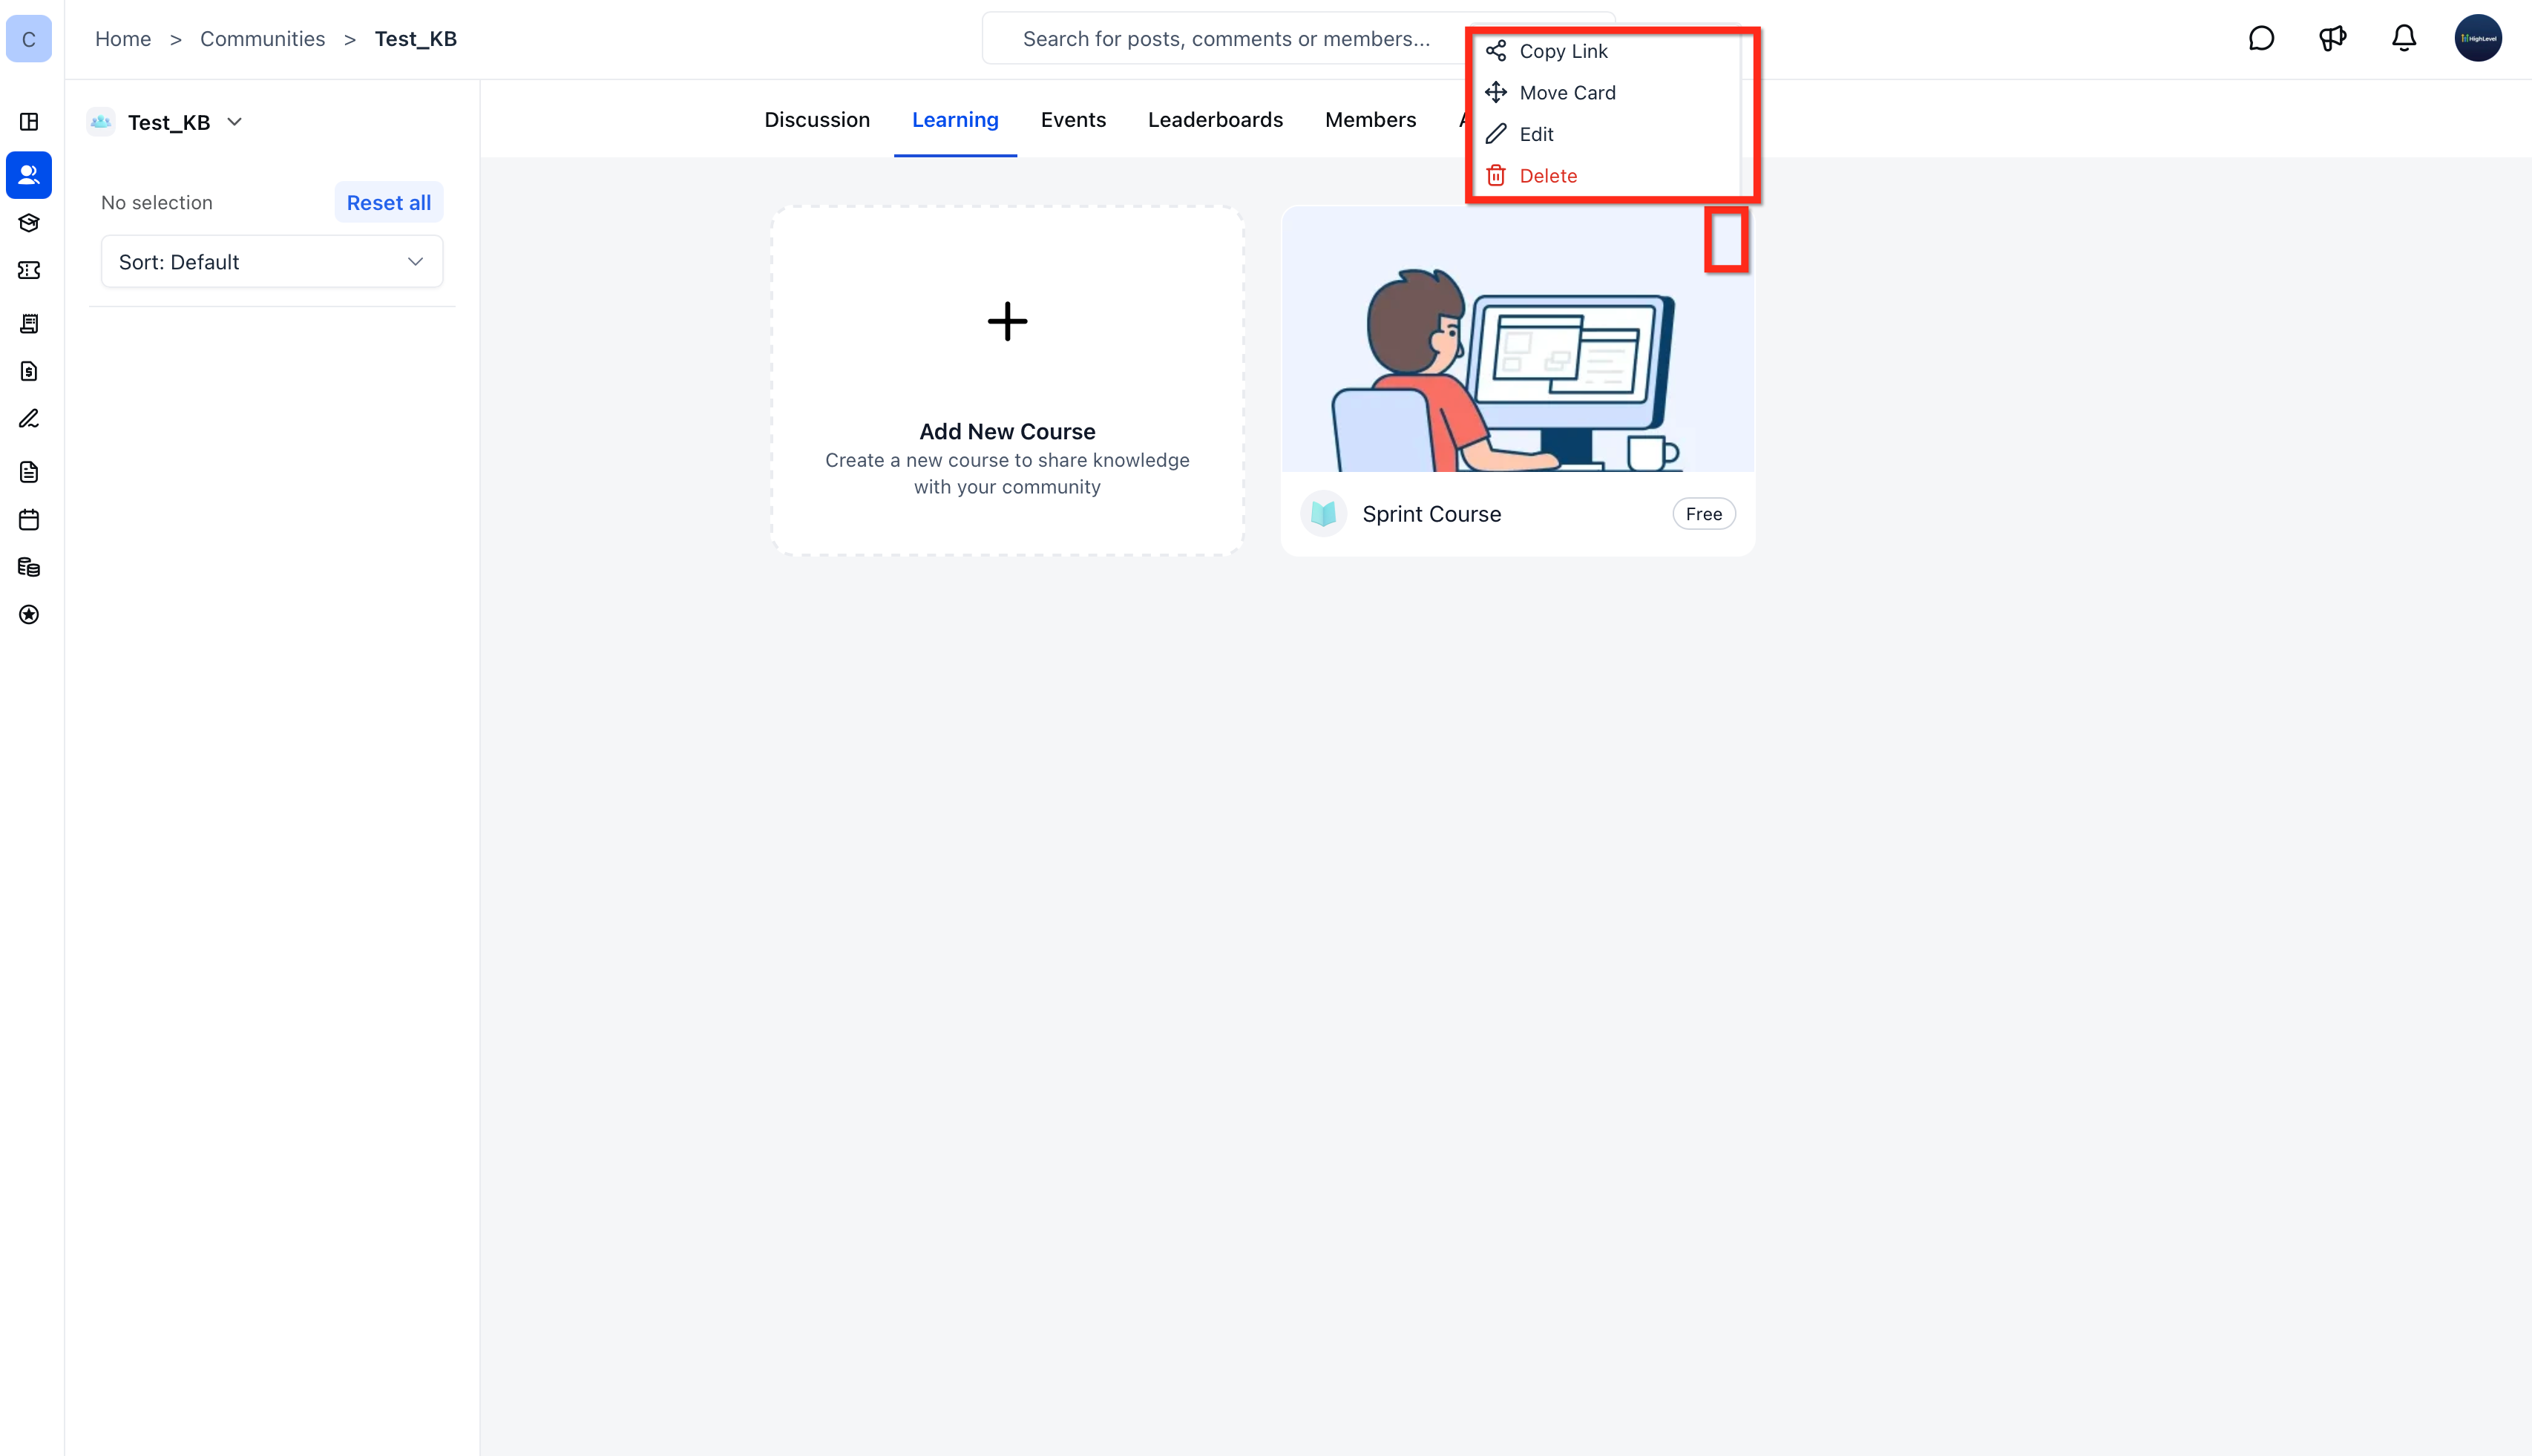
Edit Course: Open the three-dot menu on a course card and choose Edit to change visibility or applicable payment settings; save using Update Course.
Reorder Courses: Use the course's three-dot menu and Move, then drag and drop courses into the preferred order.
Share a Course: Use Copy Link from the three-dot menu to get a link for promotions or announcements.
Remove a Course: Use the course's Delete option to remove it from the group's Learning tab.
Grant Manual Access: Open Members, choose the three-dot menu for the person, select Manage Courses, then Grant Courses; select one or more courses and click Grant.
Revoke Manual Access: In the same Manage Courses panel, click the red X next to a course and confirm. You cannot revoke access when a member already satisfies the course's automatic unlock criteria.
Manual course grants send an email notification to the member. Changes to course unlock settings apply to new enrollments only, while existing members retain their current access. However, Private Channel visibility follows a separate access rule, where only members of the selected private channel can view and access the course. Review member access before changing the visibility settings of a published course.
How to Add and Manage Courses in HighLevel Communities
Setting up courses in the right group and choosing the appropriate visibility rule prevents accidental access or unexpected restrictions. You need a course in your HighLevel course library and owner or admin permissions for the community group.
In your HighLevel sub-account, go to Memberships > Communities > Groups.
Find the community group where the course should appear and select Login to open the group.
Select the Learning tab at the top of the group and Click Add New Course.
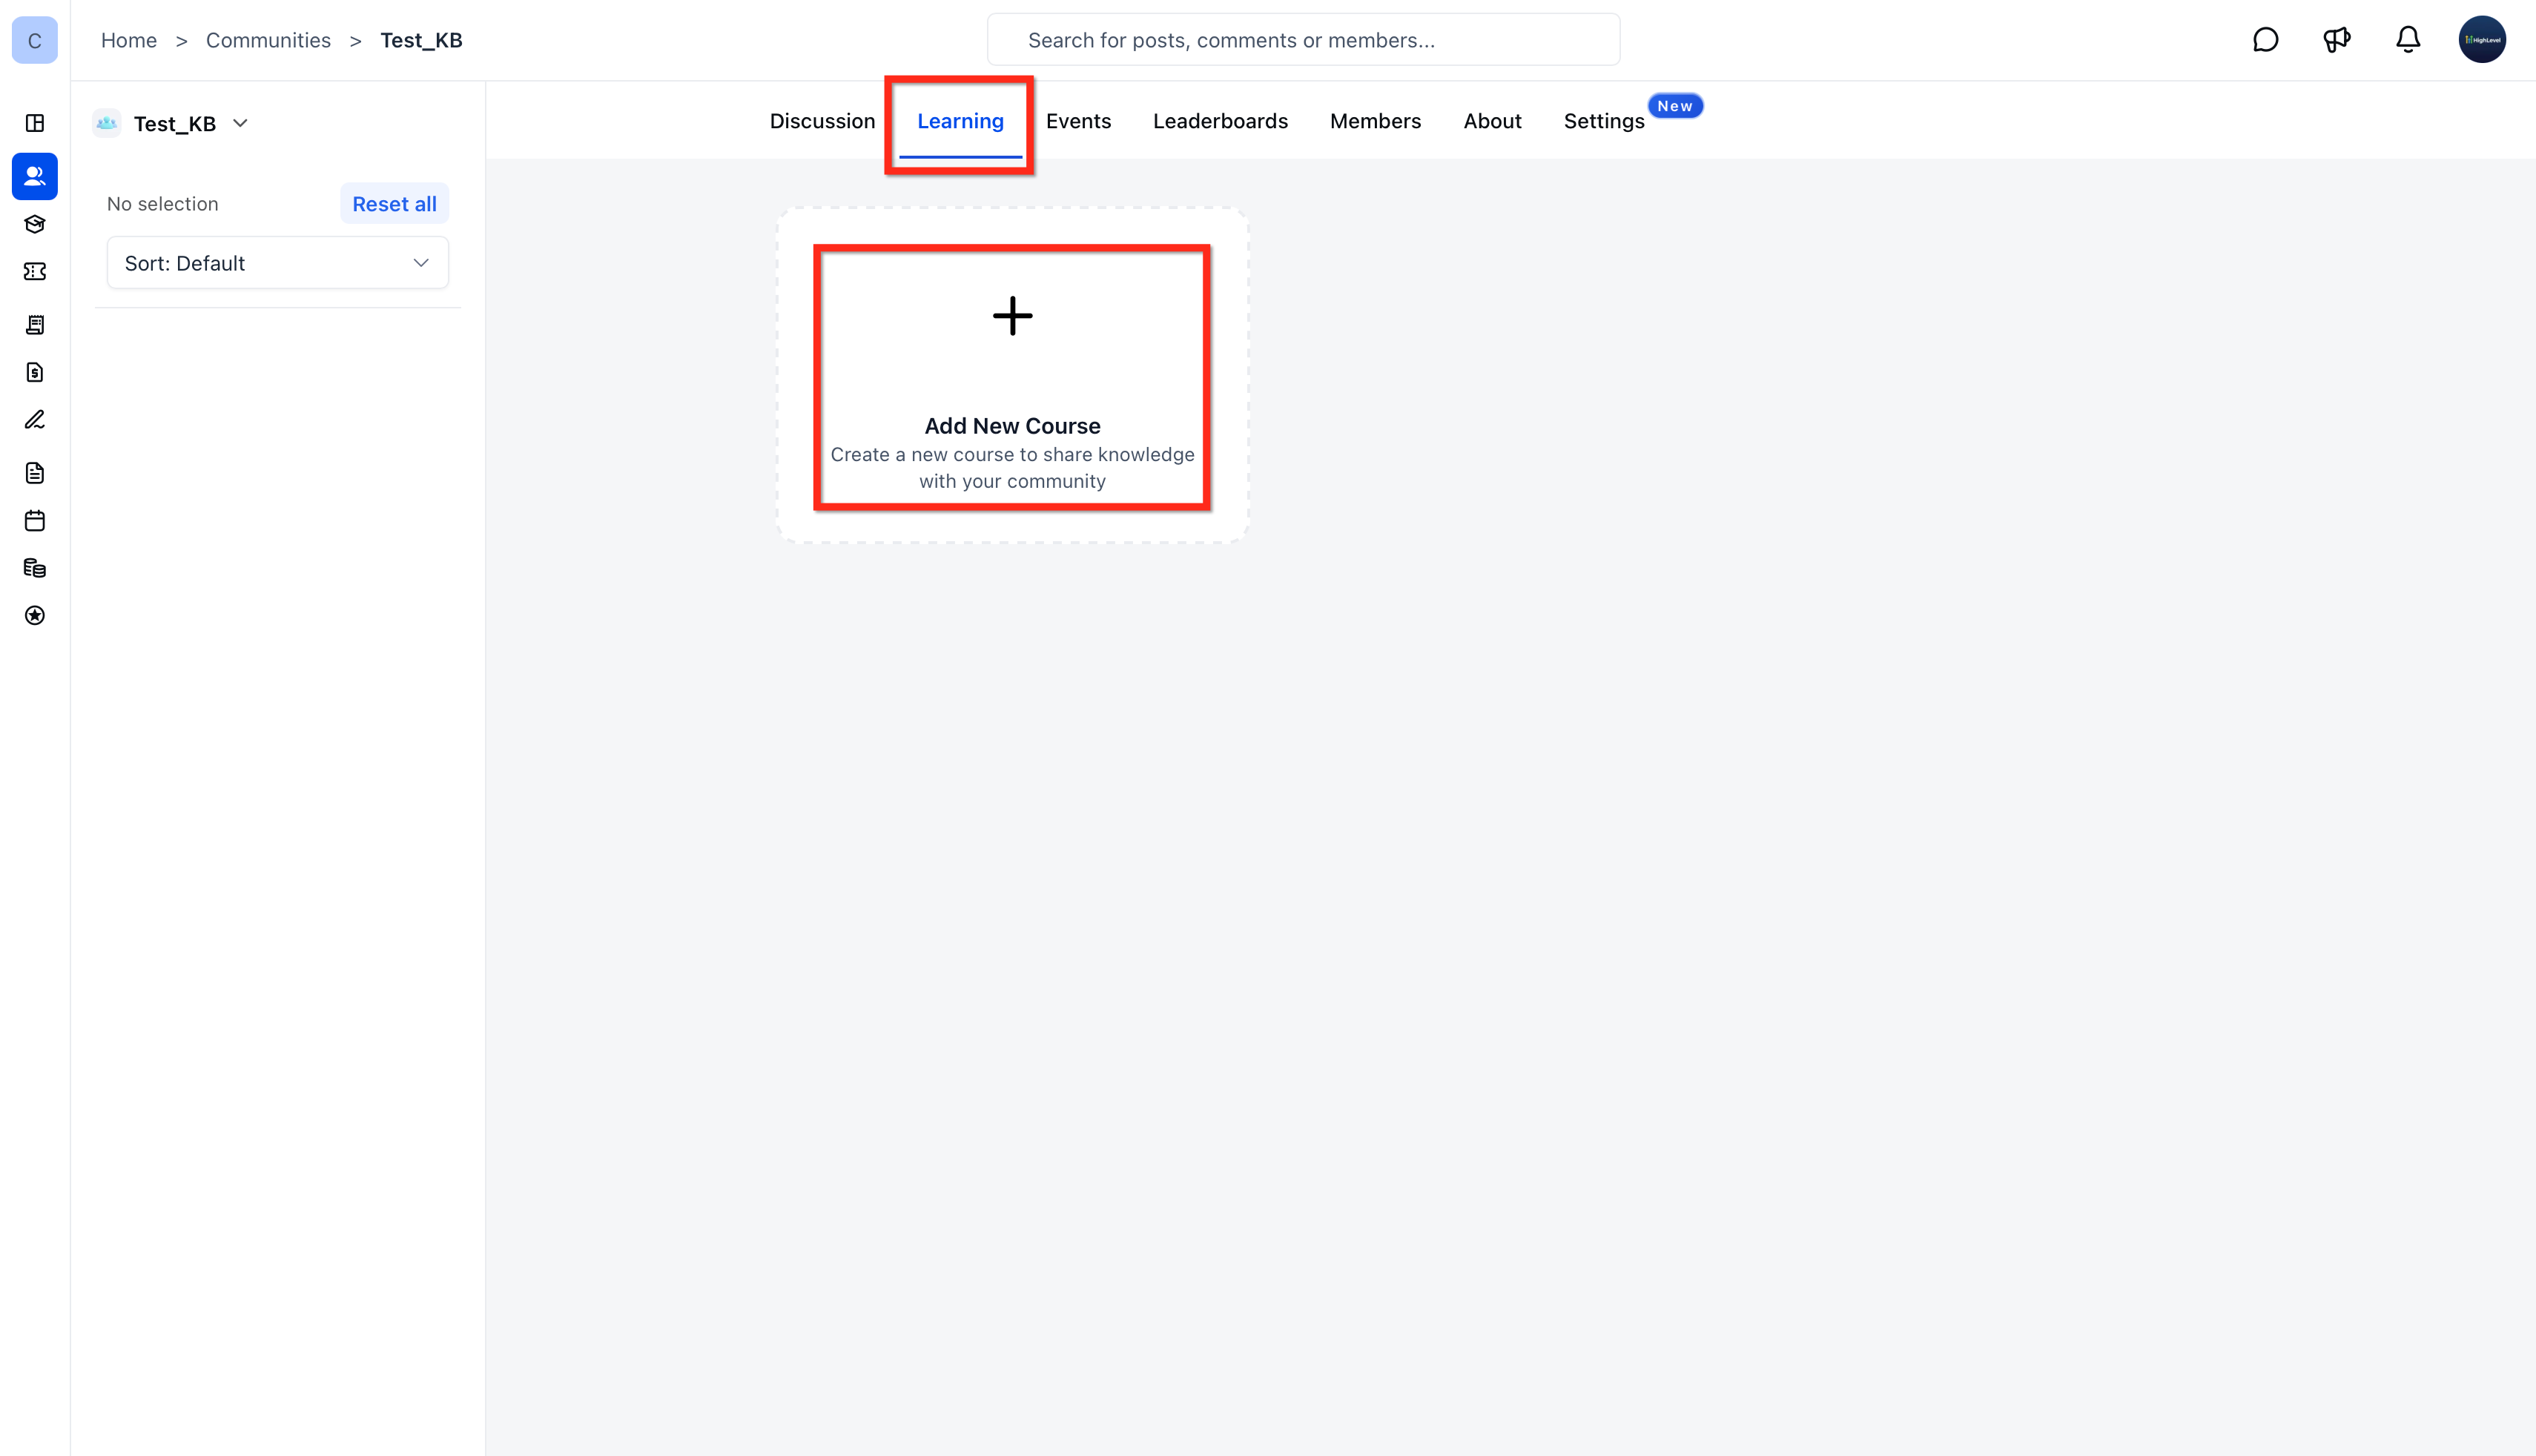
Under Select Course, choose an existing course from your library.
Open Visibility and select All Members, Level Unlock, Buy Now, Time Unlock, Private Channel, or Private.
Complete the fields for the selected rule: gamification level, payment settings, days to unlock, or private channel. All Members and Private do not require extra fields in the screenshots.
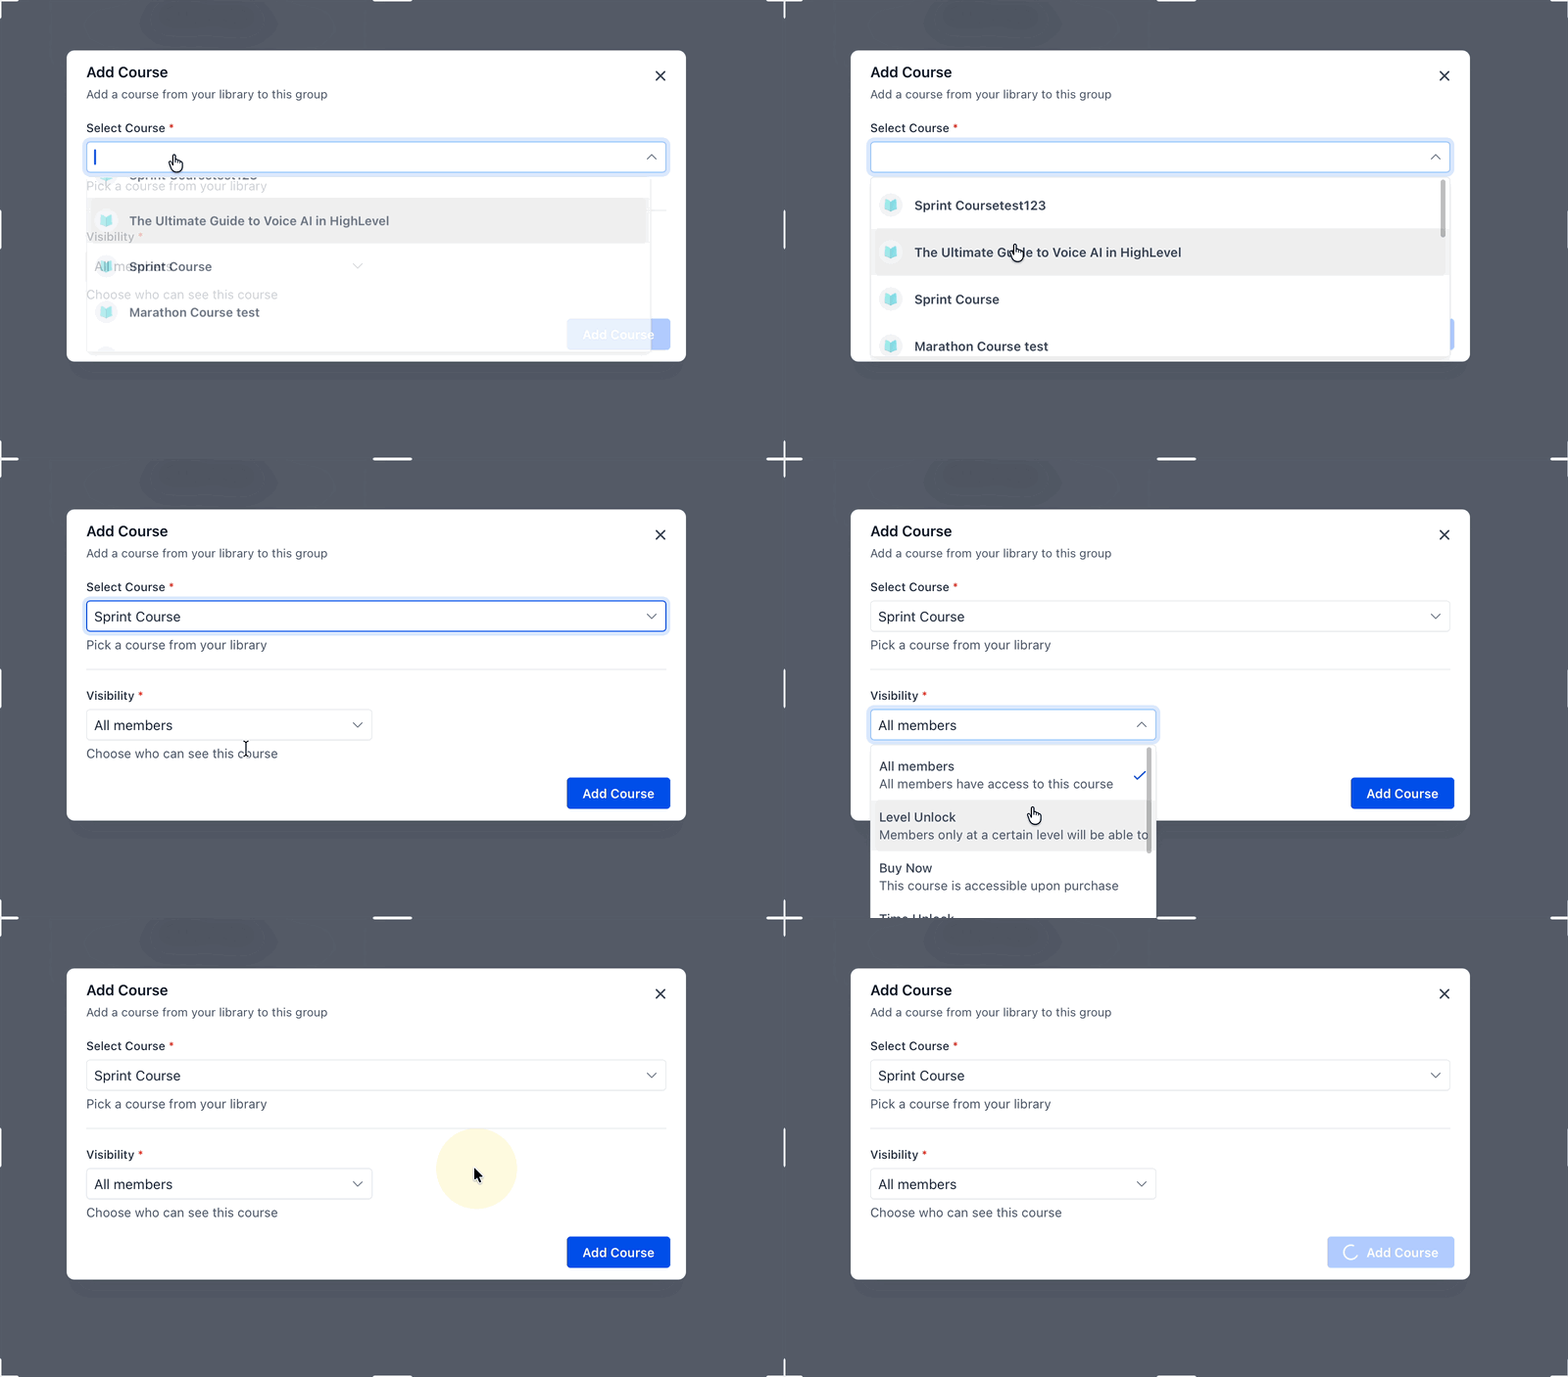
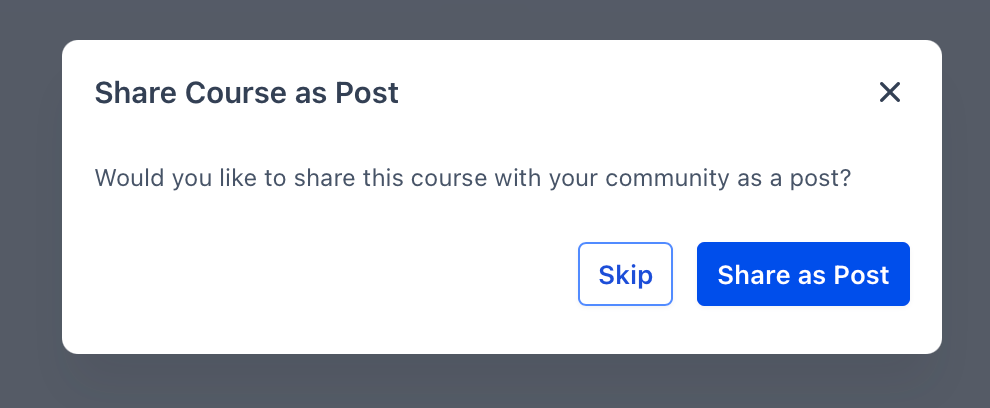
Click Add Course. After clicking Add Course, a Share Course as Post popup appears, allowing you to announce the newly added course to your community members.
- Share as Post: Click to share the course as a post in your community.
- Skip: Click to add the course without creating a community post.
The course appears in the Learning tab with access controlled by the selected visibility rule.
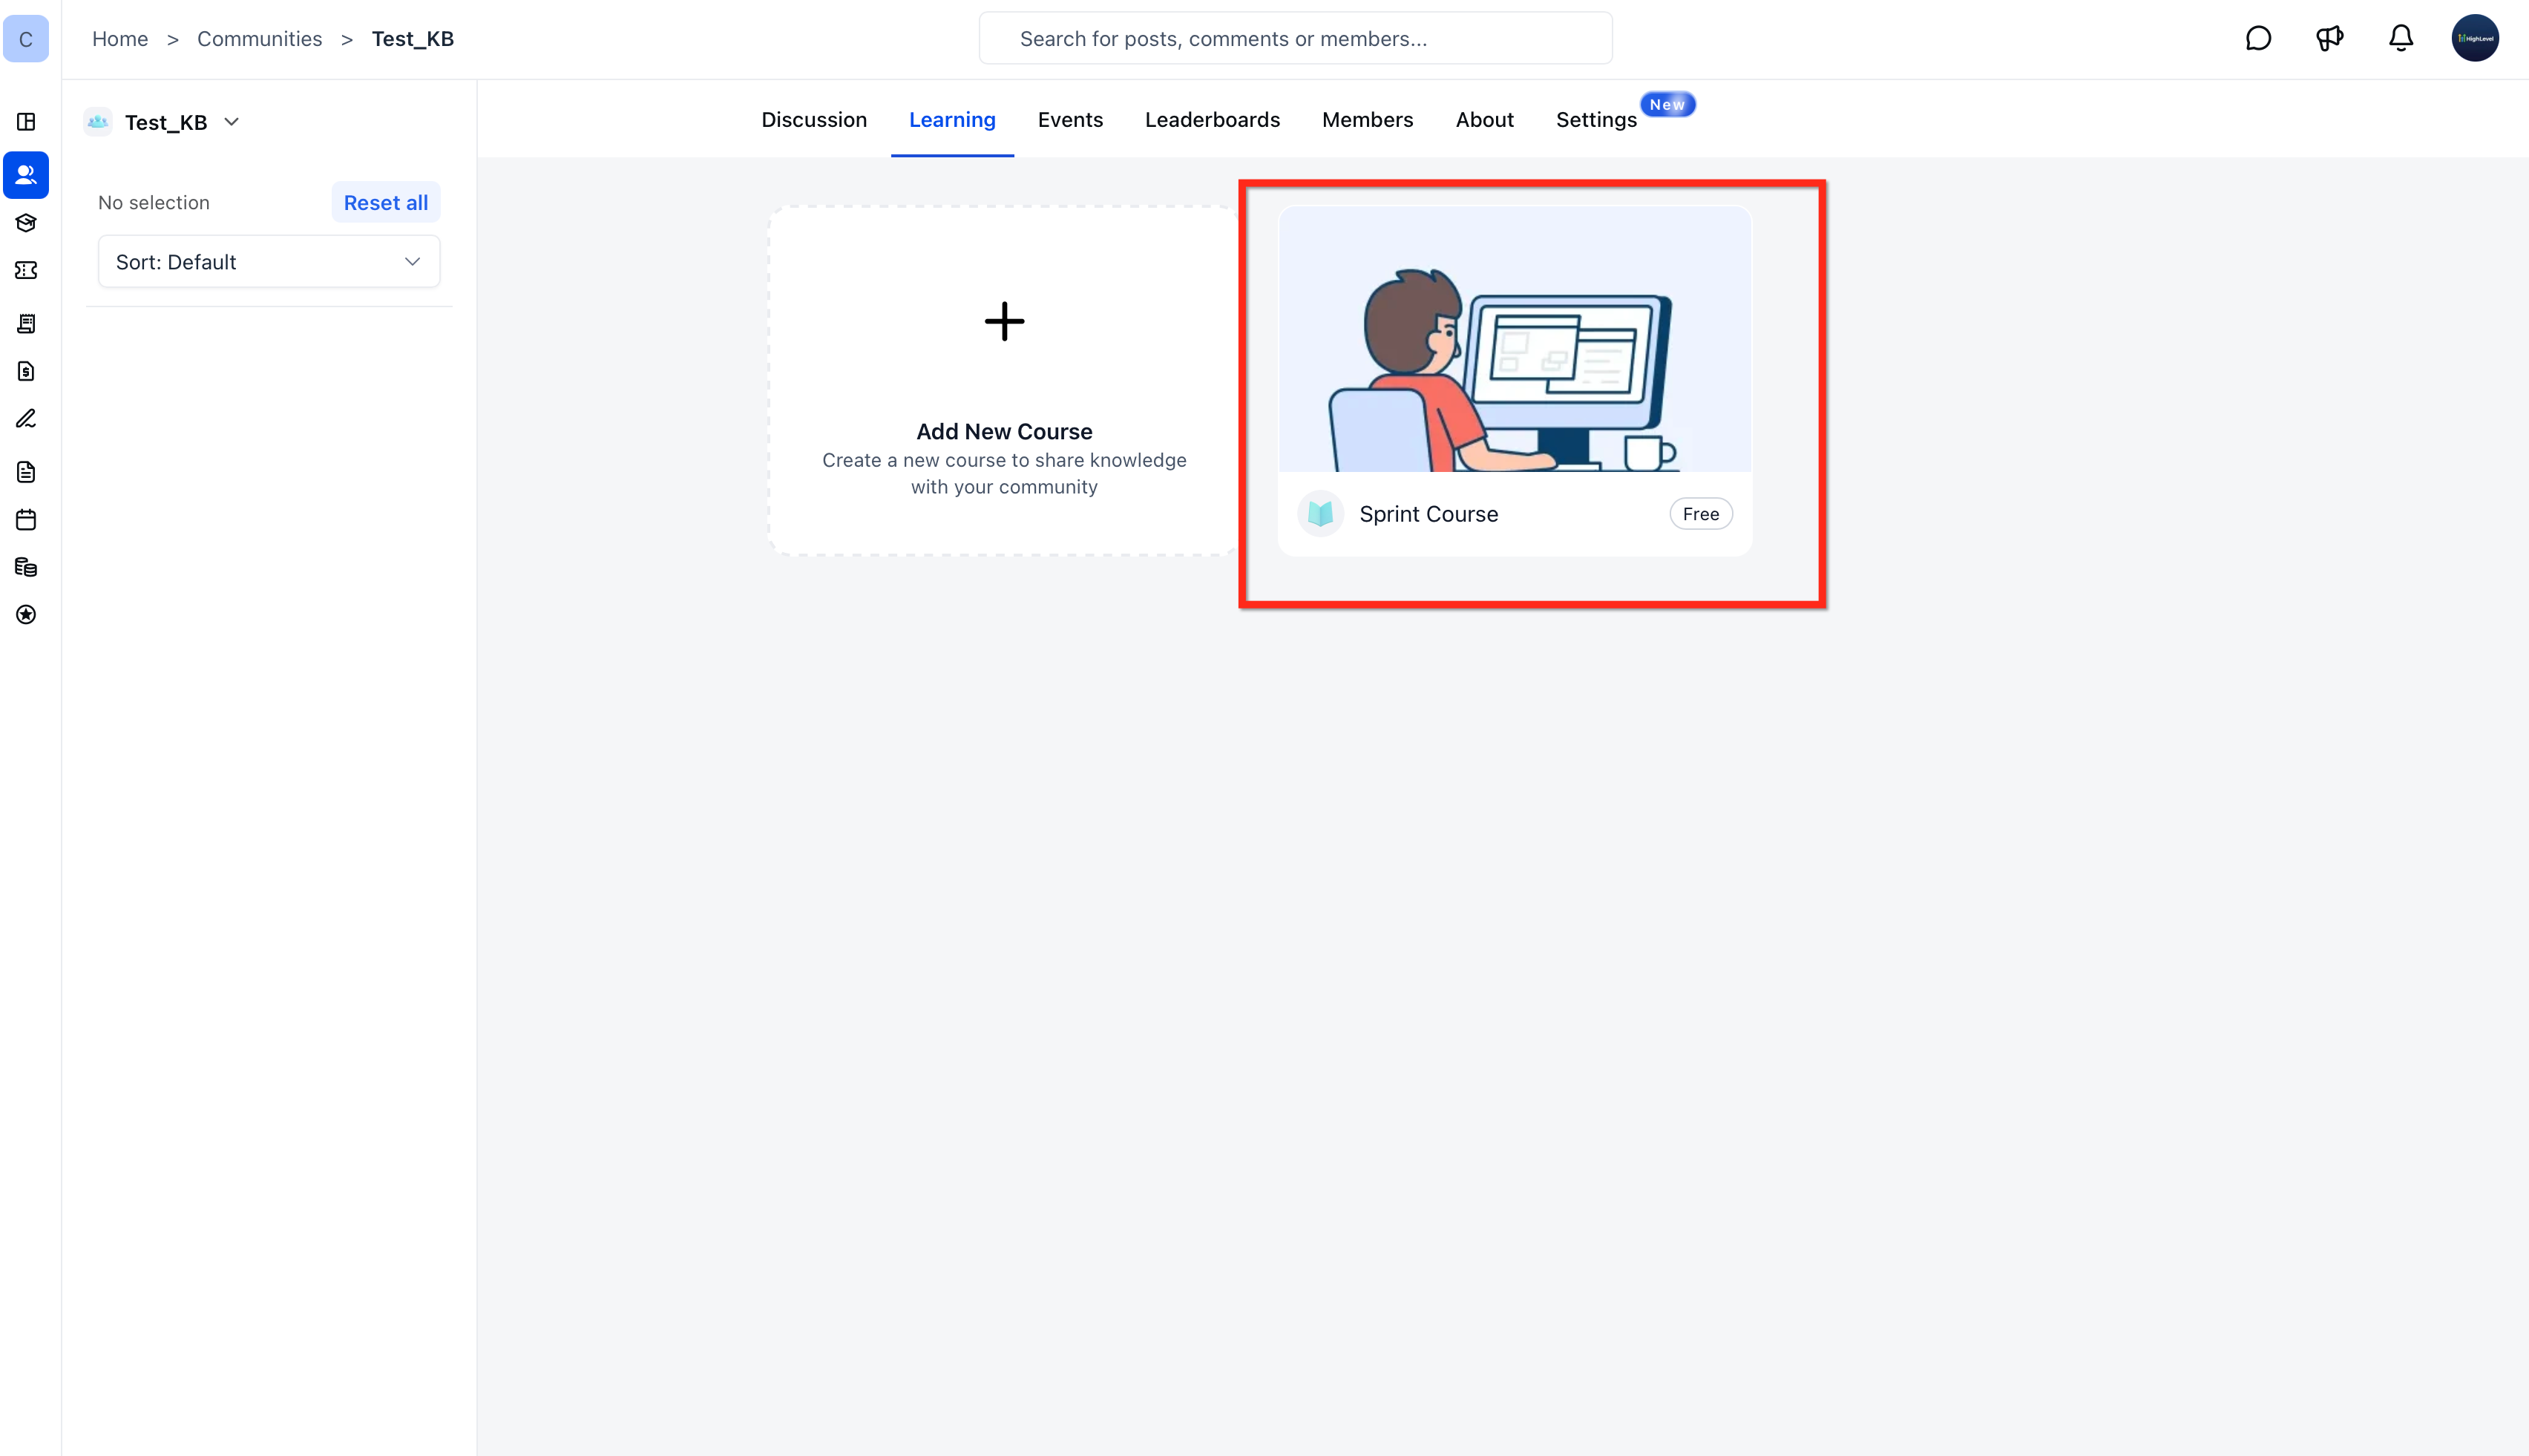
To edit a published course: Learning > course card > three-dot menu > Edit > update the settings > Update Course.
To reorder or share a course: Open its three-dot menu and choose Move or Copy Link.
To remove a course from the group: Use the Delete option on the course card.
To grant or revoke individual access: Members > member's three-dot menu > Manage Courses, then use Grant Courses or the red X and confirm.
Frequently Asked Questions
Q: What is the difference between Private and Private Channel course visibility?
Private courses remain locked until an admin grants access. Private Channel courses are visible only to members of the selected private channel.
Q: Can I change the pricing of a course after adding it?
Yes. You can edit the course to update its price, payment type, billing frequency, trial period, or currency.
Q: When do members receive access after purchasing a course?
Members receive access after completing their purchase. A payment confirmation and access details are sent to their registered email.
Q: Can I test a paid course checkout before accepting payments?
Yes. Enable Test Mode in the course's pricing settings to test the checkout using test payment details.
Q: What happens when a member joins a private channel with restricted courses?
The member can view and access courses assigned to that private channel.
Q: Is sharing a newly added course as a community post mandatory?
No. Click Skip in the Share Course as Post popup to add the course without creating a community post.
Related Articles
Was this article helpful?
That’s Great!
Thank you for your feedback
Sorry! We couldn't be helpful
Thank you for your feedback
Feedback sent
We appreciate your effort and will try to fix the article