TABLE OF CONTENTS
Overview
The "Add to Notes" action allows you to insert specific notes directly into a contact's record. This is essential for keeping track of important details about a contact or any custom information that might be relevant for future reference.
The Add to Notes action adds a note to the enrolled record.
- In contact-based workflows, it adds the note to the contact record.
- In custom object workflows, it adds the note to the custom object record that enrolled in the workflow.
Action Name
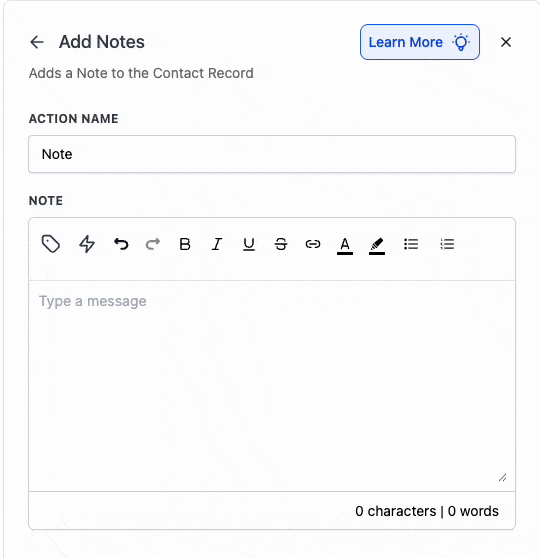
Add to Notes
Action Description
- This action enables the addition of notes to the enrolled record (for example, a contact record or a custom object record). These notes can include any information that may help in future interactions, such as specific requests, follow-up actions, or personal details shared by the contact.
- Custom values can also be added in the notes using the custom value picker.
- The added notes will be visible in the records under the "Notes" Field.
Action Details
Step by Step Guide
- Choose the Action Type: Select "Add to Notes" from the list of available actions.
- Name Your Action: Enter a descriptive name for the action, such as "Add Notes."
- Add the Note: Type the note in the text editor that you want to add to the Contact.
- Custom Values: You can use any custom values using the custom value picker.
- Trigger links: Trigger links can also be added in the notes using the "Trigger Links" icon.
- Title and color support: Add to Notes supports an optional note title and optional note color. Existing workflows continue to work because both fields are optional, and this update does not change existing notes.
- Supported workflow types:
1. Contact-based workflows
- Adds a note to the contact record.
- Supports optional **note title** and **note color**.
2. Custom object workflows
- Adds a note to the custom object record that enrolled in the workflow.
- Note title and note color are not supported yet for custom object workflow notes.
Rich Text formatting in Add to Notes
Add to Notes uses the same Rich Text editor experience available for Notes. Rich Text supports common formatting such as bold, italics, underline, strikethrough, bulleted and numbered lists, and hyperlinks.
For enablement, supported formatting, and limitations, see: Rich Text for Notes and Task Descriptions


Example
Add a note when customer books an appointment
Scenario: A business wants to add a note with the contact and appointment details when an appointment is booked.
Workflow Setup:
- Trigger: Appointment Booked
- Action: Add to Notes
- Fields: Text Editor
Workflow Trigger:
- Appointment Booked: The contact will enter the workflow when they have booked an appointment.
Workflow Actions:
- Add to Notes: Add the details in the text editor using the details from the custom value picker.
- Send Internal Notification: Send an internal notification to the team.


Outcome: This ensures that the Note is added and can be viewed under the "Notes" section for each contact.
Was this article helpful?
That’s Great!
Thank you for your feedback
Sorry! We couldn't be helpful
Thank you for your feedback
Feedback sent
We appreciate your effort and will try to fix the article