Custom fields help you collect and organize information that goes beyond standard contact details like name, email, and phone number. They allow you to customize records, forms, workflows, and pipelines to match your business process and improve how you manage leads and opportunities.
TABLE OF CONTENTS
- What are Custom Fields?
- Key Benefits of Custom Fields
- Contact vs. Opportunity Custom Fields
- Organizing Custom Fields with Folders
- How to Set Up Custom Fields
- Frequently Asked Questions
- Need Help?
What are Custom Fields?
Custom fields allow you to store additional information about contacts or opportunities beyond the default fields already available in your accounts.
These fields can be used across:
- Forms
- Surveys
- Pipelines
- Workflows
- Automations
- Smart Lists
- Contact records
- Opportunity records
Custom fields make it possible to collect business-specific details such as:
- Lead type
- Budget range
- Preferred contact method
- Referral source
- Property type
- Timeline to close
This helps create cleaner records, better segmentation, and more personalized automation.
Key Benefits of Custom Fields
Custom fields provide flexibility and structure across your accounts and automation setup.
Benefits include:
- Collect business-specific data
- Organize contact and deal information more efficiently
- Personalize email and SMS automation using merge fields
- Build better Smart Lists and workflow filters
- Display important information directly inside records and pipelines
- Group related fields together using folders for cleaner layouts
Contact vs. Opportunity Custom Fields
Choosing the correct field type is important because contact fields and opportunity fields behave differently inside the system.
Contact Custom Fields
Contact custom fields are attached directly to a person.
Use contact fields for information such as:
- Buyer or seller type
- Birthday
- Preferred contact method
- Referral source
- Business website
These fields can be used inside:
- Contact records
- Forms
- Surveys
- Contact workflows
- Smart Lists
- Email and SMS personalization
Opportunity Custom Fields
Opportunity custom fields belong to a specific deal or sales opportunity.
Use opportunity fields for information such as:
- Budget range
- Property type
- Deal urgency
- Timeline to close
- Sales stage details
These fields appear inside:
- Opportunity records
- Pipeline views
- Opportunity workflows
- Deal reporting and automation
Note: Once a field is created as either a contact or opportunity field, it cannot be switched.Organizing Custom Fields with Folders
Folders help organize related fields into sections so records remain clean and easy to navigate.
Folders appear directly inside record layouts and can group related information together.
Examples:
- Buyer Information
- Property Details
- Sales Qualification
- Appointment Preferences
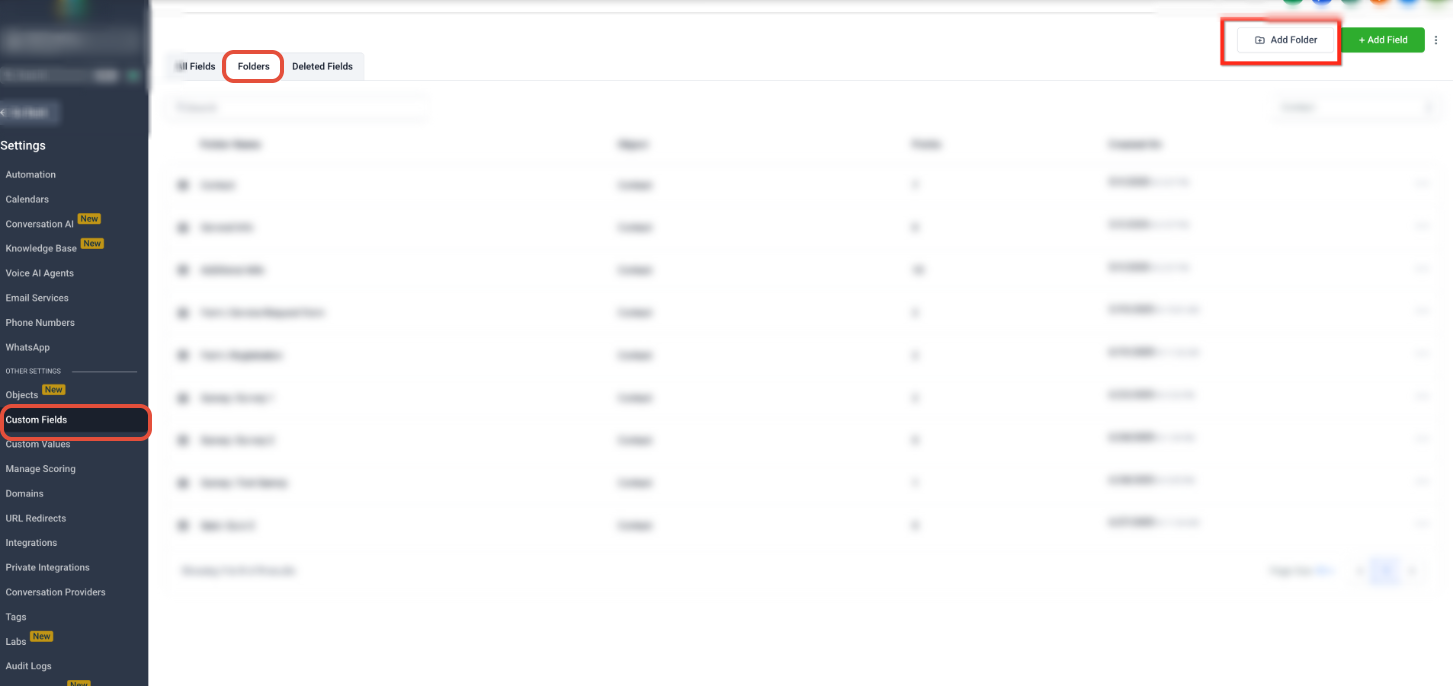
Creating a Folder
To create a folder:
- Open Settings
- Navigate to Custom Fields
- Choose the object using the object selector
- Open the Folders tab
- Click Create Folder
- Enter the folder name
- Save the folder
After creating folders, you can assign fields to them for better organization.
How to Set Up Custom Fields
Follow these steps to create and organize custom fields in your account:
Step 1: Navigate to Settings → Custom Fields
In your account, click Settings, then click Custom Fields.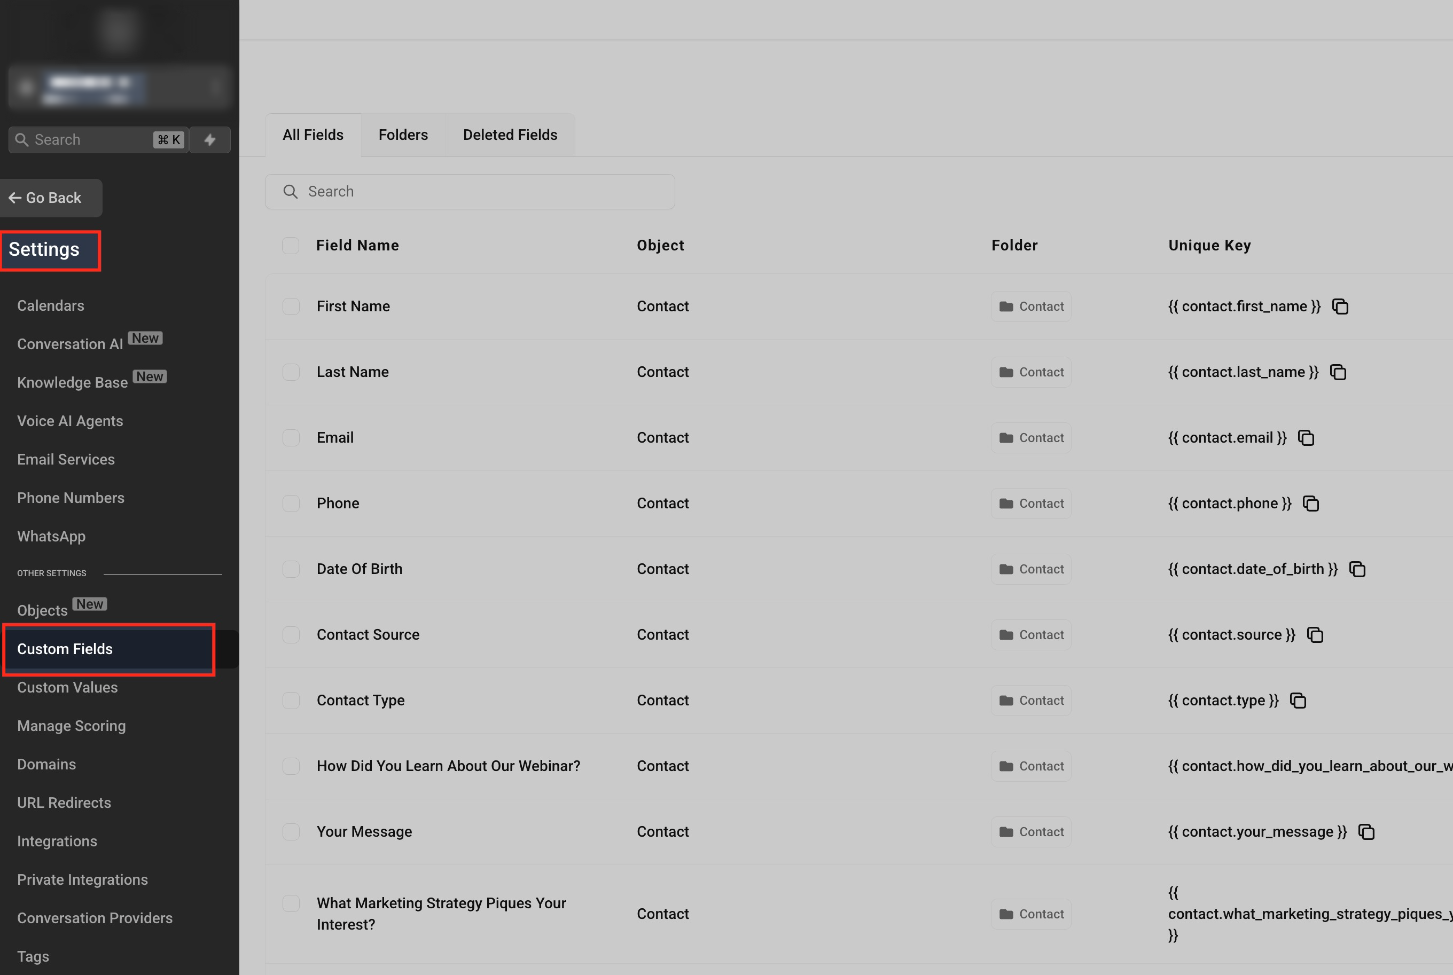
Step 2: Select the object
Use the object selector at the top of the page to choose the object you want to manage.
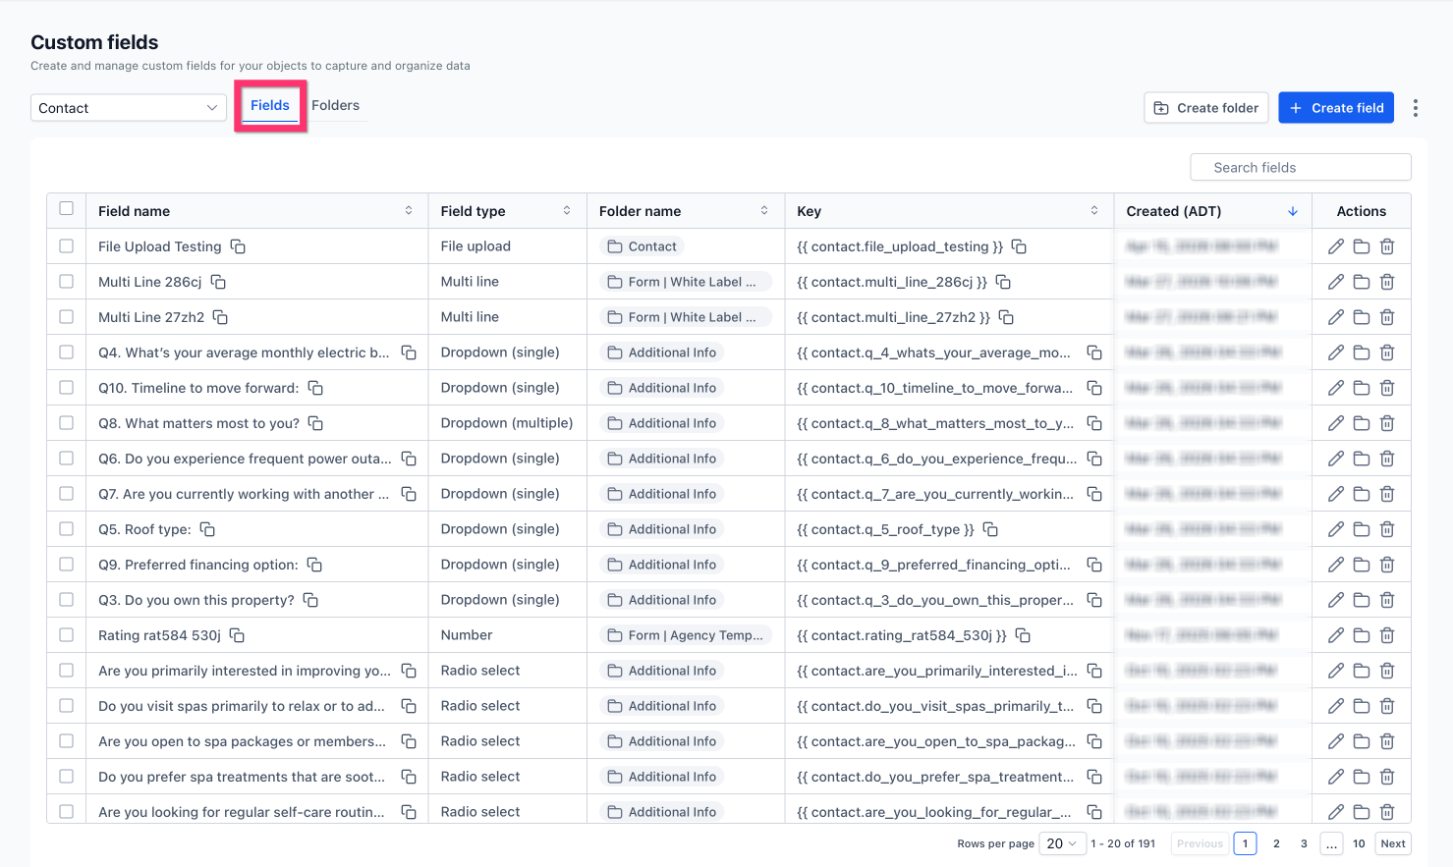
Step 3: Open the Fields tab
Stay on the Fields tab to view existing fields and create new ones.
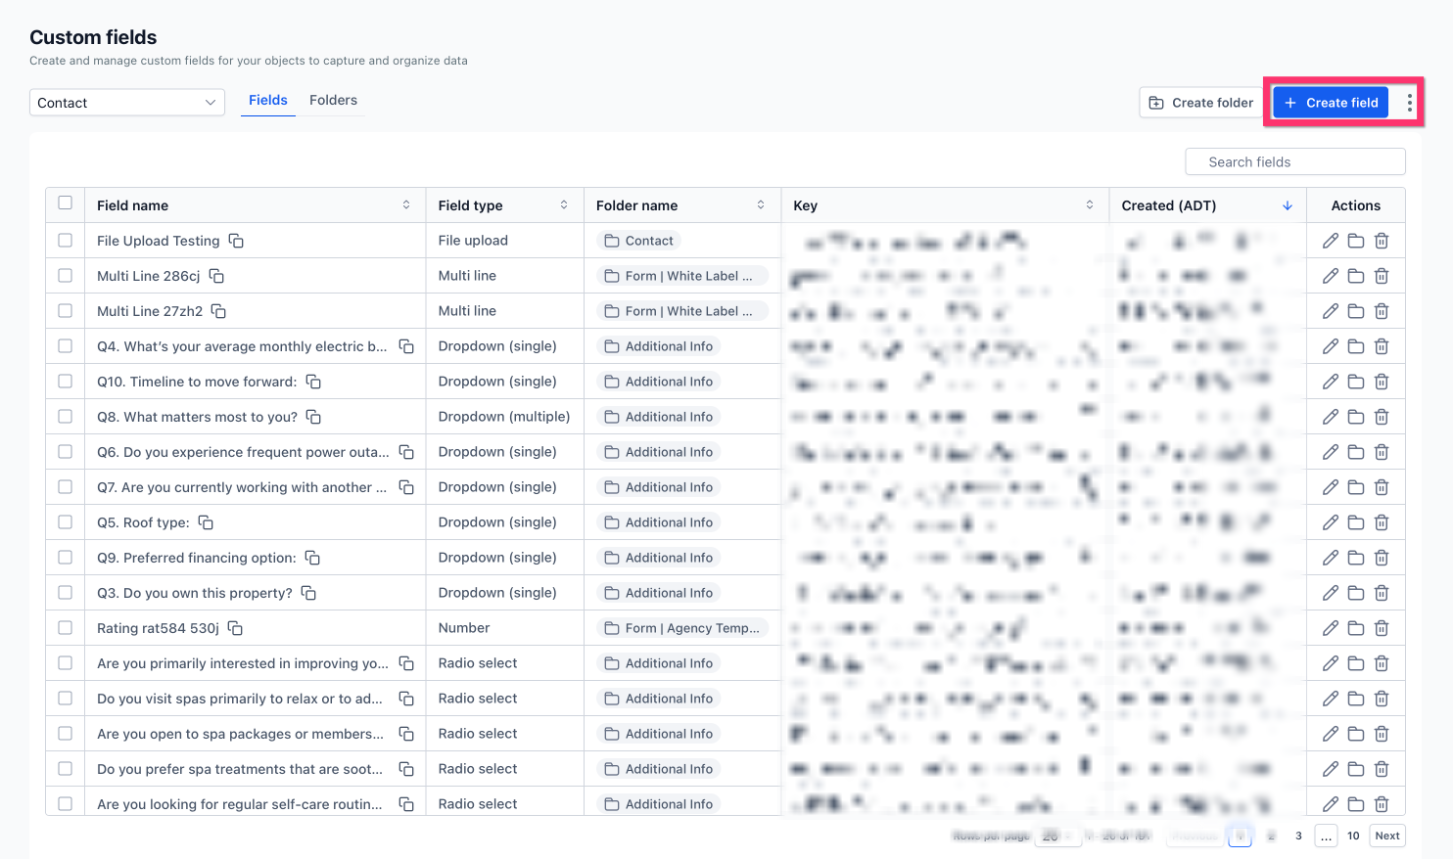
Step 4: Click Create Field
Click Create field on the top right of the page.
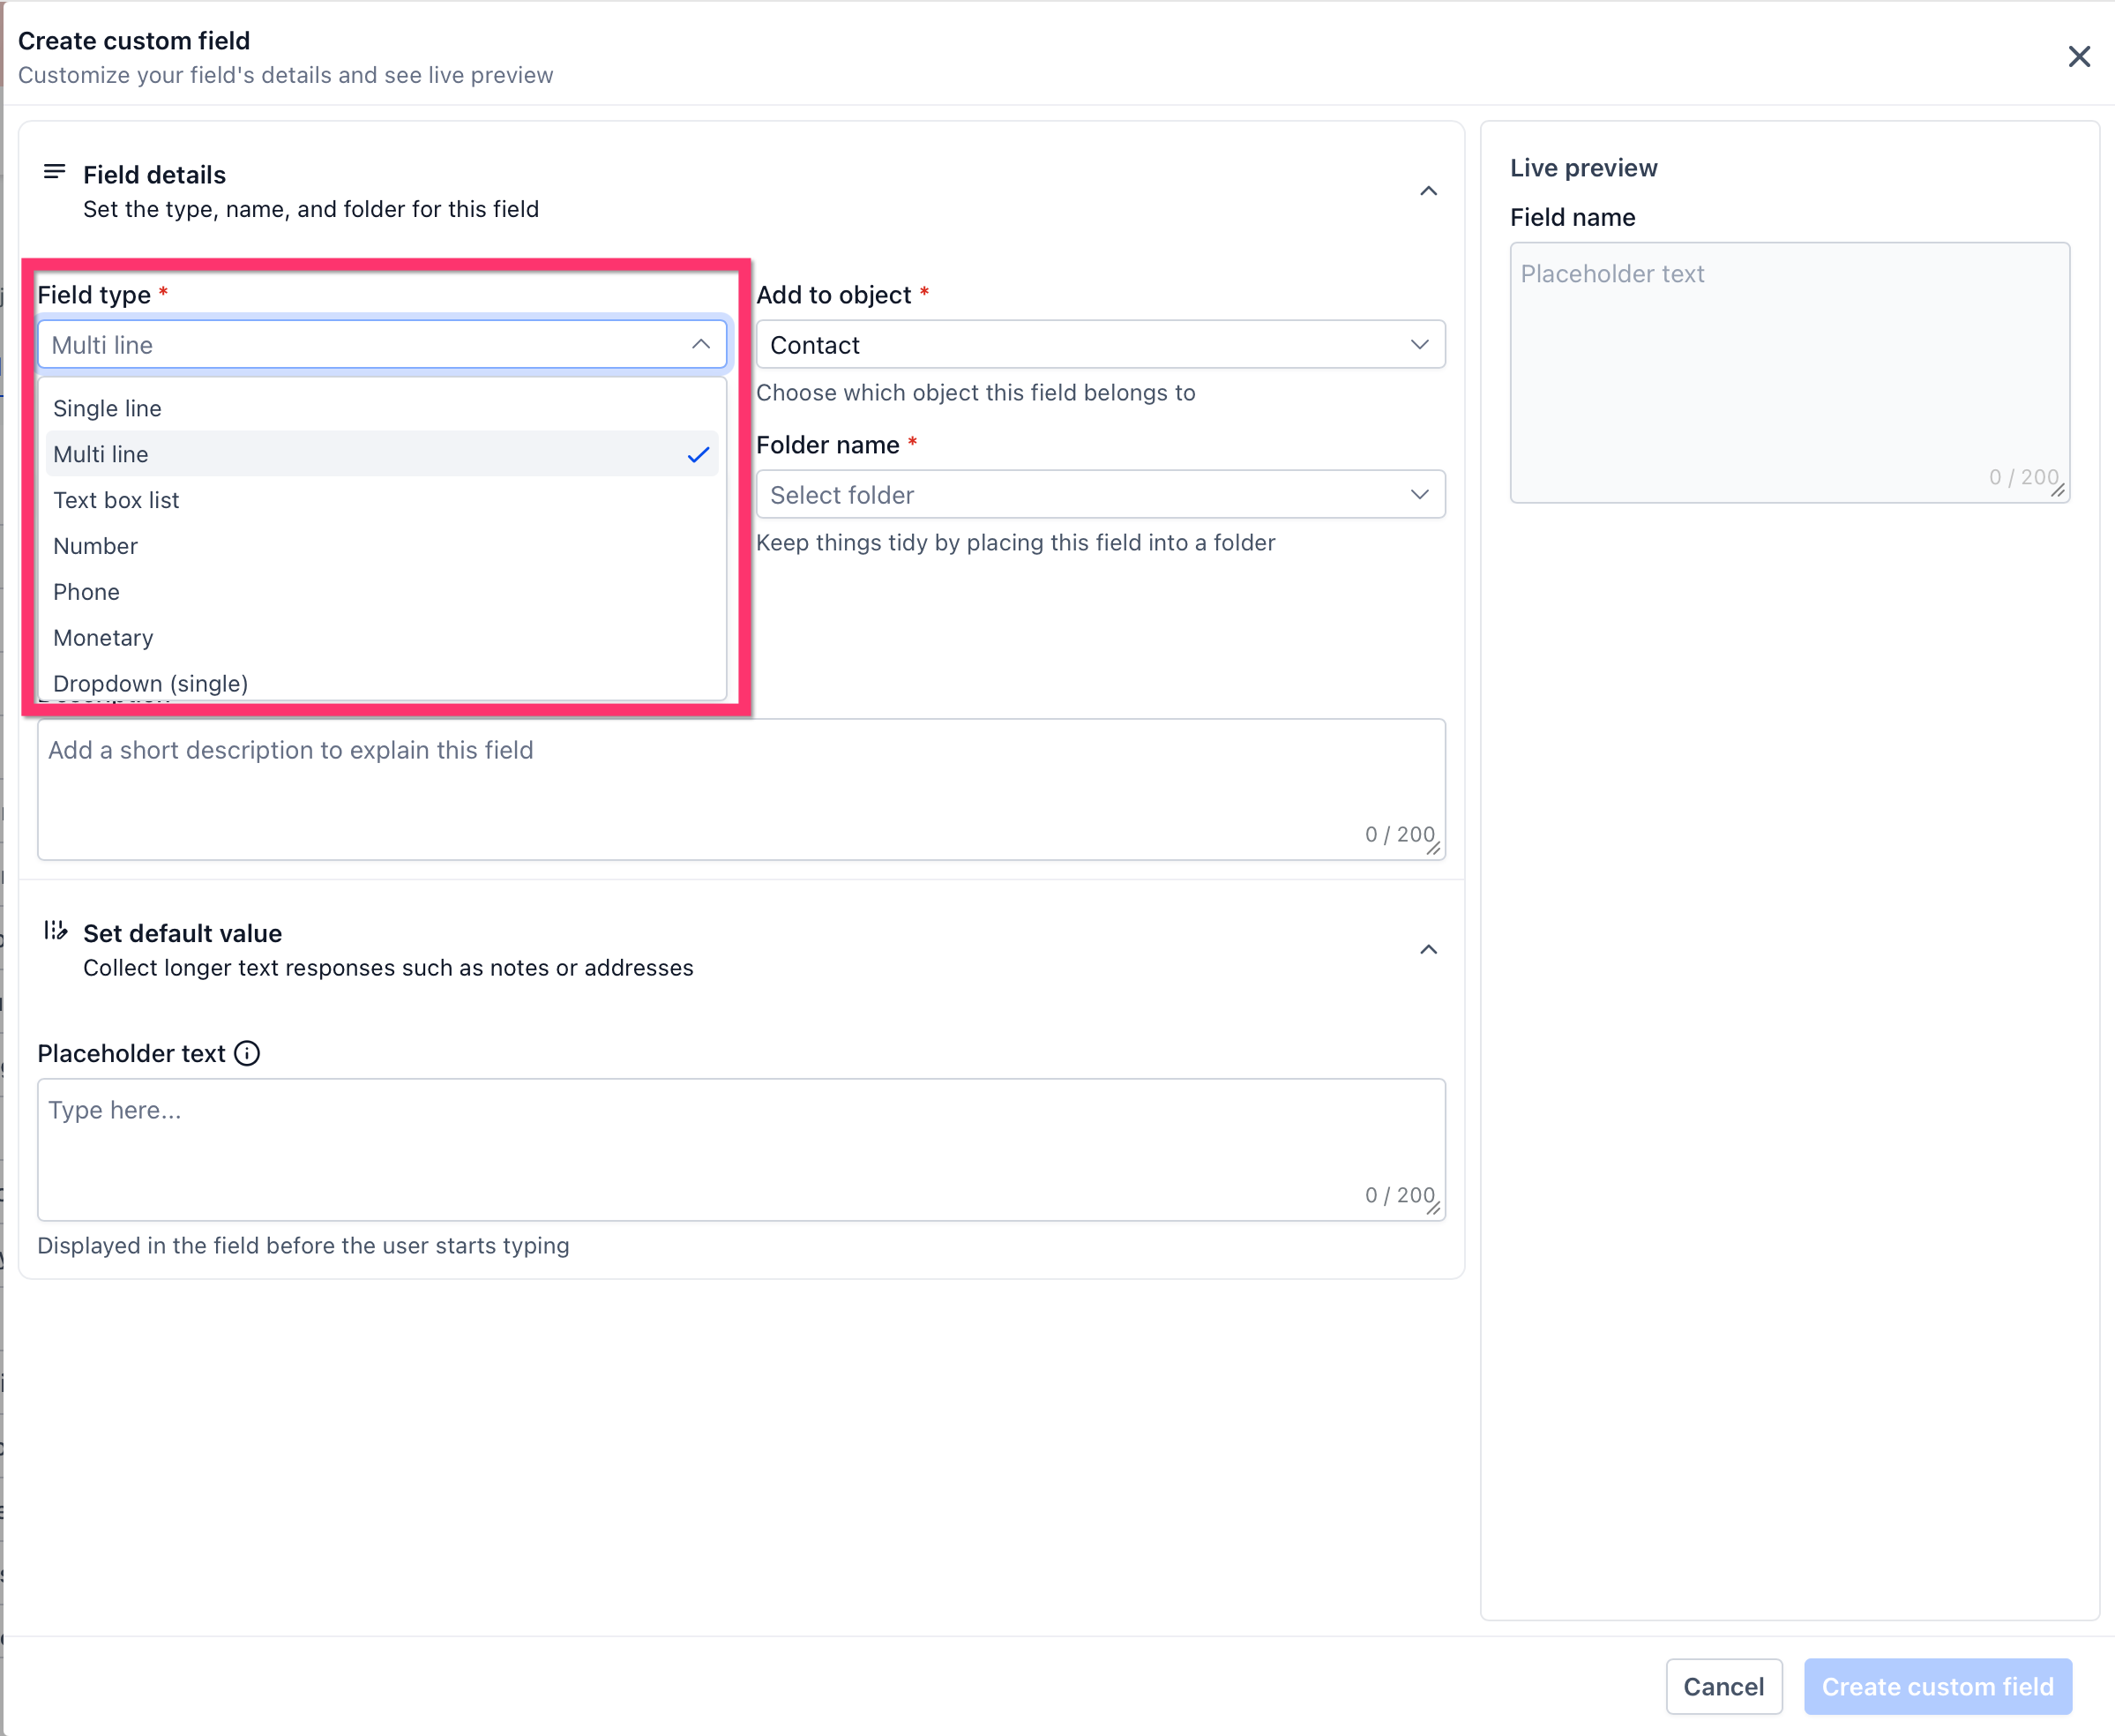
Step 5: Select a field type
Choose the field type you want to create.
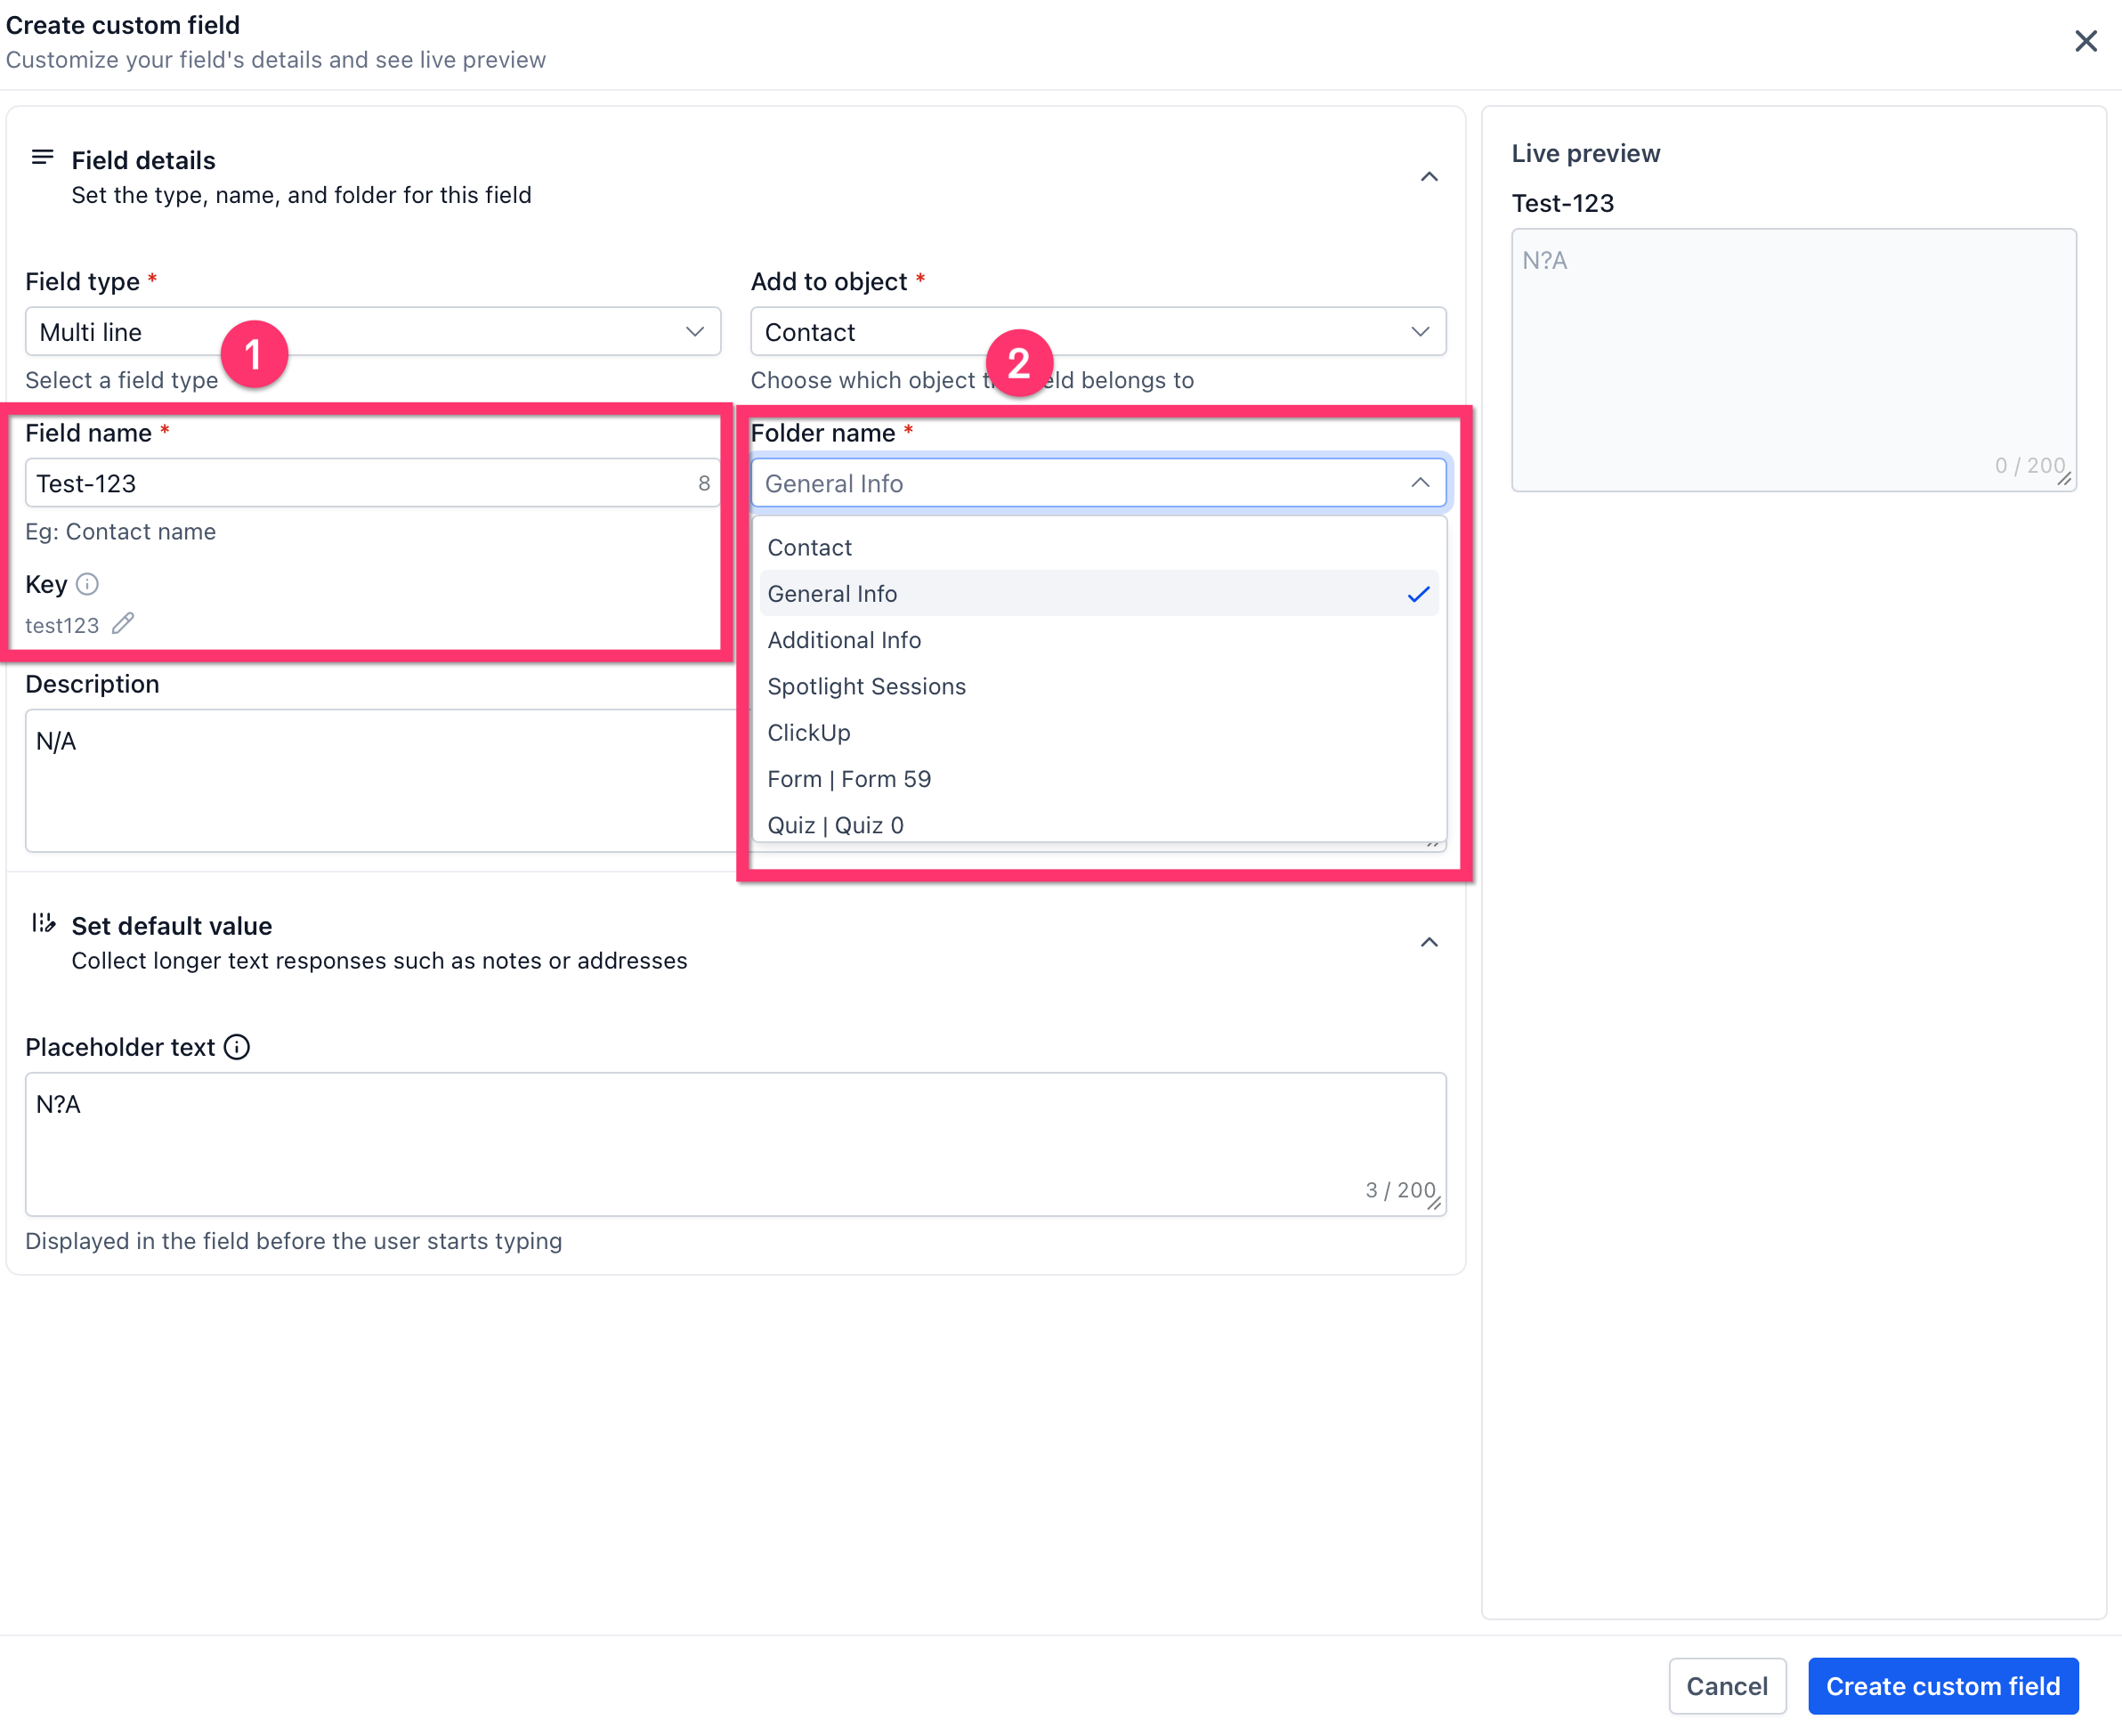
Step 6: Fill in the field details
Enter the field details, including the field name and folder if needed.
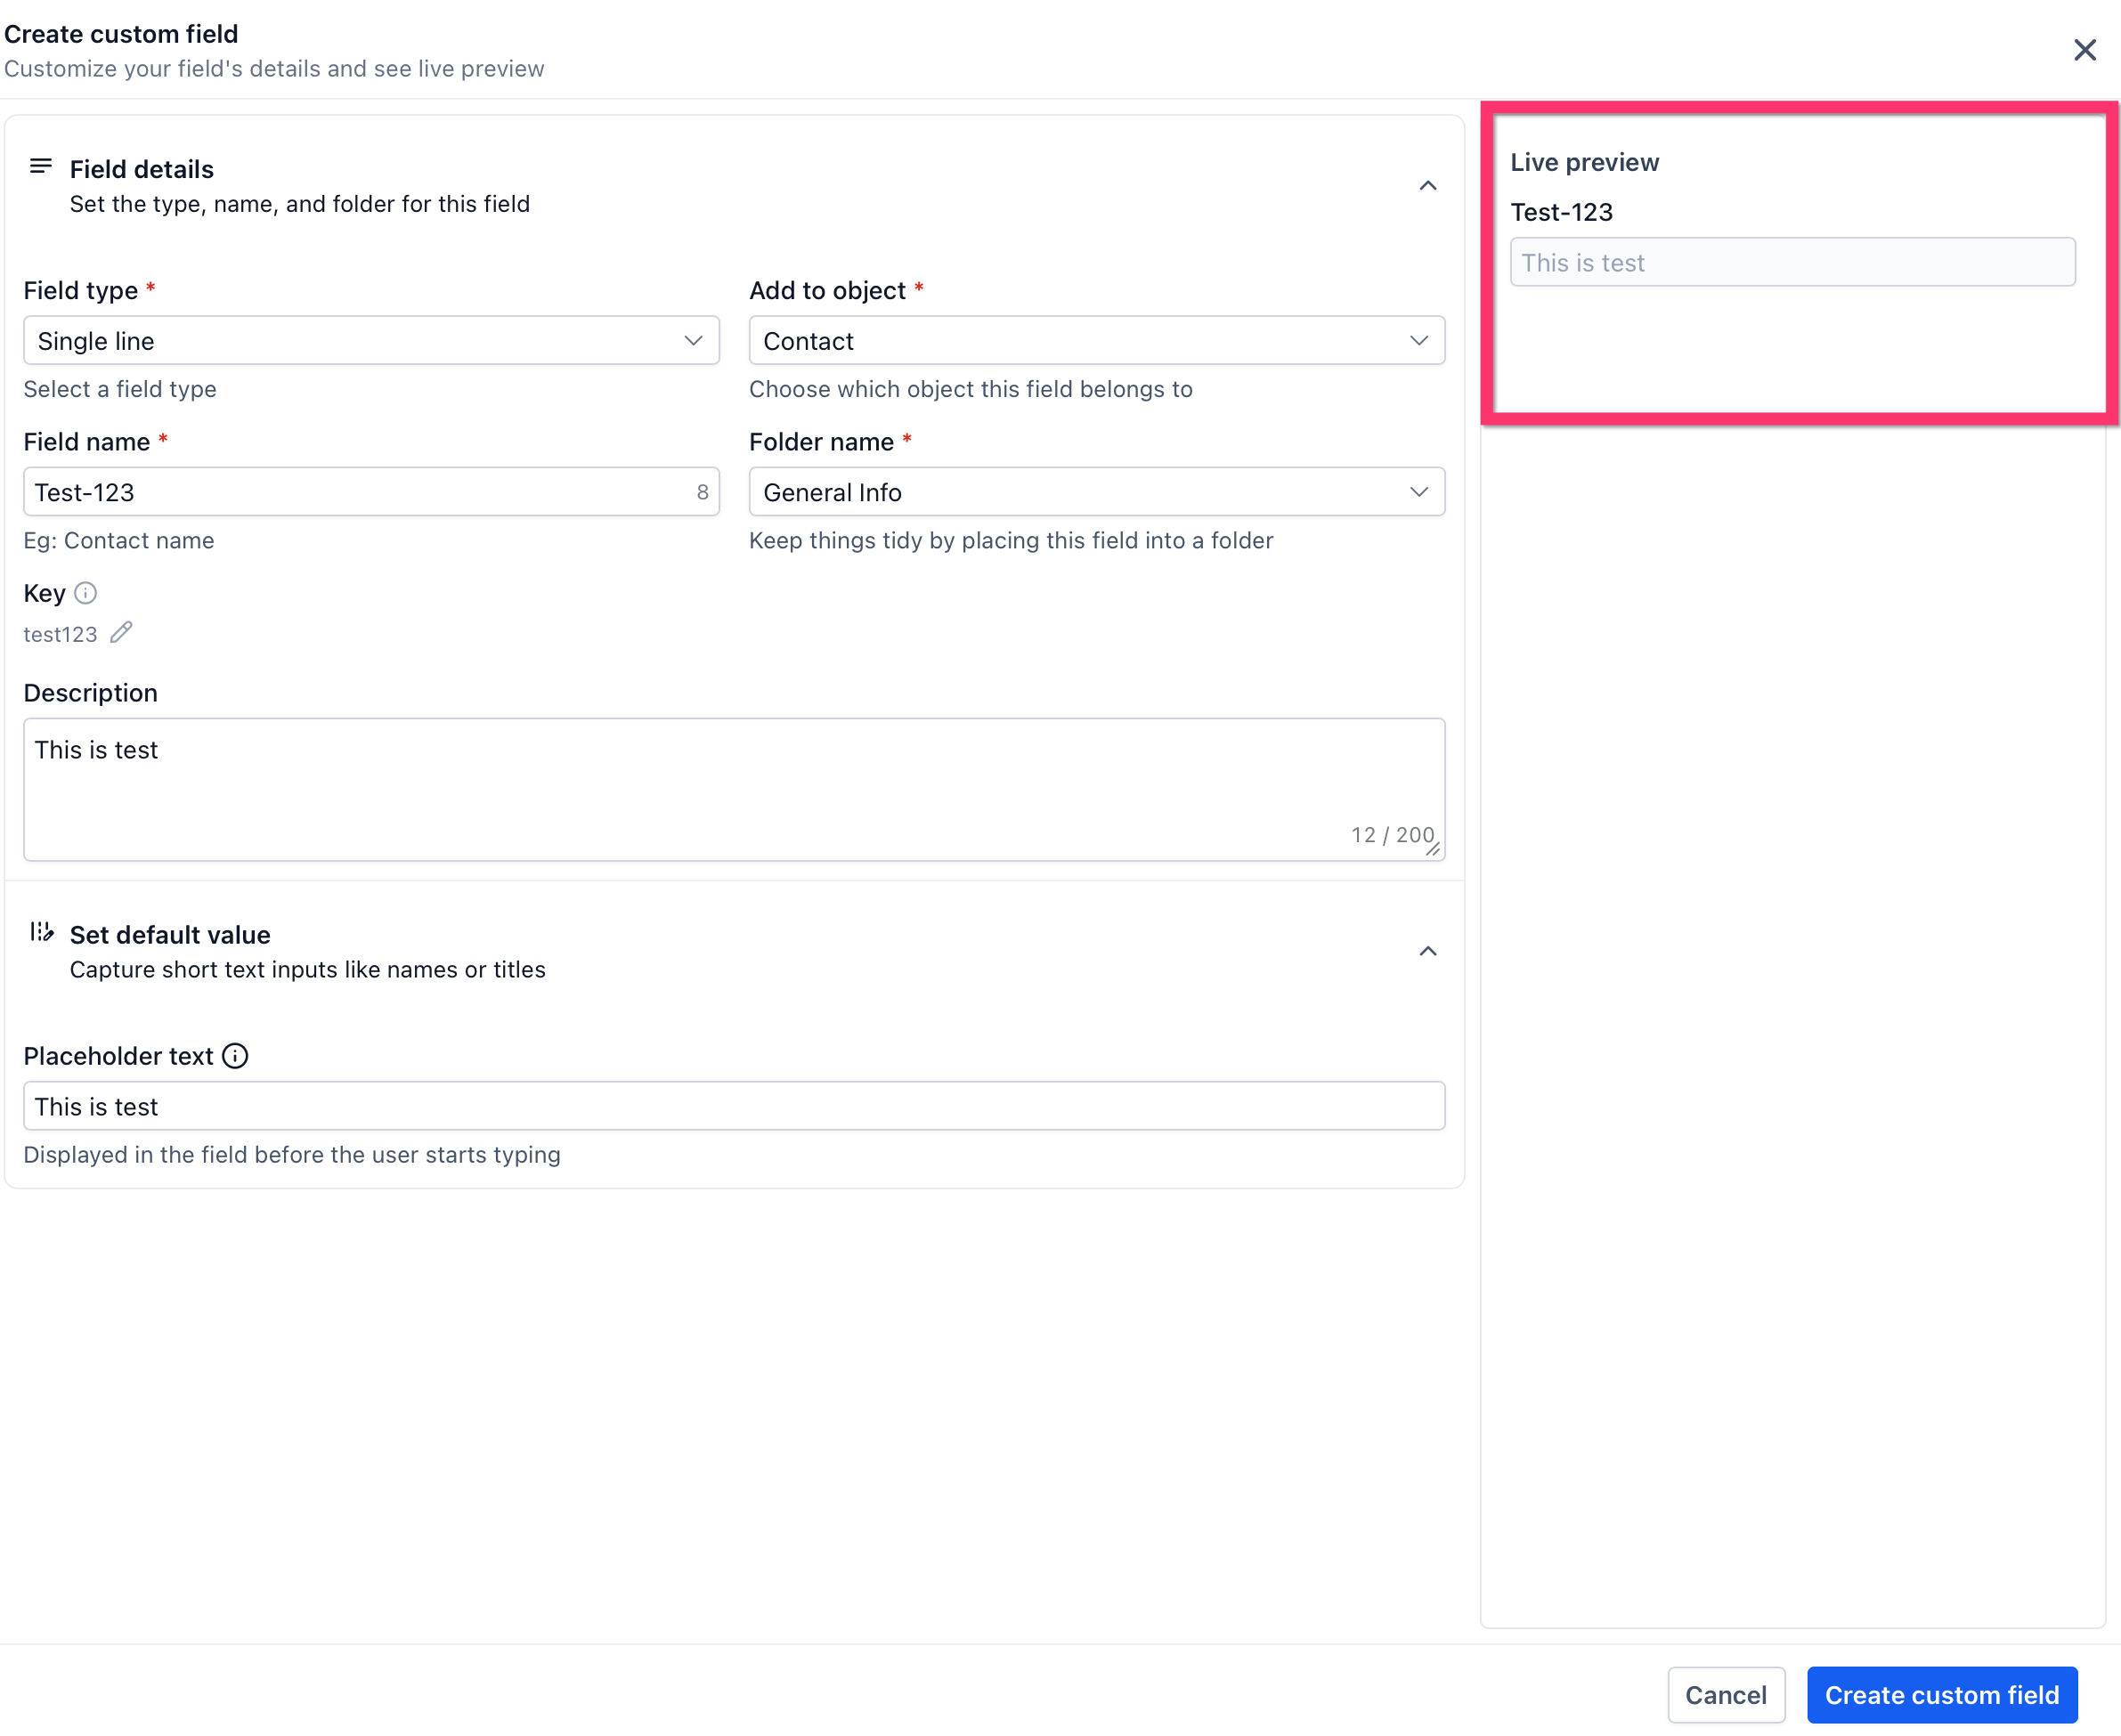
Step 7: Review the Live preview
Use the Live preview panel to confirm how the field will appear.
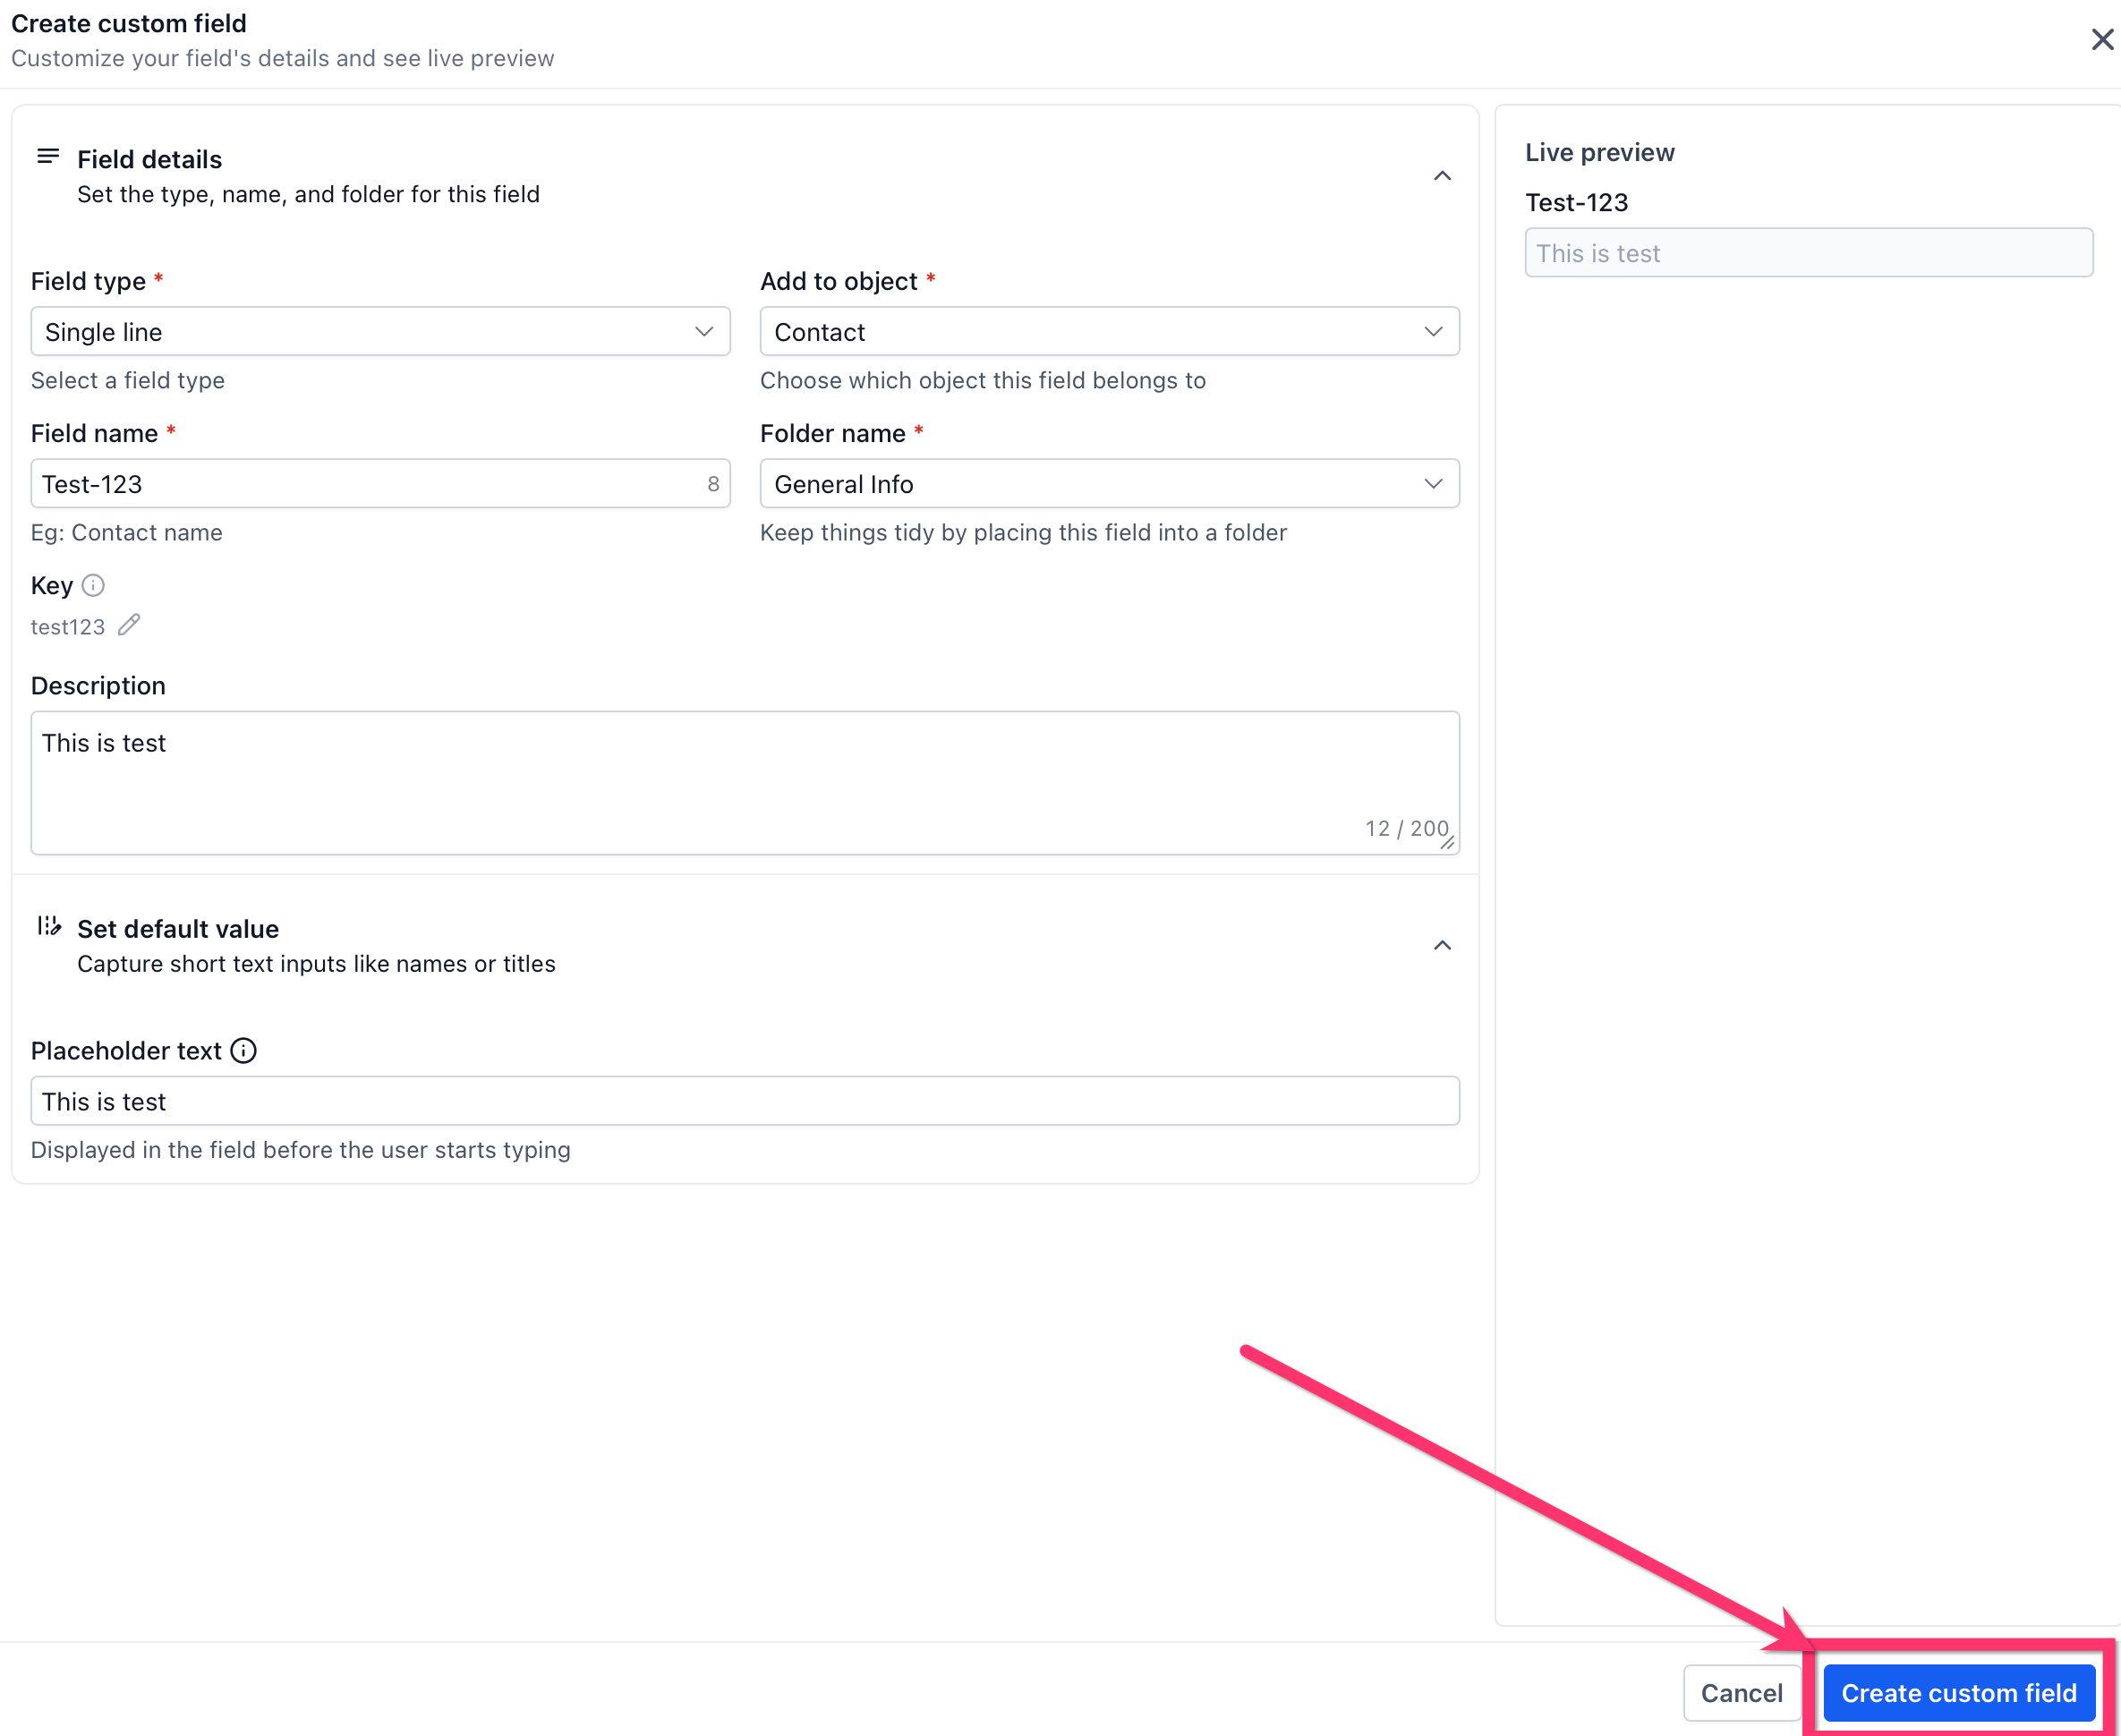
Step 8: Create the field
Click Create custom field to save the field.
Use the Custom Fields page
The Custom Fields page includes an updated layout that helps you manage fields more efficiently.
- Use the object selector at the top of the page to switch between supported objects.
- Use the Fields tab to view and manage custom fields.
- Use the Folders tab to create and manage folders.
- Sort the table by column to find fields faster.
- Use the icons in the field list to identify special field states.
Frequently Asked Questions
Q: Can I convert a contact field into an opportunity field (or vice versa)?
No. You must recreate the field under the correct object type. Field objects cannot be changed after creation.
Q: What types of fields can I create?
You can create Short Text, Long Text, Drop downs, Date Pickers, Phone, Email, Radio Selects, Checkbox Groups, URLs, and more.
Q: Why don’t my fields show in a form or workflow?
Ensure the object type matches the use case. Only Contact fields appear in forms and contact workflows.
Q: How many options can the Dropdown (multiple) custom field have?
The Dropdown (multiple) field can have a lot of options (50+) so there is no practical limit.
Need Help?
If you need assistance creating, organizing, or troubleshooting custom fields, contact support or your system administrator for additional help
Was this article helpful?
That’s Great!
Thank you for your feedback
Sorry! We couldn't be helpful
Thank you for your feedback
Feedback sent
We appreciate your effort and will try to fix the article