You can move an existing WordPress site onto our integrated hosting platform in two ways: run the migration yourself with the LC Migrator plugin, or submit a White-Glove request and have our team move it for you. Because the platform serves both agencies and their end clients, the WordPress dashboard shows a different experience depending on who is logged in. This article covers both migration methods, what each type of user sees during the process, and how to set up a White-Glove migration with a secure access link.
The two migration methods
LC Migrator plugin. A lightweight plugin you install on the source site to run the migration yourself. It has no file-size limits, so it works for large sites.
White-Glove migration (For Agency Users Only). You submit a request and our migration team moves the site for you. Most transfers finish within one to three business days, depending on the size of the original site.
What the agency sees
As an agency admin you control the whole process and can track it across every client.
To start a migration, go to Agency Dashboard > Sites > WordPress. From there you can begin a new migration and choose between running it yourself with the LC Migrator or submitting a White-Glove request.
Migrating with the LC Migrator plugin
To run the migration yourself, install the LC Migrator plugin on your source site and start the transfer from the CRM.
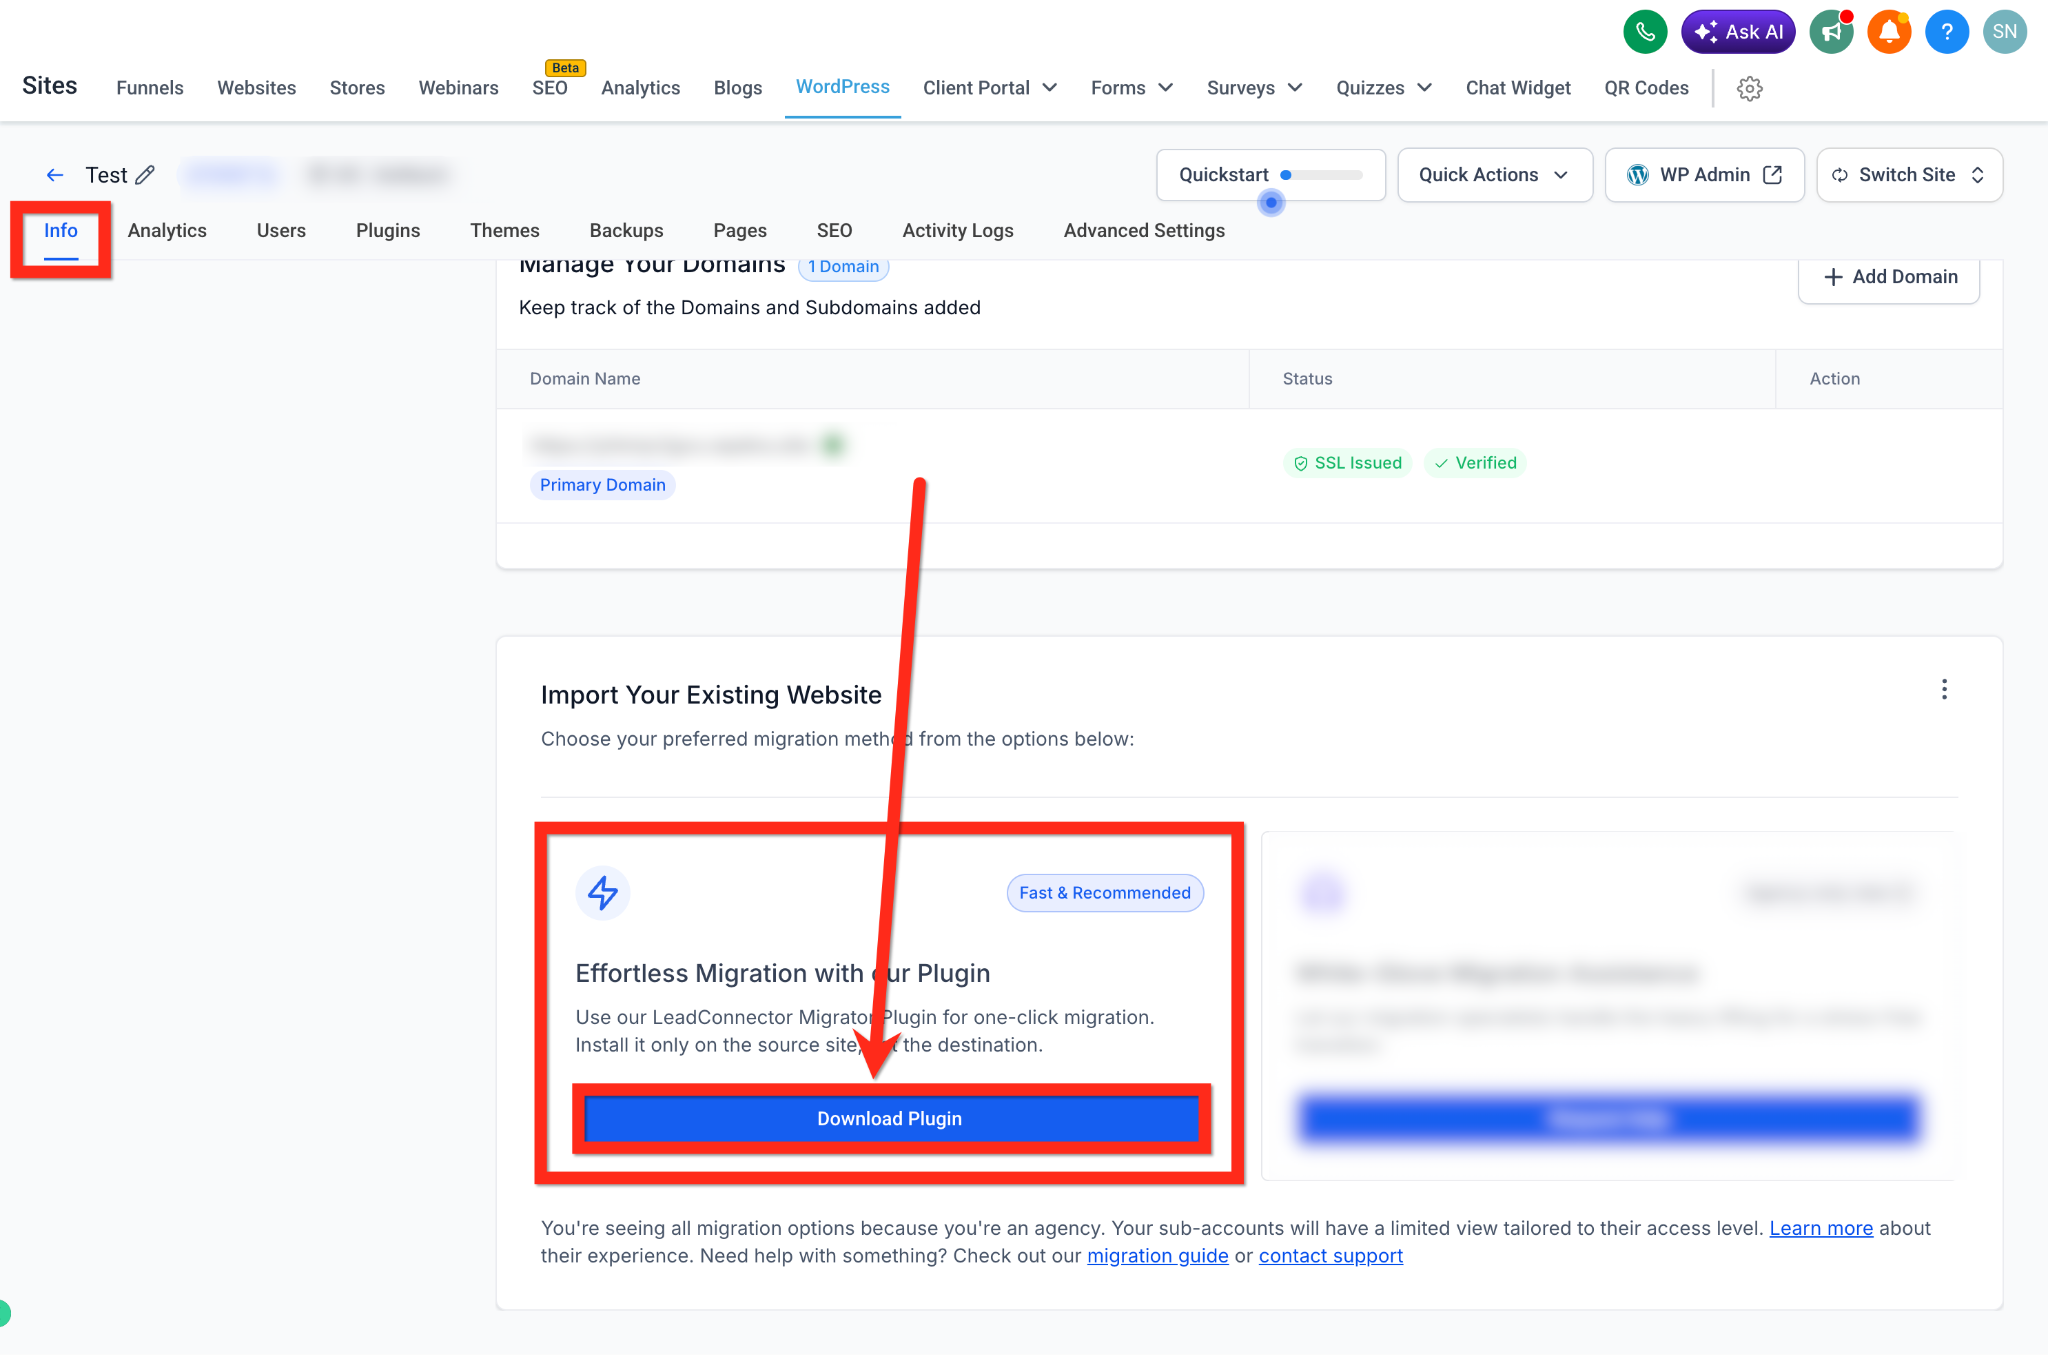
Download the LC Migrator plugin from your dashboard.
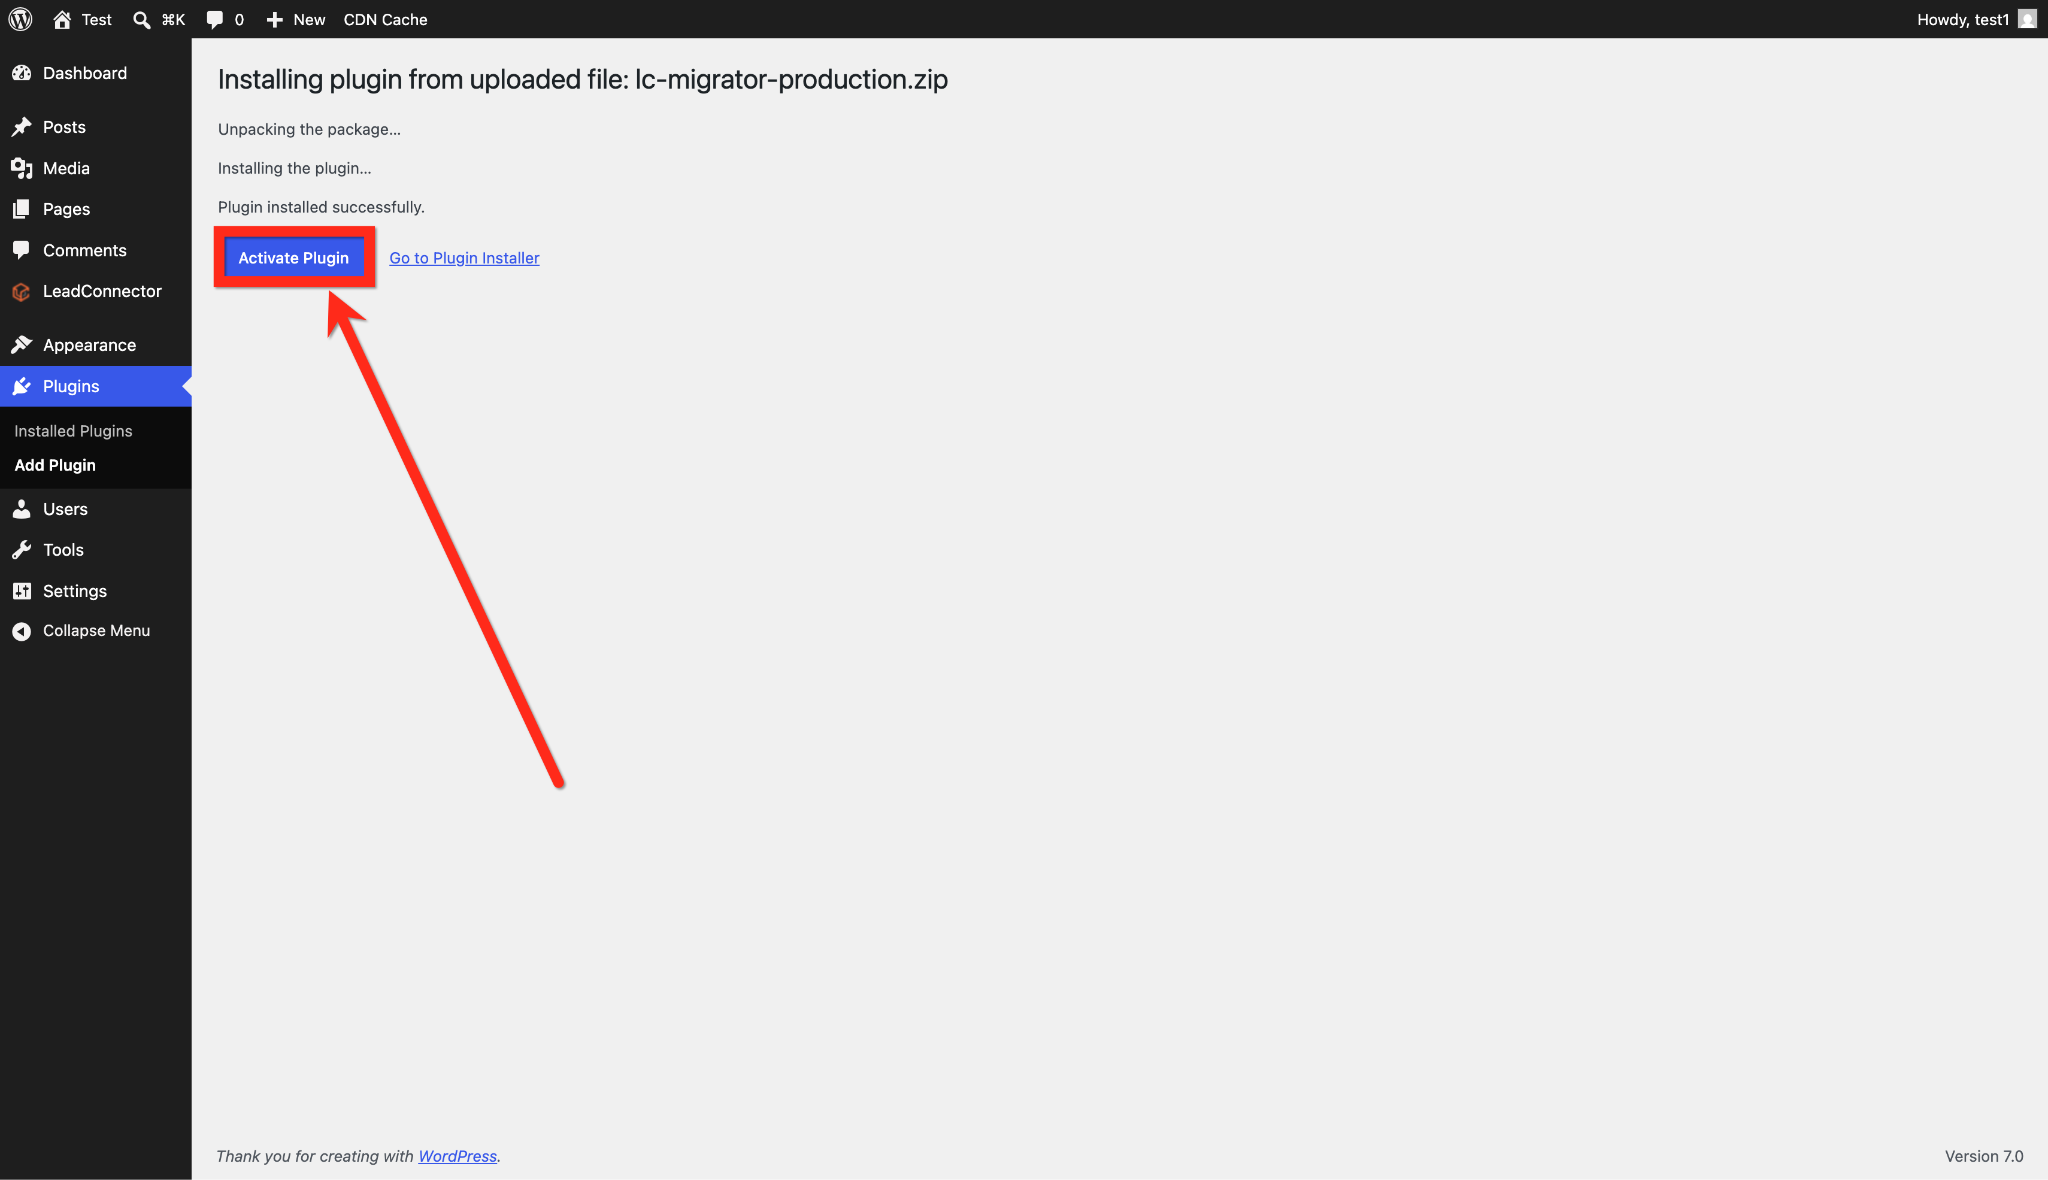
Install the plugin on the source site, the WordPress site you're moving.
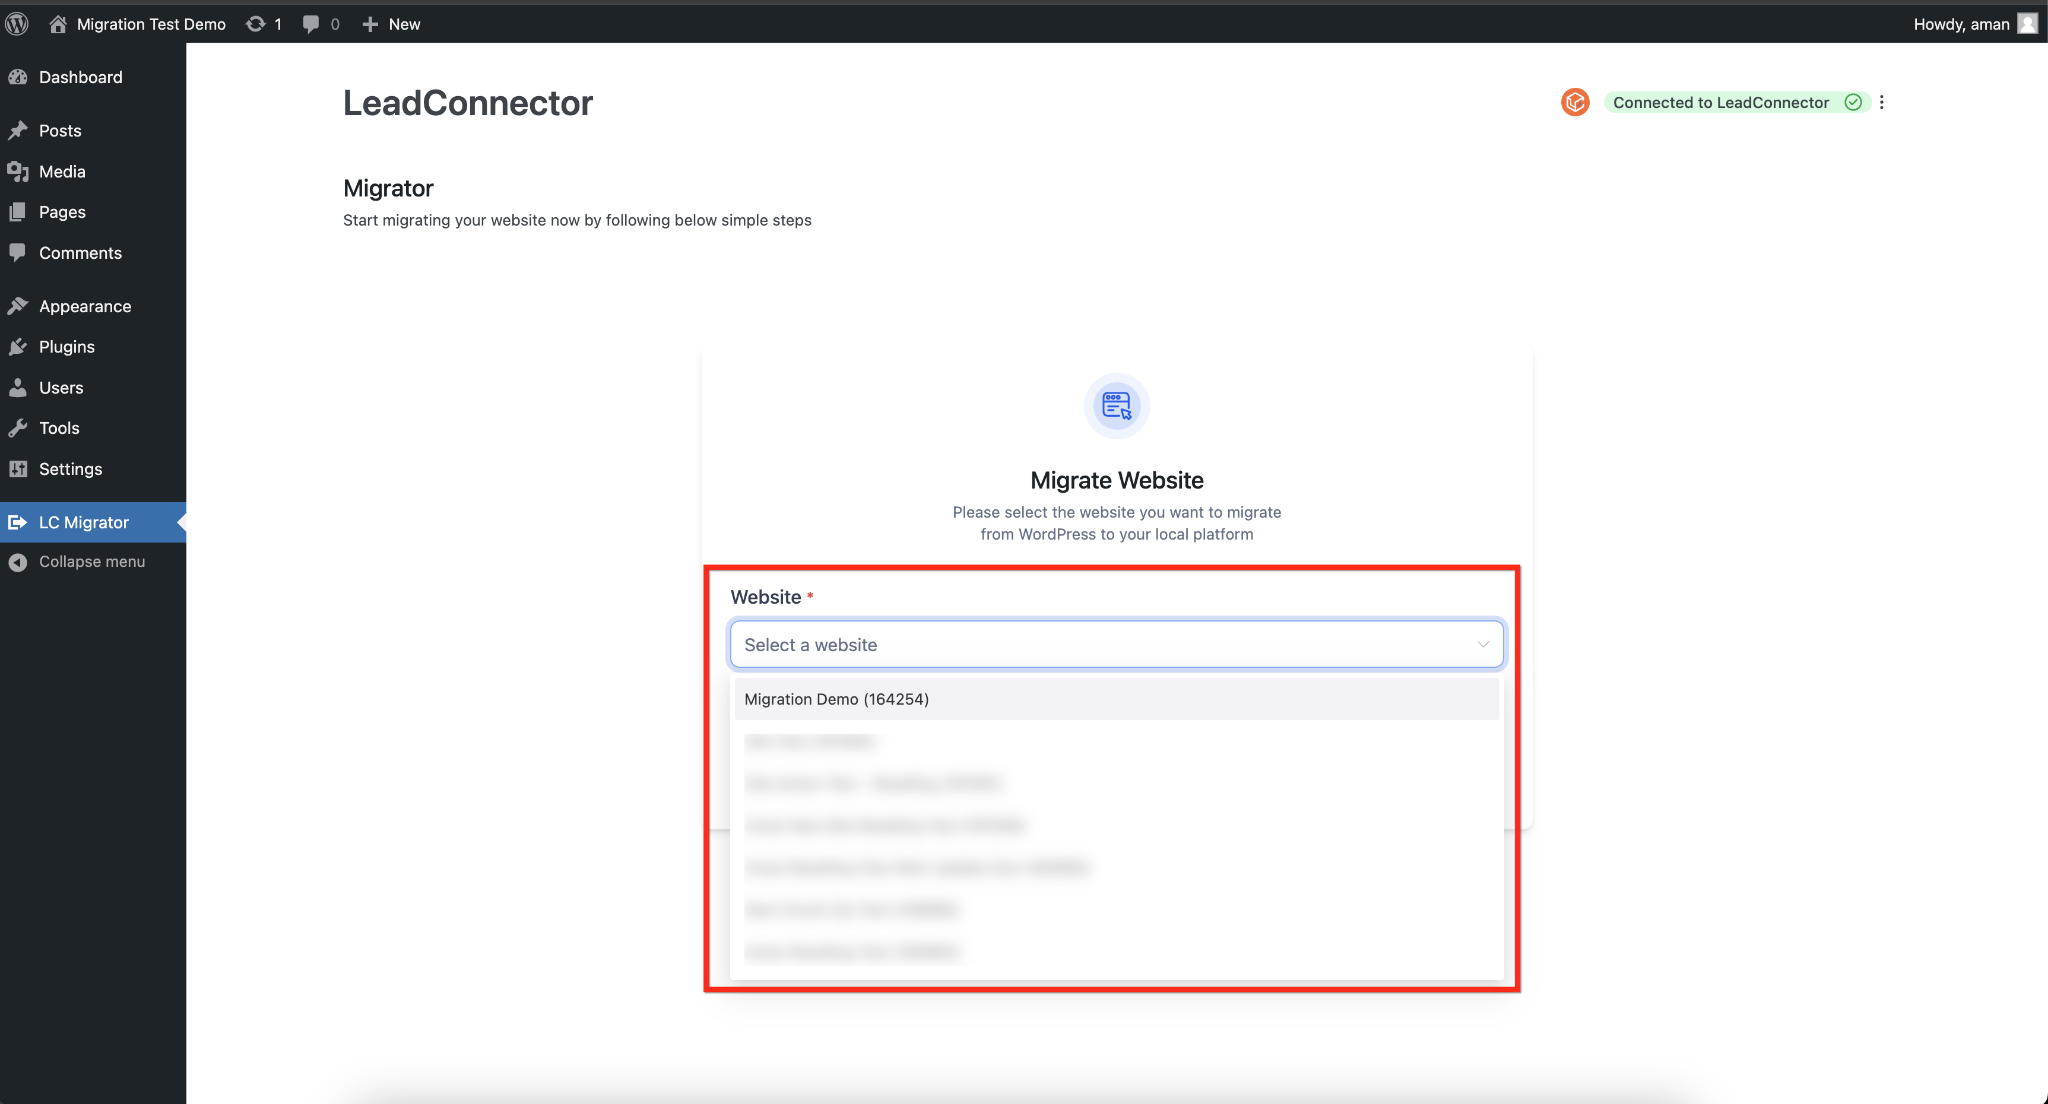
Log in to the CRM and select the WordPress site you want to migrate to.
Click Start migration.
Watch the progress bar on the source site while the plugin migrates it.
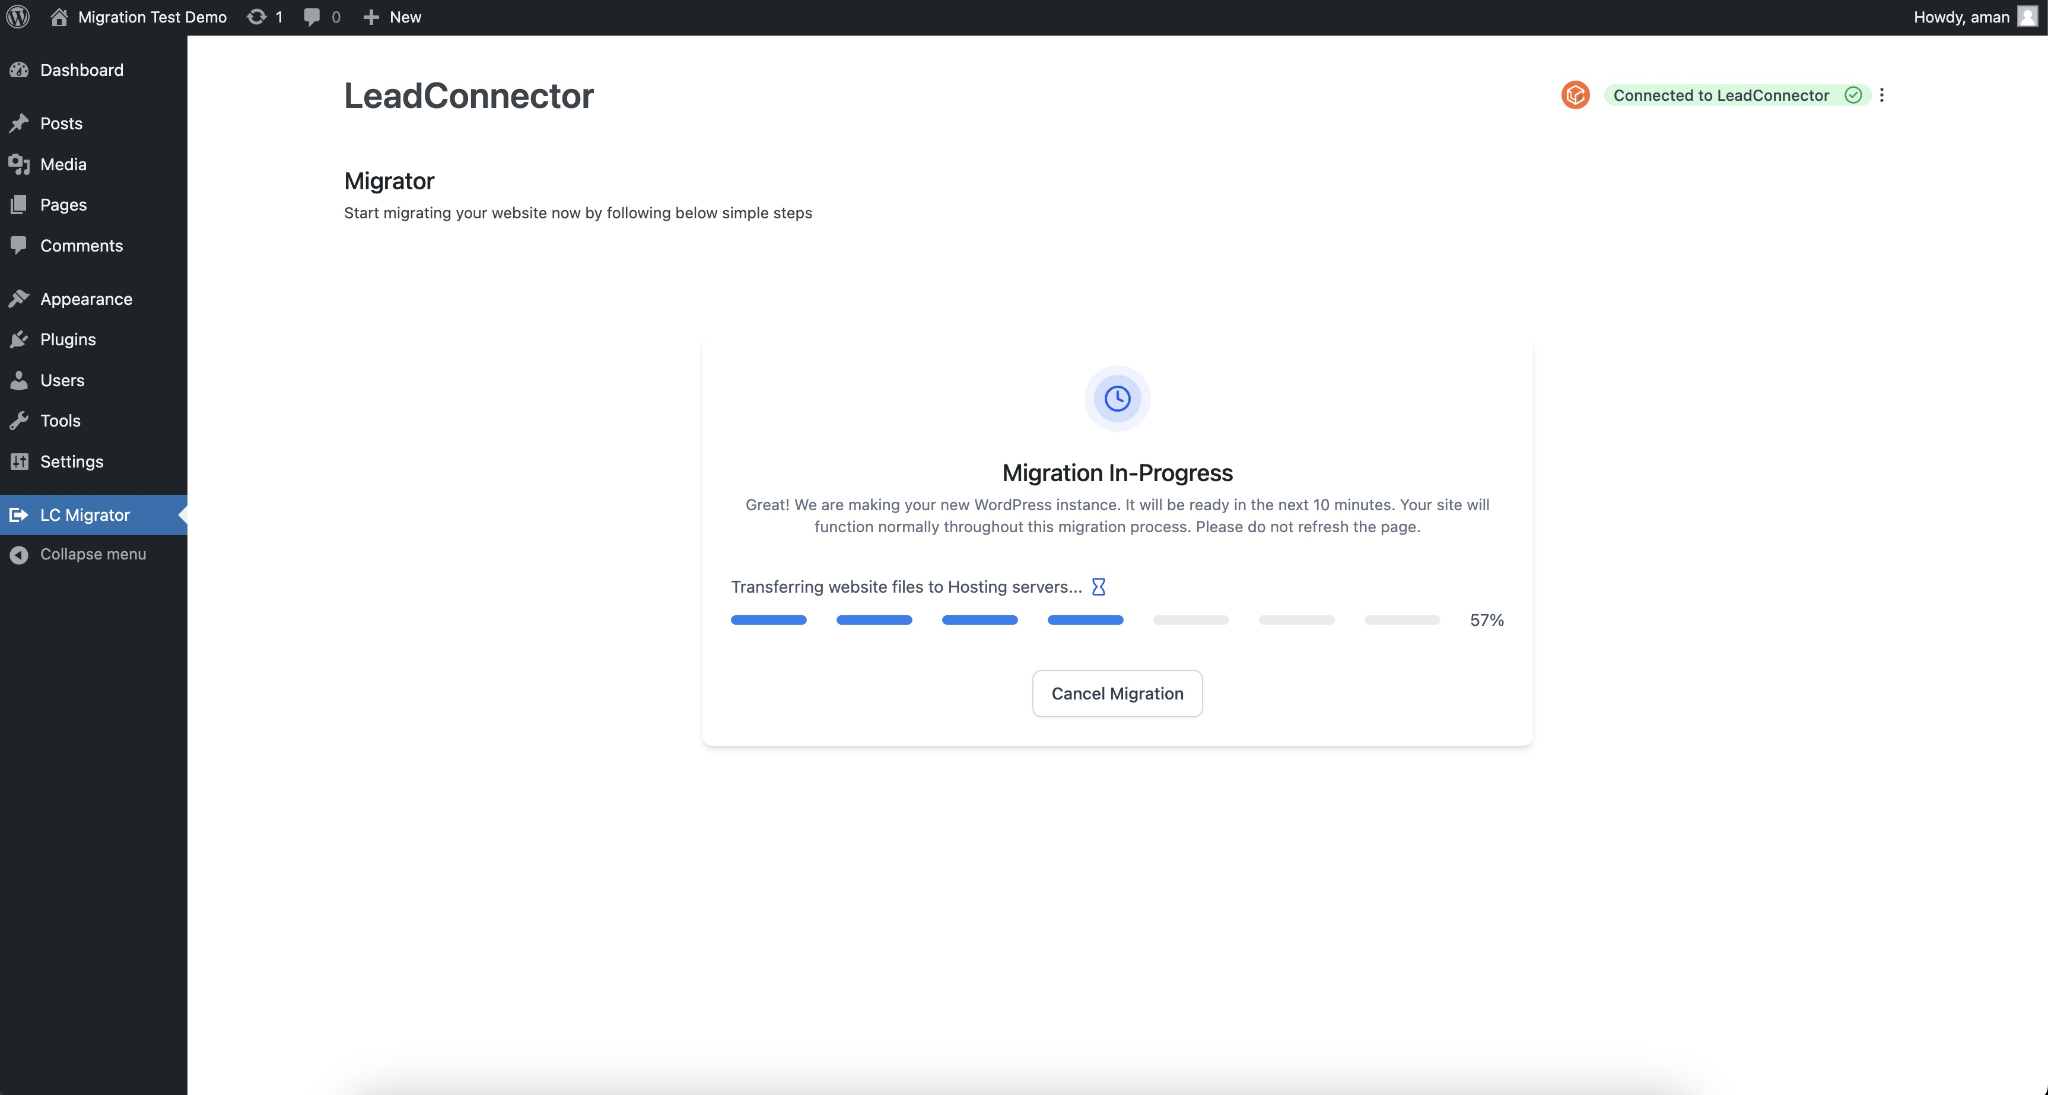
Once the migration finishes, click View Your New Website to explore your freshly migrated site. Optionally, rate your experience to help us improve!
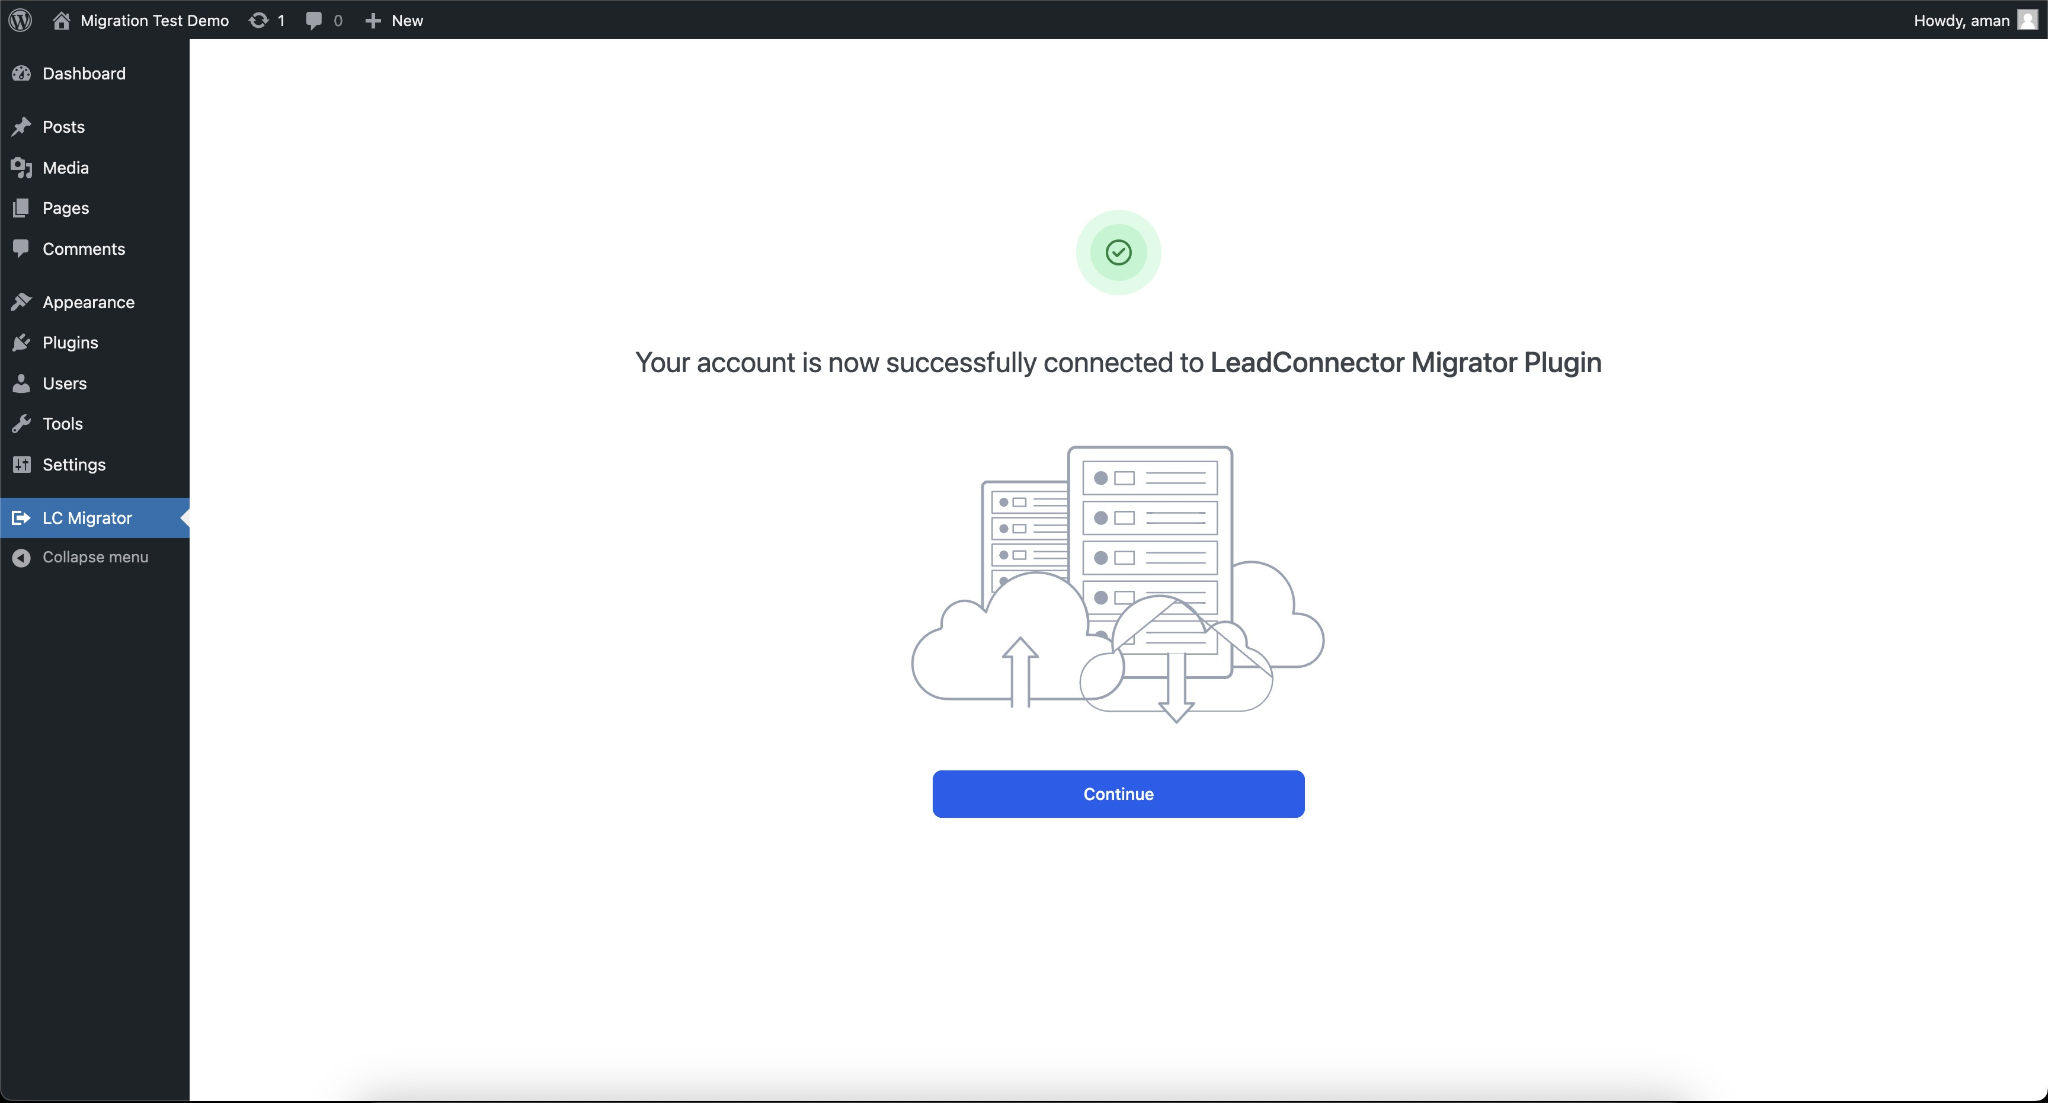
Running a White-Glove migration with a secure access link
For a White-Glove migration, you don't hand over your WordPress username and password. Instead, you use the LC Migrator plugin to create a secure access link and share that. The link lets a LeadConnector Expert sign in to run the migration, expires automatically after a time you choose, and can be revoked whenever you want. Even though it grants admin access, only a LeadConnector Expert can use it, so no one else can sign in with it.
Before you start, make sure you have administrator access to the WordPress site you're migrating.
Step 1: Install the LC Migrator plugin
Download the LC Migrator plugin. It saves as a .zip file, so don't unzip it.
In your WordPress admin, go to Plugins > Add Plugin.
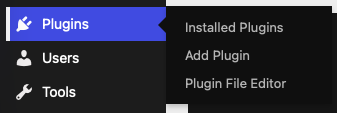
Click Upload Plugin.

Click Choose File, select the .zip you downloaded, then click Install Now.
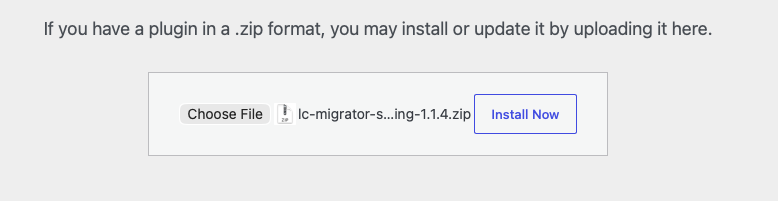
When the install finishes, click Activate Plugin.
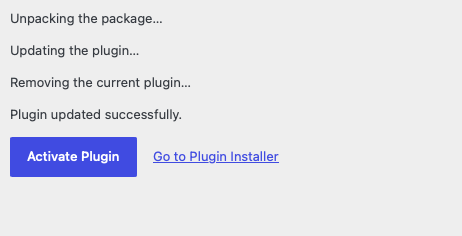
Step 2: Generate the secure access link
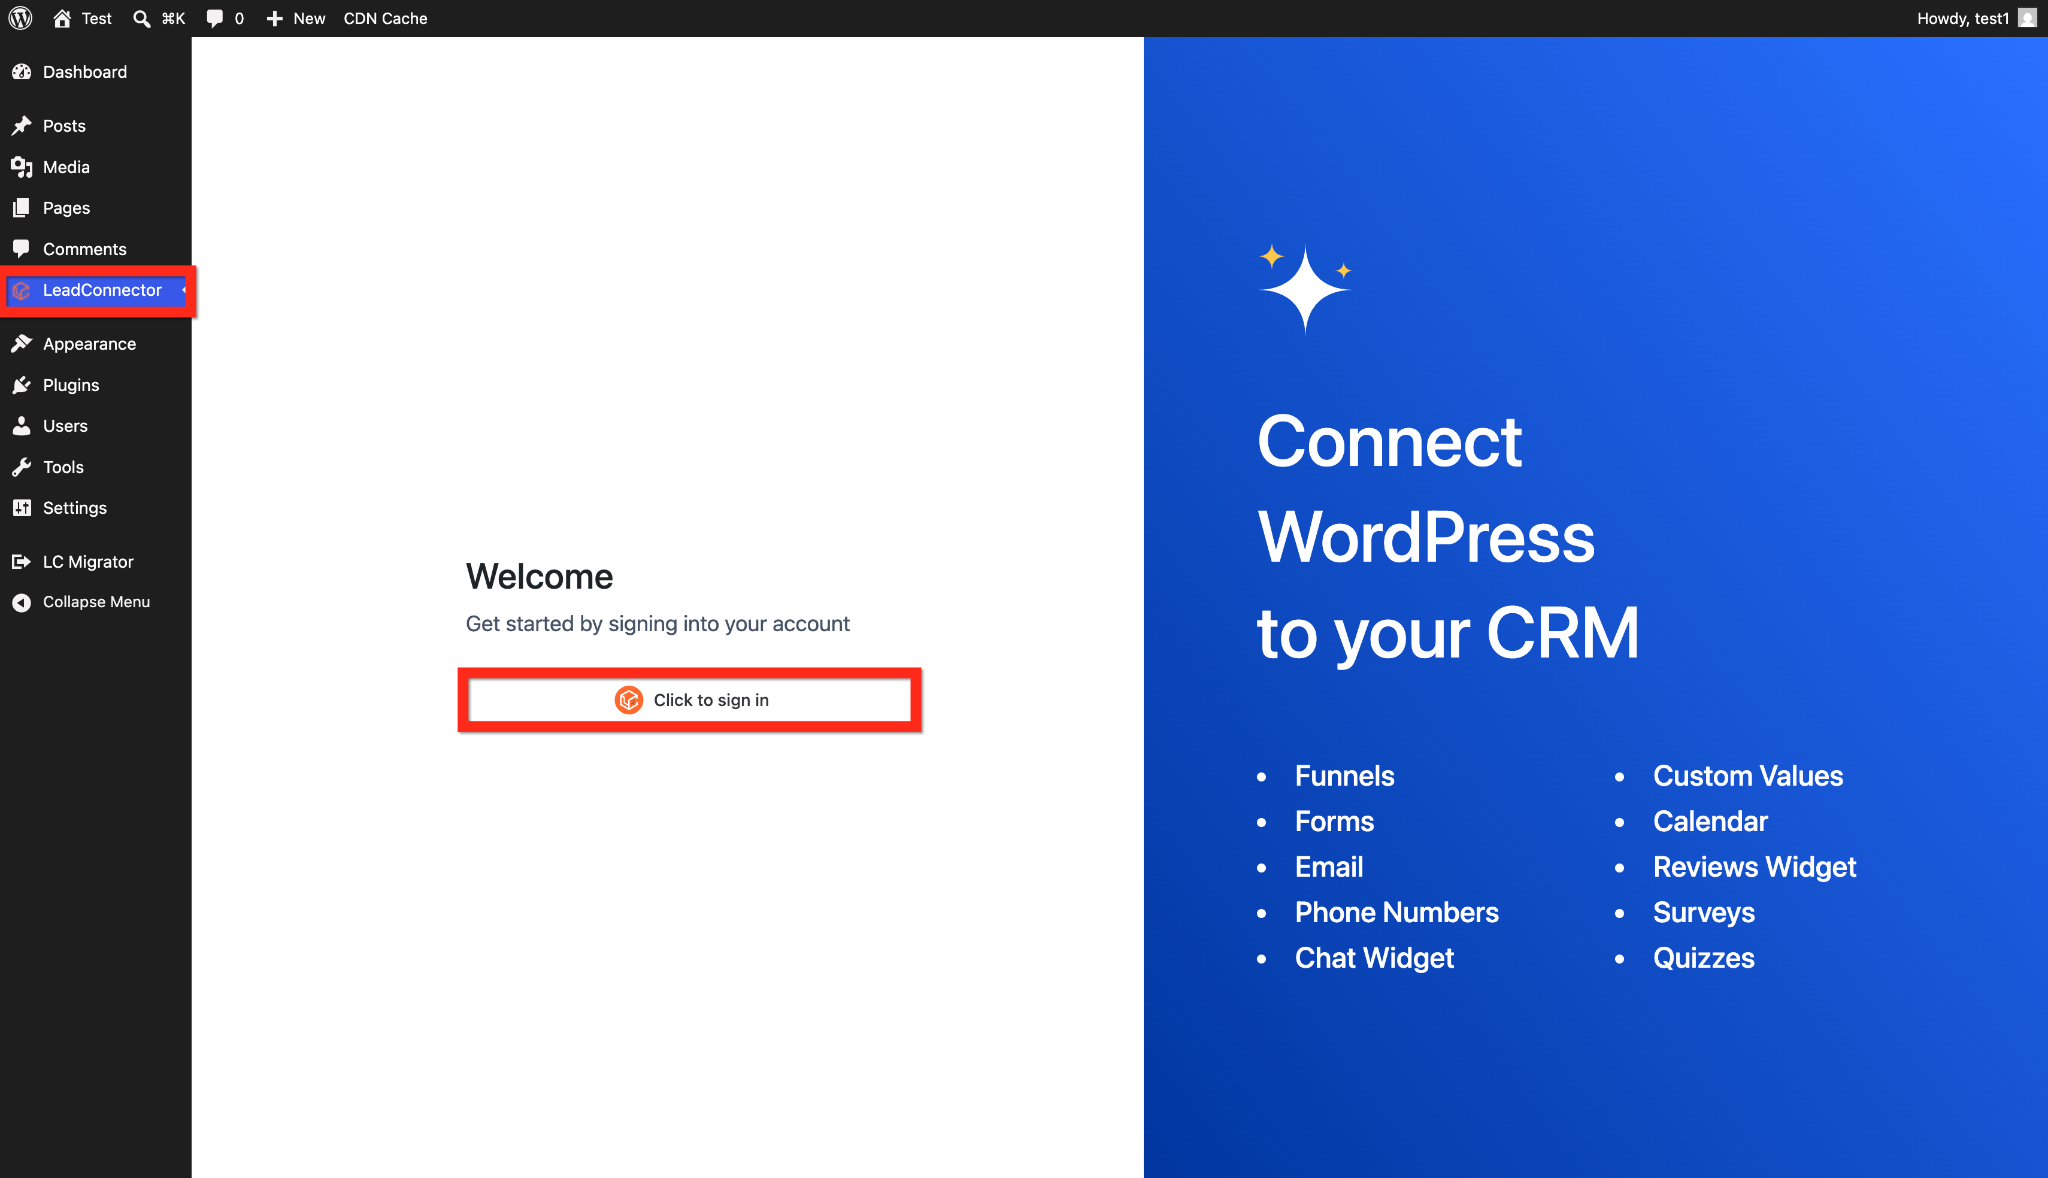
In the WordPress admin sidebar, open LC Migrator. You'll land on the Welcome screen.
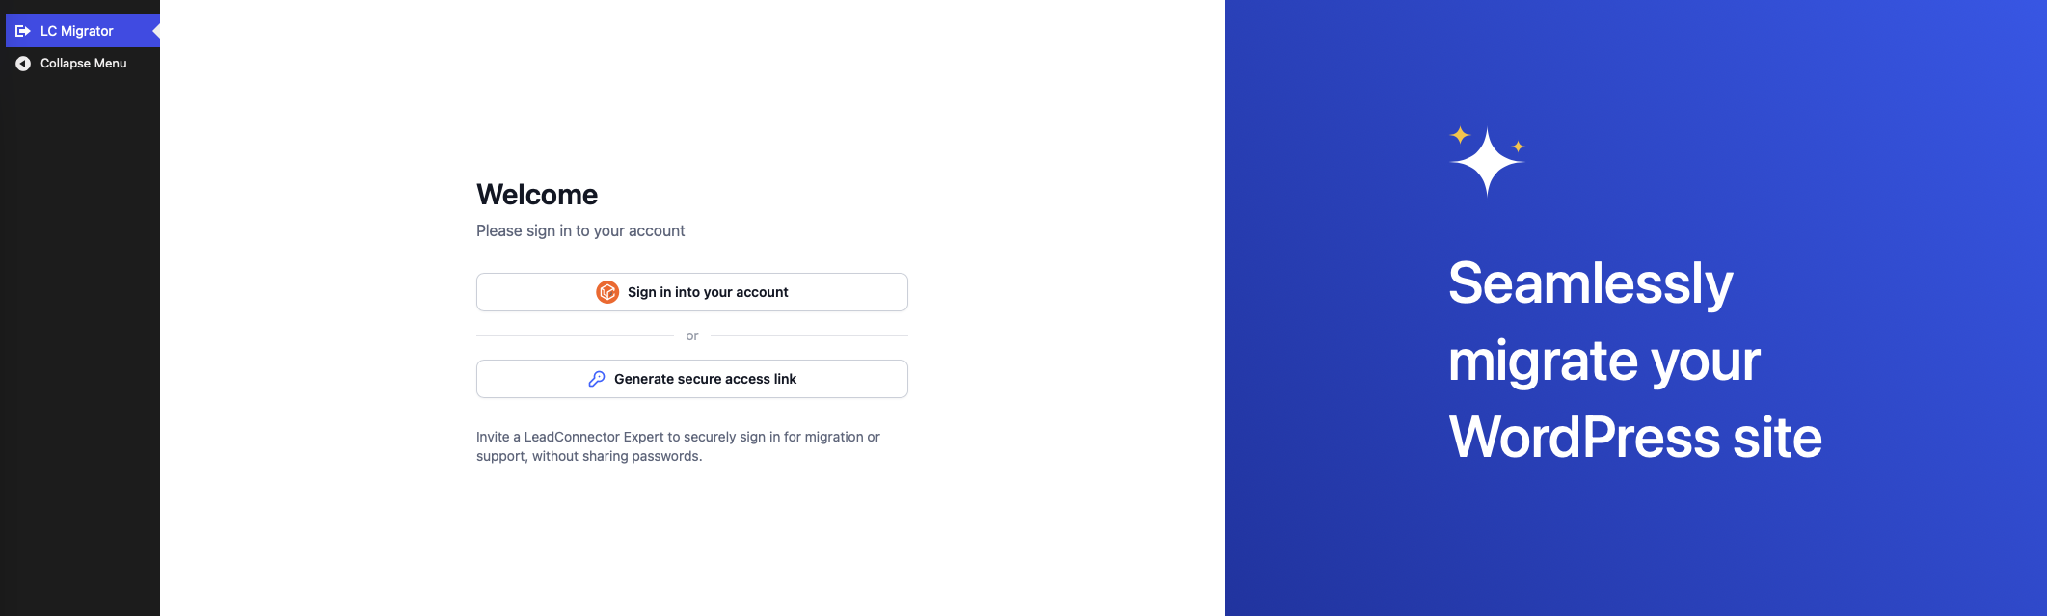
Click Generate secure access link. You don't need to sign in to an account to do this.
Under Link active for, choose how long the link stays active, from 24 hours up to 7 days. The default is 3 days. It expires on its own after that, and you can revoke it sooner at any time.
Weekend note: if you create the link on a Friday, Saturday, or Sunday, the minimum is 4 days, so your LeadConnector Expert can still use it once the work week starts.
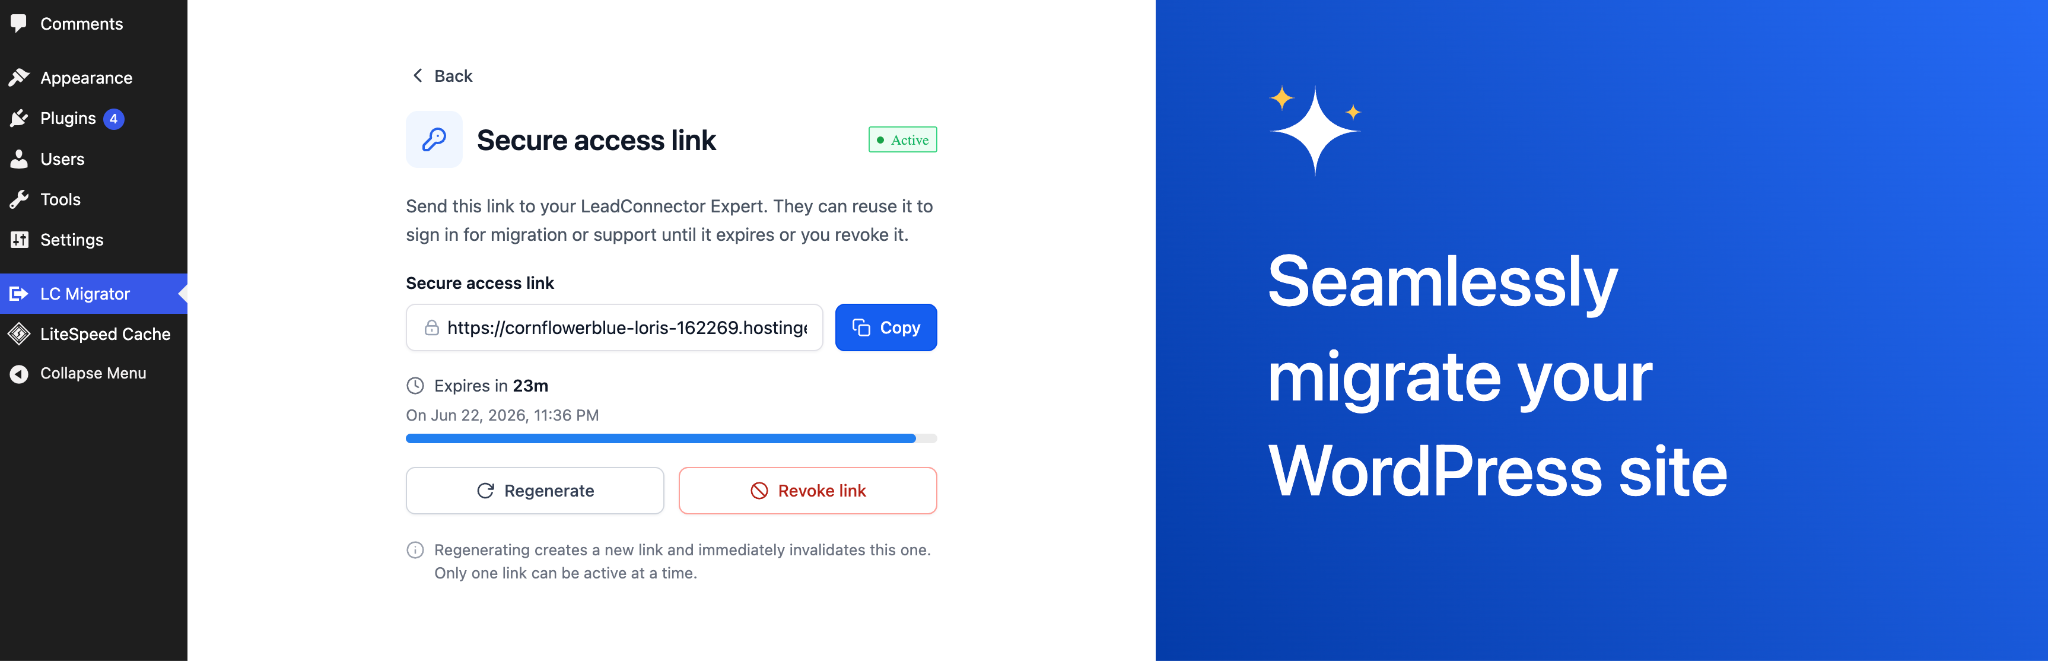
Review the note explaining that the link grants full admin access and can only be used by a LeadConnector Expert.
Click Generate secure access link.
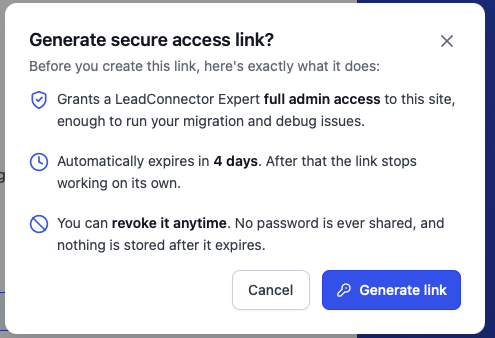
A confirmation window explains what the link does: full admin access, automatic expiry, and revocable at any time. Click Generate link to confirm.
Step 3: Share the link and submit your request
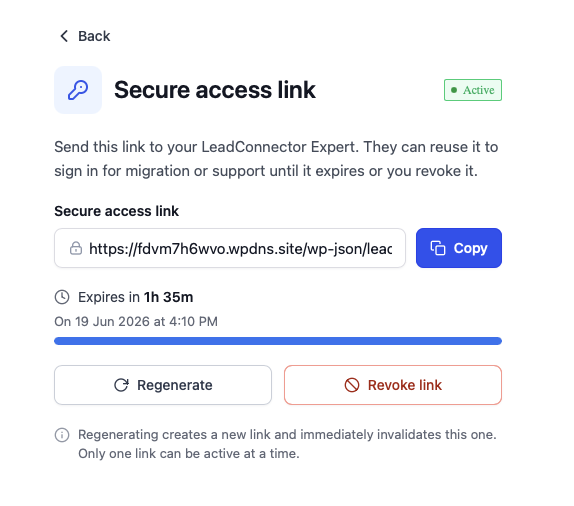
Your link is now active and is copied to your clipboard automatically. If you need it again, click Copy.
Paste the link into the Secure access link field on your White-Glove Migration request, then submit it. Your LeadConnector Expert uses it to sign in and run the migration, and no password is ever shared.
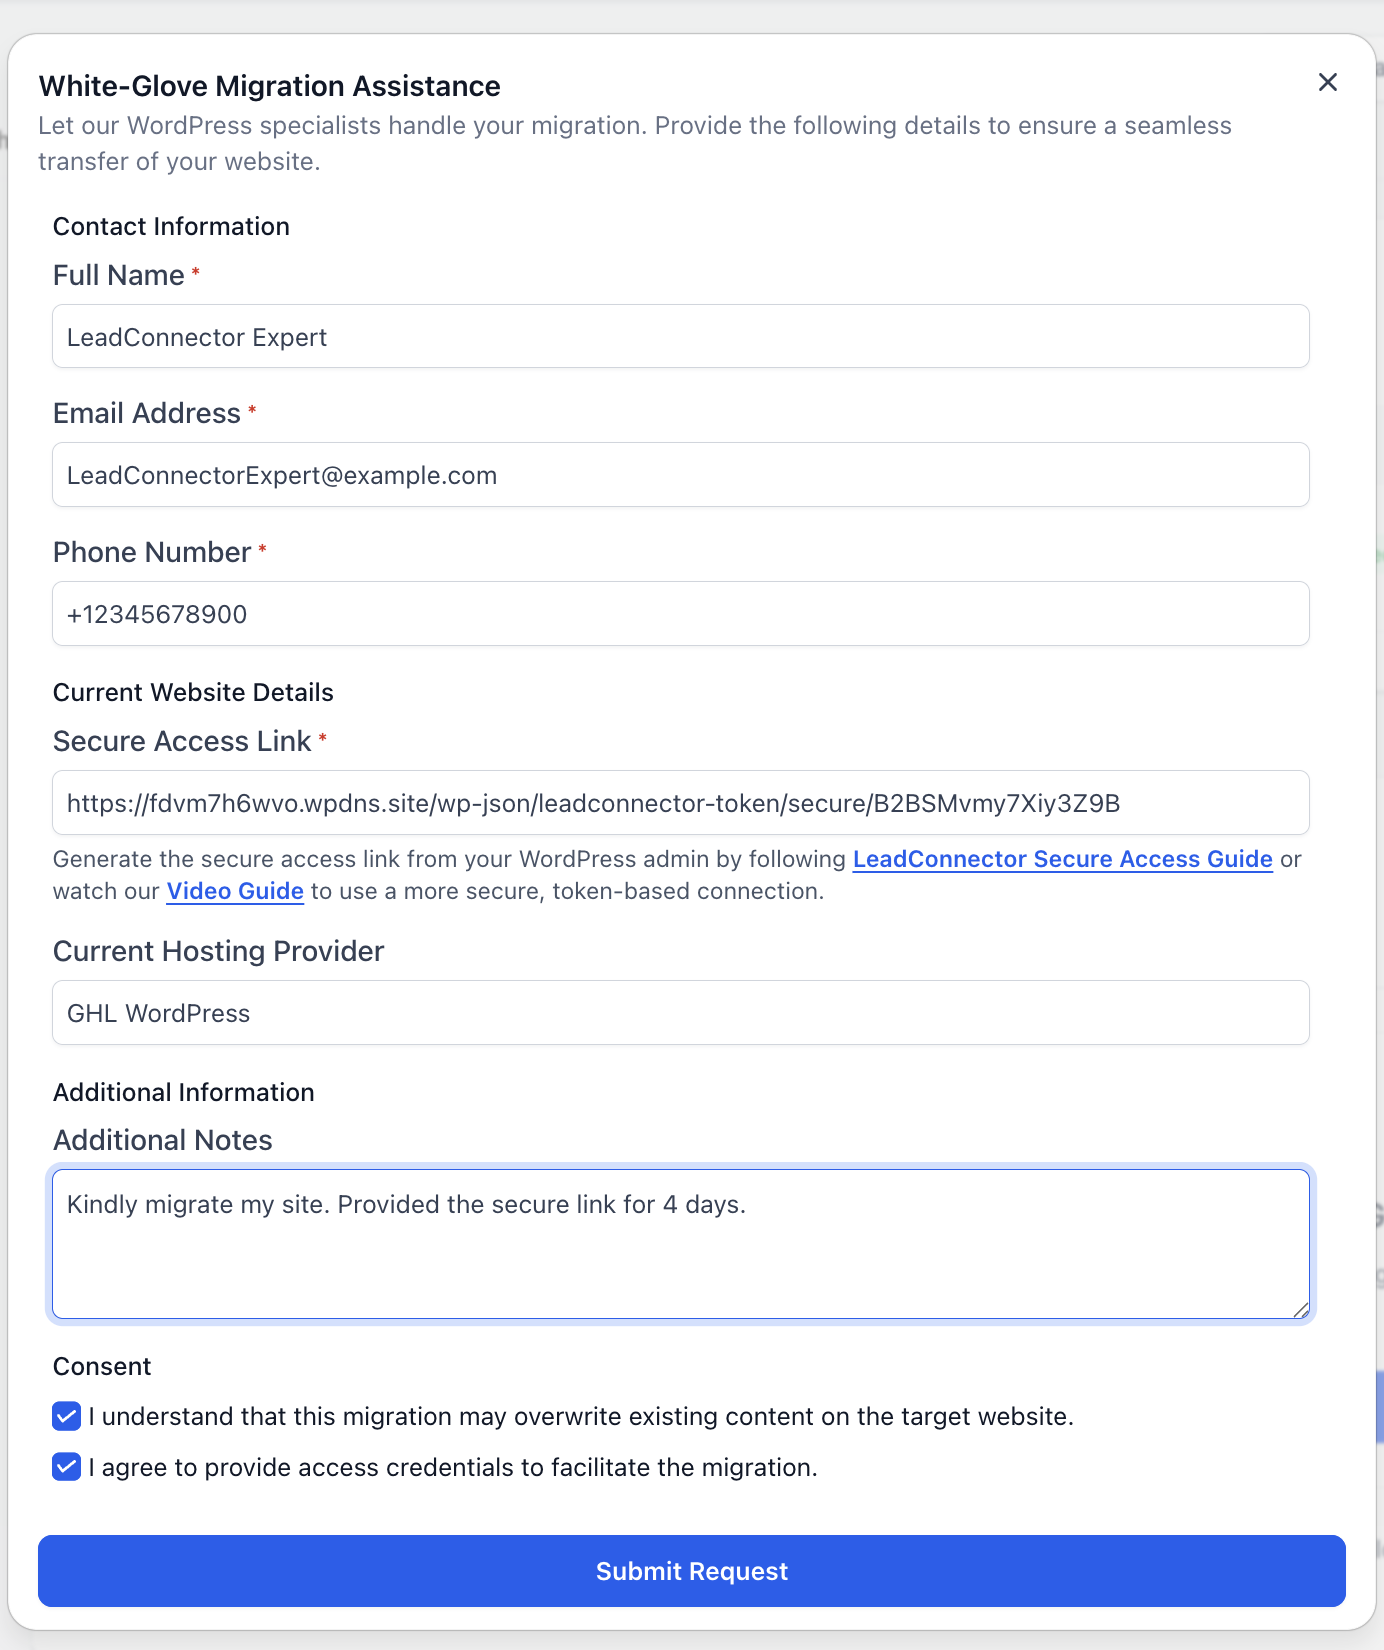
The link looks something like this:
https://your-wordpress-site.com/wp-json/leadconnector-token/secure/<token>
Managing your link
While a link is active you'll see a countdown showing when it expires. From the same screen you can:
Regenerate the link, which creates a new one and invalidates the old one right away. Only one link can be active at a time.
Revoke the link, which cuts off access immediately. To give access again later, generate a new link and share it.
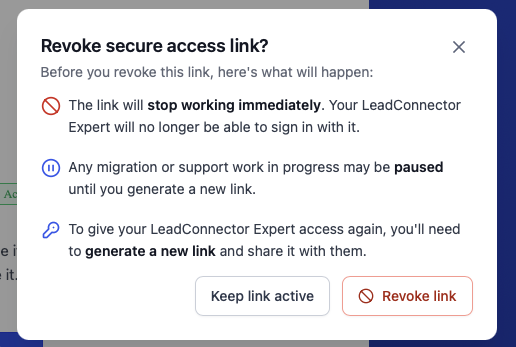
If you do nothing, the link stops working on its own when the timer runs out.
Frequently asked questions
Is this safe? Yes. Your WordPress password is never shared, the link only works for a LeadConnector Expert, it expires automatically, and you can revoke it whenever you want.
Do I have to share my WordPress username and password? No. The secure access link replaces password sharing.
If a migration fails, does my client get notified? No. Failure alerts and error logs appear only in the agency view, which keeps your white-labeled experience intact. Your client keeps seeing the migration as pending or in progress until you resolve the issue.
Can I let a sub-account user run their own migration? The initial setup, meaning generating the LC Migrator link or submitting the White-Glove form, has to be started by an agency admin. Once the site is live, the client can manage it based on the permissions you grant.
How long does a White-Glove migration take? Most finish within one to three business days, depending on the size and complexity of the original site. You can track the status in real time from the agency view.
I need more time for the migration. What do I do? Generate a new link and choose a longer duration, up to 7 days.
How do I stop access right now? Open the secure access link screen and click Revoke link.
What happens when the link expires? It stops working automatically. If access is still needed, generate a new link and share it with your LeadConnector Expert.
Need help with a tricky migration? Submit a White-Glove request from your dashboard and our support team will handle it.
Was this article helpful?
That’s Great!
Thank you for your feedback
Sorry! We couldn't be helpful
Thank you for your feedback
Feedback sent
We appreciate your effort and will try to fix the article