Customize your HighLevel Store Checkout to control field visibility, manage checkout information, and require customers to accept your Terms and Conditions or Privacy Policy before completing payment.
TABLE OF CONTENTS
- What is Checkout Page Customization?
- Key Benefits of Checkout Page Customization
- How to Customize the Checkout Page
- Frequently Asked Questions
- Related Articles
What is Checkout Page Customization?
Checkout Page Customization lets you control which fields appear on your store’s checkout, add an optional notes field, manage country selection behavior, and enable address auto-complete. Using these options streamlines the purchase experience and ensures you collect only the information needed to fulfill orders.
Key Benefits of Checkout Page Customization
Reduced friction: Show only the fields customers must complete for a faster checkout.
Higher data quality: Use address auto-complete to minimize typos and incomplete addresses.
Flexible country handling: Let customers pick their country or restrict checkout to specific countries.
Extra context collection: Capture order-specific instructions with an Additional Notes field.
Required policy consent: Require customers to accept your policy text before they complete payment.
How to Customize the Checkout Page
- Login to your Sub-account.
- Go to Sites → Stores.

- Create a newstore or edit an existing store.

- Open the Checkout page editor and select the Checkout element.

- Customize Typography.
Headline font
Card summary font
Headline font size
Card summary font size
Headline font weight
Card summary font weight

- Configure Contact options.
Sticky contact (On/Off)
New contact on every purchase (On/Off)
Validate disposable email (On/Off)

Set Button actions (Sale actions), choose what happens after the action:
Go to website URL
Go to page
Default (leave as-is)

- Use Text actions to customize the text shown across checkout sections.
- Contact details section text, edit text like:
- The headline
- Labels for email
- Shipping details section text: customize headlines/labels such as:
- Name
- Phone number
- Search box
- Full address
- Country
- Any other shipping-related headings you want to rename
- Billing details section text
- Billing details headline
- Checkbox text (and related checkbox labeling)
- Payment section text
- Payment label/name
- Checkout button name
- Footer text (example: “100 secure and save payments” or similar)
- Cart summary section text
- Cart headline
- Quantity text
- Coupon headline text
- Mobile view coupon code placeholder
- Apply coupon button text
- Sub total amount text
- Discount text
- Remove coupon button text
- Shipping heading text
- Total amount text

- Contact details section text, edit text like:
- Configure Form options
- Full name validation (On/Off)
- Enable billing address or Disable billing address
- Shipping: choose whether to show shipping or hide shipping

- Enable/disable Auto complete address (Google-powered)
- What it does:
- Provides real-time, Google-powered address suggestions
- Helps create a smoother, more error-free checkout experience
- Also enables agencies to set custom pricing and repeating/rebuilds of accounts, creating potential new revenue streams
- Supported address fields:
- Address
- City
- Country
- State
- Postal code
- Pricing Details
- $0.002972 per search request (triggered when customers start typing).
- $0.00525 per API call (retrieves full address details).

- What it does:
- Enable/Disable Postal Code & Country (gateway-specific)
- Enable/disable Notes at checkout
- On = customers can add additional notes
- Off = notes option is removed
When notes are enabled and a customer adds notes during checkout, those notes appear in the Order Notes section on the packing slip. If the customer does not add notes, the Order Notes section is hidden.
- Control which fields are Mandatory / Optional / Hidden
- Phone number
- Address
- Country (If the country/state field is hidden, country selection options will not appear.)
- State
- City
- Zip / Postal code

- Country Selection at Checkout
This section walks you through the new Country Selection at Checkout feature, which enables store owners to manage shipping locations and default customer locations during the checkout process.- Shipping Locations
Store owners can control which countries are available for shipping at checkout:- Ship to all locations: Allows shipping to any country, providing global shipping options for customers.
- Ship to specific countries: Store owners can select specific countries for shipping. Only those selected countries will be available during checkout.

- Ship to all locations: Allows shipping to any country, providing global shipping options for customers.
- Default Customer Location
Store owners can customize how the customer's location is handled at checkout:- No default location: No preselected country. The customer must choose their location.
- Geolocate: The customer’s location will be detected automatically based on their IP address.
- Show all countries: Displays all available countries for the customer to choose from.
- If Ship to specific countries is enabled, only those countries will be shown as options.
- The geolocate feature provides a seamless experience by automatically redirecting the customer’s location based on their IP address.

- Shipping Locations
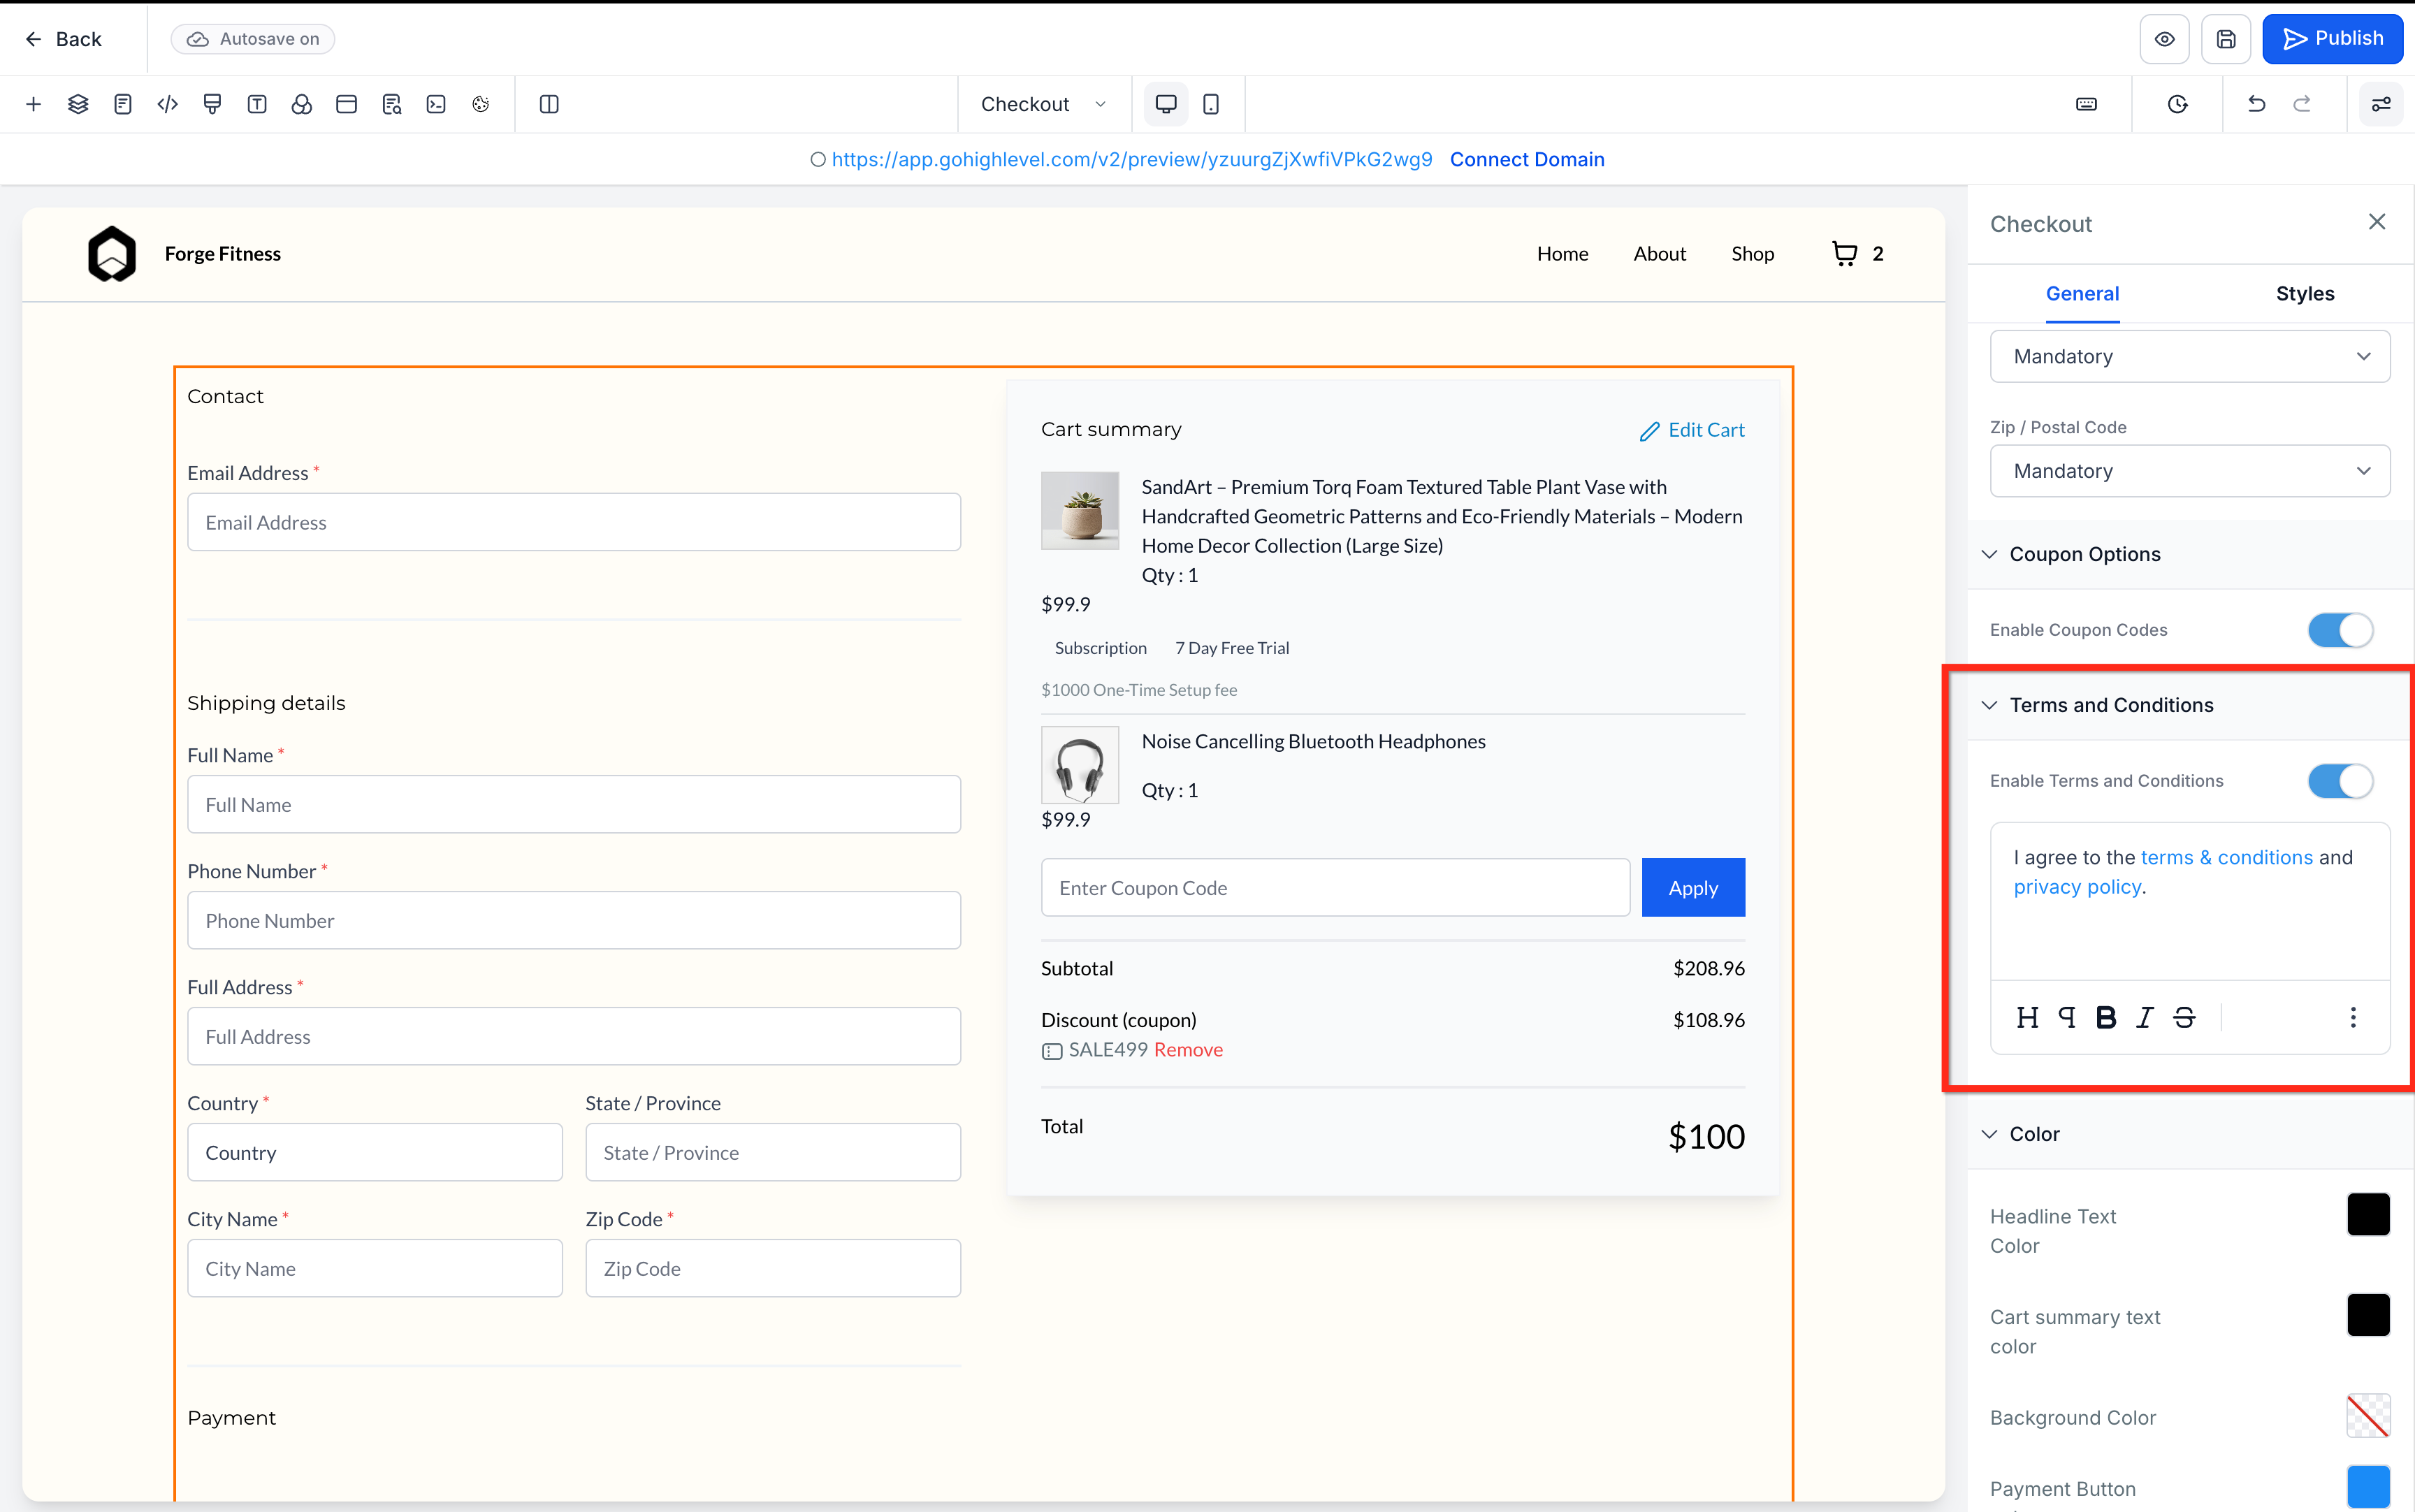
Configure Terms and Conditions Consent
Use the Terms and Conditions setting to require customer acceptance before payment.
- Select the Checkout element.
- In the right panel, scroll to Terms and Conditions.
- Turn on Enable Terms and Conditions.
- Customize the checkbox text.
- Add links to your Terms and Conditions or Privacy Policy as needed.
- Save and publish the store.
When enabled:
- The consent checkbox appears before the payment button.
- The checkbox remains unchecked by default.
- Customers must select the checkbox before completing checkout.
- An inline validation message appears when a customer attempts to continue without accepting the terms.
- The checkbox appears on desktop and mobile checkout pages.
- Enable or Disable coupon codes.

- Set Color options (brand styling)
- Headline text color
- Card summary text color
- Background color
- Payment button color
- Payment button text color
- Subscription field text color
- Subscription field background color

- Full name validation (On/Off)
Frequently Asked Questions
Q: Why don’t I see Country Selection on checkout?
If Country (or required related fields like State/Province/Region) is hidden in Shipping Details, the Country Selection option will not appear.
Q: How can I add Additional or Processing Fees to E-commerce checkouts?
Checkout this article for a detailed guide - Adding Processing Charges or Additional Fees to Customer Payments
Q: Can I limit checkout to specific countries only?
Yes. In Checkout settings → Country Selection, choose to restrict checkout to a specific list of countries and save.
Q: What happens if I don’t select any countries under “Ship to specific countries”?
If no countries are selected in that list, all countries will be available at checkout.
Q: What does the Geolocate feature do on checkout?
Geolocate detects the customer’s approximate location based on their IP address to provide a seamless country selection experience.
Q: Which fields affect shipping rate calculations?
Some carriers calculate rates using details like Address, City, and ZIP/Postal Code. Keep these set to Mandatory if you need accurate shipping rates.
Q: Do live shipping rates (e.g., via Shippo) require all address fields?
Yes. When using multi-carrier platforms like Shippo, customers need to complete all required address fields to retrieve live rates at checkout.
Q: Will reducing required fields make checkout faster?
Reducing the number of mandatory fields can streamline the process and encourage higher conversion rates.
Q: What happens if a customer does not accept the Terms and Conditions?
The customer cannot complete payment. An inline validation message appears until the customer selects the consent checkbox.
Related Articles
Was this article helpful?
That’s Great!
Thank you for your feedback
Sorry! We couldn't be helpful
Thank you for your feedback
Feedback sent
We appreciate your effort and will try to fix the article