Affiliate campaigns let you track affiliate-generated sales or leads, define commission rules, assign affiliates, and control referral tracking from one place. Depending on the campaign source, you can reward affiliates for product purchases or qualified leads while configuring commissions, payout terms, cookie duration, and optional multi-tier structures.
TABLE OF CONTENTS
- What is an Affiliate Campaign?
- Key Benefits of Affiliate Campaigns
- Step-by-Step Guide to Creating an Affiliate Campaign
- Step 1: Start by Clicking the "Add" Button
- Step 2: Choose Your Campaign Source
- Step 3: Configure Source Details
- Step 4: Review Your Product List
- Step 5: Set Default Commission
- Step 6: Customize Product-Level Commissions (Optional)
- Step 7: Enable Multi-Tier Commissions
- Step 8: Configure Tier-Specific Commissions
- Step 9: Add a Campaign Description (Optional)
- Step 10: Assign Affiliates Directly
- Step 11: Adjust Additional Settings
- Step 12: Publish or Save as Draft
- ⚠️ Changing the Source in an Existing Campaign
- What's Next
What is an Affiliate Campaign?
An affiliate campaign defines what affiliates promote, how their referrals are tracked, and how commissions are calculated. Each campaign connects affiliates to a specific source and generates campaign-specific referral links that HighLevel uses to attribute eligible sales or leads.
Campaign settings can control:
Campaign source
Landing destination
Eligible products
Commission structure
Multi-tier commissions
Assigned affiliates
Cookie duration
Payout terms
Sub-affiliate options
Key Benefits of Affiliate Campaigns
Affiliate campaigns provide a structured way to reward partners while keeping attribution, commissions, and campaign participation organized.
Flexible Tracking: Track affiliate-generated product sales or leads depending on the campaign source.
Custom Commissions: Set default commissions and product-specific rates where applicable.
Multi-Tier Rewards: Configure up to seven commission tiers for eligible affiliate hierarchies.
Affiliate Assignment: Add affiliates during campaign creation or enroll them later using Affiliate Manager and workflows.
Referral Attribution: Give each affiliate a campaign-specific referral link for eligible tracking.
Payout Control: Configure payout terms that align with your business's refund and payment policies.
Step-by-Step Guide to Creating an Affiliate Campaign
Step 1: Start by Clicking the "Add" Button
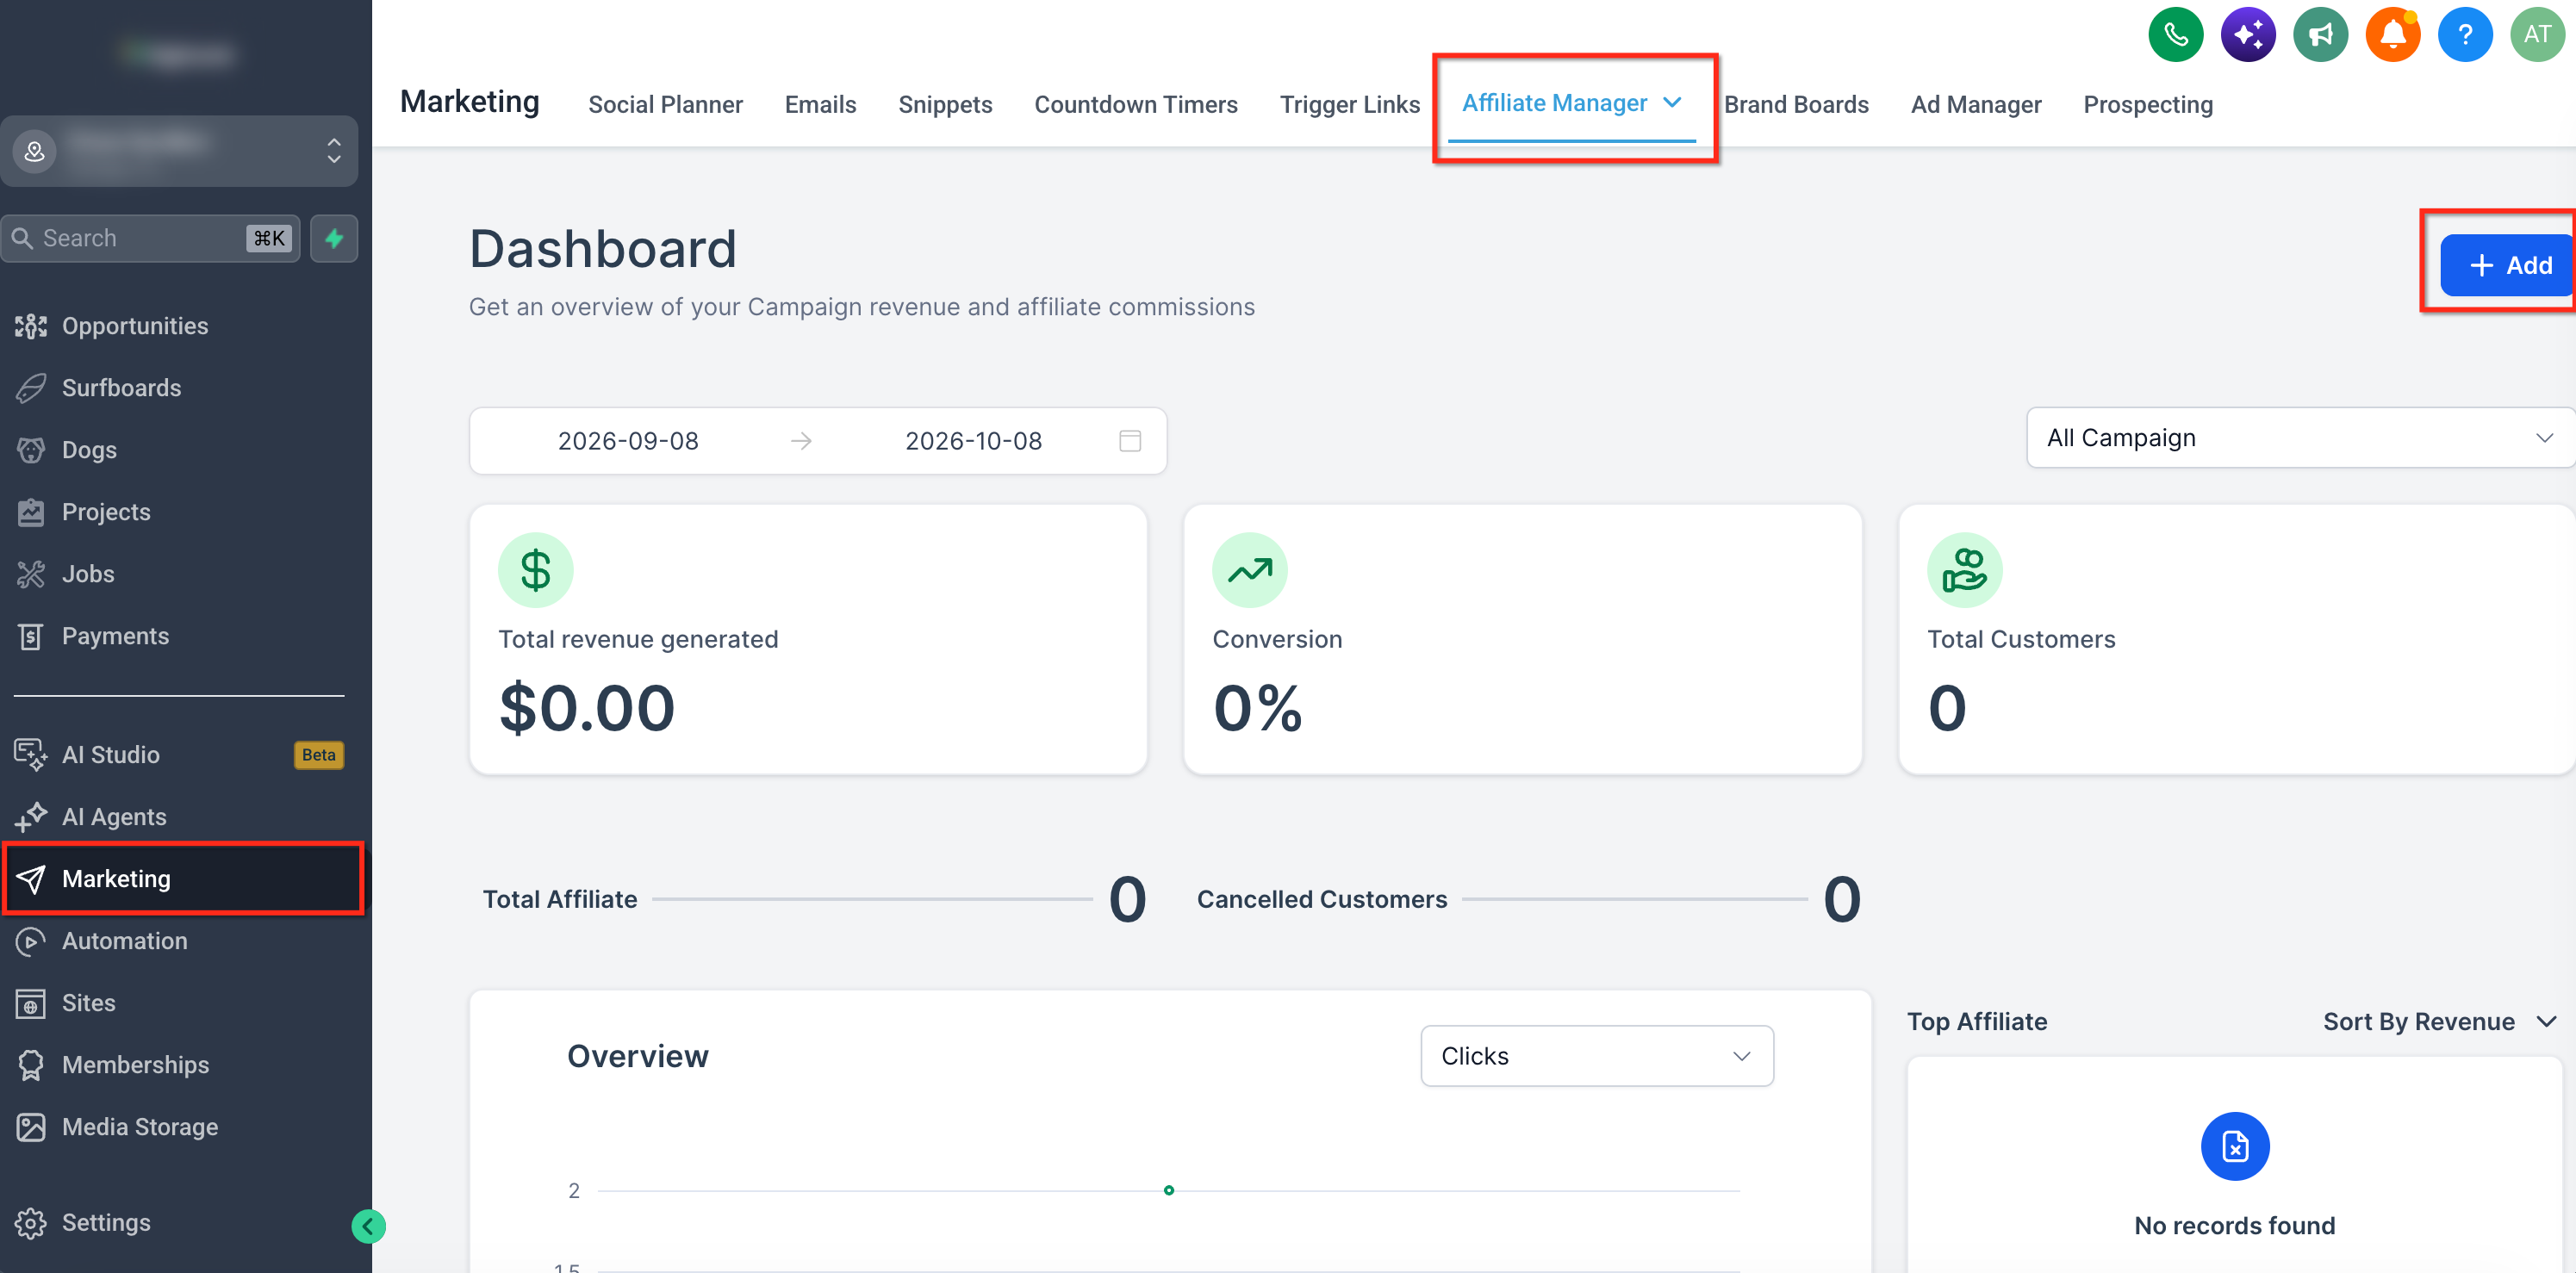
Navigate to the Affiliate Manager page and click the "+ Add" button to initiate the creation of your campaign.
Step 2: Choose Your Campaign Source
Select the source for your campaign, such as a funnel, website, or store where your products are listed.
Step 3: Configure Source Details
You can also choose the landing page where potential customers will land. Once set, the system will generate a default campaign URL. This URL includes a unique affiliate link, where the placeholder <<affiliate_id>> is automatically replaced with each affiliate's unique ID.


Please Note:
Currently, only funnels, websites, and stores support product sales via affiliate campaigns. However, you can also track leads and pay affiliates for generating leads through forms, surveys, and calendars. Learn more here.

Landing page selection is just used to set where the potentials customers will land. Please note that tracking will be done source wide not just on the landing page
Step 4: Review Your Product List
Review the products associated with your selected source. Add or remove products to ensure that only commission-eligible items are listed.

Step 5: Set Default Commission
Establish a default commission for your campaign, choosing either a flat fee or a percentage of the product price.

Step 6: Customize Product-Level Commissions (Optional)
Optionally, set specific commissions at the product level to tailor payouts based on individual product prices.

Step 7: Enable Multi-Tier Commissions
Access the Advanced Commissions settings to enable multi-tier commissions. You can support up to 7 tiers for more intricate commission structures. Learn more here.

Step 8: Configure Tier-Specific Commissions
Assign commissions to each tier by either applying the default rate or customizing them for each level based on performance.

Step 9: Add a Campaign Description (Optional)
Add a campaign description that outlines its purpose to make it more attractive to potential affiliates.

Step 10: Assign Affiliates Directly
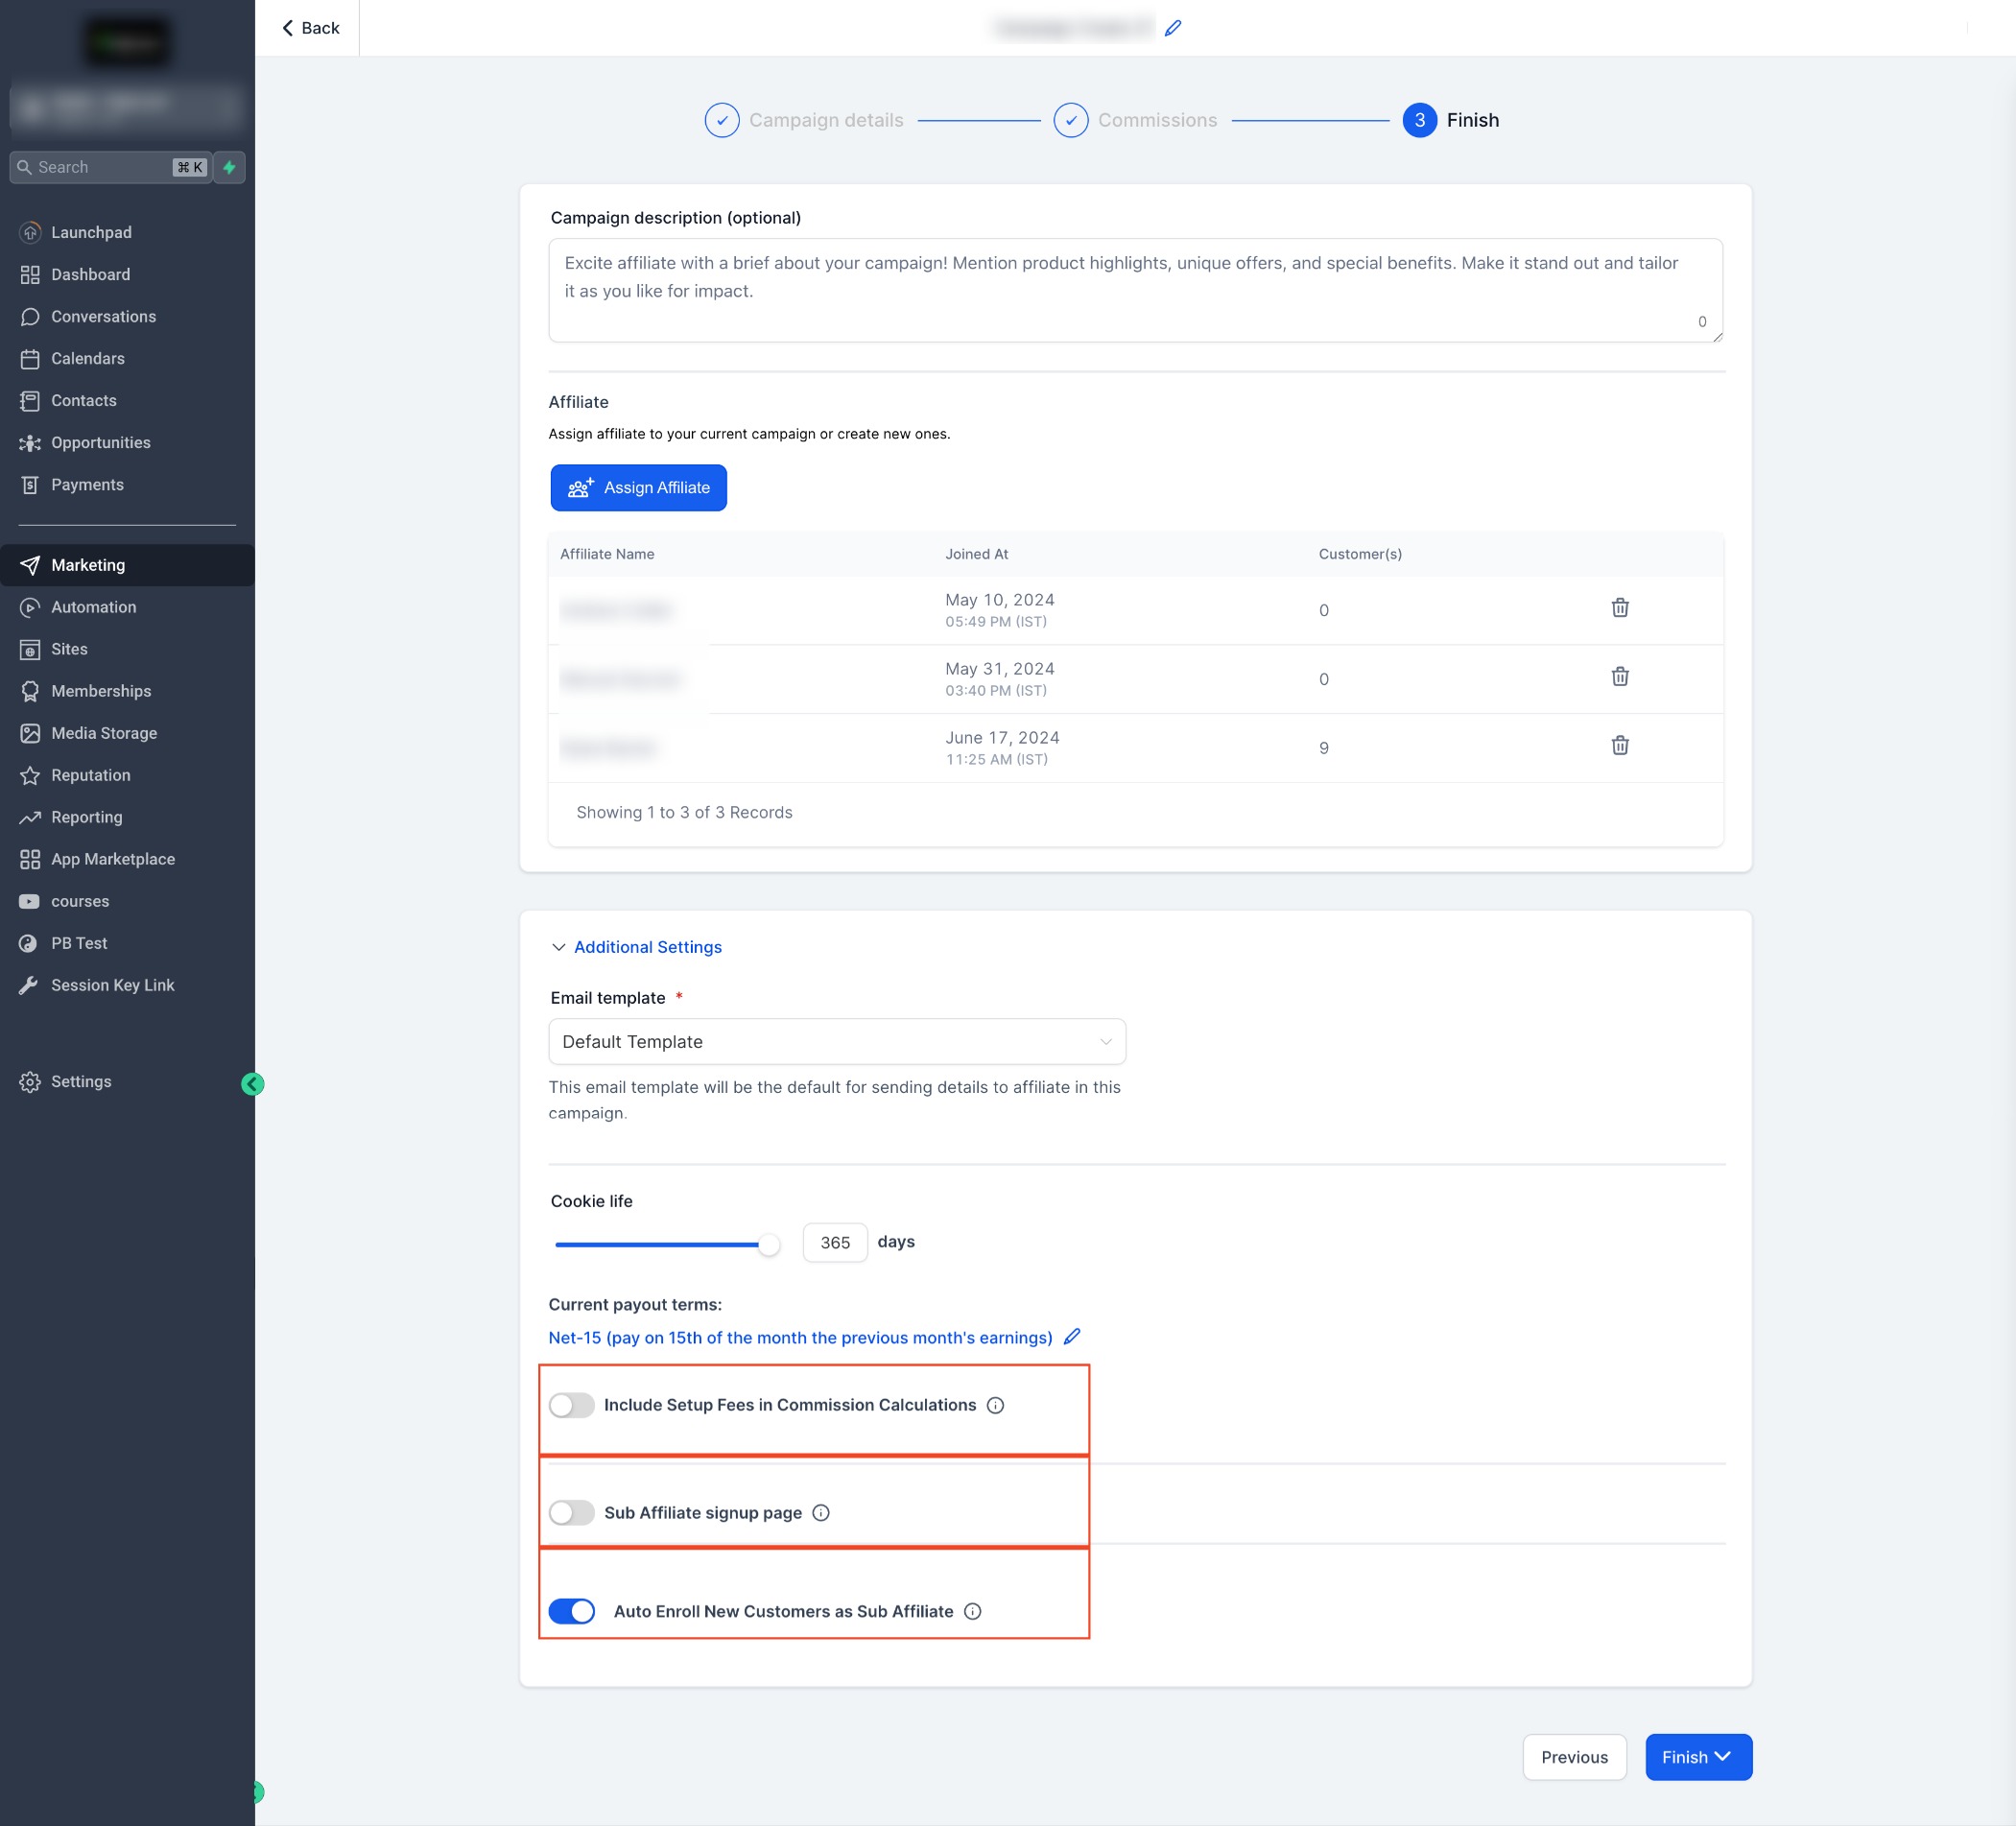
Review affiliate details, such as their join date and total affiliate count, before directly assigning them to your campaign.

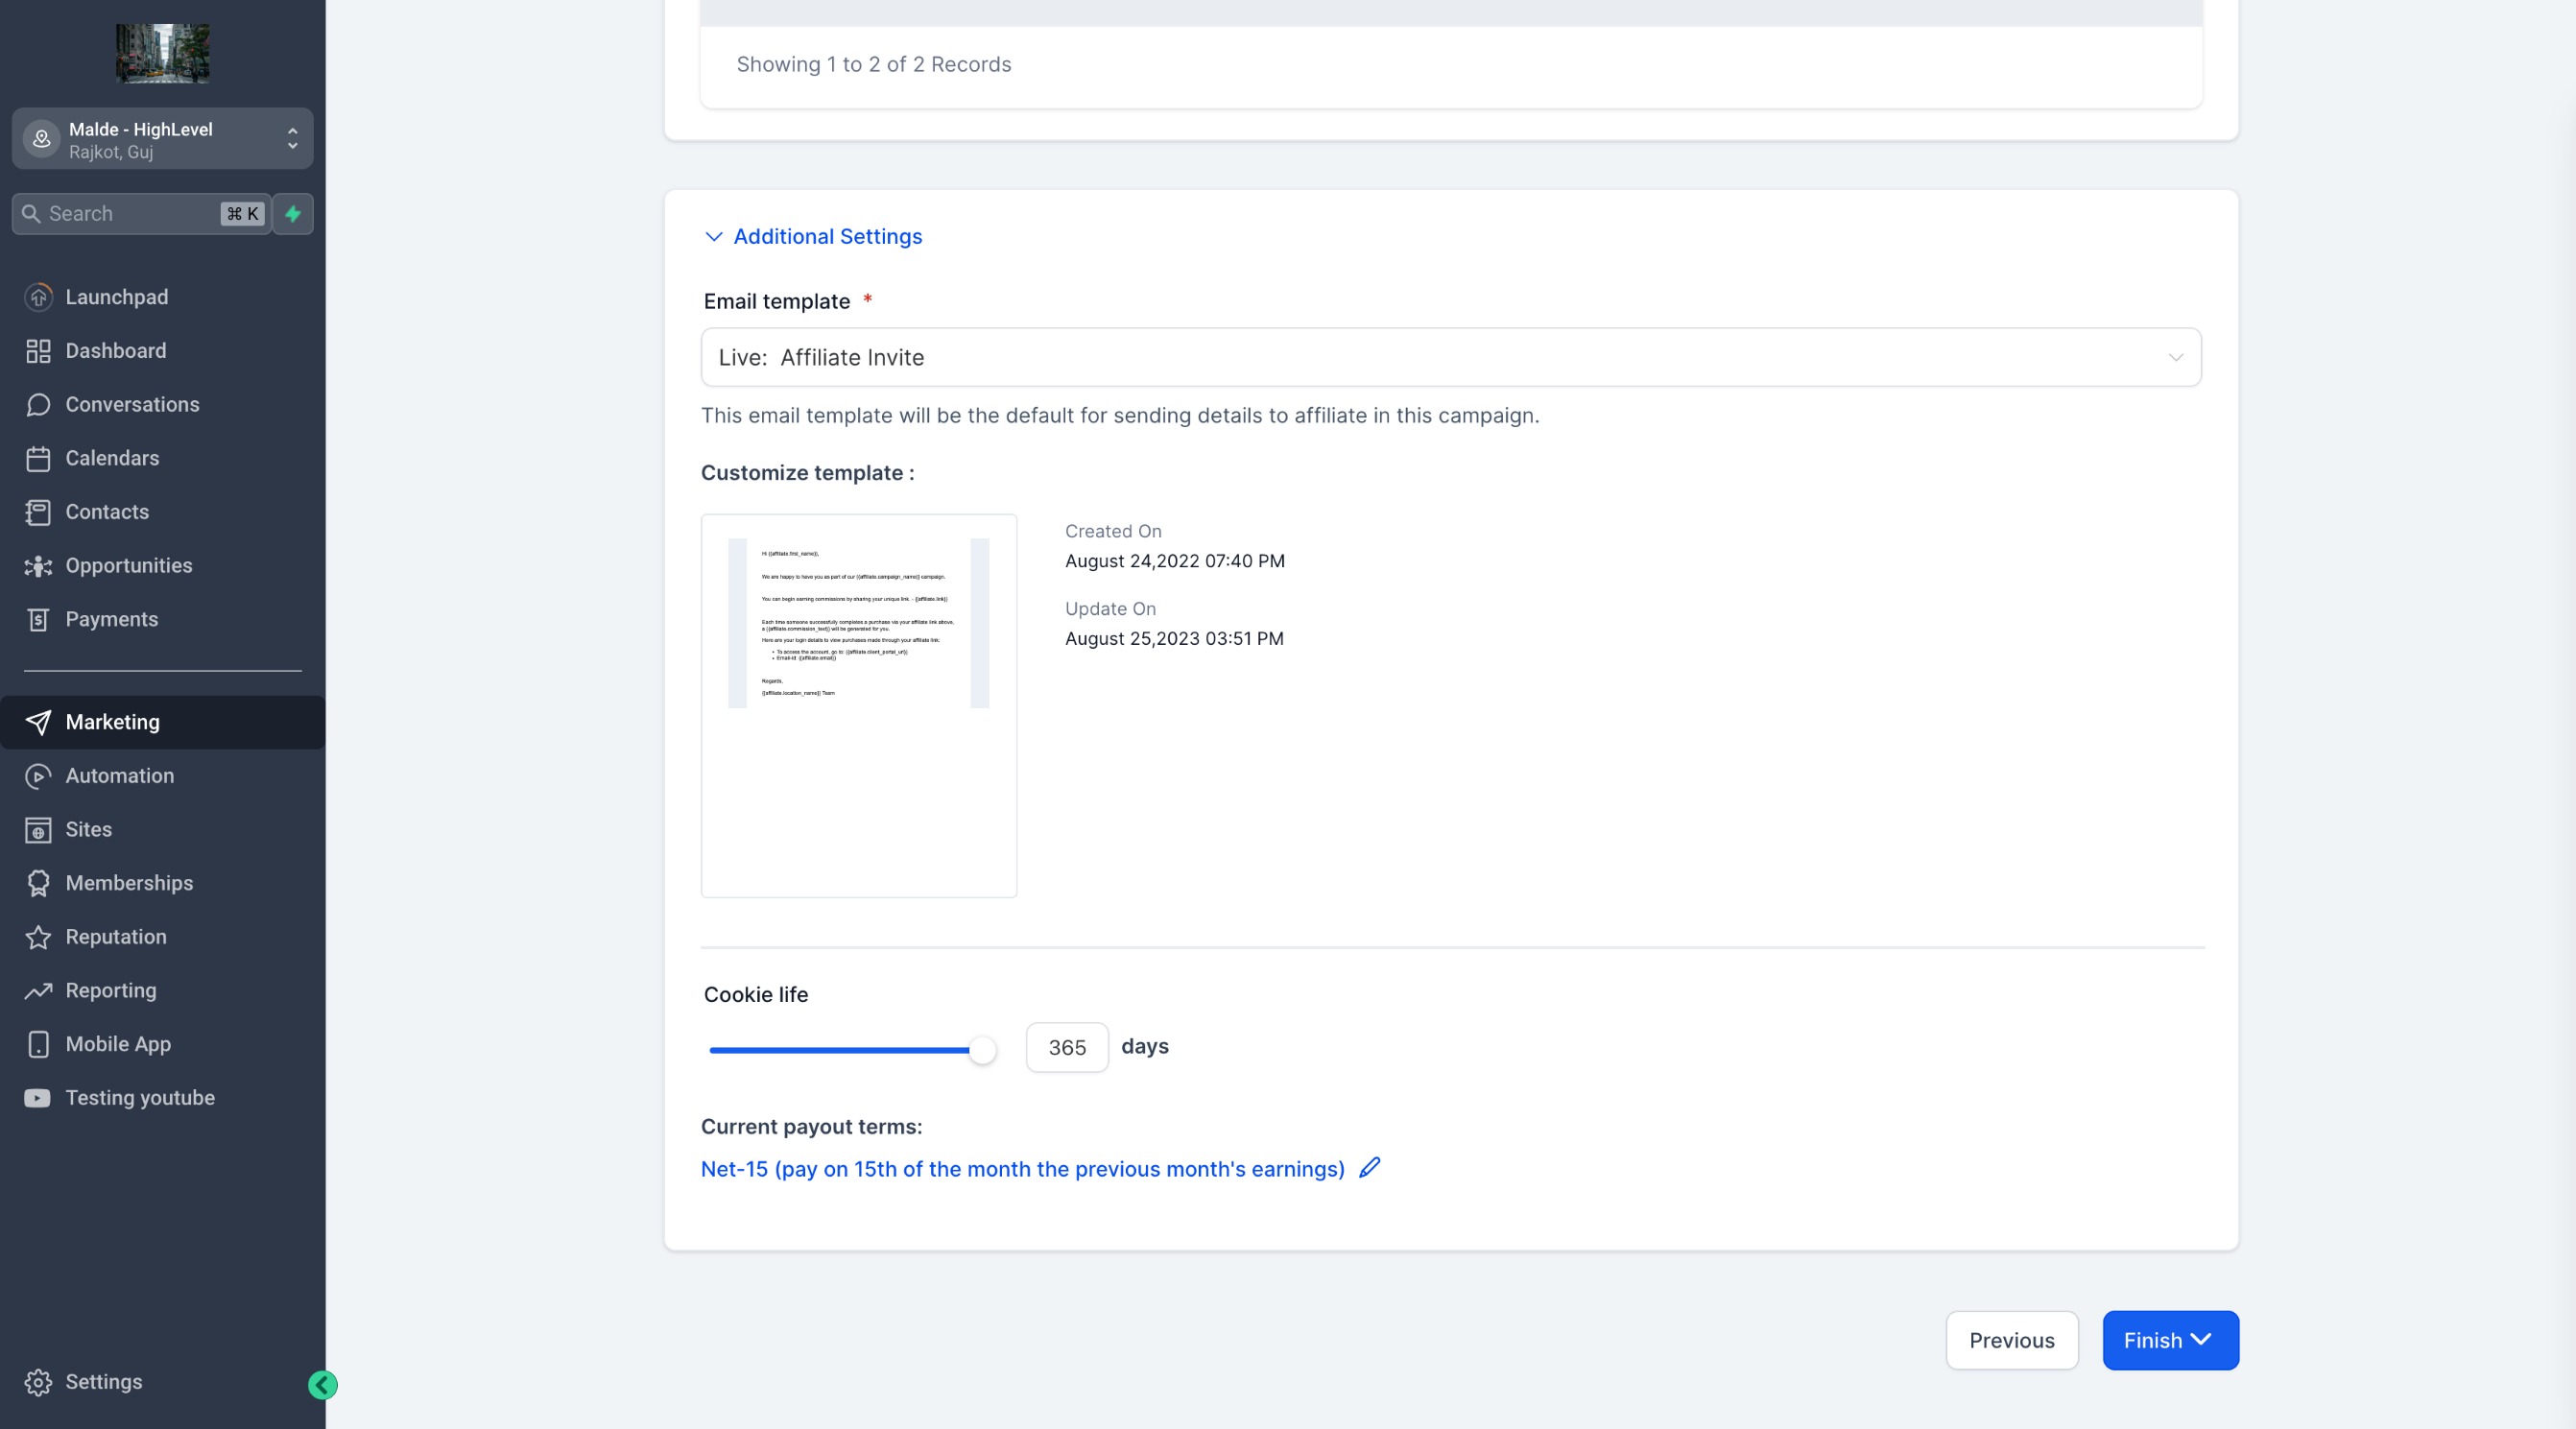
Step 11: Adjust Additional Settings
Tailor your campaign further with options such as:
- Email templates for affiliate onboarding
- Cookie duration for tracking affiliate activity
- Payout terms
- Including setup fees in commission calculations
- Enabling sub-affiliate signups
- Auto-enrolling new customers as sub-affiliates
Step 12: Publish or Save as Draft
Once satisfied with your campaign setup, you can choose to Publish it immediately or Save as Draft for further editing.
Congratulations! Your affiliate campaign is now live and ready to drive results. With these intuitive tools, you’re equipped to grow your business and reward your affiliates for their contributions.
⚠️ Changing the Source in an Existing Campaign
You can now edit the source of an affiliate campaign even after it’s published — for example, if the funnel, course, or website it was linked to has been deleted or changed.
When you change the campaign source:
A new referral URL is generated.
The previous campaign URL stops tracking new referrals.
Existing campaign settings remain available.
Historical campaign performance data is retained.
After changing the source:
Notify all participating affiliates.
Ask affiliates to replace previously shared campaign links.
Verify the new referral link before resuming promotion.
Important: Referrals using the old campaign URL will no longer be attributed after the campaign source changes.
By making sure your affiliates are aware of this change, you can avoid confusion and unnecessary support tickets about links not working.
What's Next
Was this article helpful?
That’s Great!
Thank you for your feedback
Sorry! We couldn't be helpful
Thank you for your feedback
Feedback sent
We appreciate your effort and will try to fix the article